2019.10.11
Try using the split brush to draw characters of different head lengths

“When I draw a character’s whole body, the balance tends to get out of whack.”
At such times, it’s important to be aware of the balance between the head and the various parts of the body.
Medivan Paint’s split brush is perfect for balancing body parts!
So here are some tips on using the split brush and for drawing characters of different head lengths!
1. How to use the split brush
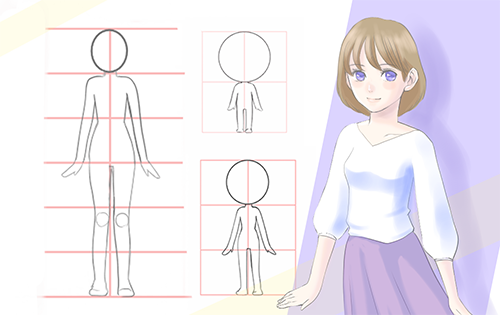
A split brush is a brush that can divide a square shape into several parts, as shown in the figure.
By matching the number of divisions to the number of head lengths you want your character to be, you can use this grid to guide you when drawing the character’s body.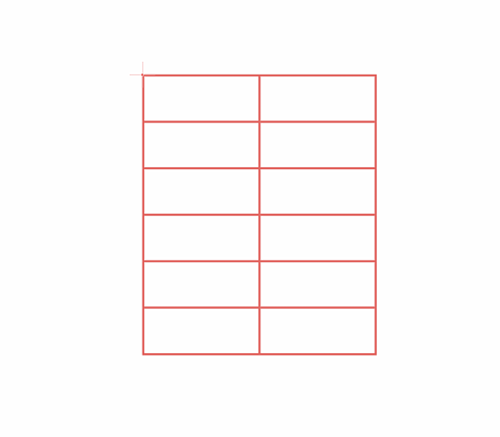
First, let’s talk about how to use the split brush.
1-1. Add the split brush
The split brush is not included in the default brushes. You can find it in “cloud brushes,” which can be used free of charge, so first of all, you need to add the brush by following the steps below.
Select “Add brush” > Select split from the cloud brushes > Press the “save” button.
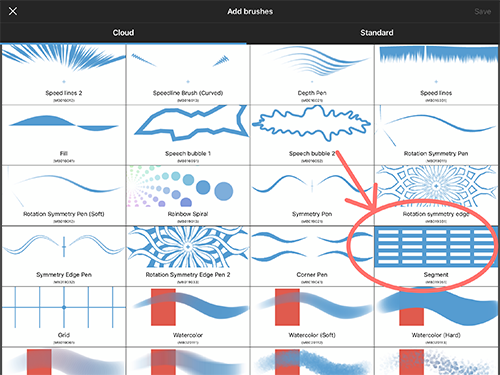
Once you’ve added the brush, you’ll be able to use the split brush.
1-2. Brush settings
First, set how many heads tall you want the character to be.
Today, let’s work with a character that is 6 heads tall.
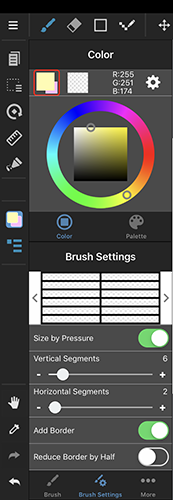
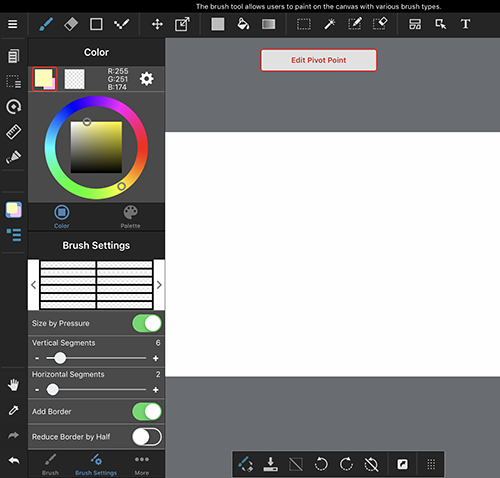
“Brush Settings”> “vertical split” set at 6.
Insert a vertical line in the center so that the part that forms the core of the character’s body does not end up distorted.
“Brush Settings”> “horizontal split” set at 2.
If you want to adjust the thickness of the line, adjust “size” in “brush settings” just as you do with other brushes.
1-3. Edit the starting point
Once you have finished with your brush settings, next decide where you want the rectangle’s reference point to be. The reference point is where the upper left corner of the rectangle sits.
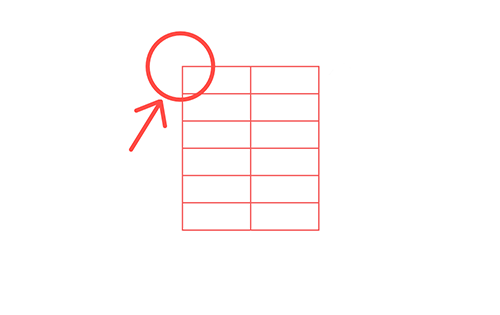
【HOW TO SET THE REFERENCE POINT】
〈I Pad〉
Press “edit reference point” at the top of the screen and move the “+” cursor to the position you want to be the reference point.
〈COMPUTERS〉
Windows: While holding down “Ctrl,” click the position you want to use as the reference point.
Apple Mac: While holding down “command,” click the position you want to use as the reference point.
Once the reference point is determined, you can slide your pen diagonally down to the right to draw a line and you will create a guide for balancing the head and body of your character.
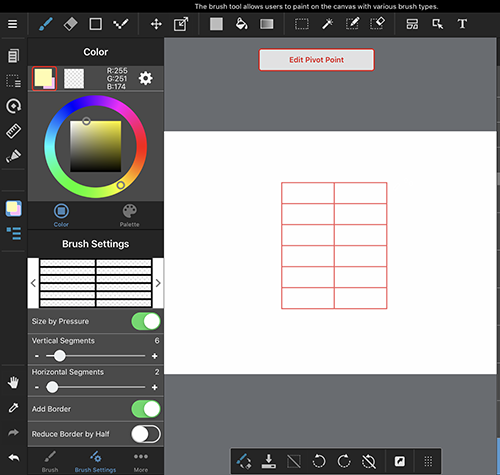
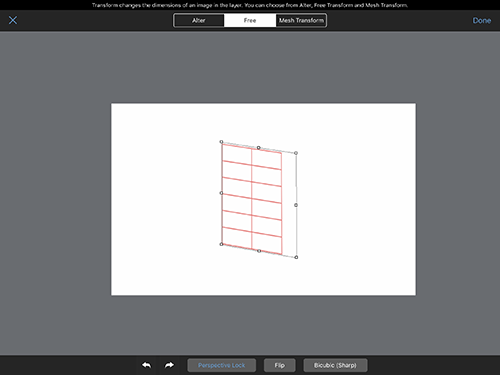
This guide can be resized to be larger or smaller, and the direction it faces can be changed using the transform tool.
Let’s adjust the direction the character faces by transforming it with perspective correction.
2. How to draw a 6-head-length character
When your guide is complete, create a new layer and draft your character.
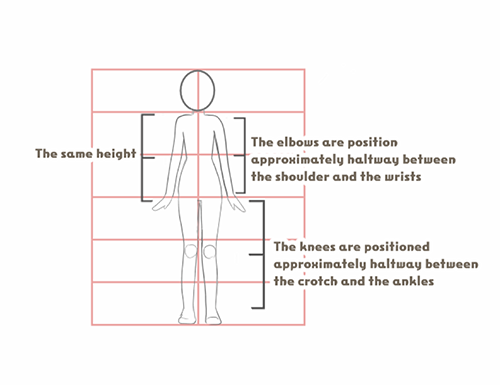
In the case of a character that is 6-heads long, it is divided into “head &body” and “legs” at approximately midpoint.
■ Head & body
The top frame is the head, the second covers from the neck to the waist, and the third covers from the waist to the crotch.
“Shoulder to waist” and “waist to crotch” are approximately the same length.
■ Legs
The knees sit exactly half way between the crotch and the ankles. If you use the guide as a guideline, the knees sit a little under the third line from the bottom.
■ Arms
Bring the wrists to the side of the crotch.
The elbows are positioned in the middle area between the wrists and the shoulders.
3. How to draw a 3-head-length character
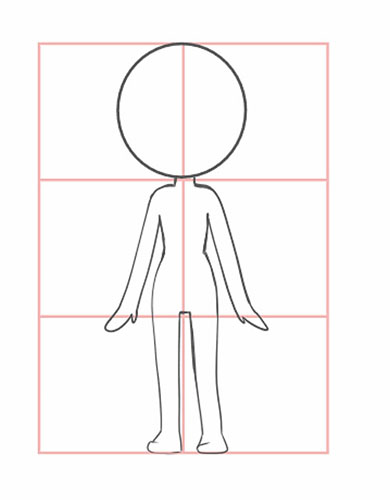
When balancing a 3-head-length character, the top frame is the head, the second frame covers from the neck to the crotch, and the third frame covers from the crotch to the legs.
4. How to draw a 2-head length character
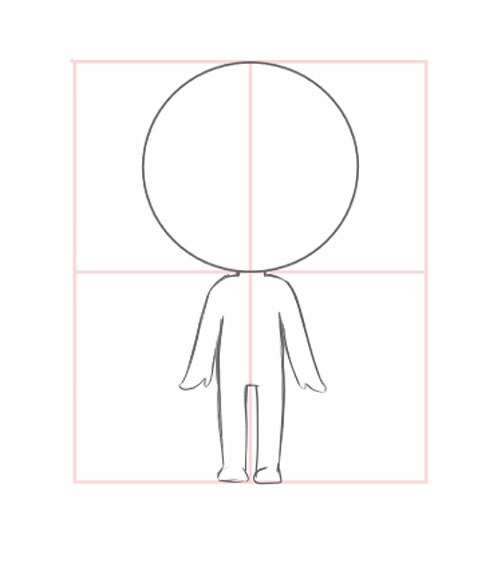
For a 2-head-length character, the top frame is the head, and the lower frame is the body.
The point about 2-head-length and 3-head-length characters is to distort of the parts of the body and face.
Try using the split brush to draw characters of different head lengths.
\ We are accepting requests for articles on how to use /

