Before we actually begin painting, we will look the settings to use when painting with a stylus.
Please note that the following settings can only be used on compatible devices.
[Recommended Device] GALAXY Note 3, GALAXY Note II. Etc.
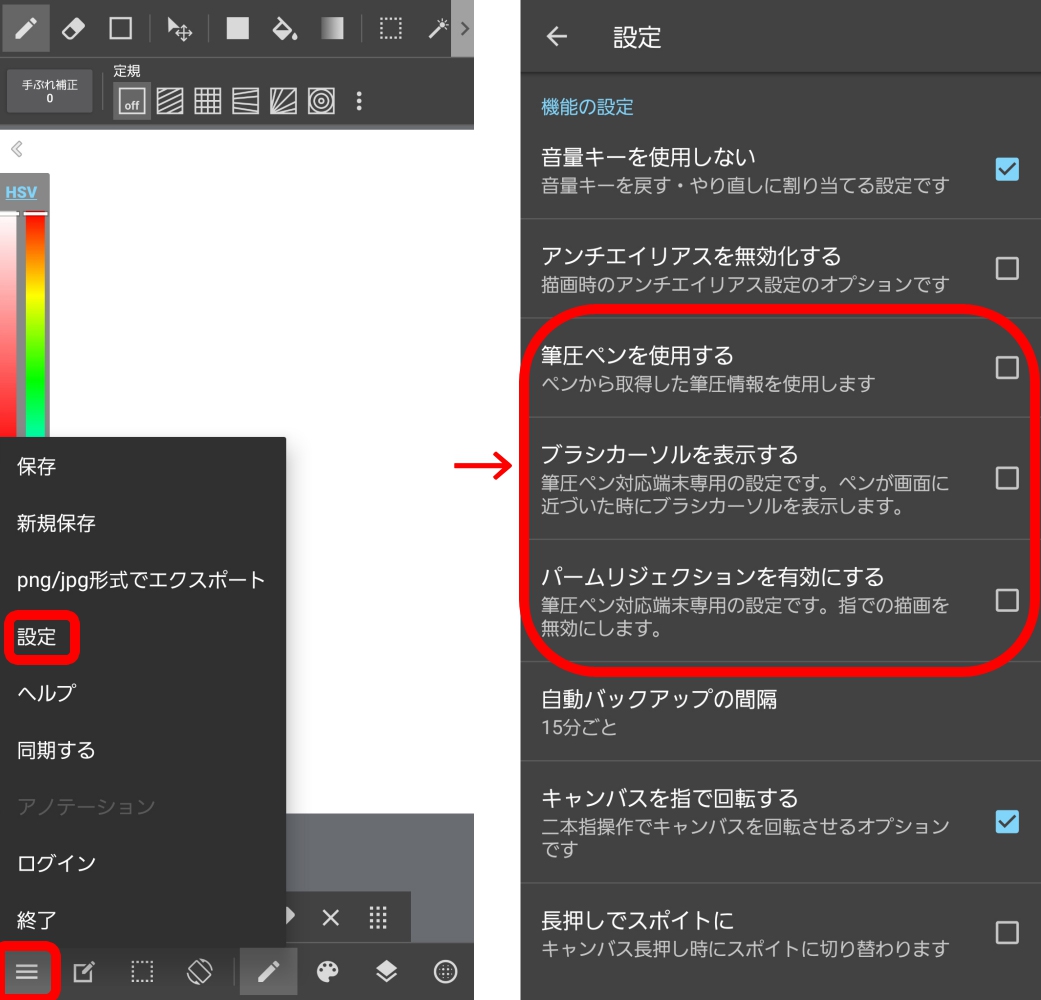
First, tap “Main Menu” → “Settings” found on the lower left of the canvas screen.

The following three “Function Settings” can be used with the stylus.


This setting is exclusive to devices compatible with pressure pen.
By check marking this feature, it will no longer detect things that touch the screen that are not styluses, such as your fingers, etc.
This convenient feature prevents unnecessary additions from being made when you accidentally touch the screen.
Press the arrow on the upper left of the screen to return to your canvas.
Now that we’re done with the settings, lets get our brush and eraser and get to painting!