2022.04.22
How to use the Time-lapse function
Explains how to use the time-lapse function.
What is the time-lapse function?
What is the time-lapse function? It records the work process of the work drawn on the canvas.
It is a function that can create a making video.
Only the works drawn on the canvas will be recorded.
・I want to make a making that only shows the work process
・I don’t want to show the whole screen
Recommended in such cases.
【Making video image】
How to use on PC
1.Start of time lapse
With the canvas open
Menu bar < Time-lapse < “Time-lapse ON”
Time-lapse is enabled with.
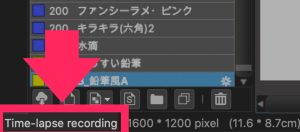
* During time-lapse shooting, the message
“Time-lapse recording” appears at the bottom left of the screen.
2.Time-lapse stop
With time-lapse enabled
By selecting “Time Lapse ON” again
It can be disabled.

3.Check the time lapse in a list
You can check the created time lapse by the following two methods.
① Check from the menu bar
Select “Time Lapse Gallery” from the menu bar < Time Lapse

②Check from the network panel
Open the network panel < Select “Time Lapse Gallery”
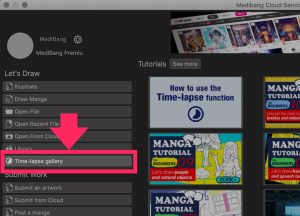
Also, by double-clicking the work
It is also possible to play.
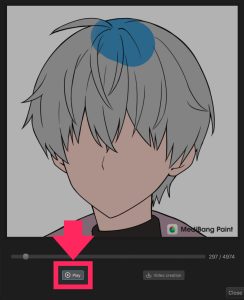
4.Save the time–lapse as a video
The created time lapse is
Menu bar < Time-lapse < “Time-lapse gallery” < Double-click the work
< Select “Create video”
You can save the video (mp4) with.
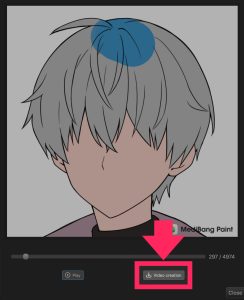
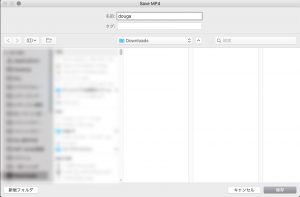
After selecting “Create Video“, first set the save destination.
Next, set how many seconds the time lapse should fit.
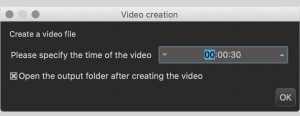
5.Delete time-lapse
The created time lapse is
Menu bar < Time-lapse < “Time-lapse gallery” < Select the work you want to delete
< Right click < “Delete”
It can be deleted with.
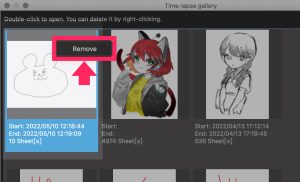
* Data once deleted cannot be restored.
Please be careful.
6.Time-lapse concatenation
The created time-lapses can be connected and combined into one.
Menu bar < Time-lapse < “Time-lapse gallery”
<Select the work you want to concatenate (*) <Click “Concatenate” at the top right of the screen
* How to select the works you want to connect
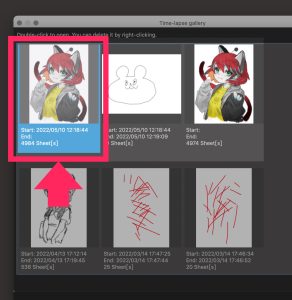
Select a work while holding down “Control” (“Command” on Mac) on the keyboard
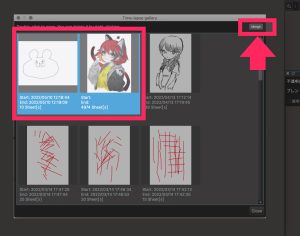
The linked videos will be added to the top of the list.
7.Let’s post a time-lapse
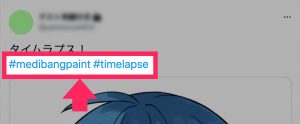
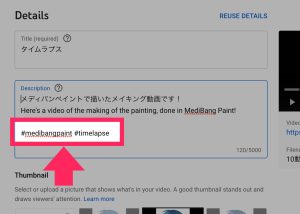
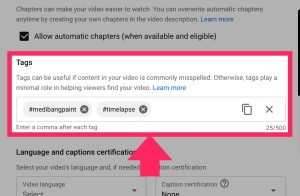
If you post with the following hashtag on Twitter / YouTube,
it will be displayed on the time-lapse posting page.
【hashtag】
#medibangpaint
#timelapse
* Please attach both tags.
①For Twitter
②For YouTube
* Enter the hashtag in the summary field or the “Tag” field.
【How to read the time-lapse posting page】
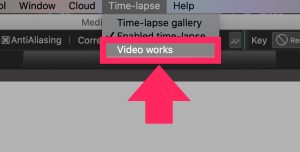
Menu bar < Time-lapse < Select “Video work”
How to use on Android
1.Start of time lapse
You can start the time-lapse in two ways:
① Start when creating a new canvas
Home screen < New canvas < Check “Enable time lapse”
The time lapse will start at the same time as the new canvas is created.
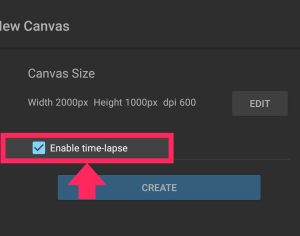
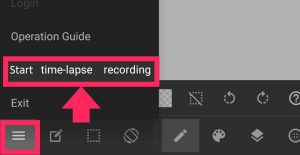
② Start the time lapse with the canvas open
With the canvas open
Menu icon < Tap “Start Time Lapse”
The time lapse will start at.
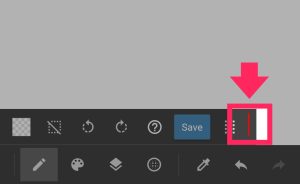
* During time-lapse shooting, the right side of the shortcut bar glows red.
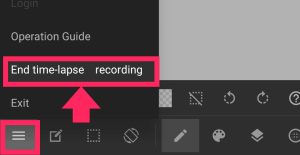
2.Time-lapse stop
With time-lapse enabled
Menu icon < Tap “End Time Lapse”
You can disable it with.
3.Check the time lapse in a list
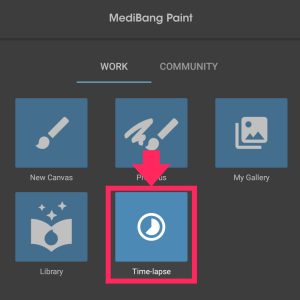
The created time lapse is
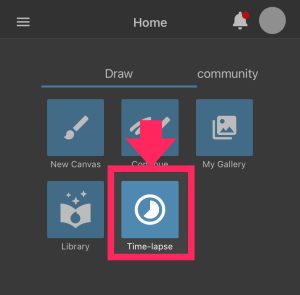
Home screen < “Time-lapse”
You can check from.
By tapping the work
It is also possible to play.
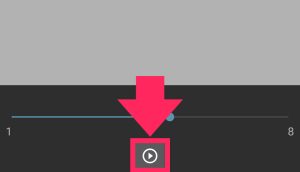
4.Save the time-lapse as a video
The created time lapse is
Home screen < “Time-lapse” < Tap the work < “Create video”
You can save the video (mp4) with.

After tapping “Create Video“, set how many seconds the time lapse will fit.
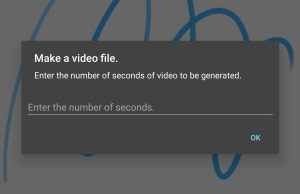
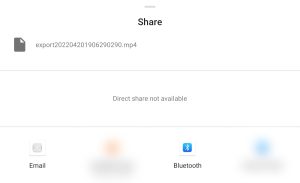
After that, specify the save destination and the creation is completed.
5.Delete time-lapse
The created time lapse is
Home screen <“Time-lapse” <Swipe the work you want to delete to the left <Tap the trash can icon
It can be deleted with.
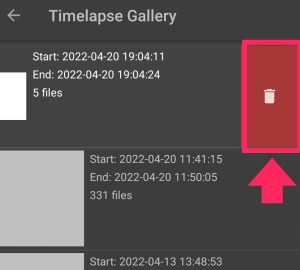
* Data once deleted cannot be restored.
Please be careful.
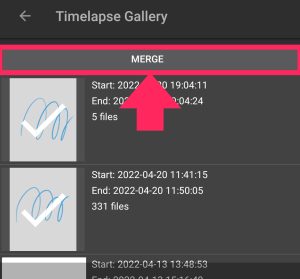
6.Time-lapse concatenation
The created time-lapses can be connected and combined into one.
Home screen < “Time-lapse” < Press and hold one work you want to connect <
Select all the works you want to connect <
<Tap “Connect Time Lapse”
7.Let’s post a time-lapse
If you post with the following hashtag on Twitter / YouTube,
it will be displayed on the time-lapse posting page.
【hashtag】
#medibangpaint
#timelapse
* Please attach both tags.
①For Twitter
②For YouTube
* Enter the hashtag in the summary field or the “Tag” field.


【How to read the time-lapse posting page】
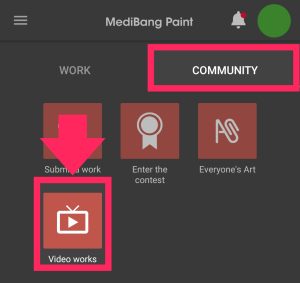
Home screen < Click the “Community” tab < Tap “Video work”
How to use on iPhone
1.Start of time lapse
You can start the time-lapse in two ways:
①Start when creating a new canvas
Home screen < New canvas < New creation < Check “Enable time lapse”
The time lapse will start at the same time as the new canvas is created.
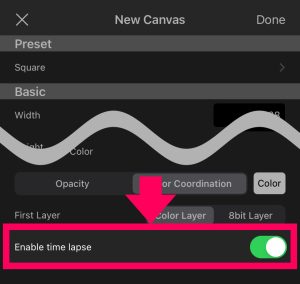
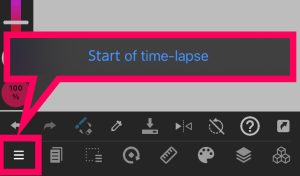
②Start the time lapse with the canvas open
With the canvas open
Menu icon < Tap “Start Time Lapse”
The time lapse will start at.
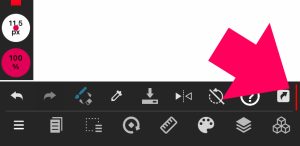
* The right side of the shortcut bar glows red during time-lapse shooting.
2.Time-lapse stop
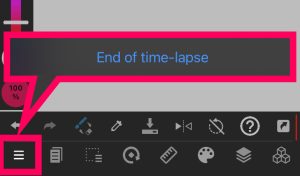
With time-lapse enabled Menu icon <Tap “End Time Lapse” You can disable it with.
3.Check the time lapse in a list
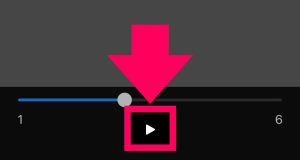
The created time lapse is
Home screen < “Time-lapse”
You can check from.
By tapping the work
It is also possible to play.
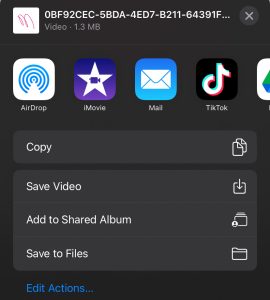
4.Save the time-lapse as a video
The created time lapse is
Home screen < “Time-lapse” < Tap the work < “Create video”
You can save the video (mp4) with.
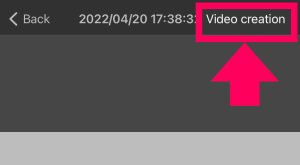
After tapping “Create Video“, set how many seconds the time lapse will fit.
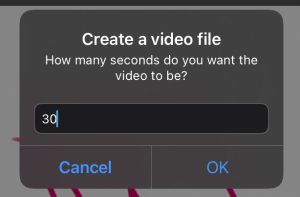
After that, specify the save destination and the creation is completed.
5.Delete time-lapse
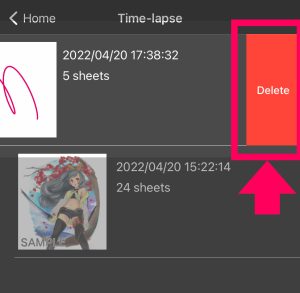
The created time lapse is
Home screen < “Time-lapse” < Swipe the work you want to delete to the left < Tap “Delete”
It can be deleted with.
* Data once deleted cannot be restored.
Please be careful.
6.Time-lapse concatenation
The created time-lapses can be connected and combined into one.
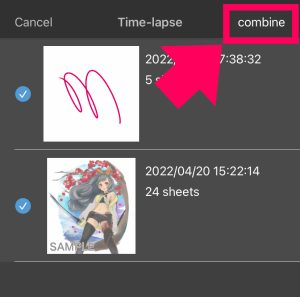
Home screen < “Time-lapse” < Press and hold one work you want to connect
< Select all the works you want to connect
< Tap “Union” at the top right of the screen
7.Let’s post a time-lapse
If you post with the following hashtag on Twitter / YouTube,
it will be displayed on the time-lapse posting page.
【hashtag】
#medibangpaint
#timelapse
* Please attach both tags.
①For Twitter
②For YouTube
* Enter the hashtag in the summary field or the “Tag” field.


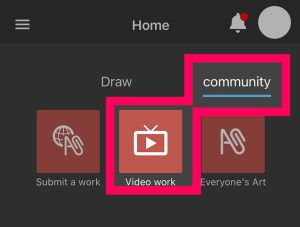
【How to read the time-lapse posting page】
Home screen <Click the “Community” tab <Tap “Video work”
How to use on iPad
1.Start of time lapse
You can start the time-lapse in two ways:
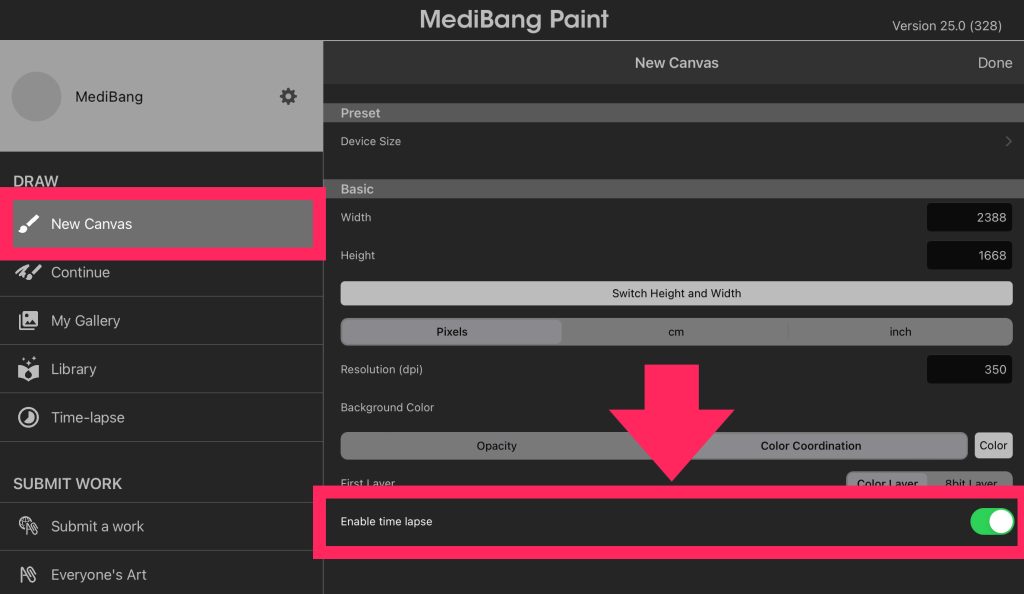
①Start when creating a new canvas
Home screen < New canvas < New creation <Check “Enable time lapse”
The time lapse will start at the same time as the new canvas is created.
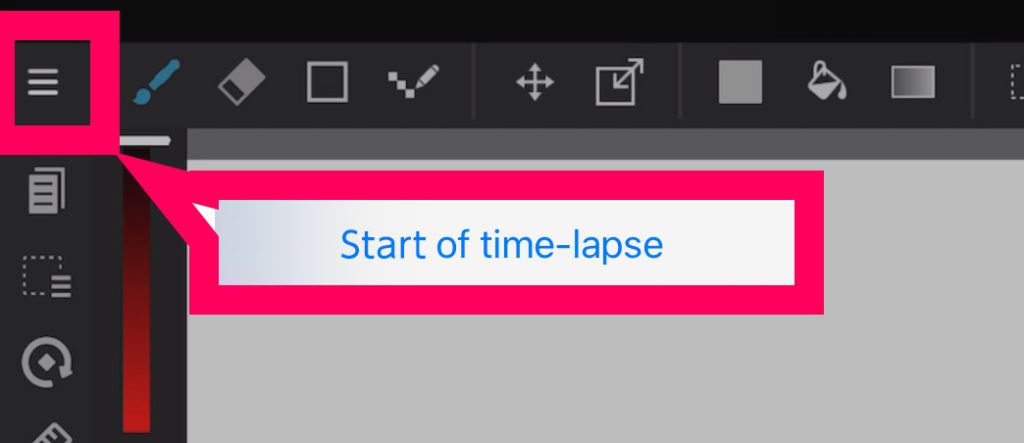
②Start the time lapse with the canvas open
With the canvas open
Menu icon <Tap “Start Time Lapse”
The time lapse will start at.
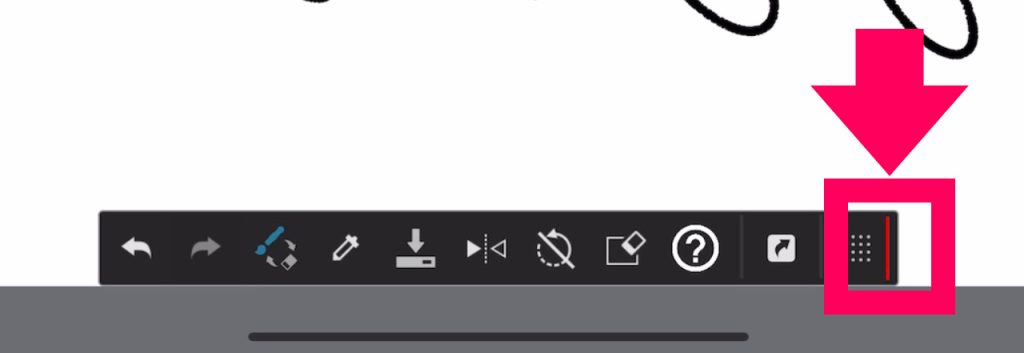
* During time-lapse shooting, the right side of the shortcut bar glows red.
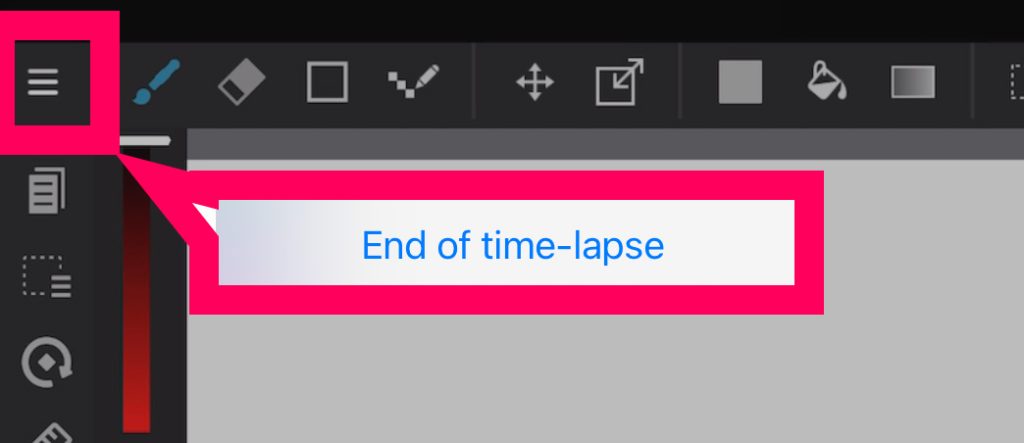
2.Time-lapse stop
With time-lapse enabled
Menu icon < Tap “End Time Lapse”
You can disable it with.
3.Check the time lapse in a list
The created time lapse is
Home screen < “Time-lapse”
You can check from.
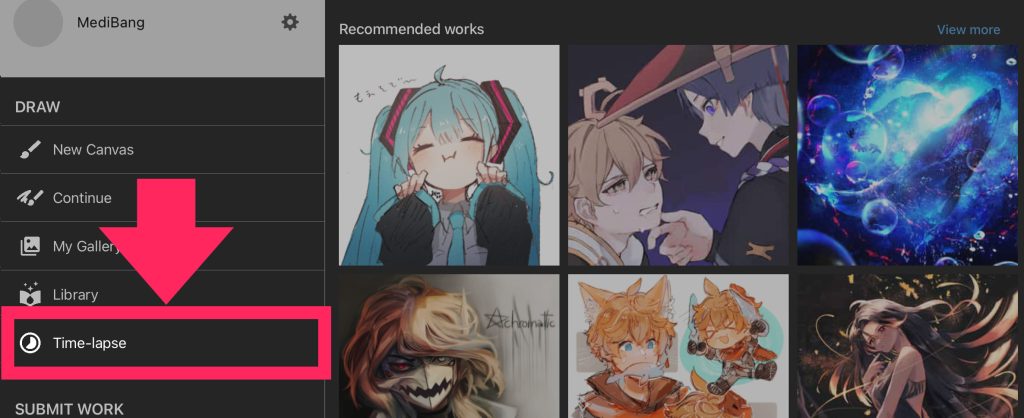
By tapping the work
It is also possible to play.

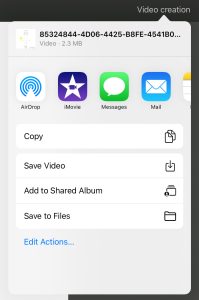
4.Save the time-lapse as a video
The created time lapse is
Home screen < “Time-lapse” < Tap the work < “Create video”
You can save the video (mp4) with.

After tapping “Create Video”, set how many seconds the time lapse will fit.

After that, specify the save destination and the creation is completed.
5.Delete time-lapse
The created time lapse is
Home screen < “Time-lapse” < Swipe the work you want to delete to the left < Tap “Delete”
It can be deleted with.

* Data once deleted cannot be restored.
Please be careful.
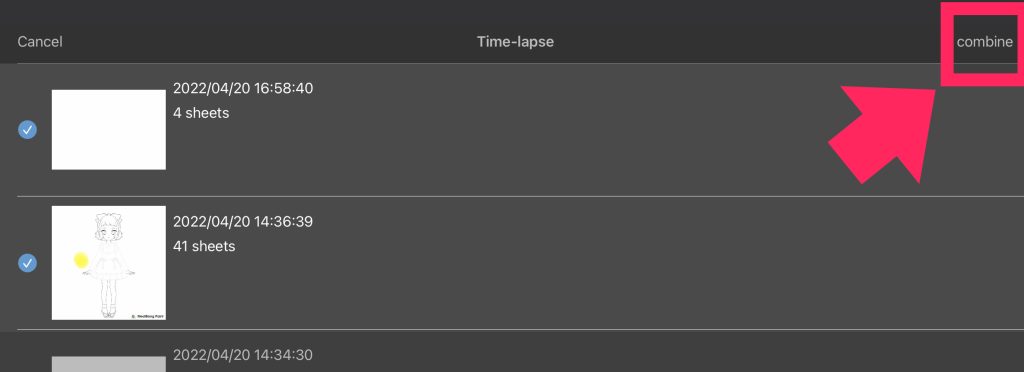
6.Time-lapse concatenation
The created time-lapses can be connected and combined into one.
Home screen < “Time-lapse” < Press and hold one work you want to connect <
Select all the works you want to connect <
Tap “Union” at the top right of the screen
7.Let’s post a time-lapse
If you post with the following hashtag on Twitter / YouTube,
it will be displayed on the time-lapse posting page.
【hashtag】
#medibangpaint
#timelapse
* Please attach both tags.
①For Twitter
②For YouTube
* Enter the hashtag in the summary field or the “Tag” field.


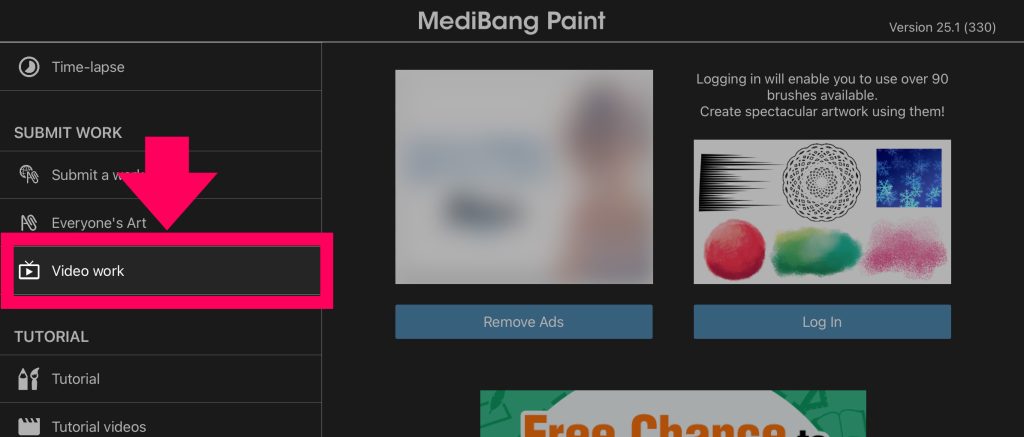
【How to read the time-lapse posting page】
Home screen < Click the “Community” tab < Tap “Video work”
others
About the logo in the video
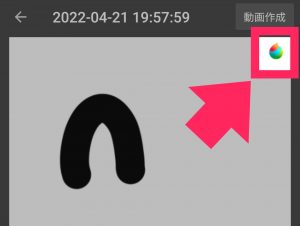
The Medibang Paint logo that is displayed when the time lapse is
animated is You can turn it off by subscribing to Medibang Premium.
Time-lapse Medibang Premium exclusive features will continue to be added.
\ We are accepting requests for articles on how to use /

