Let us introduce other useful tools.
The configuration of the screen when you launch MediBang Paint and open a canvas is as follows.
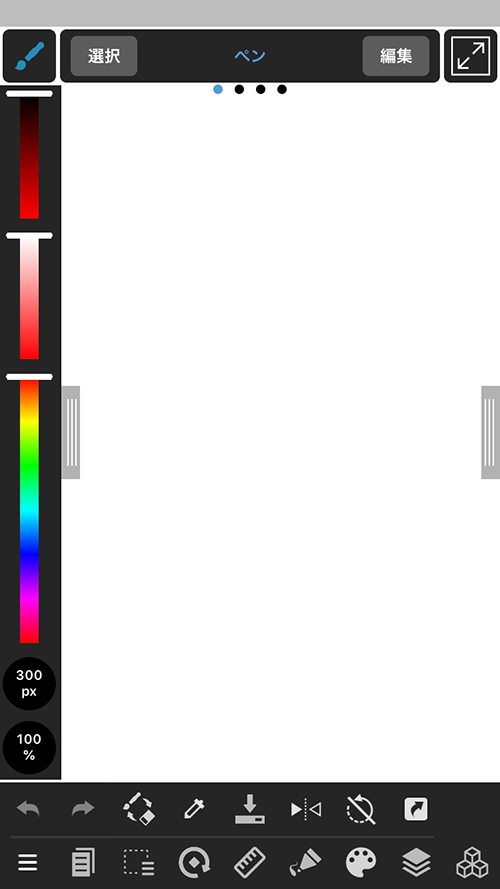
You can close the HSV bar or the layer or color window by sliding them to the side.
Slide in reverse if you want to display them.
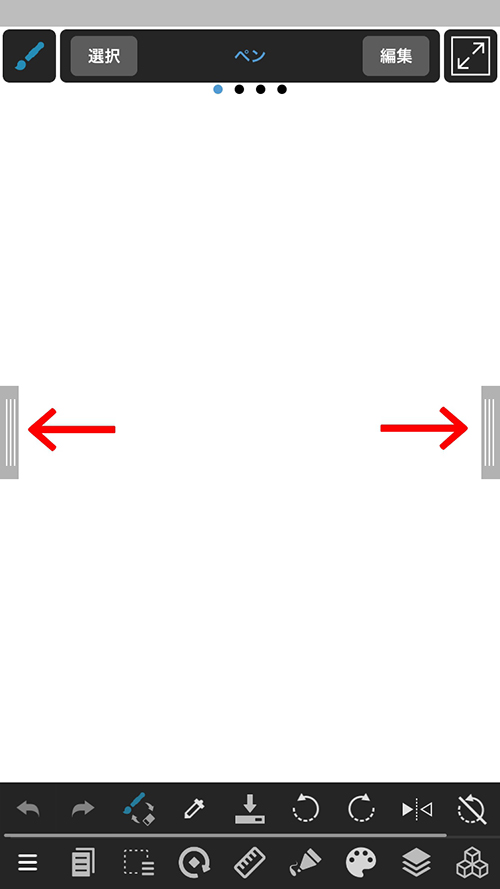
When you want to close all windows and focus on drawing …
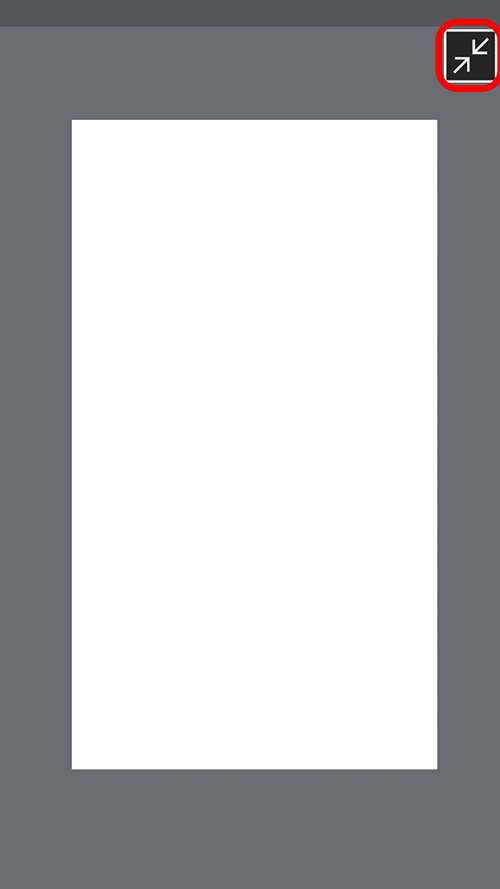
Click the red-framed icon in the picture above to close all windows.
Press the same button again to show the windows.
A window for making brush colors.
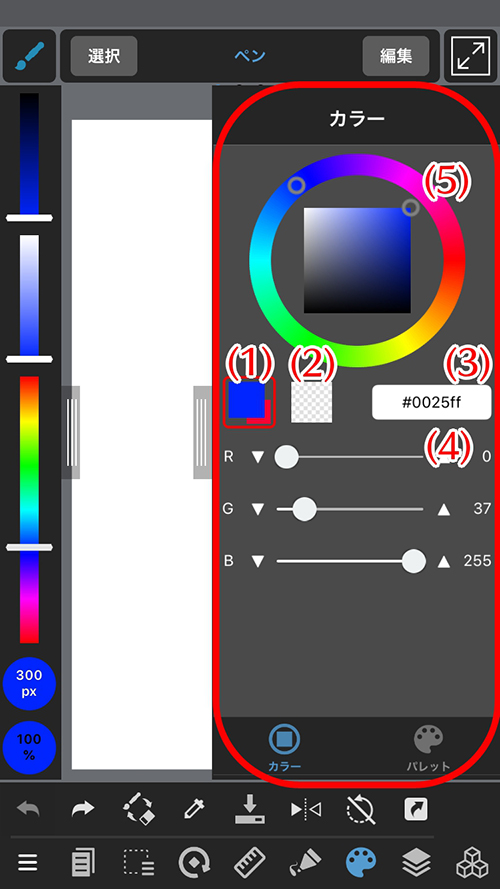
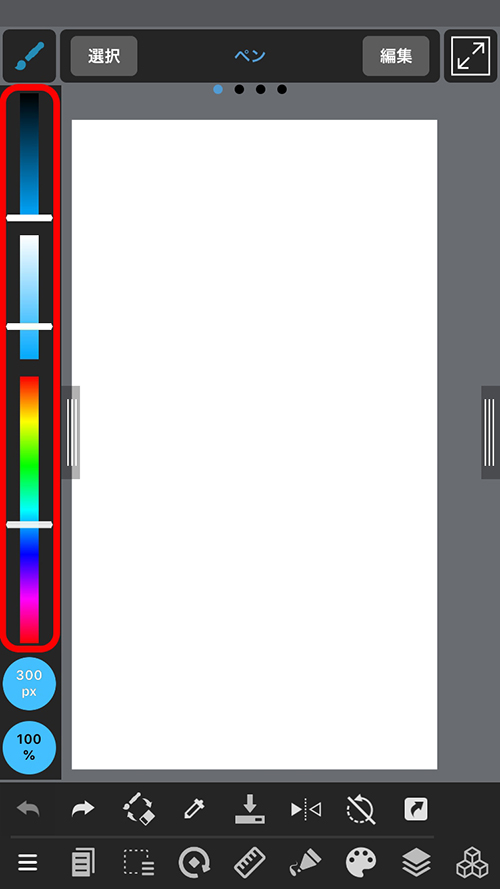
There is a palette inside the color window.
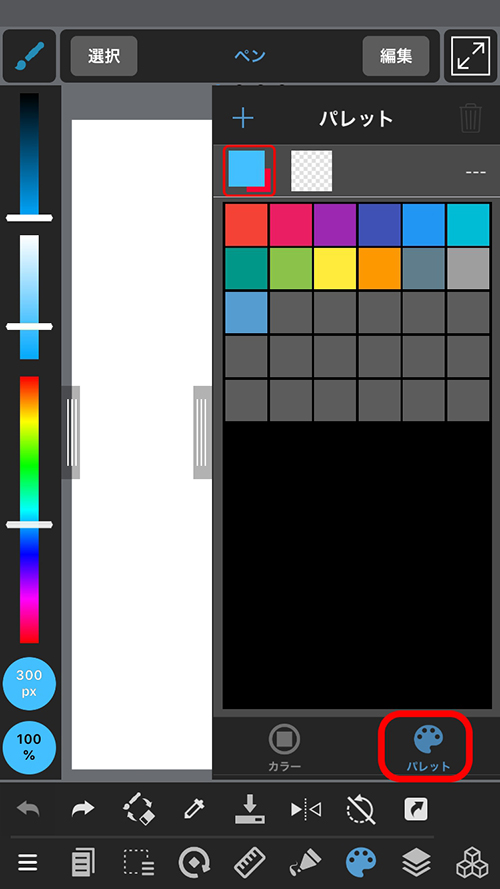
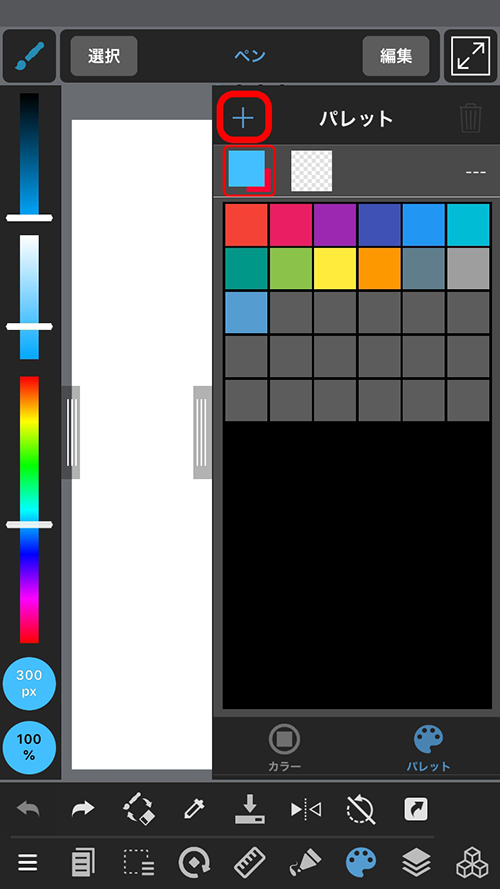
You can save the colors you use frequently in the «Palette». By pressing the + button, you can add your favorite colors.
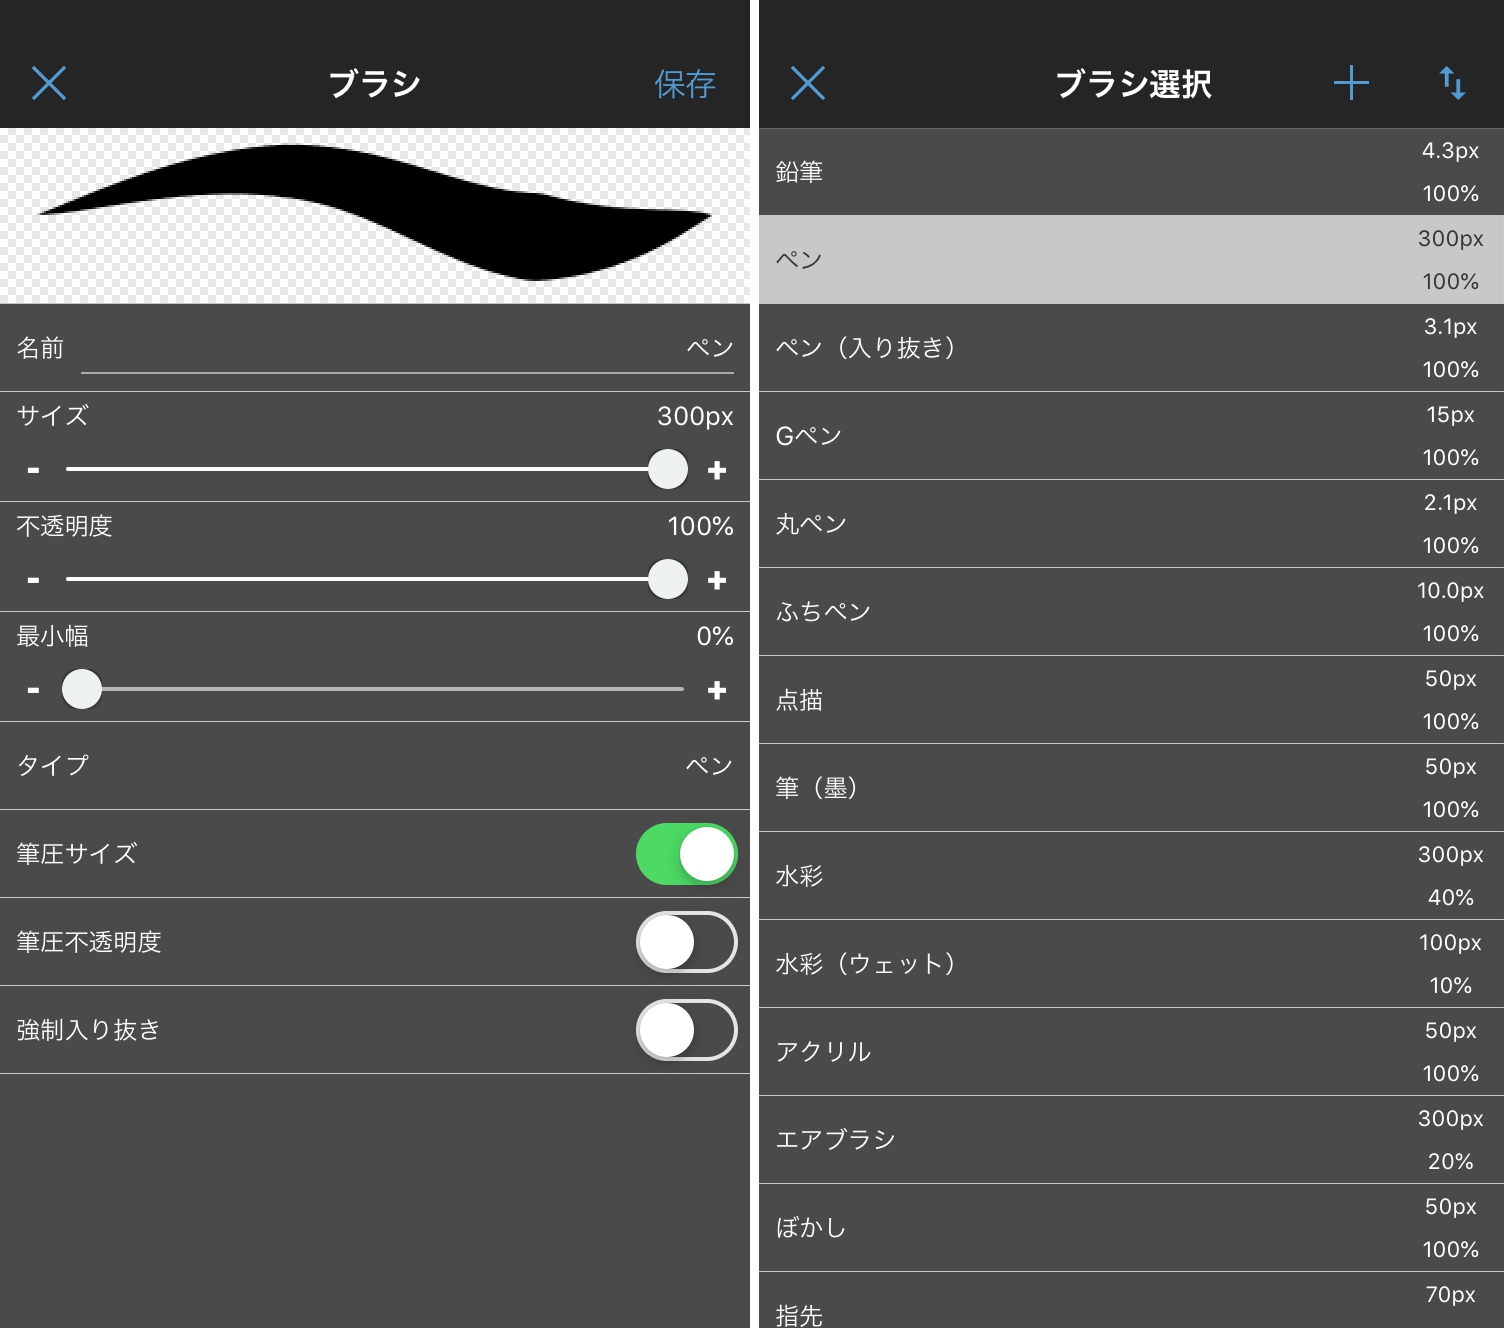
This is an introduction to editing the pen tool.
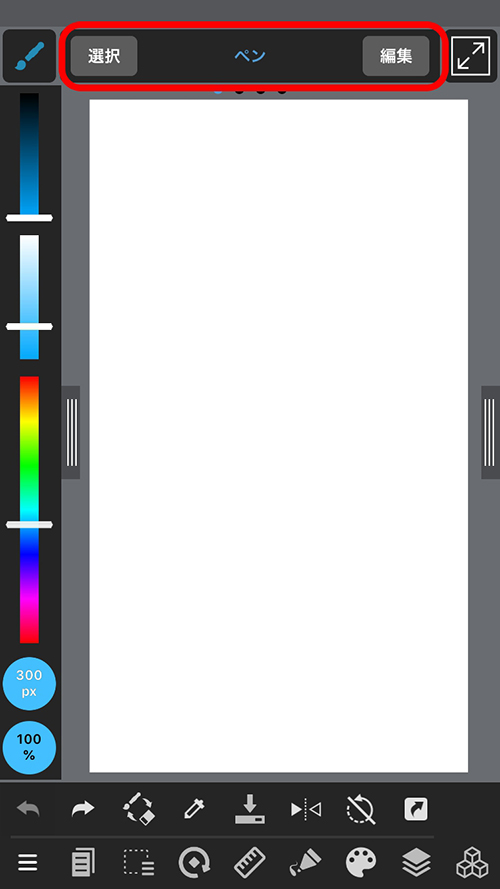
Tap the pen tool selection button to select the pen type. Press «Edit» to make detailed settings.
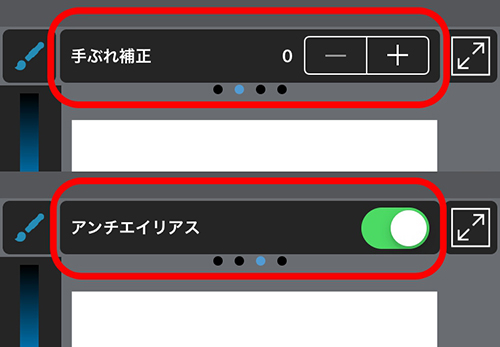
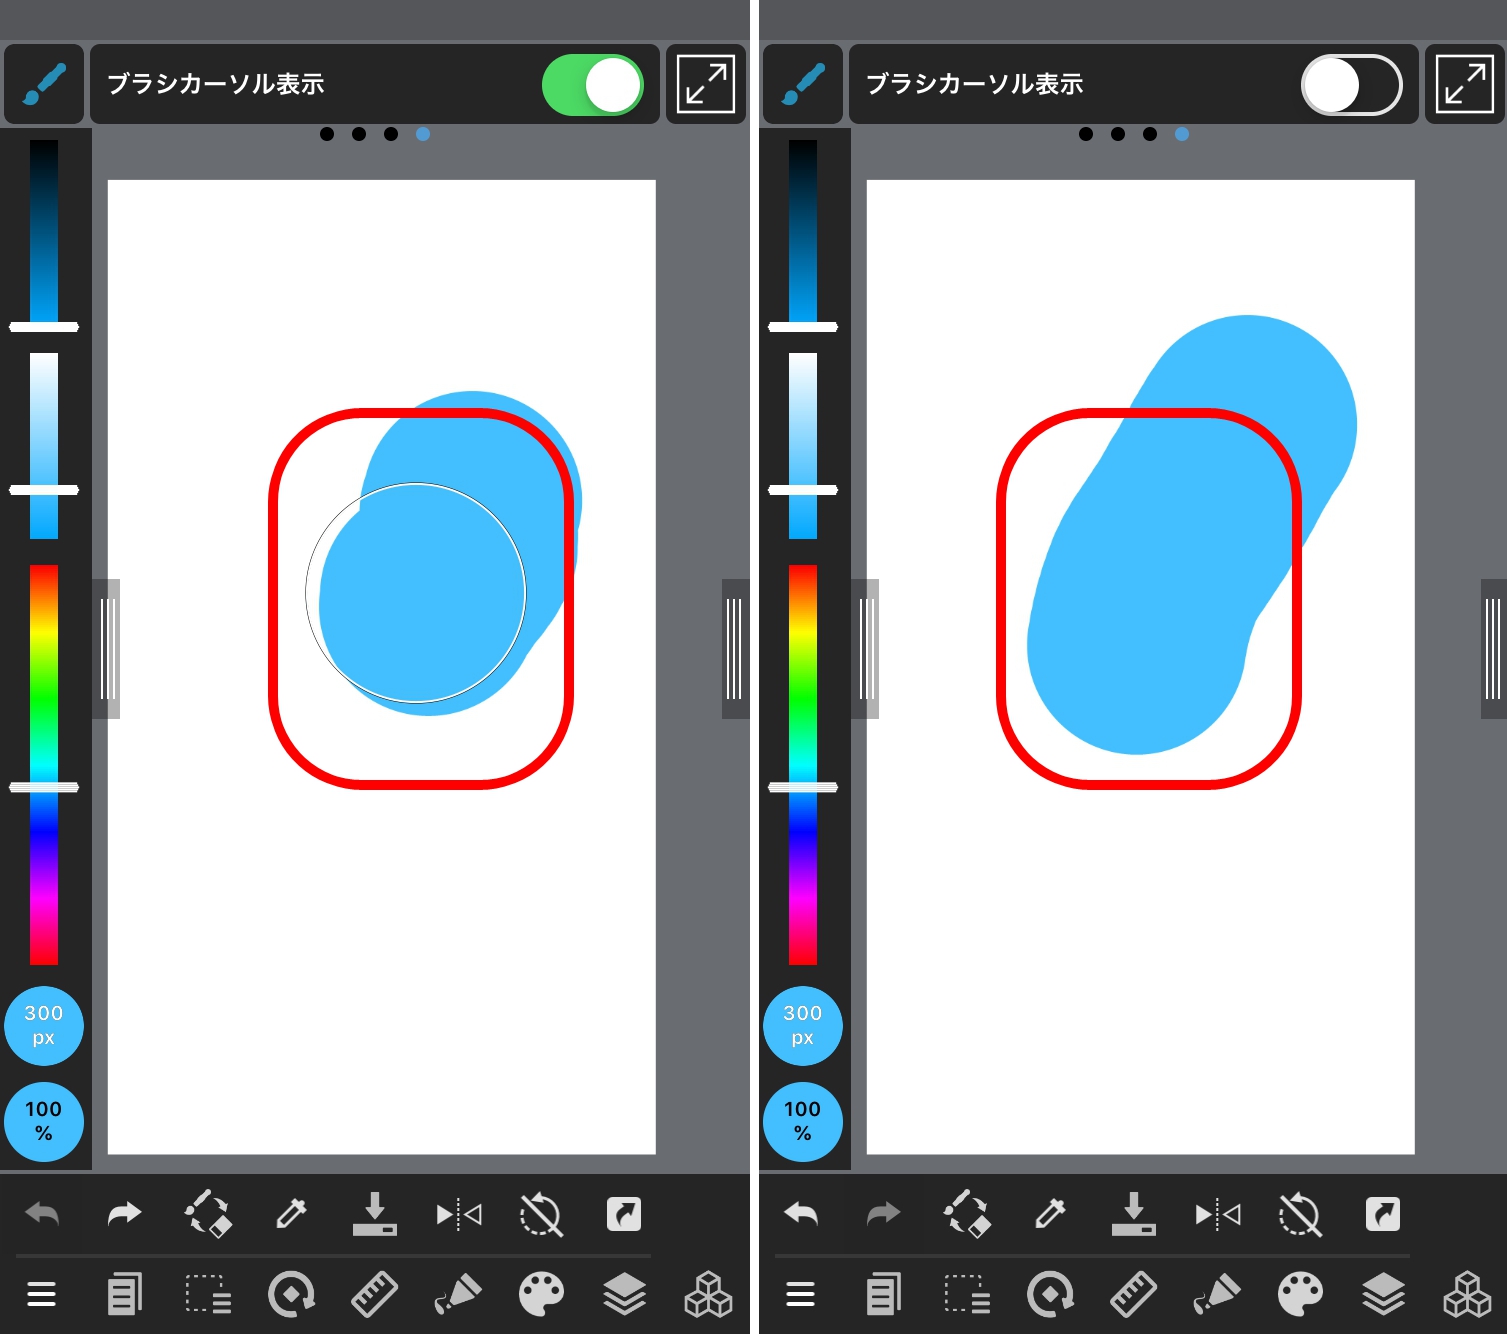
Slide the pen tool to the right to do the following:
When you make a mistake, «Undo» cancels the last operation, and «Redo» cancels the last «Undo».
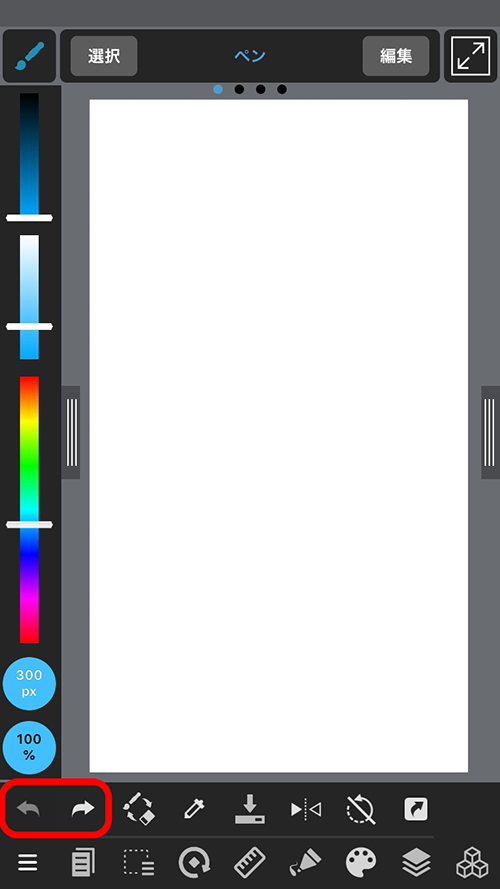
Most operations can be undone with Undo, so try making use of it.
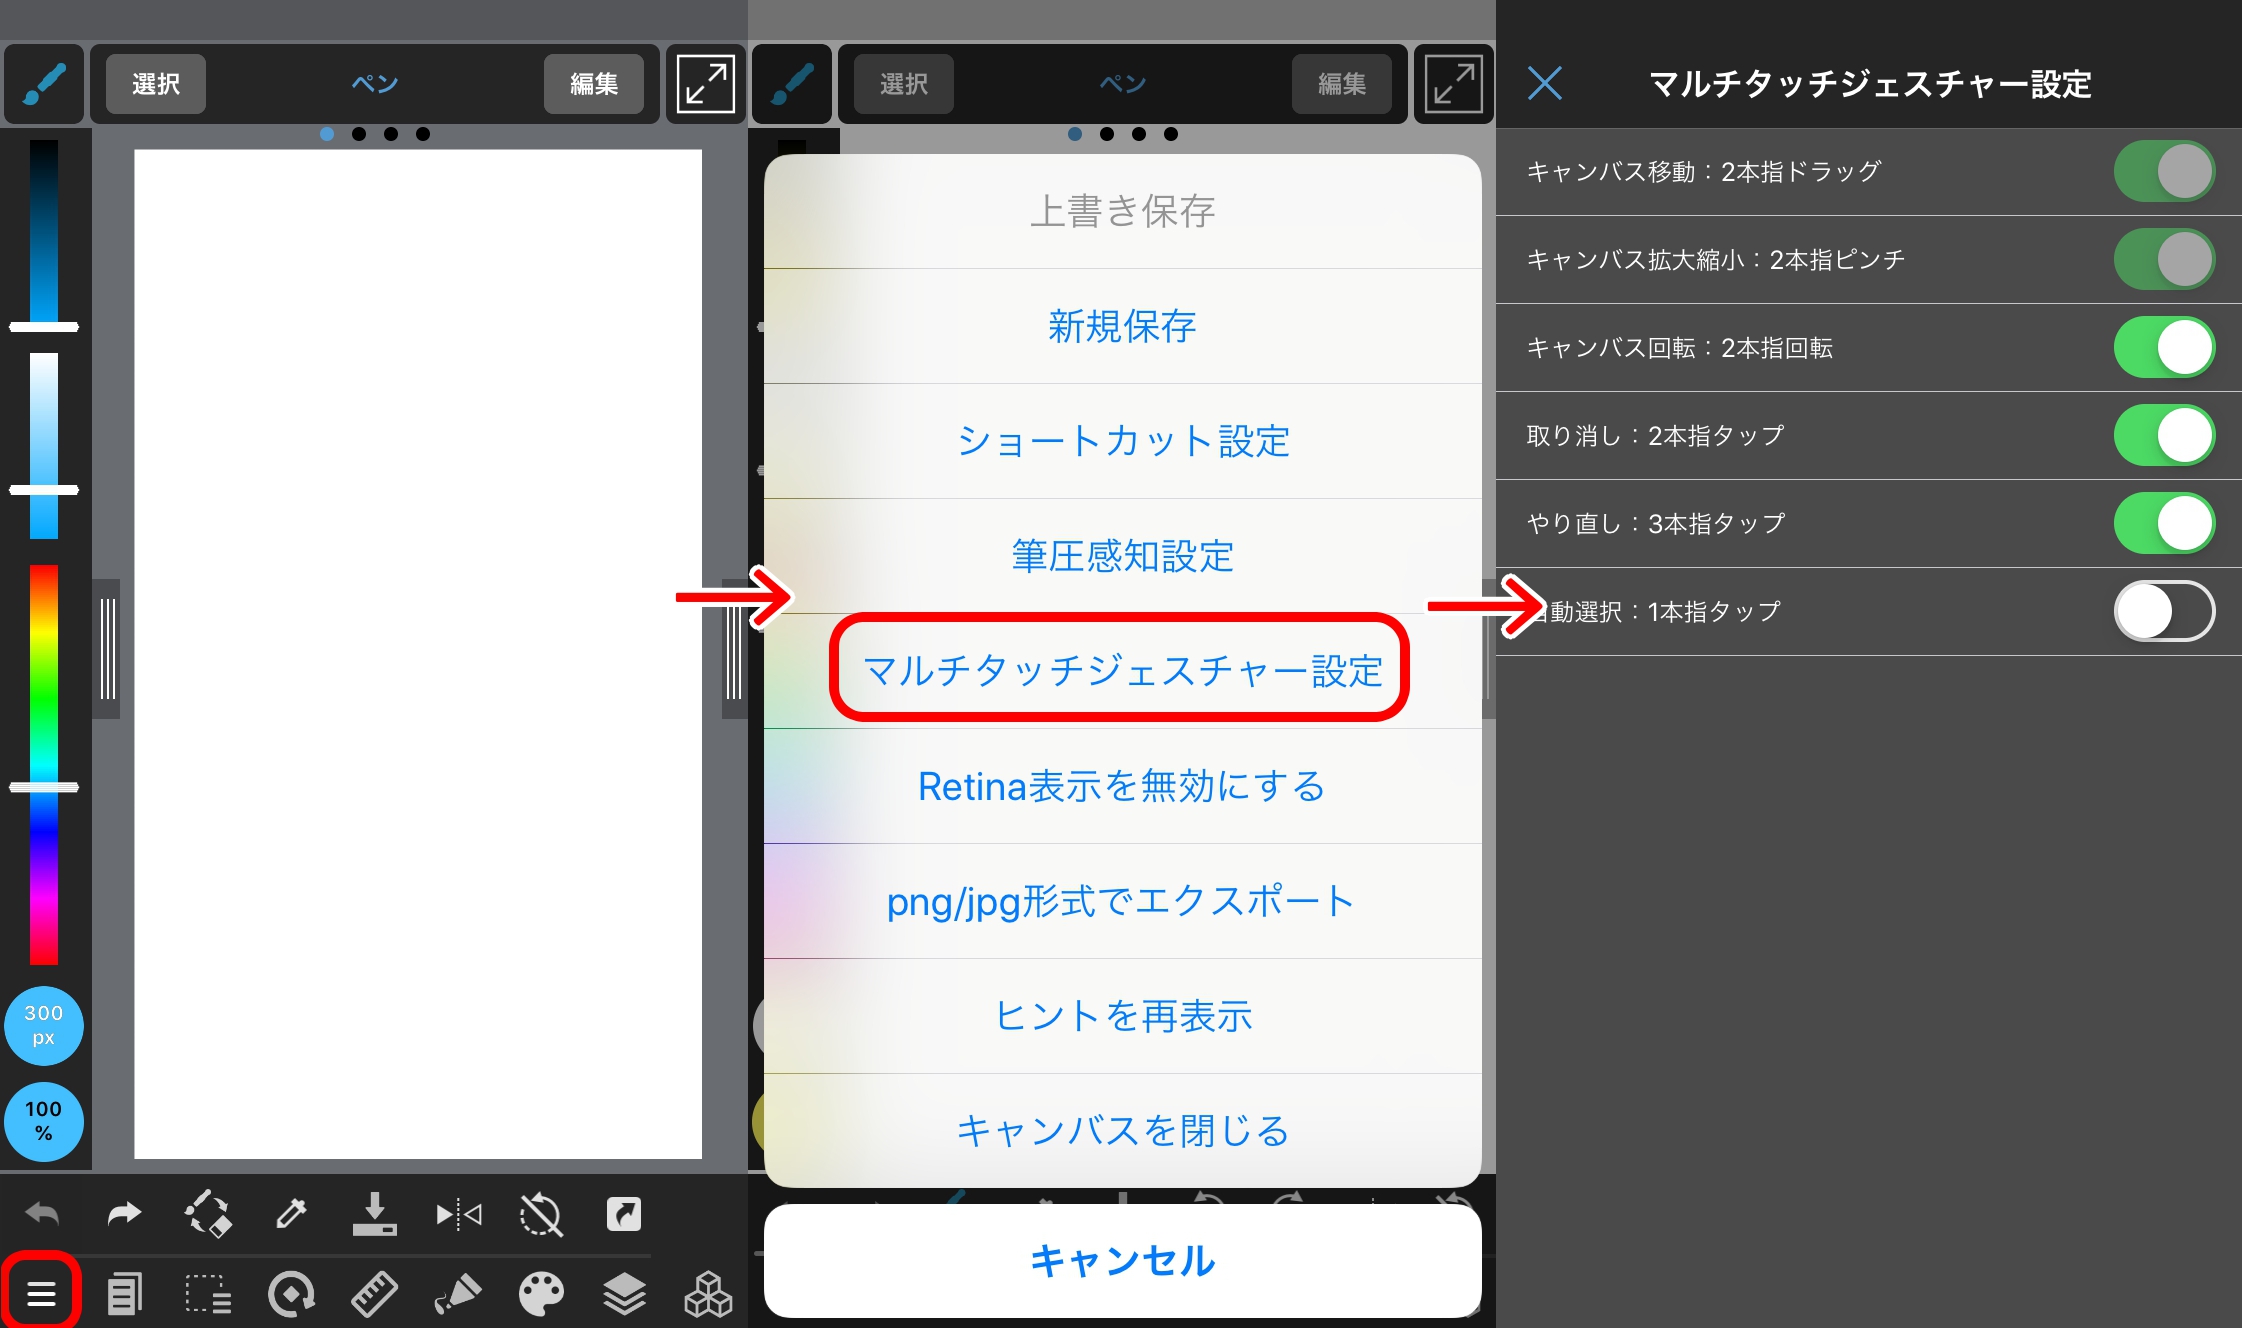
You can set Undo/Redo to a finger tap in the «Multi-Touch gesture settings» from the main menu. (*Once you turn it on, you will have to reopen the canvas to be able to use it.)
MediBang Paint has three types of rotation and flipping. Let’s learn about their differences.
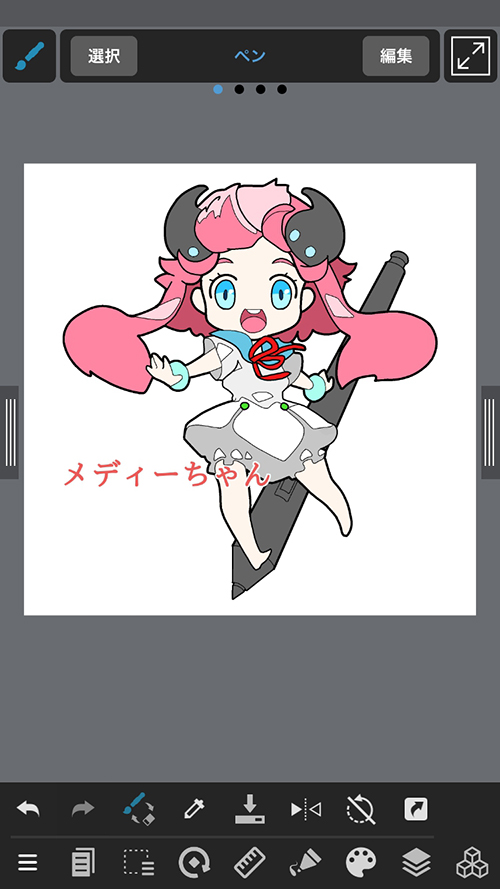
Based on this drawing, we will explain how each rotation works.
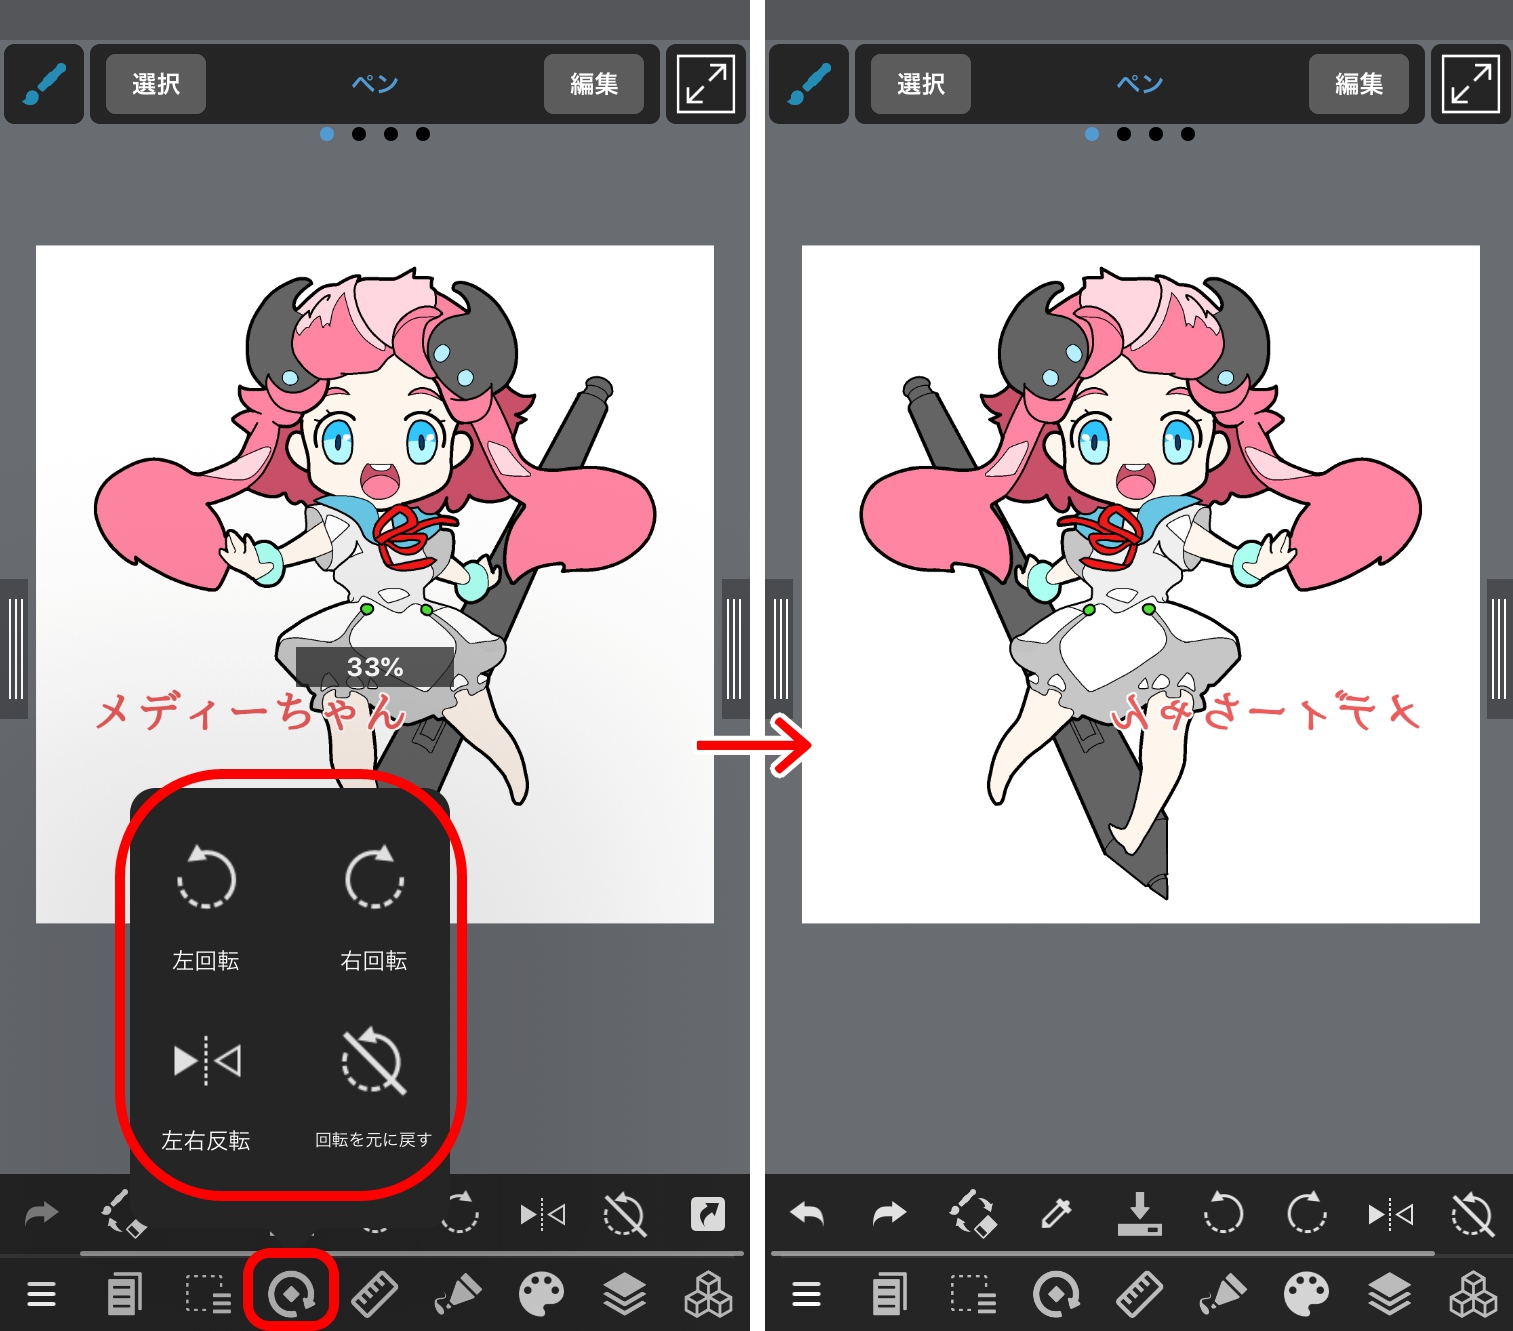
You can flip only the display horizontally by tapping the «Flip horizontally» icon in the display menu.
You can also rotate only the display by tapping the «Rotate left» and «Rotate right» in the display menu.
When you want to undo the flip or rotation, press «Revert the rotation» to return the canvas to its regular position.
By rotating it with two fingers, you can set the display of the canvas to any angle you prefer.
You can choose «Rotate canvas to the left», «Rotate canvas to the right», «Flip horizontally», and «Flip vertically» from the selection menu.
The entire canvas (all layers) will be rotated or flipped. (The text layers are not affected.)
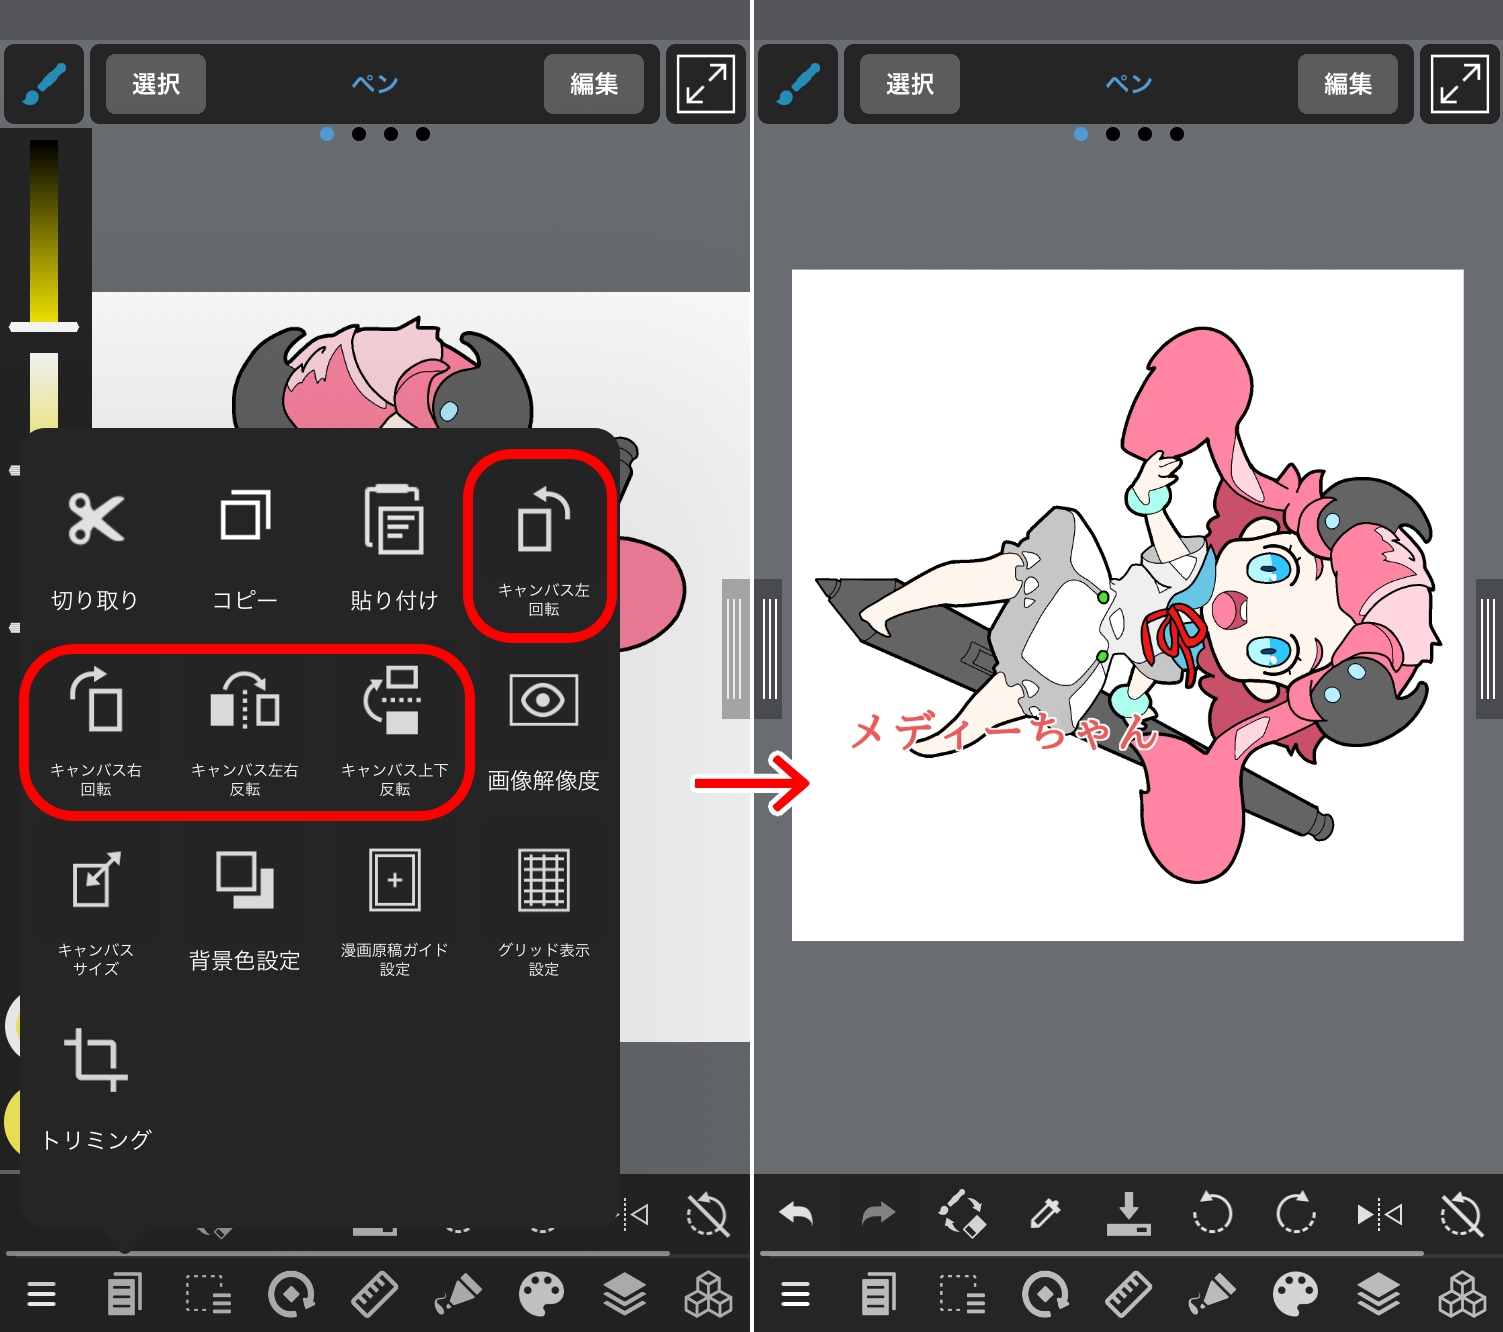
With this operation, you can save not only the display in a rotated state but the data as well.
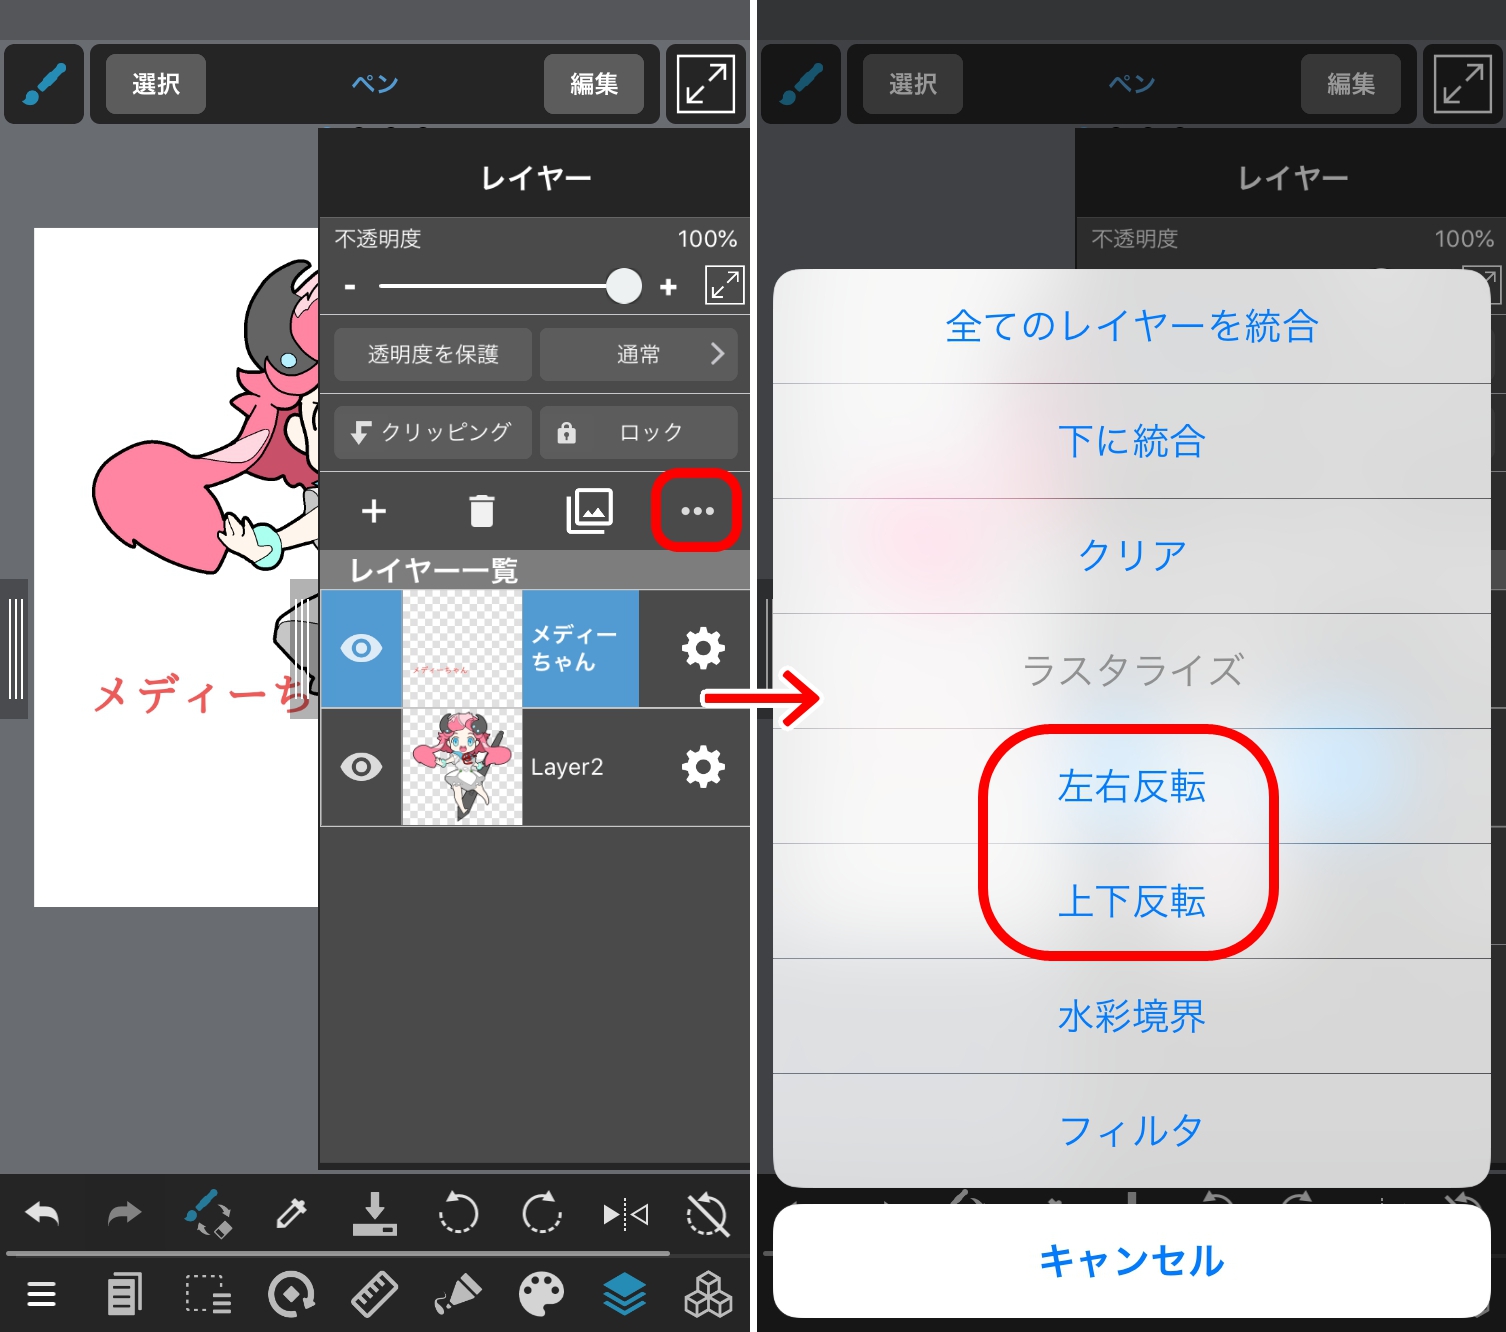
By pressing the menu button (the red frame in the image below) in the layer window, options such as «Flip horizontally» and «Flip vertically» appear, so press the option you want to execute. The currently selected layer will be flipped.
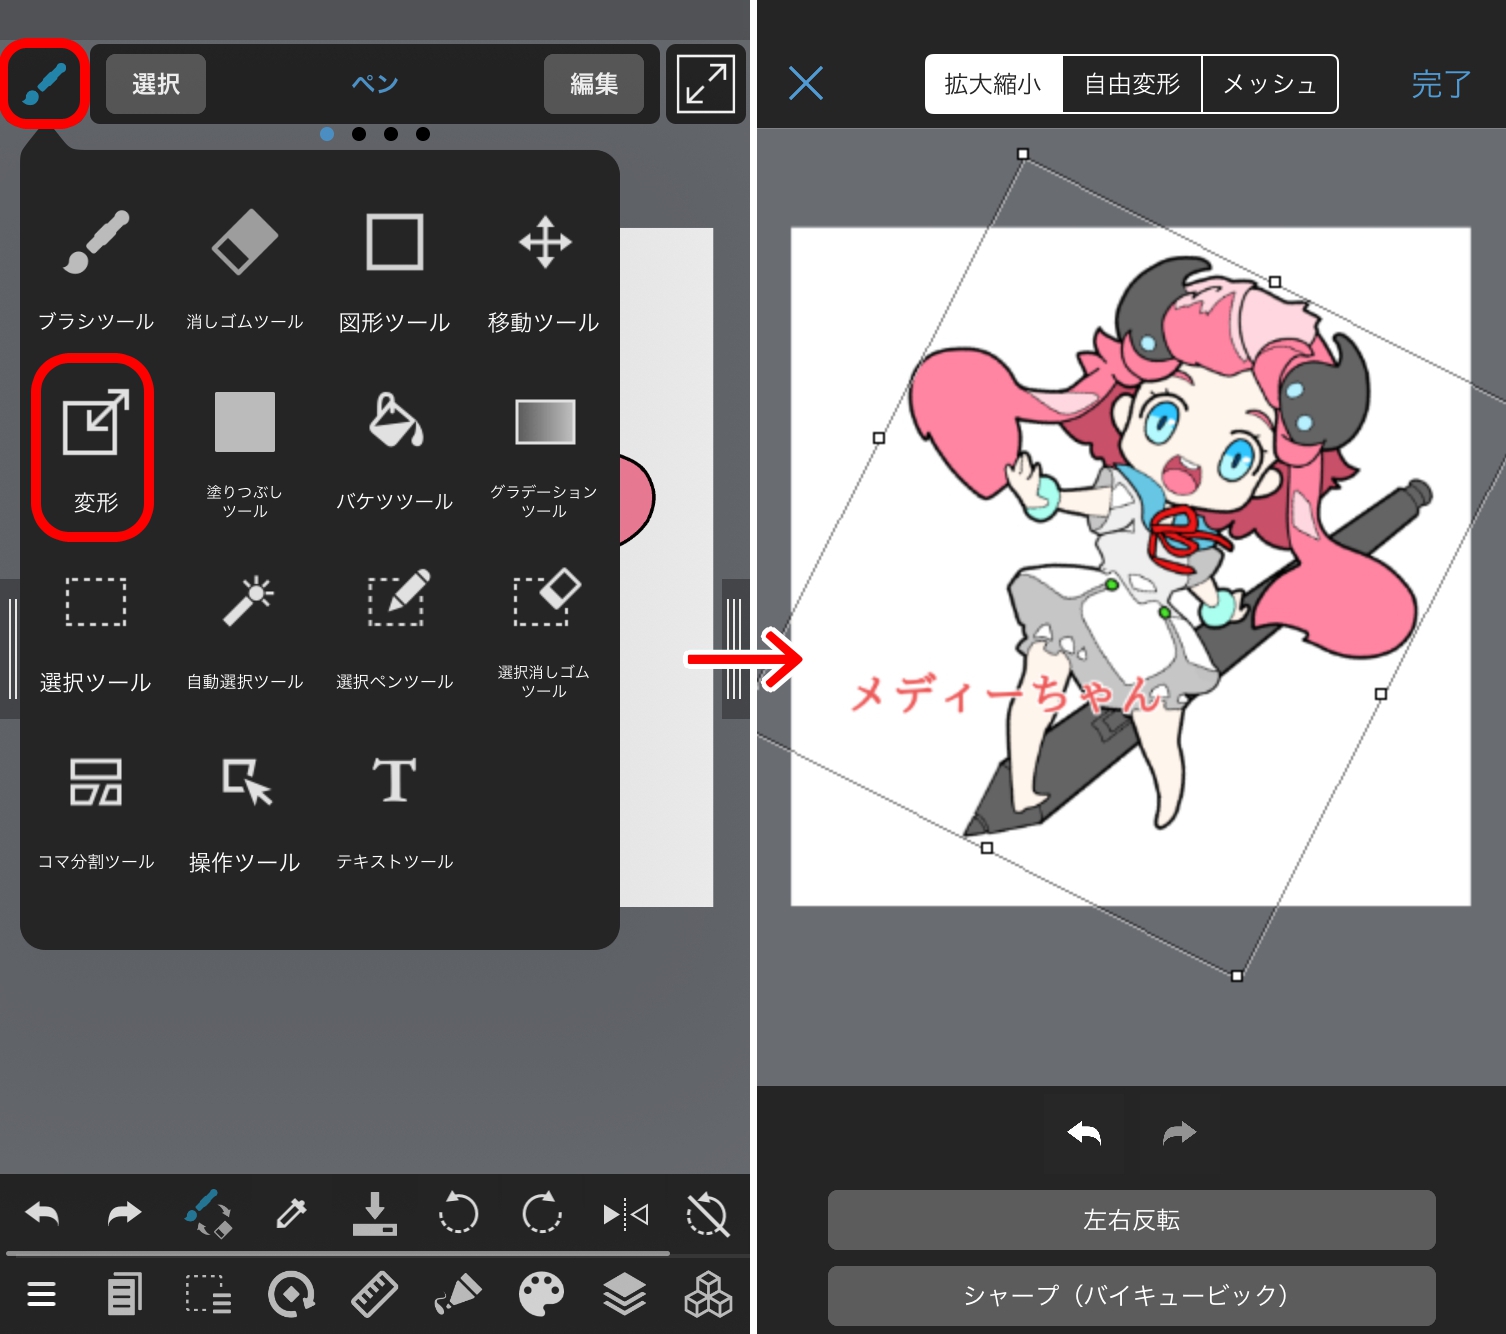
Select the layer you want to rotate, and use the «Transform tool» to rotate each layer.
You can use the ruler with the ruler tool icon in the lower part of the screen.
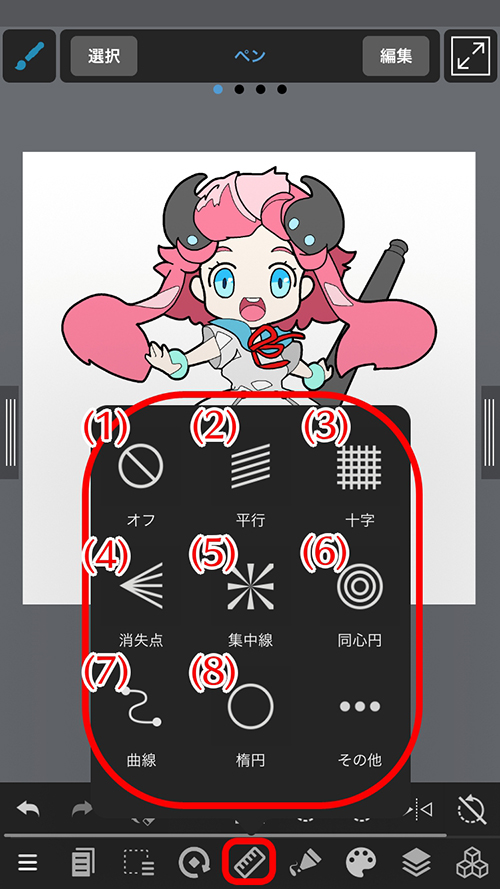
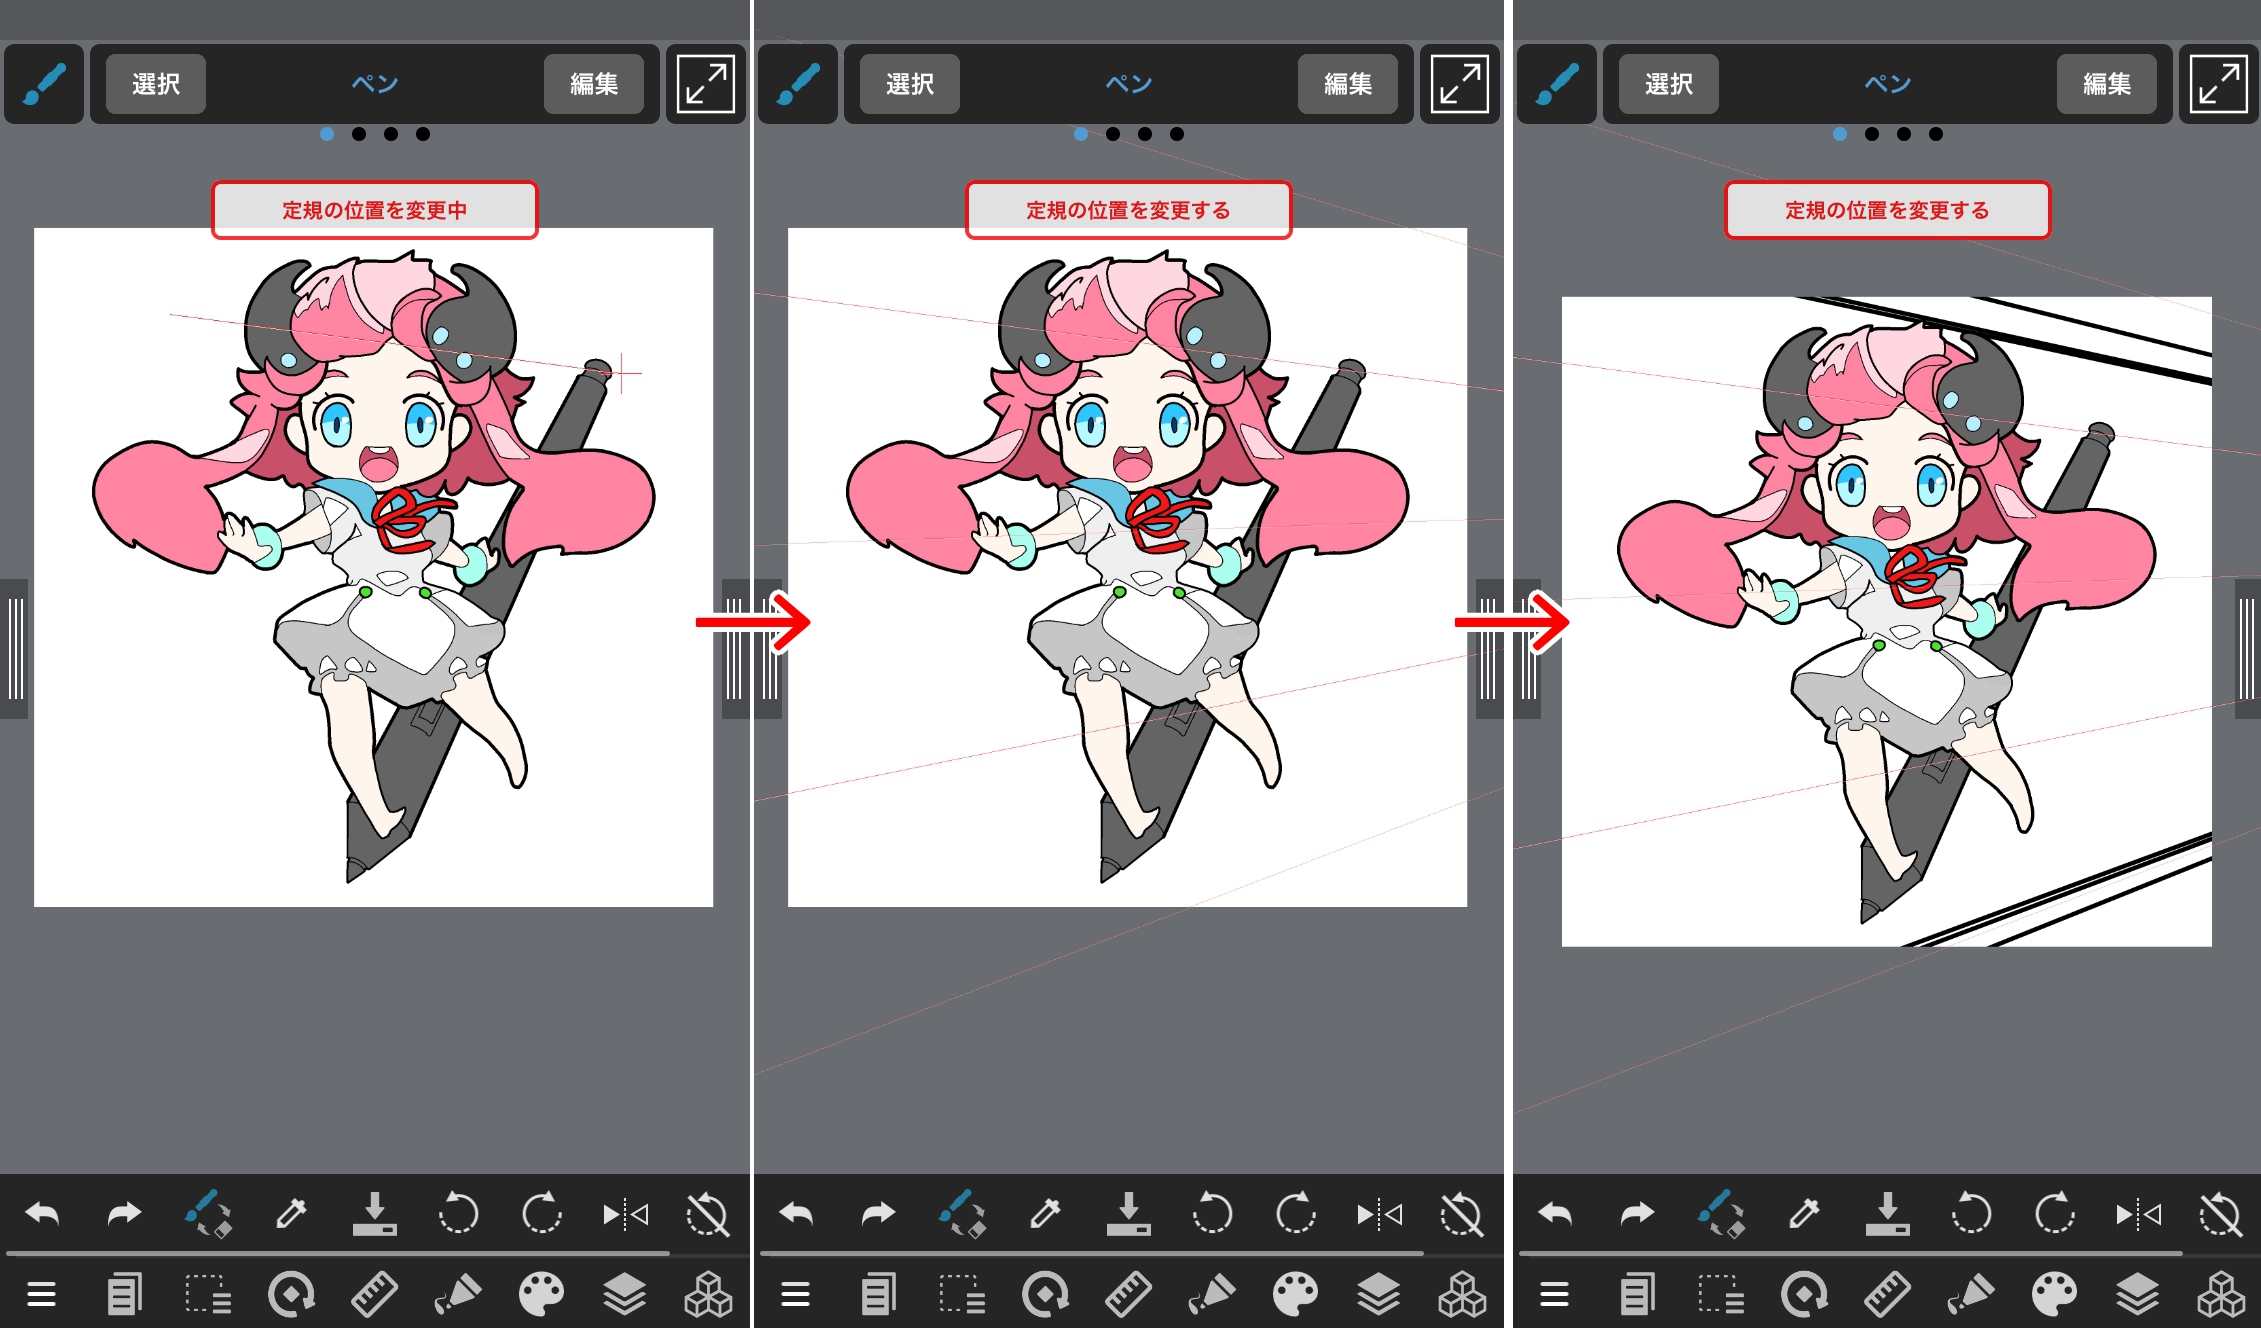
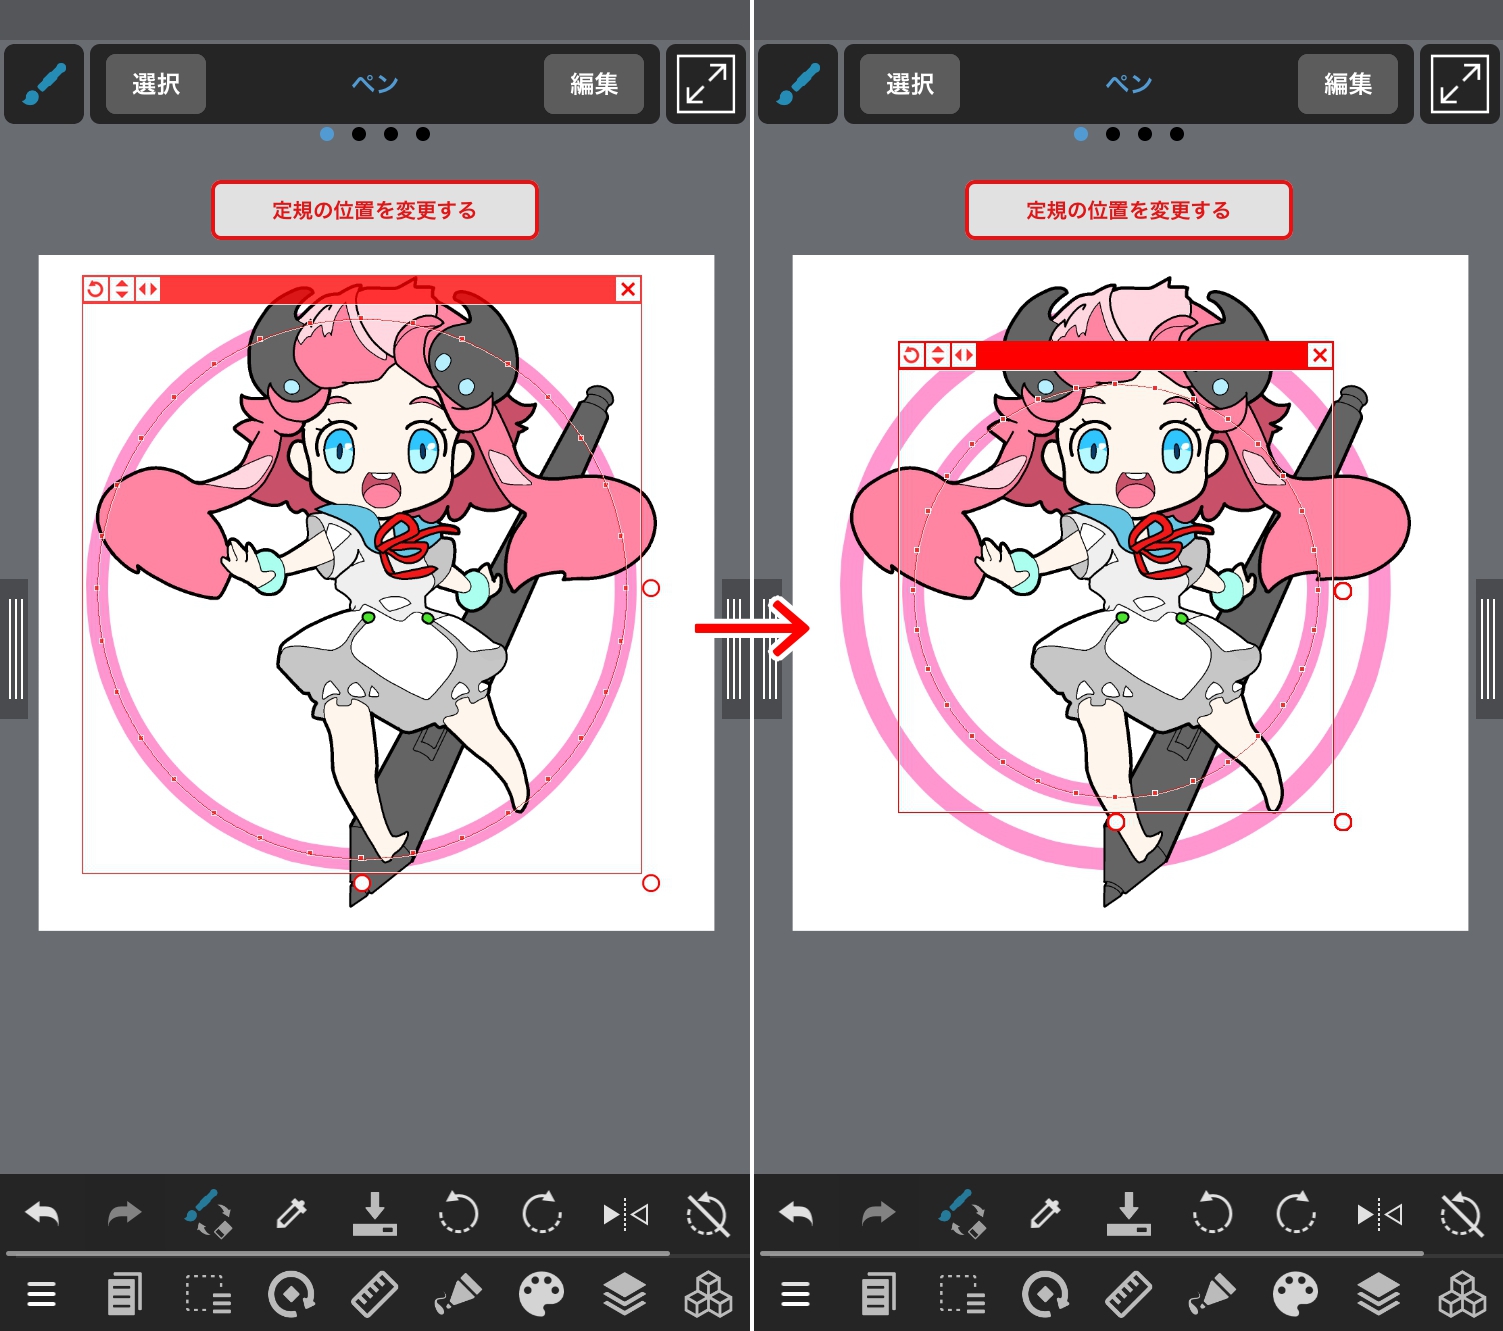
Curves and ellipses can be changed in size by moving the handle even after creating an auxiliary line.
We will now explain what the tools at the top left are.
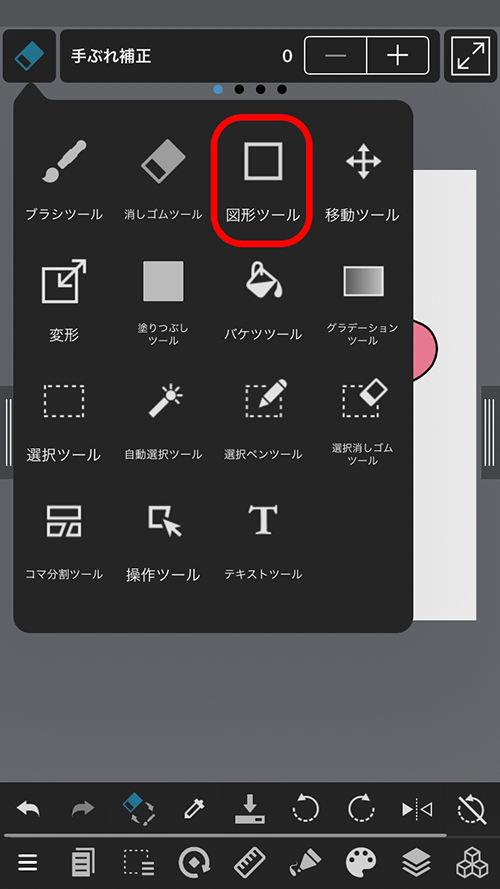
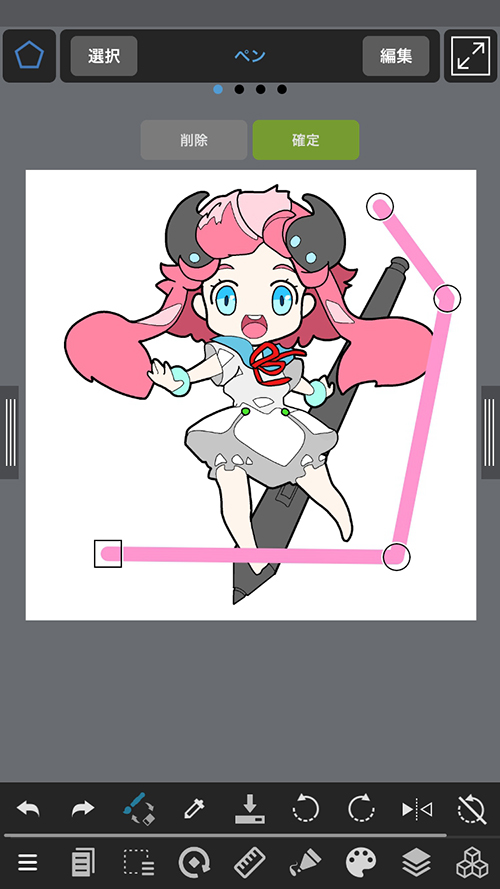
You can draw figures with ease by using figure drawing tools. Unlike fill tools, you can draw figures using the current brush.
In the case of broken lines, curves, and polygons, you can tap the vertex to set the next vertex position.
Press «Delete» in the upper part of the screen if you misplace the vertex position.
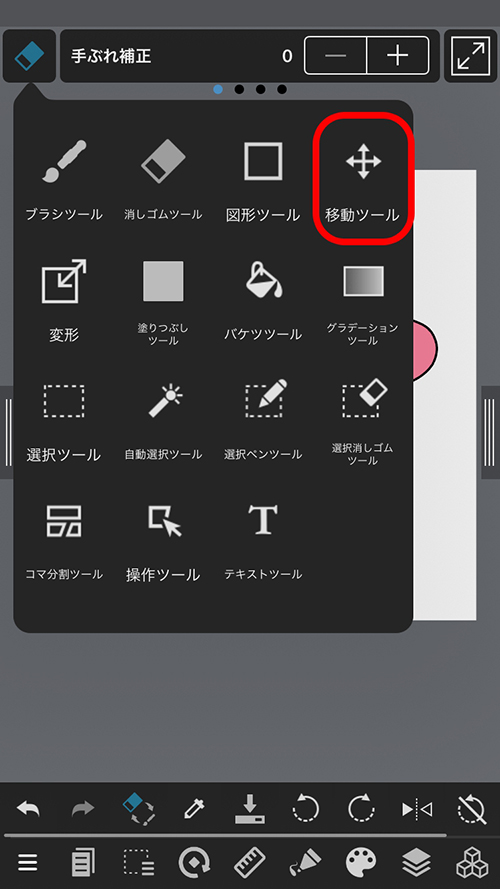
The move tool allows you to move the picture drawn on the selected layer freely. You can move only the picture in the selected layer.
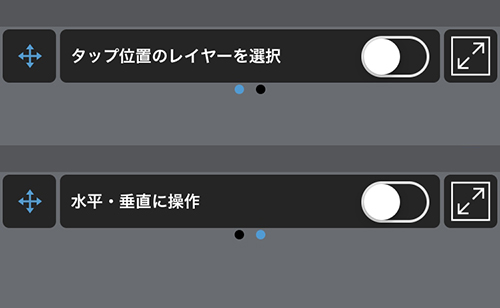
By moving the upper toolbar to the side, the «On» and «Off» options for “Auto selects the Layer clicked on” and “Horizontal・Perpendicular” will appear, so try to make use of them.
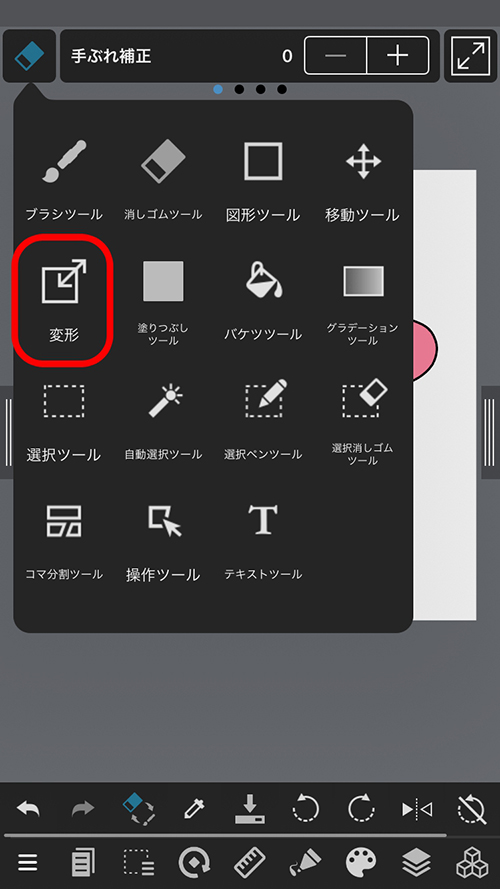
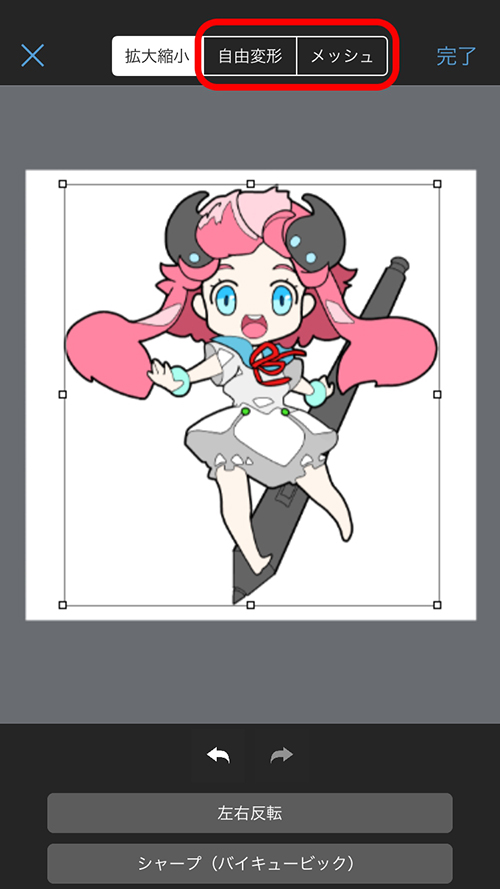
You can use the transform tool to transform a picture you drew at a later time.
Select the layer you want to transform and then press the transform tool.
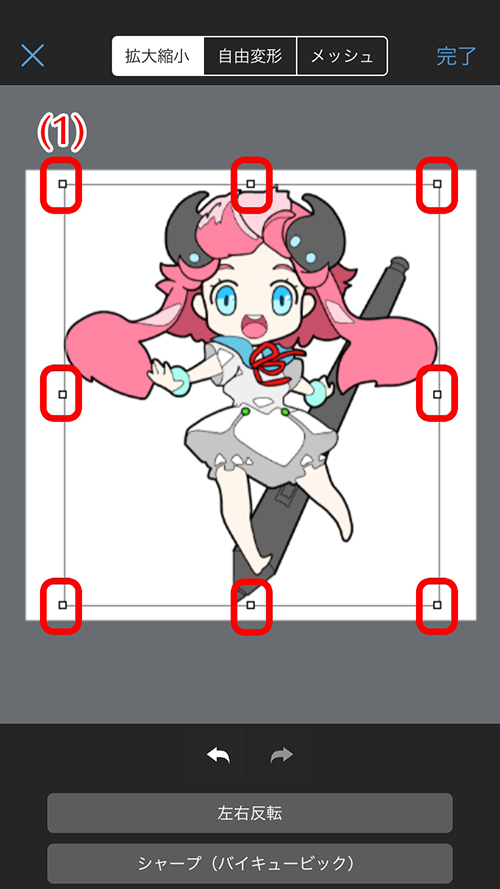
Transformation is done by dragging the handle (1) shown around the image.
To rotate, slide the outer side of the handle with your finger.
When you’re satisfied with the transformation, press the «Done» button in the upper right corner.
When you’re not satisfied with the transformation and want to return it to the previous state, press the «✕» button in the upper left corner.
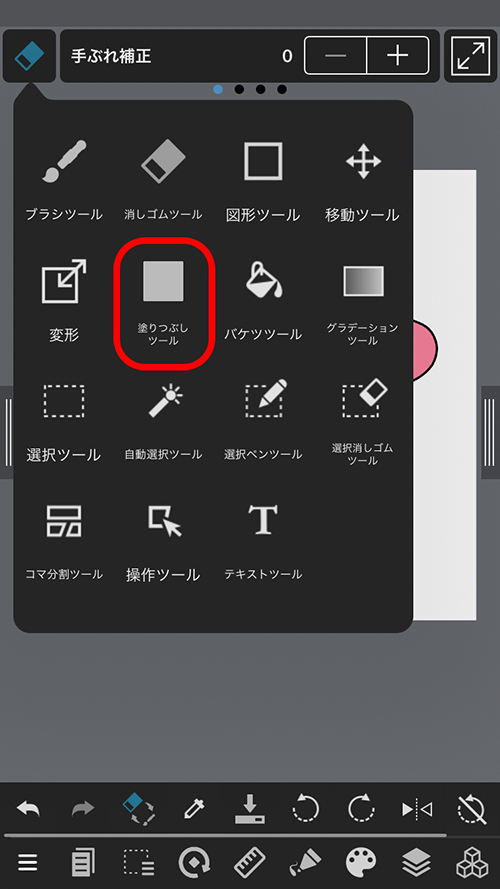
The fill tool lets you easily fill in rectangles, ellipses, and polygons.
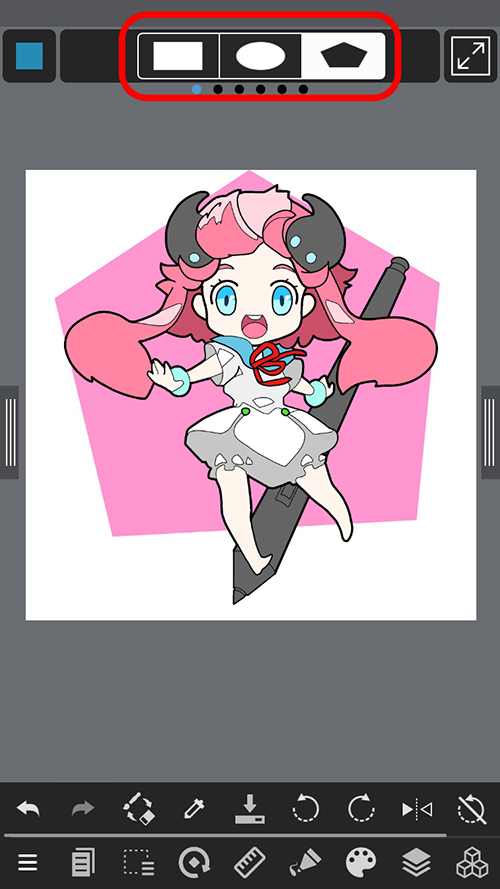
You can draw a figure by selecting the one you want from the upper bar and sliding it with your finger on the canvas.
By sliding the upper bar to the side…
You can set the rounding percentage of the figure corners, the opacity, and the «On» and «Off» options for antialiasing, fixed aspect ratio, and selection from the center.
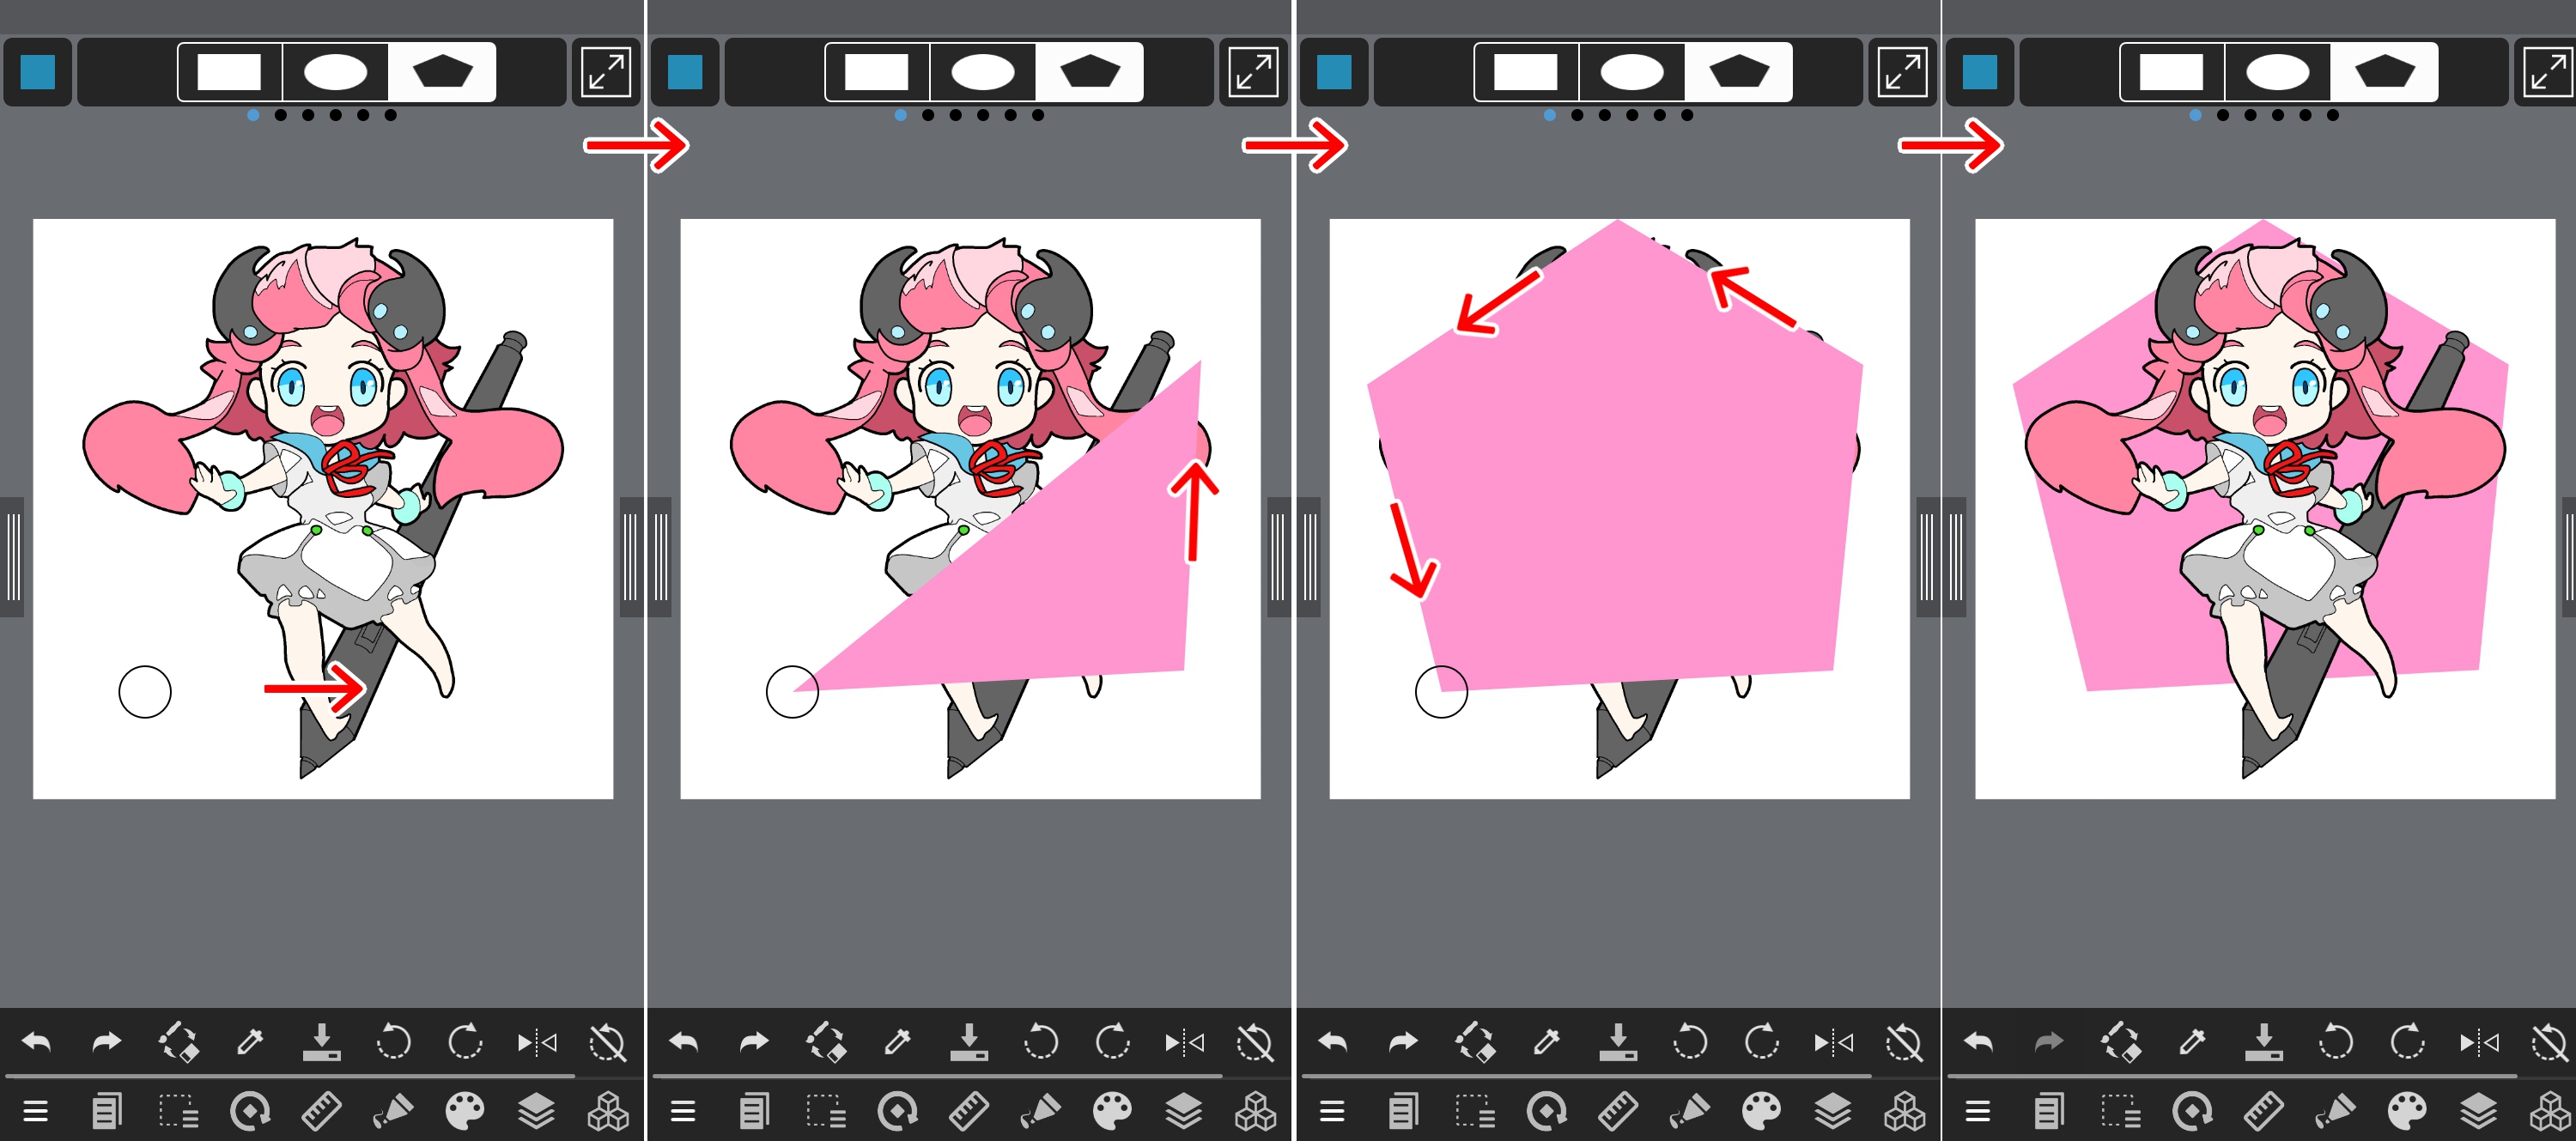
First, have a clear image of the polygon you want to draw. (This time, we’re drawing a pentagon.)
Slide from vertex 1 to the adjacent vertex 2. (Nothing is drawn in this state.)
Next, slide from vertex 2 to vertex 3. (It becomes a triangle.)
After that, continue sliding towards the following vertices, and tap the ◯ of the first vertex to finish.
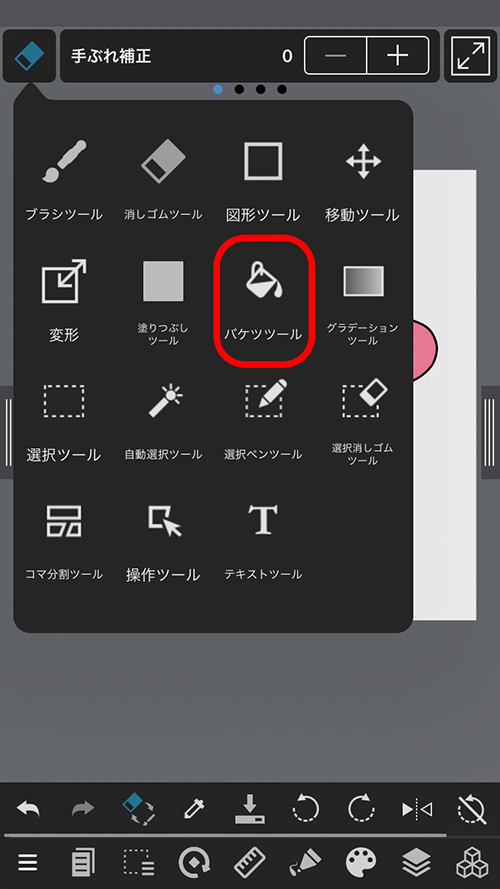
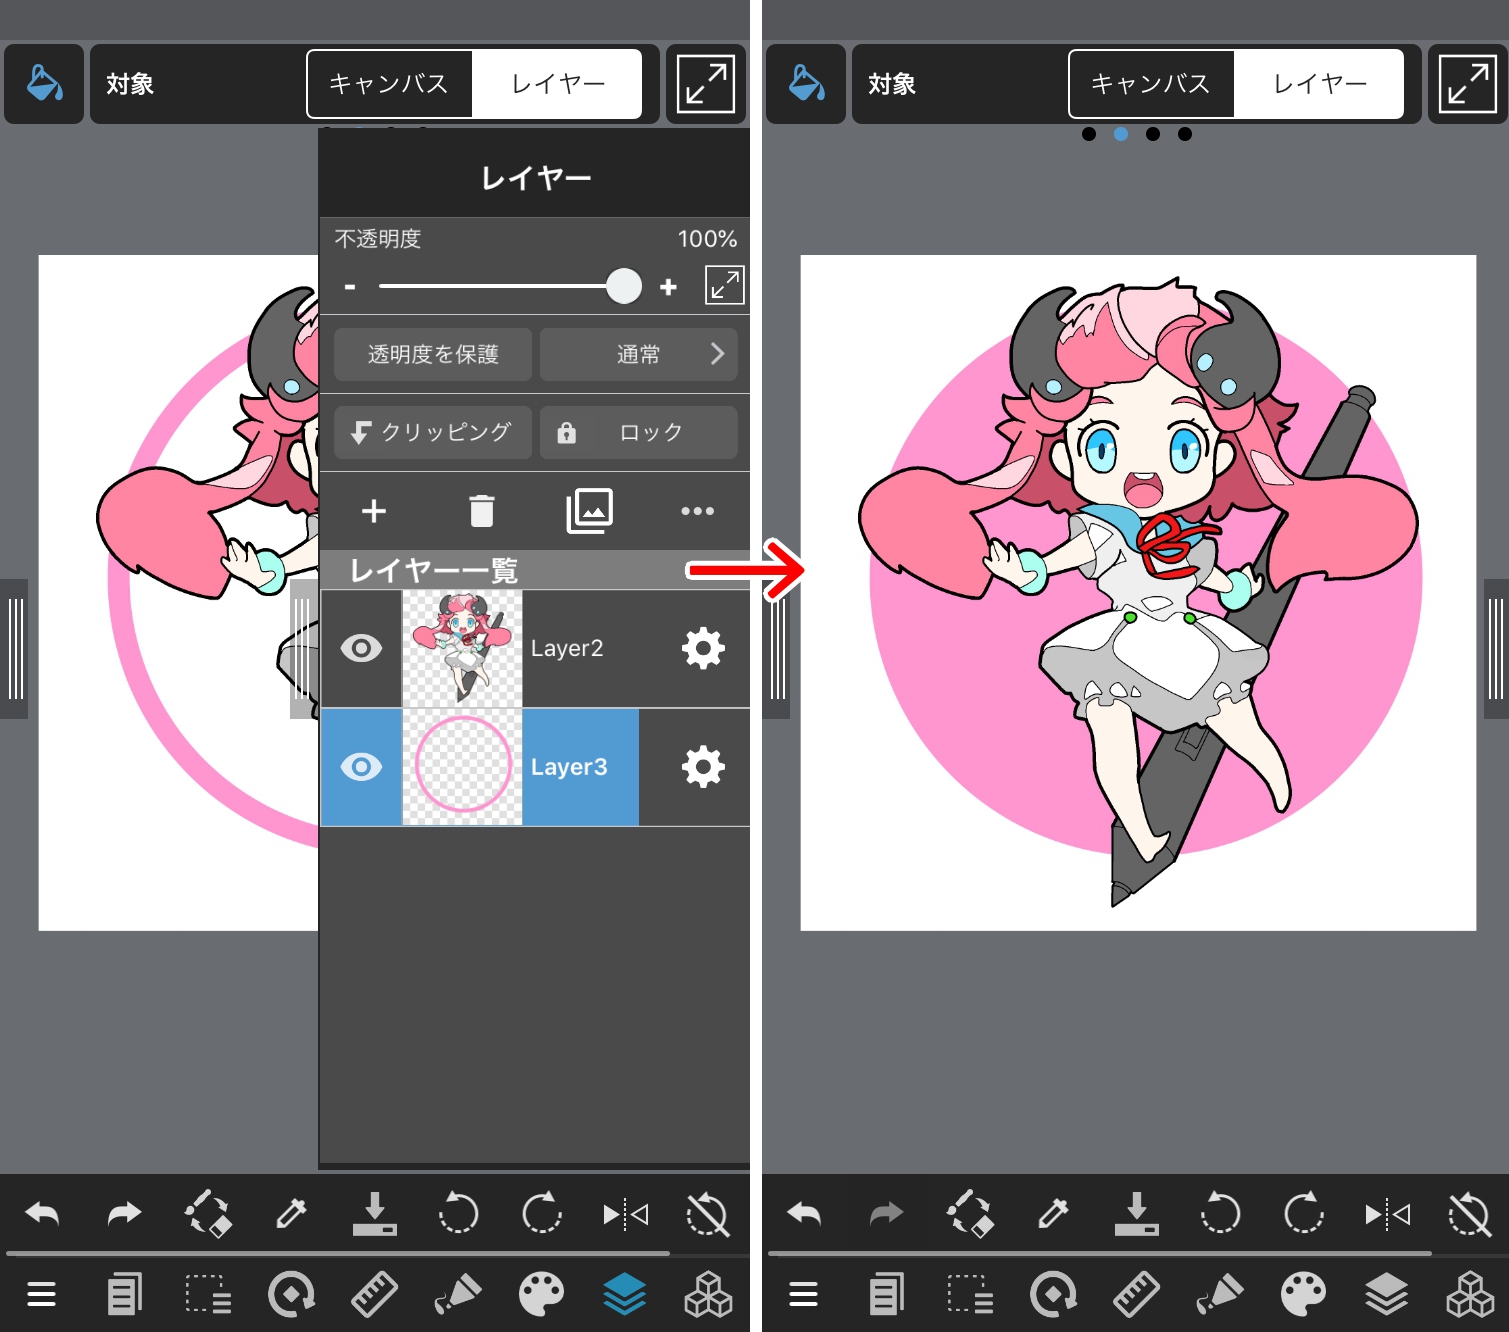
Using the bucket tool, you can color the entire area surrounded by a line at once.
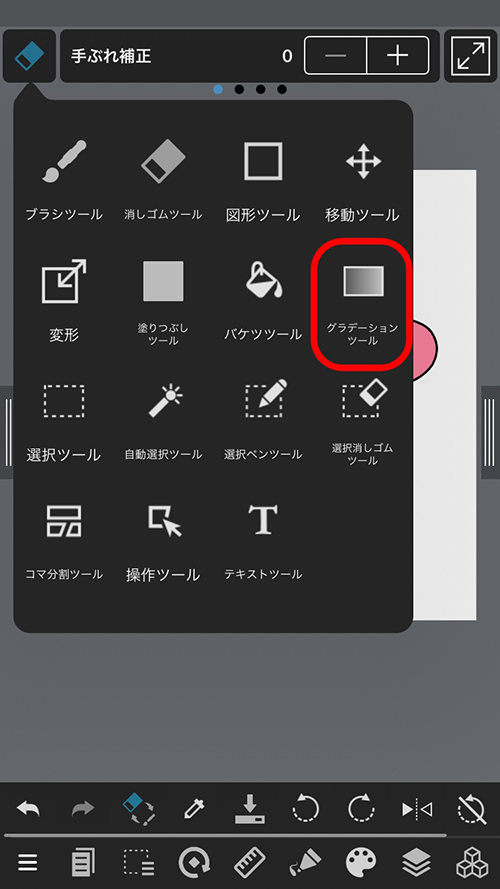
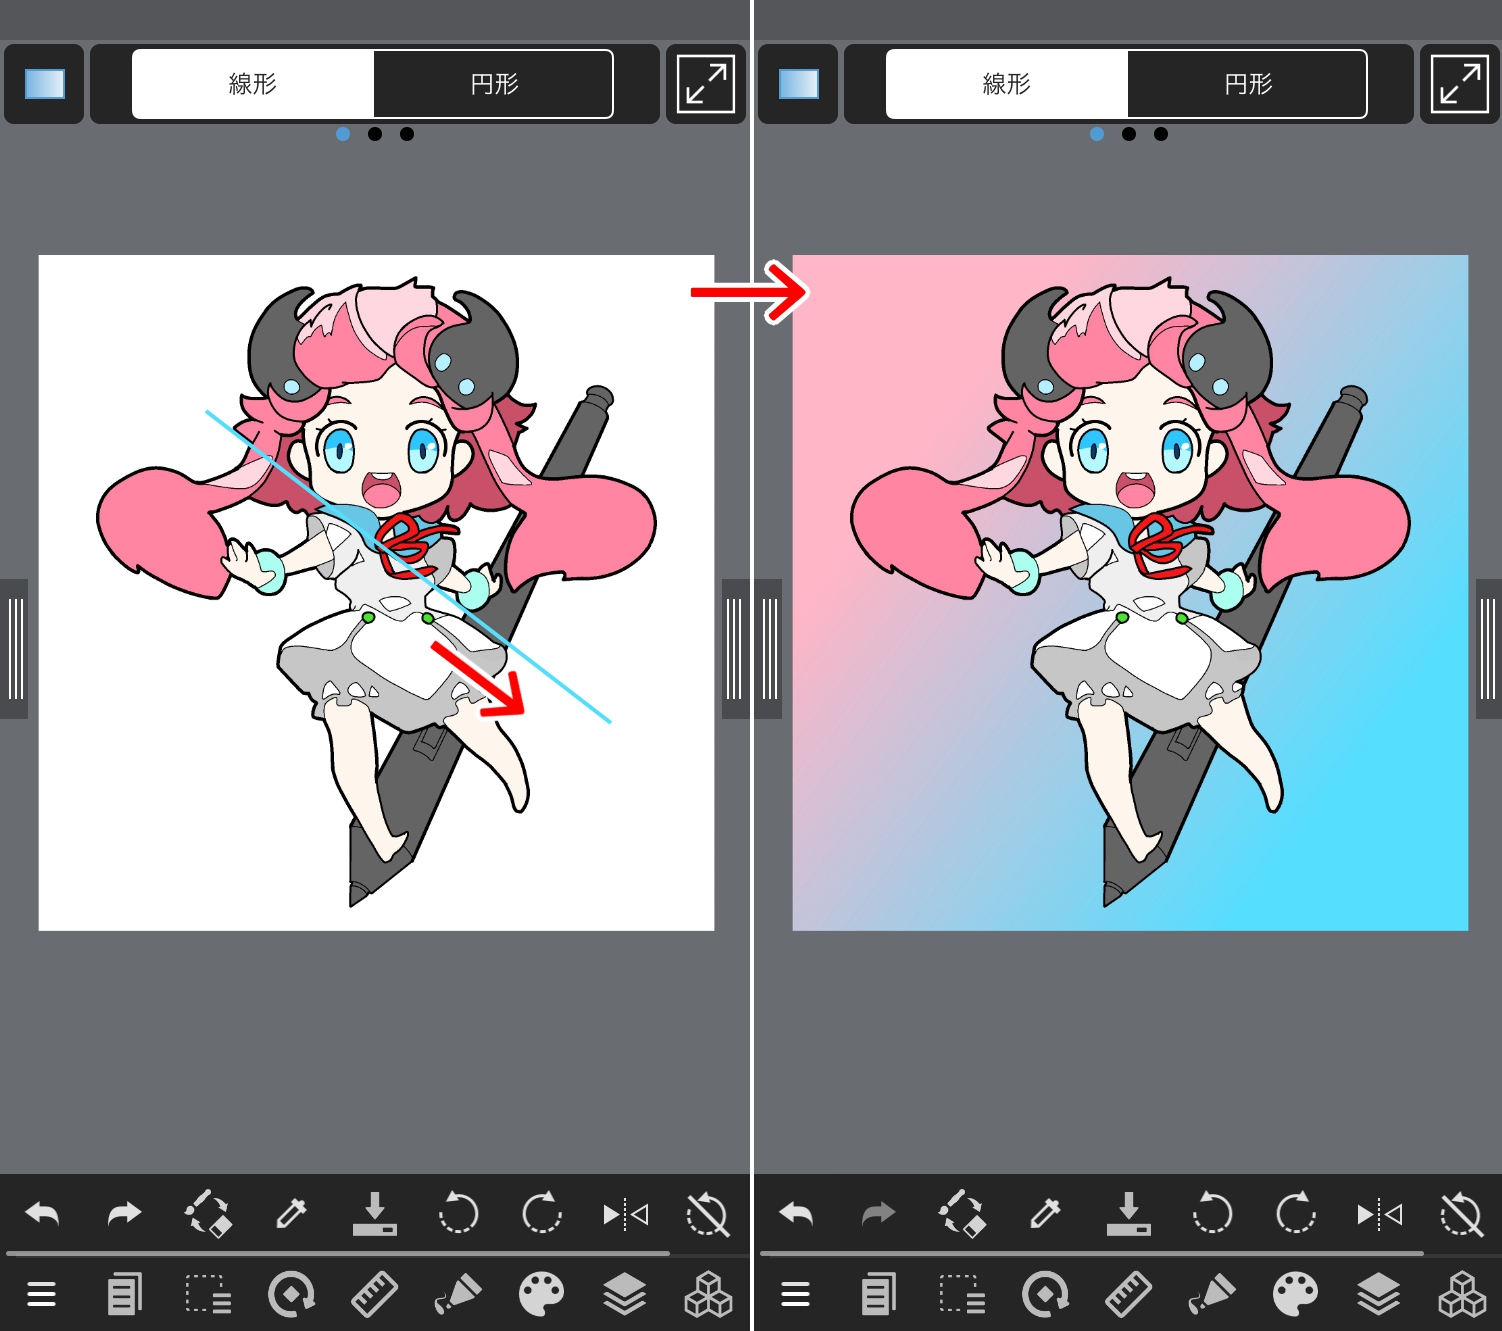
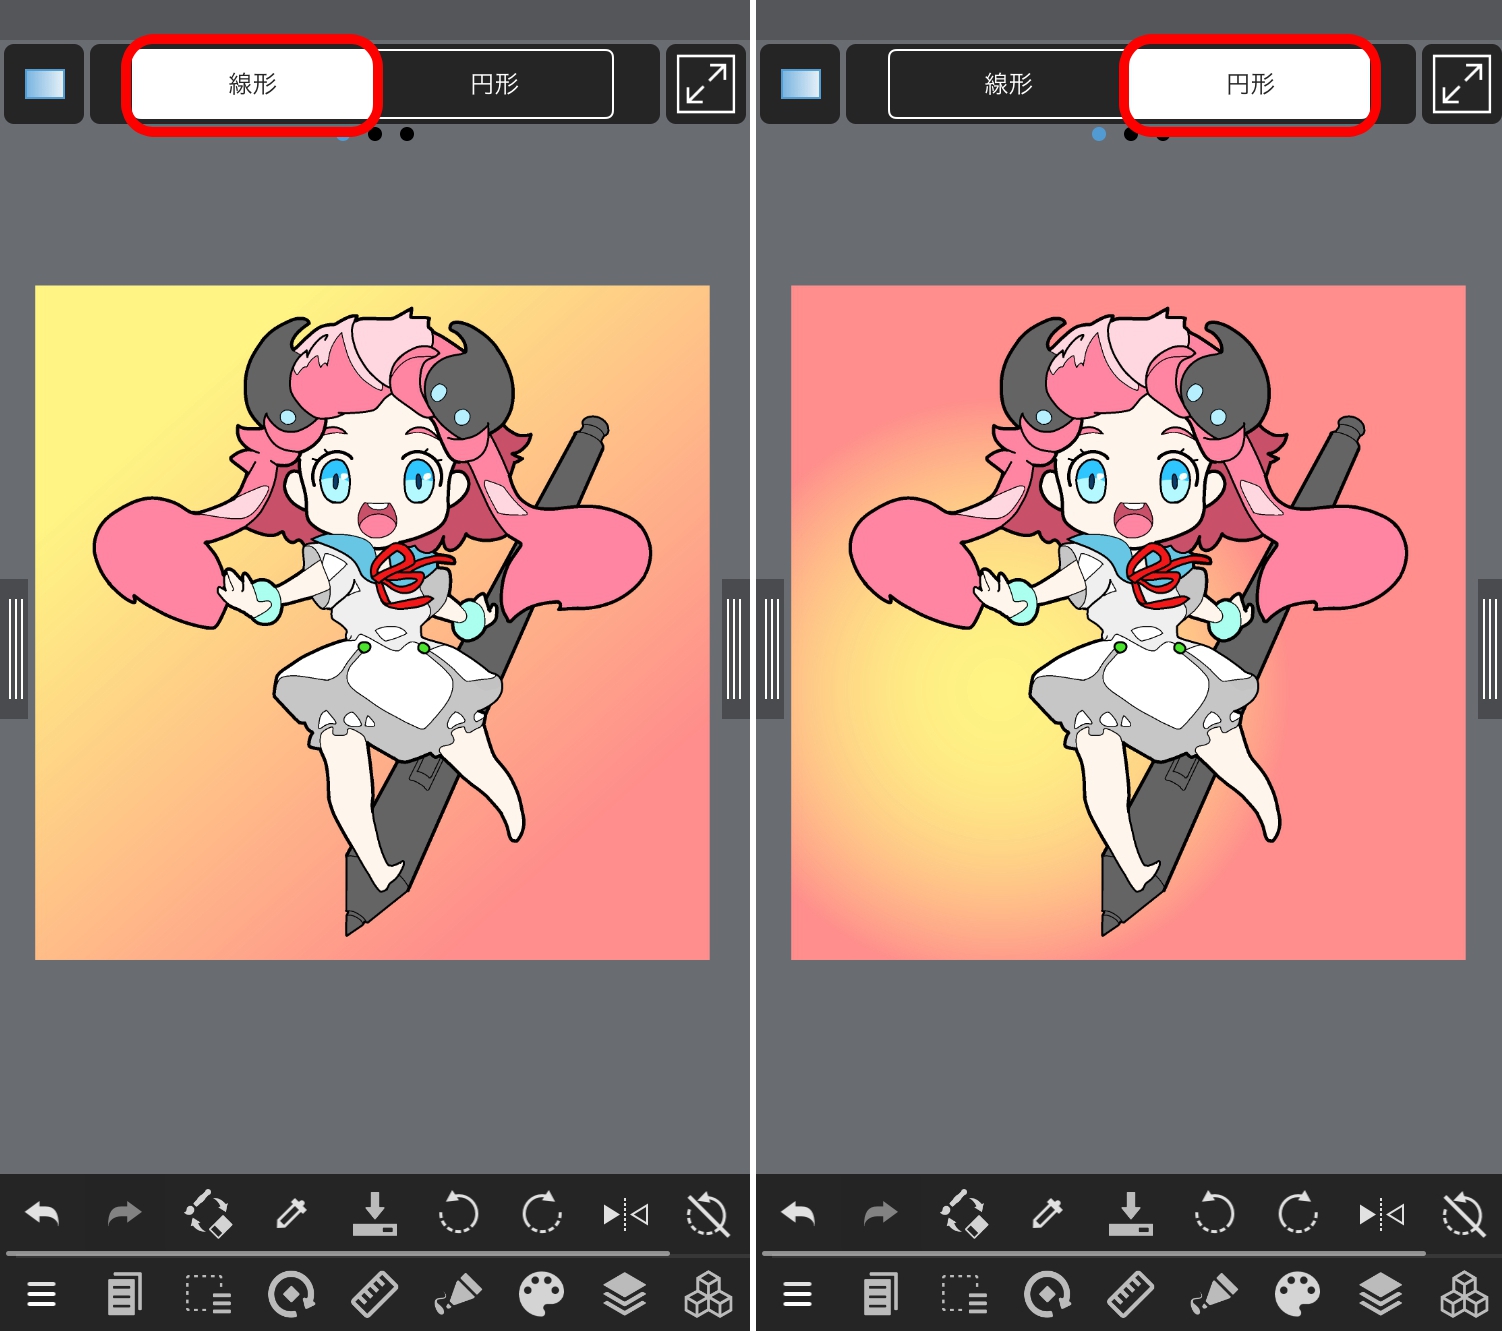
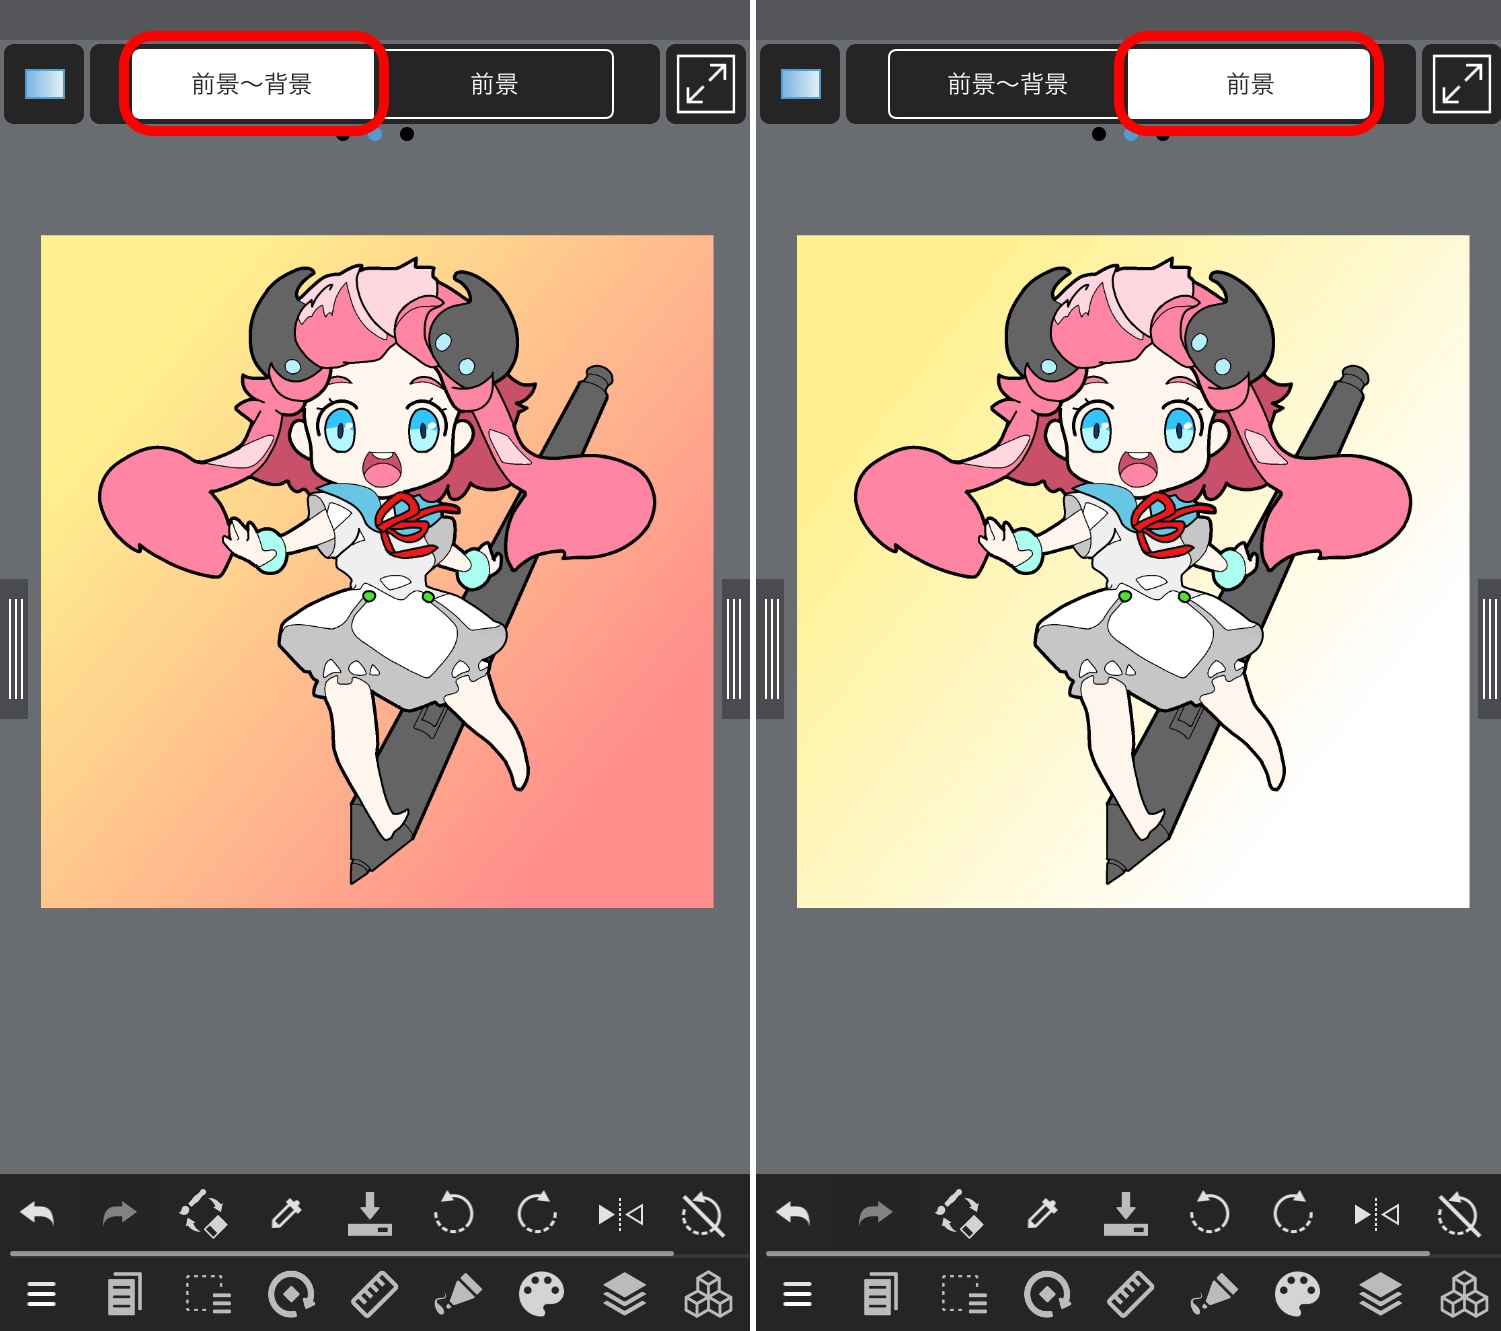
The gradient tool can be used to create gradients easily.
The width and direction of the gradient is determined by pressing a point inside the canvas and sliding.
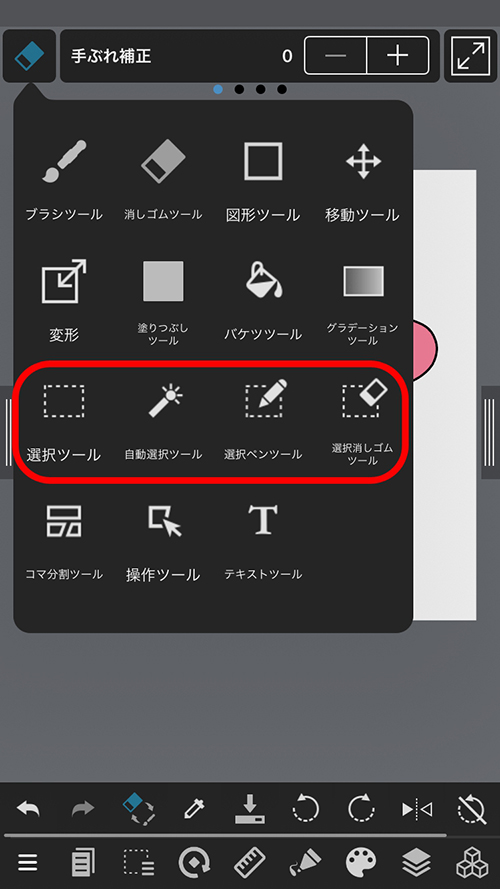
You can use the selection tool to select a part of the drawing.
The selected area is called the «selection range».
By making a selection range and using tools such as the transformation tool, you can transform only the drawing inside the selection range.
There are several ways of specifying a selection range in MediBang Paint, so each will be explained.
You can select the shape of the selection tool when picking it from the upper bar.
The lasso tool lets you make a selection range by tracing it on the canvas yourself.
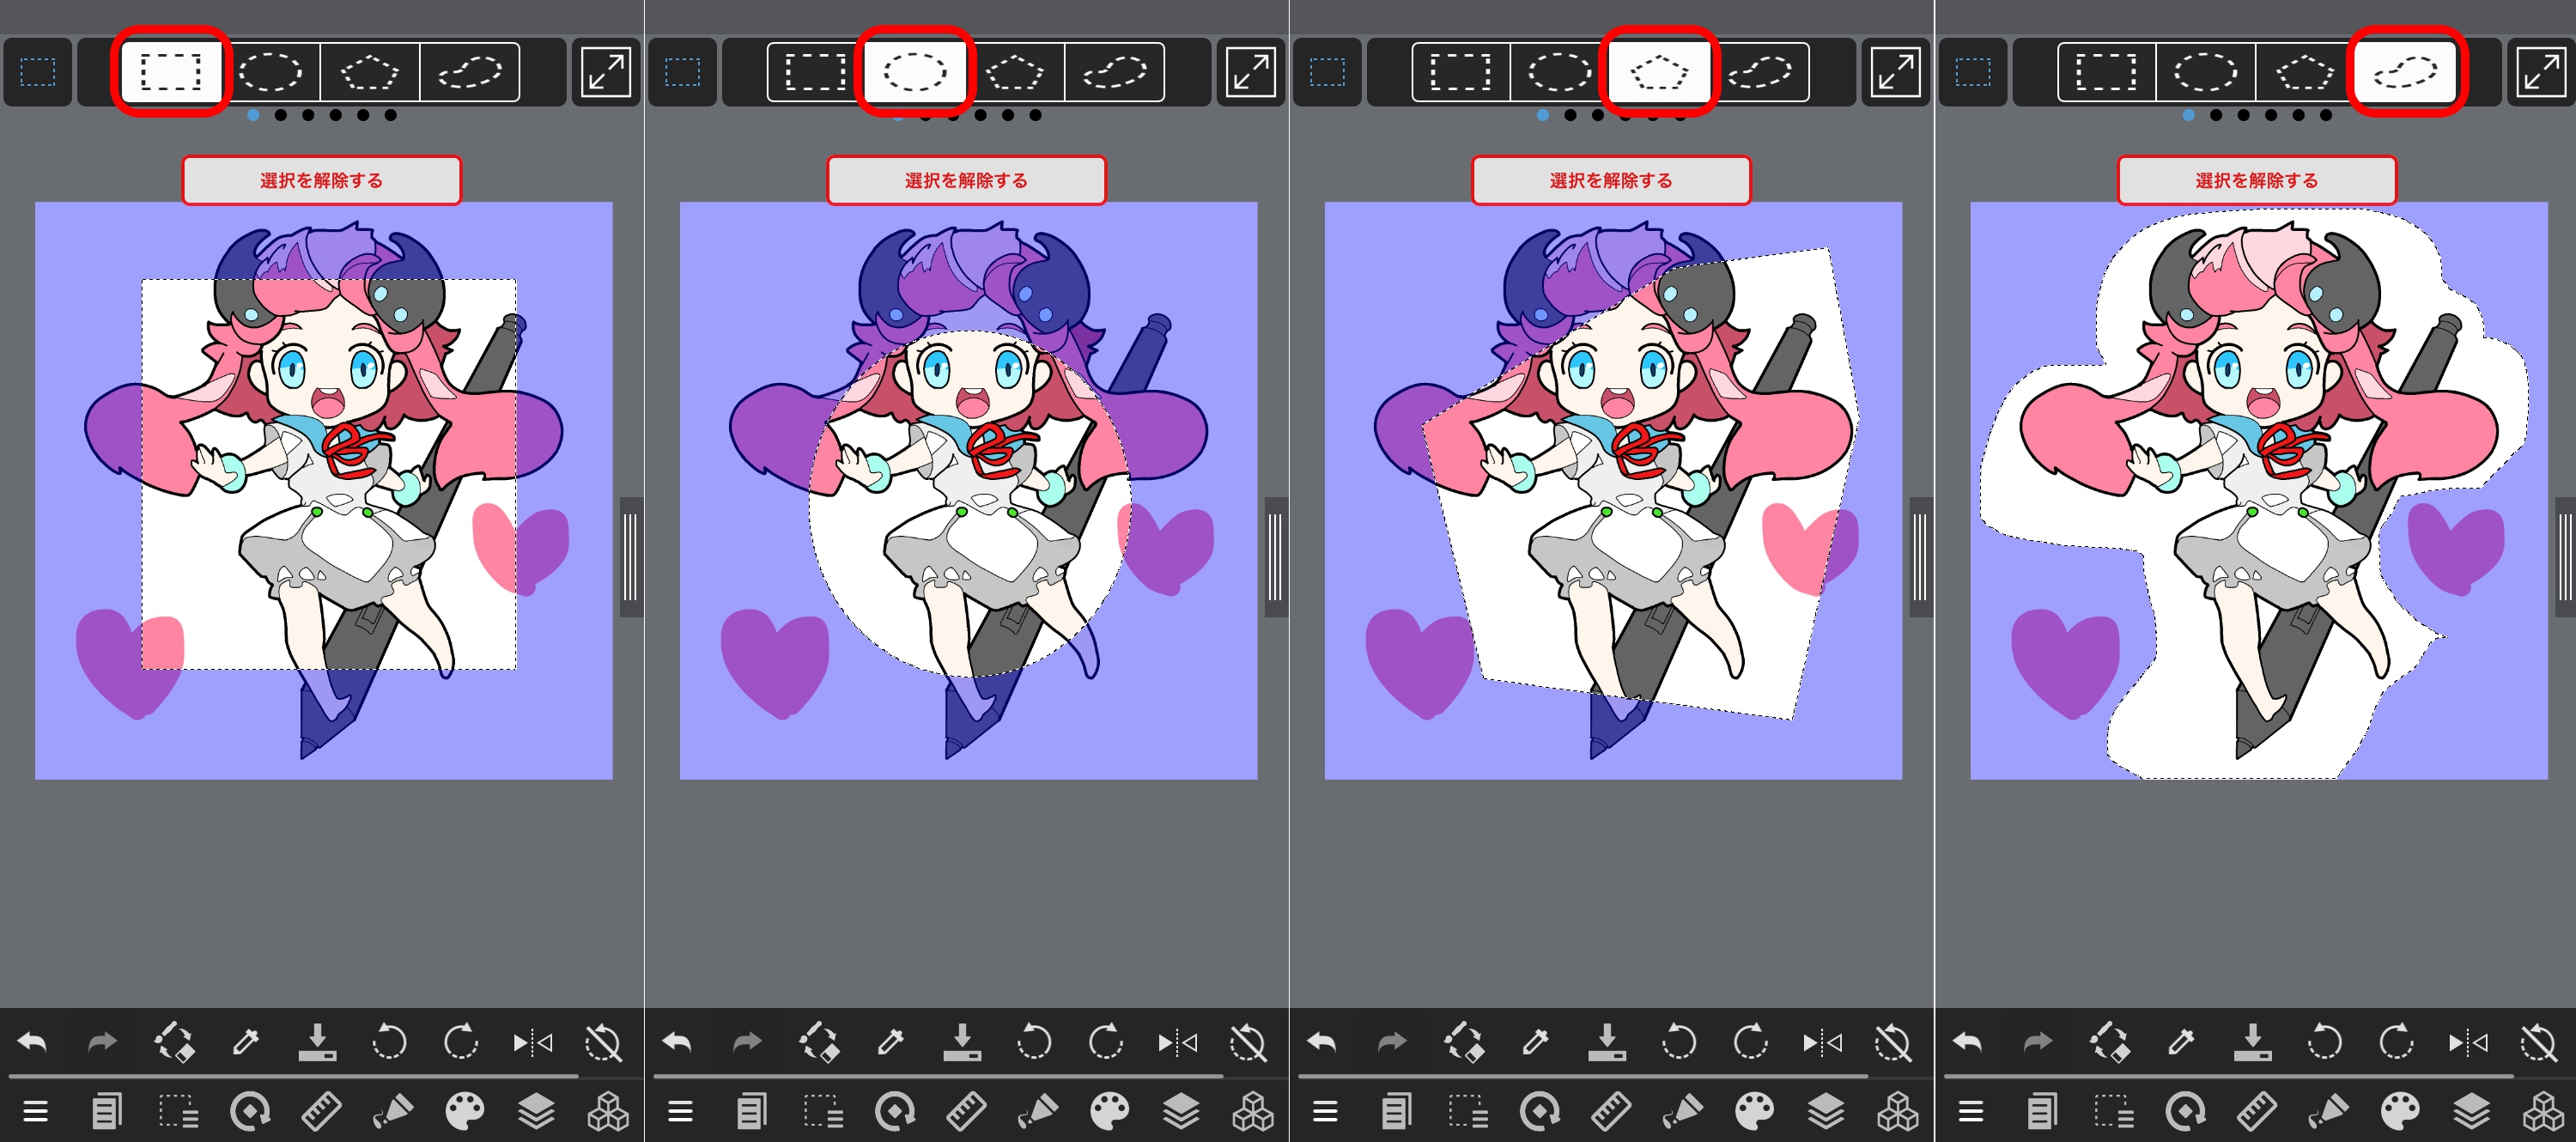
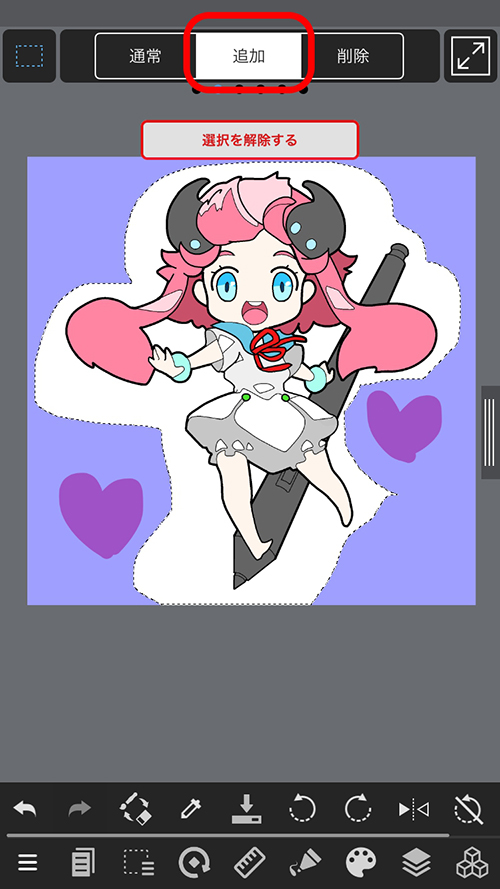
When you want to select multiple places, slide the bar and the «Add / Delete» option will appear. Press the «Add» button to select.
By sliding the bar further, you can change the “Roundcorner”, “Anti-Aliasing”, “Constrain proportions”, and “Select from the center”.
The «Magic Wand Tool» automatically creates a selection range along an area surrounded by a line or the shape of a colored area.
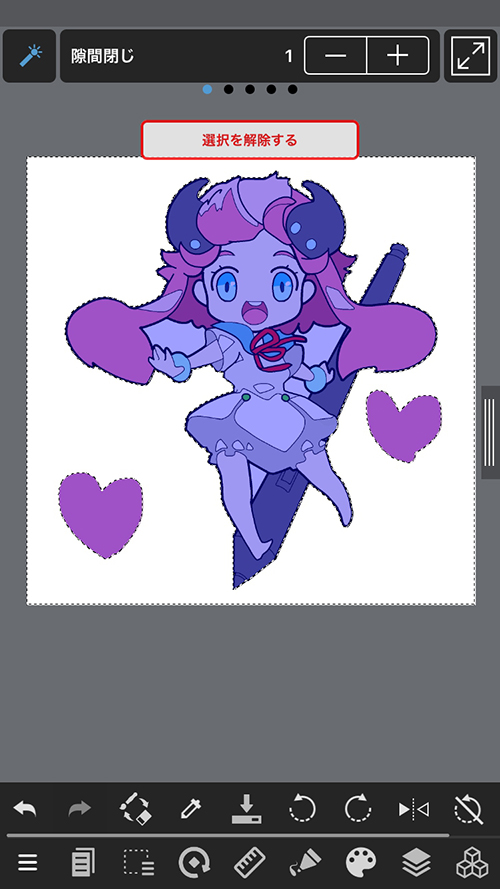
By sliding the upper bar, you can change the «Close Gaps», «Target», «Normal / Add / Delete», «Expand (px)», and «Anti-Aliasing» settings.
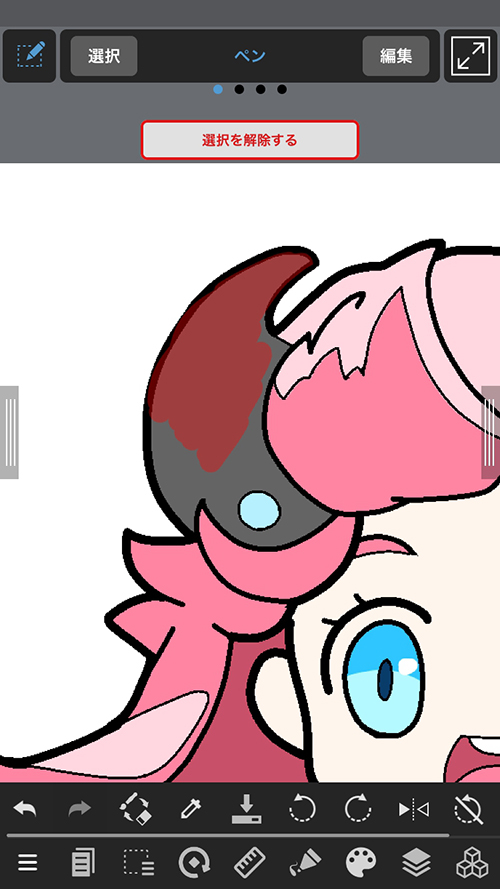
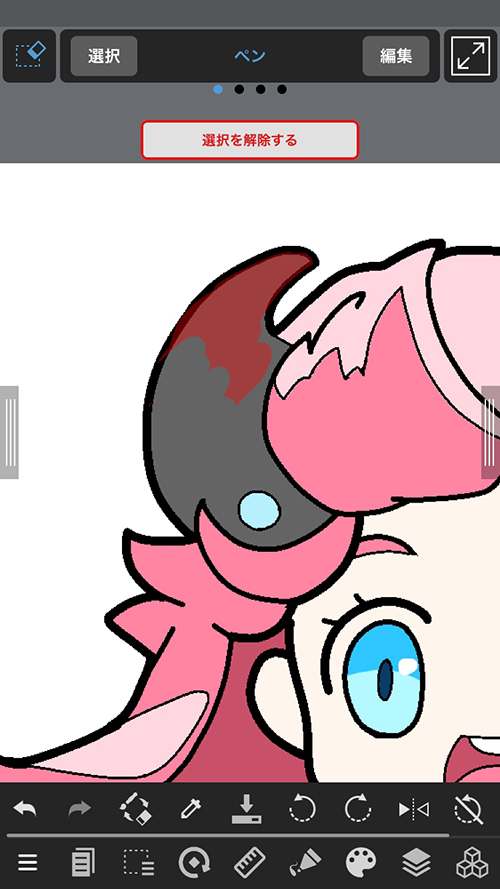
The selection range remains the same even if you change the selection layer, so you can use the selection range in another layer.
The selection range remains the same even if you change the selection layer, so you can use the selection range in another layer.
After specifying the selection range, choose «Crop» from the selection range menu to crop the canvas to the size of the selection.
You can set the pen pressure sensitivity settings when using a stylus.
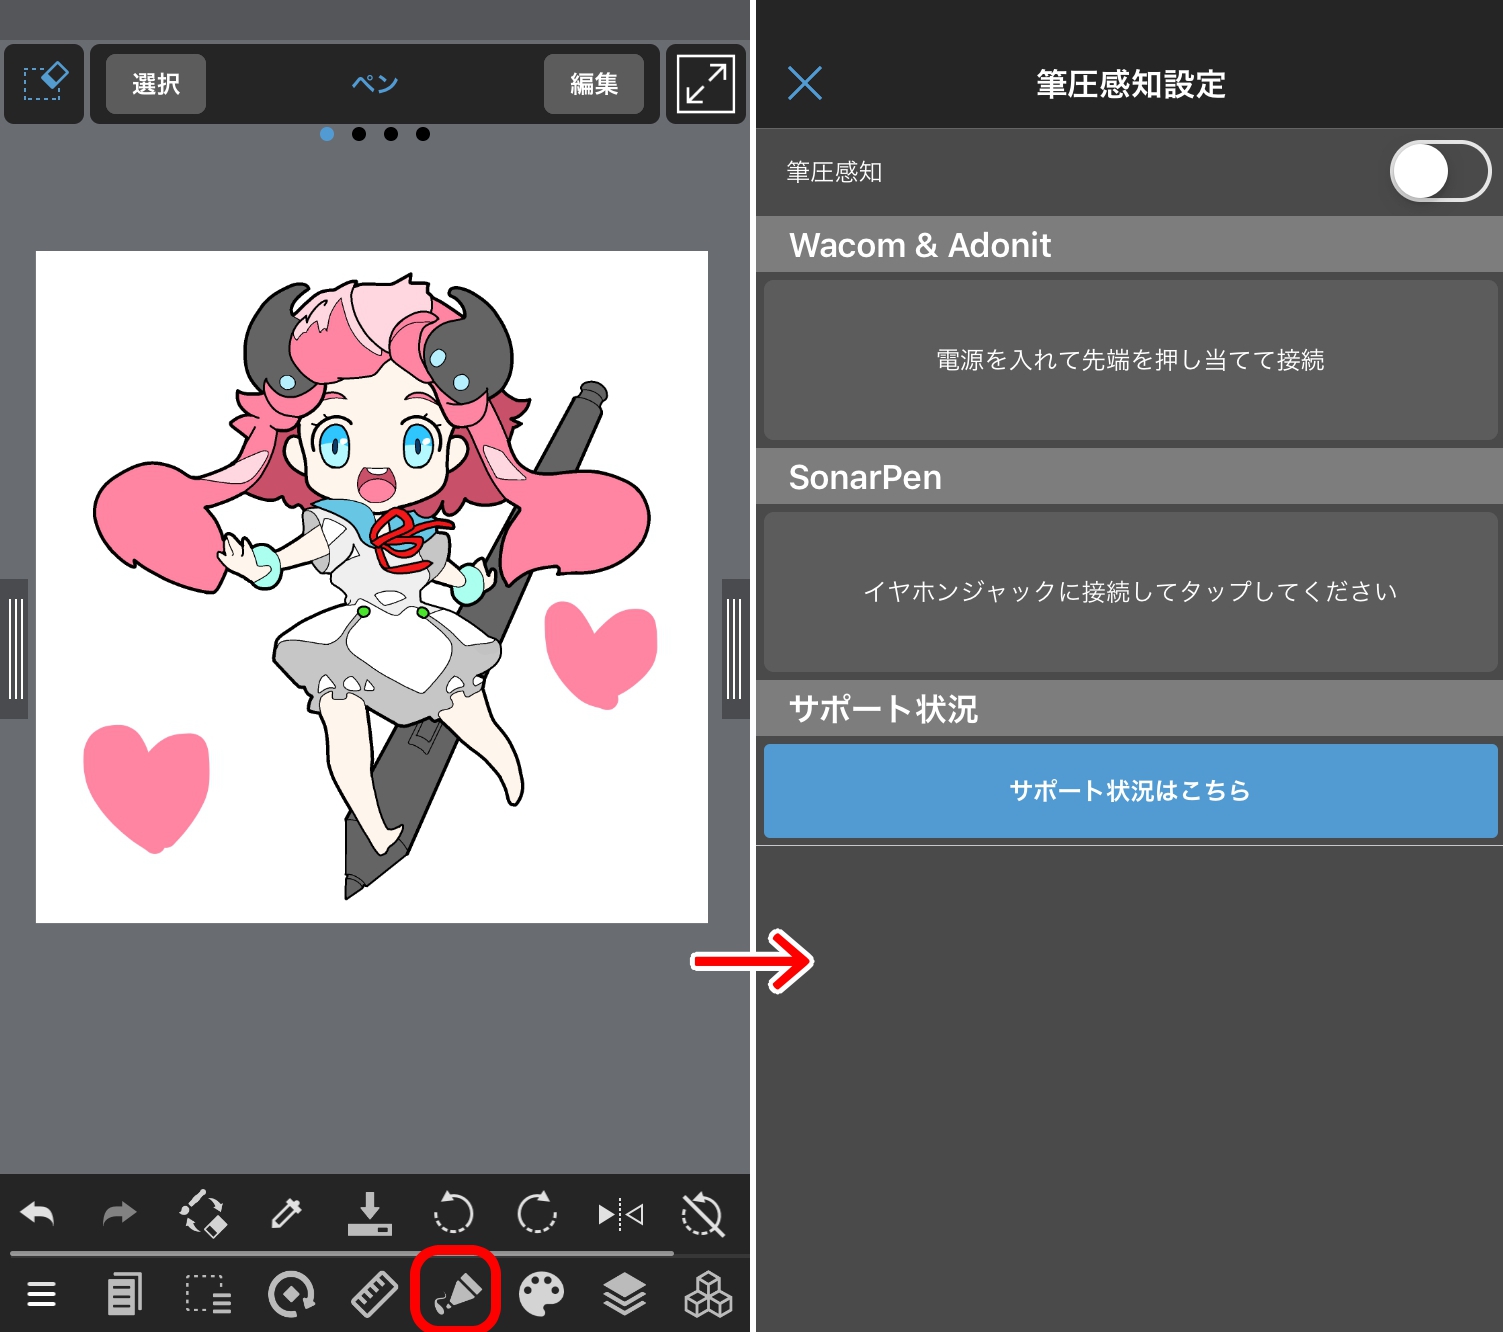
Connect using the appropriate connection method for your stylus.
Click here to see the connection method for Wacom and Adonit.
You can use the color picker to select the color you want from the canvas as the foreground color. The color picker is located in the shortcut bar at the bottom of the screen.
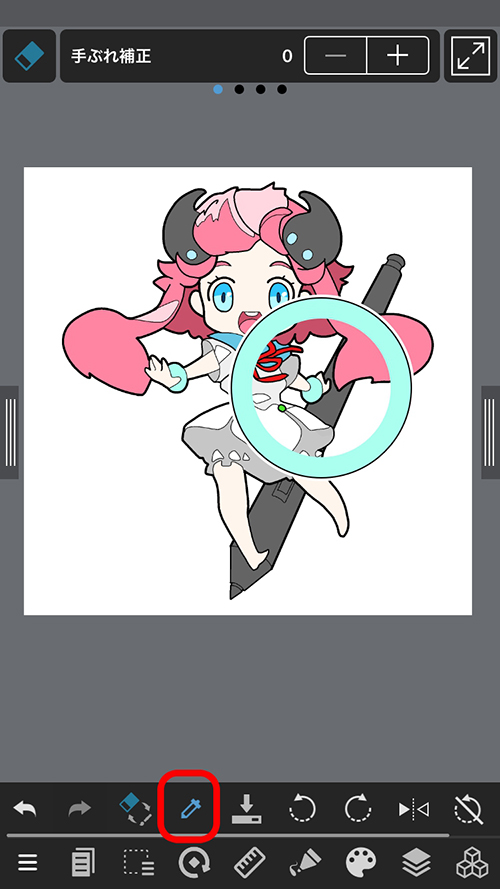
Press the icon and tap the place of the color you want to take.
You can use the hand tool to move the display position of the canvas.
With the default settings, you can do the same thing as with the hand tool by moving the canvas with two fingers. You can also set it in the shortcut bar.
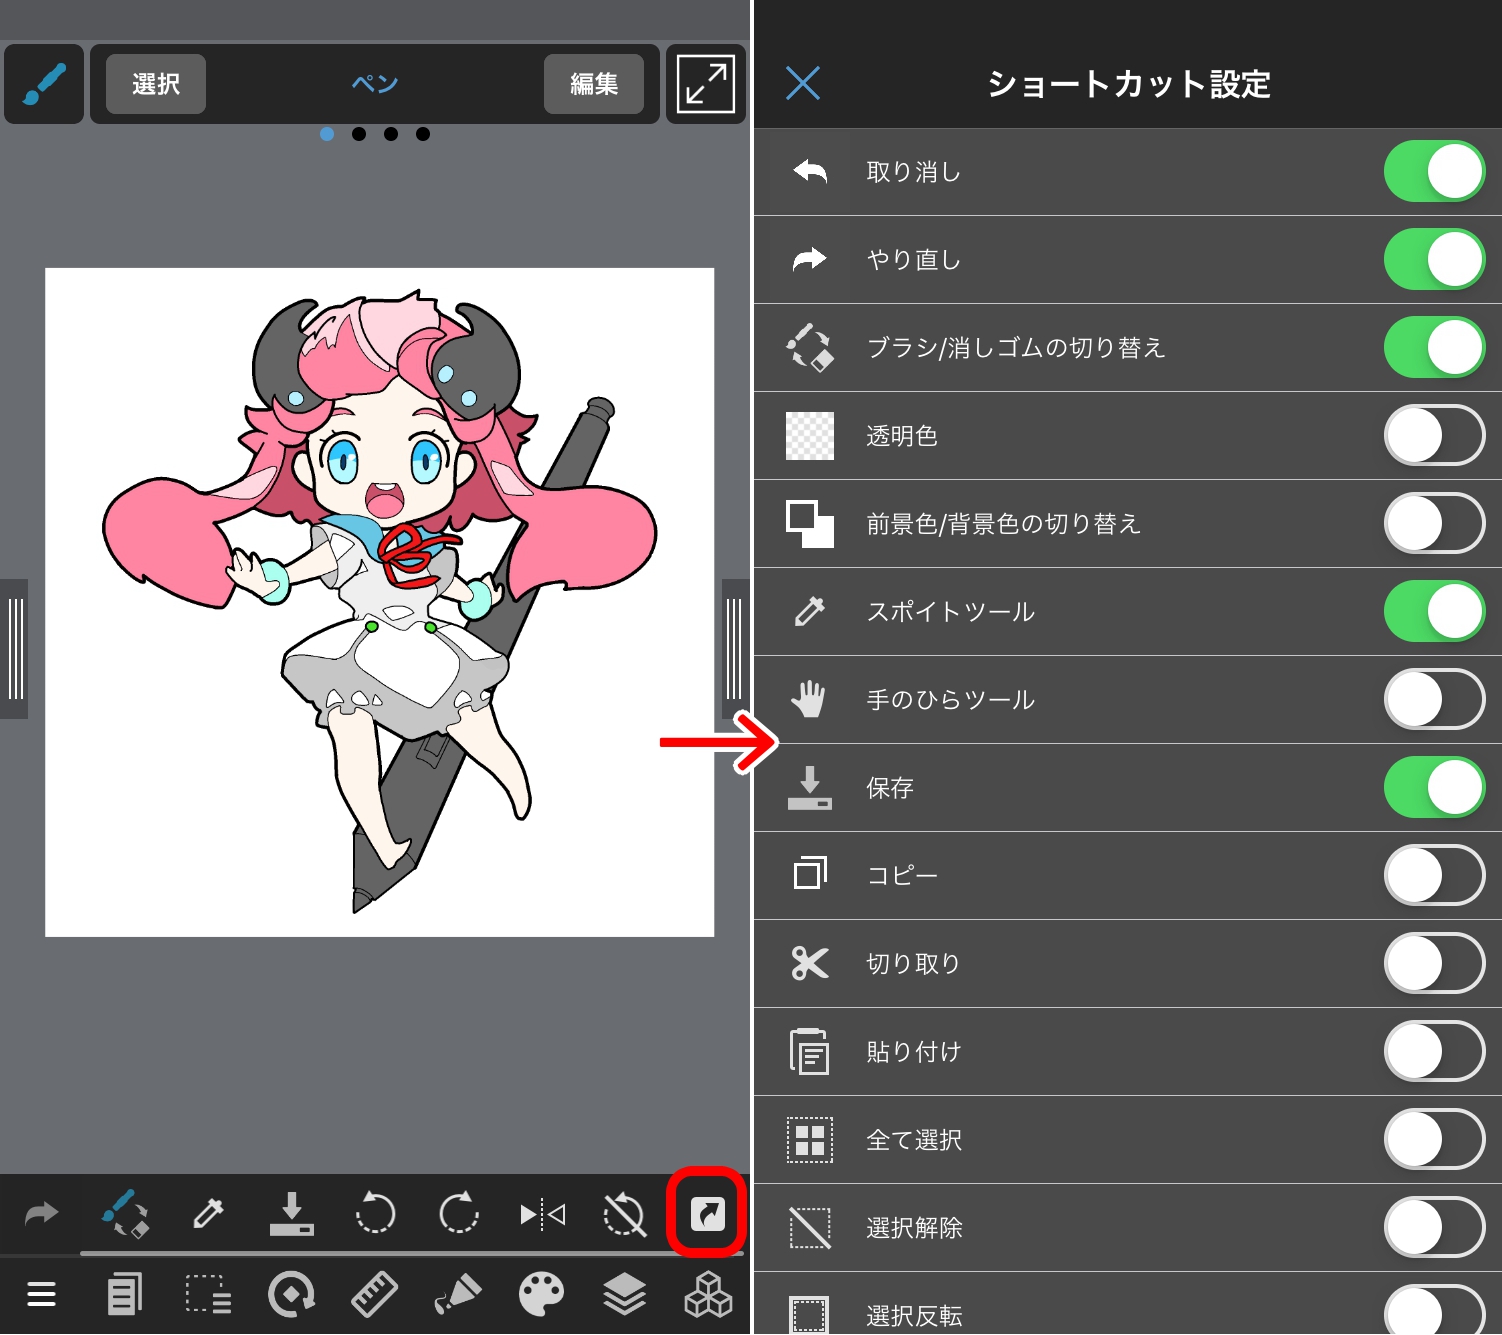
A place where you can show the shortcut buttons of various tools at the bottom of the screen.
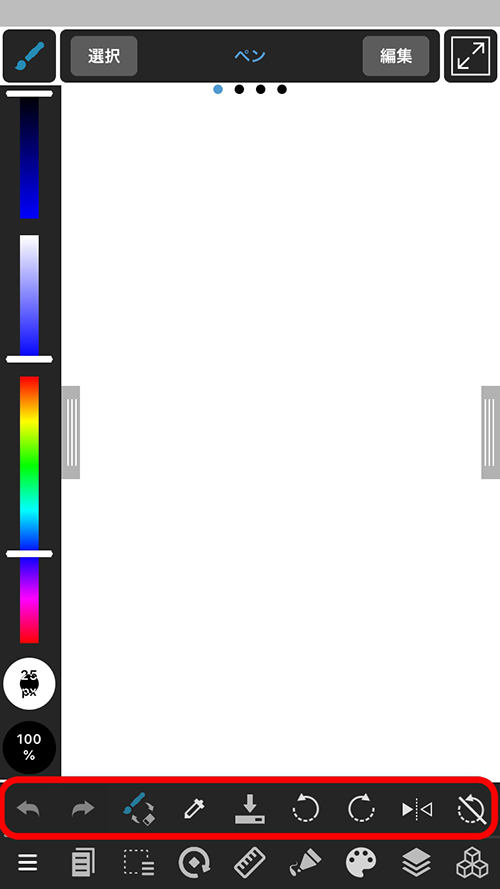
You can customize the tools you want to display from the icon on the far right.
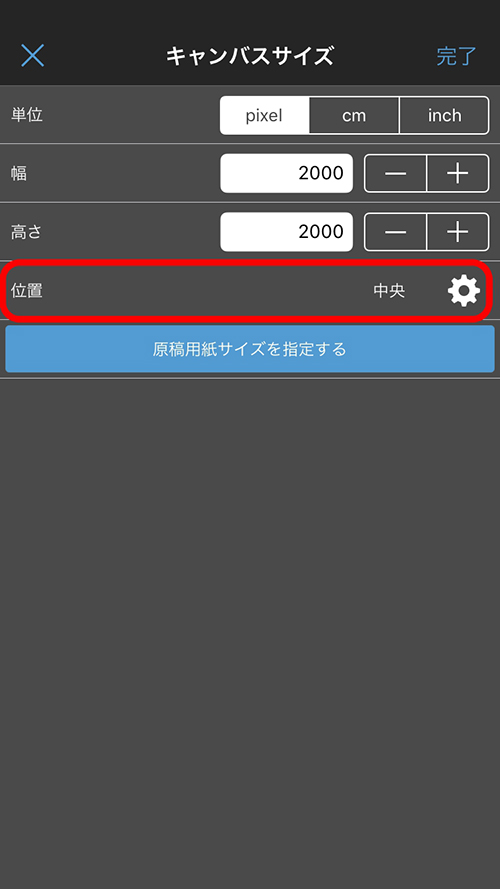
We will explain how to change only the canvas size without changing the size of the drawn picture.
You can change the canvas size by pressing «Canvas Size» from the selection range menu at the lower left of the screen.
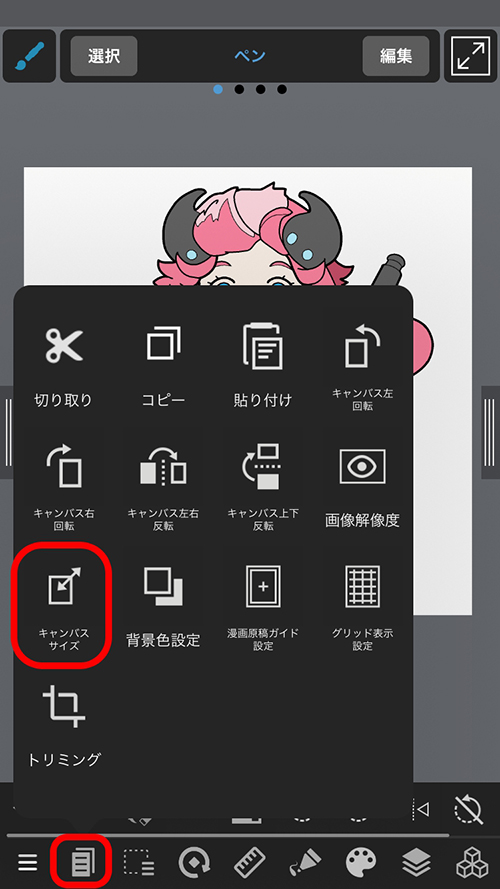
Please note that the picture will be cut if you do not select the «Position» location properly when changing the size.
