We will explain the basic of drawing manga using MediBang Paint.
Menuscript are lines which serve as a guide when printing manga.
Opening a new canvas as a Comic template will automatically display the Menuscript.
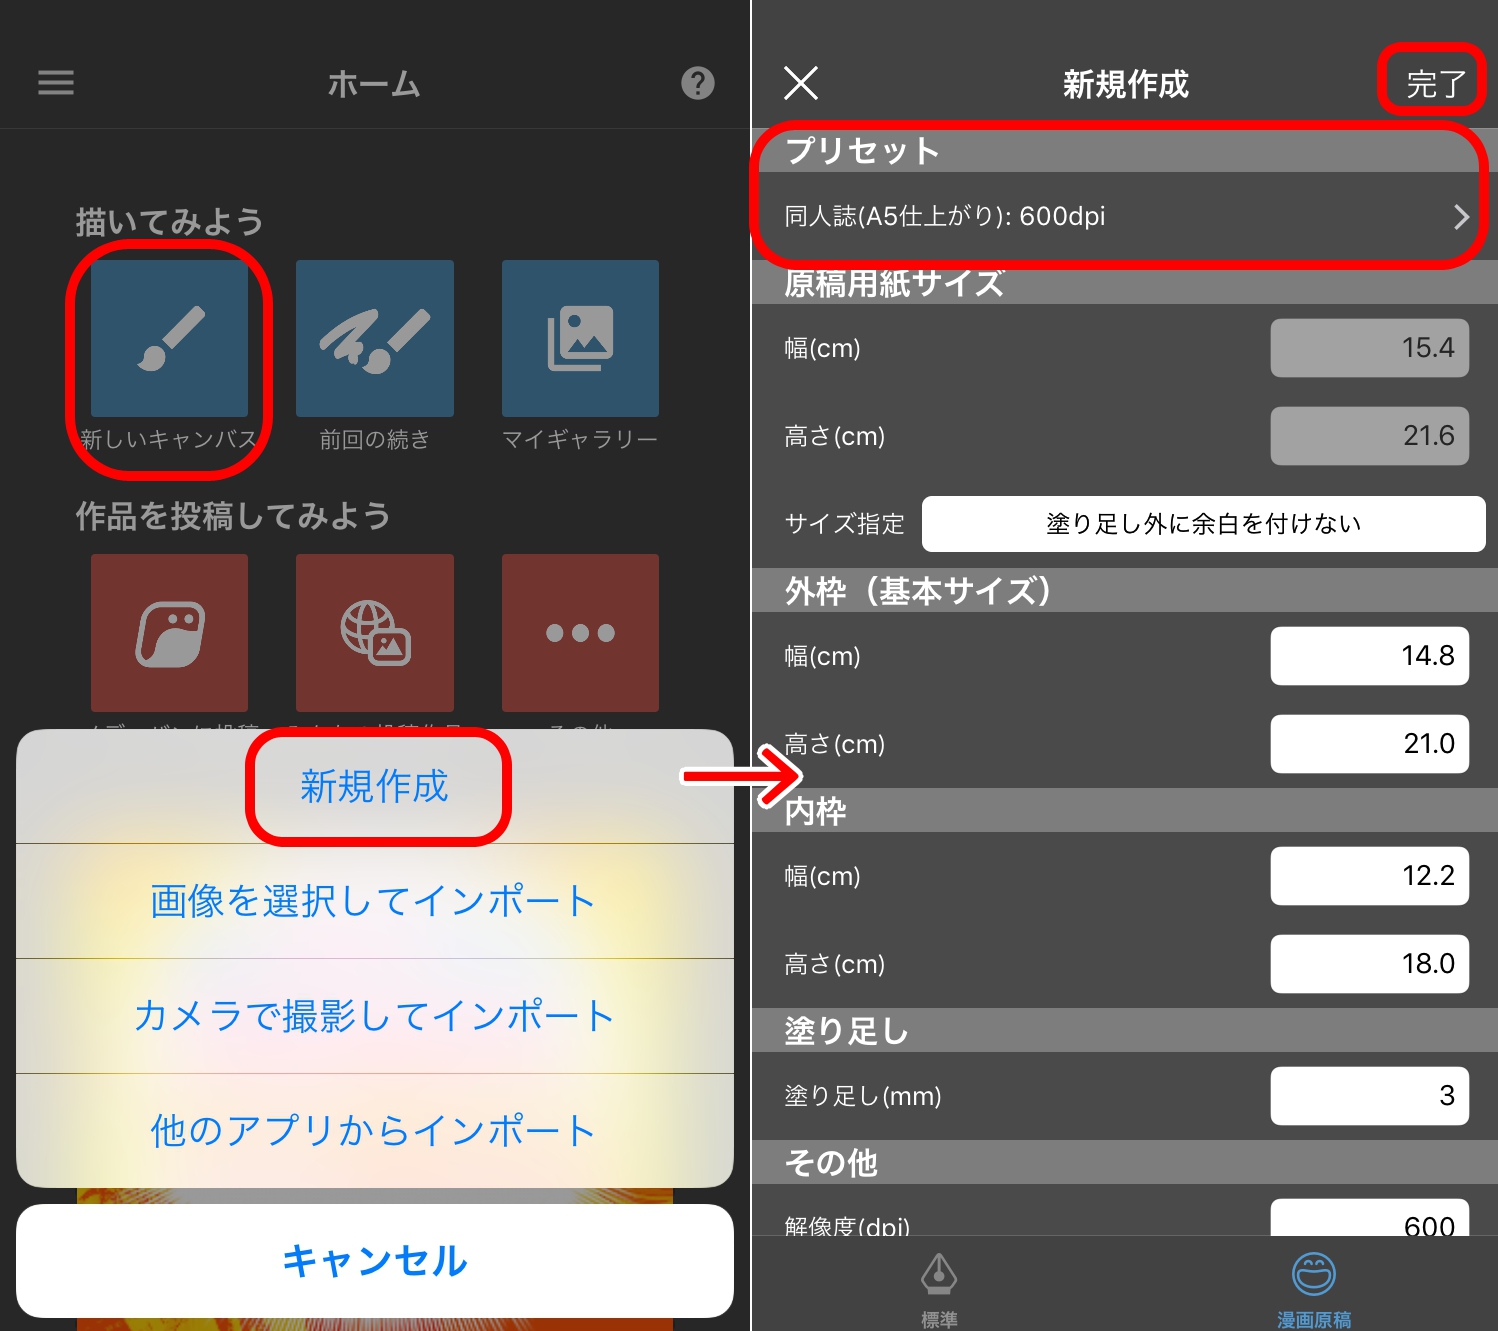
To open a canvas as a Comic template, press “New Canvas” from the home screen → “New Canvas” → Press the “Comic Template” icon in the lower right → Select any size from the “Preset” in the upper part of the screen → Press the “Done” button.
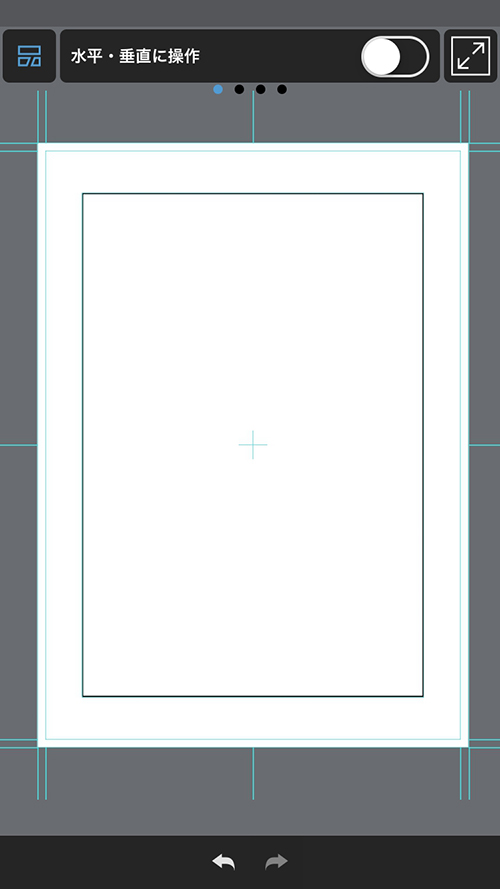
We opened a manga draft canvas.
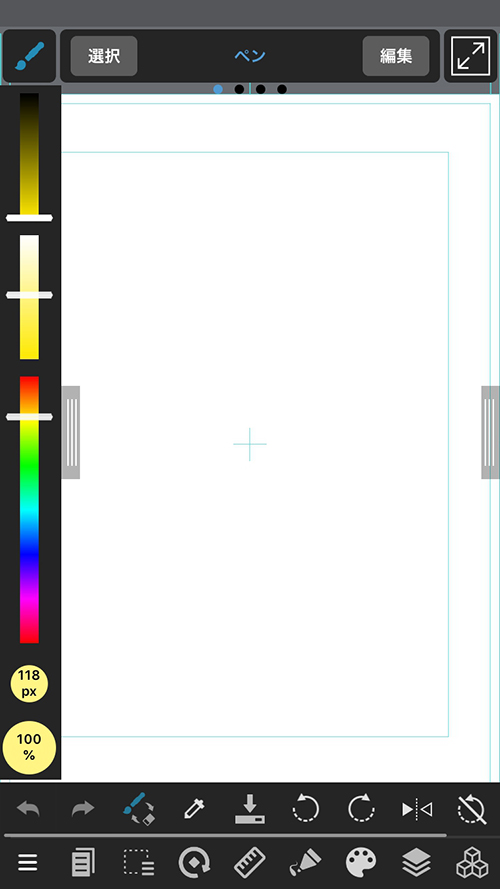
These light-blue guidelines are Menuscript.
(Please see here for the meaning of “guideline”.)
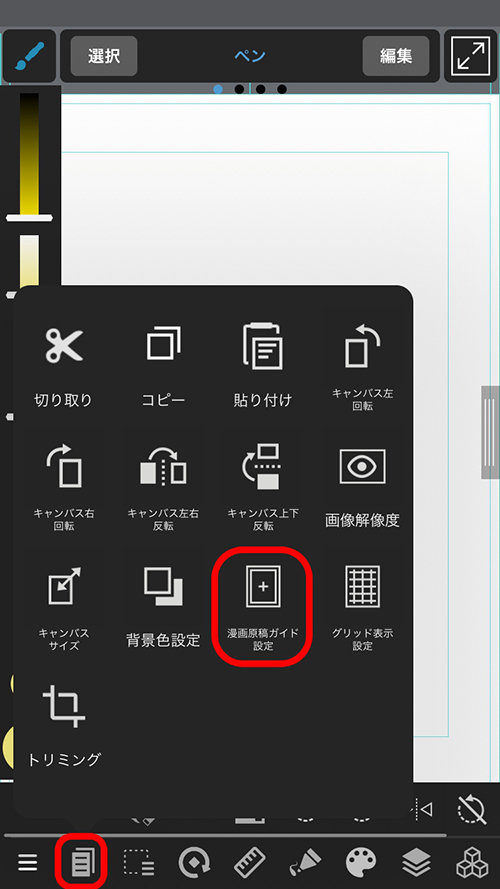
You can change the size and “On / Off” settings of the manga draft lines at any time from the “Manga draft line settings” in the selection range menu.
Let’s try drawing a draft!
Let us explain the process of panel splitting, which is indispensable when drawing manga.
You can easily split panels with MediBang Paint.
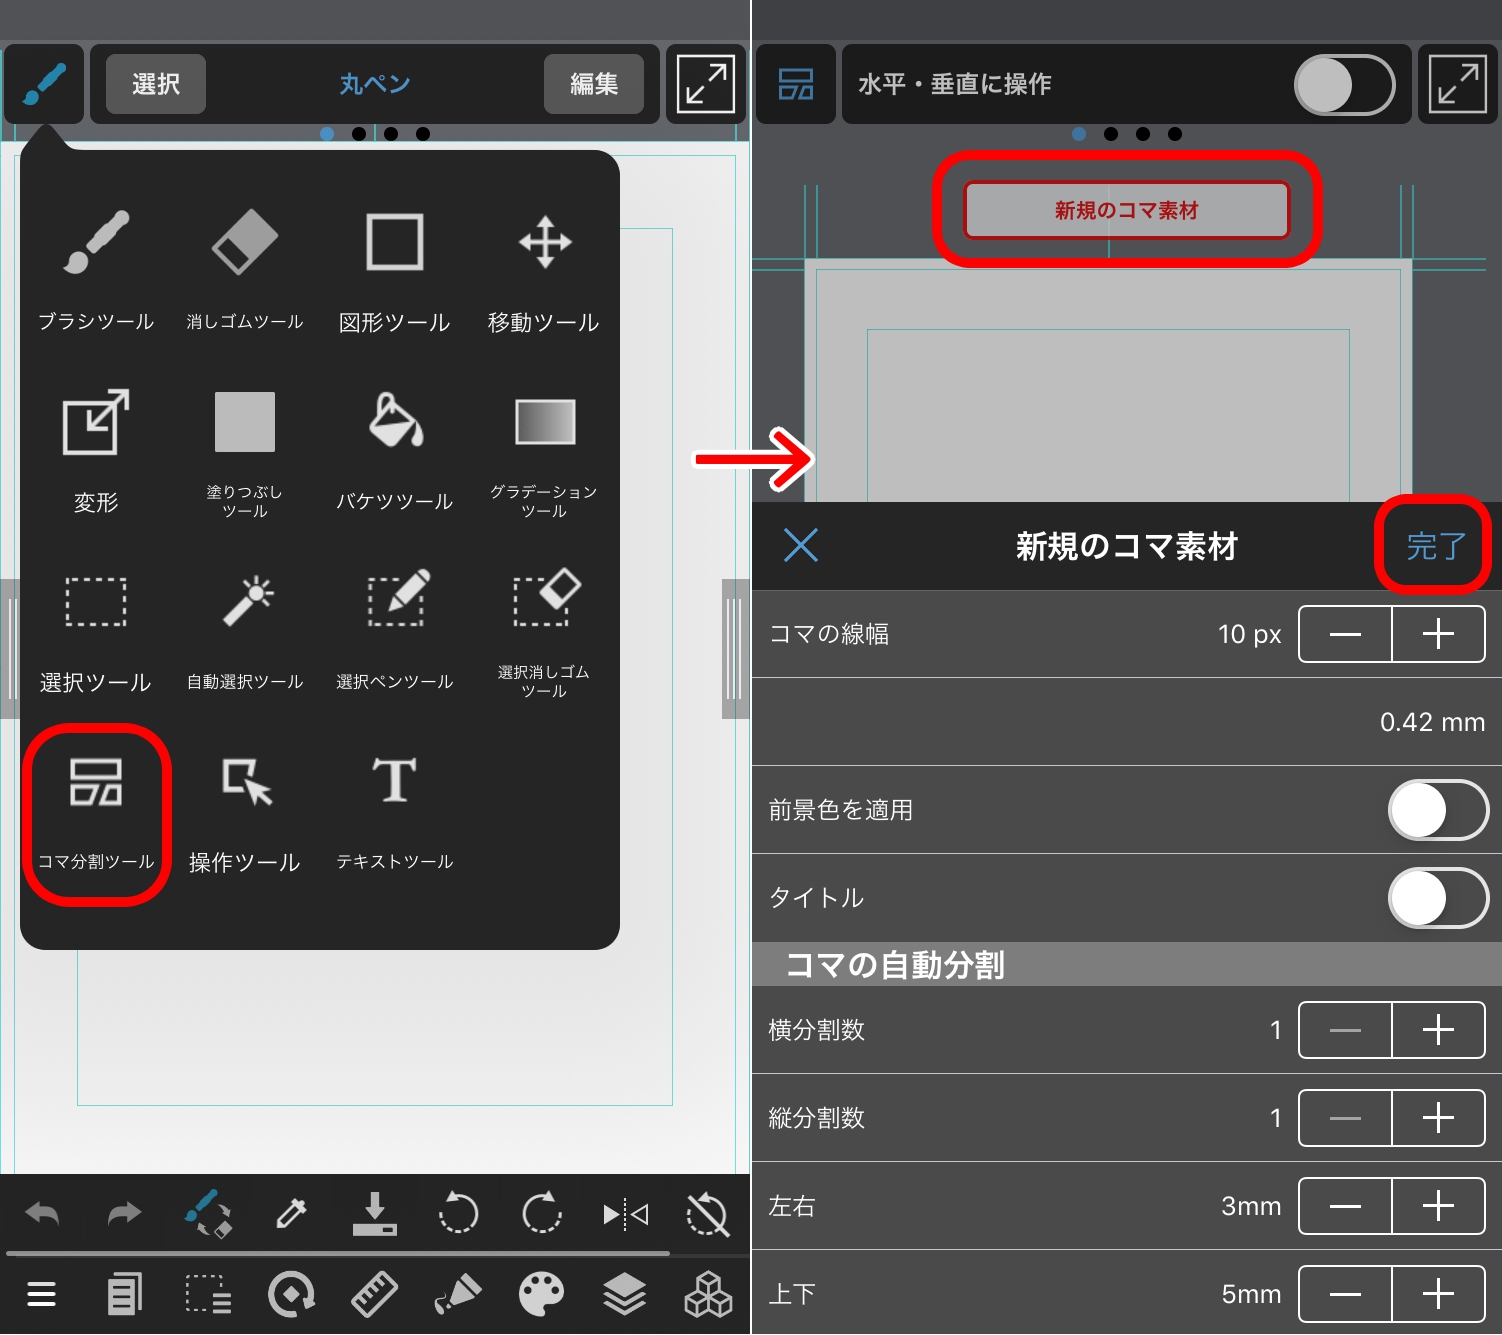
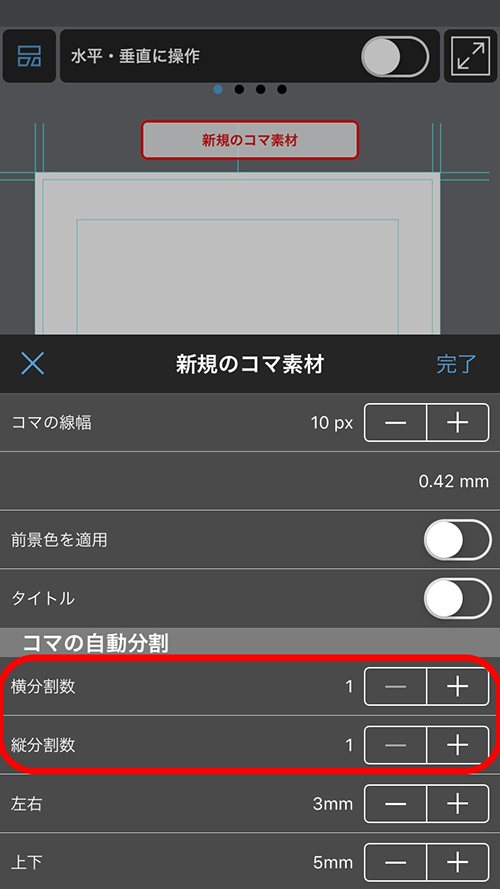
Create a new layer, select the “Divide Tool” from the upper left menu, and tap the “New Panel Material” displayed in the upper part of the screen.
You can change the panel settings in the window which appeared, but for now just press “Done”.
The panel material has been added according to the inner frame of the manga draft lines.
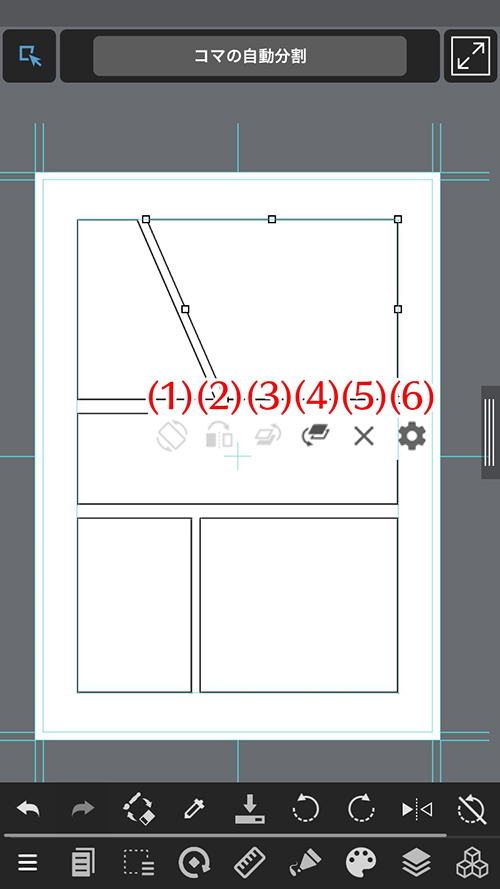
Now, with the splitting tool selected, you can split the panel material.
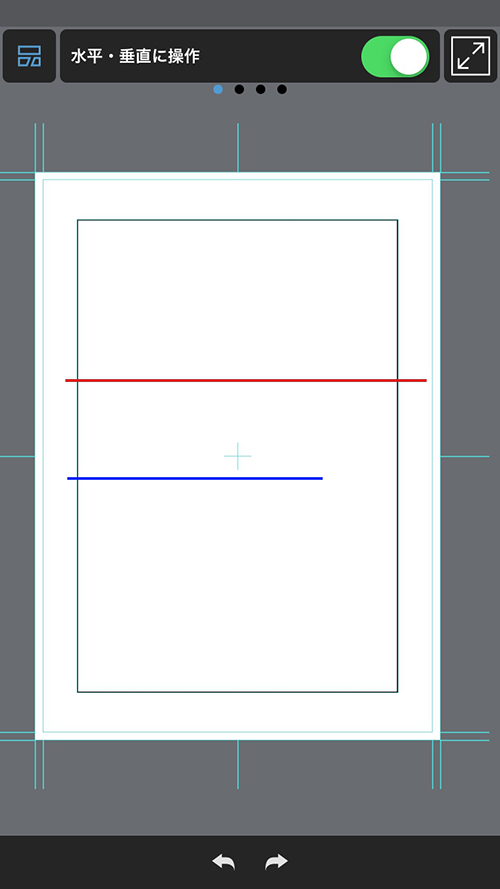
Let’s split a panel to the side like shown with the red line.When splitting panels, split them so that they are divided into whole parts.
When a panel isn’t divided properly, like with the blue line, you can’t split it.
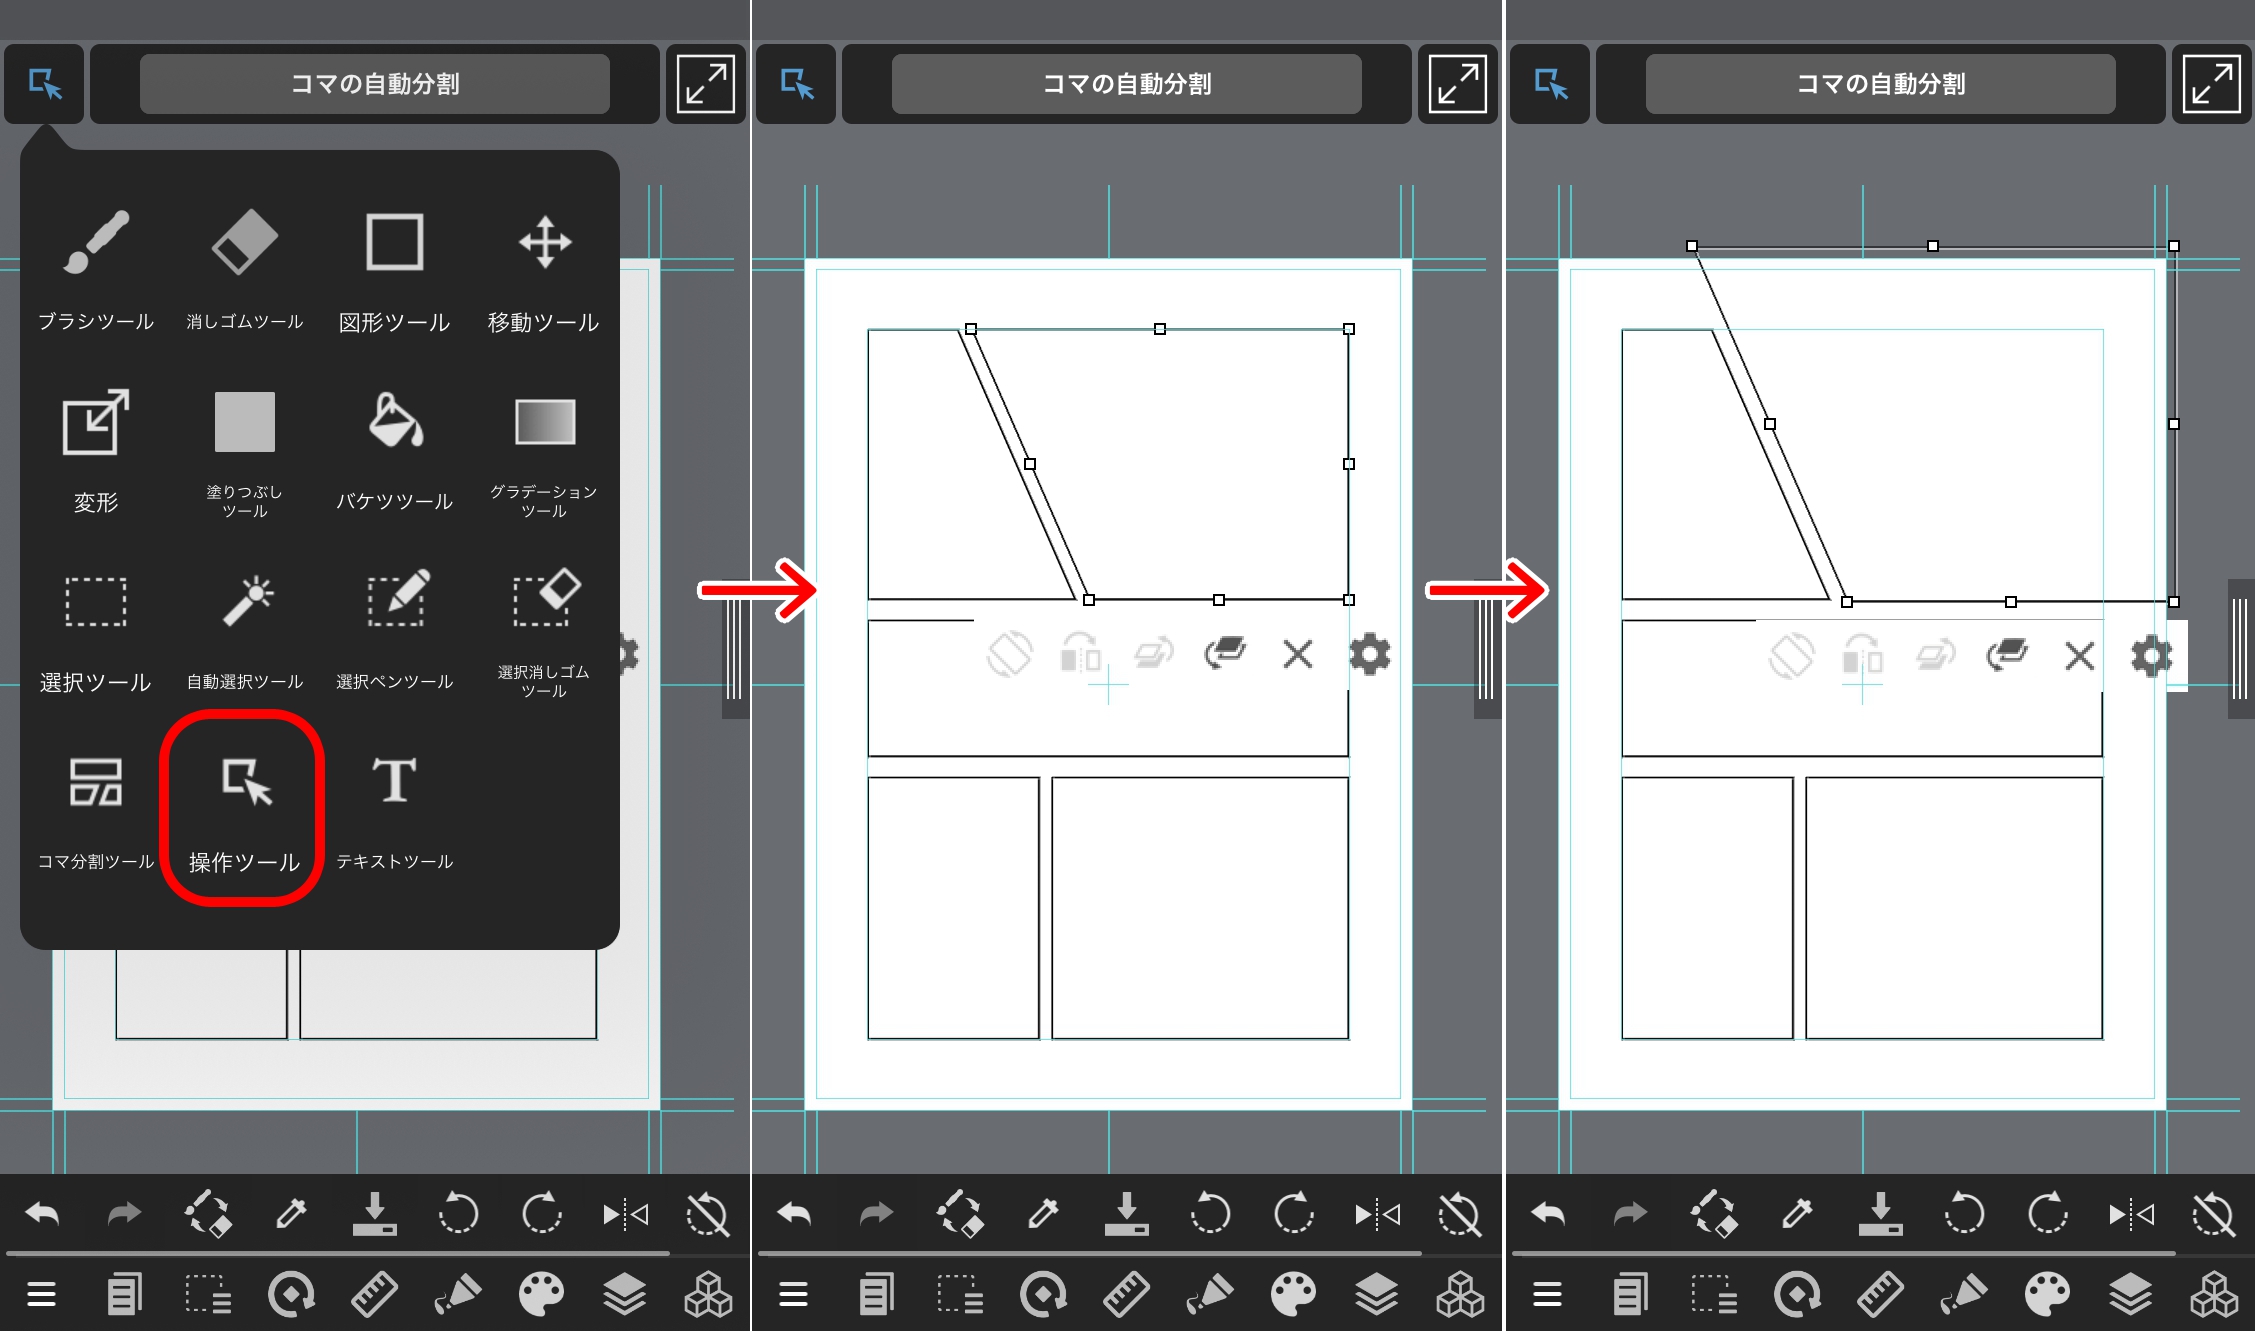
When you want to split a panel diagonally, try dividing it using your fingers.
If you accidentally split a panel, use the “Undo/Redo” options at the bottom of the screen.
When you want to divide panels evenly …
You can split the canvas into the number of panels you want using the “Vertical / horizontal division” tool in the panel window which we showed at the beginning. Even after splitting panels once, if you select the panel you want to divide using the “Divide Tool”, the “Automatic Panel Creation” window will appear, so you can change it according to your preferences.
Use the manipulation tool if you want to transform or move a part of the panels.
Select the “Manipulation tool” from the top left.
After tapping and selecting the panel you want to move, move the handles to adjust the size.
You can use the text tool to easily insert text. Select “Text tool” from the upper left and tap the place on the canvas where you want to insert the text. When you type the text and press the “Done” button, the “Edit text” dialog will appear.
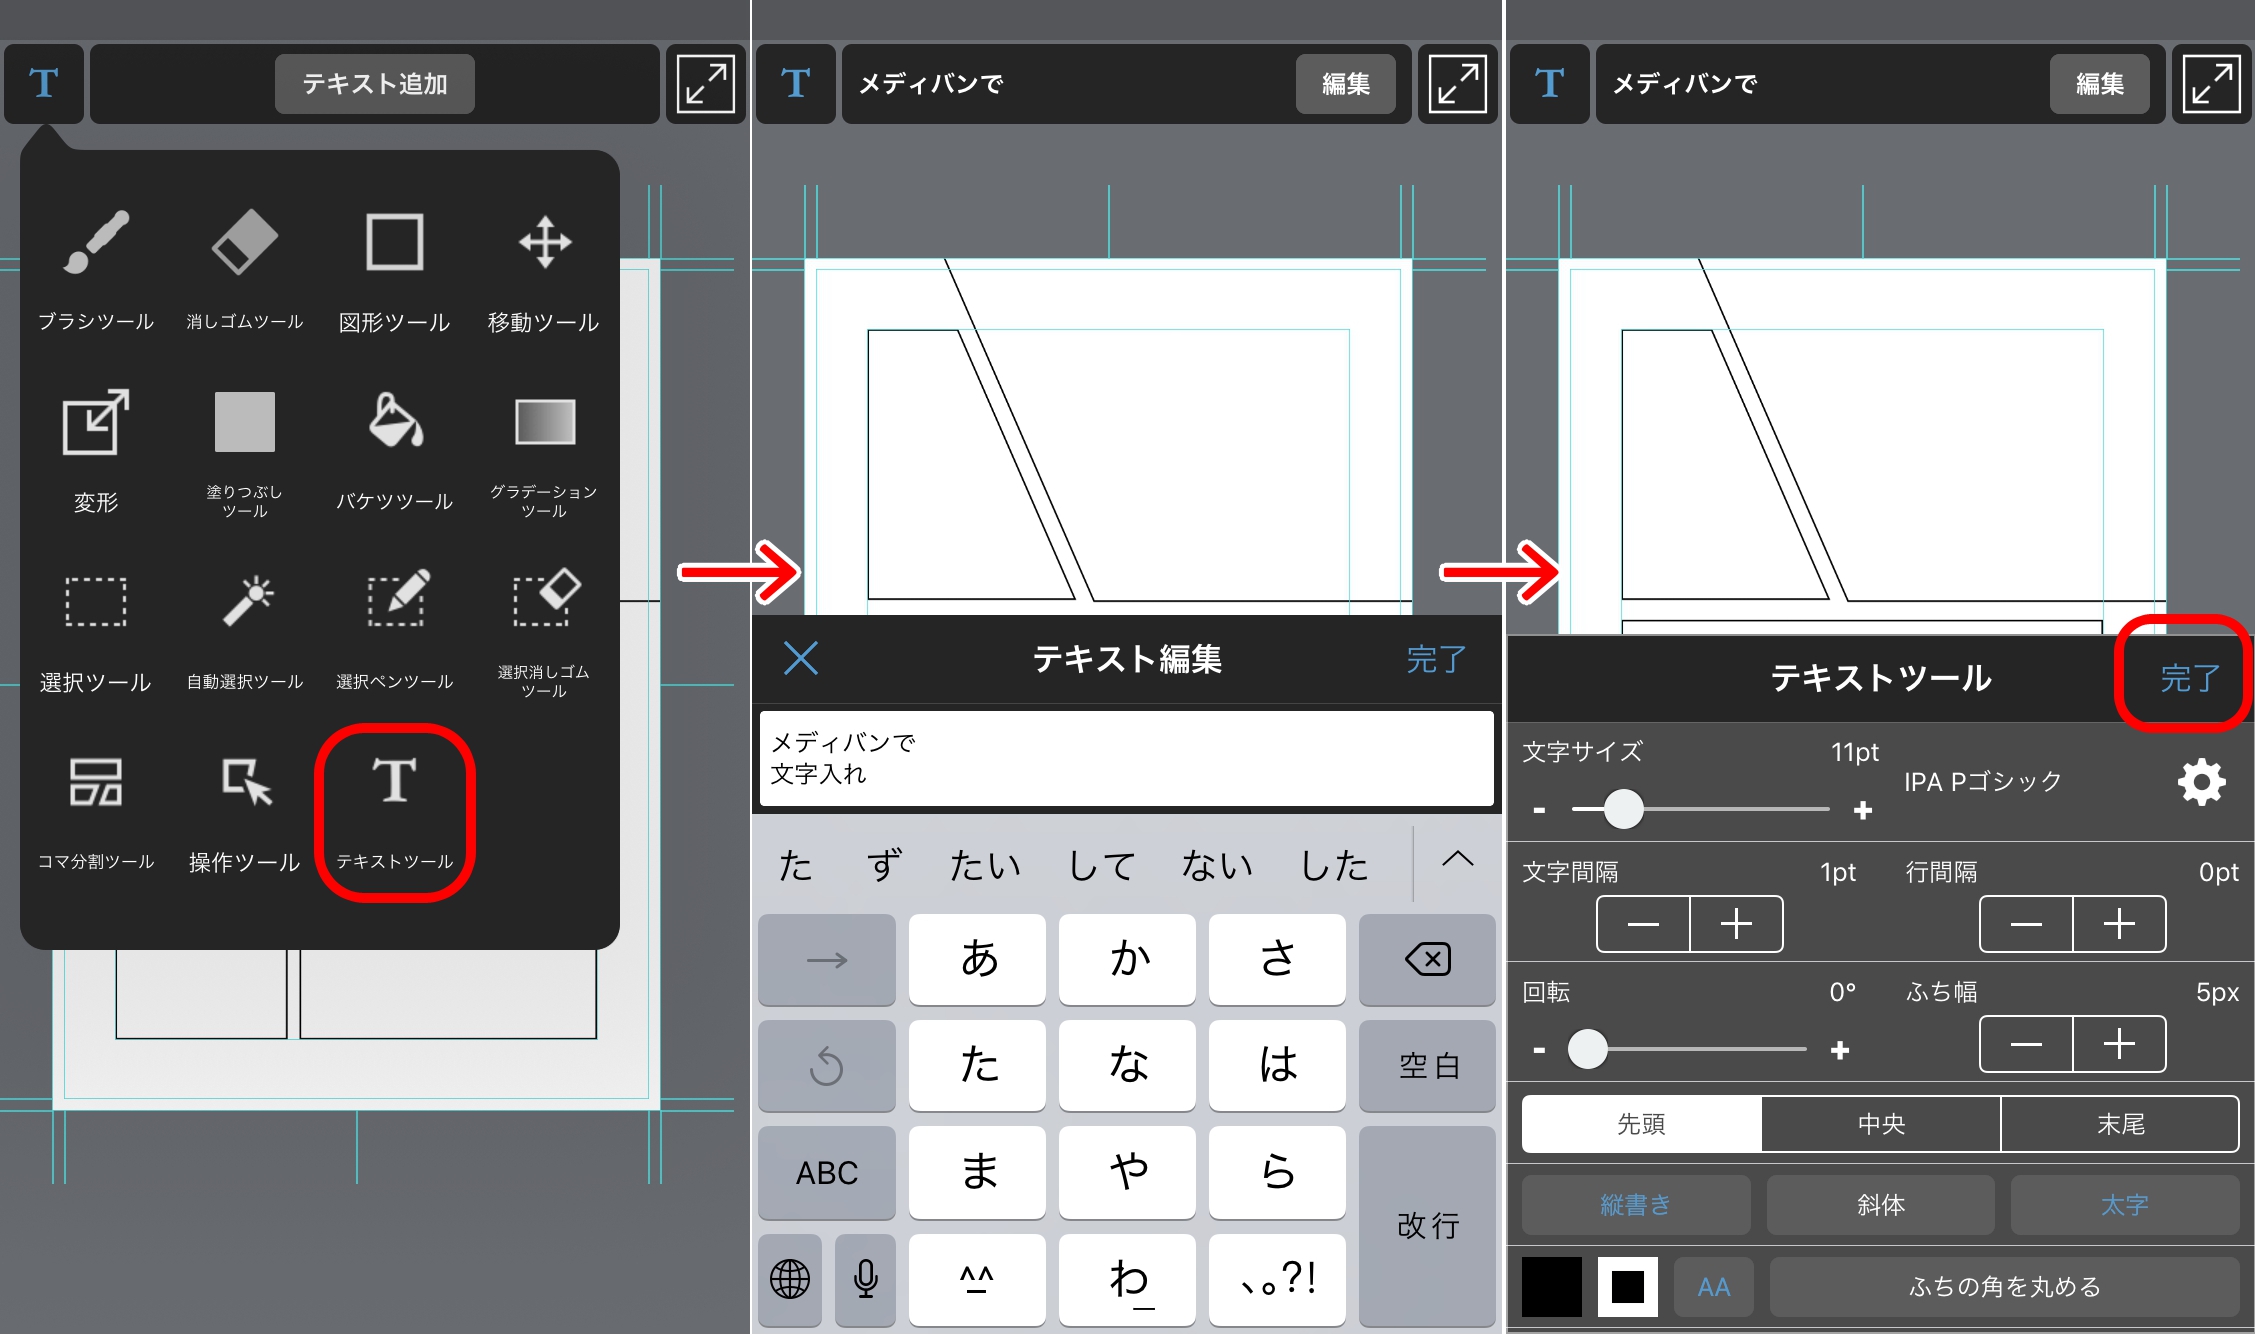
The “Done” button on the top right adds a text layer and displays the text on the canvas.
Enter the text you want to show on the canvas and press OK to add the text and a text layer.
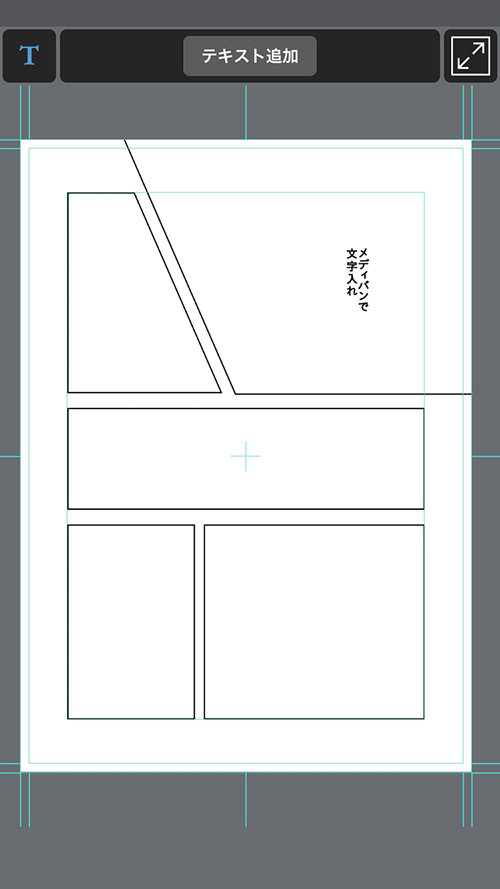
This text can be moved when the “Text tool” or “Move tool” are selected.
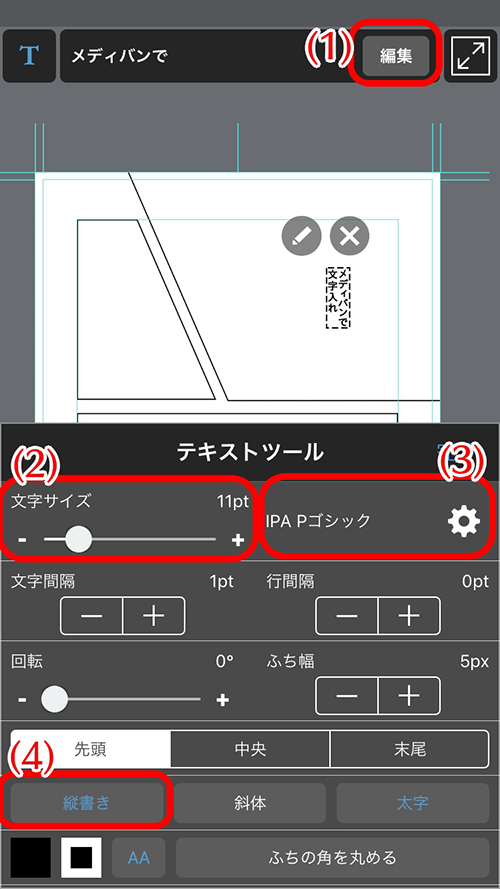
You can make other changes as well, so give it a go!
If you’ve made it this far, let’s try drawing a pencil sketch!
A black & white (binarized) draft for printing: Turn antialiasing off.
A grayscale draft for printing: You can either turn it off or leave it on.
When publishing on the Internet: Both are alright, but it looks better on the Internet when it’s turned on.
Toning comes the last.
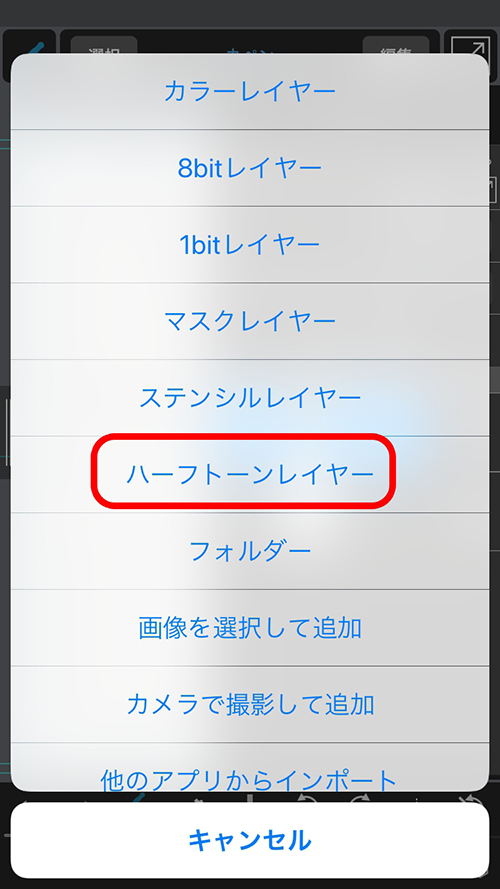
When creating a new tone, select a “Halftone layer”.
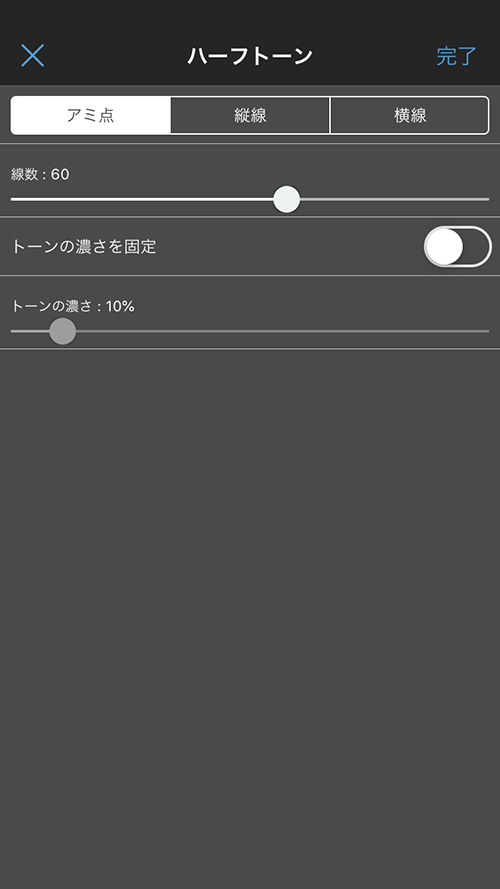
From the edit screen below, select the tone shape and the line amount, and press “Done” on the upper right.
(If you want to fix the tone density for each layer, turn on “Fix tone depth” and move the slider below.)
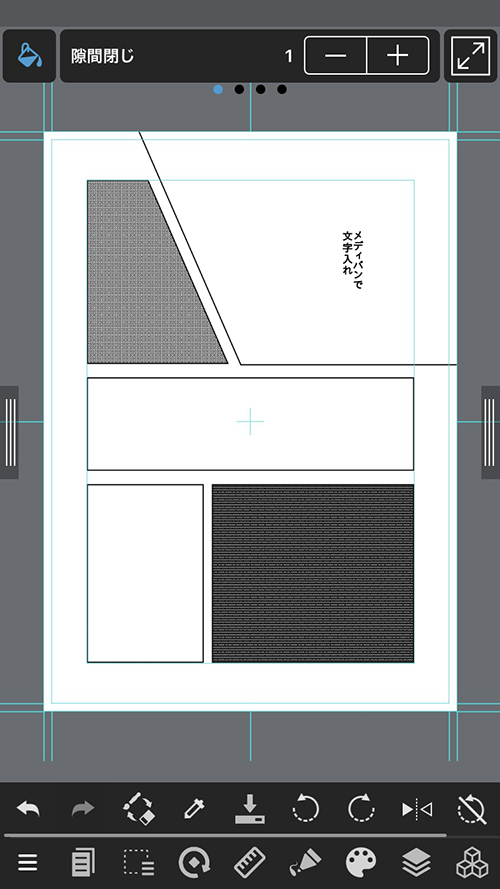
Once you create a halftone layer, the tone will be applied with the grey density of your preference. You can apply it quicker with the bucket tool or selection range tool!
Using a transparent shade is useful when removing the tone.
Removing the tone
You’ve completed your Comic page!
讓你的創作更有特色
MediBang Paint全新服務,
MediBang Premium登場!
專用筆刷、素材無限使用、
MediBang
Paint全功能開放等,
我們準備了幫助創作的多樣特典。