Finally, let’s draw a picture on the canvas.
Launch MediBang Paint and open the appropriate canvas. If the canvas is already open, you can use that canvas.
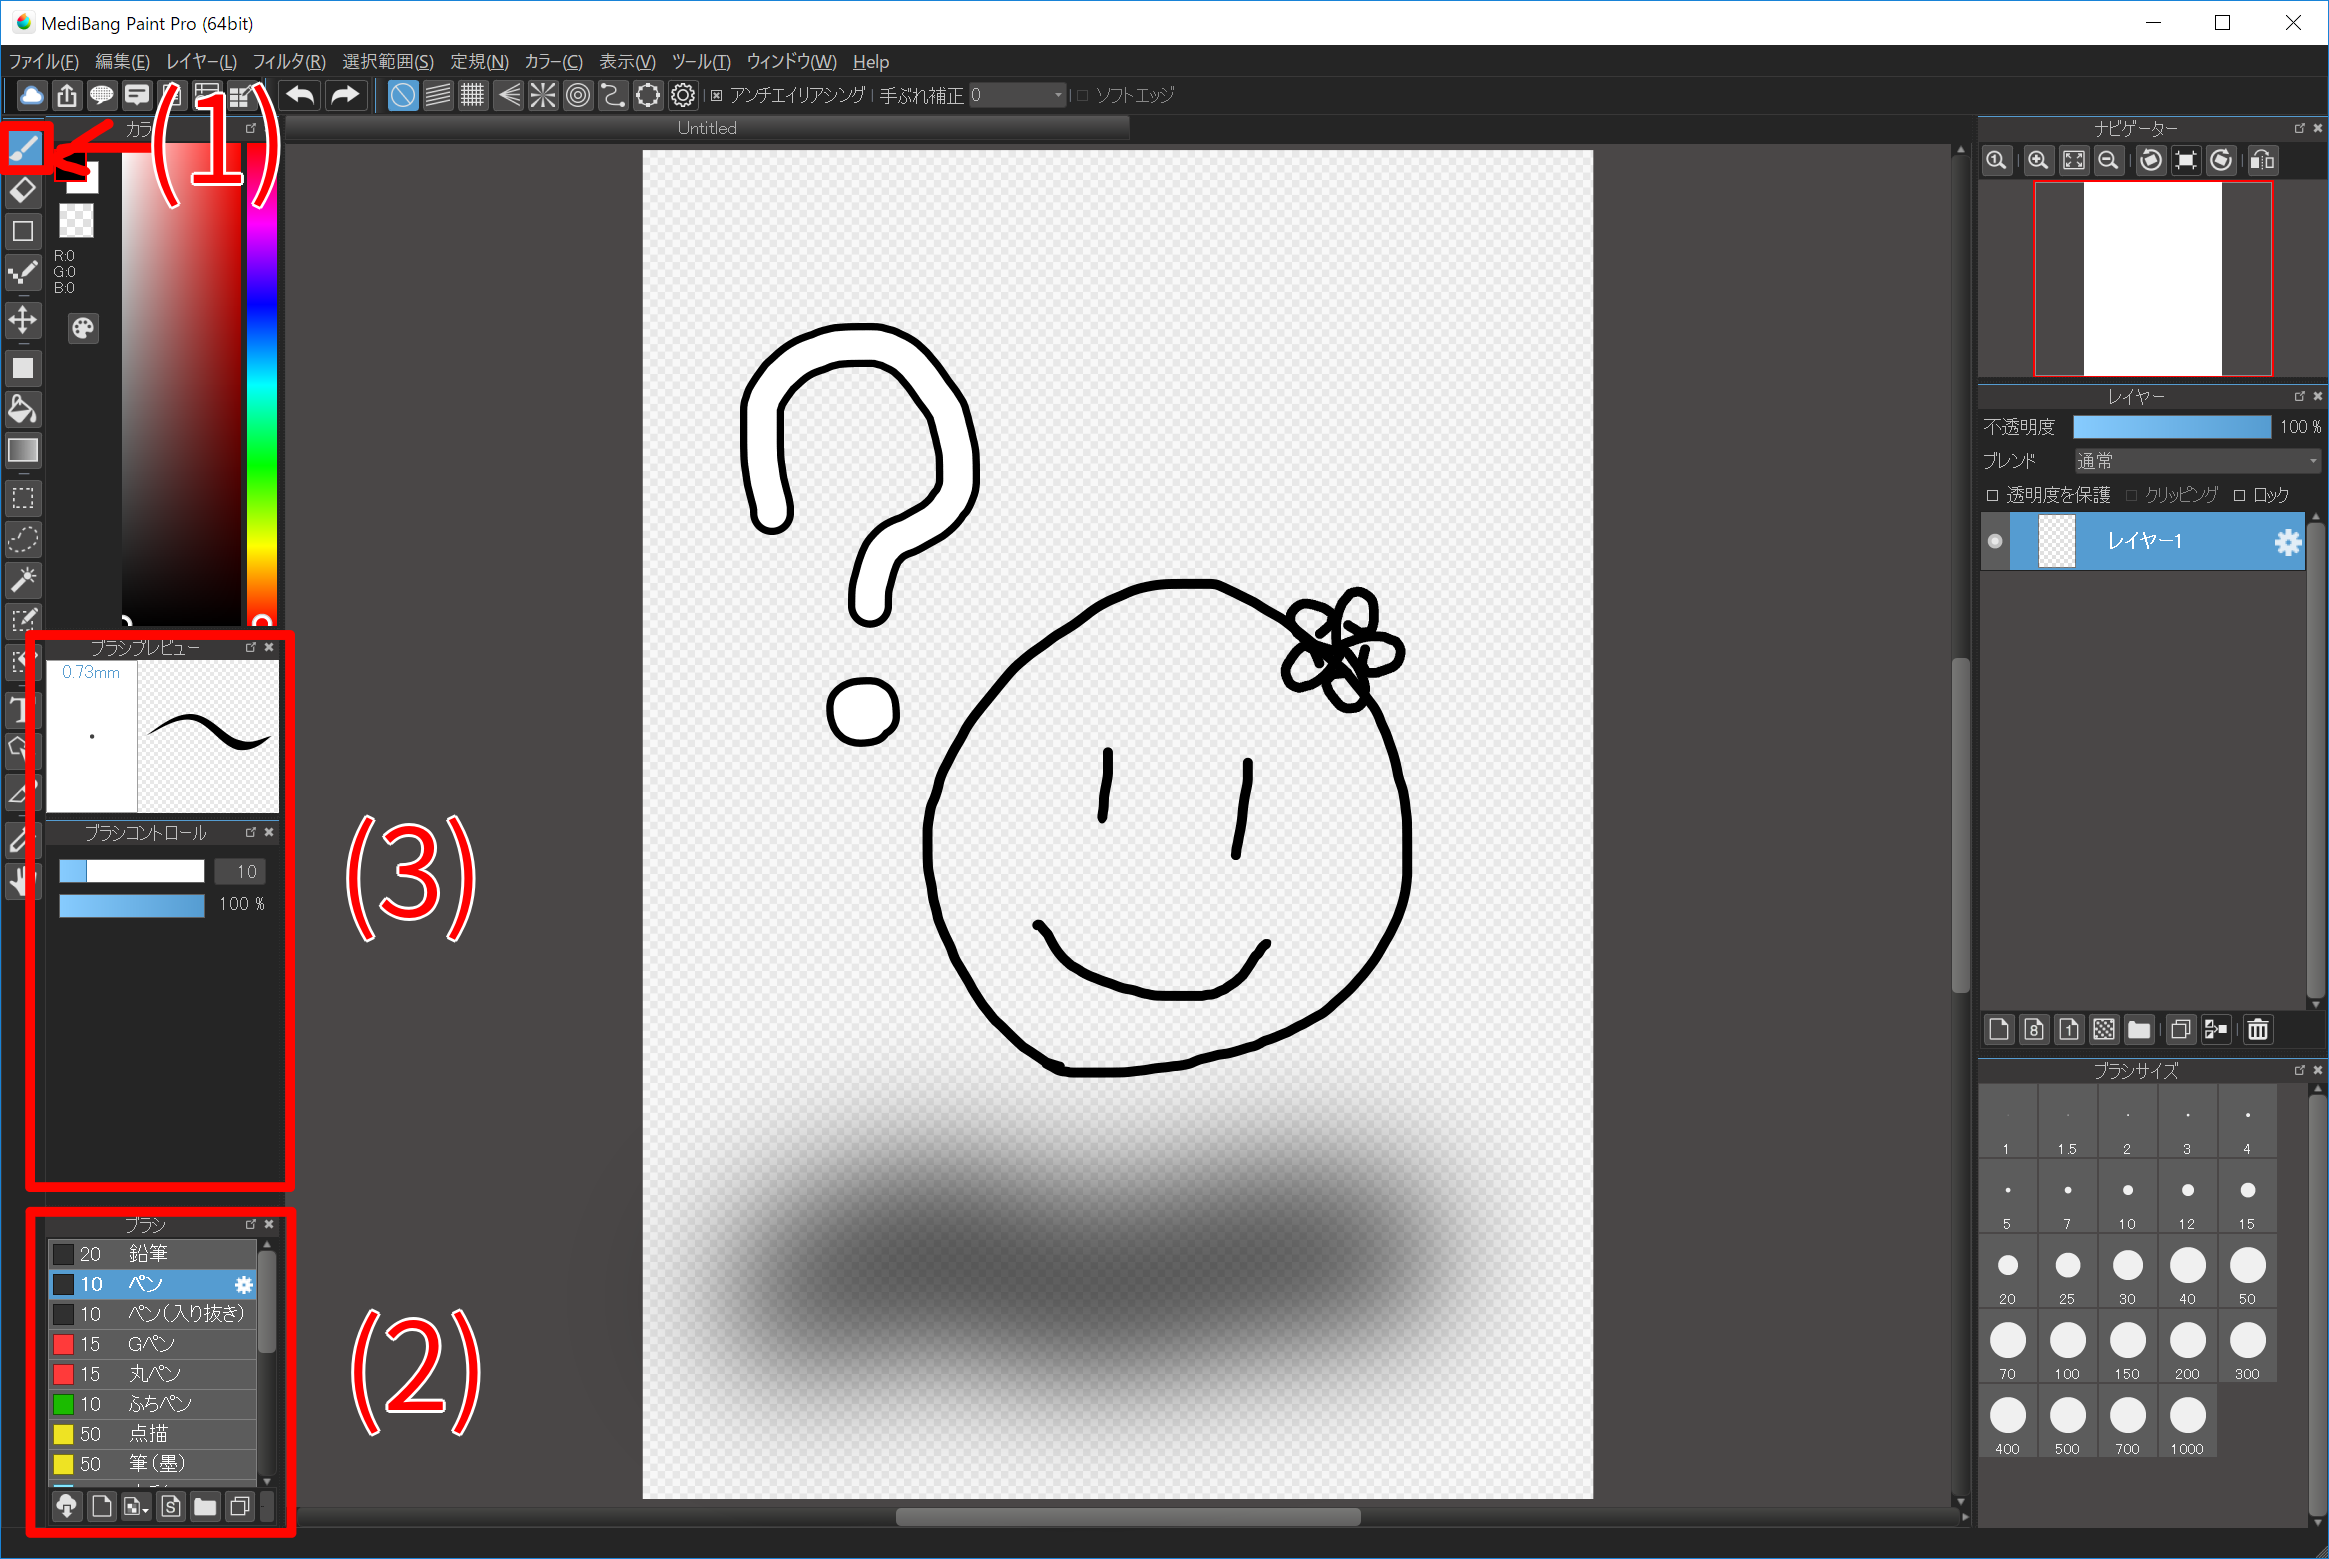
With «Brush tool (1)» selected, select the appropriate brush and draw a picture on the canvas.
Brushes can be selected from «Brush window (2)». You can also change the brush size and opacity with «Brush control (3)». Please try out various brushes.
If you fail to draw a line or you want to redraw a line …

Please press the «Undo (1)» button at the top of the window without panic.
You can return the state of the canvas to the previous state. (If you have returned too much, you can advance the returned procedure by pressing «Redo (2)» button)
Since this function is a convenient function unique to digital, let’s use it well.
Please try «Undo» and «Redo» several times. (Details of the function is explained here)
Even if you draw with only black, it’s not fun, so let’s change the color of the brush this time.
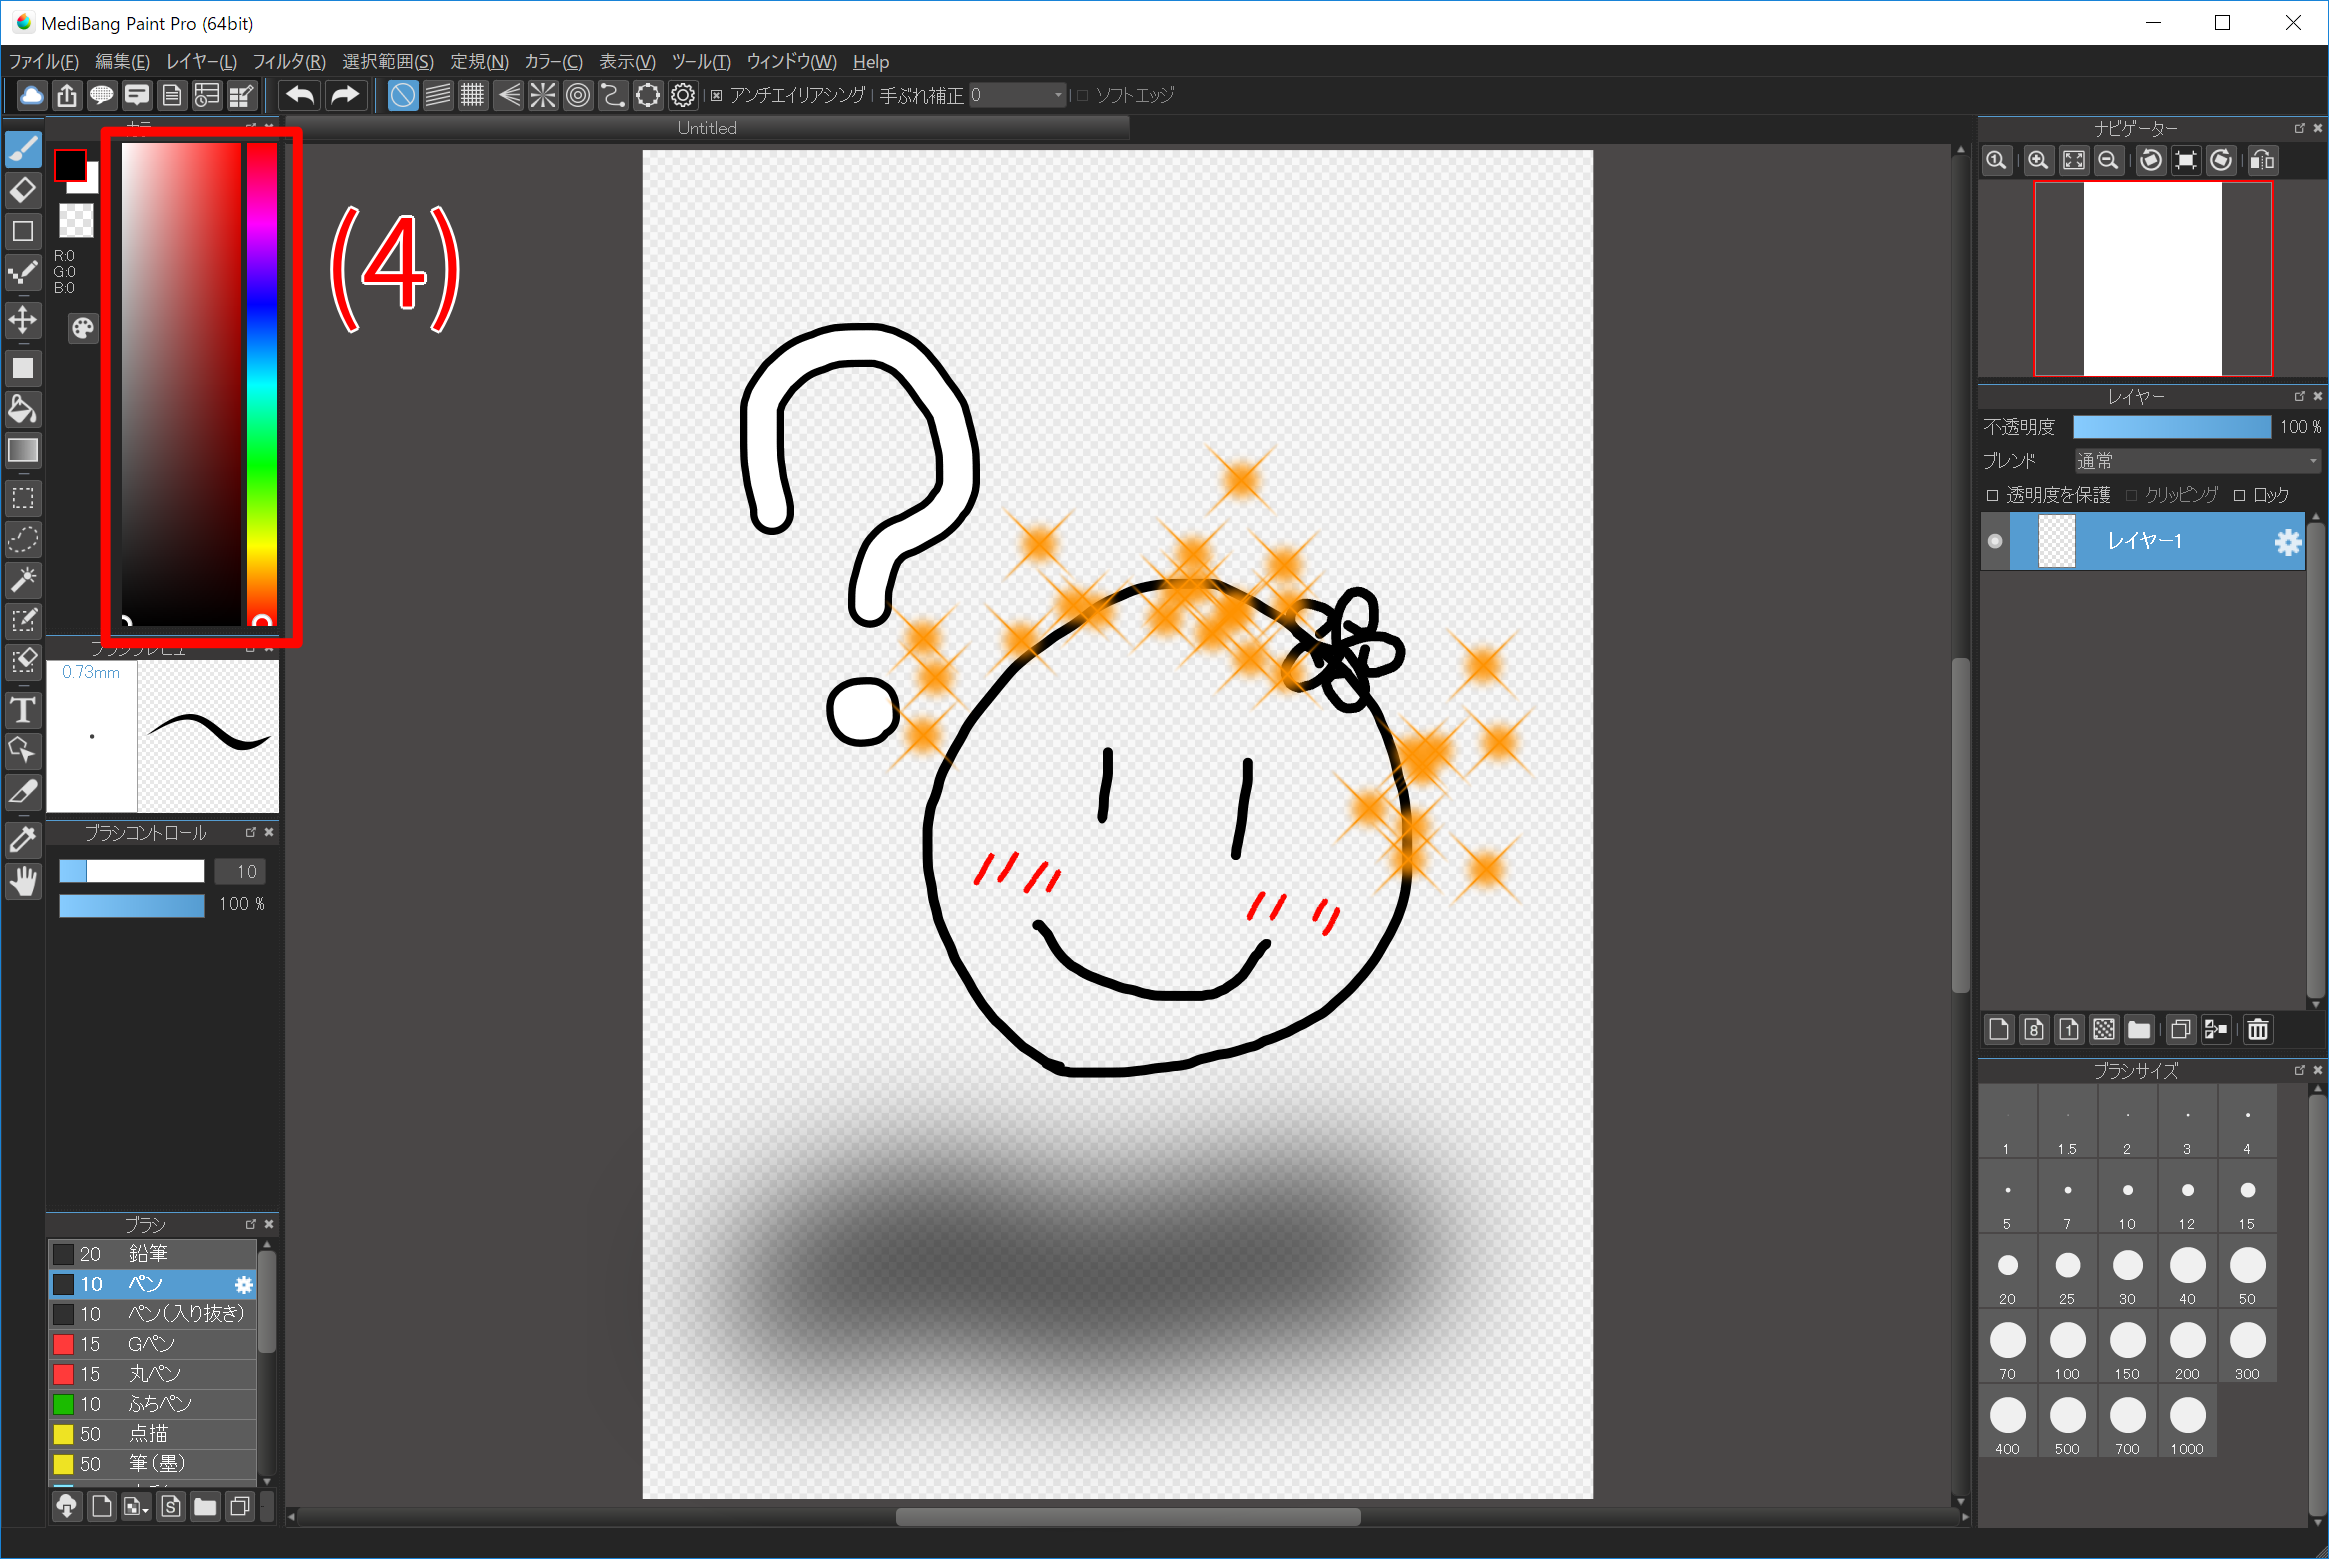
The color of the brush can be changed from «hue bar (4)». Let’s draw more and more pictures while actually changing the color of the brush.
I will explain how to use the eraser when the canvas is full.
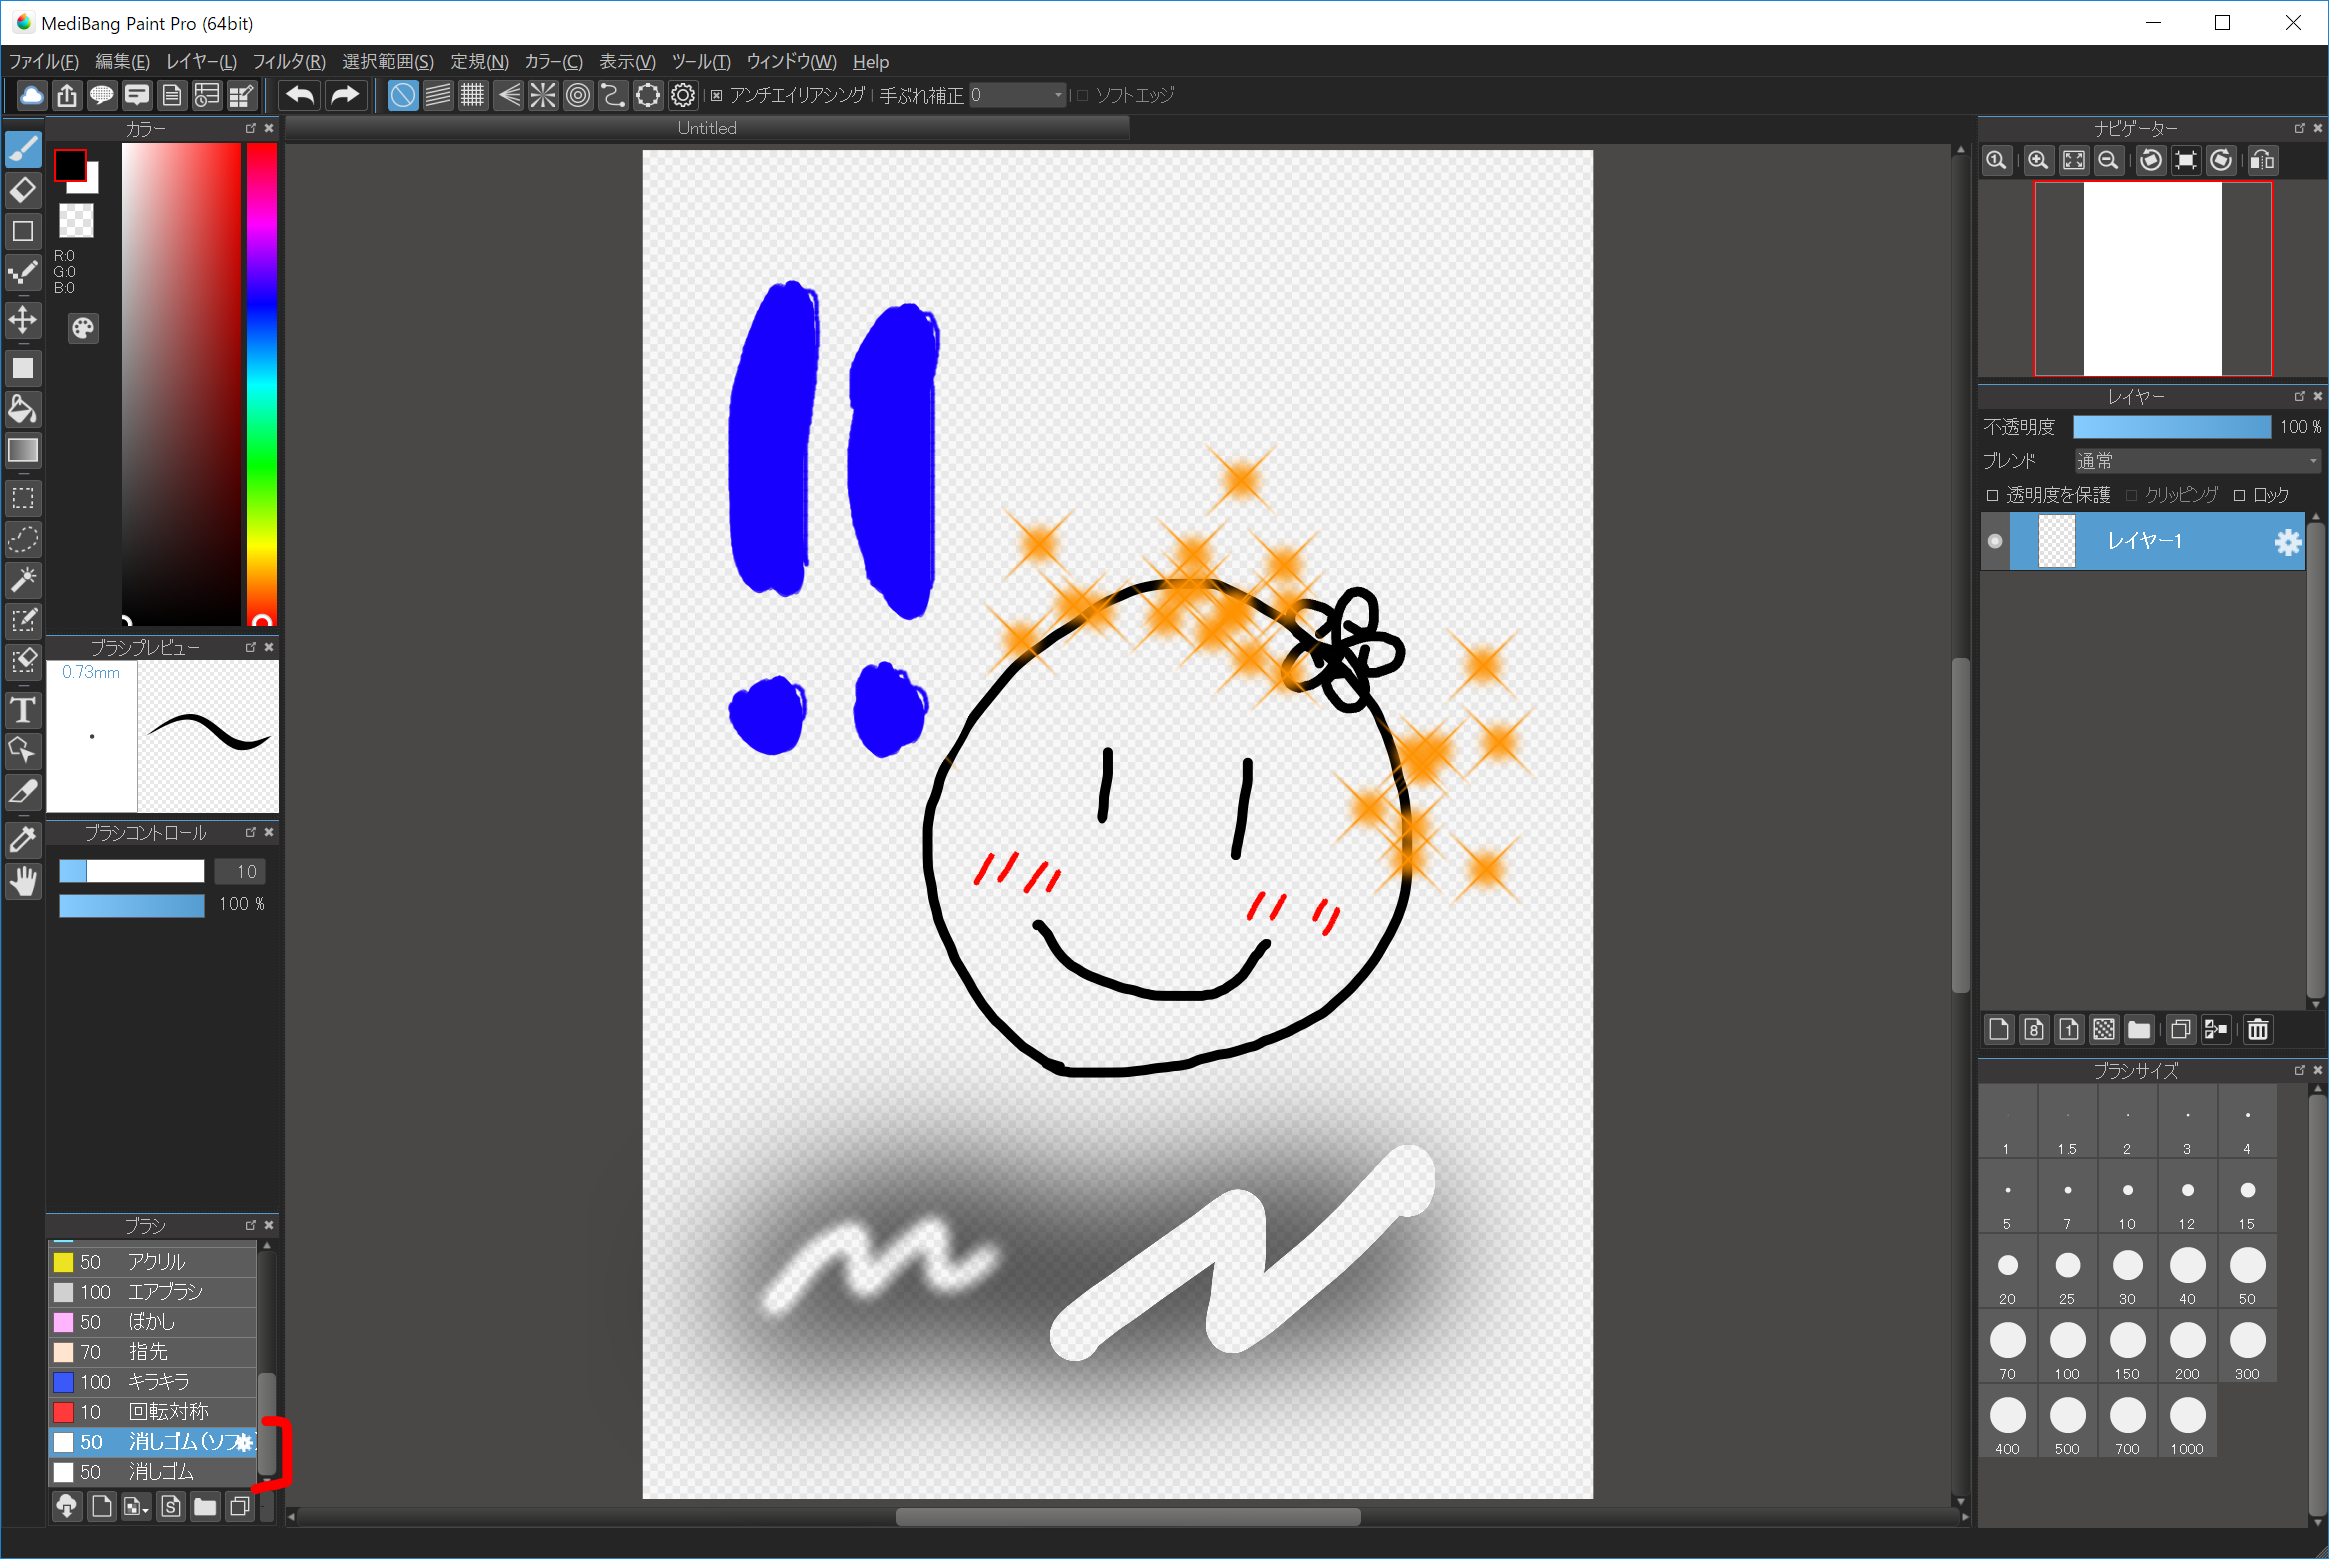
In the «brush window» there is a brush called «eraser» so please select it. There are two types of «eraser»: normal «eraser» and «eraser (soft)».
Let’s try each difference. Like «Brush» «Eraser» you can change brush size and opacity from «Brush control».
Of course, after erasing with an eraser, you can also draw new paintings.
You can also erase everything in the layer at once by using «Layer» -> «Clear» in the menu or the «Delete» key on the keyboard.
So far, basic operations to draw pictures are now available.
Although I can draw a picture without knowing, I will explain the setting of a little useful brush if I know it.
With the brush tool, you can draw the color of the ink transparent. With this function you can use the brush instead of an eraser.
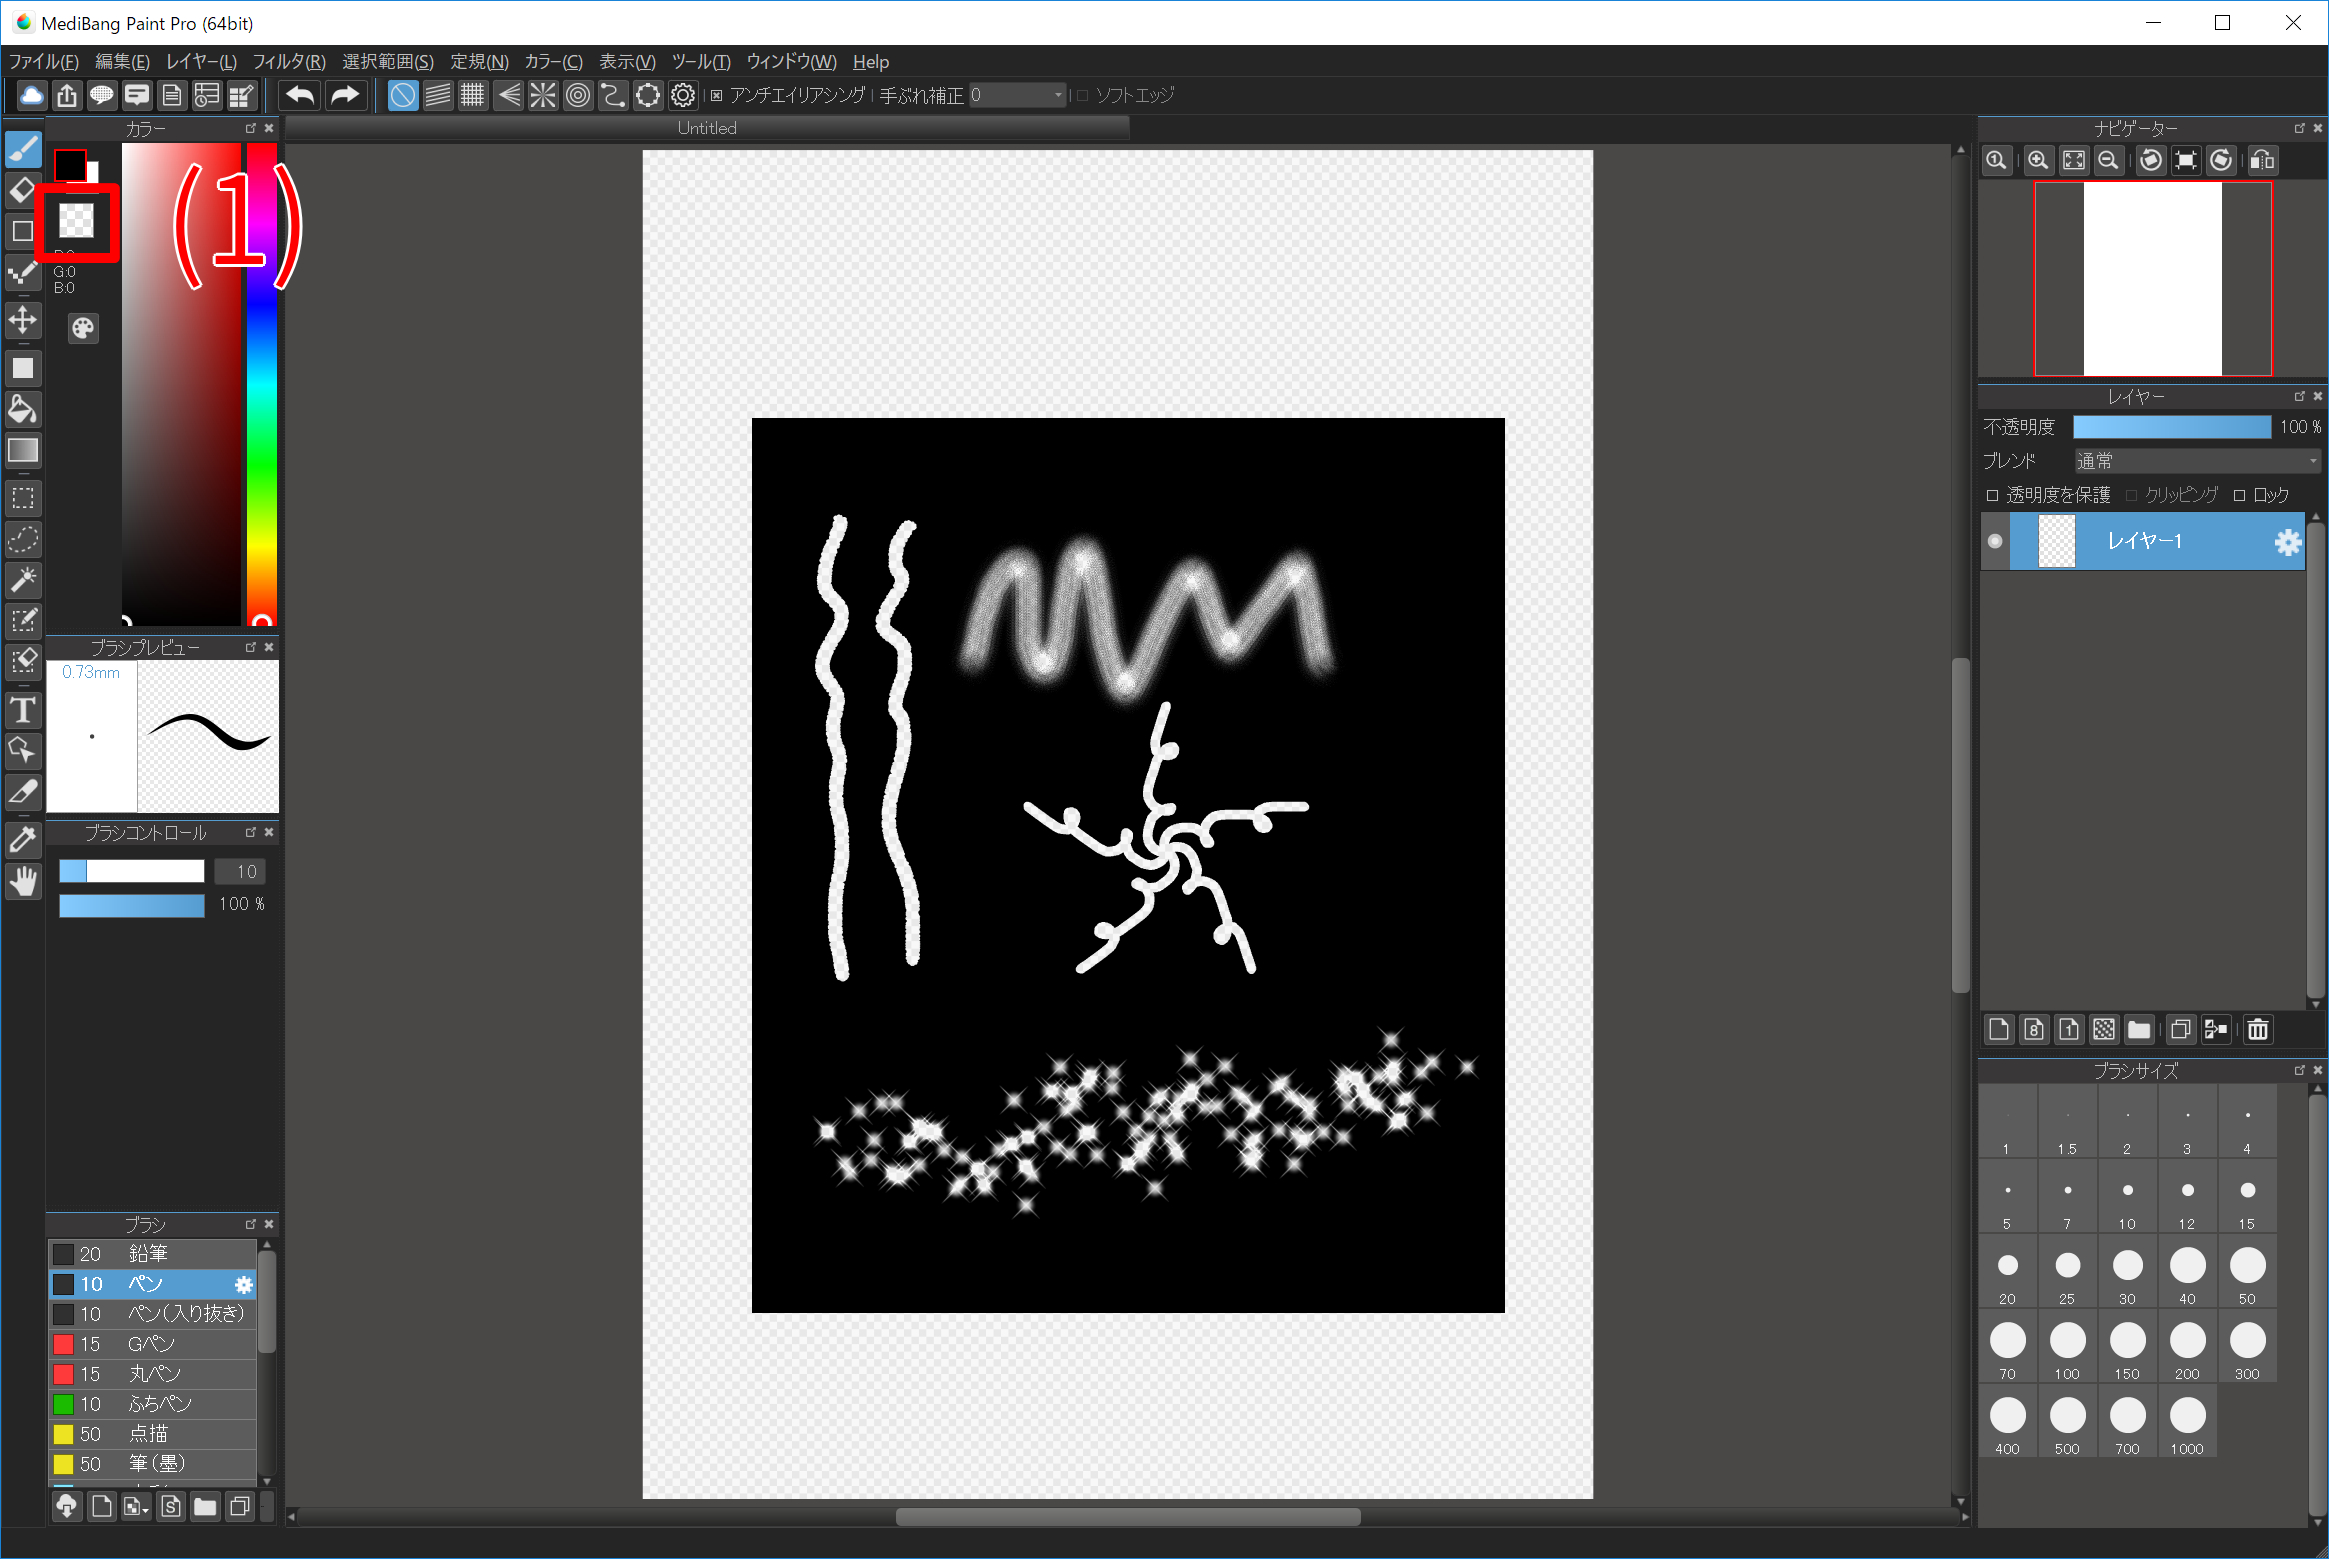
Transparent color can be selected with button (1). Because it can erase with the shape of the brush, you can erase it can not be expressed with an ordinary eraser.
Please try drawing with transparent color in fact.
If you hold down the [z] key on the keyboard and draw, you can draw in transparent color while pressing the [z] key.
Anti-aliasing (anti-aliasing) is a function that makes jagged edges of images less noticeable. Please check the anti-aliasing item if there are symptoms such as «The brush line has become jagged!» «The line got dirty!» (Click here for details on anti-aliasing)
)

Antialiasing can be confirmed and set in (1) place with the brush tool selected. (It is [ON] when the cross is marked)
When you actually draw anti-aliasing [ON] / [OFF] and draw it, it looks like this.
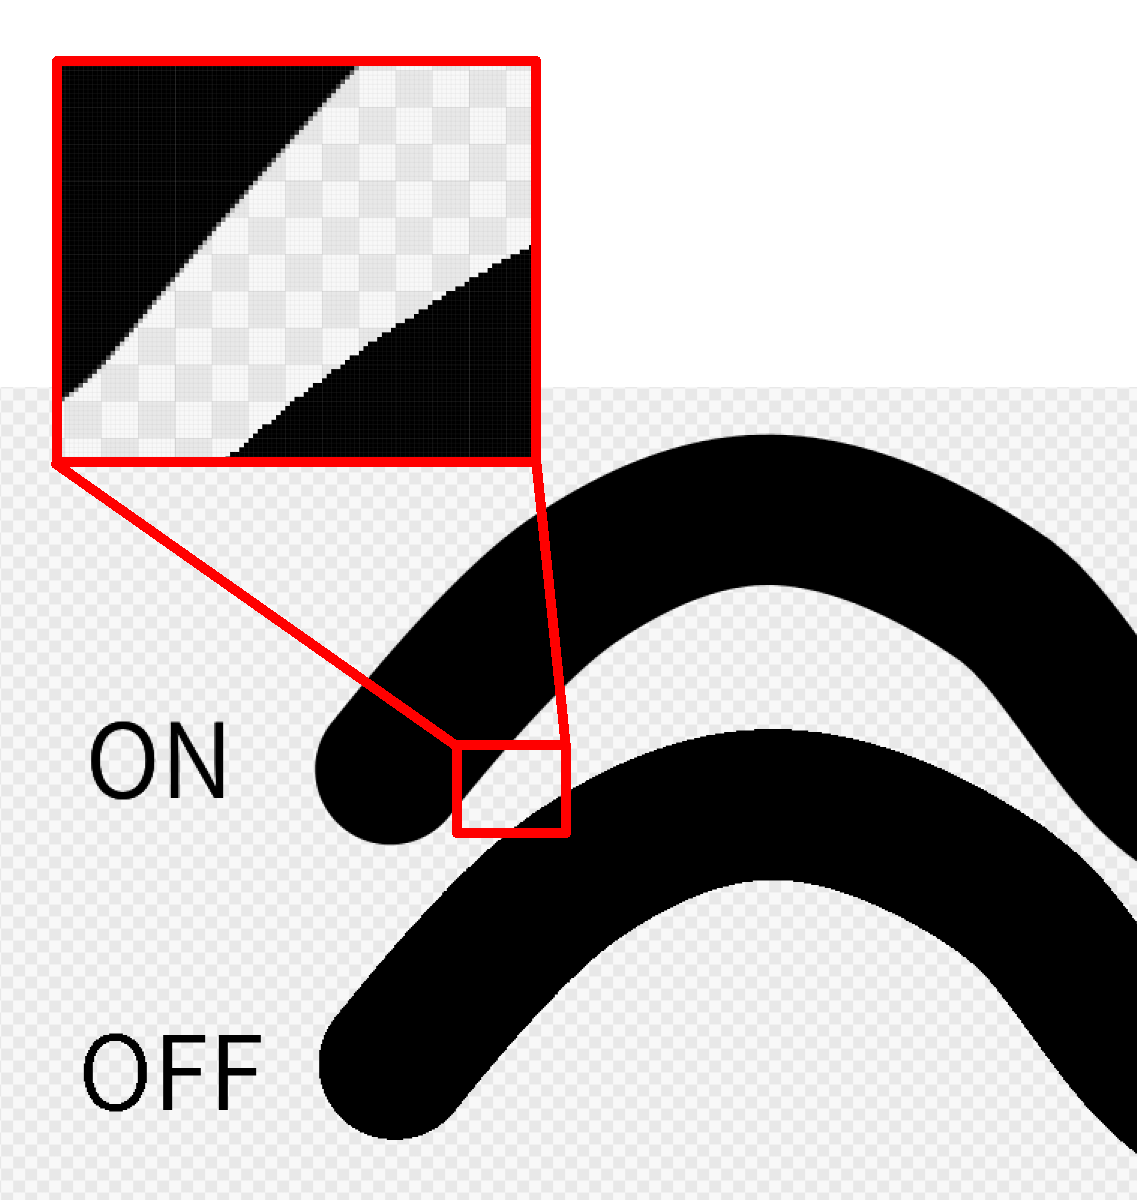
Please switch anti-aliasing and check the line difference.
Shake correction is a function to correct line disturbance caused by camera shake during drawing.

With the brush tool selected, you can check and set the Shake correction in the place (1). The larger the number, the stronger the degree of correction, but the slower the drawing speed.
Please switch the value of the camera shake correction and check the difference of the lines.
«Hue bar» can be switched from «color» of menu to «hue bar» and «hue circle». Please switch according to your preference.

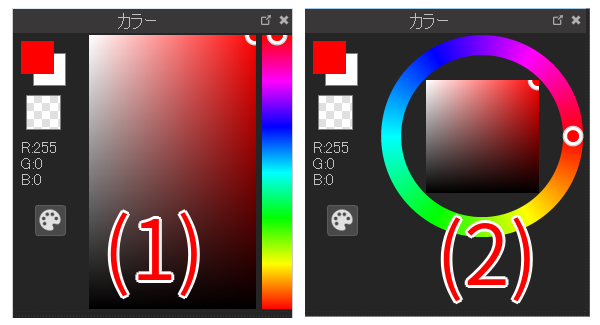
Let’s change the «hue bar» and «hue circle» to see the difference.