I will explain the digital unique features and bucket tool.
With the bucket tool, you can paint a color in a blank area around the line.
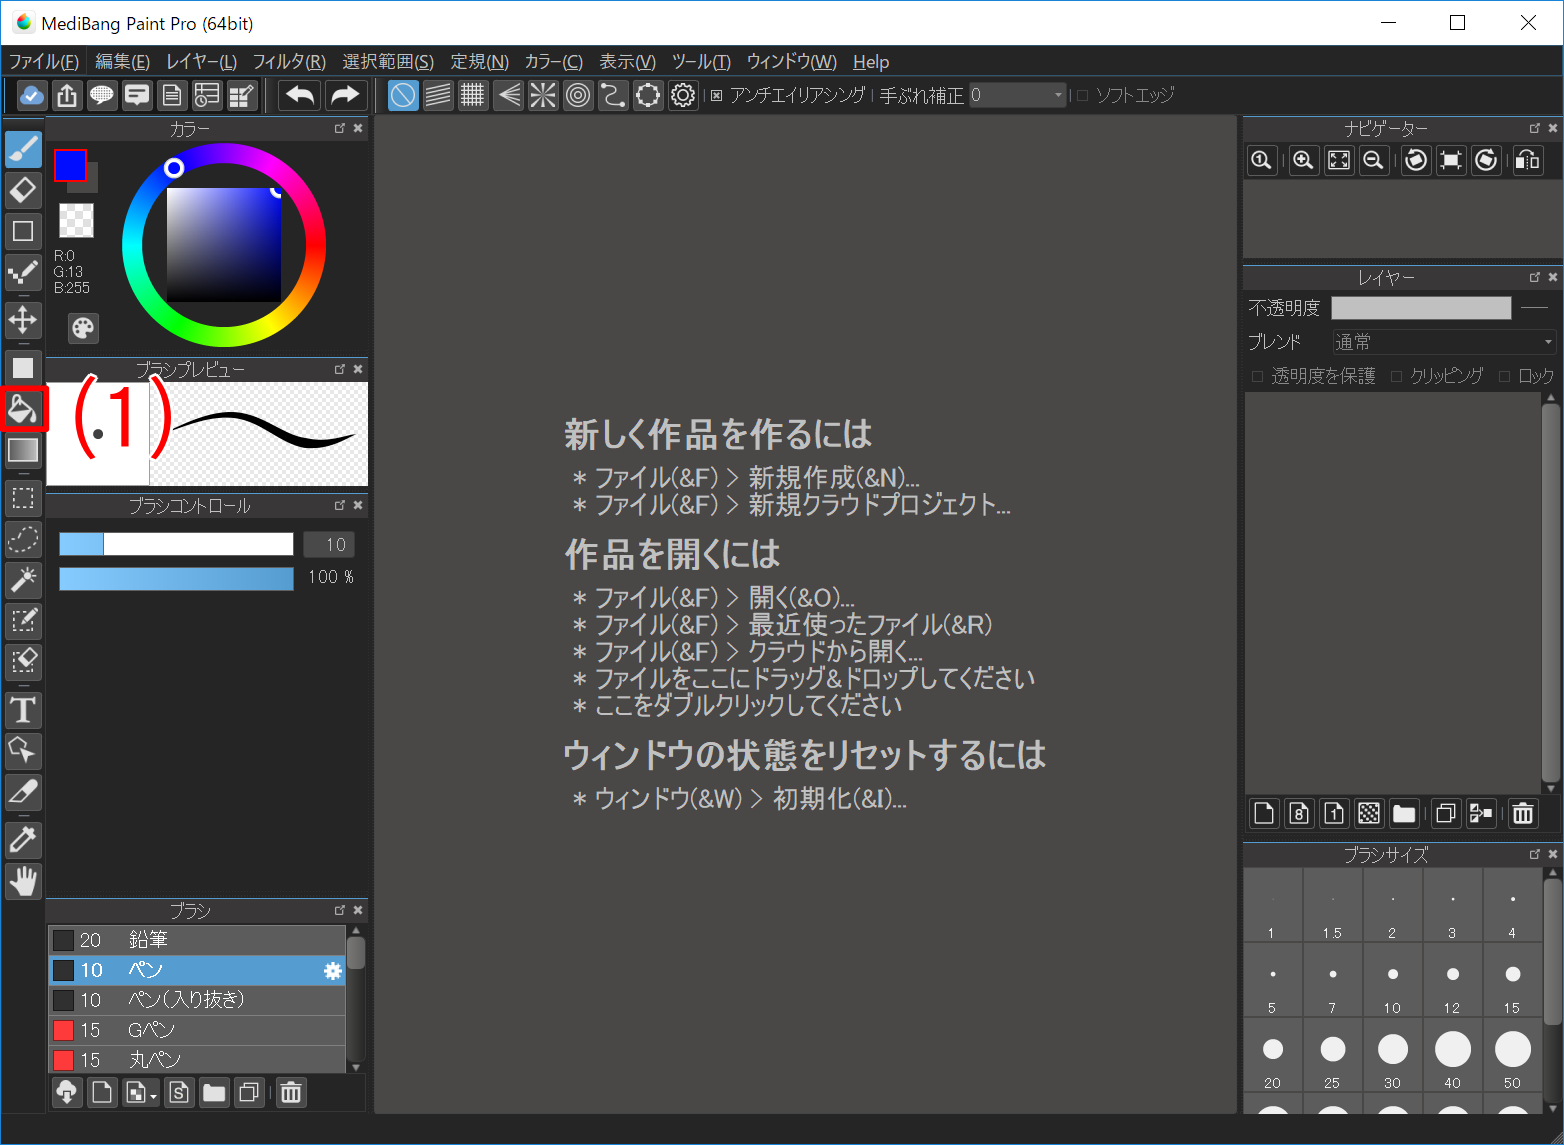
«Bucket Tool» is located in the toolbar on the left side of the main window ((1) tool).
First of all, please download and open the sample for this tutorial.
Next, click «Bucket Tool (1)» button and switch to «Bucket Tool».
«Toolbar» for «bucket tool» is displayed at the top of the main window.

Let’s explain each function of the toolbar.
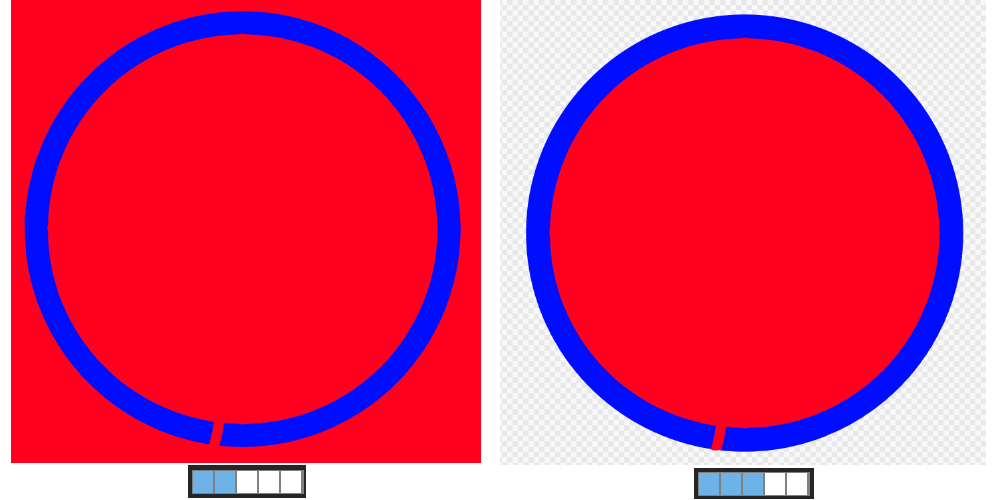
It is the object to reference when deciding the area to be painted with a bucket. You can select either «Layer» or «Canvas».
If you set the reference to «Layer», fill the area surrounded by lines against the active layer. If you set the reference to «Canvas», fill the part surrounded by the line against the canvas.
Please select the «not drawn» layer of the sample, set the reference to «Canvas» and click inside the red circle. The inside of the red circle is painted with the foreground color of the brush.
Next, please undo once and cancel the fill.
Next time, select the «not drawn» layer, set the reference to «Layer» and click in the red circle. The entire canvas is painted.
In this way, you can adjust the area to be filled with a bucket by switching the «Reference».
If you set the «Tolerance» value, you can apply color in a bucket at a time even in slightly different colors.
Let’s paint the inside of the yellow-green circle by selecting the «not drawn» layer of the sample, making the reference «Canvas» and changing the tolerance.
(Every time you fill, please undo, erase the yellow green circle with a layer clear or eraser and fill it in new.)
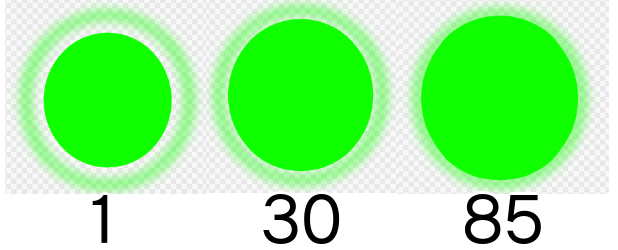
When the allowable value is 1, the filling of the bucket stops when the color changes even a little, so if you paint a line with blur like an airbrush, a large white area will remain around the line However, if you set the allowable value appropriately, you can paint cleanly with lines like airbrush.
When checked, anti-aliasing of filled border becomes effective.
Switch anti-aliasing checks and fill in the «inner circle» of the sample «black double circle» to check the difference. Let’s enlarge the canvas display when it is difficult to understand the difference as it is.

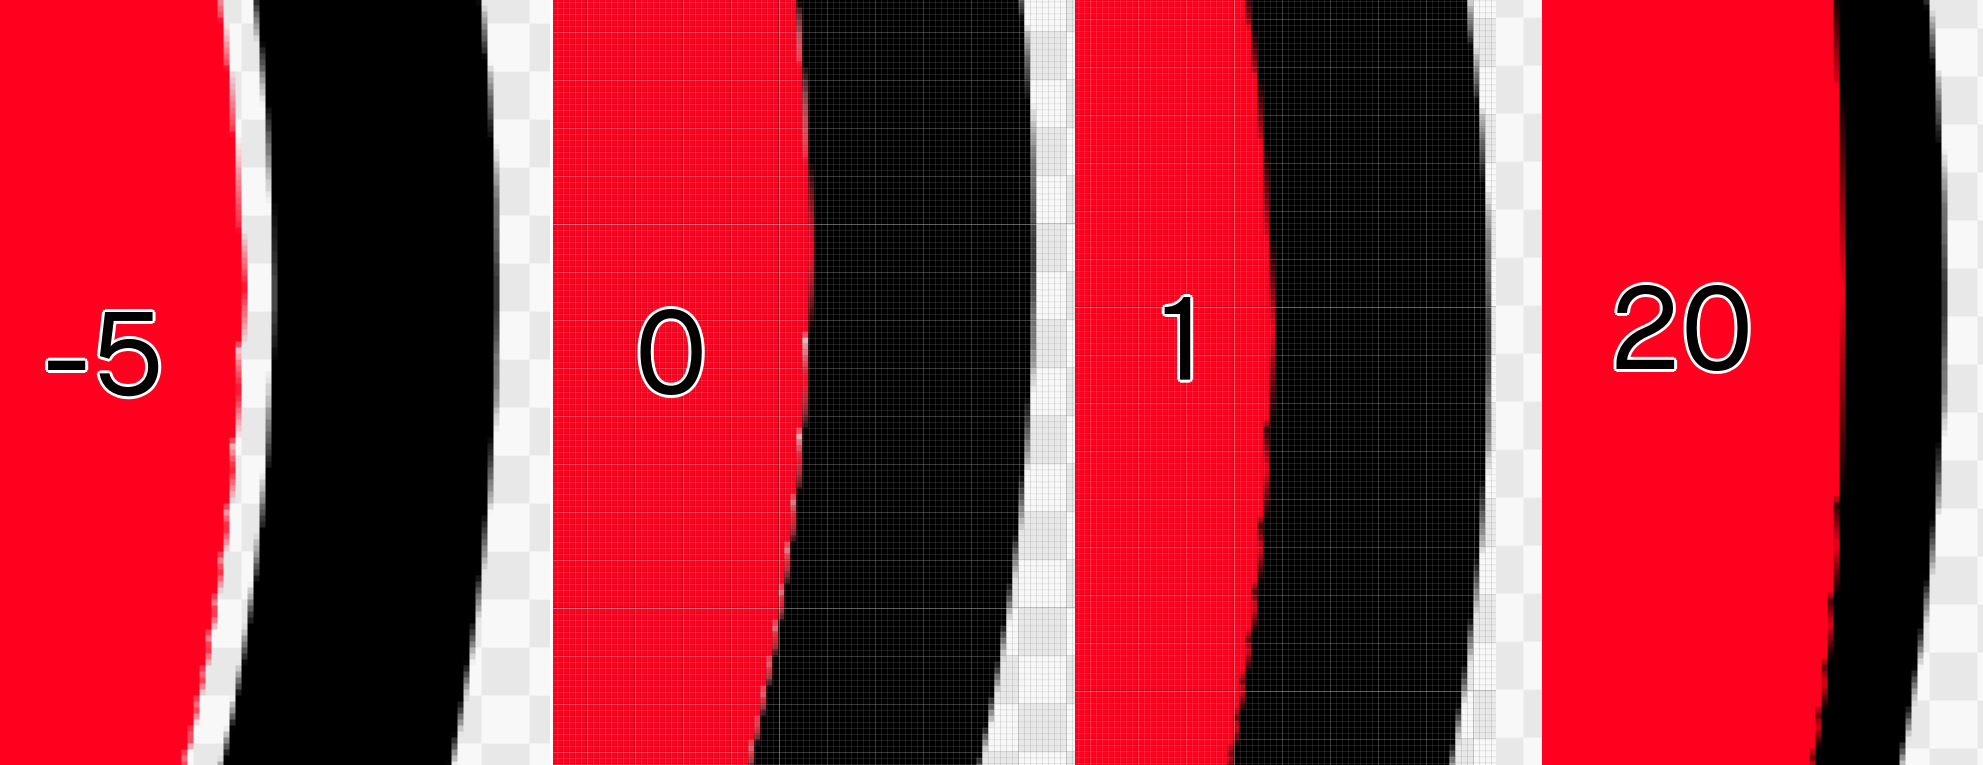
If line drawing is anti-aliased, there may be a gap between line drawing and bucket painting. You can use «Expansion» to fill that gap.
Let’s change the value of the extension and fill in the «outer circle» of the sample «black double circle» to see the difference.
If you use the «Close Gap» function, you can paint even a slightly interrupted line drawing without sticking out. If you check «Close Gap» you will be able to choose level in 5 steps. «Close Gap» will be invalid if unchecked.
Let’s paint in the blue circle of the sample with a bucket while changing the level of the gap closure.
When the level is 1 or 2, it will protrude out of the circle, but if you increase the level above 3, you will be able to fill in only the circle.
MediBang Premium, новая услуга MediBang Paint, теперь доступна!
Вы получите неограниченное количество кистей и материалов,
полный доступ ко
всем функциям MediBang Paint,
а также множество других преимуществ,
которые
помогут вам в ваших творческих начинаниях.
Введем облачные функции, доступные в краской Medibang.

Введем конкретные примеры командной продукции, используя Medibang Paint и Mangainem.

Введен официальное программное обеспечение Manga Production Software «Right Paint».