Here, we will explain how to use layers, a feature unique to digital drawing.
By using layers, you can change the color of a line drawing or facial expressions at a later time.
Layers are a feature which allows you to draw a picture in parts or stages, as if you were to layer transparent films on top of one another.
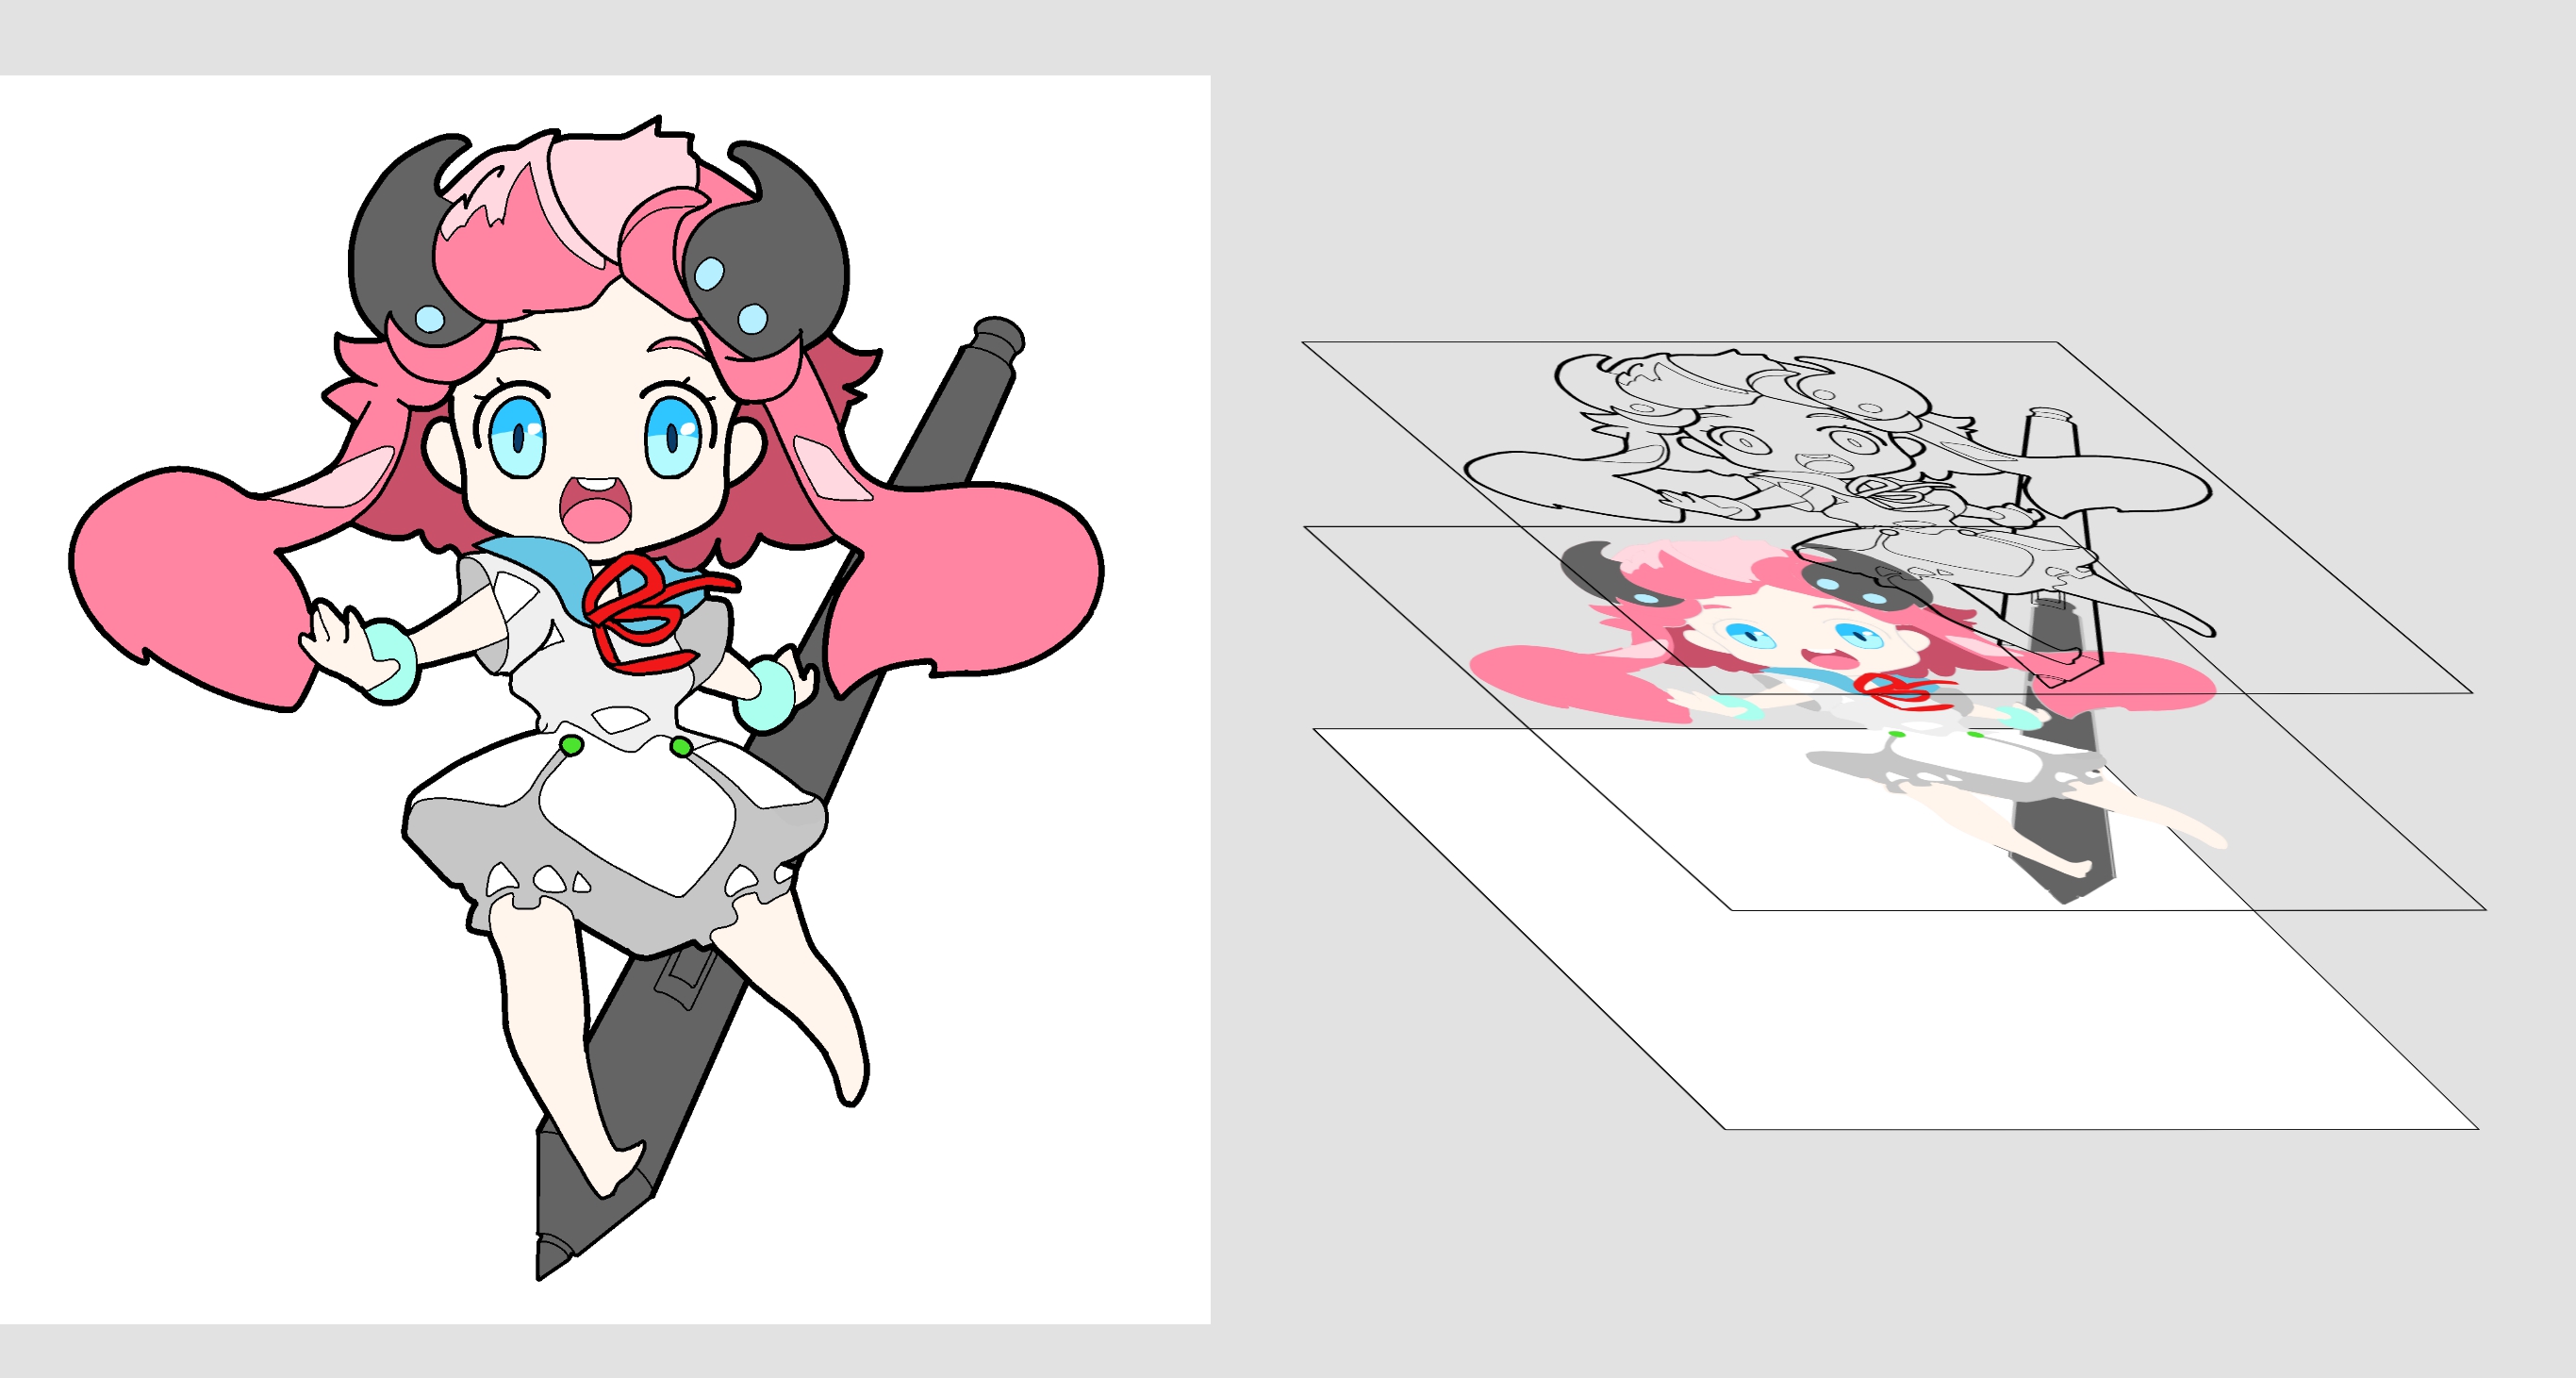
For example, by separating the line drawing layer and the color painting layer …
Even if you make a mistake in coloring, you can erase only the area you colored without erasing the line drawing in this way.
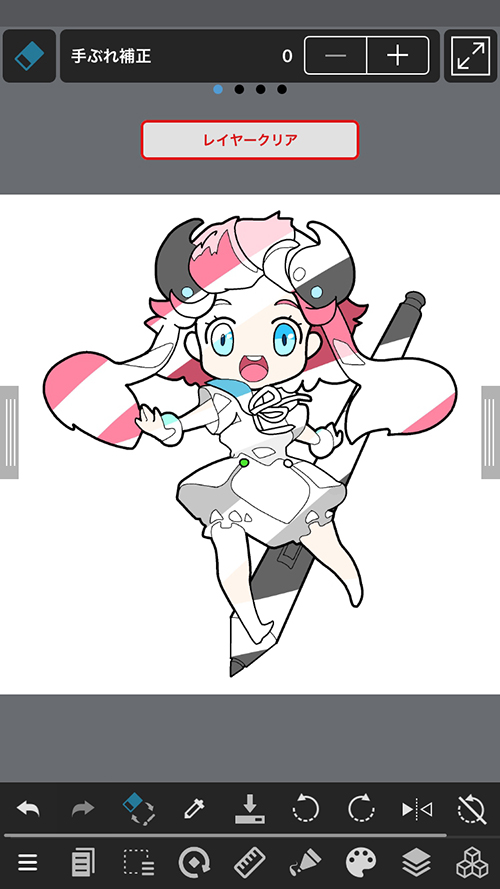
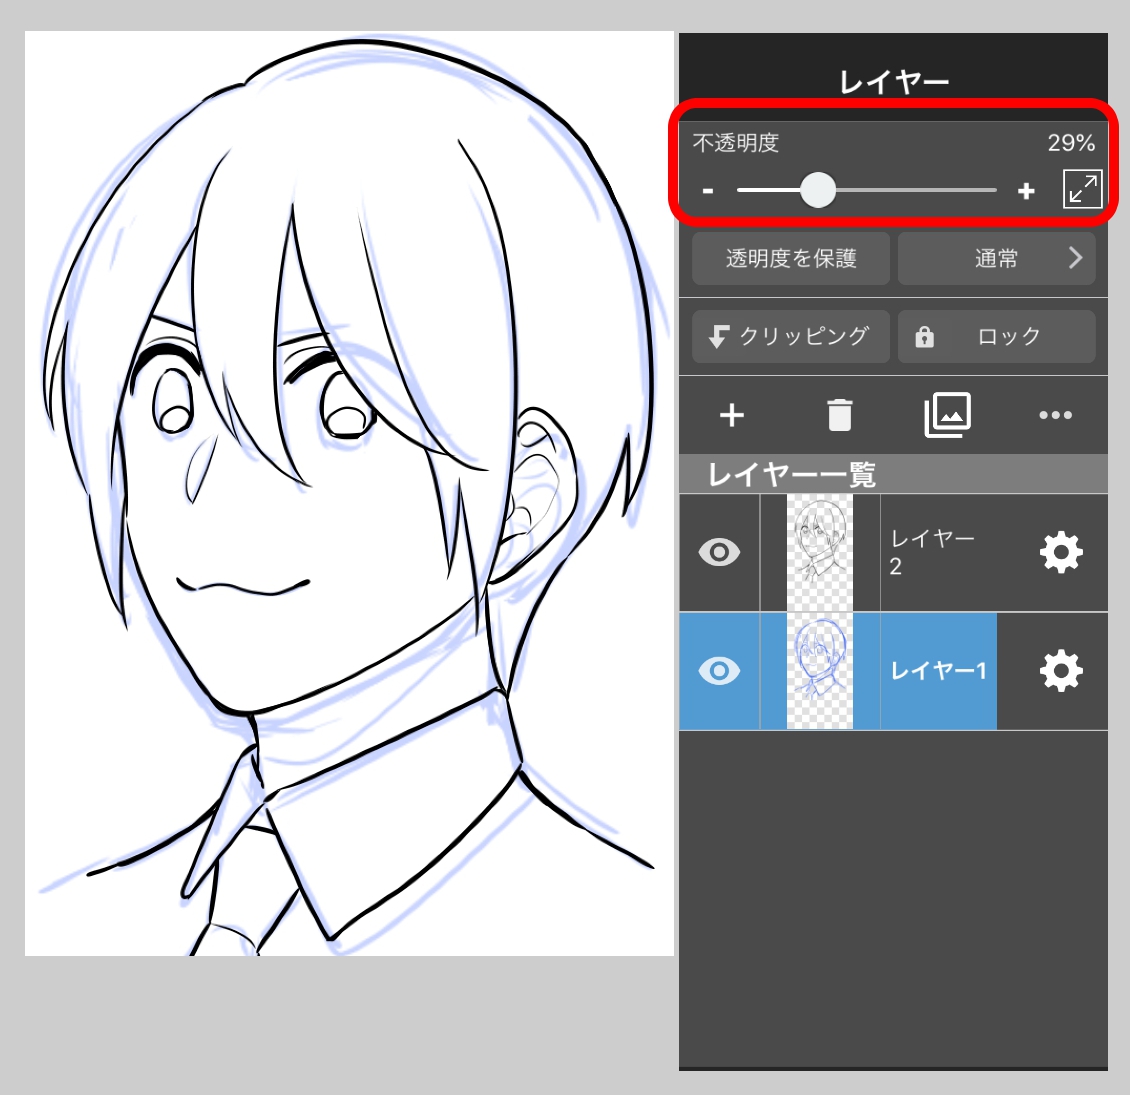
Layers are operated in the “Layer window” (1). Tap (2) to display the window or slide (3) to the left.
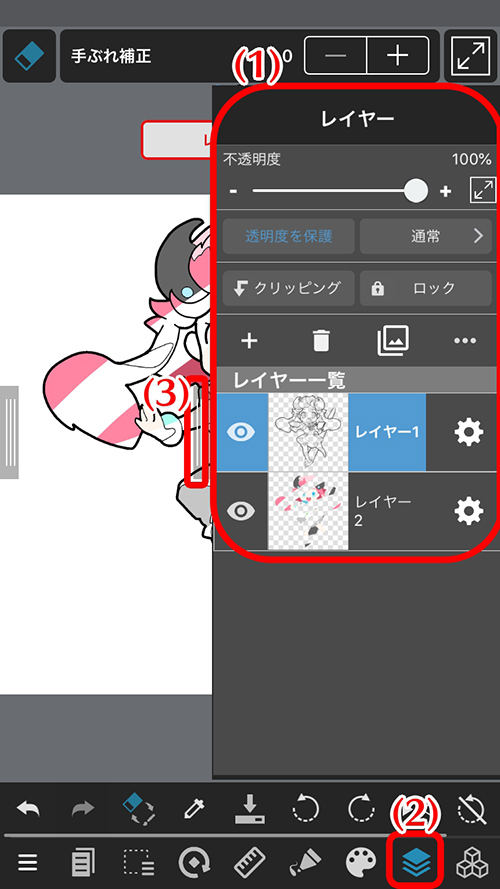
The selected layer will be displayed in blue. Make sure to draw while checking which layer you are working on.
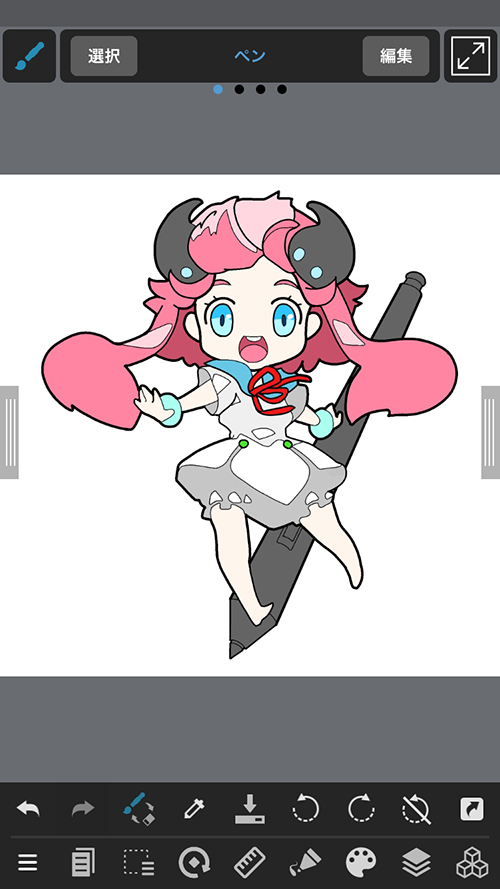
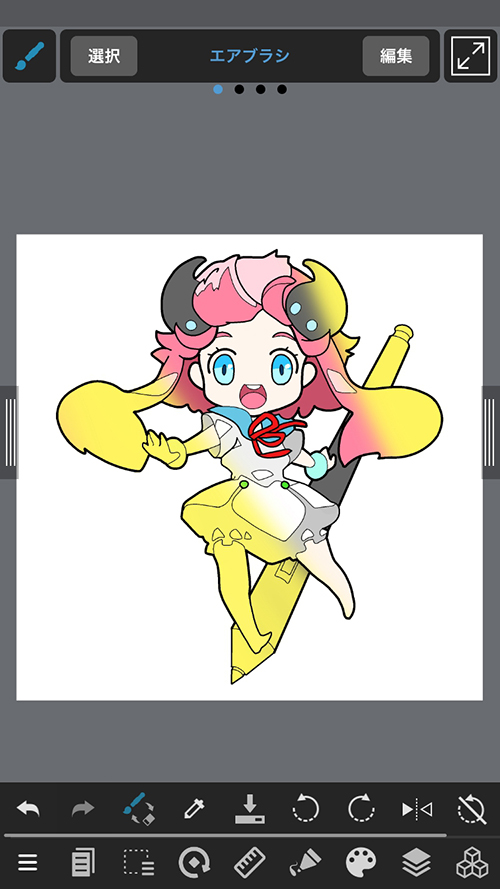
Try drawing a picture using layers.
After making a line drawing on one layer, try adding a new one and coloring it!
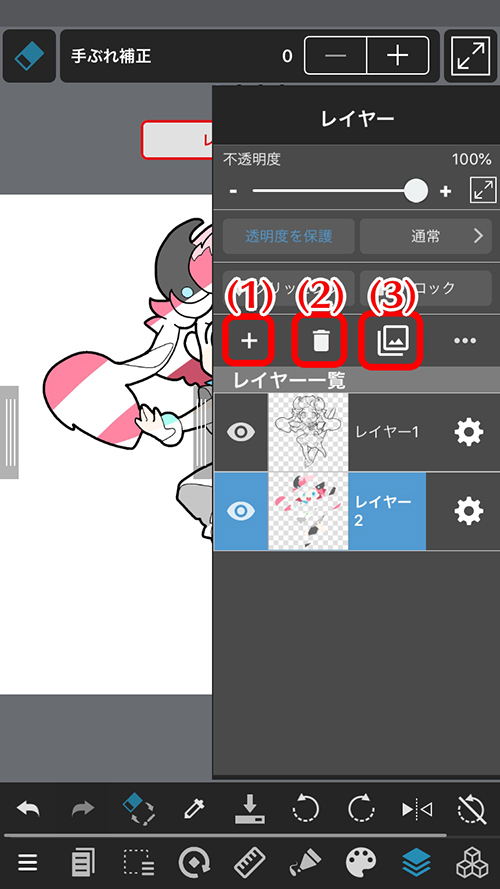
Let’s add a layer for coloring. Layers can be added or deleted freely.
Press (1) in the picture below to add a layer, (2) to delete it, or (3) to duplicate it.
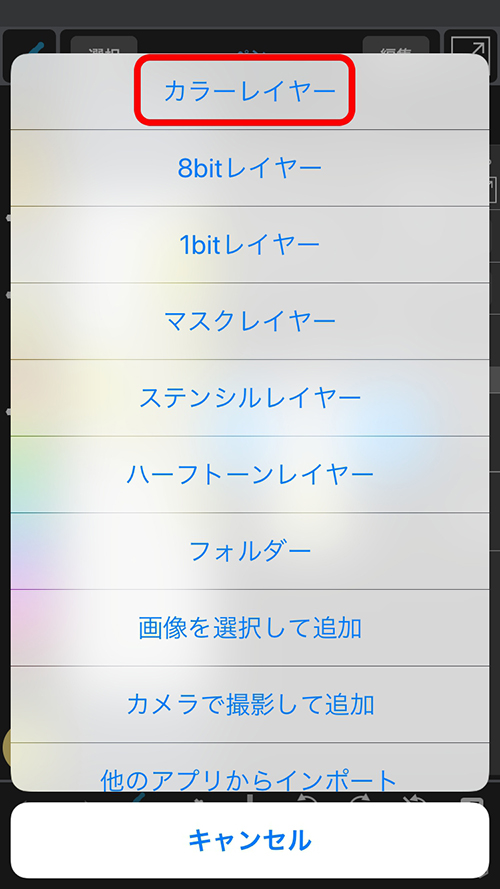
We will now pick a “Color Layer” for coloring the picture.
Layer deletion or duplication applies to the currently selected layer. Execute options after having checked which layer is selected.
There are other special layers, but you will essentially be able to draw pictures if you learn these layers.
A new layer is added above the currently selected layer.
This time, we want to color under the line drawing, so we rearrange the layers.
The layer you want to move will float if you press and hold it, so let’s try moving it.
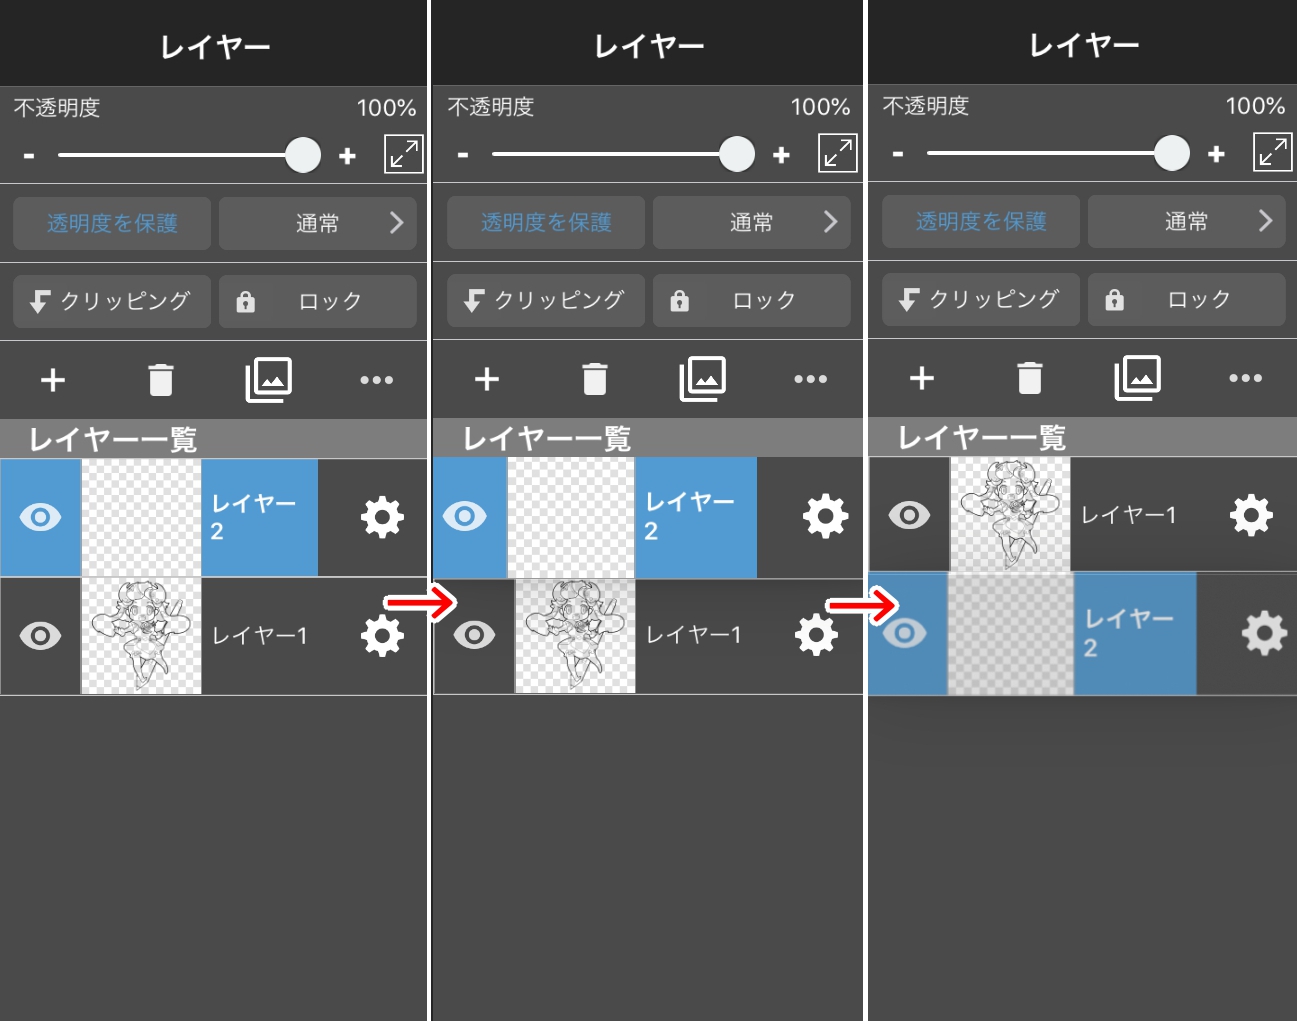
If you hold and move it, other layers will move, so it’s easy to know where it will go.
We successfully moved a layer!
Select the added layer, color it, and you’re done!
Here are some more useful features for working with layers.
Layers can be temporarily hidden.
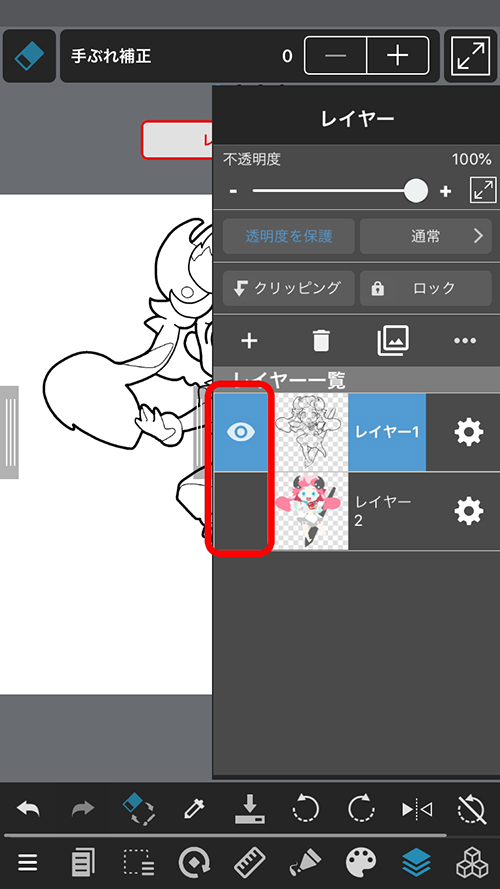
Press the eye icon on the left of the layer thumbnail to toggle its visibility.
The eye icon means that the layer is currently being displayed.
We first explained that a layer is like a transparent film. You can change the opacity of each layer individually.
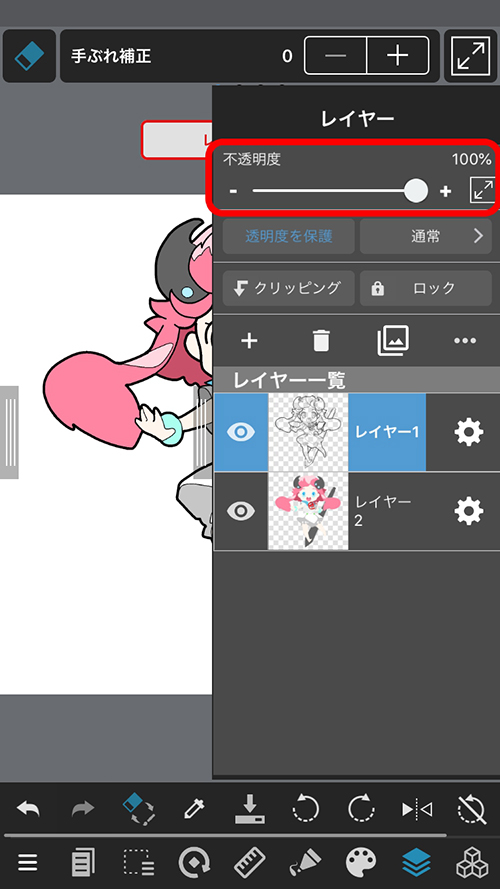
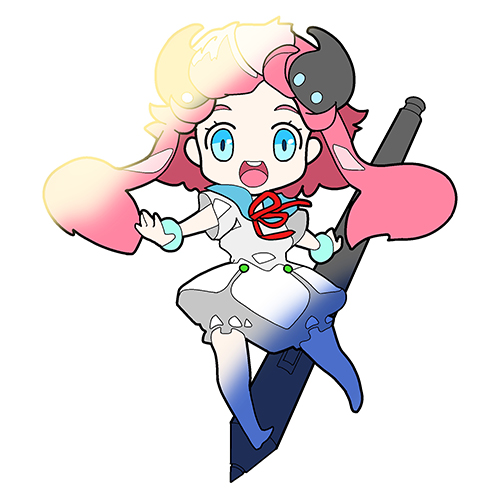
Change the opacity from the “Opacity” slide in the “Layer Window”. An opacity of 100% makes it completely opaque, while an opacity of 1% makes it almost transparent. Let’s now try and change the opacity of the color layer and see how it changes.
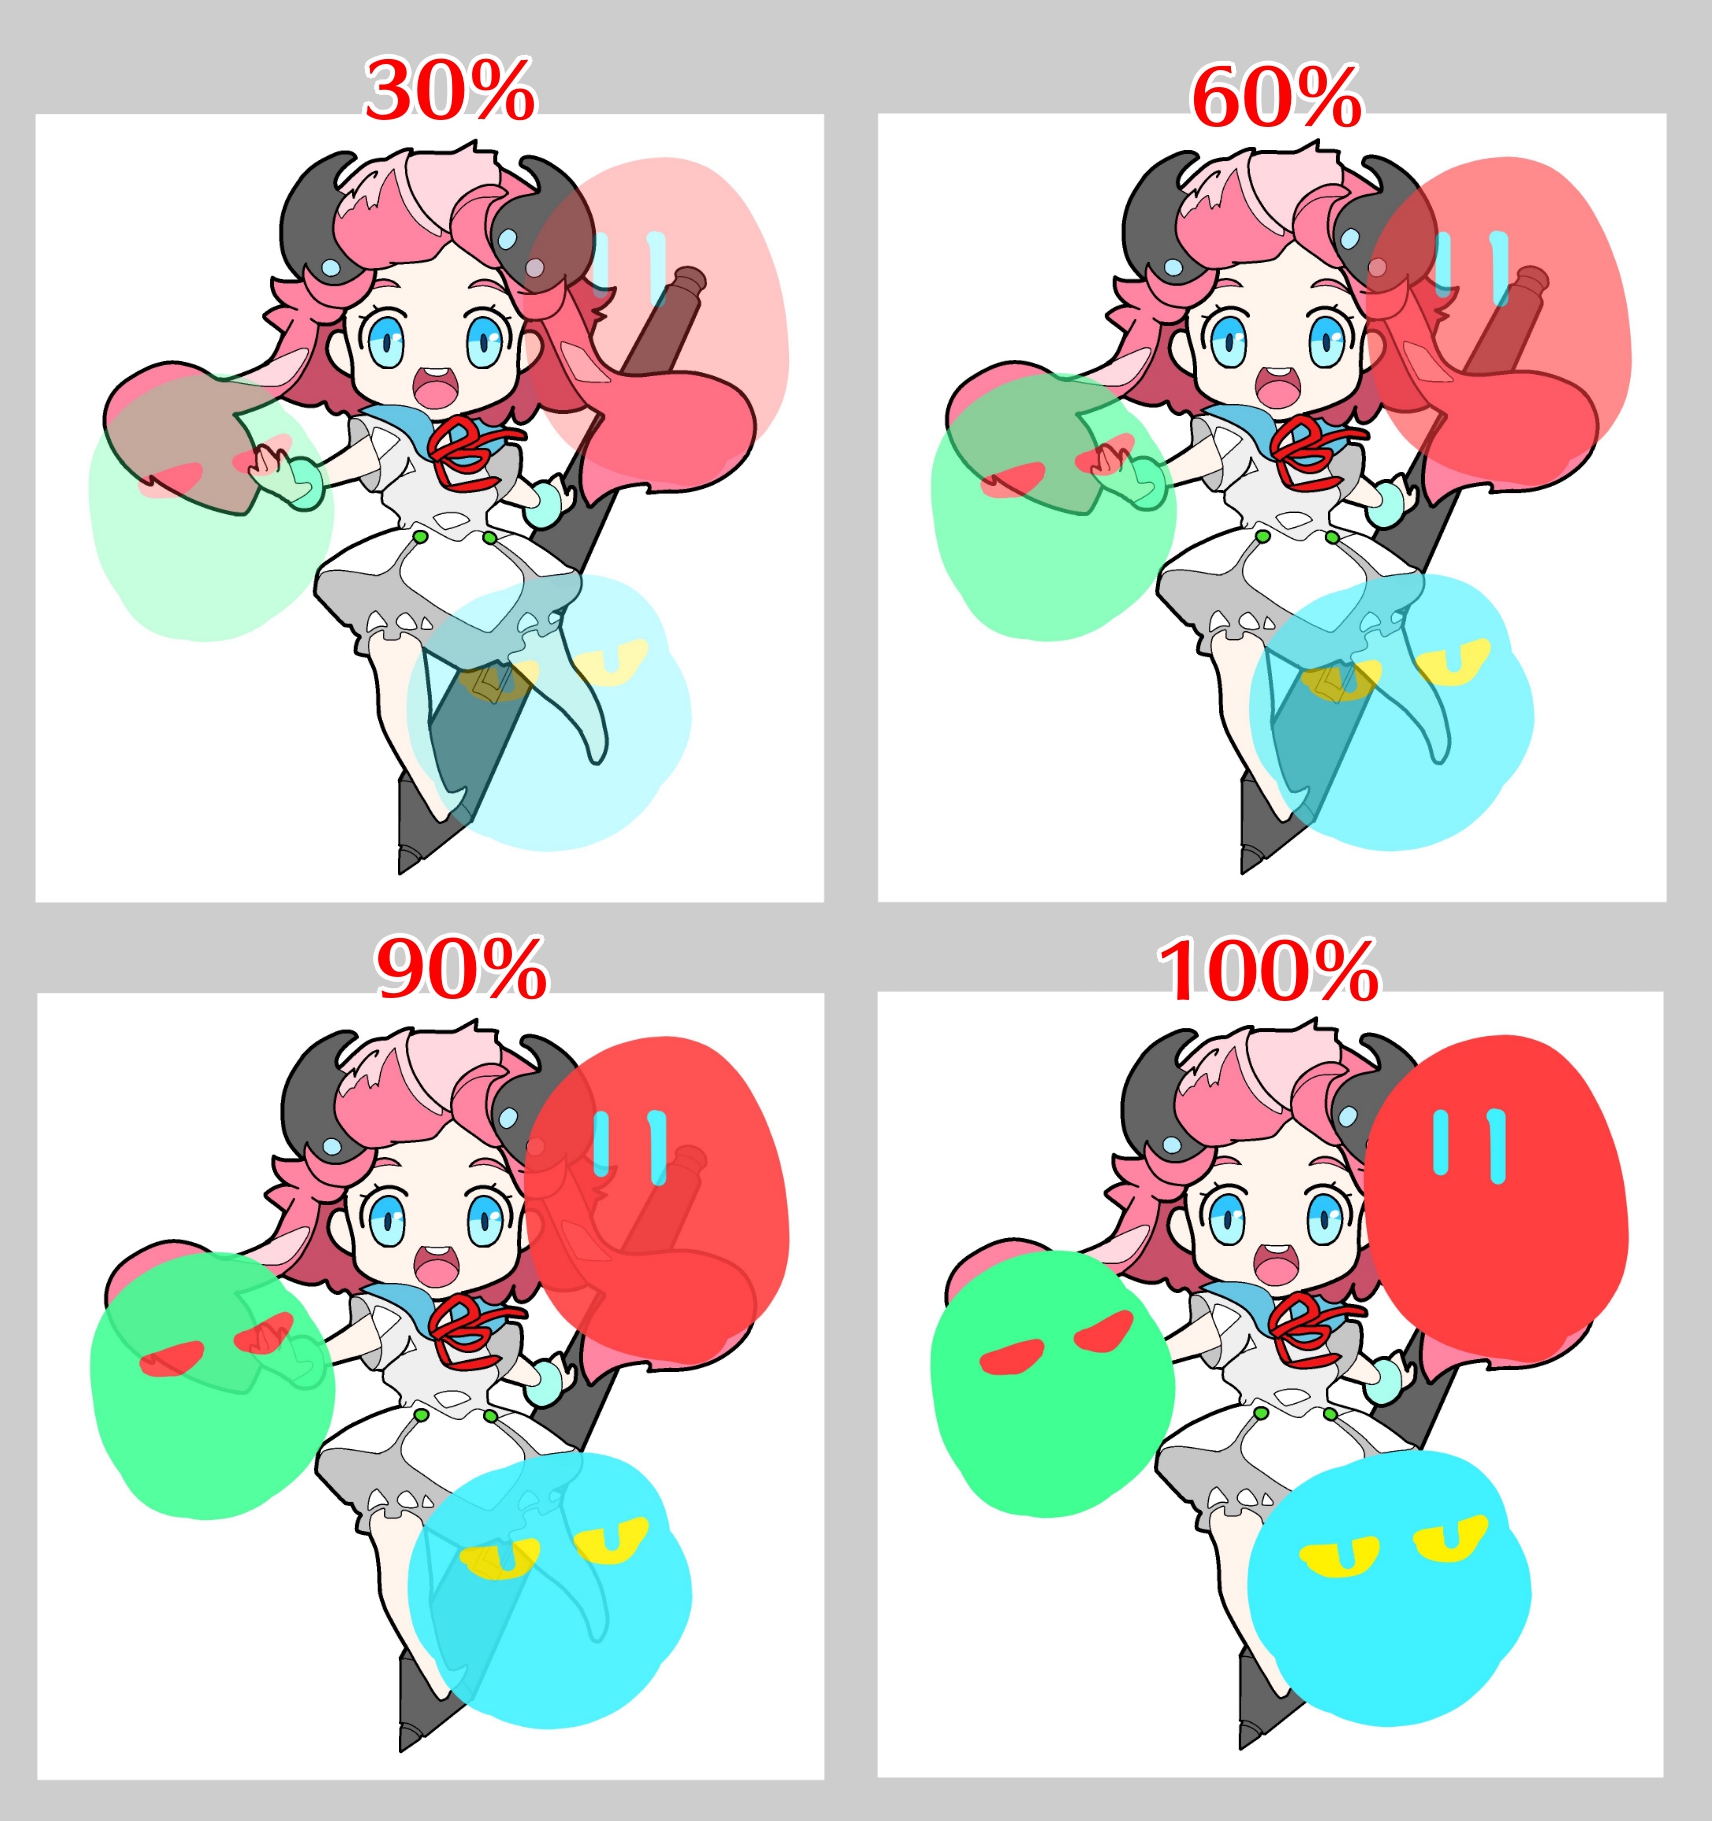
As you can see, the higher the opacity of the layer, the harder it is to see the picture below.
For example, you can reduce the opacity of the sketch layer to make it easier to draw a line drawing (in a different layer).
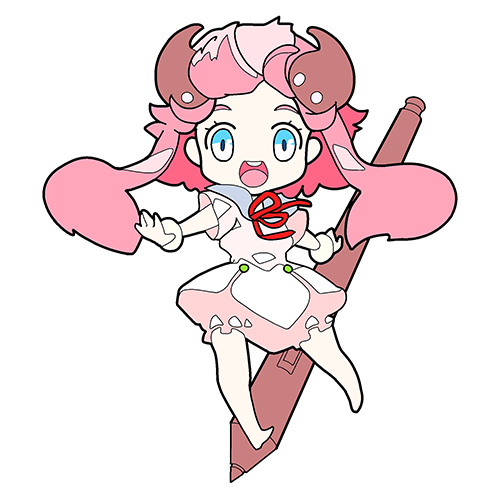
Layers with preserved opacity will become uneditable except in areas with color.
You can use this to change the color of a line drawing.
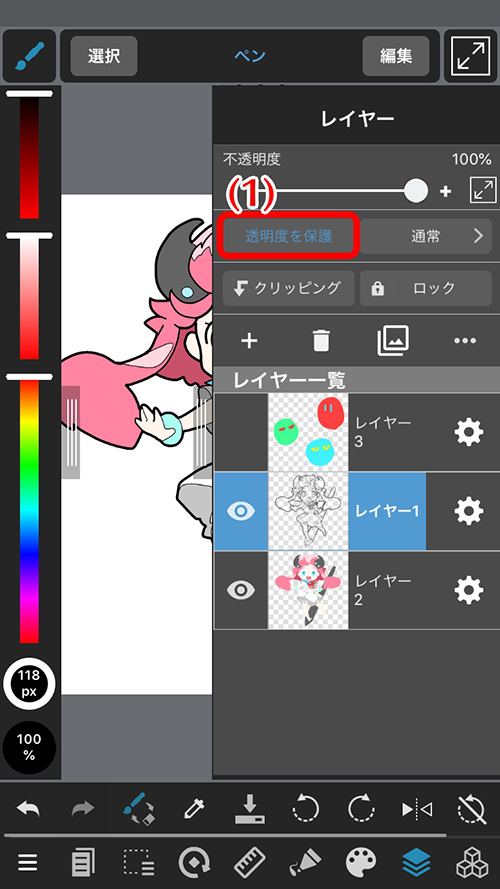
In order to preserve the opacity, check the “Protect Alpha” (1) with the layer selected.
If you change the color of a line drawing, it will look like this.
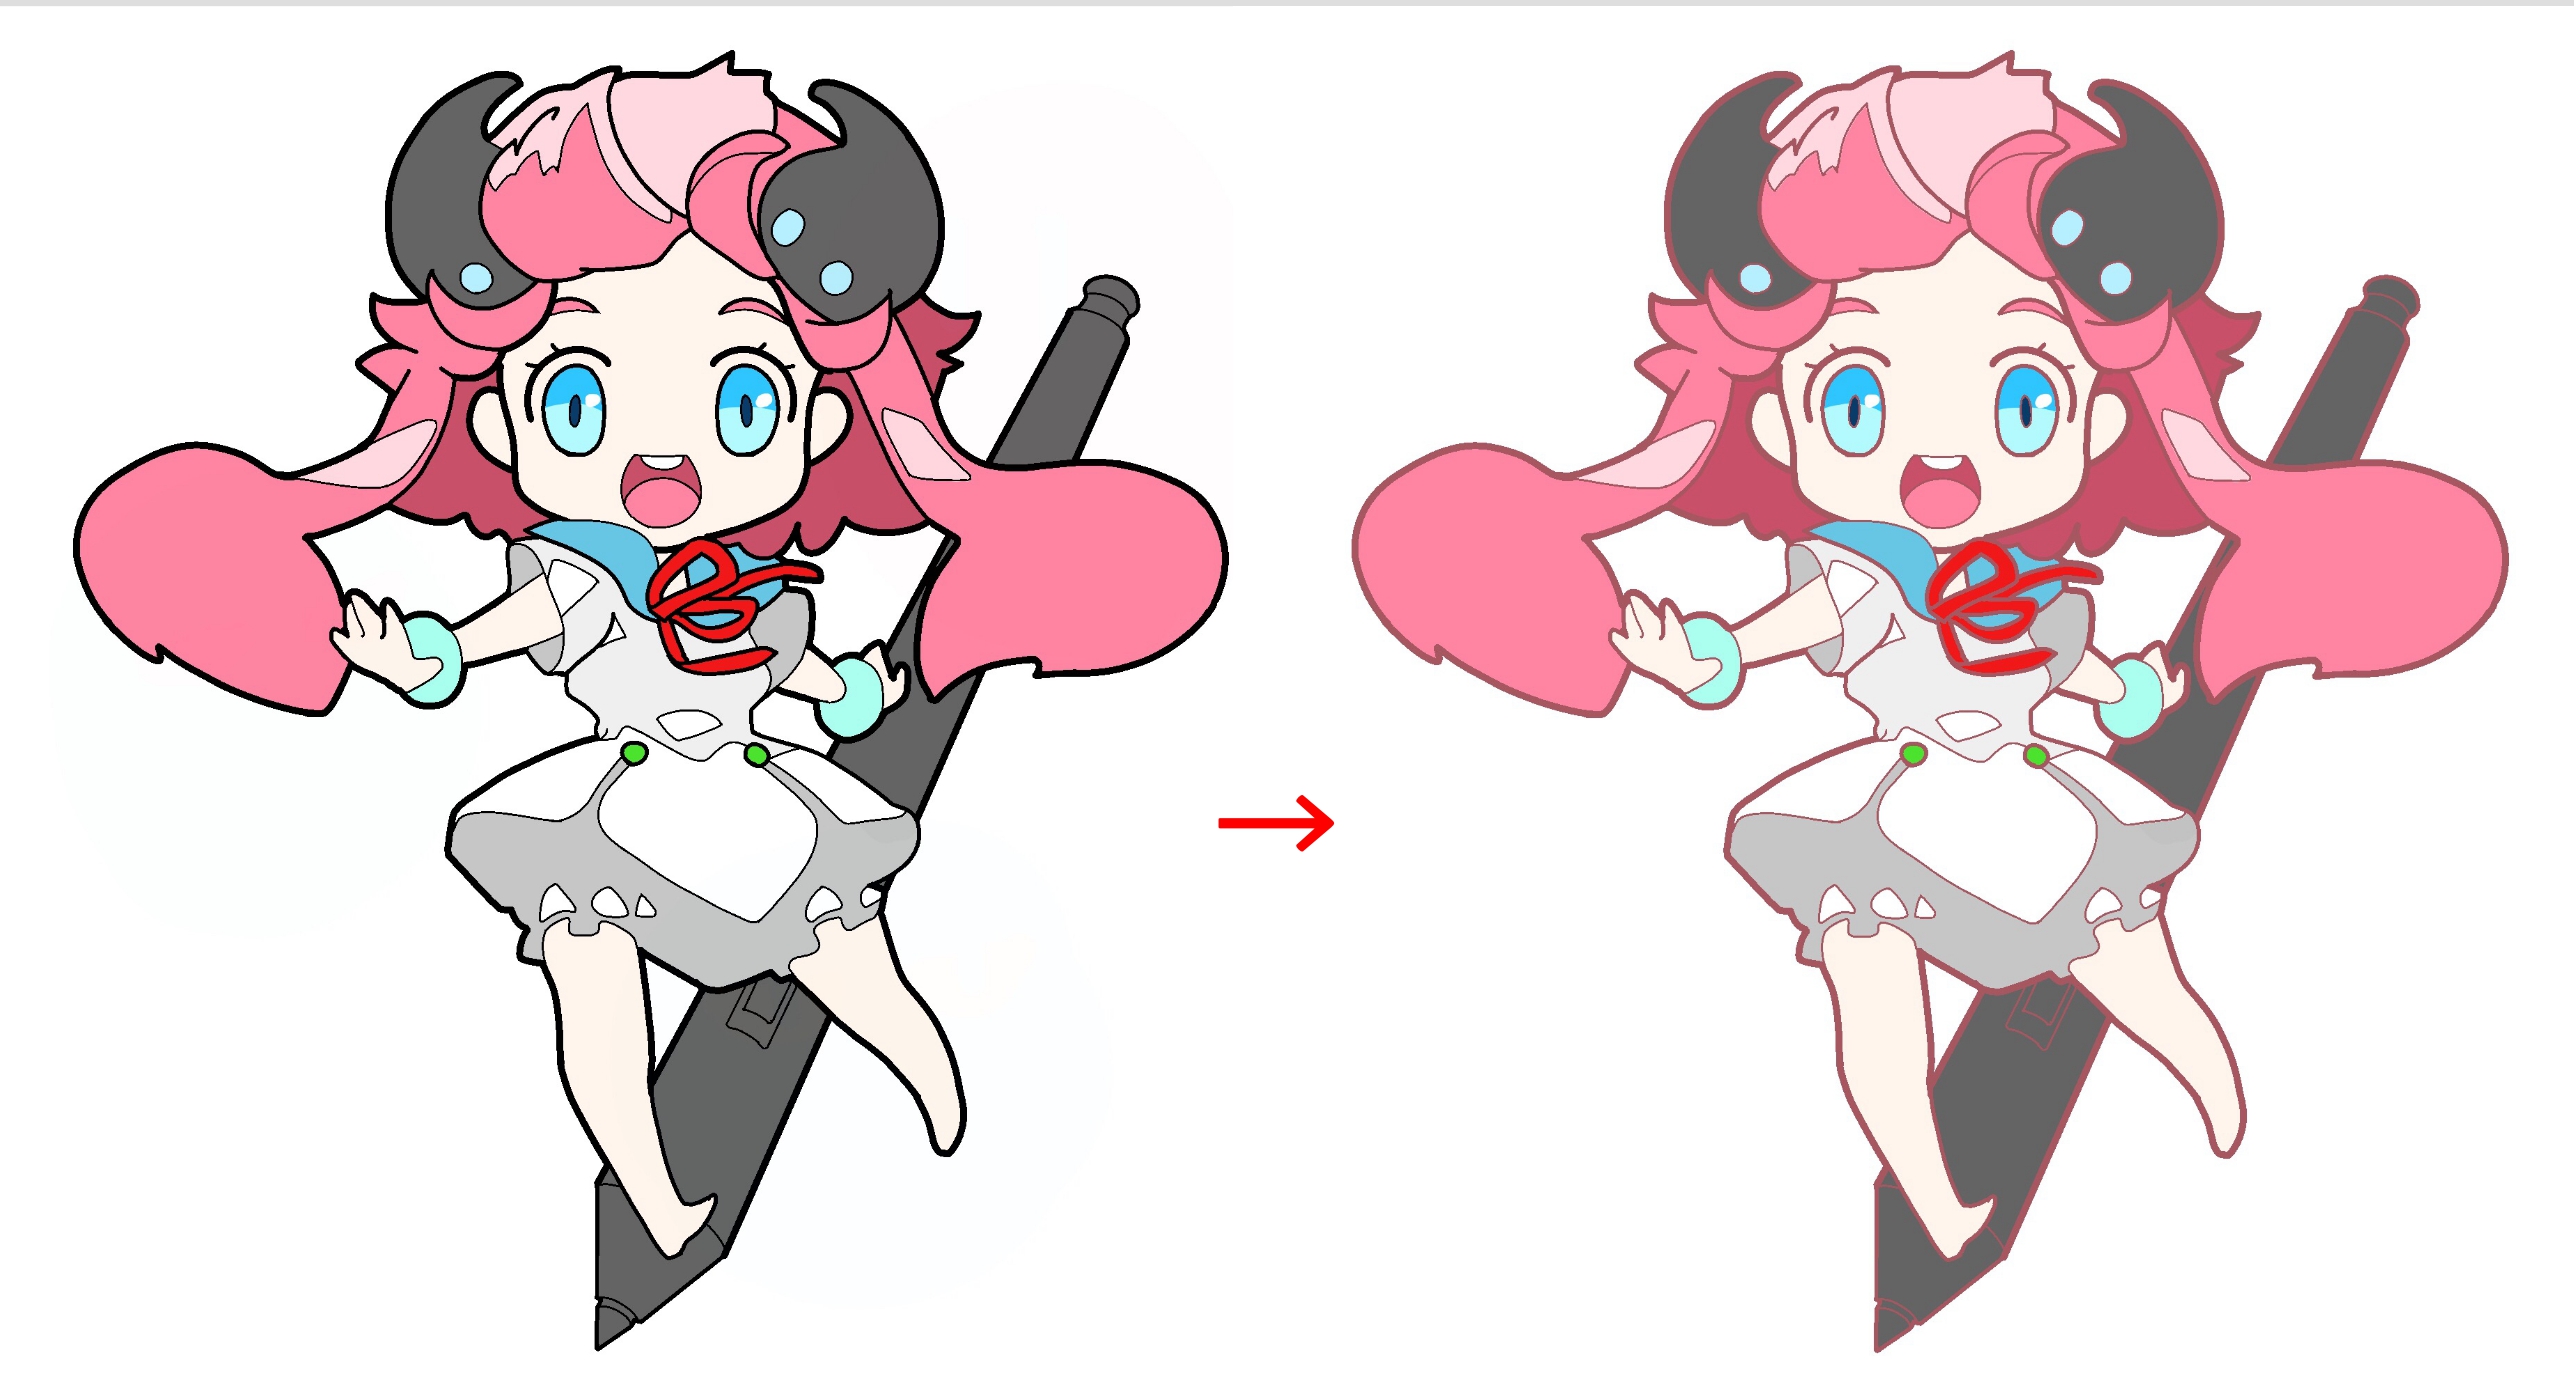
By preserving the opacity of both the line drawing and the color layer, you can re-color it to a different color later.
This is a feature which gives various effects to the layer below the layer with blending set. You can produce shades difficult to make by yourself or change the appearance of the drawing in an instant.
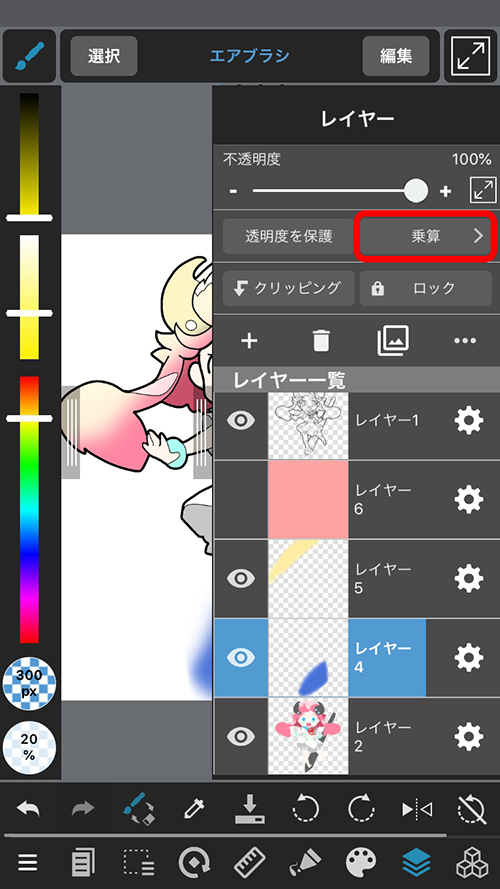
Some useful blend modes are “Multiply”, “Screen”, and “Overlay”, so try using them!
Let’s play with various other effects!
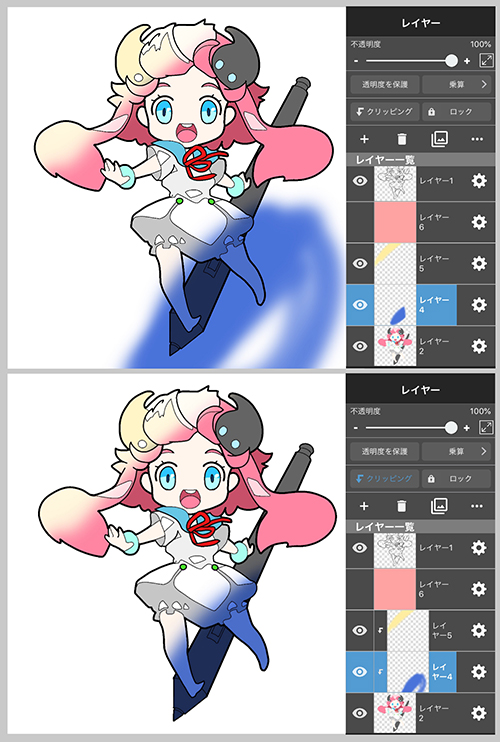
“Clipping” is a function you use when you want to apply effects such as blending only to the lower layer.
After selecting a layer, press “Clipping” (1) to apply the effect only to the colored area of the layer below. When clipping, an arrow appears next to the layer thumbnail.

Using clipping is convenient because you can paint without worrying about the color getting outside the lines!
The contents of a locked layer become uneditable.
By locking a sketch or a line drawing layer, you can prevent mistakes such as drawing by pen on the sketch layer or coloring on the line drawing layer.
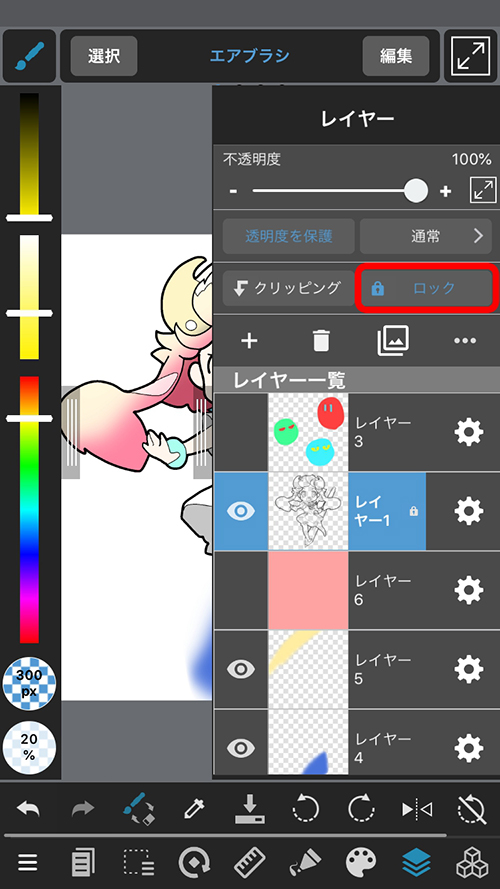
In order to lock, select a layer and tap “Lock” in the layer window.
Locked layers have a lock icon.
If you try to draw on a locked layer, a message saying “A locked layer is selected.” will appear, so tap the button again if you want to edit the layer.
In the case you’ve suddenly become unable to draw on a layer, check whether it’s locked as well.
讓你的創作更有特色
MediBang Paint全新服務,
MediBang Premium登場!
專用筆刷、素材無限使用、
MediBang
Paint全功能開放等,
我們準備了幫助創作的多樣特典。