2023.12.05
Using Gradient Maps
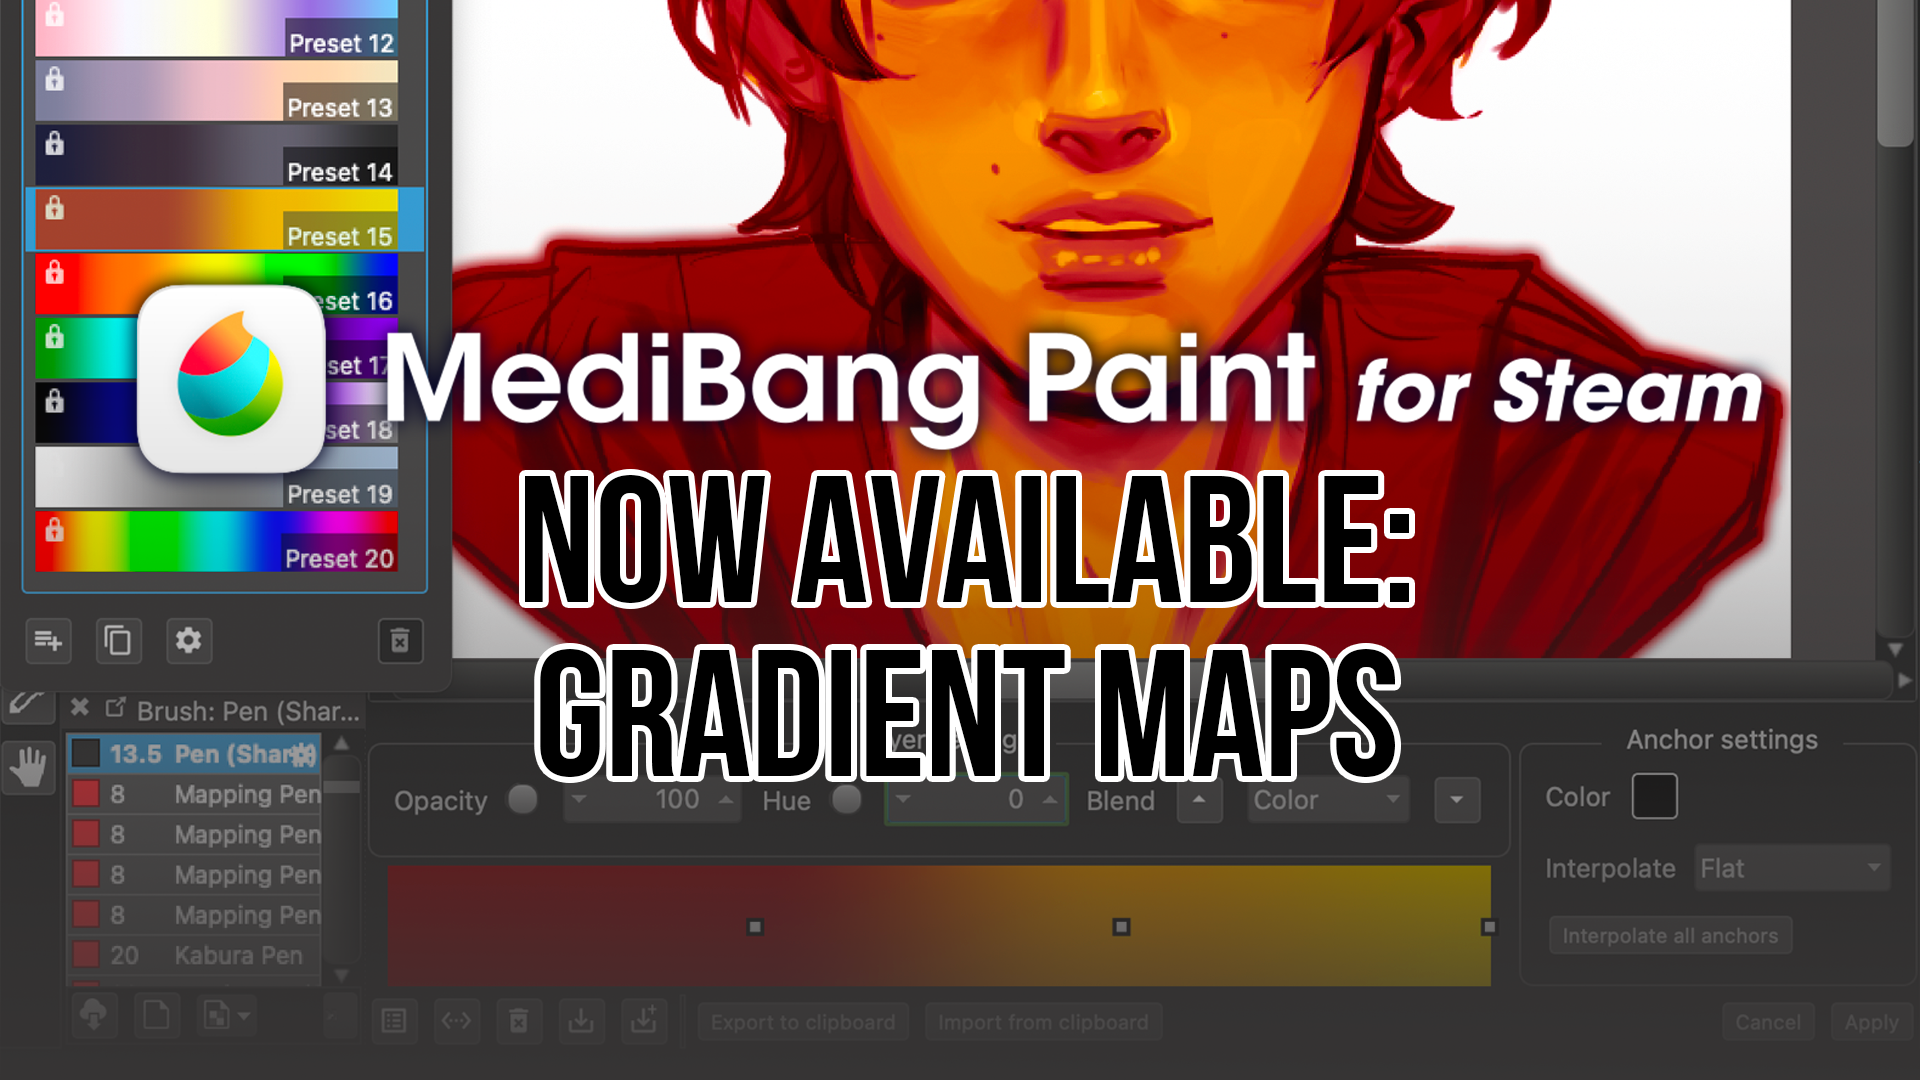
The Gradient Maps function in MediBang Paint for Steam as a helpful tool for editing colors and refining tones.
Gradient maps translate the colors on an image to match a specific gradient. These gradients depict smooth transitions between colors, and you can either use one of MediBang Paint’s preset gradients, or make your own personalized one. When a gradient map is applied to a whole image, it systematically replaces the darkest and lightest hues with corresponding colors at each end of the gradient spectrum.
This process offers artists a rapid and non-destructive way to experiment with trying out diverse color schemes and influencing the overall ambiance and tone of the artwork. Beyond just setting a gradient map on top of an image, you can also edit the gradient maps further, fine-tuning the effect by manipulating the opacity of the adjustment layer, altering blending modes, or directly editing the colors within the gradient.
Ultimately, gradient maps are a versatile tool empowering artists to explore and achieve distinctive visual effects in their digital creations, amplifying the creative potential for color manipulation in the digital realm.
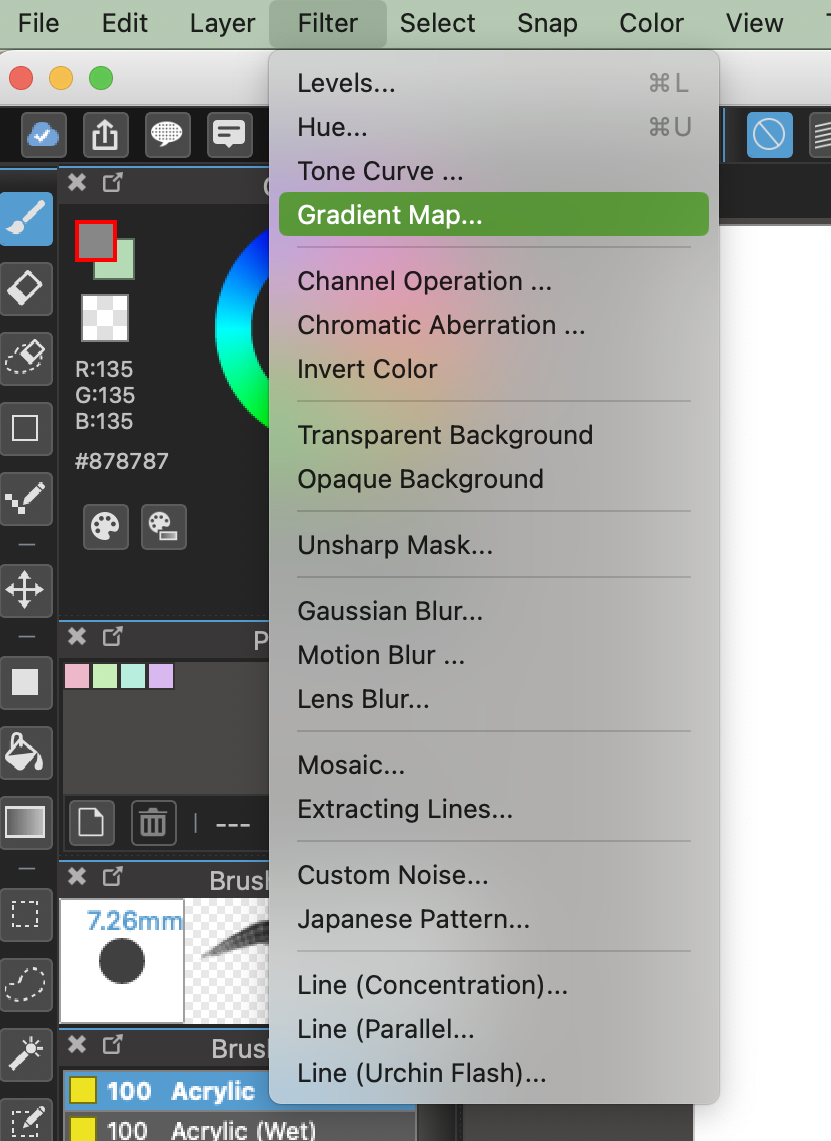
You can access the Gradient Map feature from the Filter drop down menu.
On the left window, you can access 20 different gradient map presets as seen in the image below. Select the lower left button in the Gradient Map window to create your own new one, or feel free to edit the settings of the selected gradient.
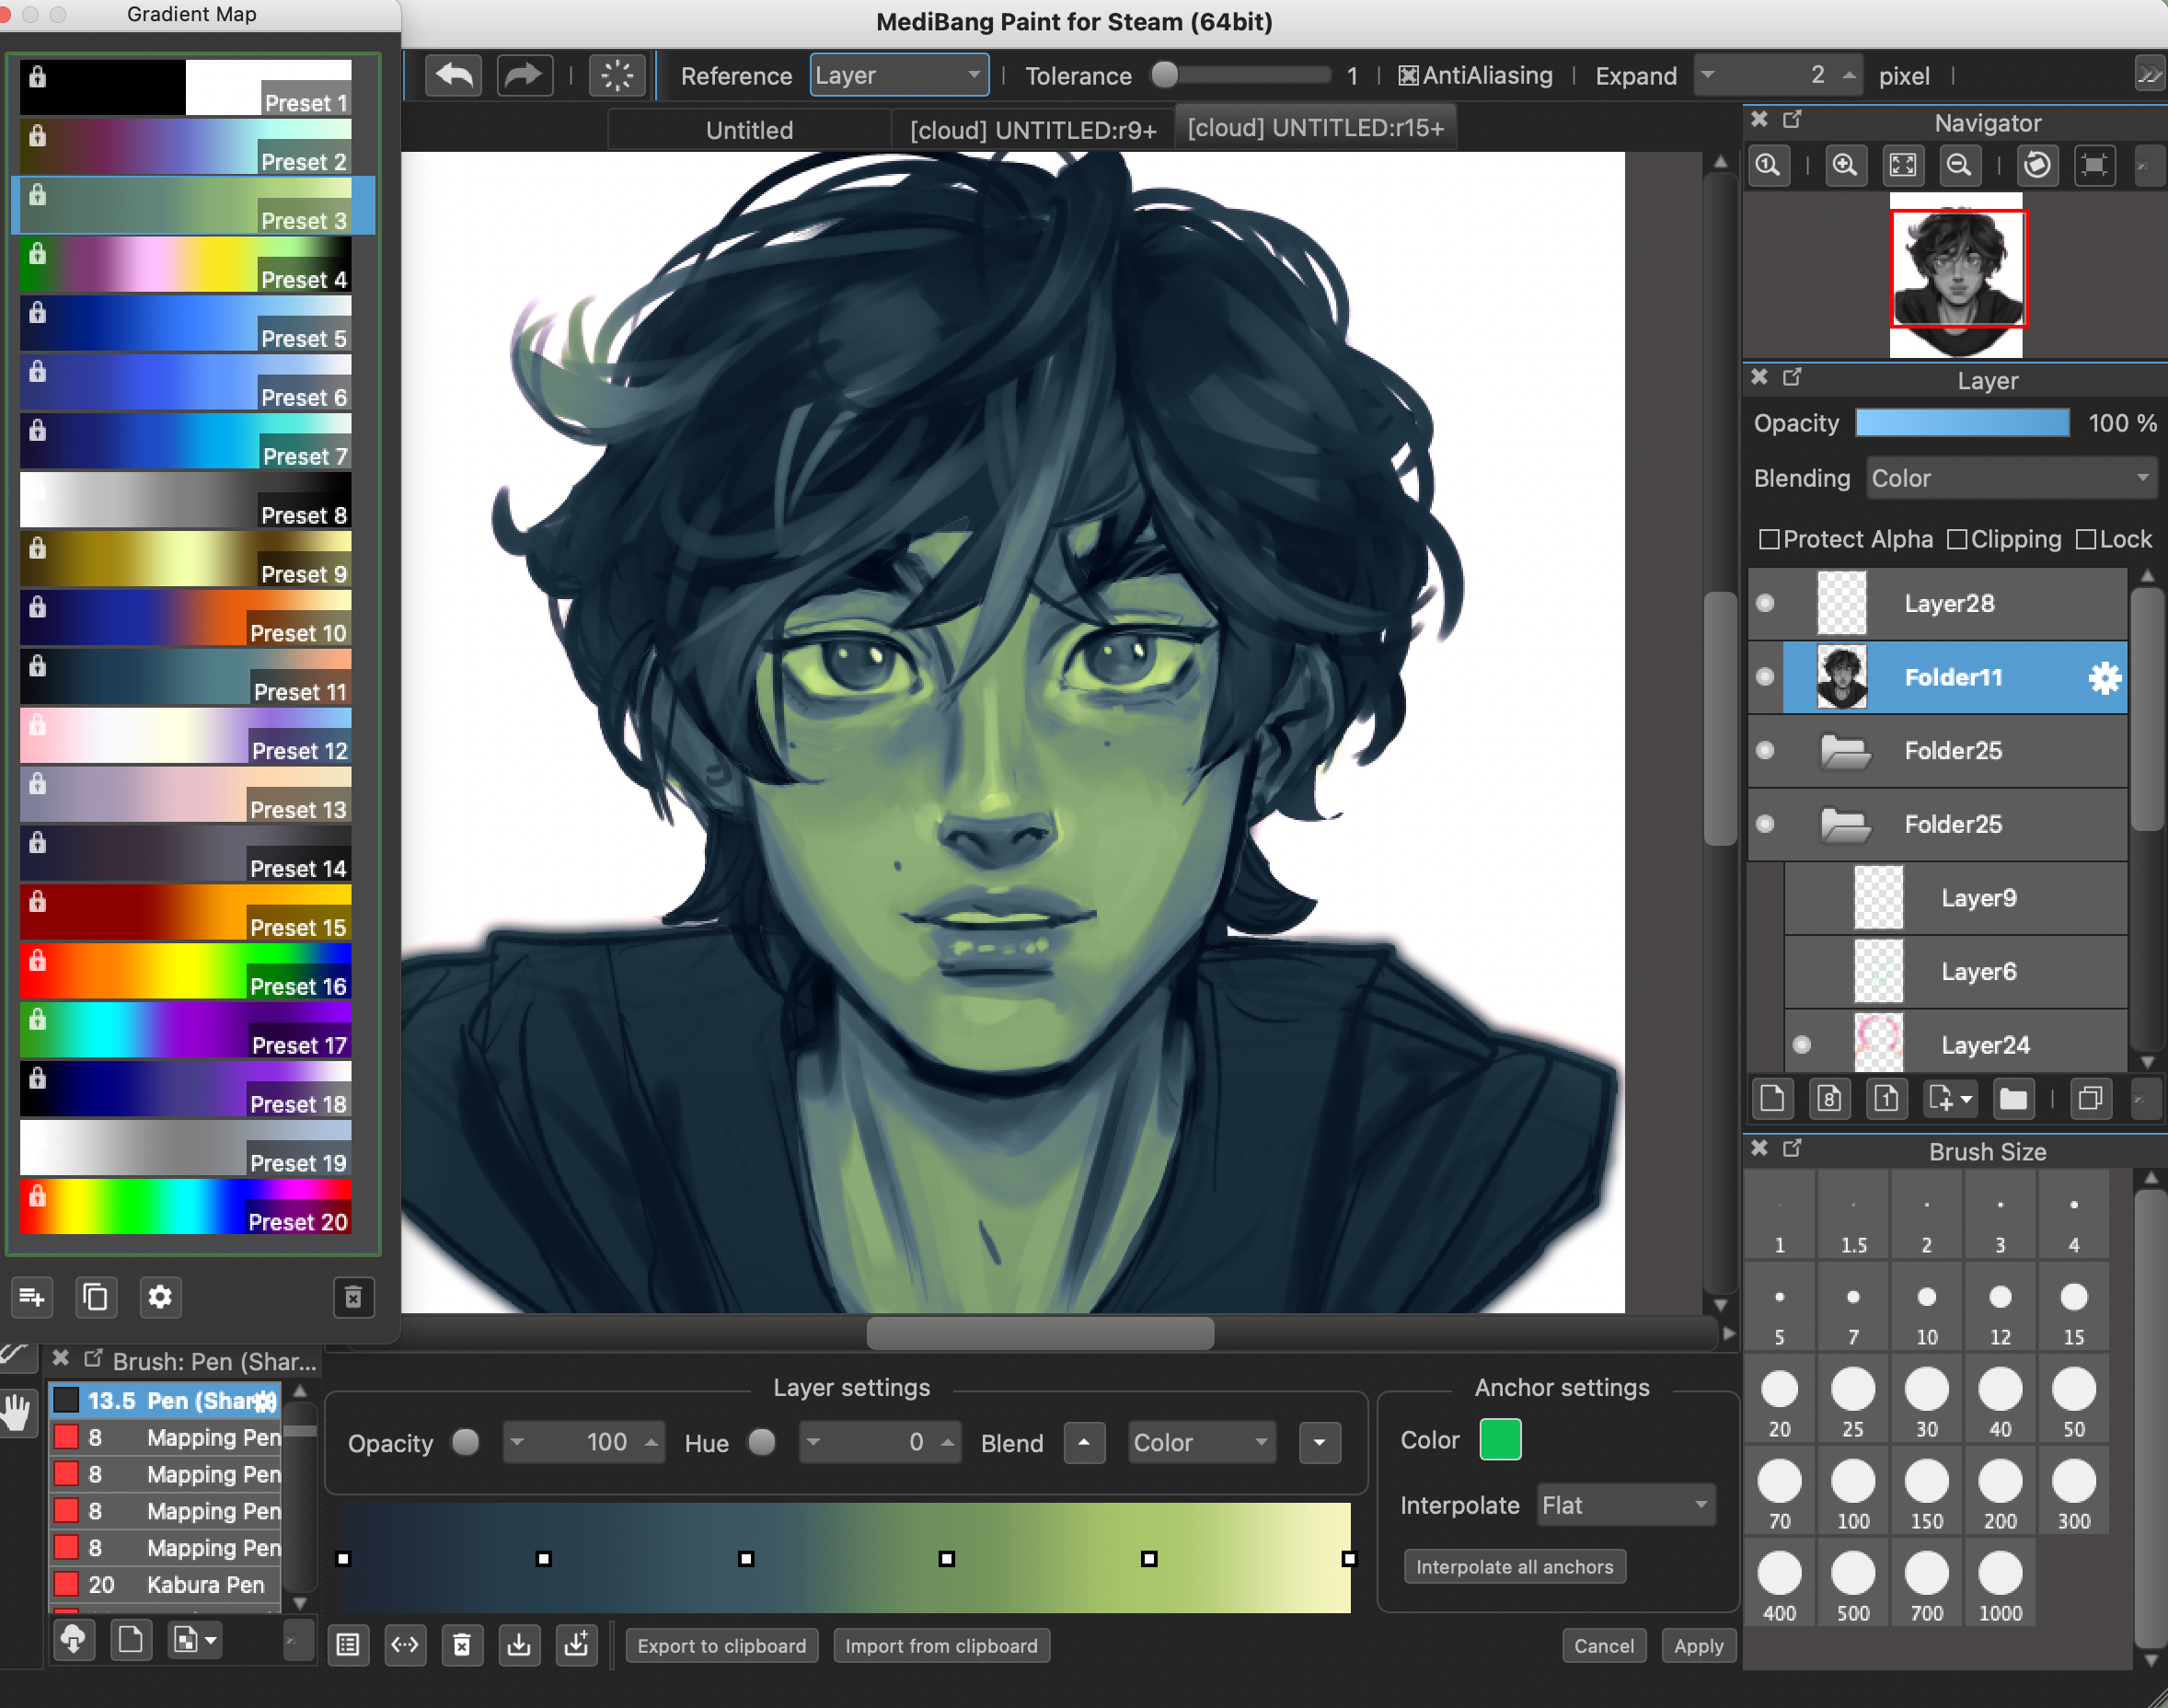
A great and easy way to change the look of your painting is by selecting different layer settings for the Gradient Map. All of MediBang Paint’s layer blending modes are also accessible in the Gradient Map layer settings. You can achieve cool effects easily with modes such as “Color”, “Overlay”, and “Soft Light.” As seen above, Color is the best setting for turning a grayscale painting into a full color one using Gradient Maps.
The little white squares on the gradient are known as Anchors. Anchors refer to the specific gradient values that you choose as the color reference points.
Gradient Map Layer Settings

- Opacity: Adjust the opacity of the Gradient Map layer.
- Hue: Change the Hue of the Gradient Map layer.
- Blend: Change the blending mode of the Gradient Map layer.
- Anchor Settings: Adjust the color and interpolation settings of the selected Anchor on the Gradient Map. Click the color icon to change the color of the Anchor, and interpolation to adjust the strength.
- Show Gradient Map List: Clicking this brings up the Gradient Map list on the MediBang Paint screen.
- Horizontally Flip Anchors: Clicking this will flip the anchors on the gradient map to invert the gradient.
- Delete Selected Anchors: Clicking this deletes the selected anchors from the current gradient map.
- Save Gradient (Overwrite): Clicking this overwrites the previously saved gradient map settings with the current settings on your screen.
- Save Gradient (New Save): Clicking this saves your gradient map as a new, separate gradient map on the list.
- Export to Clipboard: Clicking this will copy the gradient map as a code that can be shared with other MediBang Paint users.
- Import from Clipboard: Clicking this will import a gradient map code for MediBang Paint previously copied to the clipboard.
Gradient Map Window

- Create New Gradient: Clicking this will create a new, blank gradient map that you can adjust to the colors of your choice.
- Duplicate Selected Gradient: Clicking this will duplicate the currently selected gradient map so you can edit a new version while preserving the original.
- Selected Gradient Settings: Clicking this shows the settings for the currently selected gradient map.
- Delete Selected Gradient: Clicking this permanently deletes the selected gradient map from the list.
\ We are accepting requests for articles on how to use /

