2021.06.19
How to Draw a Lightful Watercolor Style Illustration

Hi, I’m Yu Haruawa.
In this article, I would like to explain how to draw light-filled watercolor style illustrations using MediBang Paint for the iPhone.
It’s a bit long because I’m going to show you the whole process of how I usually do it, but I hope it will give you some ideas for your future work!
1. Preparing the Canvas
I prepared a new canvas with 1000×1500px size.
I used a small canvas because the line drawing itself is very detailed, but I recommend that you use a size that you feel comfortable drawing.

2. Rough to Line Drawing
(1)Draw a rough image of the illustration. In this case, I created a rough image of a cherry blossom falling in the wind and a girl crying.
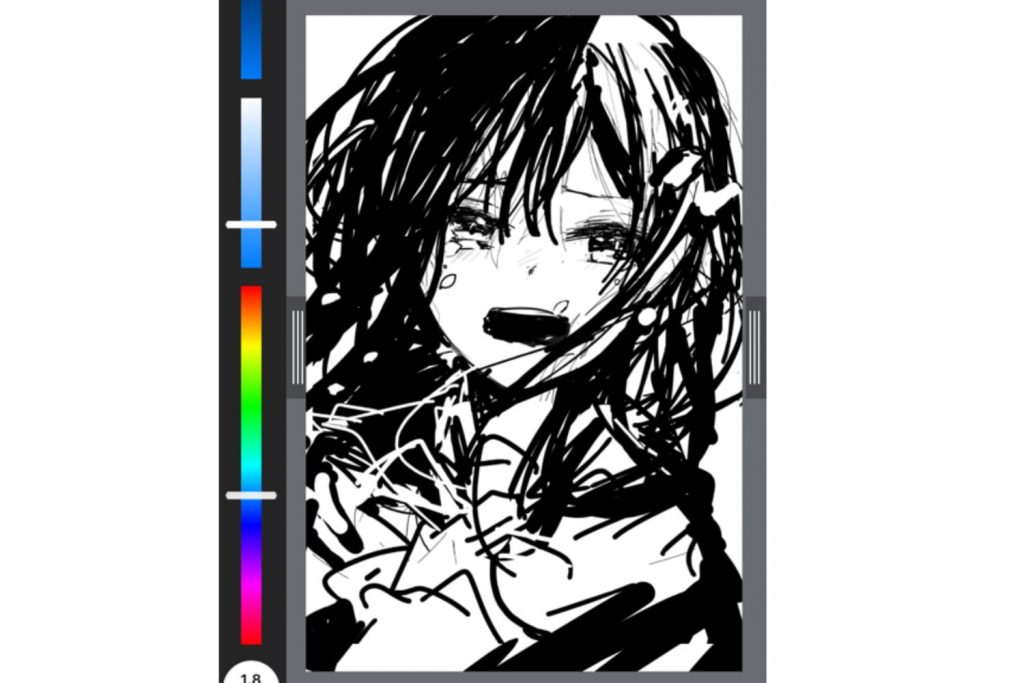
(2)Once the rough drawing is complete, set the opacity to 10%. Add a new layer on top of it.
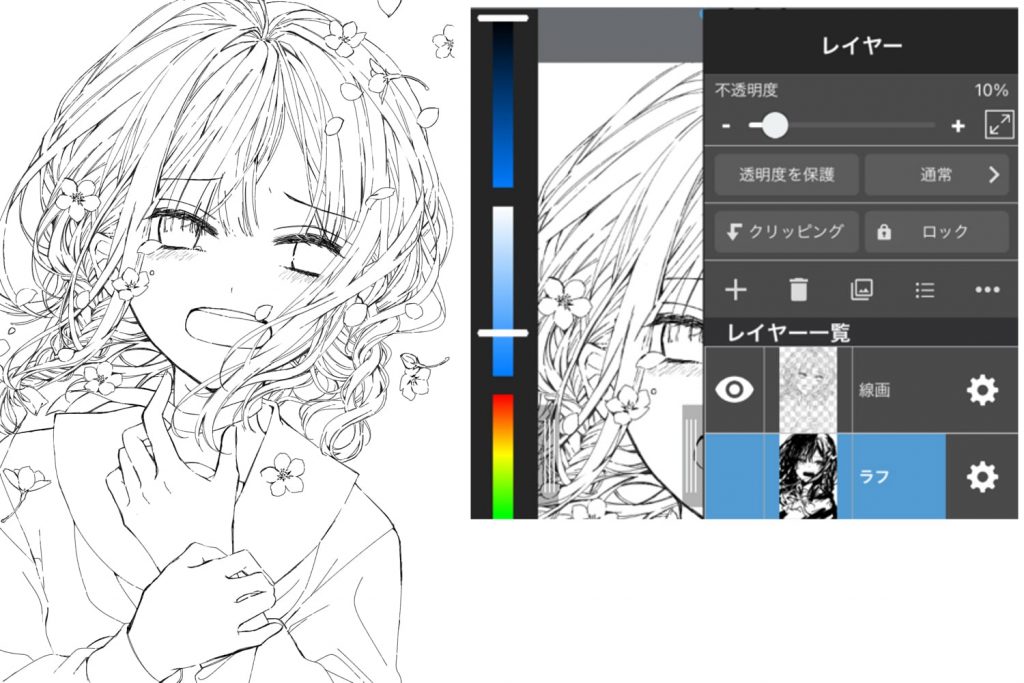
(3)I used G Pen 2 to create a line drawing along the rough drawing. I wanted to add a little complexity to the line drawing, so I changed the normal long hair to braids. To express the strength of the wind, the braids on the left side are untied.
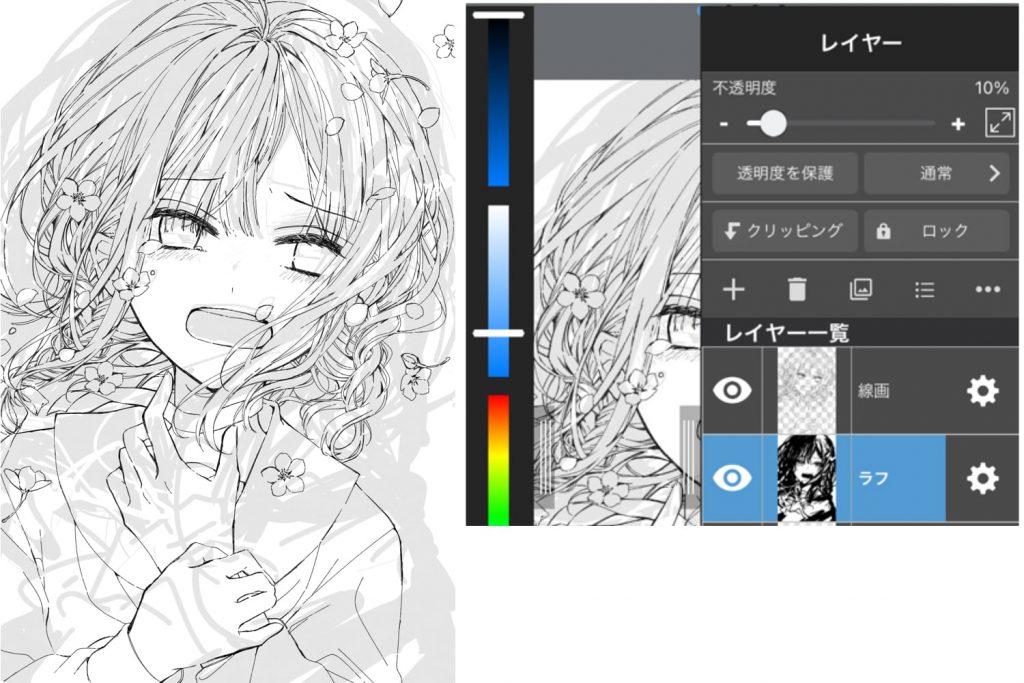
(4)After checking for balance and drawing errors, hide the rough.
3. Base Color & Texture
(1)Create a new layer → I paint all the areas where I want to apply color once. After painting with a clear color so that it is easy to see if there is any leftover paint, protect the transparency → change the color to skin tone.
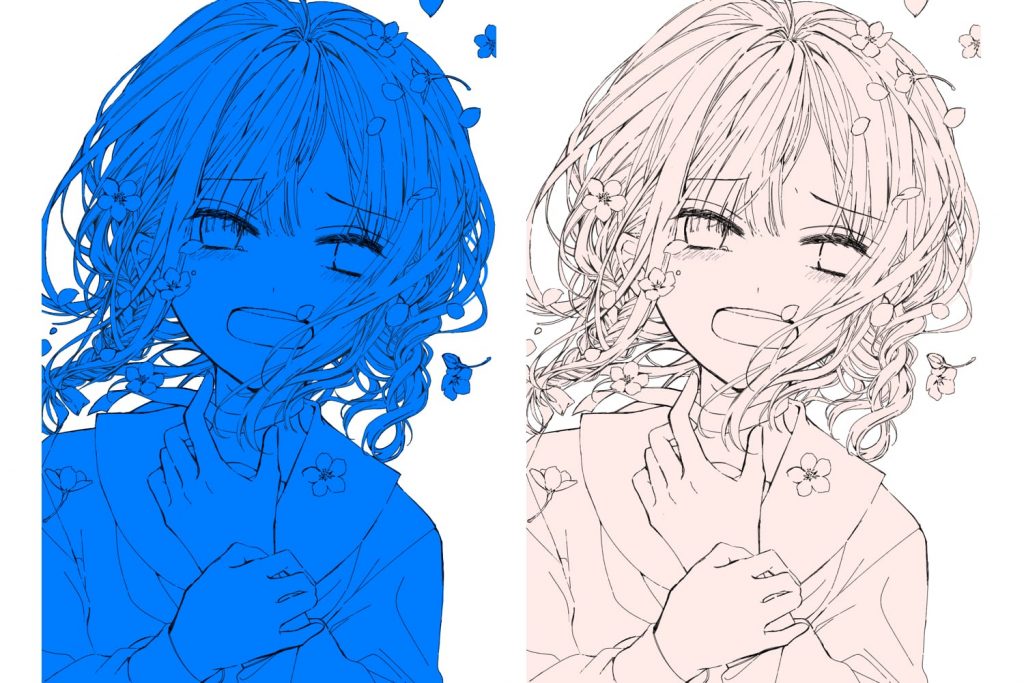
(2)Clipping to the painted base, paint one part at a time.At this time, it is easier to apply the paint in layers, from the back to the front, to make it easier to work with later.
I wanted to make an illustration in which the color of the cherry blossoms would be seen, so I used blue for everything except the cherry blossoms.
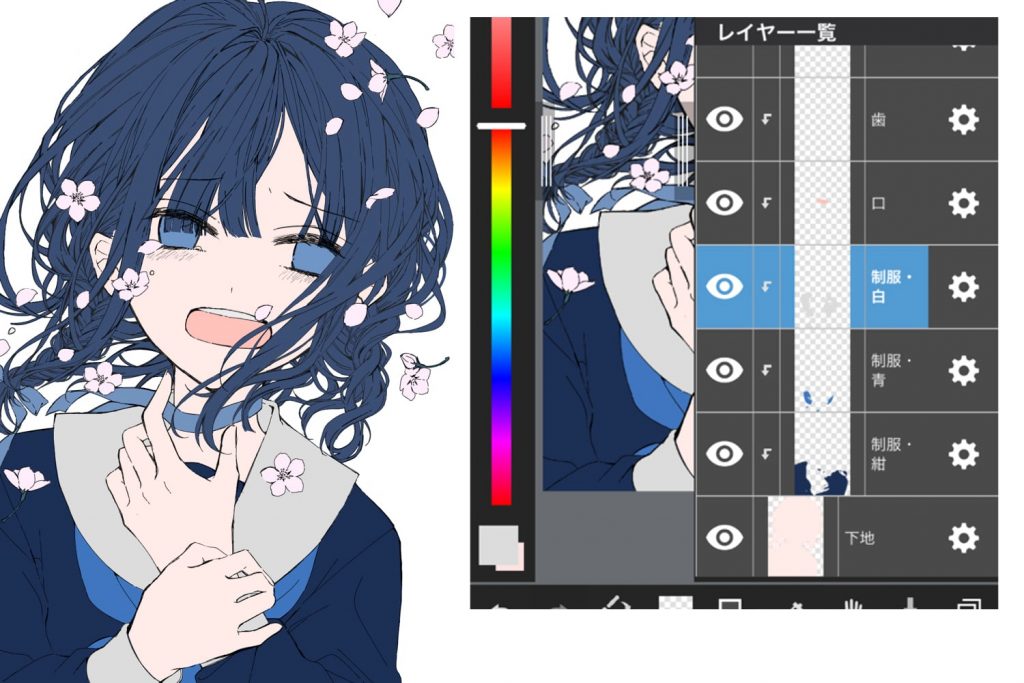
(3)Before starting the main painting, apply a texture in advance as an overlay (40%).
In this case, I used one created with custom noise, but you can try other rough ones that you think you like, as they will help create the watercolor atmosphere.
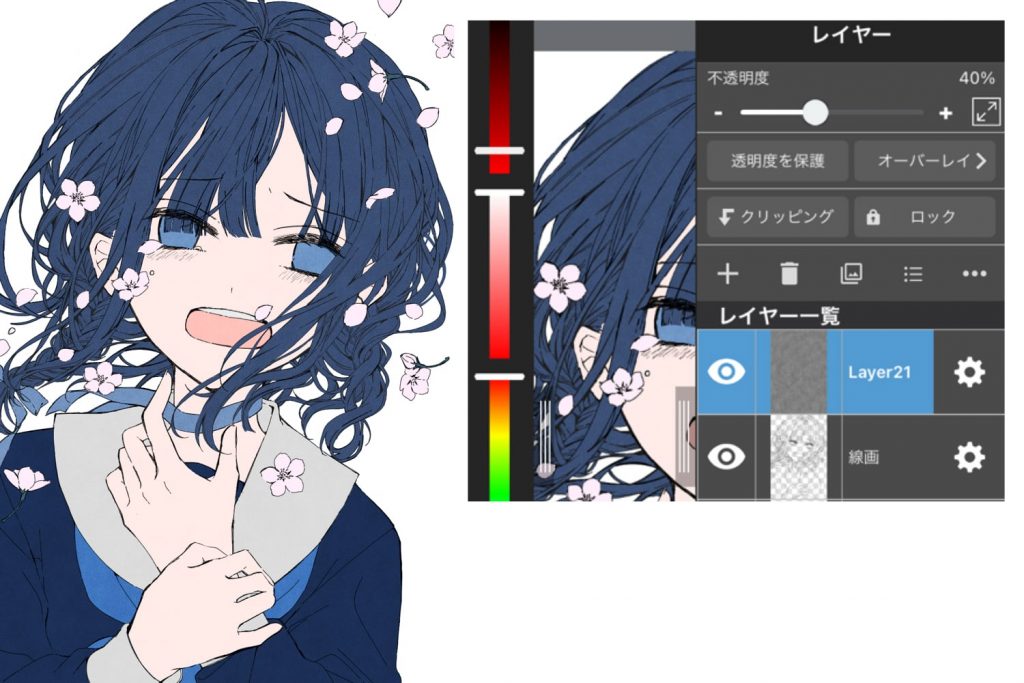
4. Coloring
・Layers of Watercolor
From here, I will start painting in the watercolor style.
(1)First, create a burn layer and then clipping.
(2)Fill the entire burn layer once with white, and then paint the areas where you want the color to be darker with a black fluffy watercolor pen.
※You can make the burn-in stronger by filling in the white once.
(3)Adjust the created burn layer with the tone curve. Make additions and changes to the curve based on blotches and colors.
(4)Apply an unsharp mask to emphasize the blotches. There’s nothing wrong with skipping this step if you prefer.
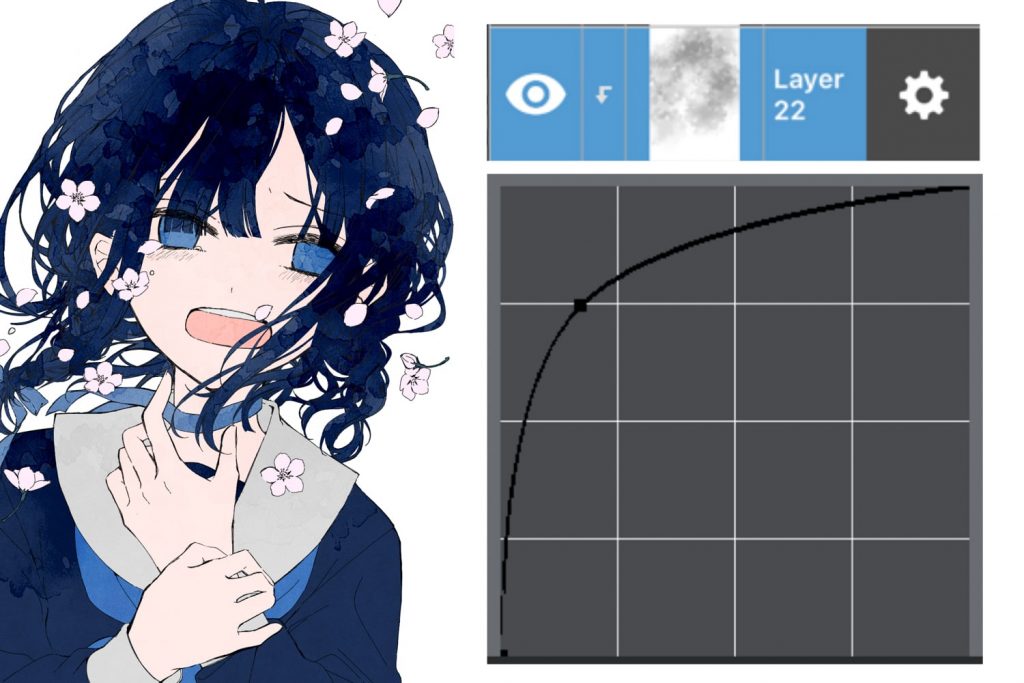
(5)Protect the transparency of the hair layer. Apply a thin layer of pink, with the image of the color changing from the direction of the cherry blossoms falling. Use a blurred color scheme where it is adjacent to other parts.
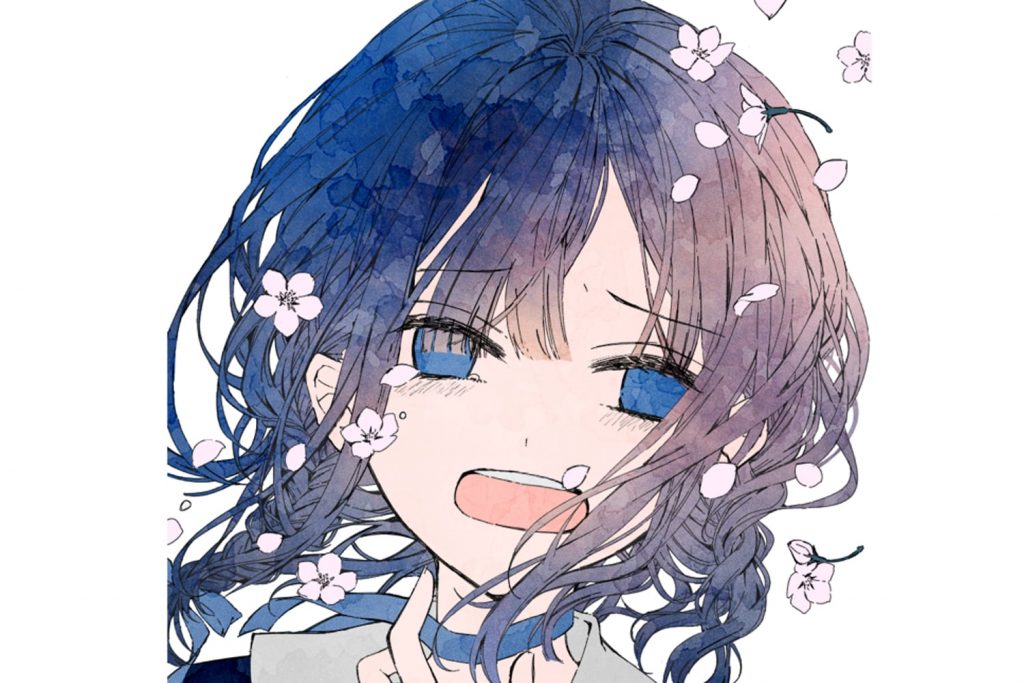
(6)The previous step alone is fine, but to make it a little more transparent, another layer of color is added in the same way as steps (2) and (3). The same black color would be too heavy, so a bright light blue color is used this time.
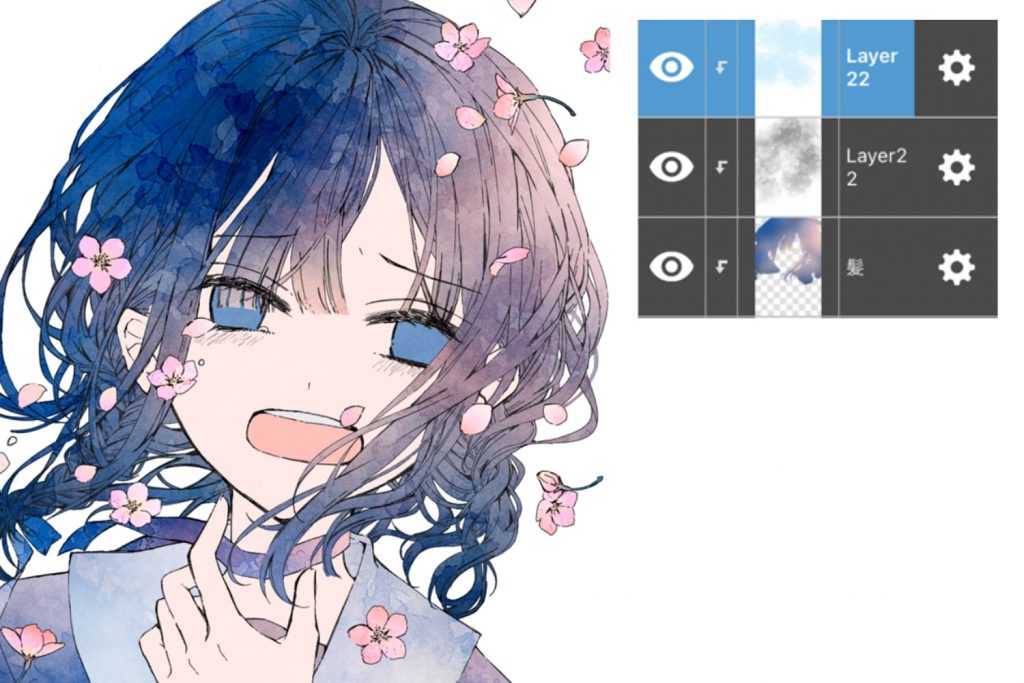
(7)Once the hair layer is removed from the clipping, merge the two burn layers that have been stacked on top of each other into the hair layer, and then clipping the hair layer to the base layer again.
Repeat the same process for the clothes and cherry blossoms, but keep the transparency of the layer protected for the eyes.
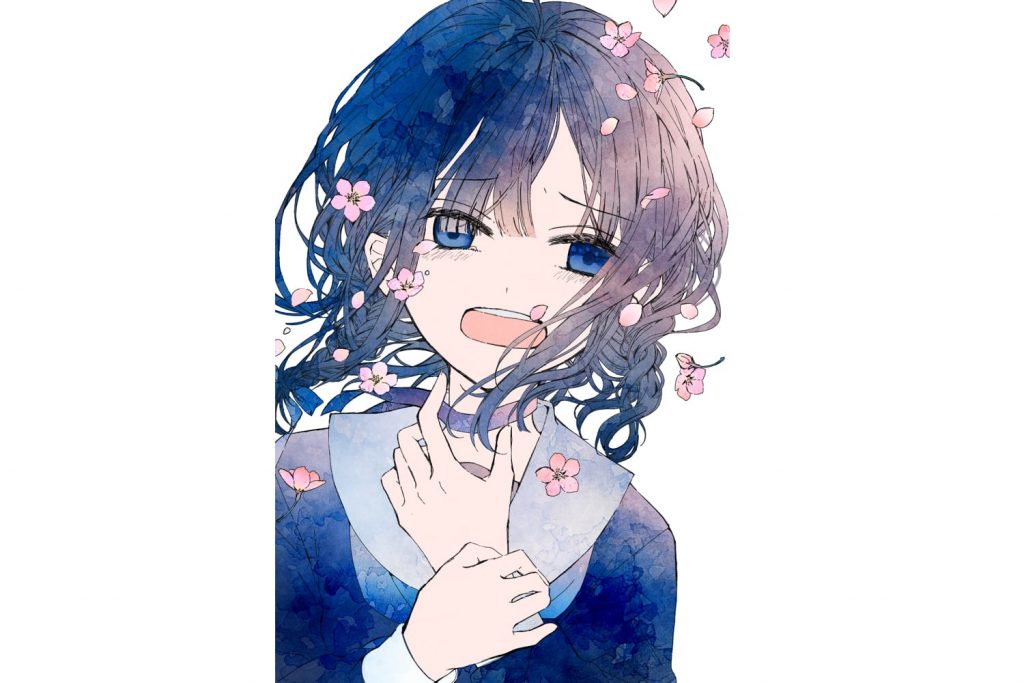
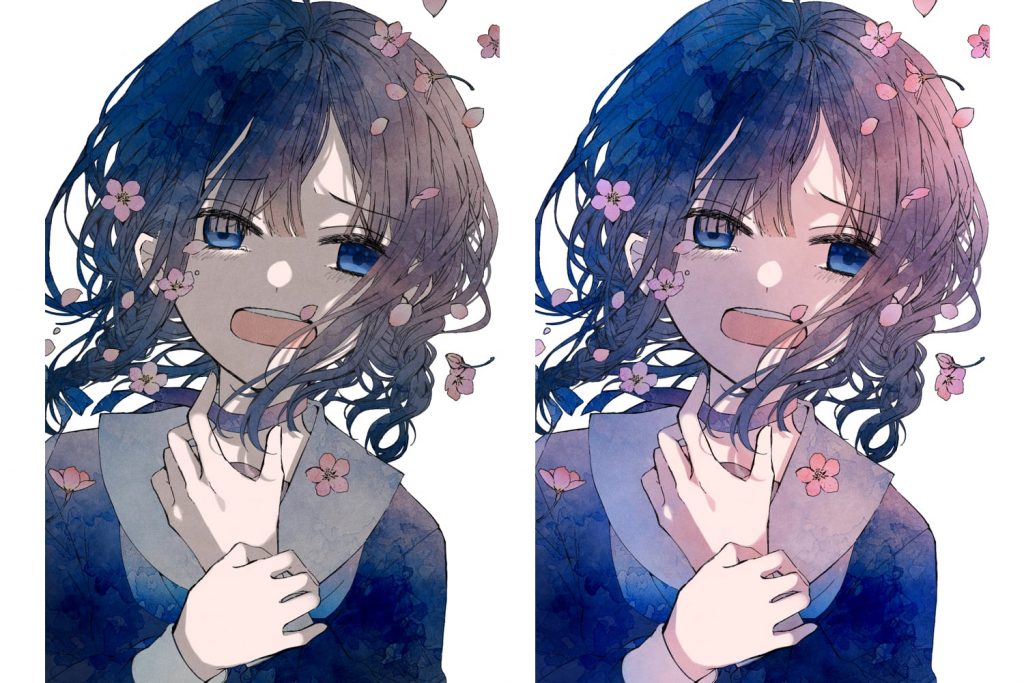
・Shadowing
Add a multiply layer → clipping Once the shadows are painted in gray, protect the alpha. Change the color while checking the overall balance.
This time, I mainly used pink and blue, but you can use different colors depending on the mood of your work to create a wider range of works.
・Blend the line drawings.
Change the line drawing layer to a multiply layer. Paint over it so that it blends in with the surrounding colors without looking out of place.
For eyelashes, eyebrows, and other areas where the color and line overlap, paint a little lighter so that they are less noticeable and more transparent.
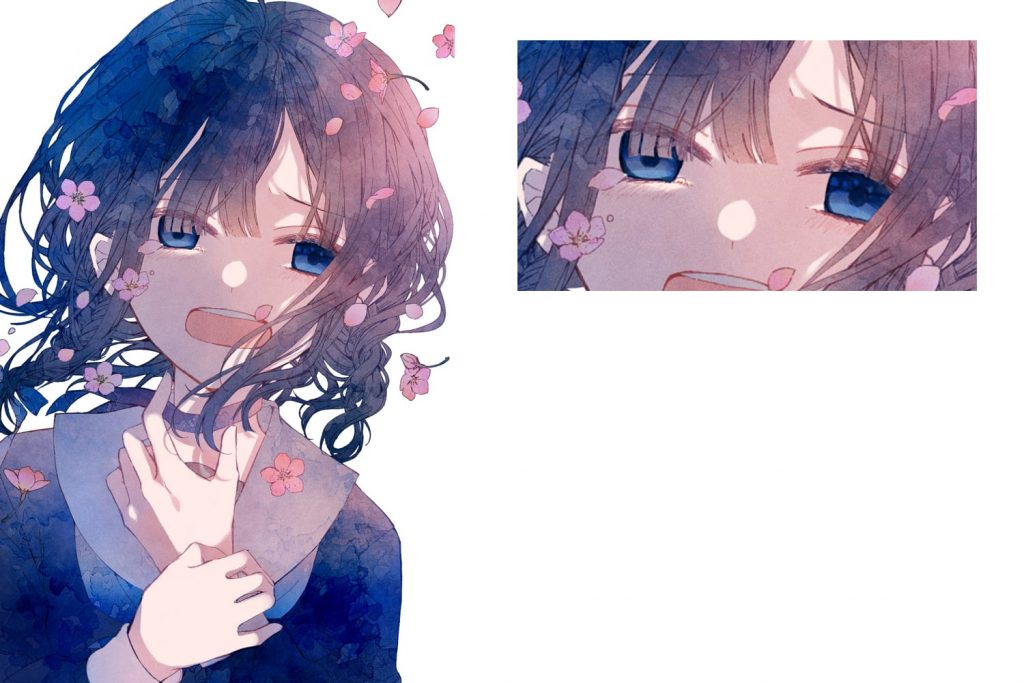
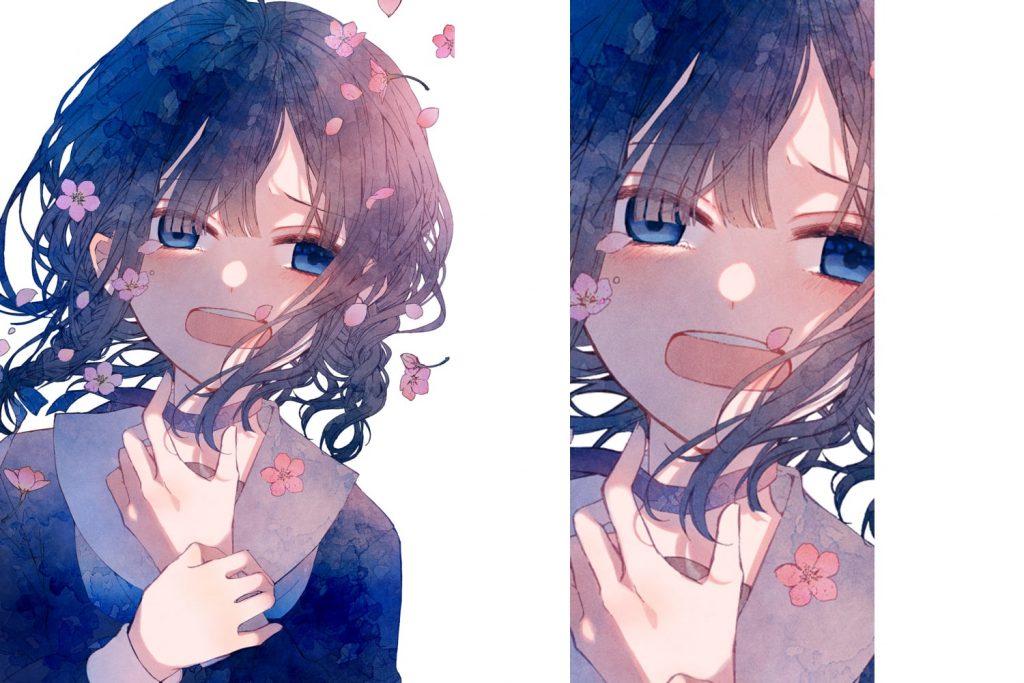
・Paint the skin
Paint the cheeks and fingertips with a light orange color using Fluffy Watercolor 3 directly on the base layer.
At this point, paint the edge of the shadow with a darker orange to enhance the expression of light.
・Add details with Watercolor
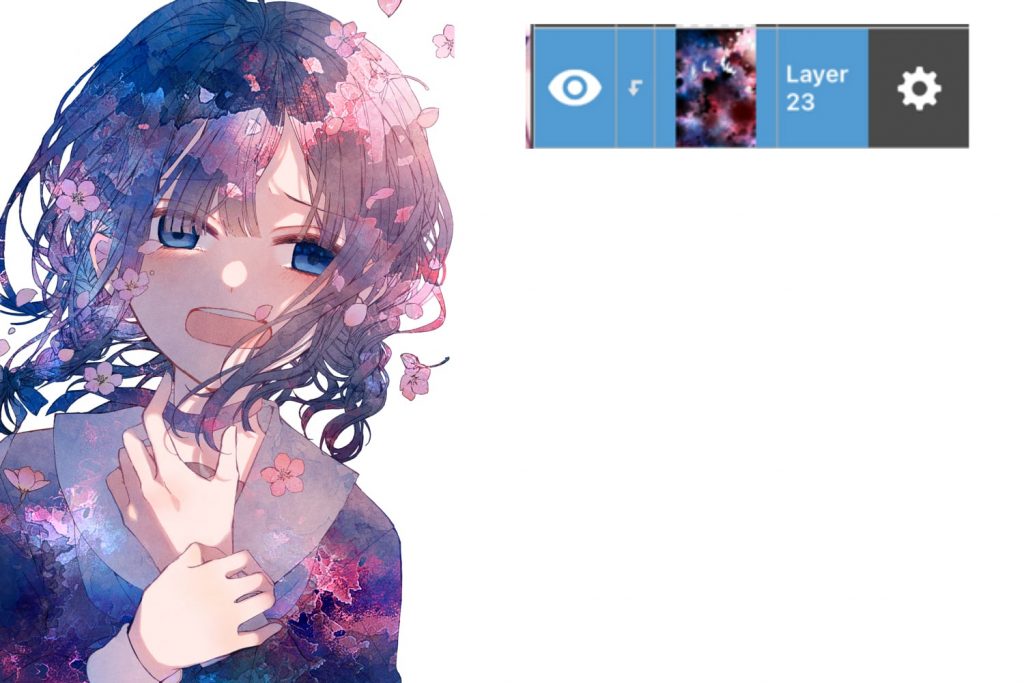
Create a new layer, set it to compare (bright), clipping, fill it once with black, and then add the color you want to add with a misty watercolor pen in the same way as you would add watercolor layers.
Apply the unsharp mask, but you can skip it if you like.
・Add lights
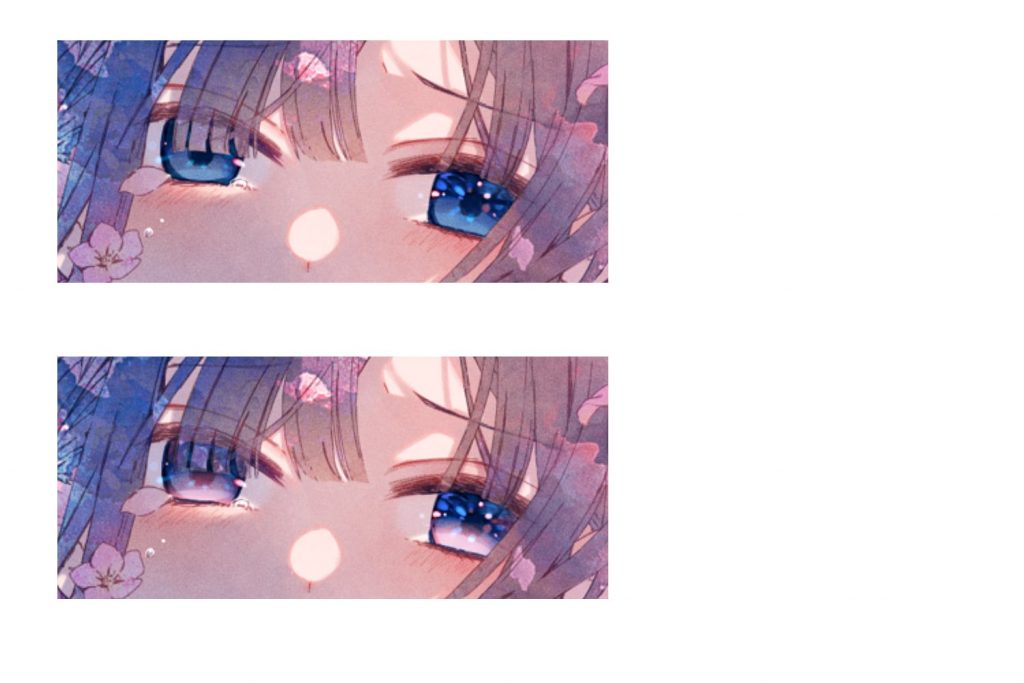
(1)Create a new layer → change it to add layer. Add the light to the eyes and tears. (Use watercolor/wet)
(2)Create a new layer on top of the eye layer → Screen and apply a pink gradient, then merge it with the eye layer.
※For areas covered by hair, select the hair layer and erase it with the 50% eraser to make it more transparent.
(3)Spatter the entire illustration with add layer. The finer the detail, the more information it will be, so patiently add more grains of light using not only spattering (watercolor) but also a pen.
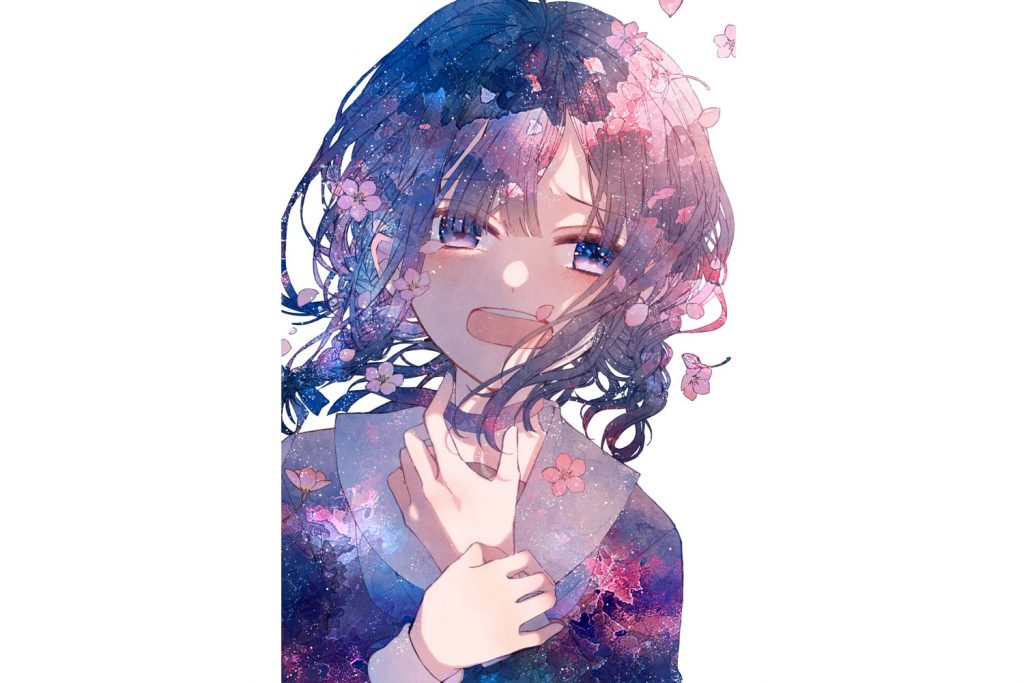
(4)Create a new layer, make it add layer, and clipping. I want a little more color variation, so I’ll add a stronger red and blue layer.
(5)The eyelashes should also be added details with add layer.
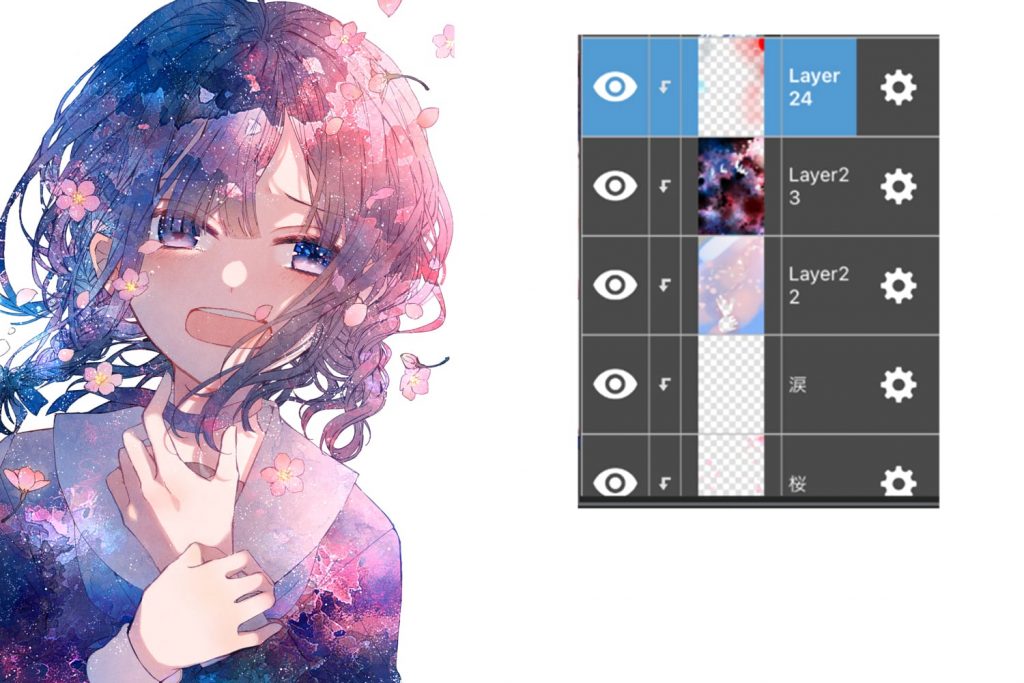
5. Add Details
To give the illustration a sense of depth and dynamism, I will draw in details.
(1)Create a new layer, set it to multiply, and clipping. Turn on the watercolor border and draw in the details of the hair and clothes.
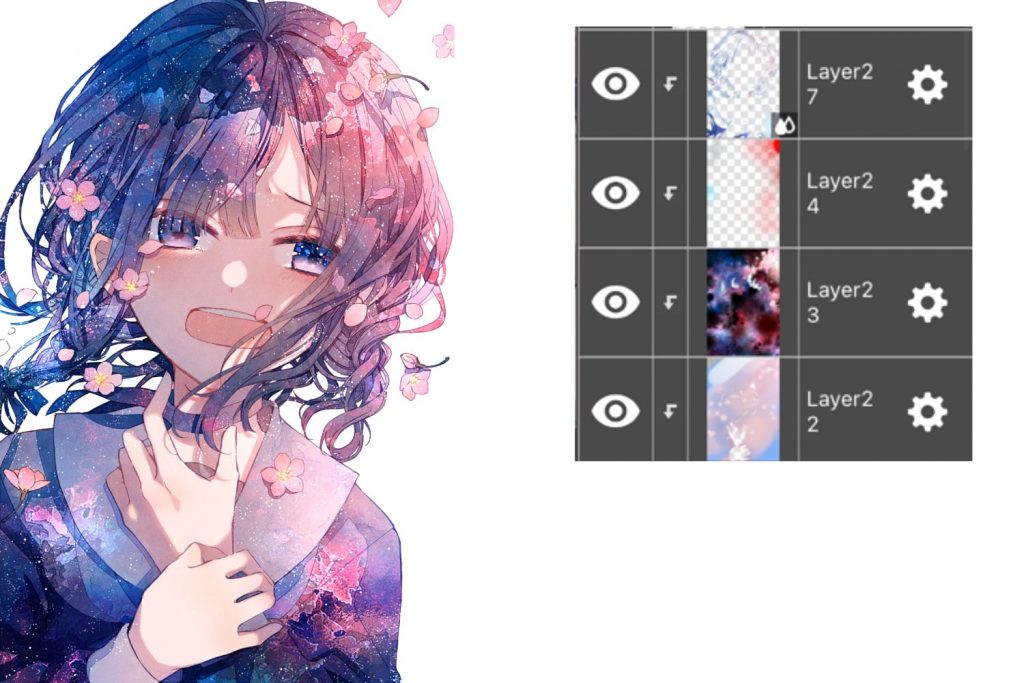
(2)Create a new layer under the base layer. Draw cherry blossom petals and apply a moving blur.
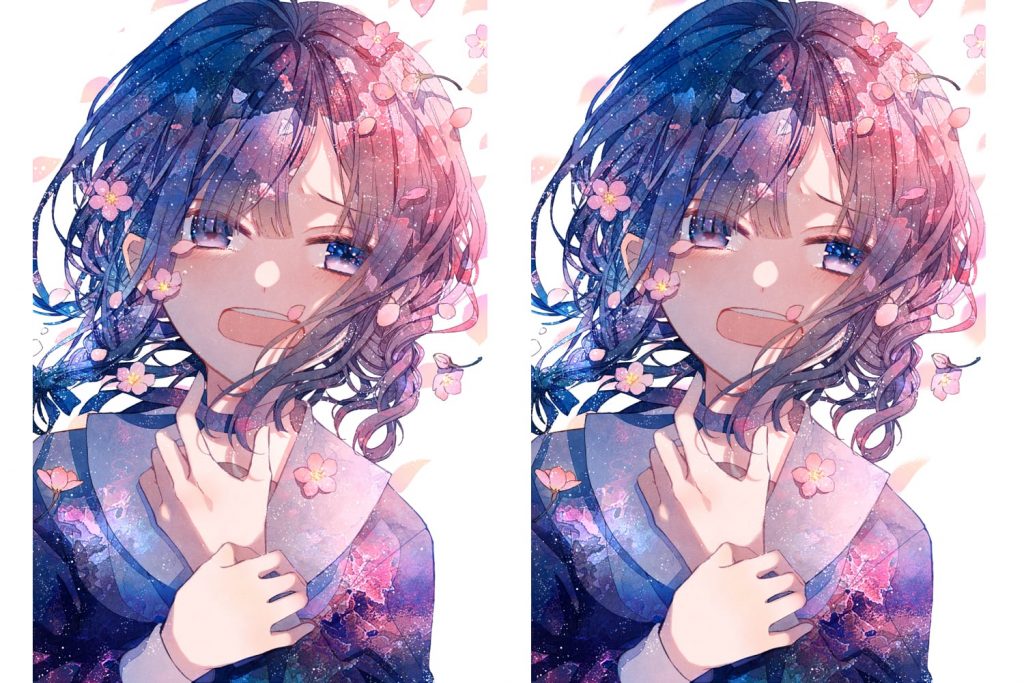
(3)Create a new layer, turn on the watercolor border in overlay. I will draw the petals in pink, and create another layer of the same color.
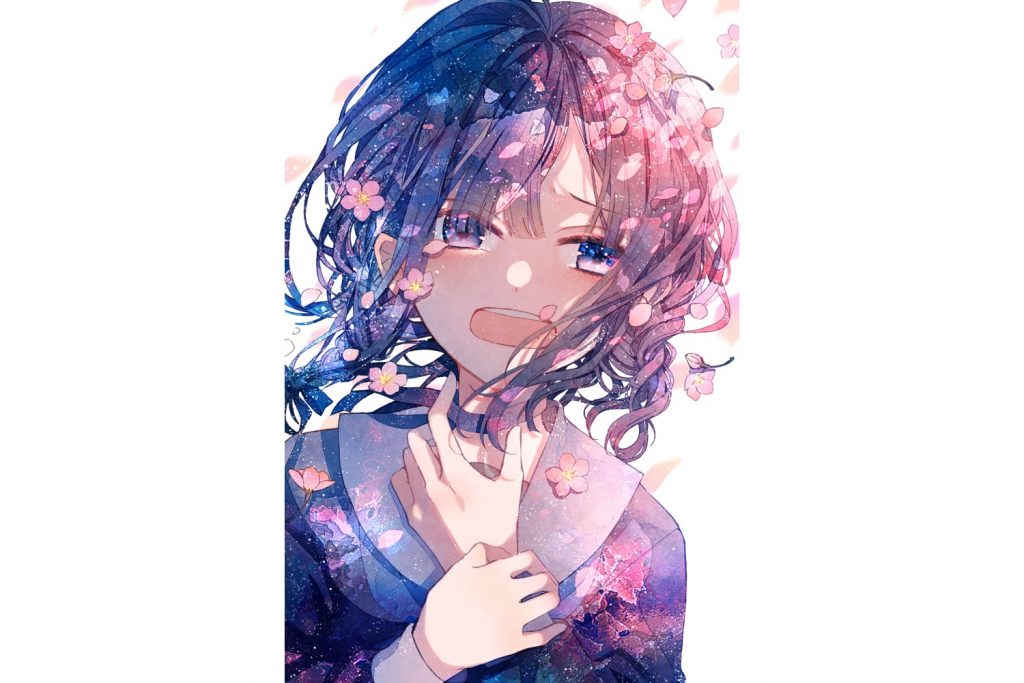
(4)Create a new layer. Add more cherry blossom petals in the foreground using the same procedure as (2).
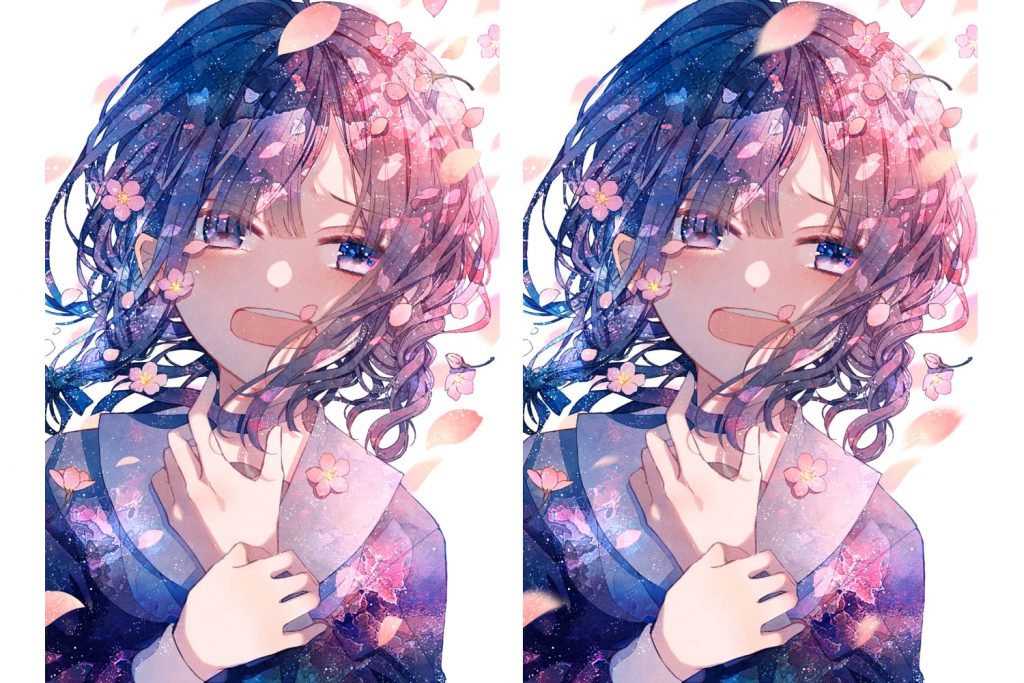
6. Finishing
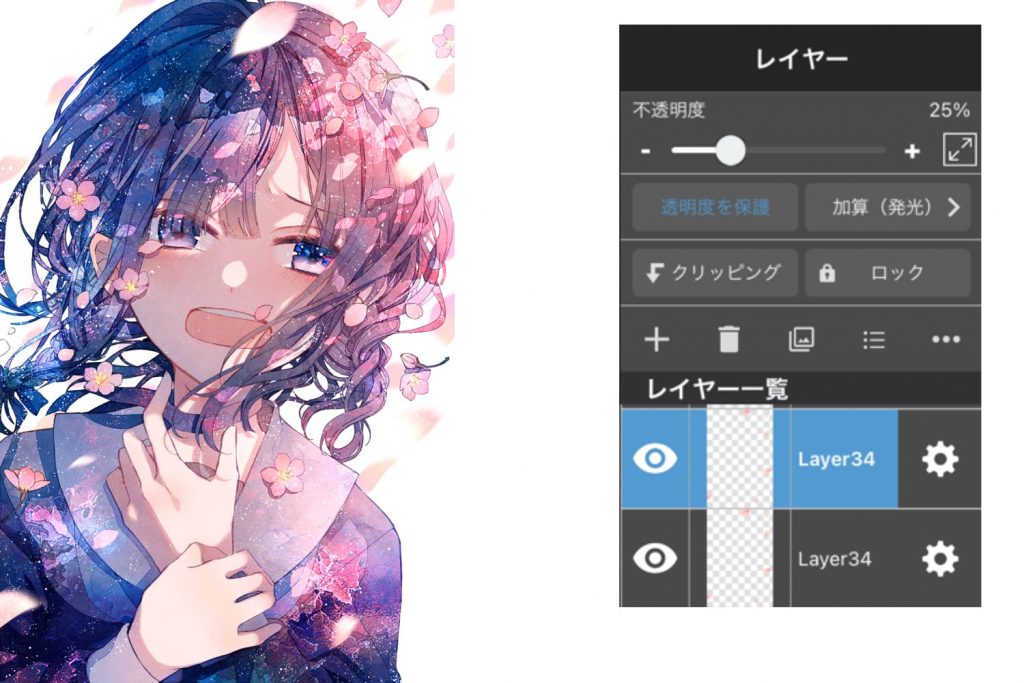
(1)Duplicate the cherry blossom petal in the foreground that you just created and change it to Add layer. Set the opacity to 25% and make it glow.
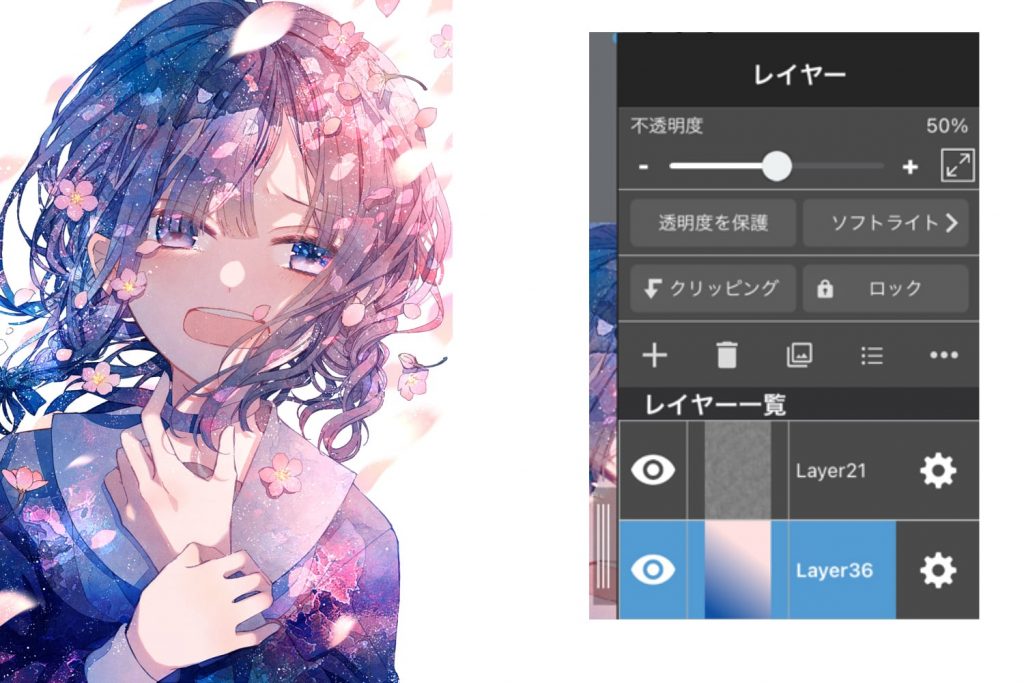
(2)The overall color is too dark, so I created a new layer, set it to soft light, and applied a gradient.
I changed it to 50%. The color calmed down a little.
(3)Finally, blur the details and adjust the color of the shadows.
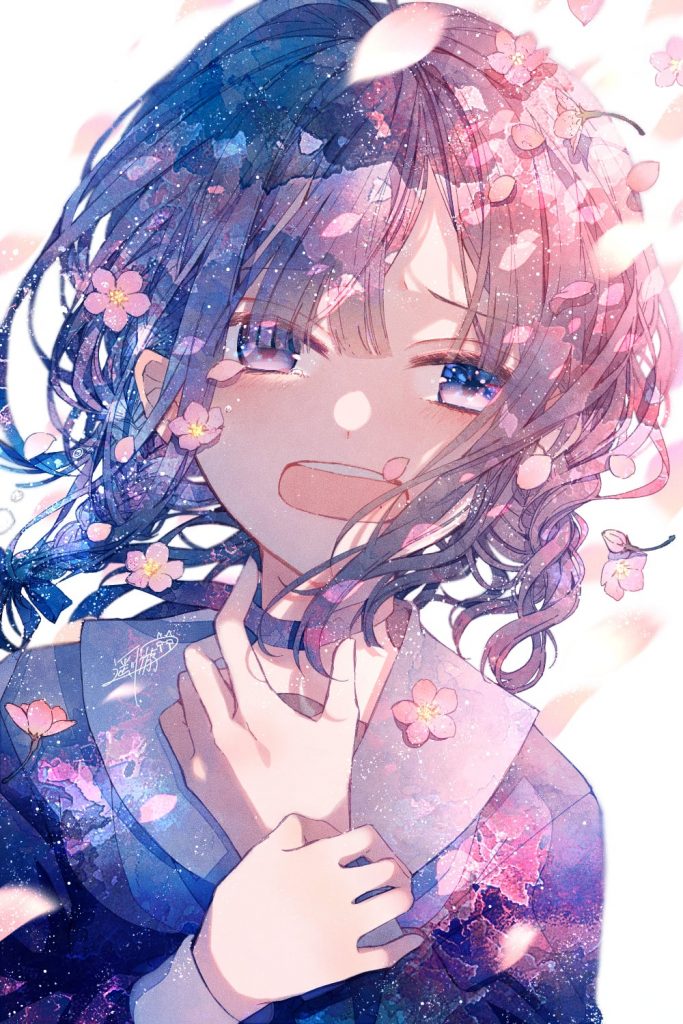
That’s all, how to draw a lightful watercolor illustration!
I hope this will be helpful for those who are interested in watercolor in digital.
Thank you for your patience!
Click here for the collection: https://medibang.com/u/Harukawa25/
twitter: https://mobile.twitter.com/haru_hp25
\ We are accepting requests for articles on how to use /

