2016.12.14
How to Create Panels
We will explain how to use MediBang Paint for Desktop.
Today, we will show you how to create panels.
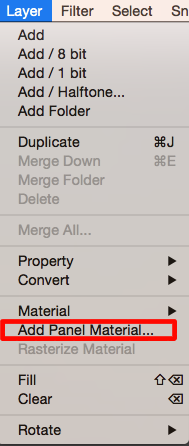
- Select Add Panel Material in the Layer tab.
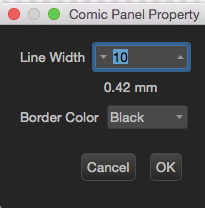
2. The Comic Panel Property window will appear, so input your preferred line width, and click OK.
The mm displayed in the centre of the Comic Panel Property window are the actual thickness of the lines (in millimetres).
3. Clicking OK will make a panel appear on the canvas.
4. Divide the panel.
① Choose the Divide Tool  .
.
② Click on the edge of the panel you want to split, then drag your mouse to the other side of the panel and release it. Your panel will now have split into two.
- Dragging your mouse while holding Shift will enable you to split panels diagonally.
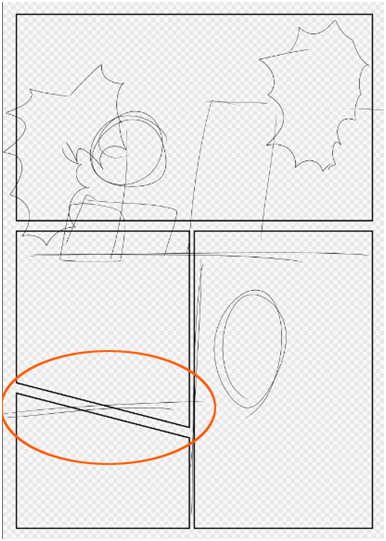
- When you want to adjust the space between panels, you can do so from toolbar that appears below Menu. If you set the parameters before splitting the panel, then the panel will split exactly as you’ve designated.
5. Adjusting the size and position of panels
Moving and transforming a panel after dividing is done via the Operation Tool  .
.
After selecting it, click on the panel you’d like to Move/Transform.
A toolbar will appear where you’ve selected the panel.
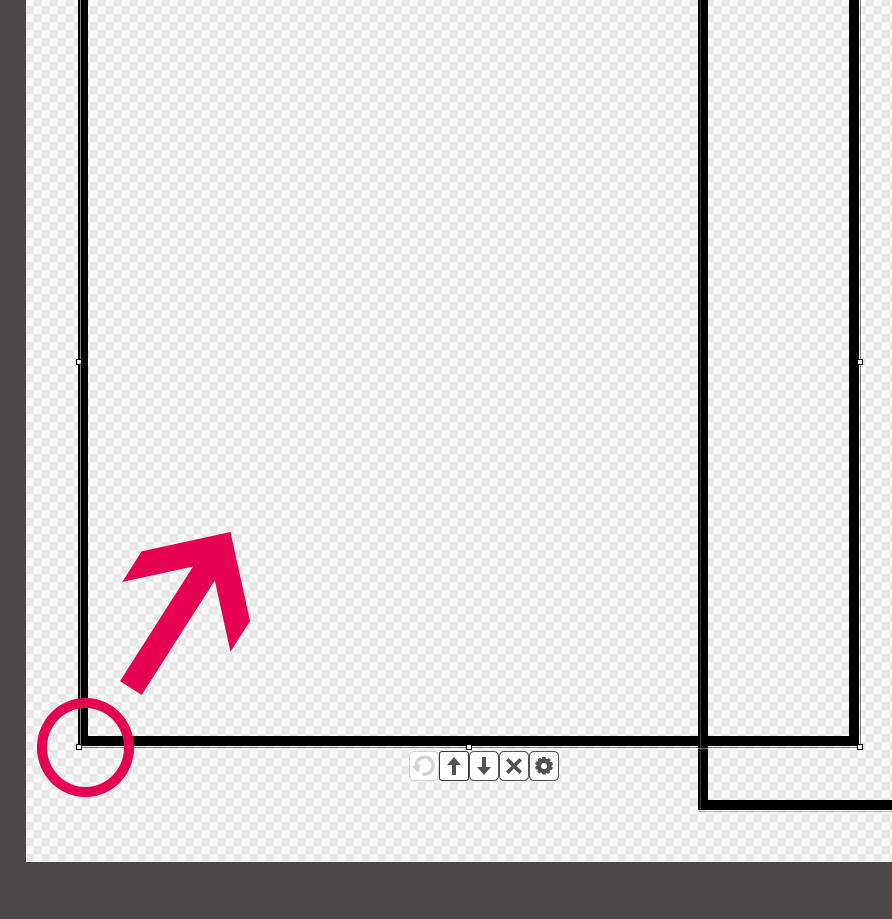
To Transform, click and hold the □ at the corner of the panel, and drag it in the direction you want to Transform it.
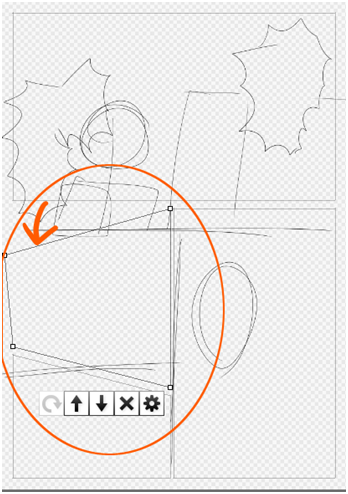
The buttons that appear below your selection have the following effects.
 Rotate – An icon that is used with Item Materials. It cannot be used with Panel Materials.
![]() Raise by one – When multiple Panels or Items overlap, this will move the selected Item above by one.
Raise by one – When multiple Panels or Items overlap, this will move the selected Item above by one.
![]() Lower by one – When multiple Panels or Items overlap, this will move the selected Item lower by one.
Lower by one – When multiple Panels or Items overlap, this will move the selected Item lower by one.
 Delete – Erases the selected Panel or Item.
 Panel Settings – Change the line width of panels and colour.
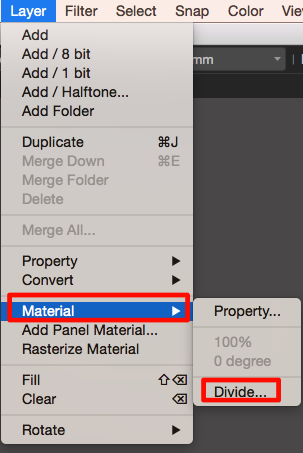
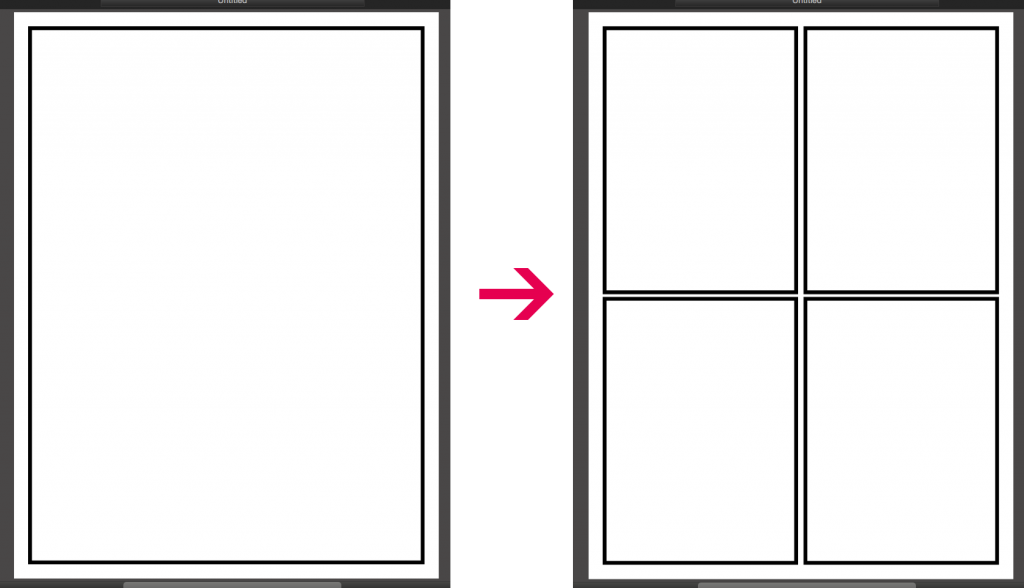
When you want to evenly split your panels, from the menu bar, select Layer > Materials > Divide.
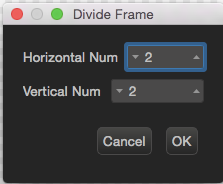
When you select it, the following window will appear, so choose the values you want.
We can split the panel like so:
Tip
Panel Materials normally cannot be partially deleted.
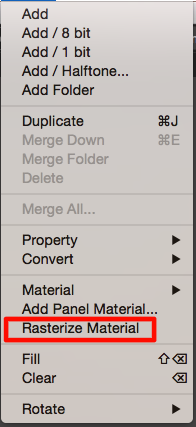
If you want to partially delete them, click Layer > Rasterize on the menu bar.
By rasterizing it, you will be able to use the eraser tool to partially delete it.
(However, you won’t be able to edit it using the Operation Tool.)
*Regarding Rasterize Material
Panel Materials and Item Materials (referred to as Objects) which have been applied to the canvas will not be displayed even when saved, so erasing them will be impossible as well.
Selecting Layer > Rasterize Material will make the toolbar around the panel disappear, and enable you to draw on it and erase it.
If an Item Material (Object) which hasn’t been rasterized, is in the layer, then there will be a @X beside the layer name. X = the number of Objects currently in the layer. When a panel is split, each panel is counted as a single Object.
The below example has divided a panel into 4, so it has 4 Objects.
Besides Panel Materials, materials in Items are Objects as well, so in order to work with materials in Items, we need to rasterize them first.
For example, without rasterizing Speech Bubble Materials, it will be impossible to put text inside of them.
*If you save the file under the PNG, JPEG, Bitmap or PSD format, Objects will automatically be rasterized.
\ We are accepting requests for articles on how to use /

