2020.08.17
Let’s Make Your Very Own Pattern Using MediBang 2 [Basic Drawing].
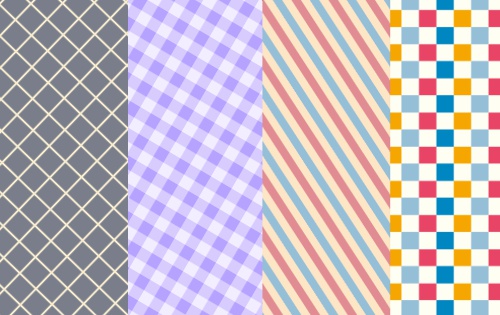
Below, we will go through how to draw the pattern from “Let’s Make Your Very Own Pattern Using MediBang 1” that we have seen before.
The pattern I’m going to show you is one that can be created using squares drawn with the Bucket tool.
It’s super easy, so we do invite you to take a quick look at it.
Index
First Step
When you create the material for the pattern, remember to set the canvas size to 500x500px.
Checkered Pattern
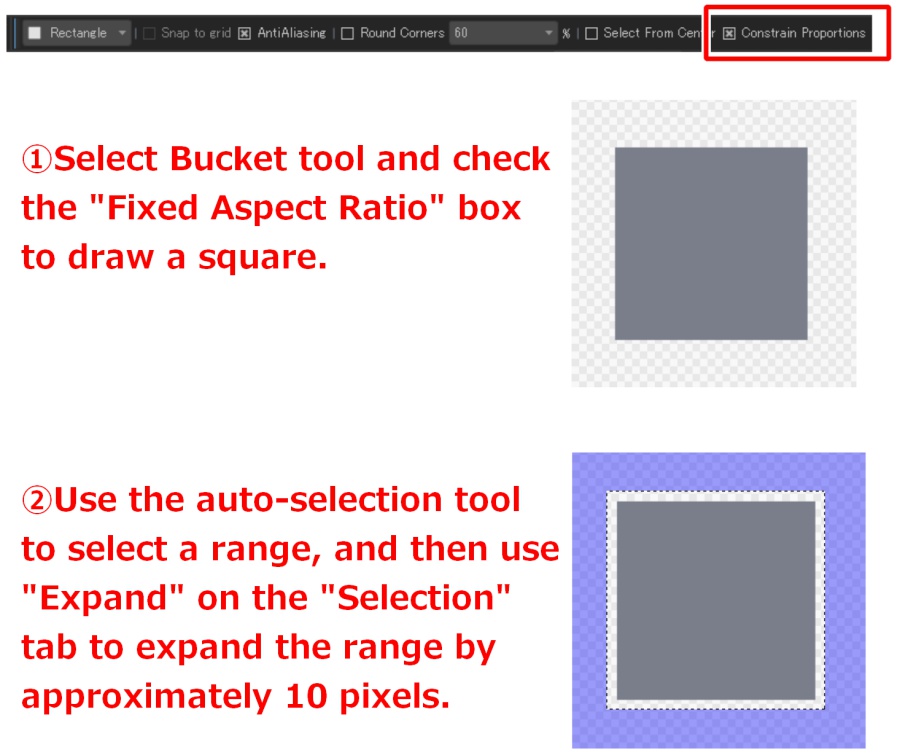
Draw a square with the checkered mark with the Bucket tool.
Select a range of squares with the auto-selection tool, and then select “Extend” in the “Select” tab to extend the range by approximately 10 pixels.
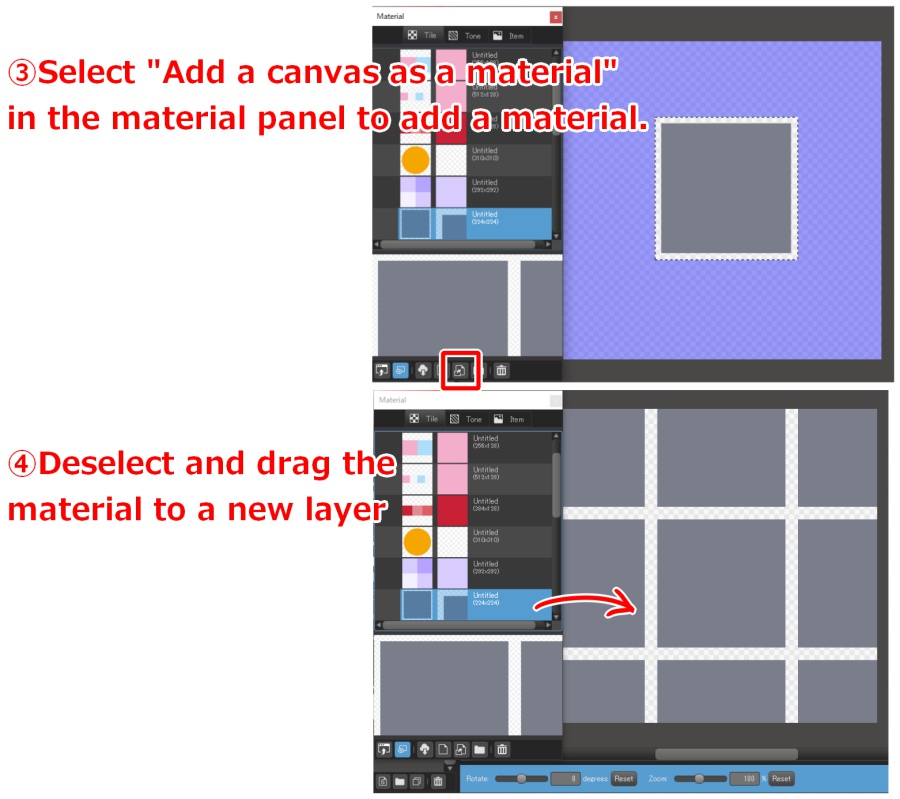
Open the Material Panel and select the “Add Canvas as Material” icon at the bottom of the panel to add a material.
Deselect the selection and drag and paste the material you have just registered into a new layer.
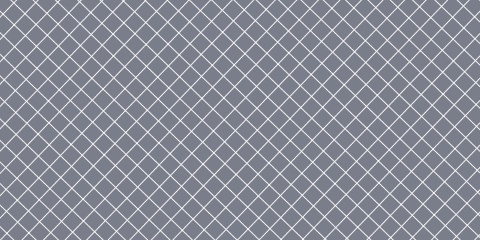
Adjust the rotation and magnification values and press the OK button to complete the grid pattern.
Border Stripes
If your material has more than one layer, be sure to put it in the layer folder as you create it. (See below for detailed explanation.)
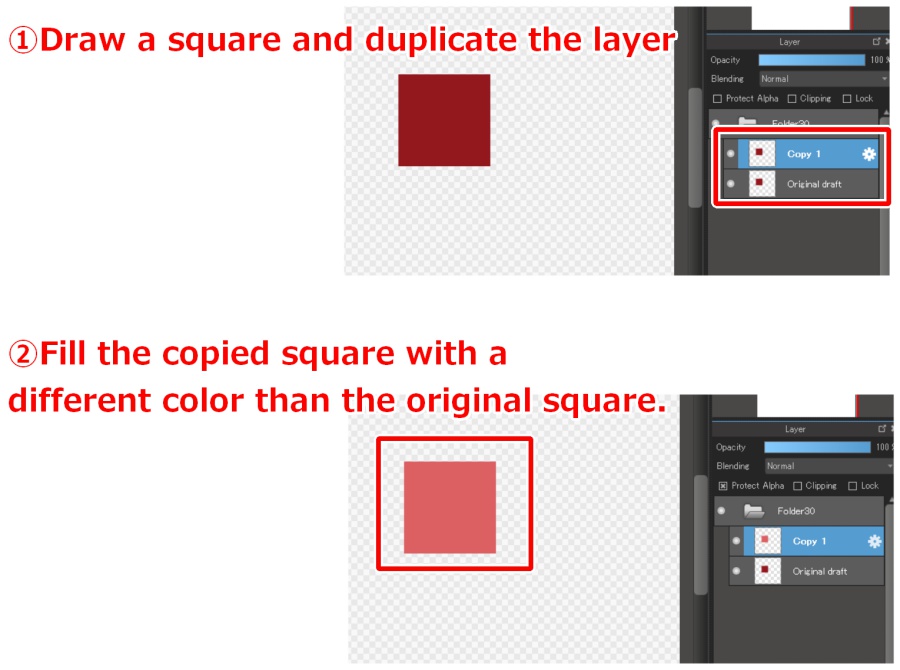
Draw a square and duplicate the layer.
Protect the opacity of the copied layer and paint it a color that’s different from that of the original square.
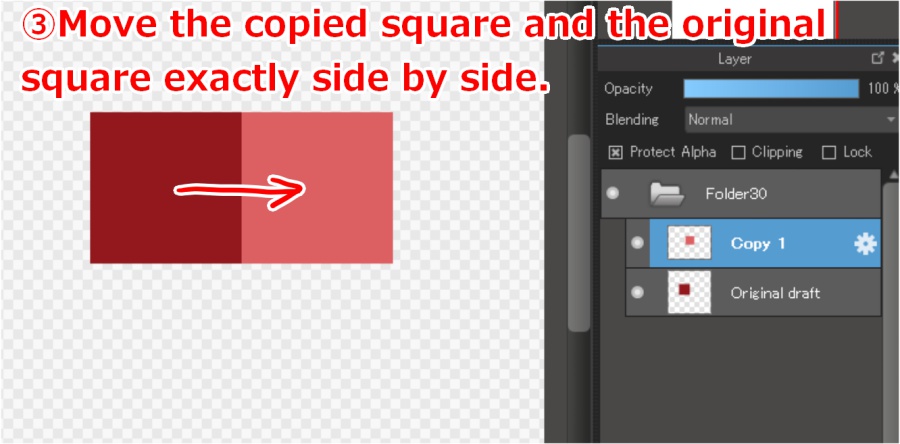
Move the copied square with the Move tool so that it is exactly aligned with the original square.
The border material is now complete.
The borders don’t require any margins, so you need to register only the drawn area by selecting the range.
If you have multiple layers, it’s not easy to select them all automatically. So, when you select a layer folder, you can select the layer from the “Selection” tab by selecting “Create from layer/ Opacity” or Do “Opacity”.
When you do this, all the objects on the layers in the folder will be automatically selected.
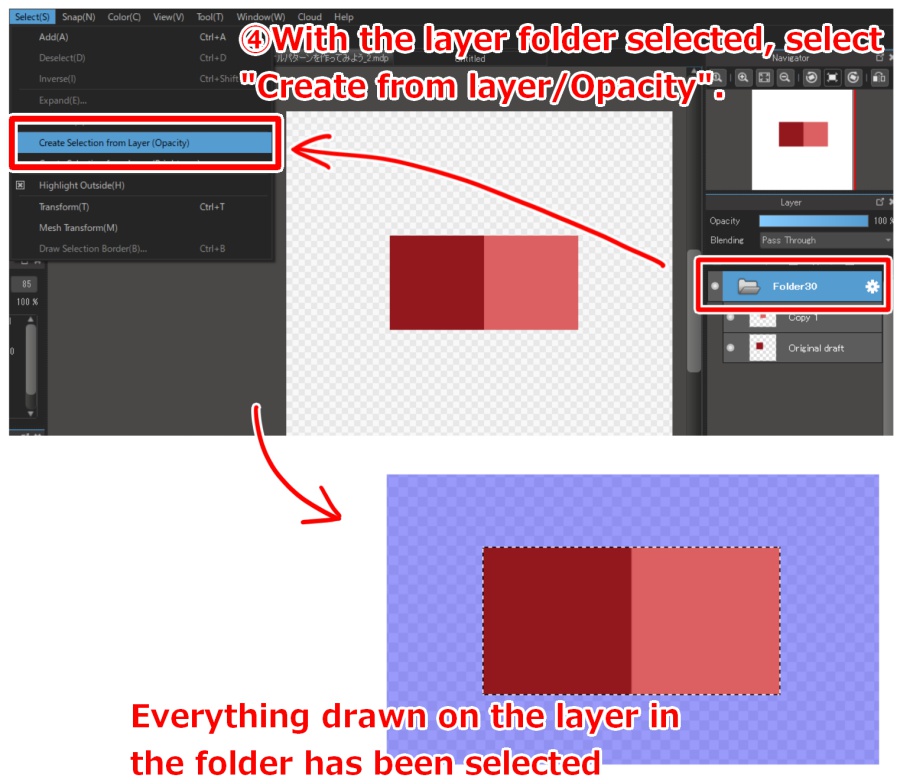
When you have selected a range, you can register it as a material.
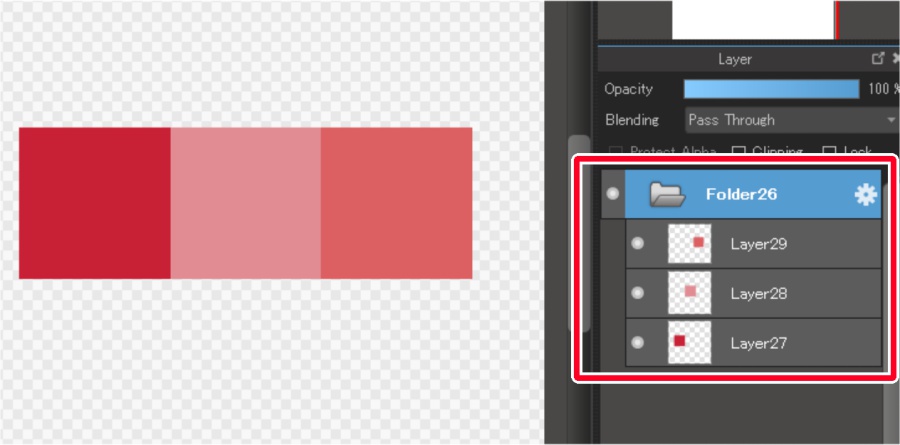
You can increase the color of the border by copying the square, changing the color, and moving it horizontally.
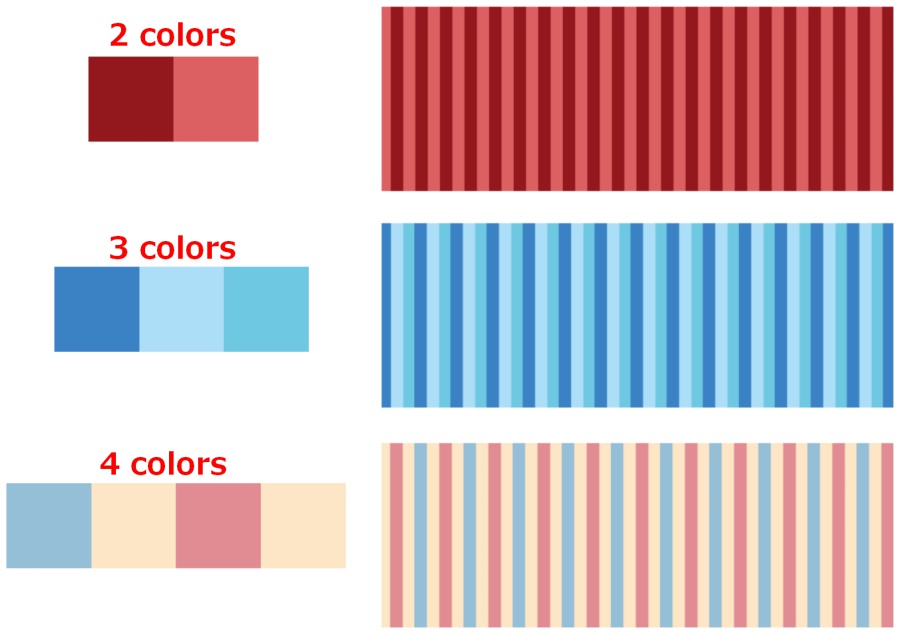
Checker
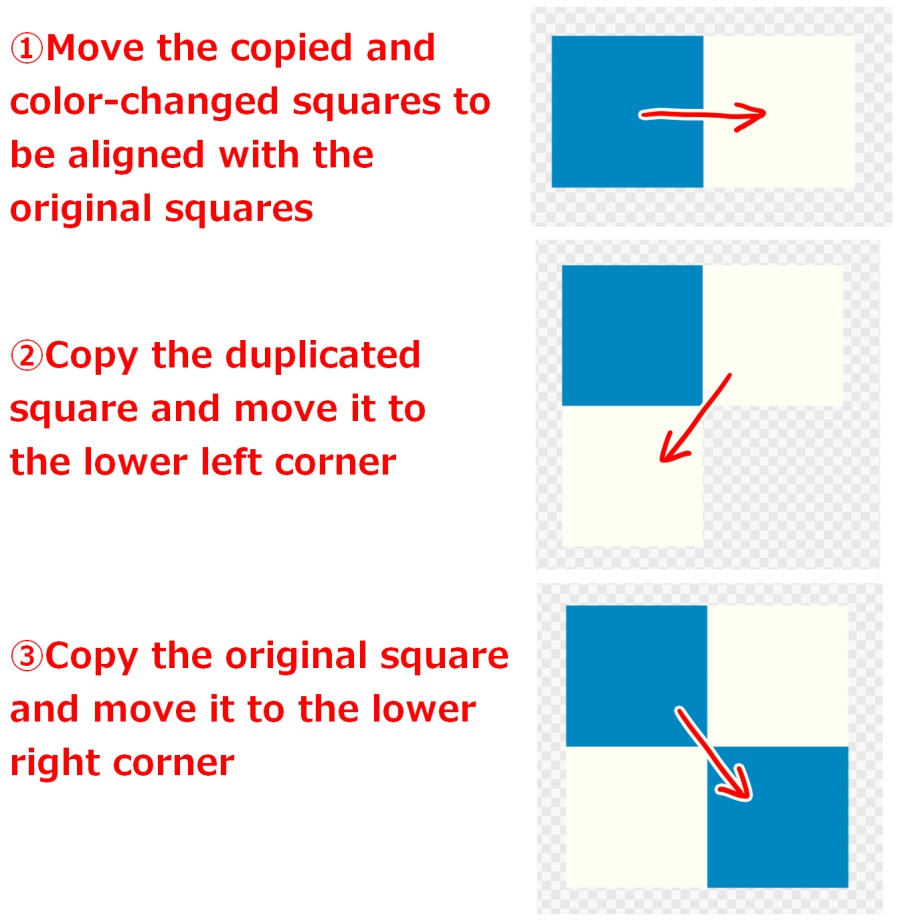
Copy the square, change its color, and move it so that it is alongside the original square.
Copy the copied square again and move it to the bottom left.
Copy the original square again and move it to the bottom right.
Go to the layer folder and select “Create from layer/ Opacity” to register it.
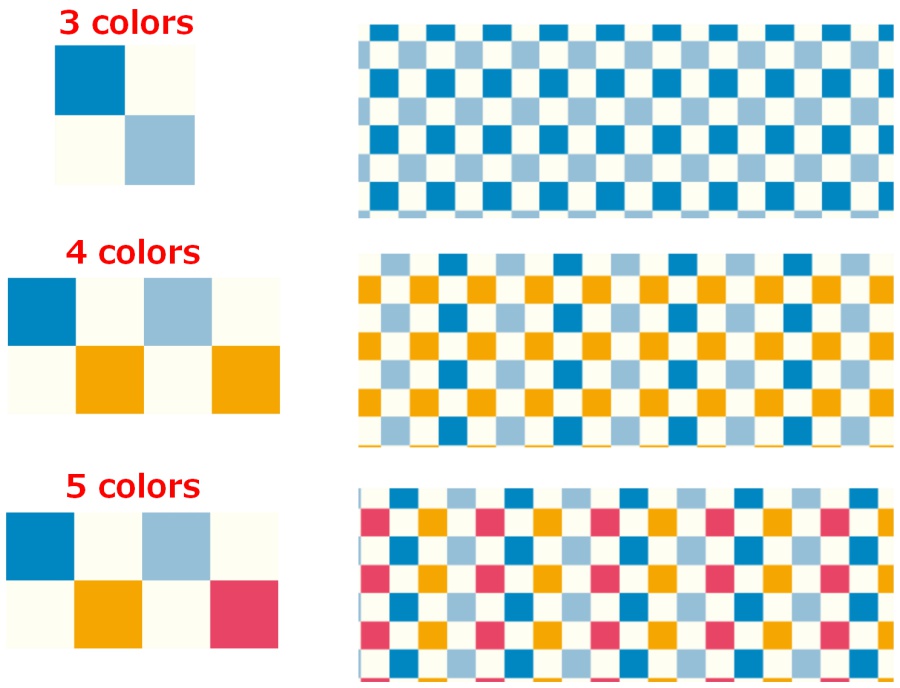
If you wish to increase the number of colors, change only the main color on the light-colored side without changing the color on the light-colored side to create a cohesive look.
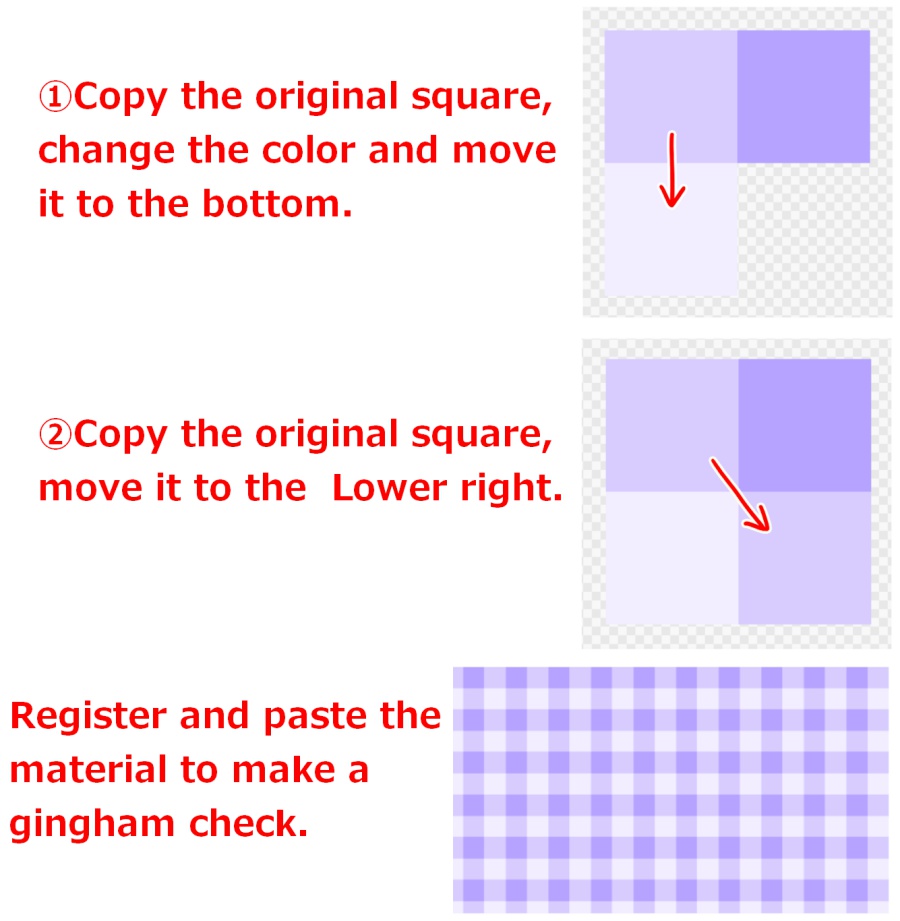
Gingham Check
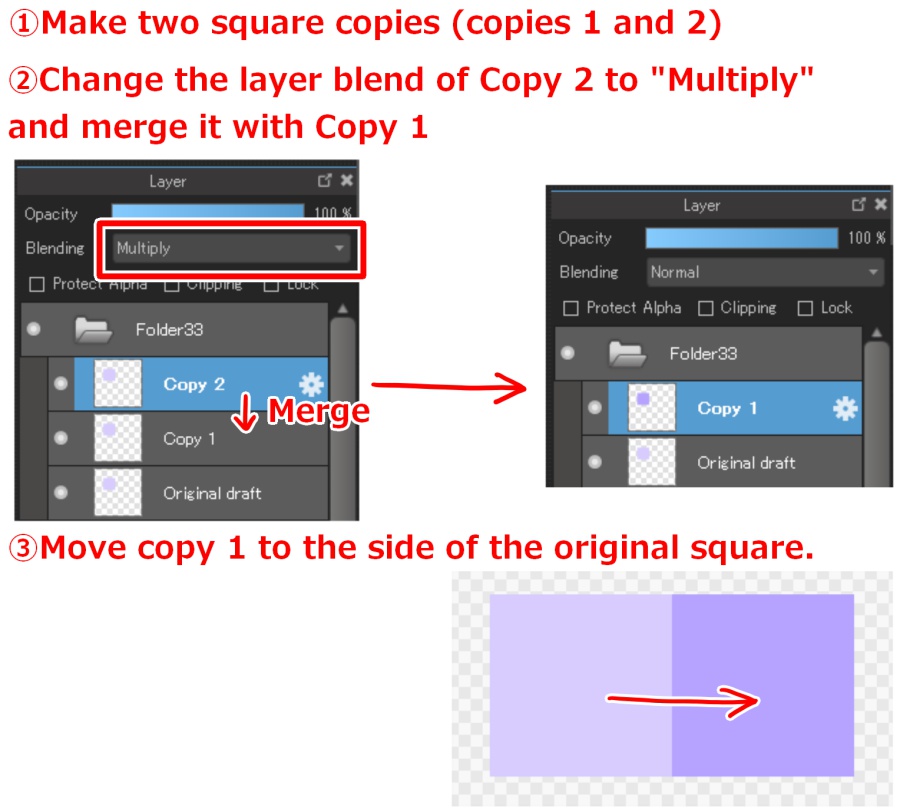
Make two copies of the square. (Copies 1 and 2)
Change Copy 2’s layer blend to “Multiply”, merge it with copy 1, and then move it to the side of the original square.
Copy the original square and paint it white, or a very light color of the original color, and move it to the bottom right.
Copy the original square and move it to the lower right corner.
Go to the layer folder and select “Create from layer/Opacity” to register it.
Next time we will see how to draw a pattern using circles.
Stay tuned.
\ We are accepting requests for articles on how to use /


