2021.03.01
Let’s try to draw a landscape illustration (Part 2)
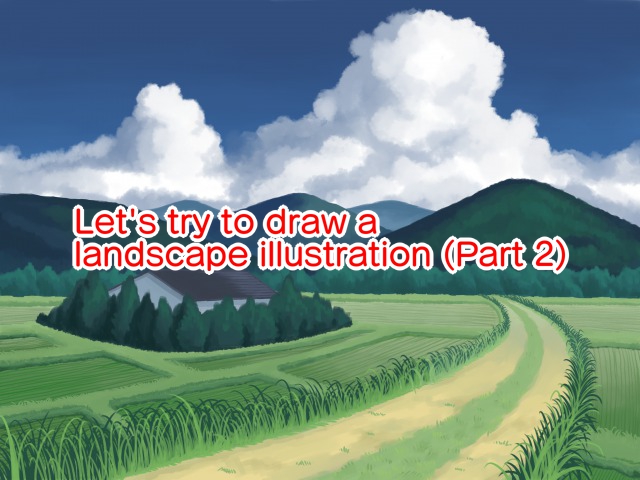

This time we’re going to paint in the details!
Let’s finish up the primer that we skimmed over last time!
1. How to paint the clouds
First, let’s decide on the color of the clouds.
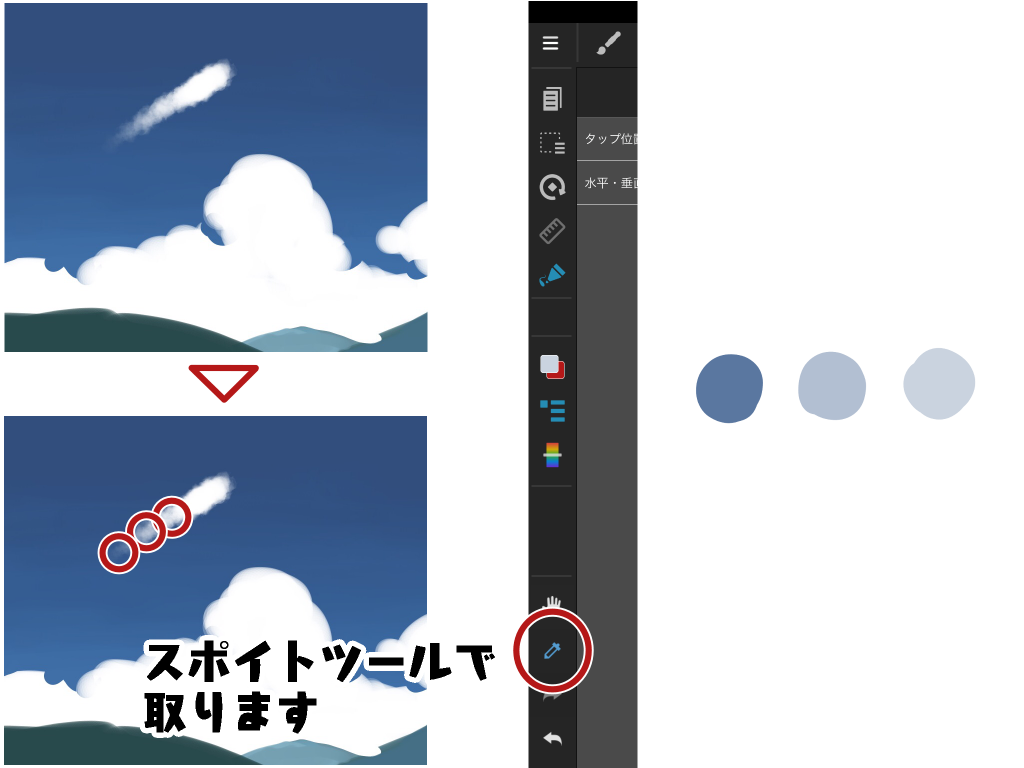
First, we need to decide on the color of the clouds. You can easily create the cloud color by drawing a single line with a fuzzy brush and then using an eyedropper.
Then place the color from the darkest color to the left side of the shadow as shown in ①.
The second color is placed at ②, and the lightest color is placed at ③ to blend in.
It might be a good idea to consciously leave the lightest part of the image white.

Next, trace the pure white areas with the cloud brush and add fuzzy shapes to make it look more like a cloud.
At this time, trace the remaining white parts of the cloud to emphasize them more.
Especially in the upper right corner of the large cloud, I want to make the colors clearer, so I use a smaller brush and draw in more detail.

For the clouds on the left and right edges, increase the brush size, touch them with a gentle touch to make them fuzzy, and the eye will go to the big cloud in the middle for effect!

The clouds are now complete!

2. 3D effect of the mountains
Next, for the mountains, I’ll use a flat brush!
Place a bluish shadow on the left half, which will be the shadow.
Instead of simply placing a dark green, place a bluish color to create a sense of air.
Use the eraser and shape the mountain at the same time.

Blend the colors you have placed, and increase the shadows as well, keeping in mind the unevenness of the mountains.

Place another lighter color and blend it in the same way as before.
When blending, gently trace the border with the darker color to get the best results!


Since the 3D effect was not quite there, I placed the color on the right side where the light hits and blended it again in the same way.
To make the edges of the mountains clearer, trace them with a darker shadow color to give them more shape.

Using the same drawing method, draw in the mountains on the left and behind.
Since the color base is already done, put light and dark colors, blend them, and repeat.
The back mountain is farther away, so you can’t see the details, so it’s better to paint less than the front mountain.
The mountain is now complete!

3. How to draw in trees and grasses
Now, let’s move on to the bottom half of the plant.
Since I had only placed the colors once in the primer, let’s start shaping them.
The trees at the back of the house and around the house should be jagged to resemble conifers, and the narrow path between the rice fields should be thickened a bit.
(Attention! There are separate layers, so make sure you don’t draw on different layers by mistake!

Place a bright color on the innermost trees.
Place them jaggedly and blend them in the same way as the mountains.

We will also place bright colors on the trees around the house.

The trees were not dark enough, so I added shadows around the left side.
In the rice paddies, I used a thin brush to add lines along the path.
I blended the colors in the center of the path, and put darker colors on the path to make it look like soil.

Next, let’s add more weeds to the center path.
Use a watercolor brush for weeds to grow them along the path, one by one, starting with the darkest color first.

This is what it looks like when you grow it all over.
The further back you go, the smaller it gets and the lighter the color becomes.
The more vigorously you draw it, the more it looks like grass. to express the grassiness.

Paint a brighter yellow-green over the top in the same way.
It looks better if you draw it in such a way that it hides the edge of the darker grass you just drew.

A little bit of grass grows on the ground in the center of the path.

4. How to draw a house
This time I’ve hidden the house with trees so that we don’t have to think too hard about the shape of the house.
Only the roof is visible, so let’s start shaping it.

The triangular pillars of the roof are represented while painting flat.
Then add a brighter color to the border to give it a three-dimensional effect, lighten the right side of the roof, and add lines to give it a roof-like appearance.

Here’s what the whole thing will look like when the house is finished!

As a final touch, the trees under the mountain and around the house

And it’s done!
Good job so far!
I hope you have a better understanding of some of the sceneries that you may have been reluctant to take on, if you look at the explanations one by one.
I hope you’ll give it a try!

5. Difference: Autumn scenery

Finally, I’ll show you how to draw autumn as a difference.
What’s clearly different from summer is the overall color, clouds, rice paddies, and grass.
Let’s get right to it!
This time, I’m going to create a summer image and then edit it to make it autumn, but of course you can use the same method as for summer, using orange for the mountains and trees from the start.
First, delete the sky layer and use the sky watercolor brush to create a sky that gradually gets darker from top to bottom as it spreads out to the left and right.
In the summer, the sky was brighter from the top to the bottom, but this time it is lighter from the bottom to the top.
When painting, use the largest brush size possible for the sky, and don’t put too much pressure on your hands to create a beautiful gradation.

Next, we’ll change the mountains to look more like autumn!
It’s a bit complicated, so here’s an illustration!
1) Create a new layer on top of the mountain layer.
(2) Click on “Clipping” (clipping means that you can only draw on the mountain layer in this case).
(3) Select the “Normal” button in the upper right corner, and set it to “Hard Light”.

Use the airbrush in the brush to add fluffy orange and change the color to autumnal.
Use the airbrush to apply a thin layer of orange to the front mountains and a tighter layer to the back.

Do the same clipping on the tree and grass layers, and add more and more orange with the airbrush!
Next is the field.
Next is the field, which will look very different from the summer.
The base color was green before, but this time I added a dark yellowish color.

Add color again so that the farther back in the field, the brighter the color will be with less contrast.
At this point, instead of using a solid color, leave a line along the furrows to show a little expression.

Next, use the watercolor brush set for grass to paint the bushy rice.
You can easily convey the fluffiness of the rice by painting it so that it covers the rice field.

Draw the entire rice plant along the base color, dropper the color of the field.

Now on to the clouds!
Clouds in autumn are spread thinly high in the sky, unlike in summer.
Use a cloud brush to spread them thinly.
The closer the clouds are to the ceiling, the closer they are to the horizon, the farther away they are.
Therefore, make the clouds thicker at the top of the screen and thinner as they approach the mountains to create a sense of depth in the sky.

The next step is to lightly cover the clouds with gray.
It’s evening, so a slightly darker gray is fine.

Tracing in bright yellow to bring light into the clouds.
Unlike in the summer, you can add color to the underside of the clouds to make it look more like a sunset.
Then add a thin layer of bright clouds near the mountains.

Finally, draw in the grass in the center of the path in the same way as in the summer, but choose colors that are more autumnal.
In autumn, fluffy weeds also grow, so use a flat brush set for mountains to add long, thin strokes.

And there you have it, your autumn landscape is complete!

What do you think?
Clouds and plants show many different expressions, so there are many different ways to draw them.
Please give it a try!
(Text and pictures by Hiromi Arakane)
\ We are accepting requests for articles on how to use /

