2021.11.21
The Final Touches: How to Darken a Light Shadow
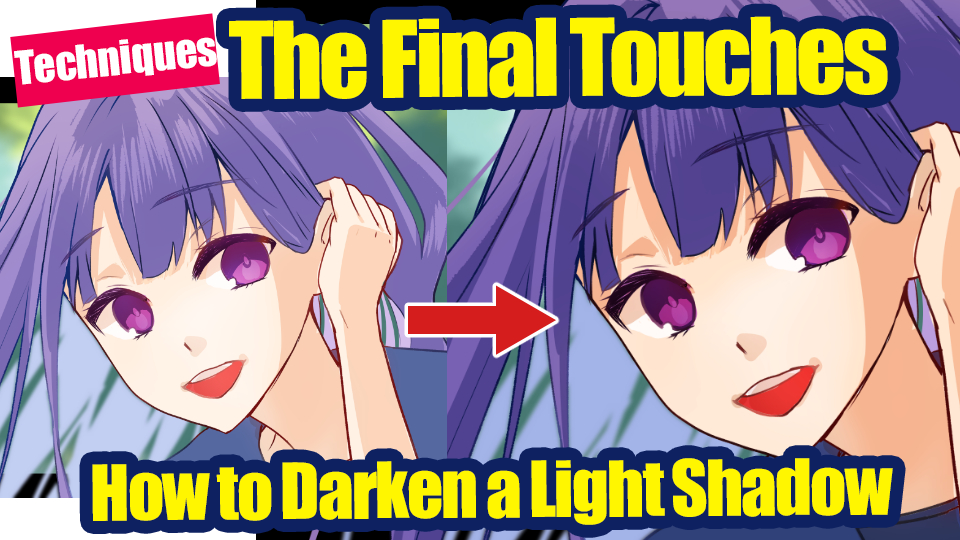

When you review your finished illustration, do you ever feel that the shadows have kind of faded?
In this article, I would like to introduce two simple methods that can be easily used to darken the shadows.
The following image below is an illustration that does not look very crisp when seen from a distance because the shadow is thin.
Sure, thin shadows may look good in some scenes, but in this article we will darken the shadow to improve the drawing.

In order to do this we can either,
1. Create a merged illustration and cover it with a multiplied layer.
2. Raise the Contrast Tone Curve
We will go study these two methods.
Method 1:Create a merged illustration and cover it with a multiplied layer.
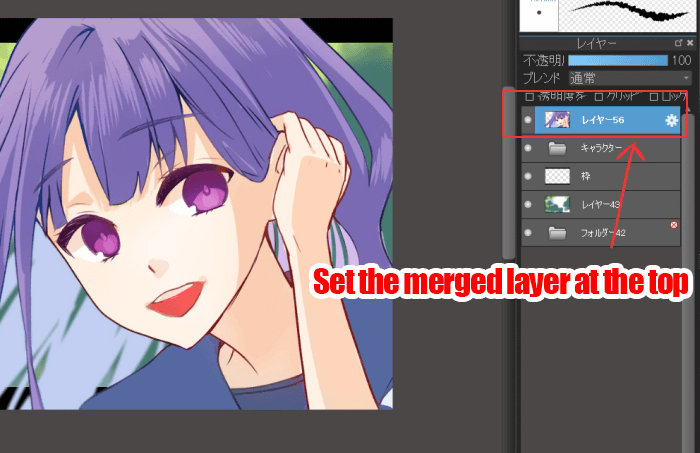
Create a single layer and bring it to the top layer.
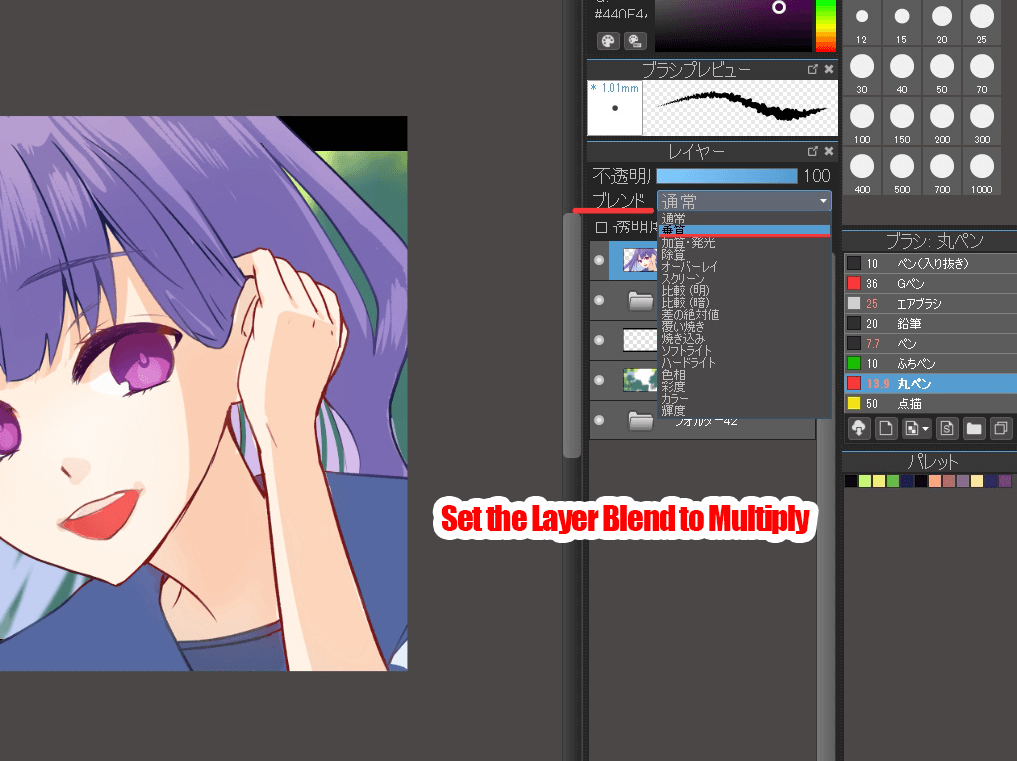
Set the layer blend to Multiply.
The opacity of the multiplier is 100%.
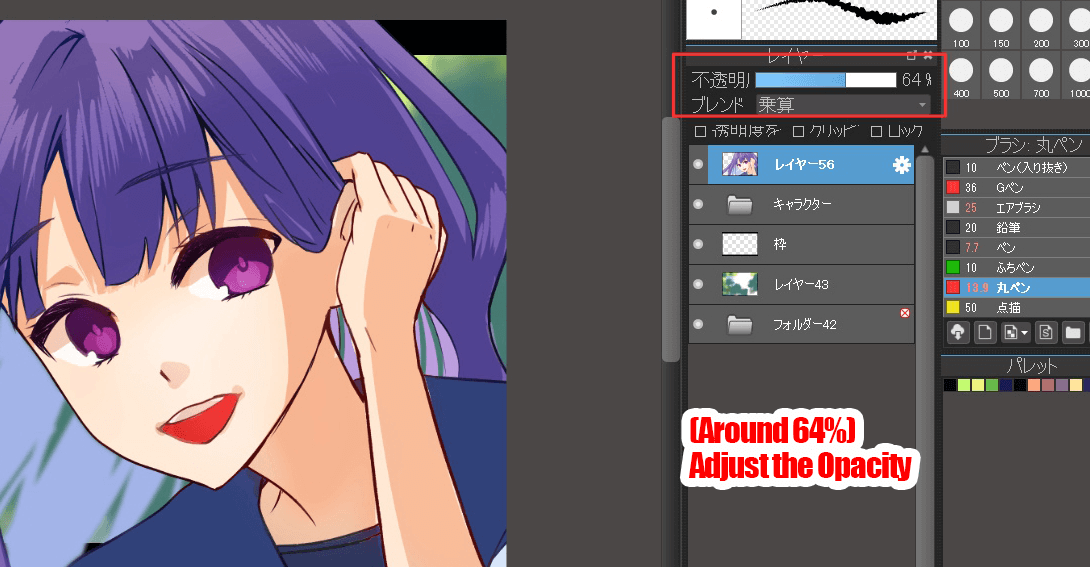
This will make it look too dense, so we will lower the opacity.

Lower the opacity of the multiply layer.
Here, I set it at about 64%.
Now the shadows are darker and more crisp than in the first illustration.

Correct and add highlights to the eyes to complete the project.

Method 2:Raise the Contrast with Tone Curve�
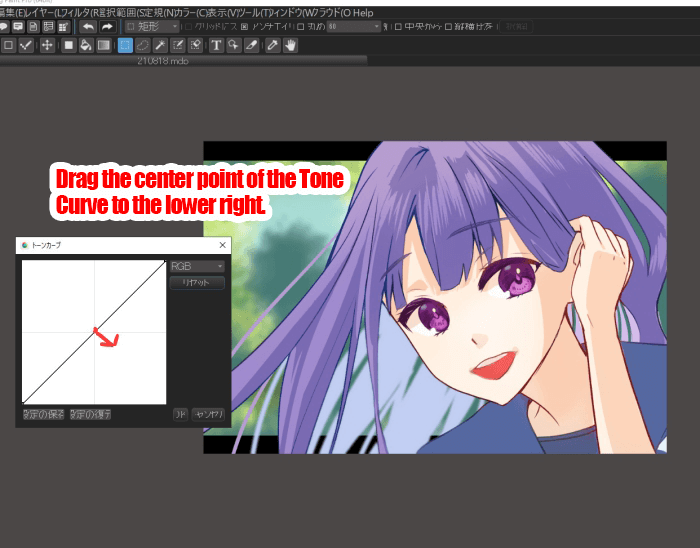
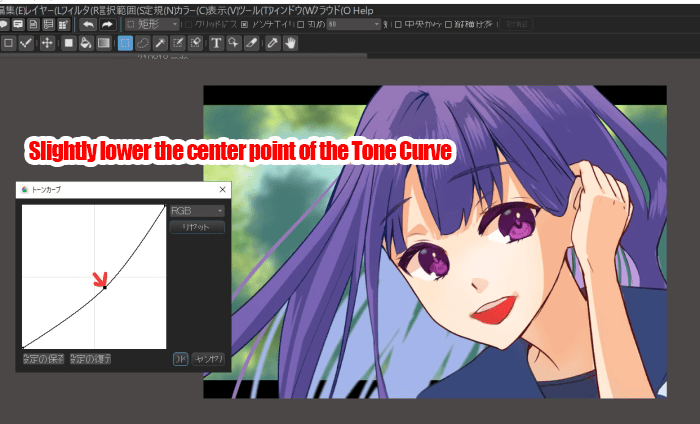
The second method uses the tone curve.
Select “Tone Curve” from the “Filter” menu.
This makes the shadowed areas more darker and lively.

?Click the link below to learn more about Tone Curve.
?Technique?What is Tone Curve?
And that is how you can easily fix thin shadows.
The strength of digital technology is that it allows us to adjust shadows whenever we want.
Please give it a try!
(Text and picture by Setsu Yoshida)
\ We are accepting requests for articles on how to use /

