2022.08.15
How to Draw “Hand-Drawn-Picture-Like” Illustrations
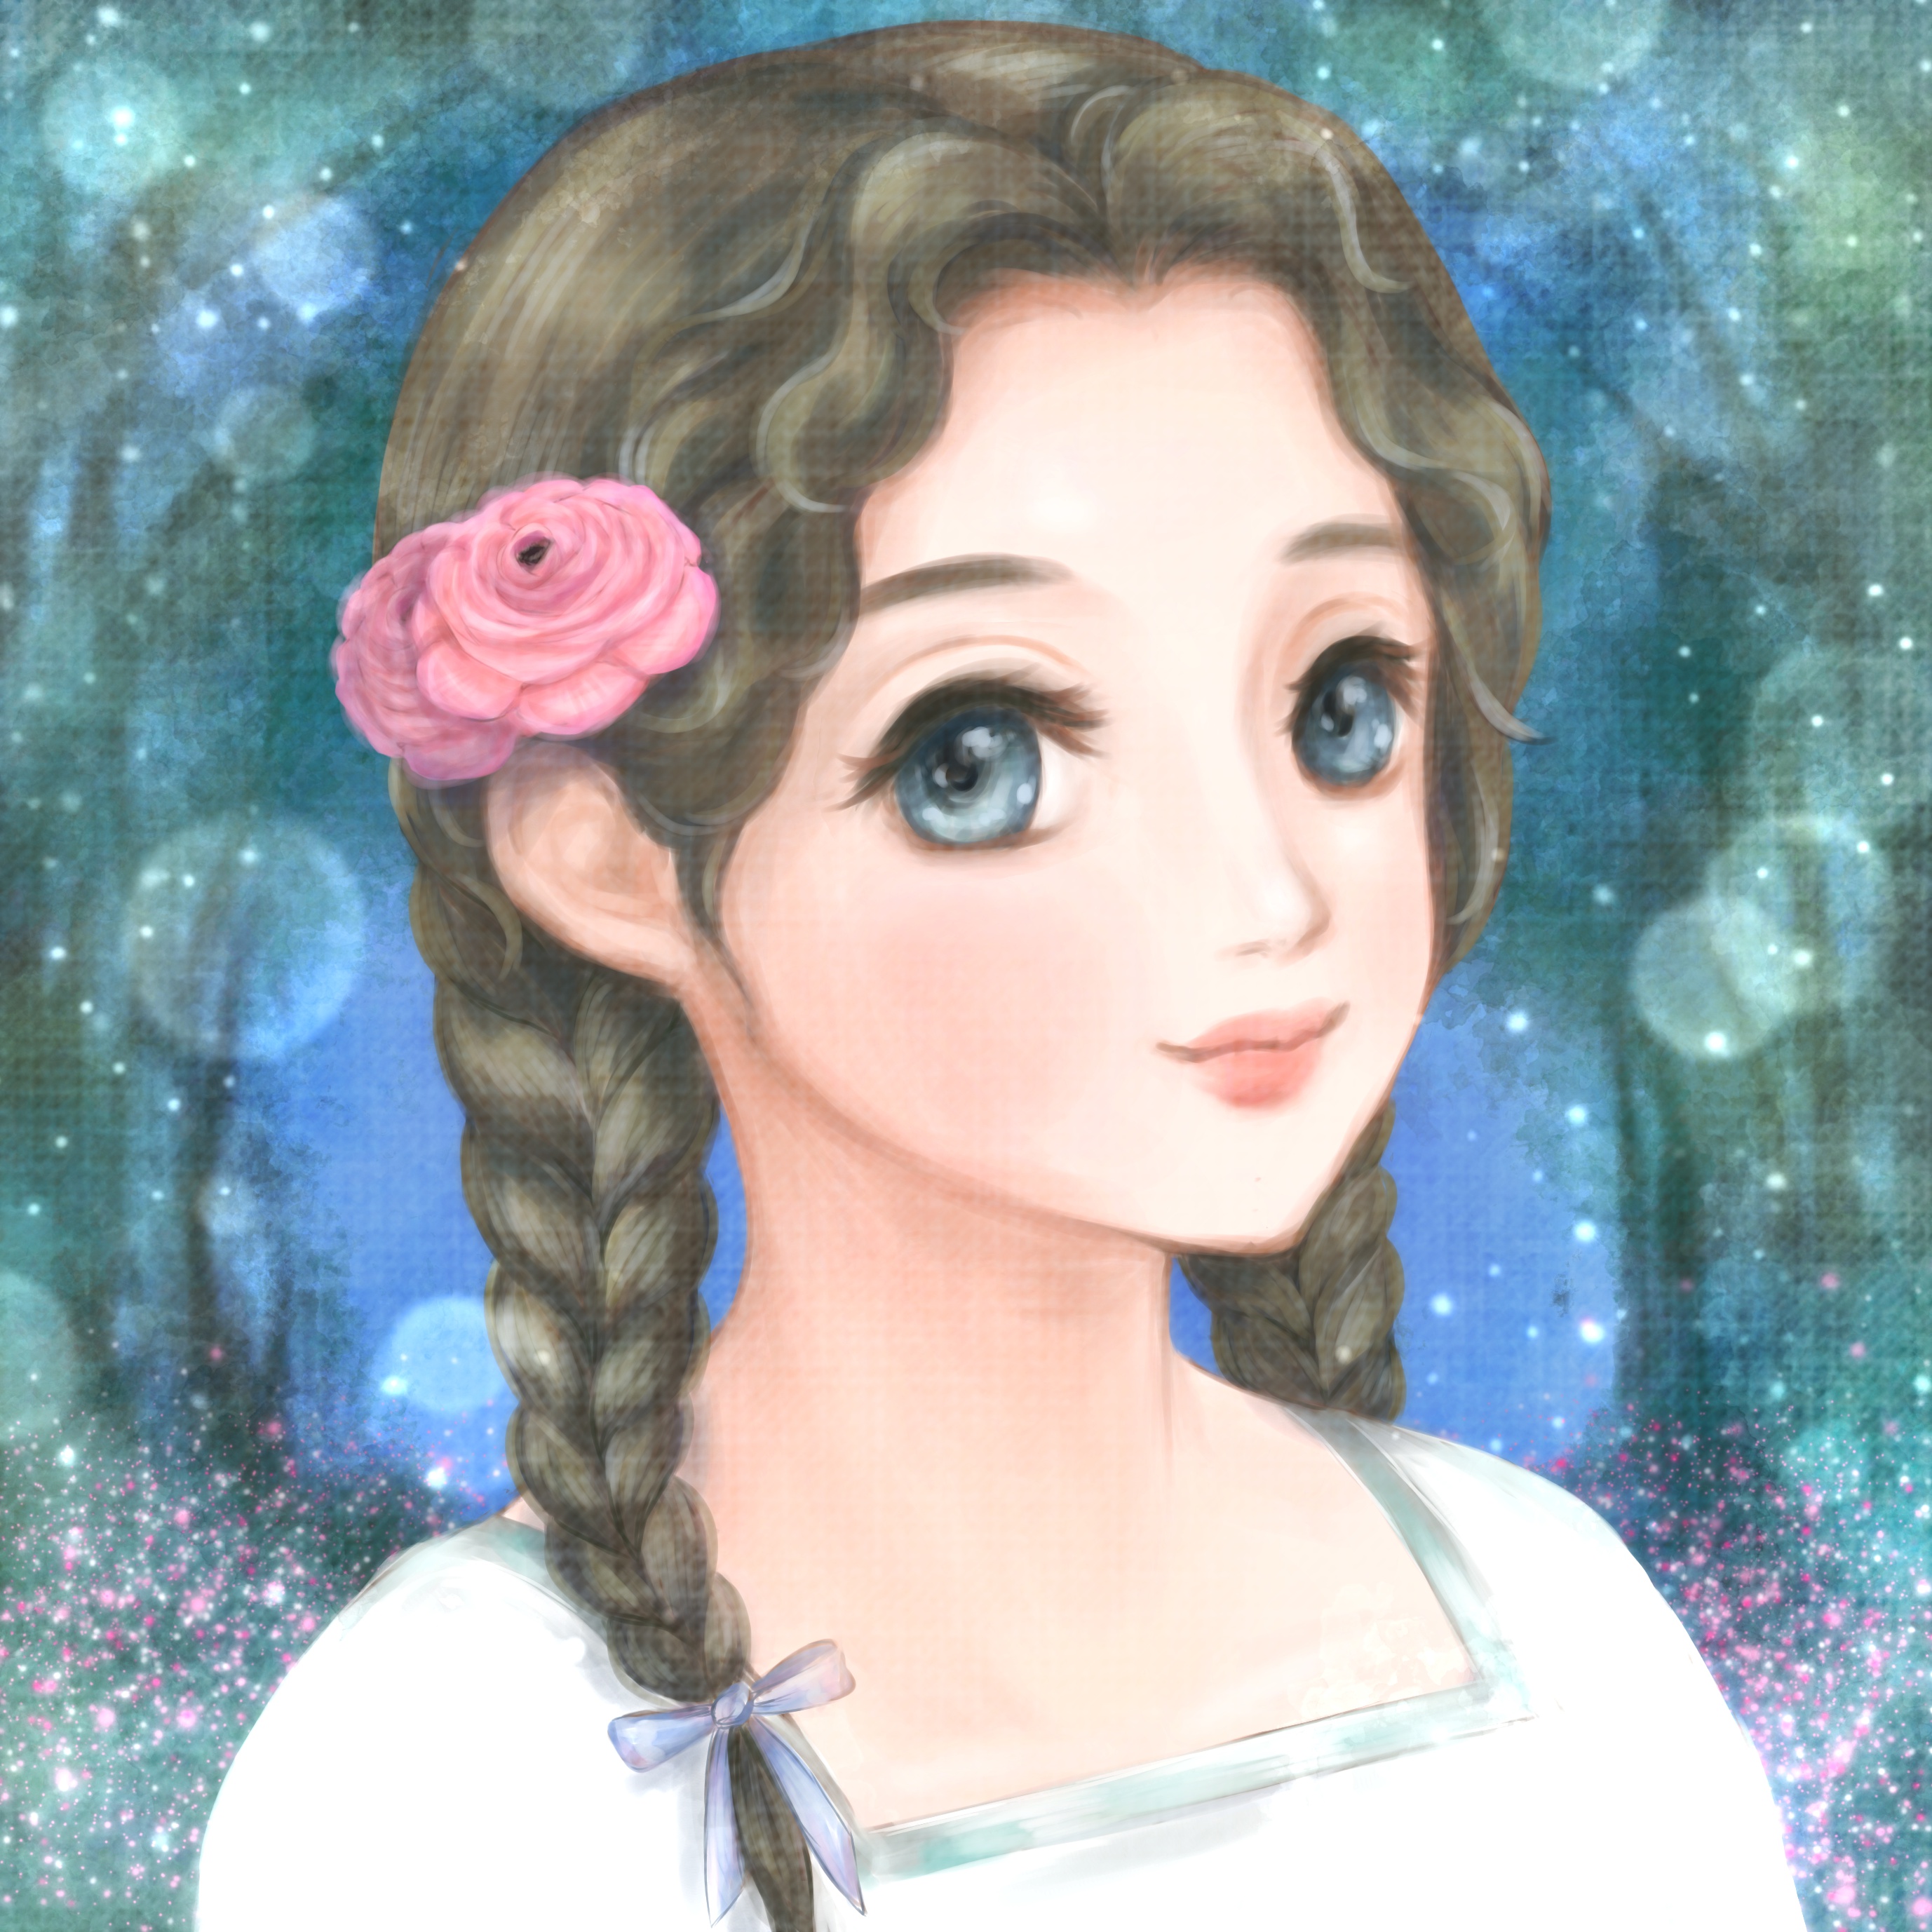
This article will show you how to draw digital illustrations that look like “hand-drawn pictures”.
You will be able to create works with a unique texture, ideal for picture books etc.
Draw a Sketch
To begin with, let’s draw a sketch. This time, the face of a girl.
Start drawing a rough sketch with the image of a cute girl in your mind.
The name of the brush used is “watercolor”. Draw it lightly with the opacity of 20%.
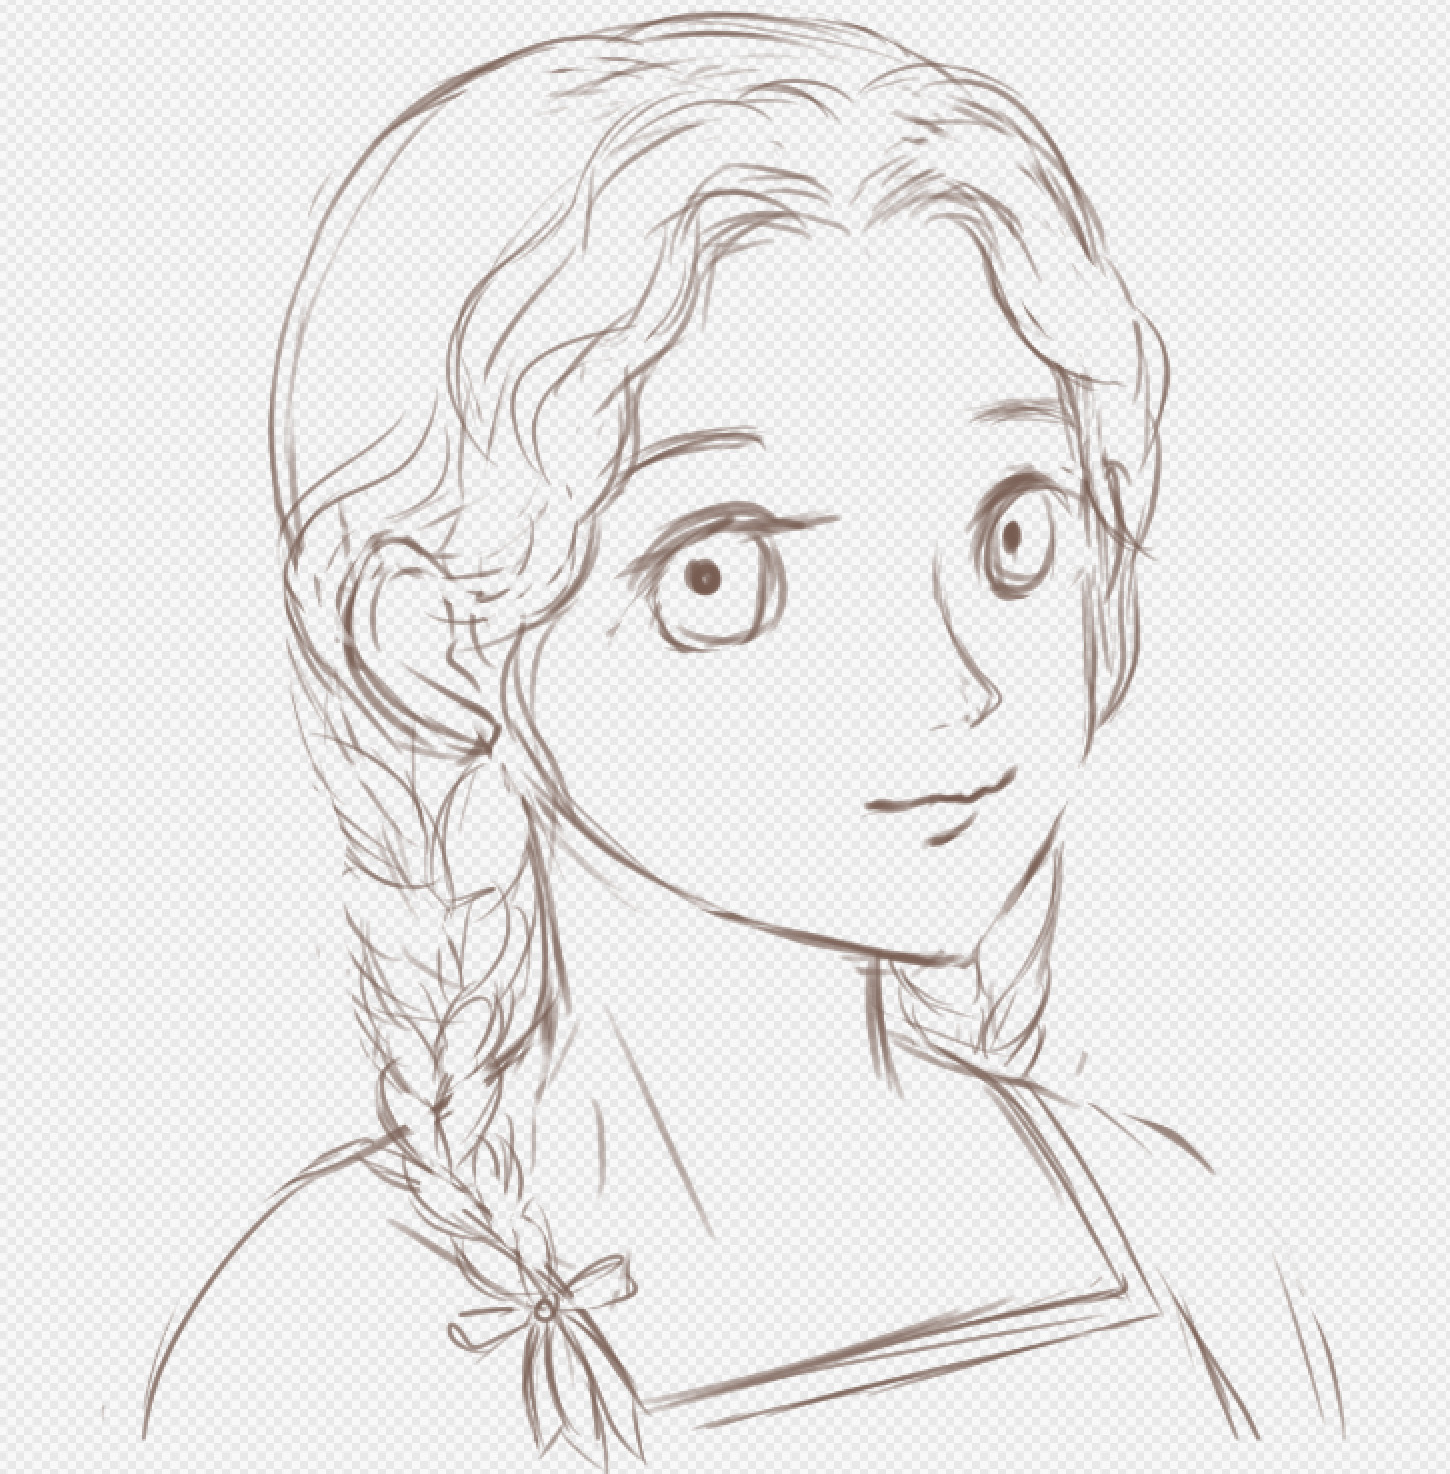
Since we’ll add colors on this sketch, try erasing as many unnecessary lines as possible.
Draw Details in a Thick Coating
I bet that for “hand-drawn picture-like” illustrations, a thick painting method is ideal.
Some readers may think that a thick coating seems difficult to do. However this method is not that difficult as it sounds, since it doesn’t need subdivided layers!
We’ll use a “watercolor” brush mainly for a thick painting.
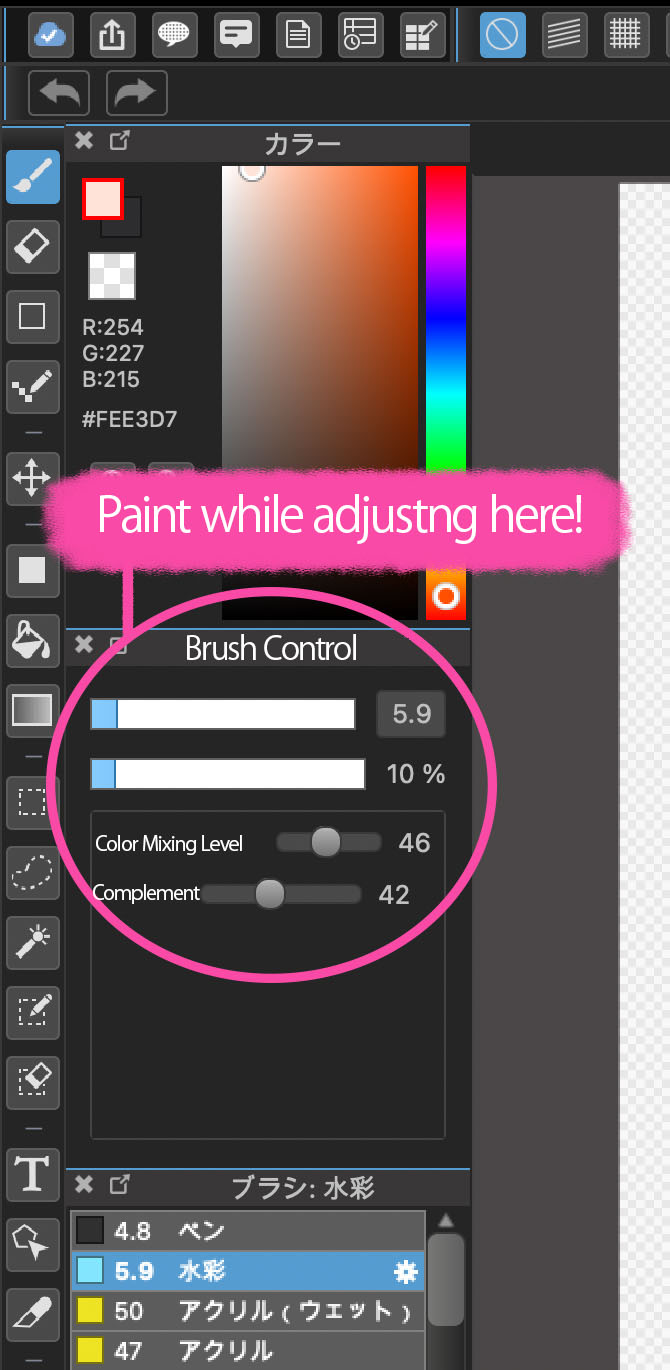
Start painting, while adjusting “opacity”, “color mixing level” and “complement” in the brush control.
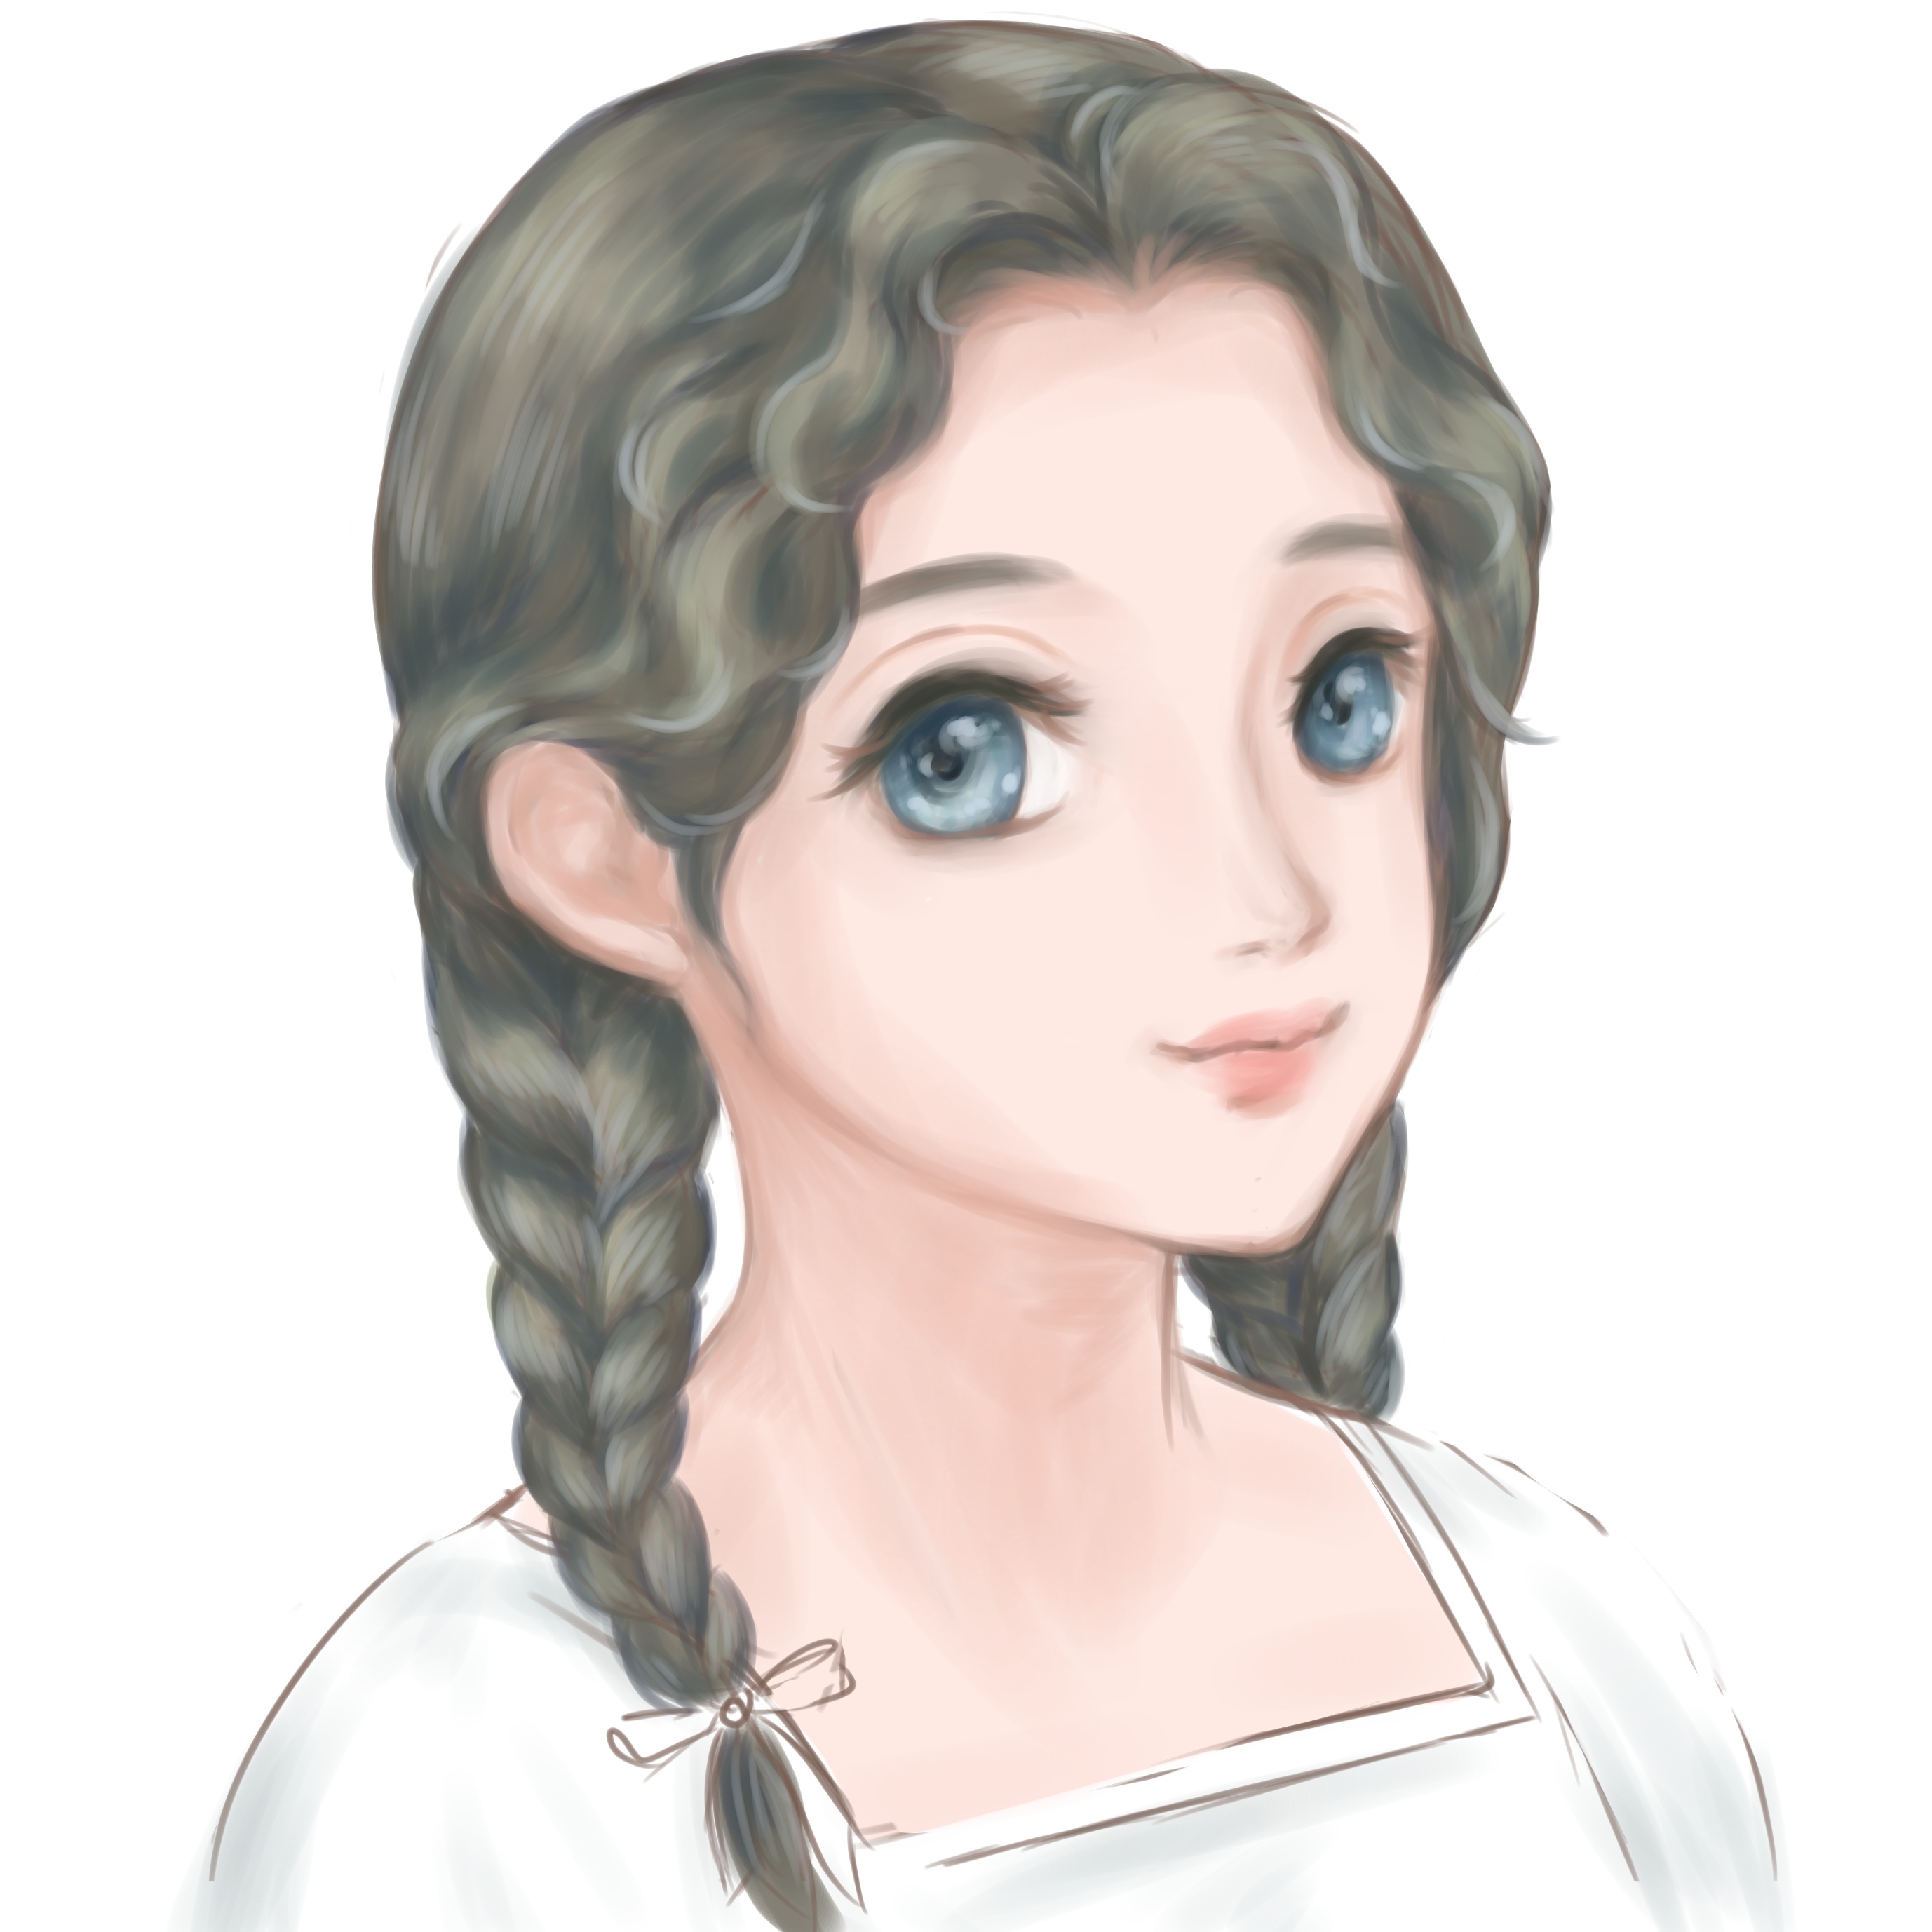
After the solid painting of a base color of the skin, add other colors lightly.
Adding colors continuously at an opacity of 10-20% will keep the work from being muddy and staying in a beautiful clear color.
“Color mixing level” and “complement” are about 50% this time.
Try to find the setting you like while checking how the colors are accumulated!
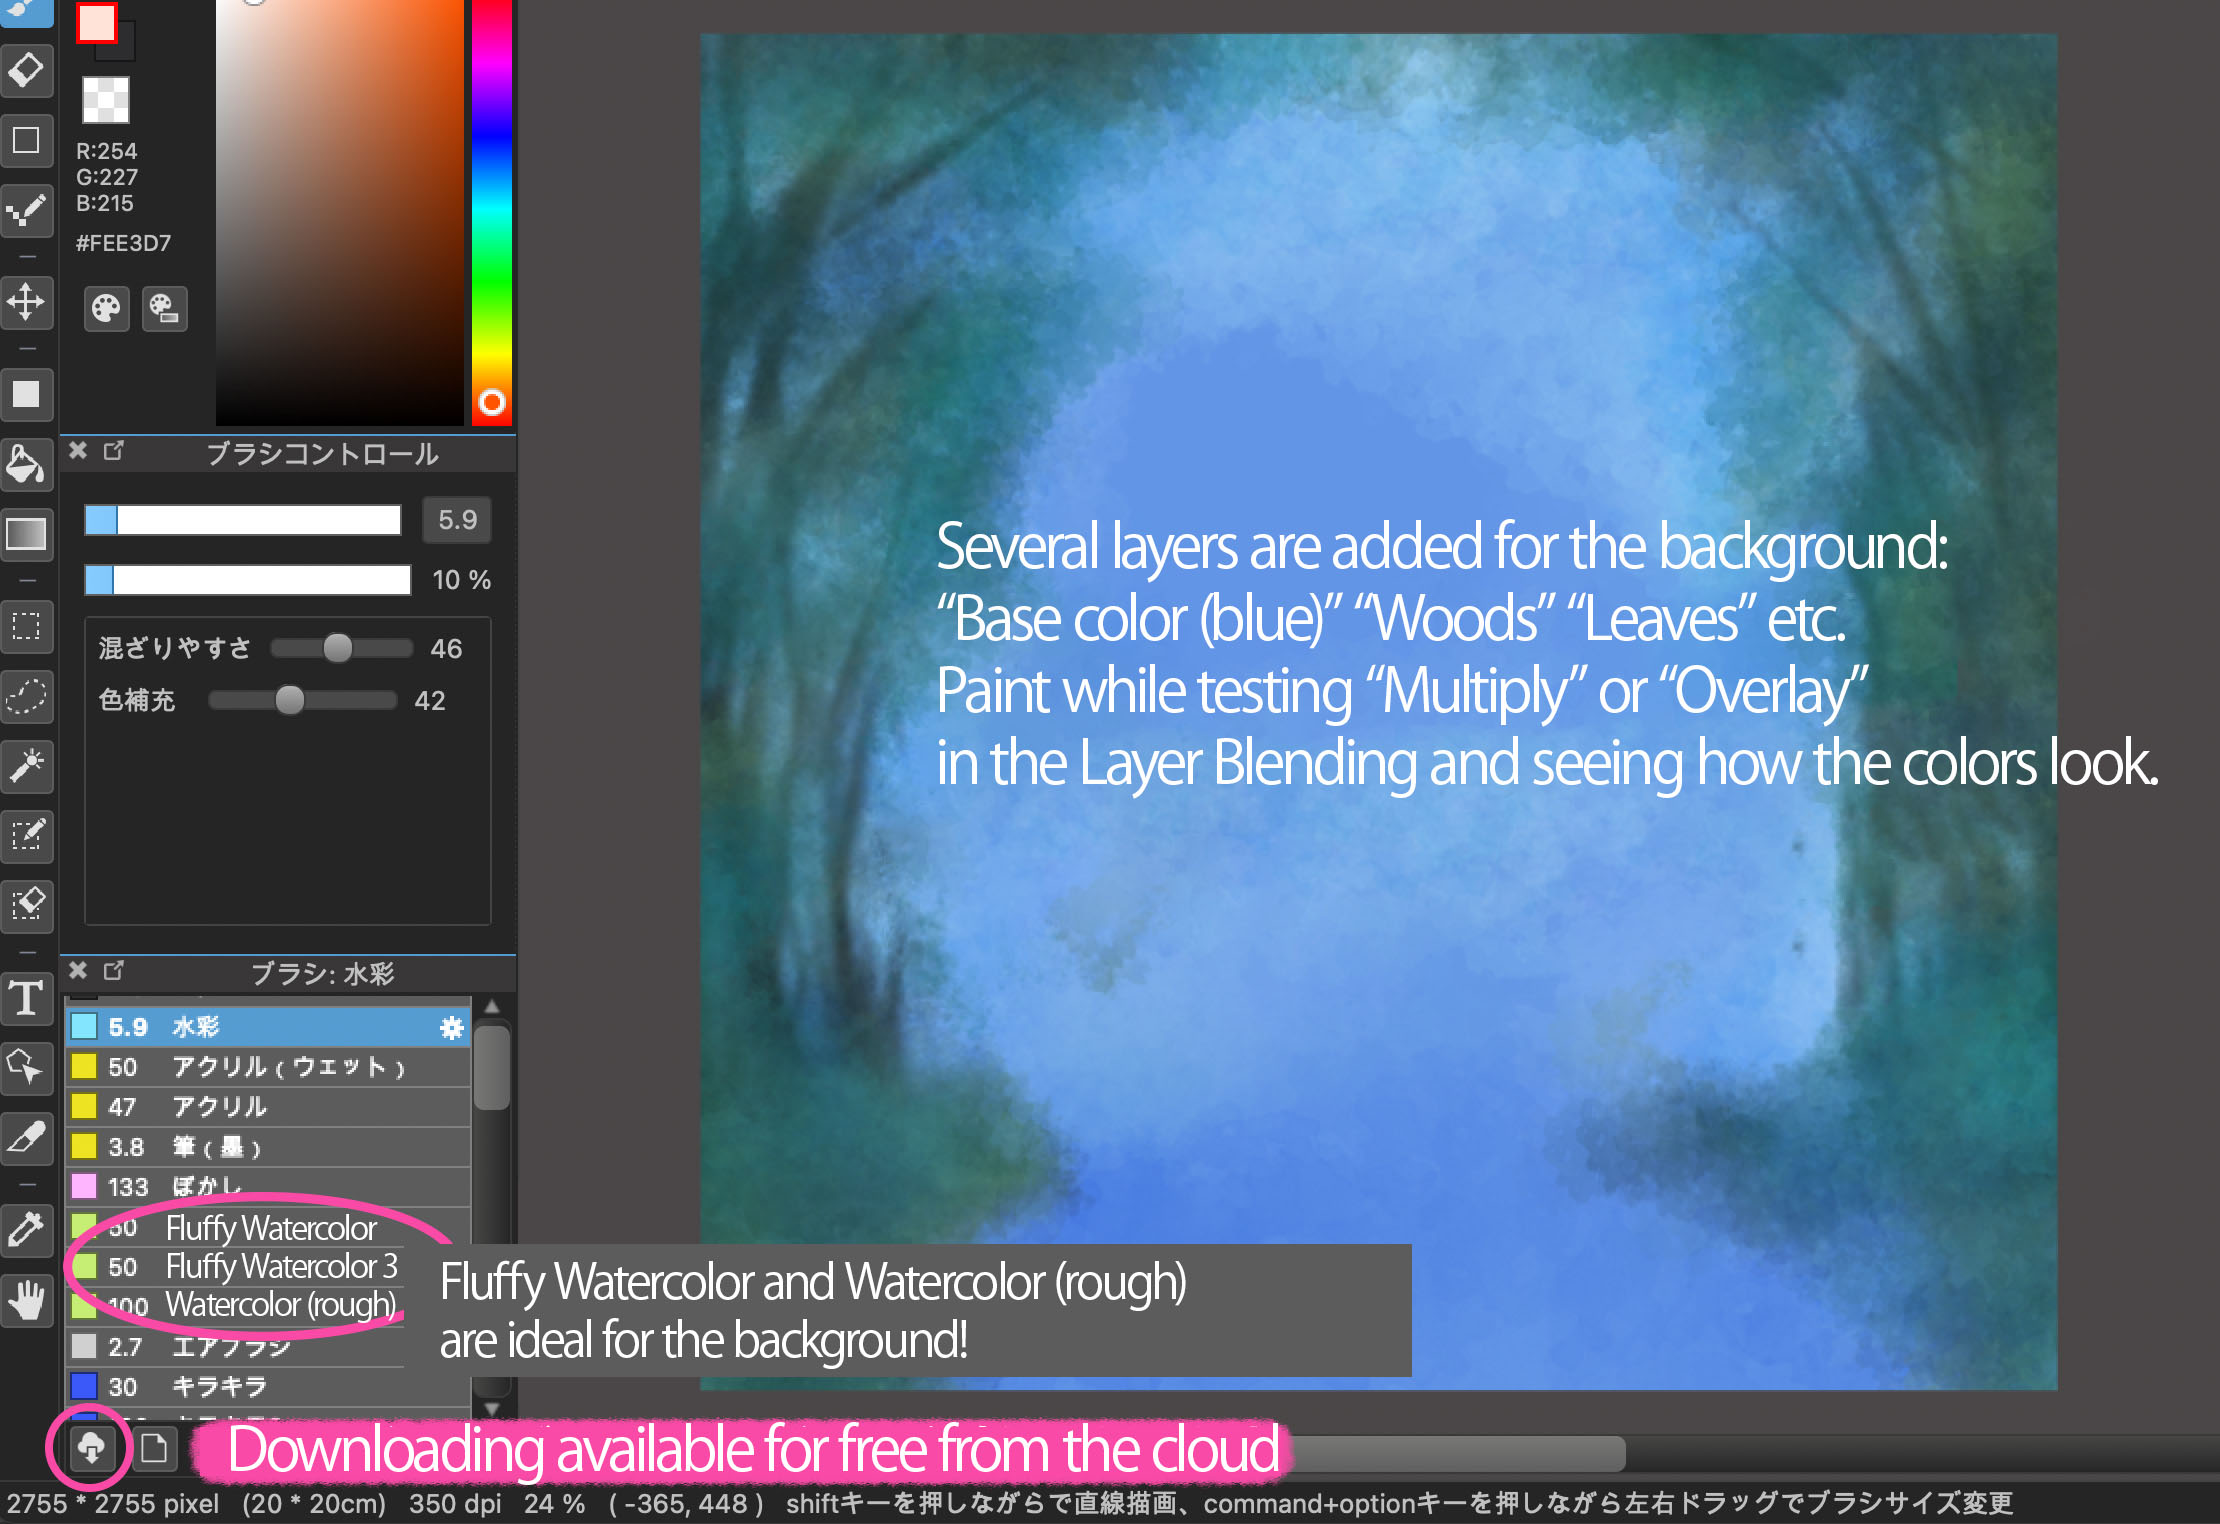
As for the background, you can use “Fluffy Watercolor” and “Watercolor (rough)” brushes to create a hand drawn, vague look effortlessly!
To make it more expressive, you can set the brush color as “Transparent”, and continue both the painting and erasing.
Add Textures
This process is the most instrumental part to make the work look like a hand-drawn picture.
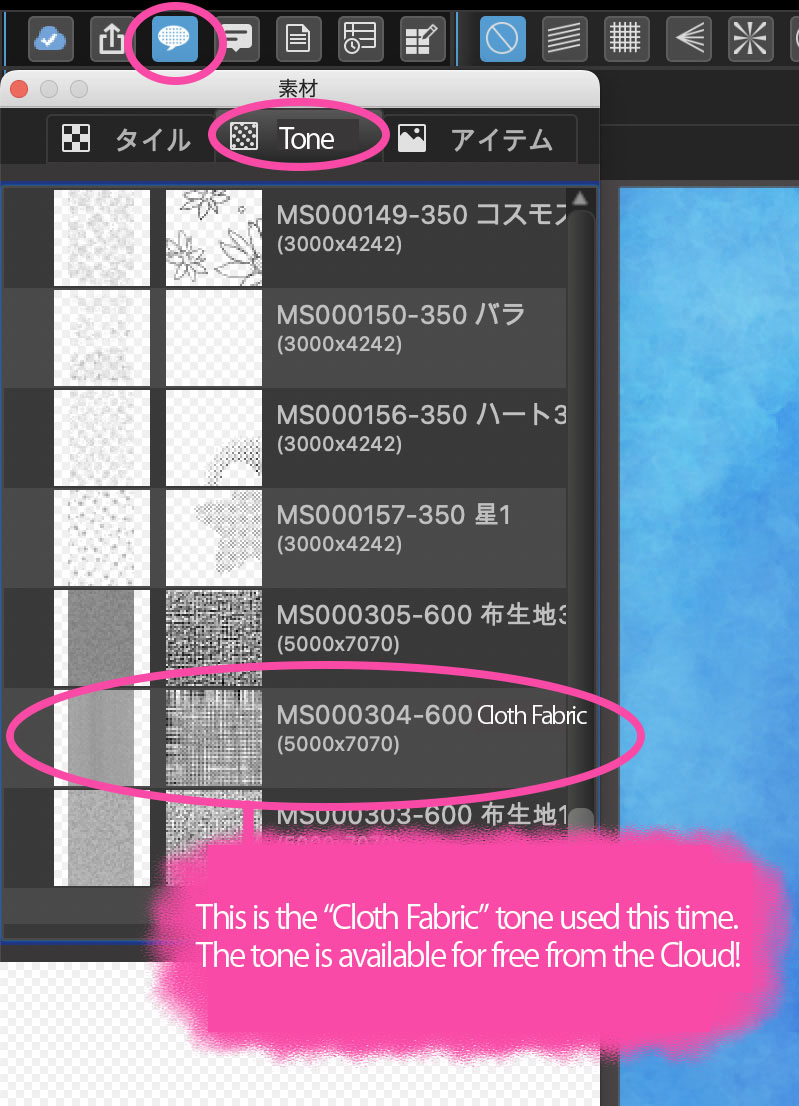
Add a new layer. Open “Tone” in the cloud material window, and download “Cloth Fabric”.
Drag the tone onto the illustration.
Select “Overlay” of the tone’s layer blending.
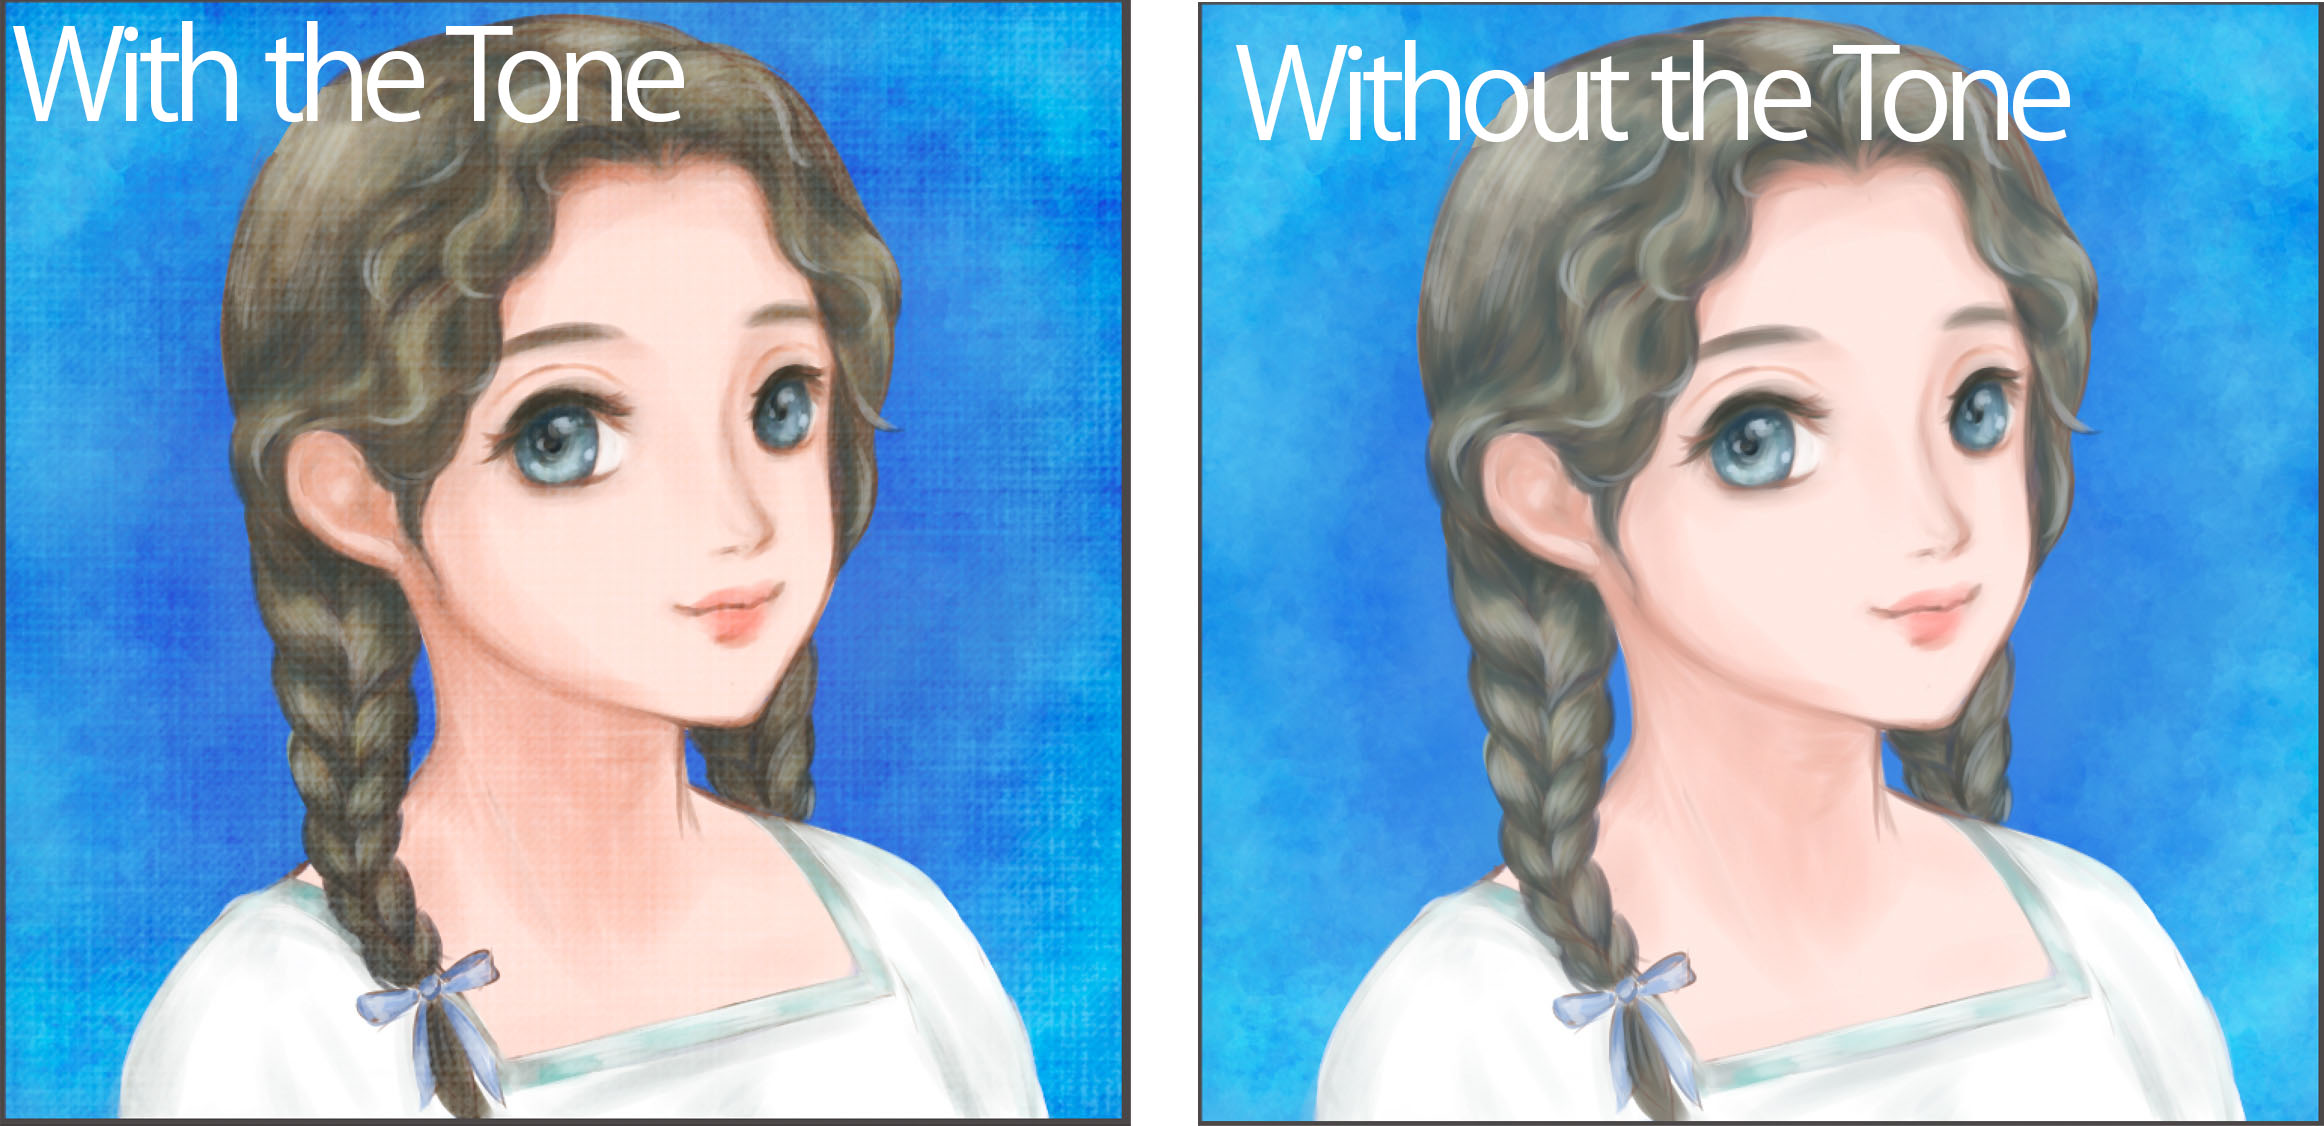
This will easily create a texture which looks as if painted on a canvas!
This looks fine by itself, but you can make it look more like a real canvas by blurring the tone a little with “Gaussian Blur” from the “Filter” menu.
Adjust the Entire Image to Complete
After adding the texture, continue touching in the work seeing the whole balance.
You may think that revision cannot be done this time, since individual facial parts are not divided in layers. It’s fine.
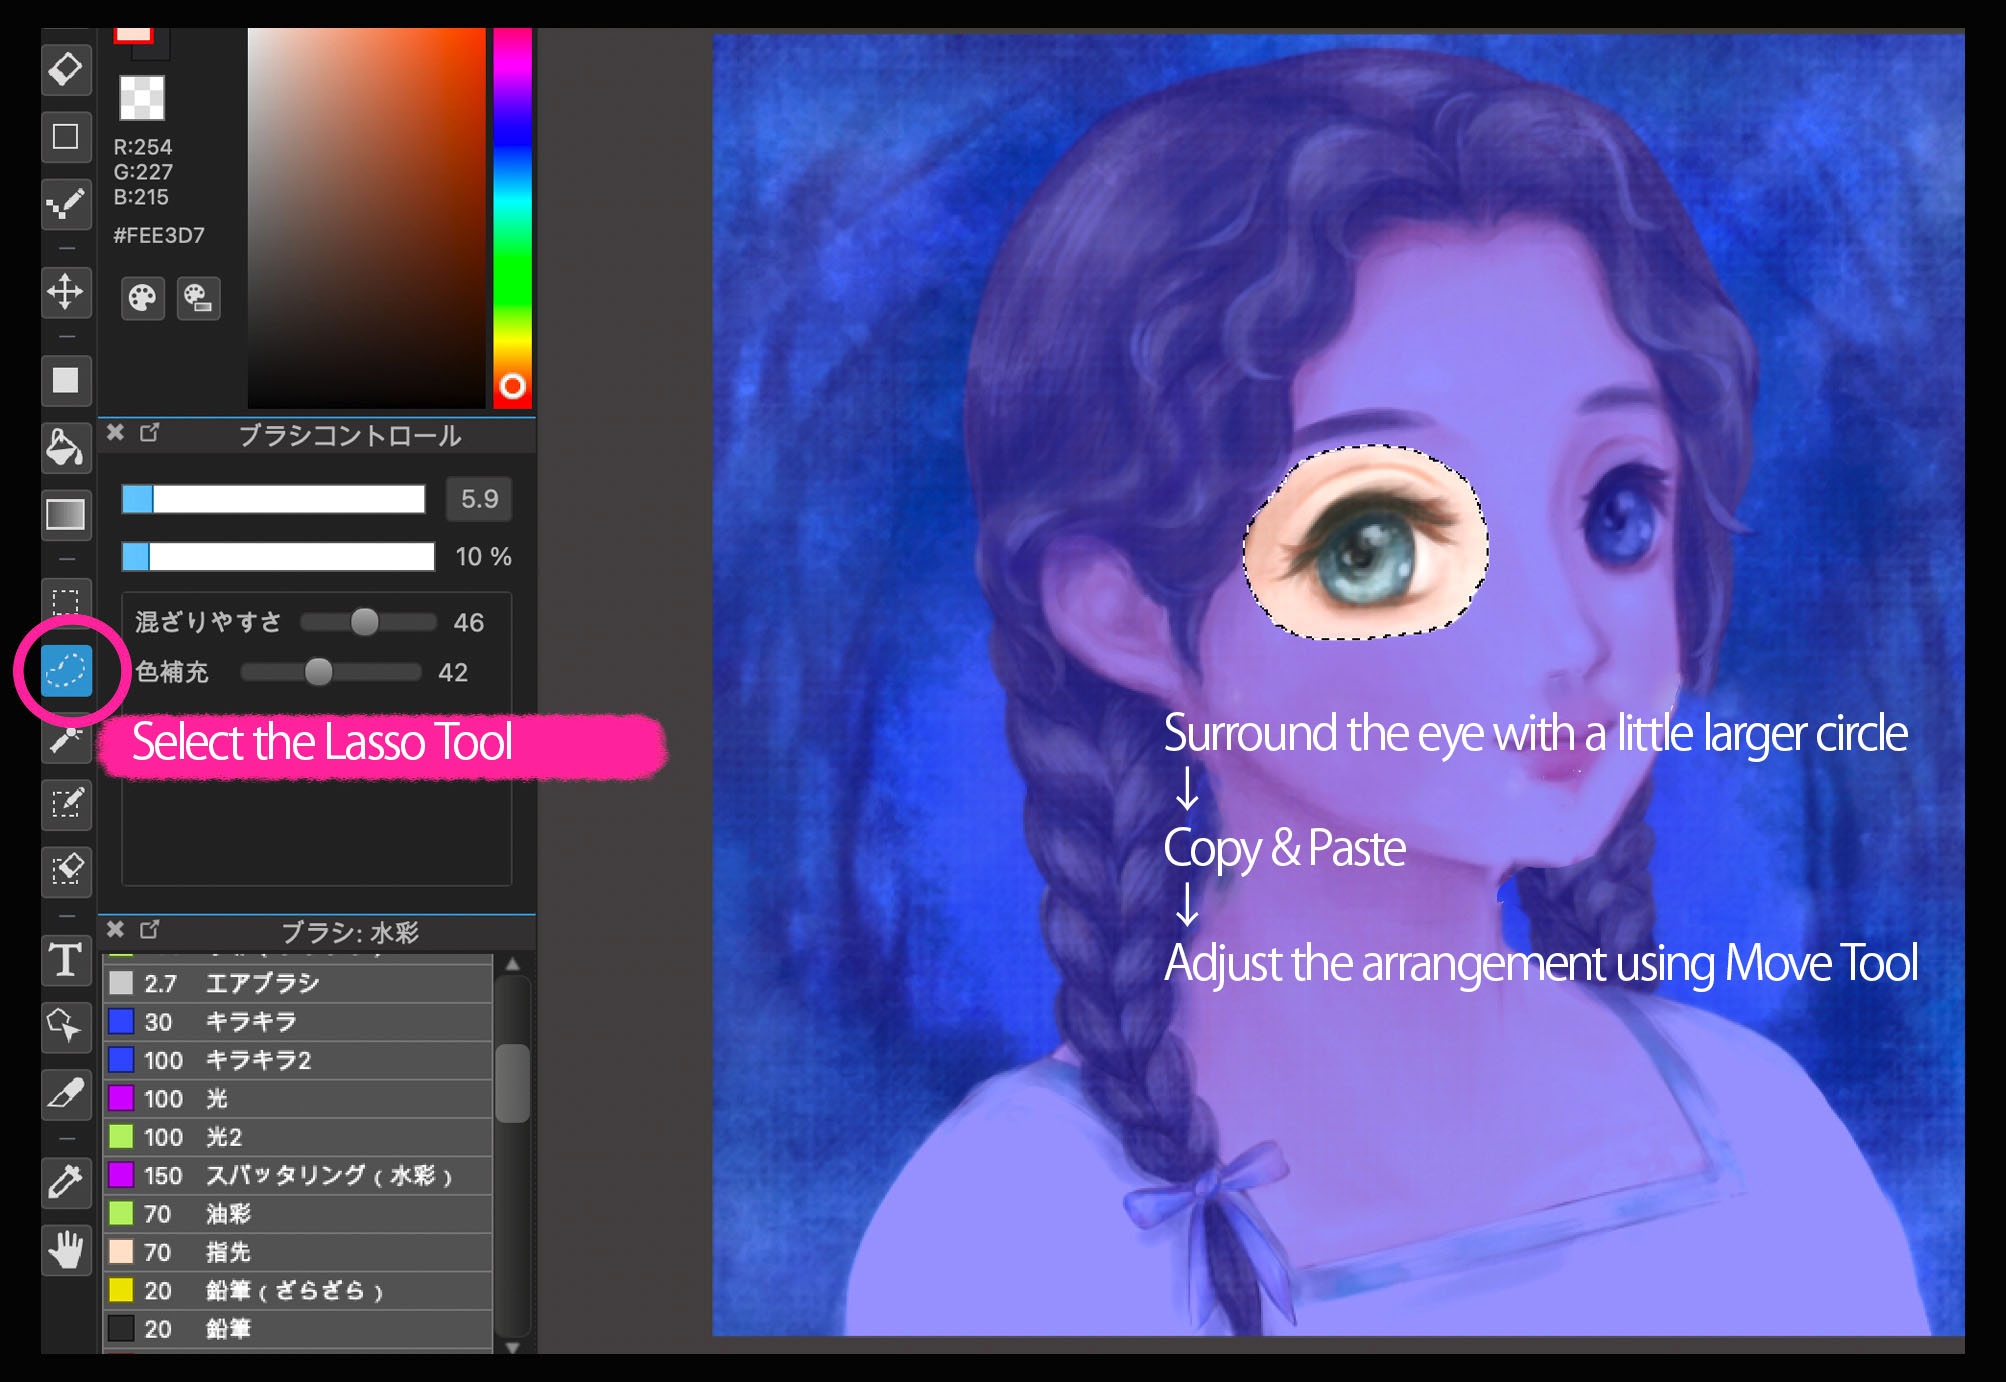
To make little position adjustments such as that of eyes, you can use “Lasso Tool”. Surround parts you want to select with a bit larger circle, and move them by copying and pasting.
With places decided, blur the outline and integrate them to the original layer. Then, blend them to the surroundings using brushes such as a watercolor brush.
This is the good thing about digital illustrations. Easy to fix.
Seeing the whole balance, add details for objects and backgrounds.
This time, flowers on the head and the flower garden in the background have been added.
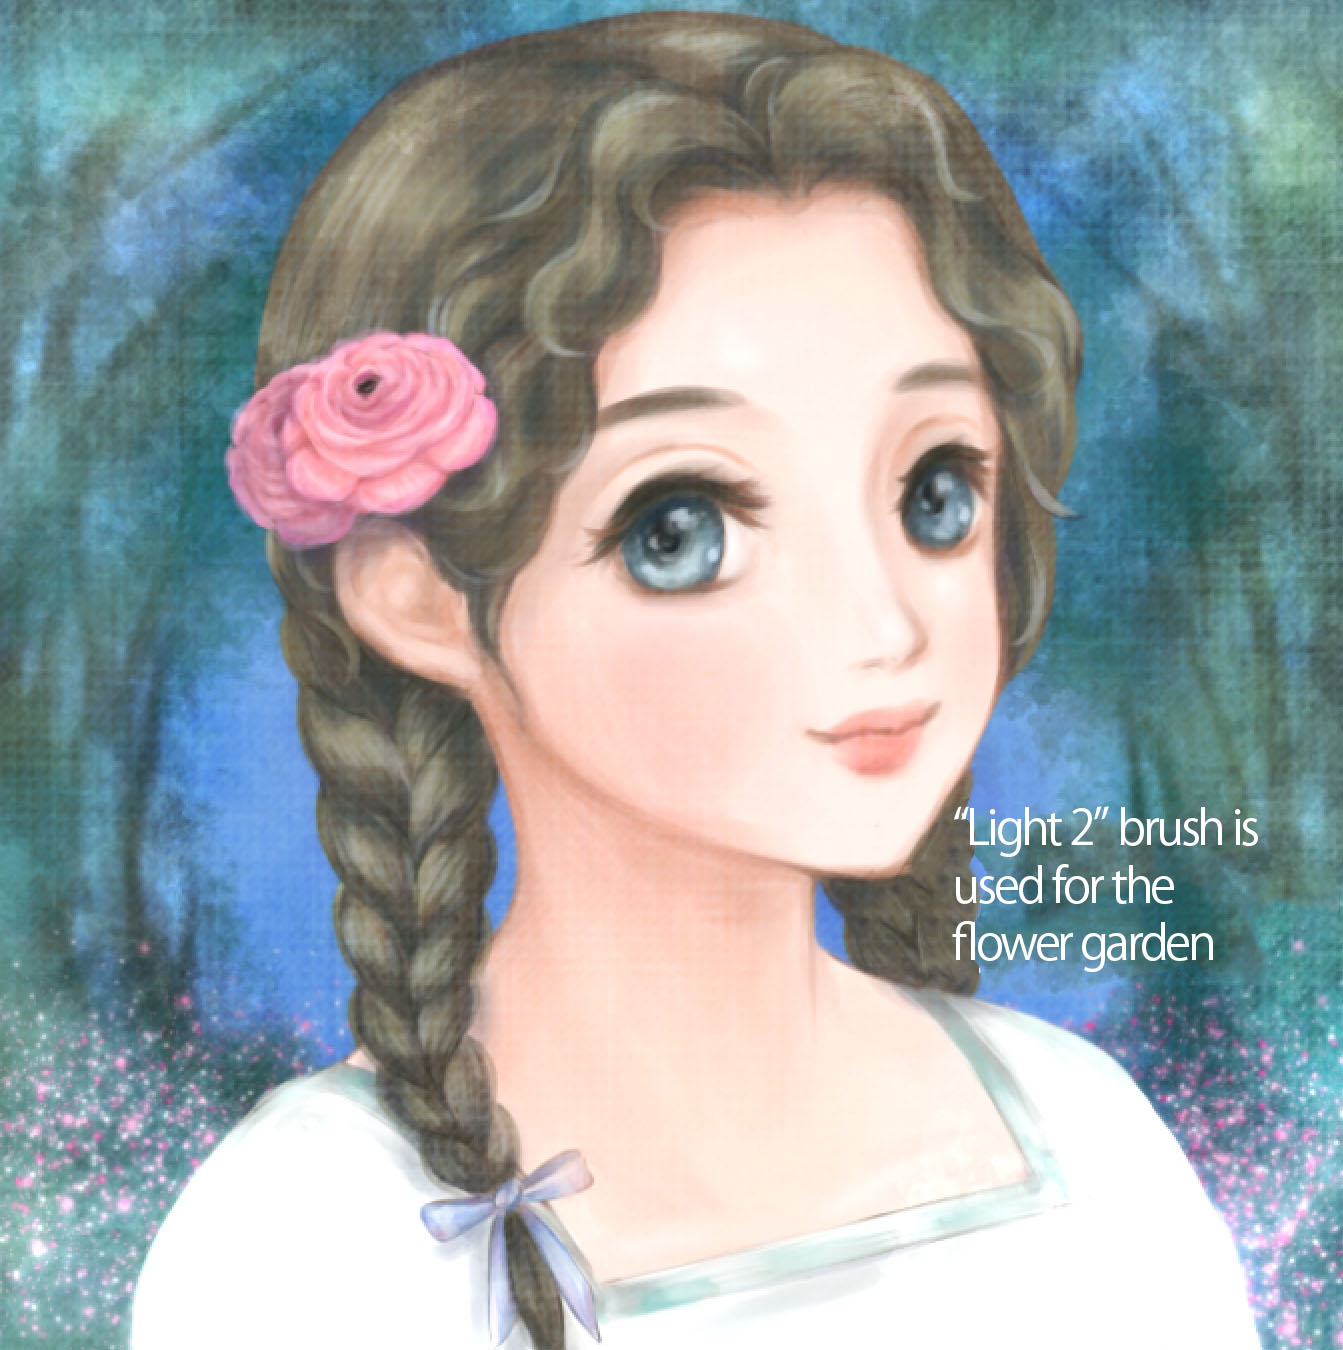
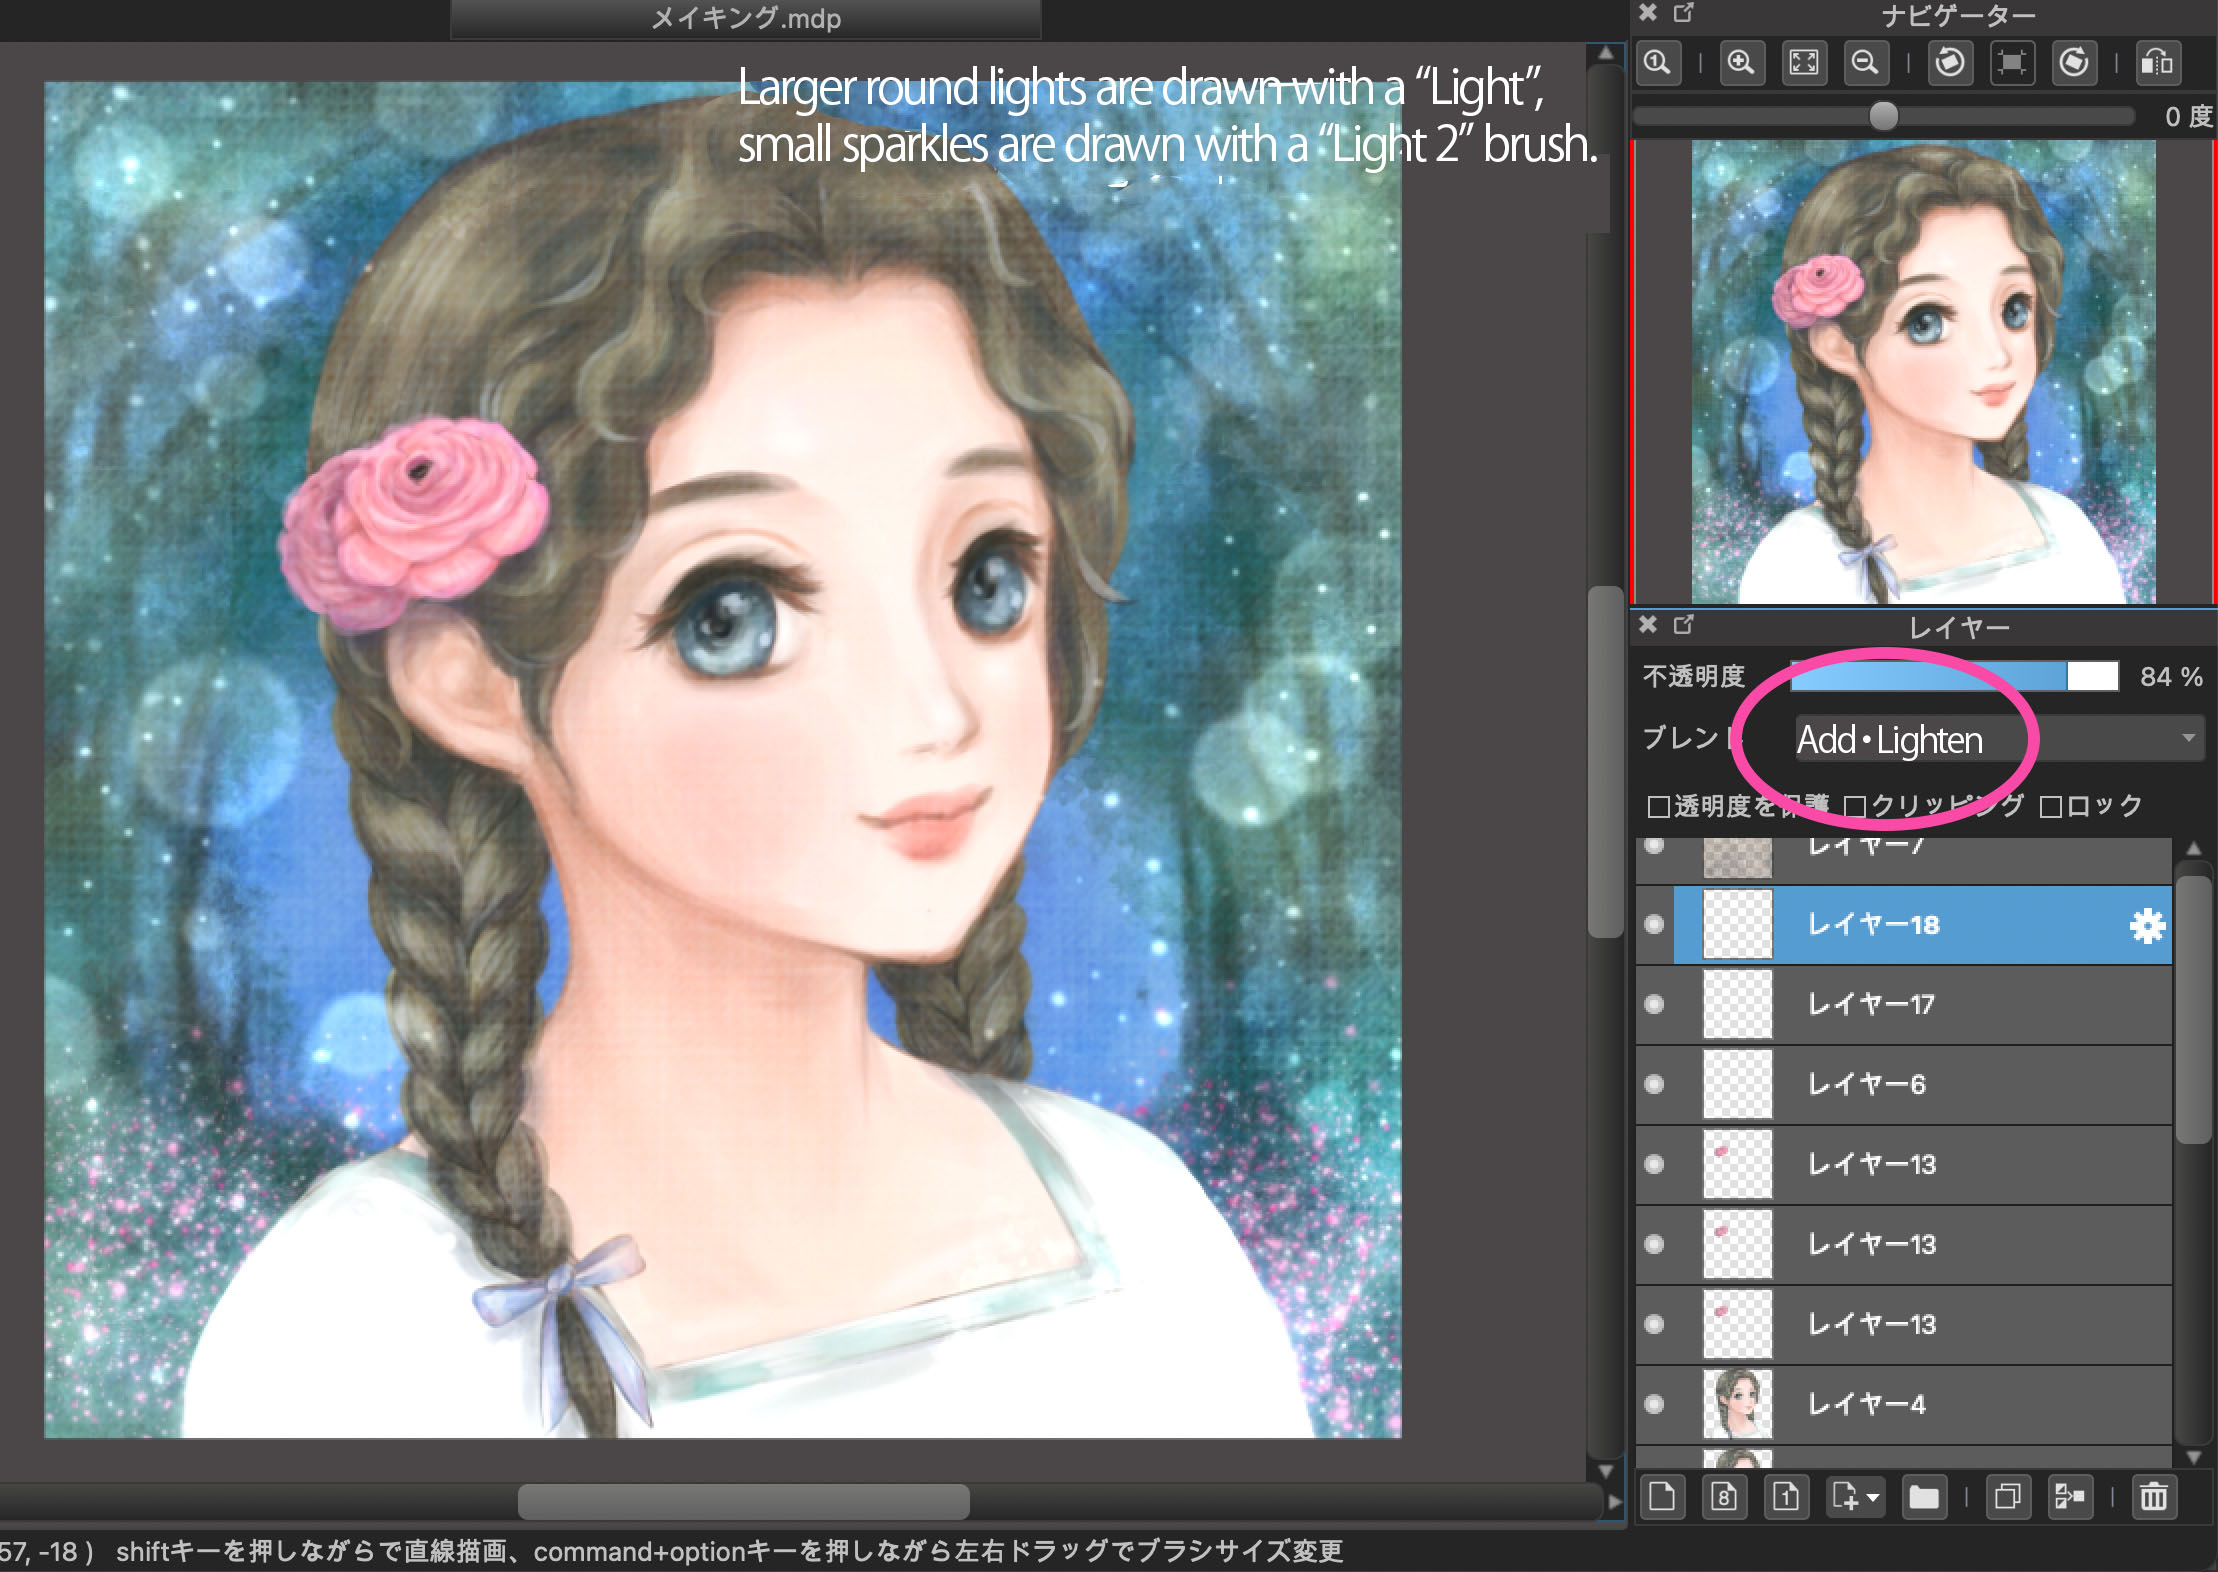
Lastly, sparkle effects have been added for the illustration by using “Light” and “Light 2” brushes!
Add lights in a balanced manner, and select “Add/Lighten” from Layer Blending.
You can create fantastic lights easily! Here again, Gaussian Blur can make a not-overly-assertive light layer that blends with the illustration.
The work has been completed!

This is the end of the article “How to Draw Hand-Drawn-Picture-Like Illustrations”. How did you like it?
I’d appreciate it if you find the article useful as a hint for one of your illustrations!
(Text・Illustrations/ mana美術 まぬ)
Twitter / https://twitter.com/@LBl4dFKa3BhdXrq
ART street / https://medibang.com/u/manaart/
\ We are accepting requests for articles on how to use /

