2022.08.26
Let’s start painting【For Android】
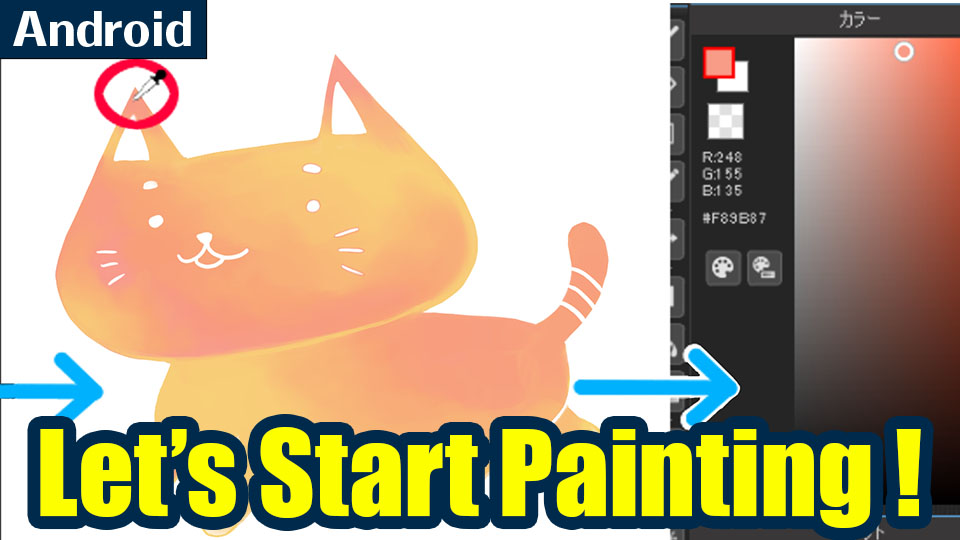
In this article, I will be explaining some of the useful functions and tools you can use to paint colors in MediBang Paint for Android.
How to use the palette
First, you need to prepare the colors for painting the canvas.
You can select a color from the Color Window every time but the palette and Eyedropper tool come in handy for this.
Registering colors in the palette
The palette function allows you to register and save the colors.
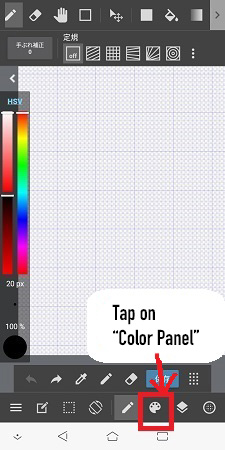
From the bottom of the screen, tap on “Color Panel” with the palette icon.
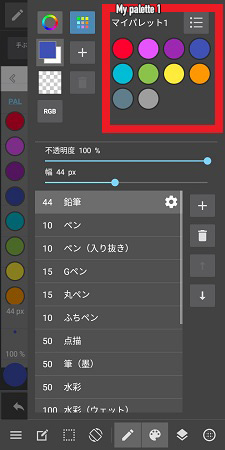
Choose the top right from the icons placed on the left of the color picker wheel.

Then “My palette 1”, a palette registered with the default settings will appear.
If you click the menu icon on the top right above the palette, you can change your selected color palette from the “Change palette”, sorted into various categories.
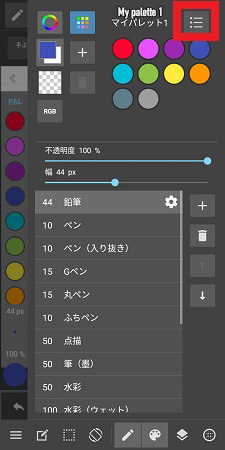
The colors are sorted into categories like “Light”, “Dark”, “Skin Tones” etc. so you can utilize them for the theme you are working with.

You can also display the color palette from the HSV bar.
Tap on the “HSV”…
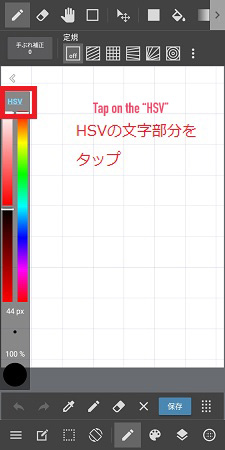
and now the HSV bar has switched to the palette.
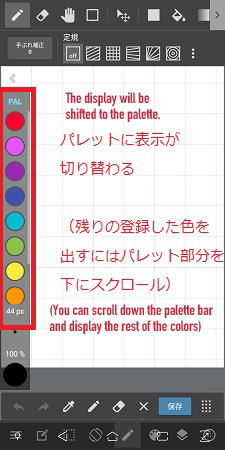
You can only see about 7 to 8 colors at once but you can scroll down the palette bar and display the rest of the colors registered to your chosen palette.
I recommend you the palette for saving time as well.
Eyedropper Tool
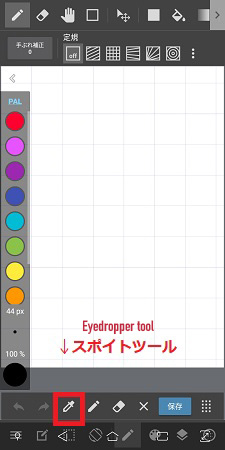
Using this tool, you can select any color on your canvas as your pen/brush color.
Choose the Eyedropper Tool and tap on the color you want to use, now the color for your pen changes to the one you chose.
Long press eyedropper
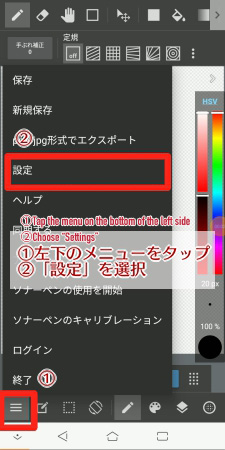
You can set your tool to switch to the Eyedropper Tool when you hold down on the canvas.
From the menu with three horizontal lines on the lower left corner, choose “Settings”.
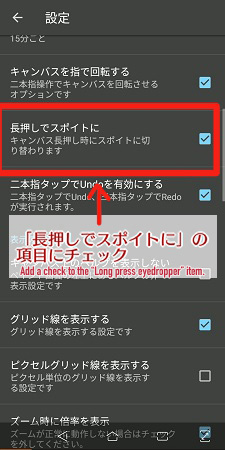
Add a check to the “Long press eyedropper” item.
Now, if you hold down on the screen, your pen switches to the Eyedropper Tool.
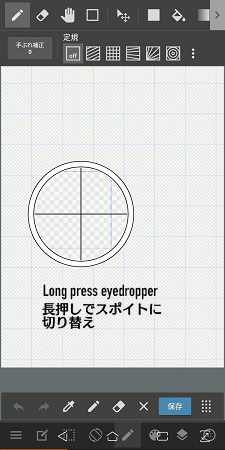
▼ Check the article for basics of selecting colors here ▼
・Selecting Colors (for Android)
Next, we will be looking at the Select Tool.
Select Tool
Before you start painting, you should remember how to use the Select Tool.
Using the Bucket Tool, you can fill the chosen area with paint all at once. Utilize this tool to save a lot of time.
I will explain about the Bucket Tool later.
Let’s look at the Select Tool first.
There are 3 types of the Select Tool.
- Regular Select Tool
- MagicWand Tool
- SelectPen Tool
First, I will start off with the regular Select Tool.
1. Select Tool
With this one, you can choose the area of your liking in the shapes of square, circle etc.
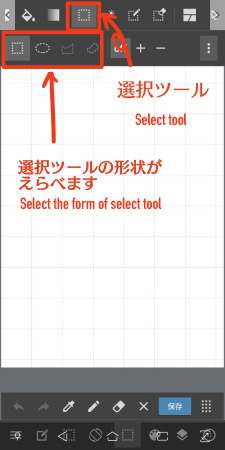
If you have chosen the square shape, you can create a square selected area.
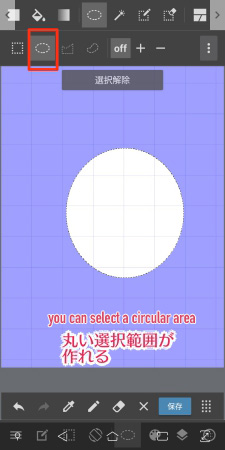
The parts selected will be white and the unselected area will be displayed in blue.

If you choose the ellipse, you can select a circular area.
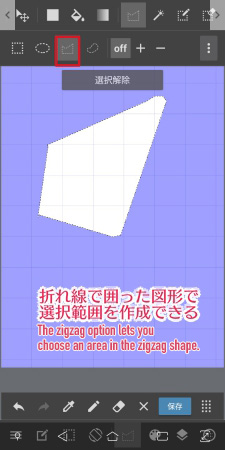
The zigzag option lets you choose an area in the zigzag shape.
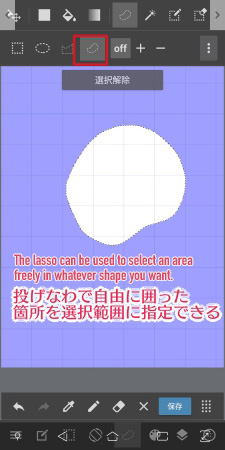
The lasso can be used to select an area freely in whatever shape you want.
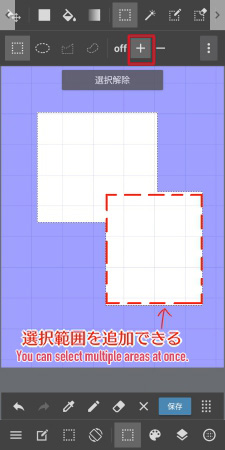
Tap on the + (plus) sign next to the “off” and you can select multiple areas at once.
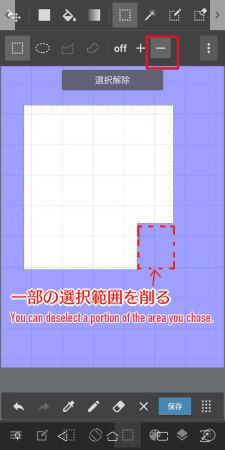
On the other hand, selecting the – (minus) sign allows you to deselect a portion of the area you chose.
2. MagicWand Tool
This tool selects an outlined area or an area by color/shape, automatically.
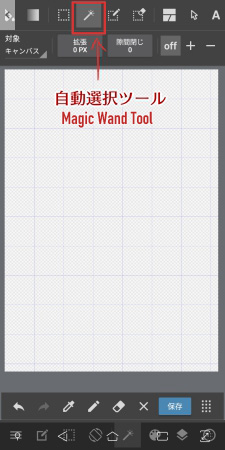
I’ve drawn a circle and tapped on the inside, the area inside the border was chosen.

If you tap on the area outside the circle, it chooses the entire area except for the circle.

3. SelectPen Tool
With this tool, you can draw and select any area in any shape.
You can adjust the width and the opacity in the same way as you do for the brush. This is useful for selecting a detailed shape.
The part you drew using the SelectPen Tool is displayed in pink.

When you switch your tool from SelectPen to Brush, it creates a selection.

Inside the SelectPen Tool, there is a “Snap” option which you can use as a ruler when creating a selection.

Use the Bucket Tool in combination with the selection tools to paint the chosen area all at once.

Tips for Selected Areas ~Object, Expand, Close Gaps~
In the MagicWand Tool and the SelectPen Tool, there are three options inside its menu.
● Object
● Expand
● Close Gaps
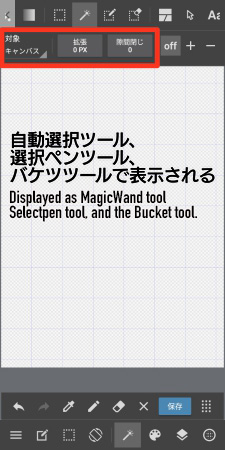
These items are also shown for the Bucket Tool, but you can use it the same way.
Object
When you tap on Object, you can choose between Canvas and Layer.
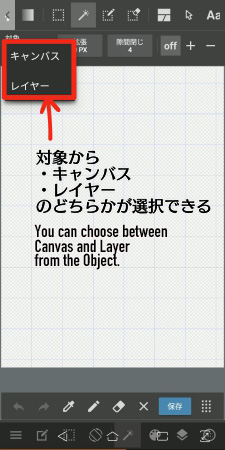
Select either the Canvas or the Layer.
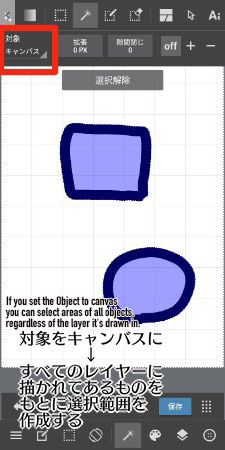
If you set the Object to canvas, you can select areas of all objects, regardless of the layer it’s drawn in.
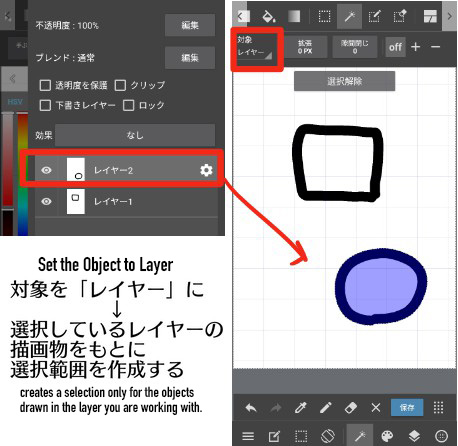
On the other hand, setting the Object to Layer creates a selection only for the objects drawn in the layer you are working with.
Think about whether you want to select areas in multiple layers or if they are only on a single layer, and adjust the setting for your target.
Expand
Next is expansion.
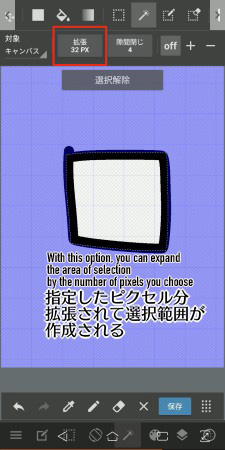
With this option, you can expand the area of selection by the number of pixels you choose (up to 32 pixels).
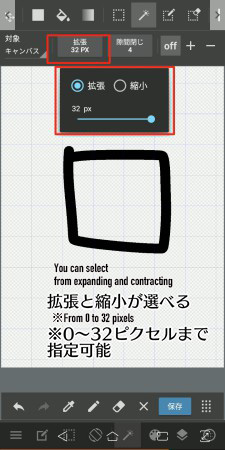
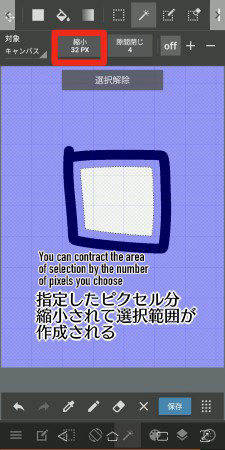
Let’s try expanding and contracting with 32 pixels.
When I select the area inside the square, the area of selection has expanded by 32 pixels, up to the outline of the square.
You can see the contract option with 32 pixels creates a selection area smaller than the square.
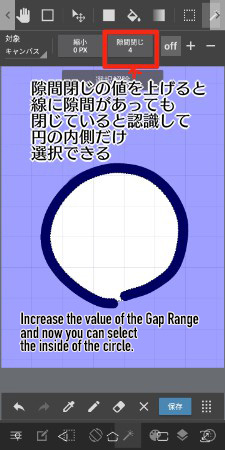
Close Gaps
This option allows you to select an area inside a shape even if it isn’t closed properly.
If the Gap Range is set to 0, the selection area inside the circle slips through the gap.
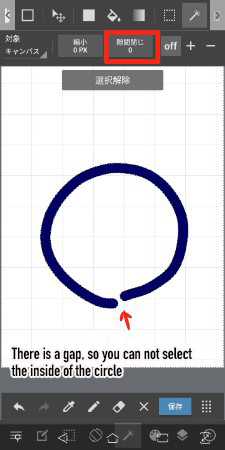
Increase the value of the Gap Range and now you can select the inside of the circle.
Selection Menu
Next, let’s take a look at the basic controls of selection.
From the menu bar at the bottom, you can display the Selection Menu.
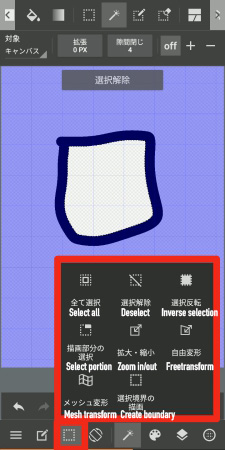
The menu contains the following functions.
Select All:
You can select the entire layer you are working on.
Deselect:
You can deselect the selection area.
Inverse Selection:
You can invert the area of selection.
Select Portion:
You can select multiple objects at once.
Zoom In / Zoom Out:
You can expand or contract the selected area.
Free Transform:
If you add a check and drag the anchor point, you can transform the object freely.
Mesh Transform:
In Mesh Transform, you can deform or stretch a part of the image, regardless of its ratio.
You can transform the image more naturally by selecting “Perspective correction”.
▼ Read more about Mesh Transform here
・【Android】How to Use Mesh Transform
Create Boundary:
You can draw an outline along the area of selection.
Use this function to outline your illustration with a border.
The forecolor will be reflected as the outline color.
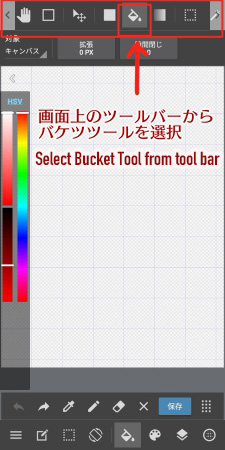
Bucket Tool
Bucket Tool is a tool for filling the selection area with paint at once.
You can fill in an area or a part of the canvas enclosed by the border with color paint.
The Bucket Tool also has the settings for Object, Expand・Contract and Close Gaps.
The settings can be applied in the same way I introduced for the selection area tips.
Gradation
Lastly, I will explain about the gradation.
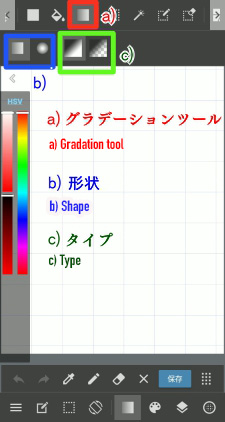
1.Shape
There are two shapes to the Gradation tool: linear and ellipse.
With the linear option, the gradation is created in the swiped direction.
With the circular option, the gradation spreads around the starting point of the swipe.
2.Type
There are two types to the way the color changes in gradation: “Forecolor to Backcolor” and “Forecolor”.
The “Forecolor to Backcolor” gradation starts with the forecolor and ends in the backcolor.
In contrast, the “Forecolor” gradation starts with the forecolor and ends in transparent color.
This was the tutorial for basic functions useful for painting on MediBang Paint for Android.
Try various devices and get familiar with the tools on MediBang Paint!
(Text・Illustration/吉田 セツ)
\ We are accepting requests for articles on how to use /

