2022.09.19
[Custom Noise] Use noise filters to create textured art
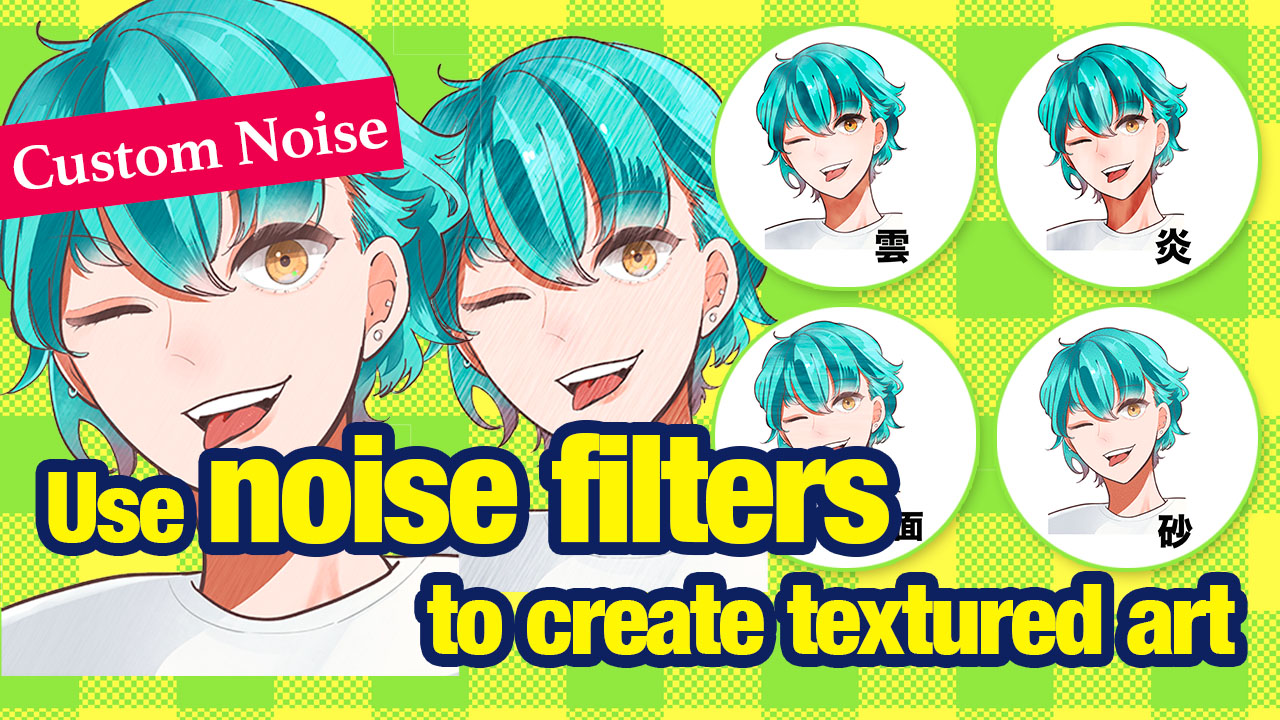
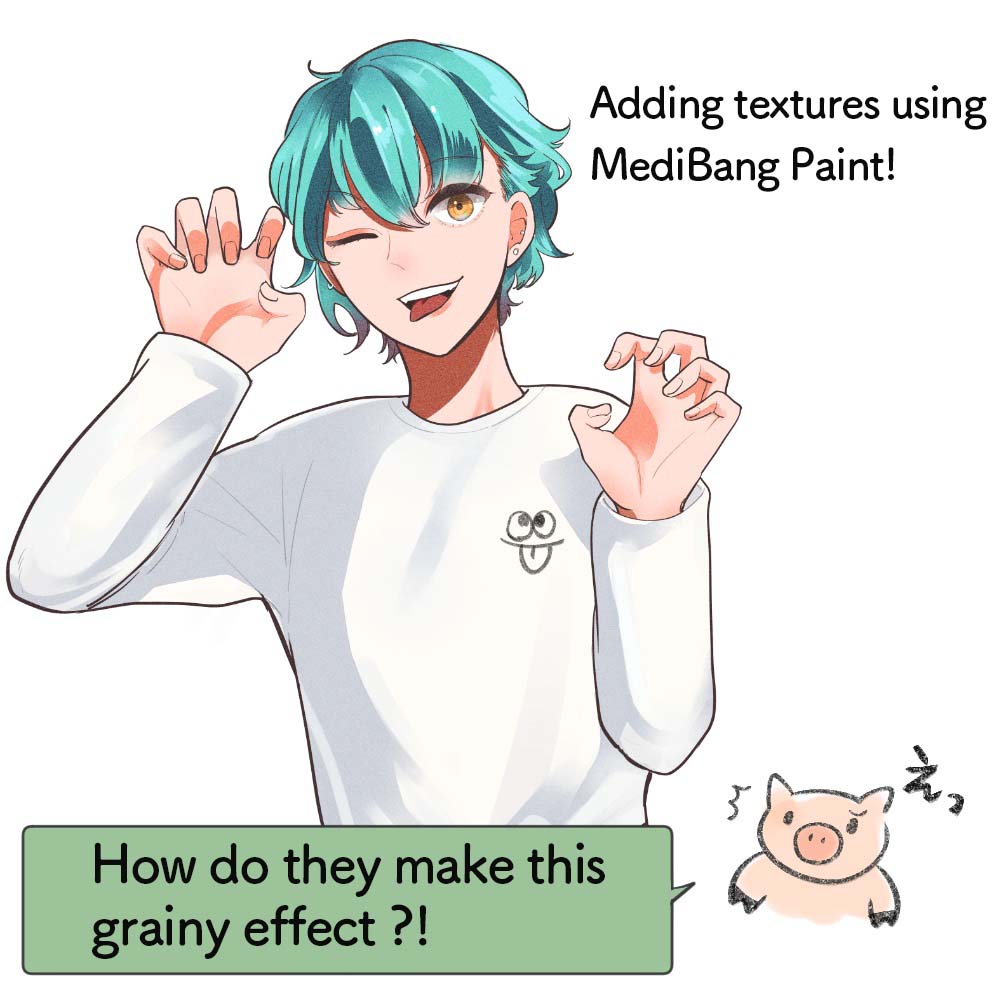
Have you ever seen illustrations with textures like grainy paper and white noise?
It’s become a trend recently and it also looks super cute as well!
To those of you thinking… “I want to add that effect too but I don’t know how…” or “I want my digital illustrations to have an analog-ish texture !”.
I will be introducing you, our dear friend for illustration filters, the “Custom Noise” Filter Function in MediBang Paint!
In this tutorial, I am using MediBang Paint Pro for PC.
① Prepare an illustration
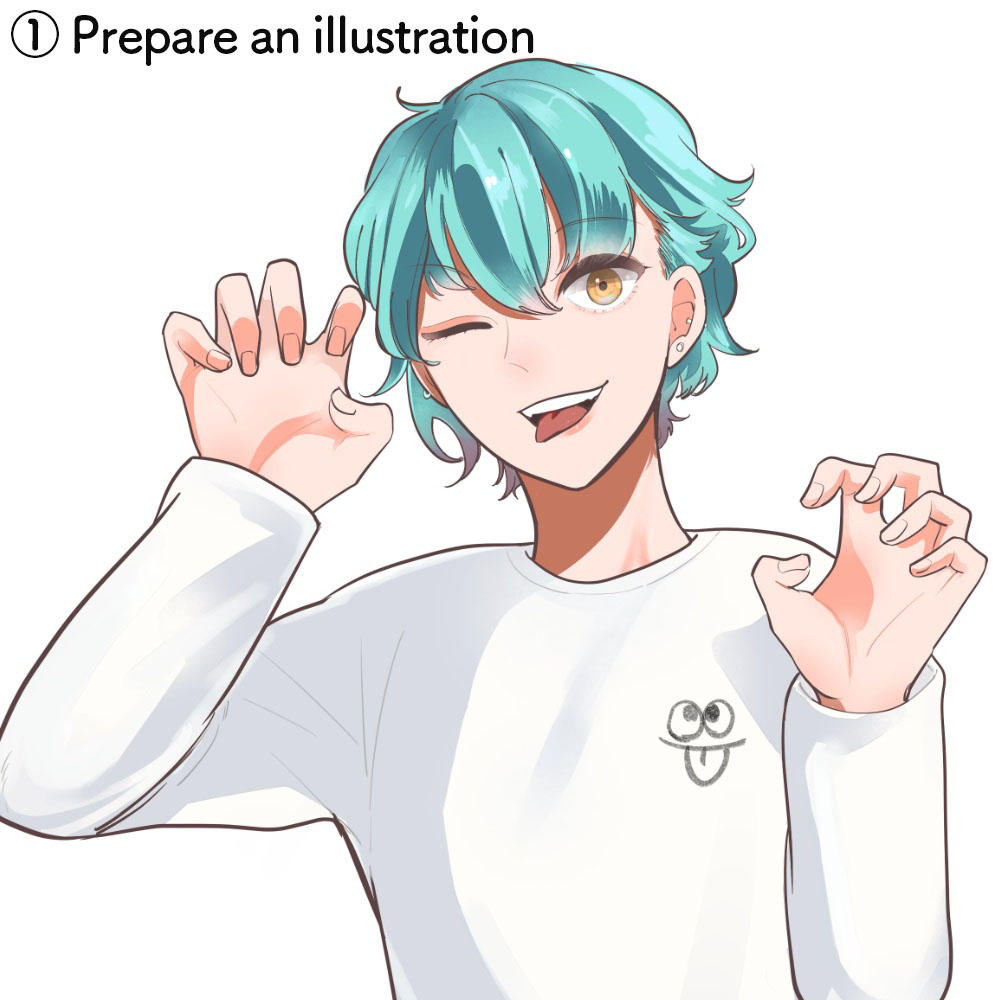
First, draw an illustration you want to edit.
② Create a new layer
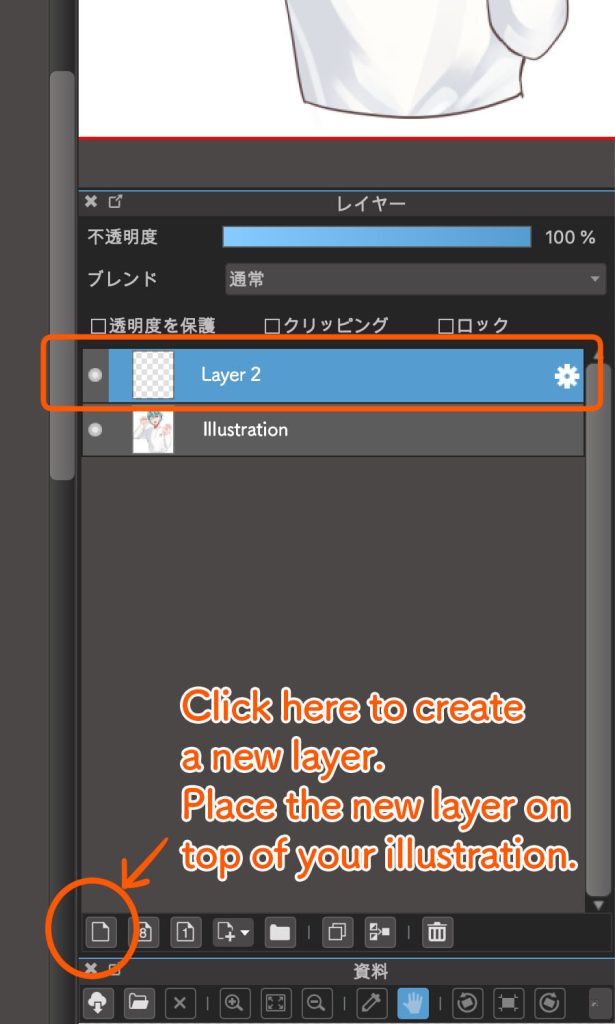
Create a new layer on top of your illustration layer.
③ Select “Custom Noise”
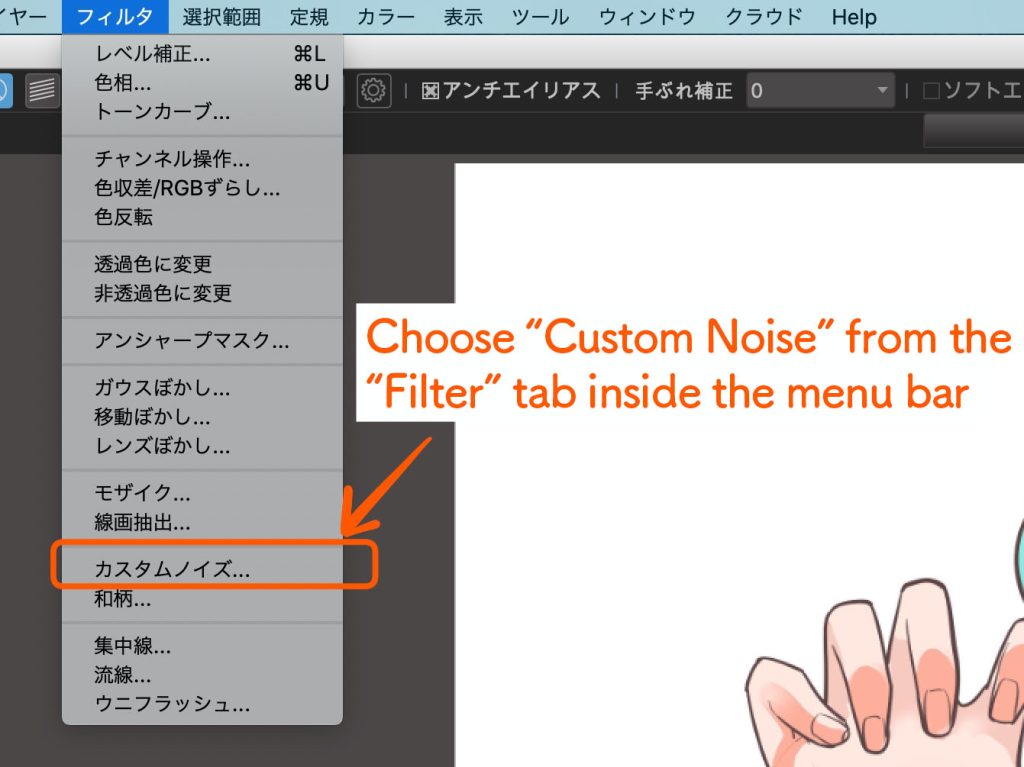
From the top menu bar, choose Custom Noise inside the Filter tab.
④ Change the settings for the Noise Filter
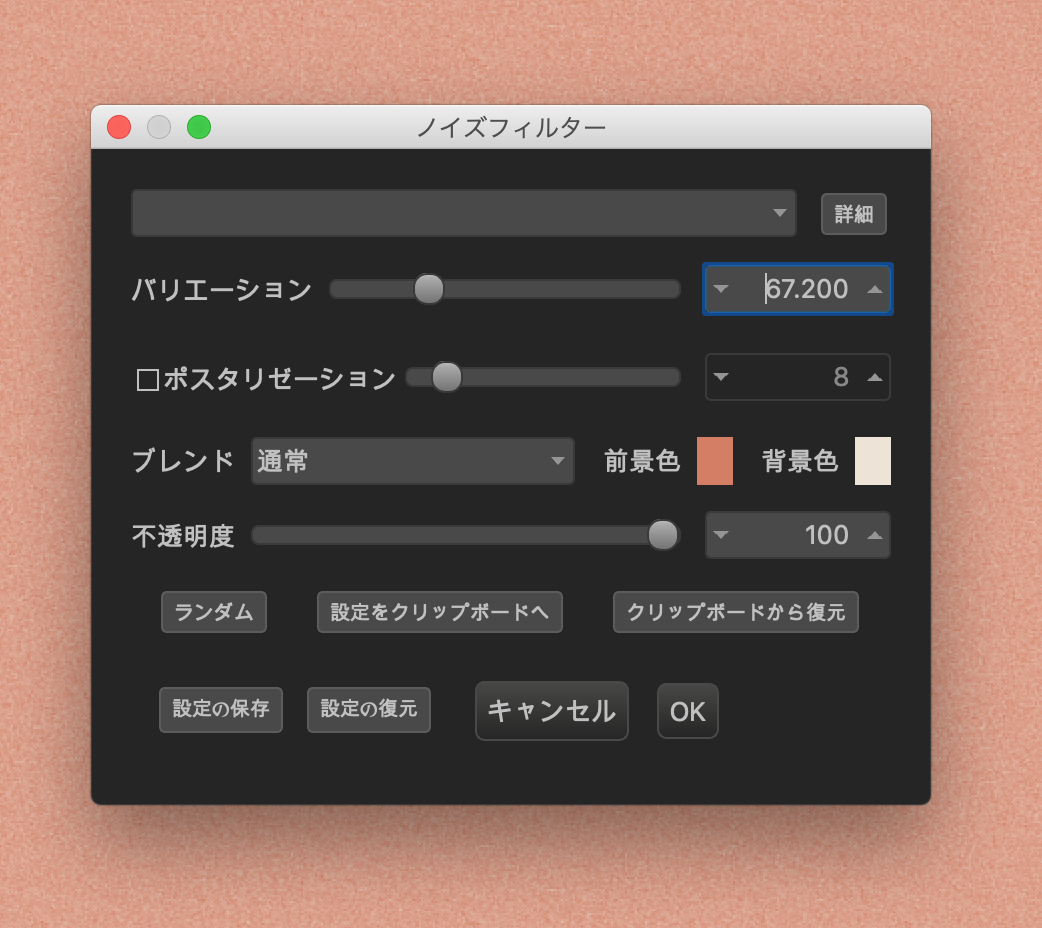
When you select Custom Noise, a window will appear like the above image.
◎ Choose the noise type
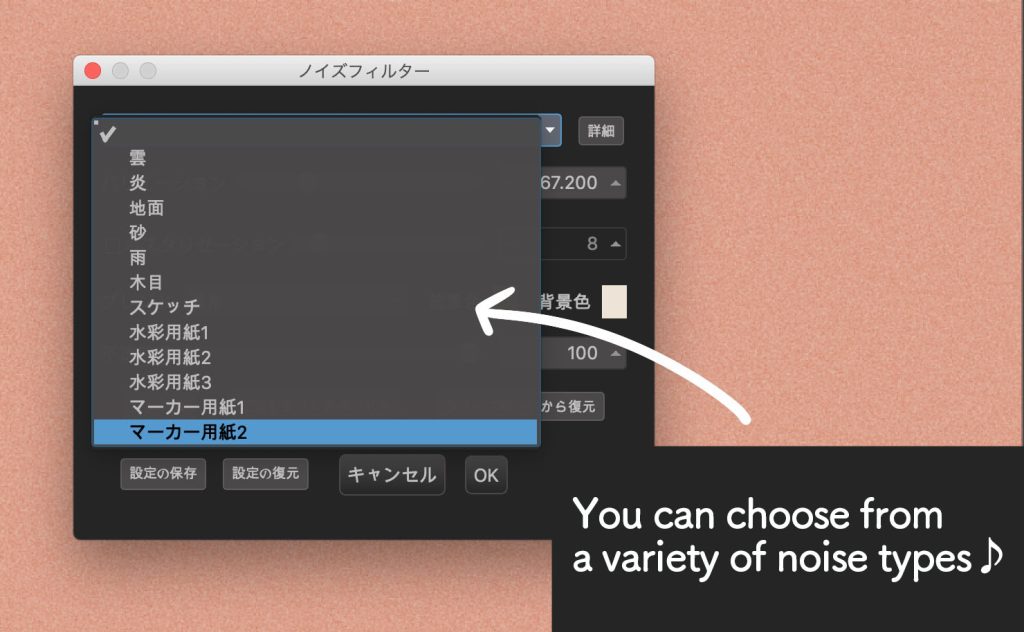
If you click on the top empty bar inside the window (nothing is chosen at default), you can select from a variety of noise types like Cloud, Flame etc.
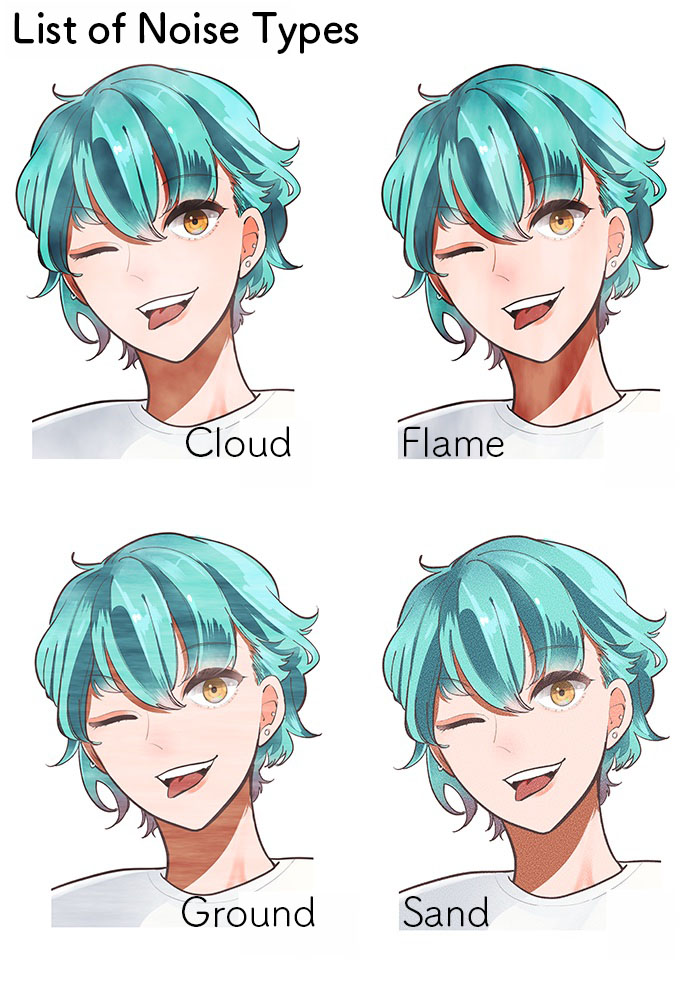
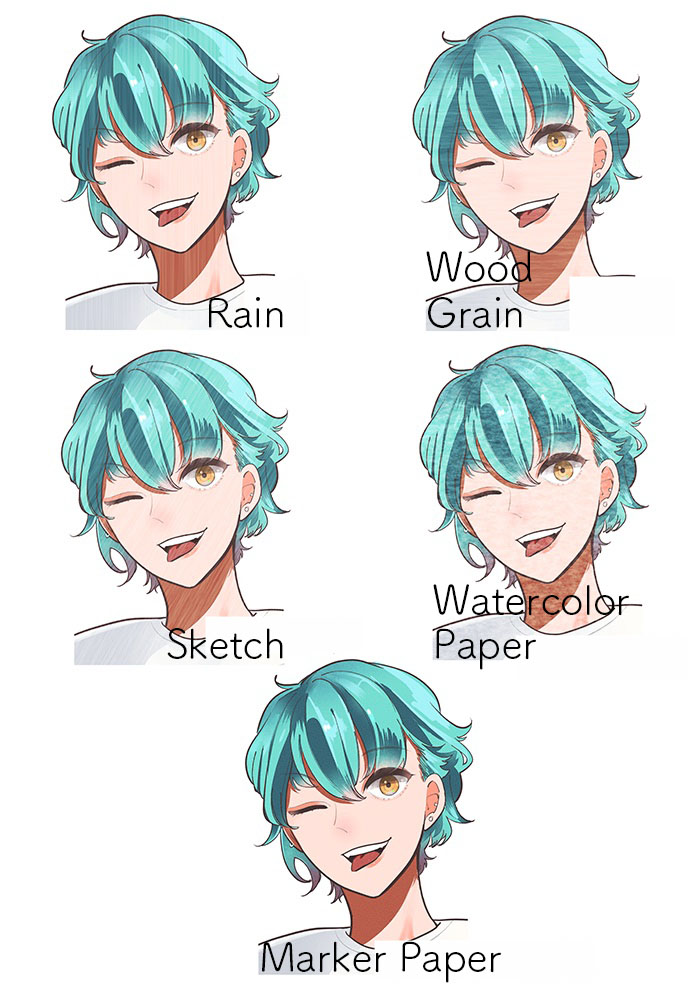
The two images above compare all the noise types.
Try various types of textures and choose the one fitting to your liking!
◎ Adjust the noise levels from “Variation”
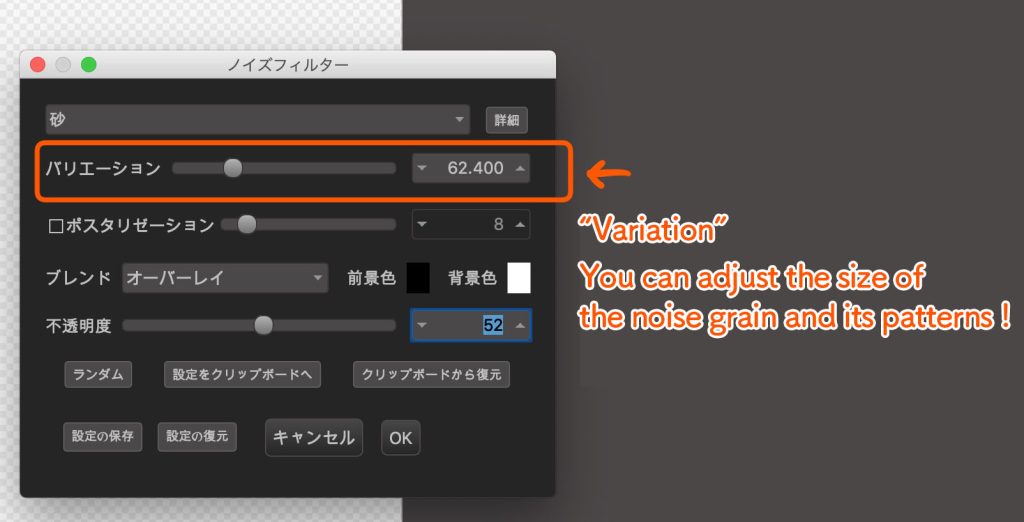
In this tutorial, I have chosen the “Sand” filter.
From the “Variation” slider, you can adjust the size of the noise grain and how the patterns will appear.
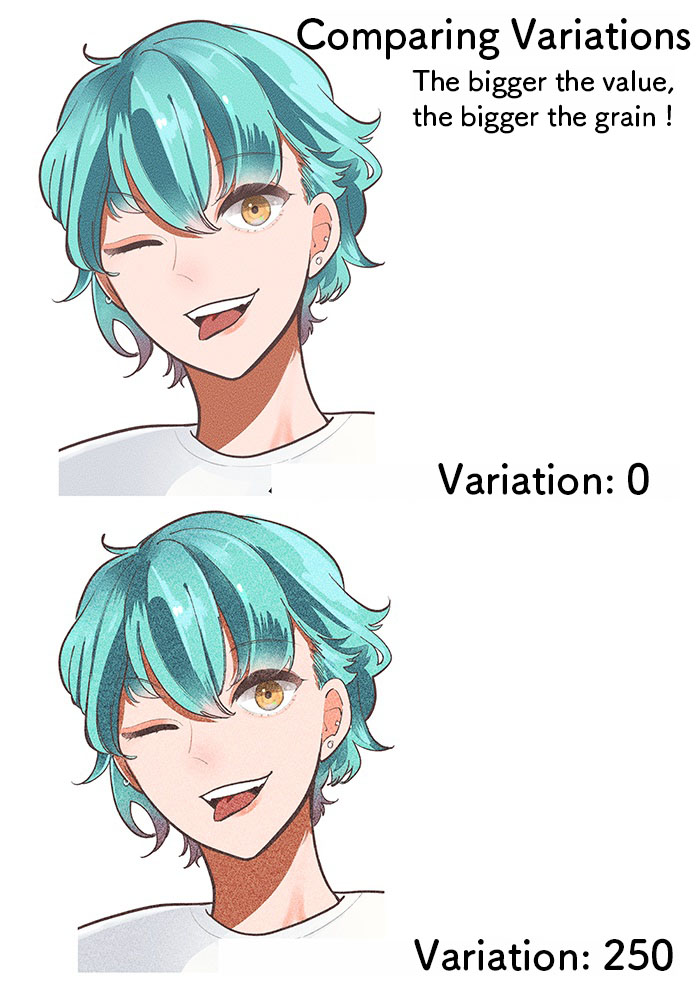
Adjust the Variation value and set the noise level to your liking.
◎ Adjust the color of the noise using “Posterization”
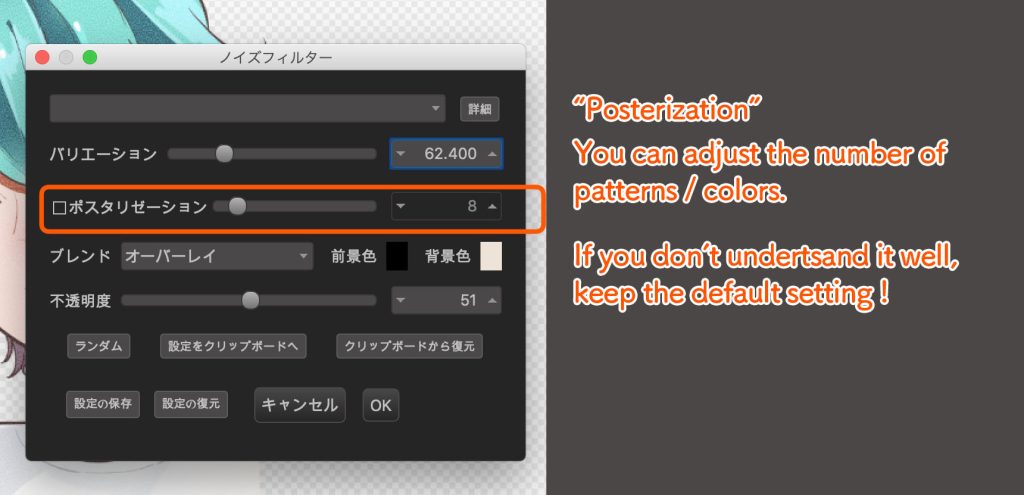
“Posterization” allows you to adjust the number of patterns (colors).
The lower the value, the less colors so with a higher value, it increases the number of colors creating a smooth gradation.
If you are confused with this function or if you don’t have a particular preference, you don’t have to check the box for Posterization.
◎ Choose the “Blend” type
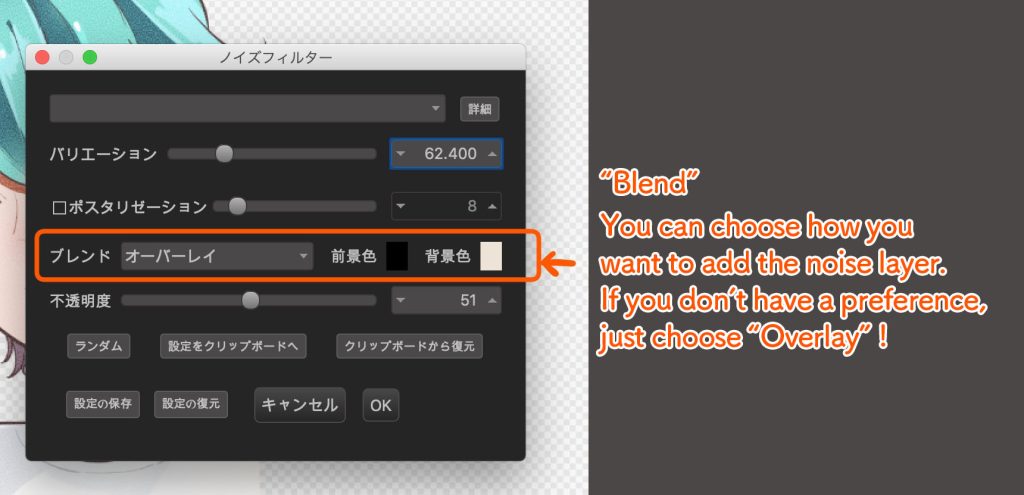
If you click on “Blend”, you can choose the type of blending you want to use (as you would with layers) like Normal, Multiply, Overlay etc.
If you don’t have a preference for the blending and you just want to add noise to your illustration, you can keep the Blend at its default setting.
◎ Adjust the opacity of noise
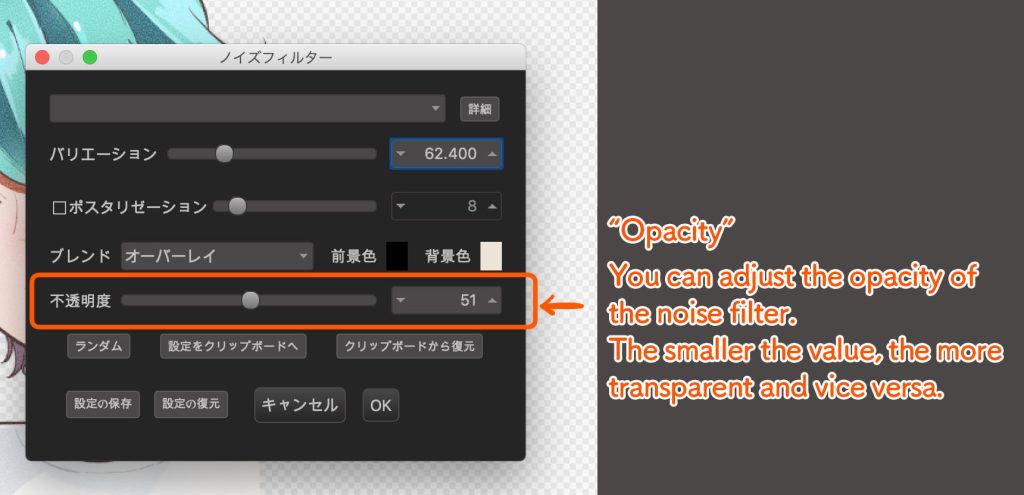
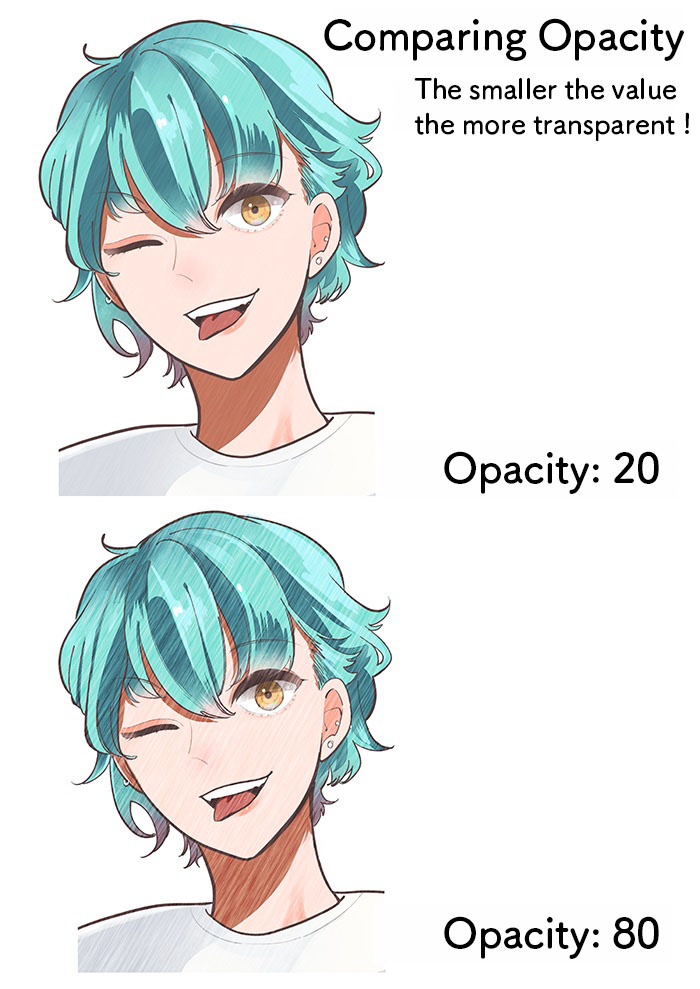
The lower the value of opacity, the less noise there will be.
Adjust the opacity to suit your liking.
◎ You can save your noise filter settings!
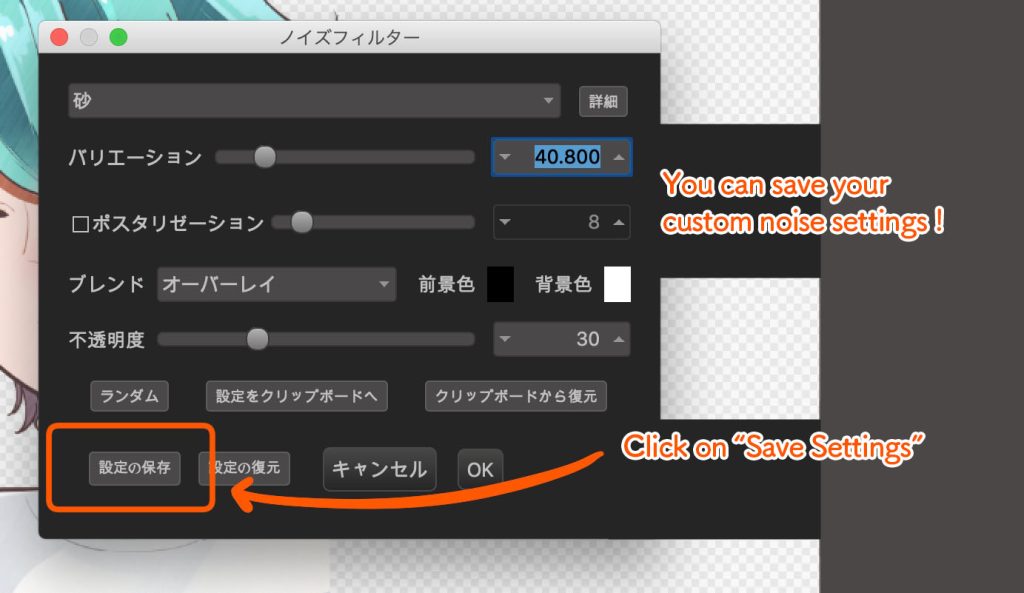
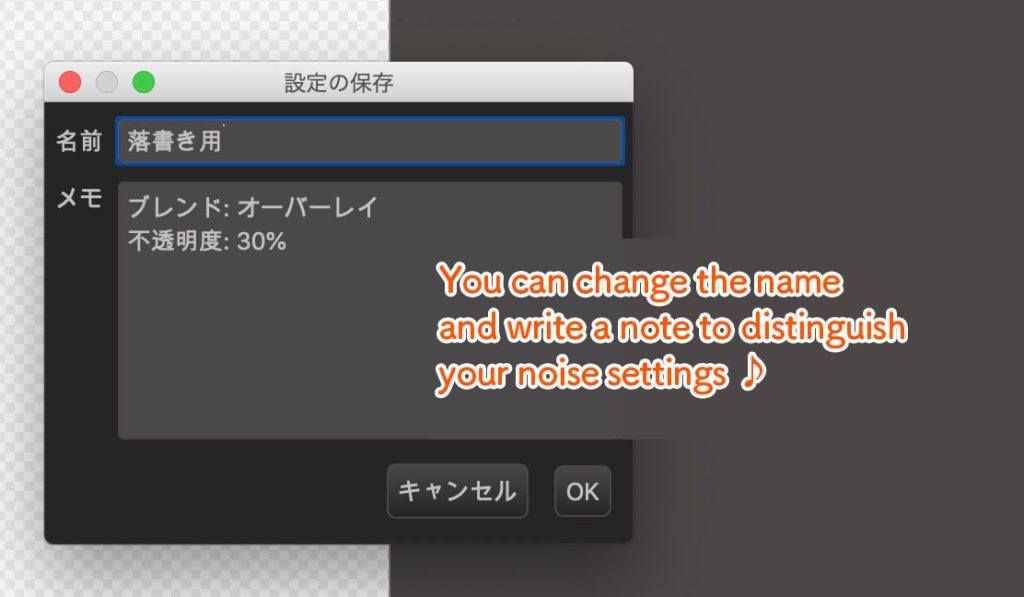
If you have succeeded in creating a noise filter perfect for you, or if you want to use the same setting for your future illustrations, you can save the noise settings.
Click on “Save Settings” and once you have entered the name, click on OK.
Now the noise setting has been saved.
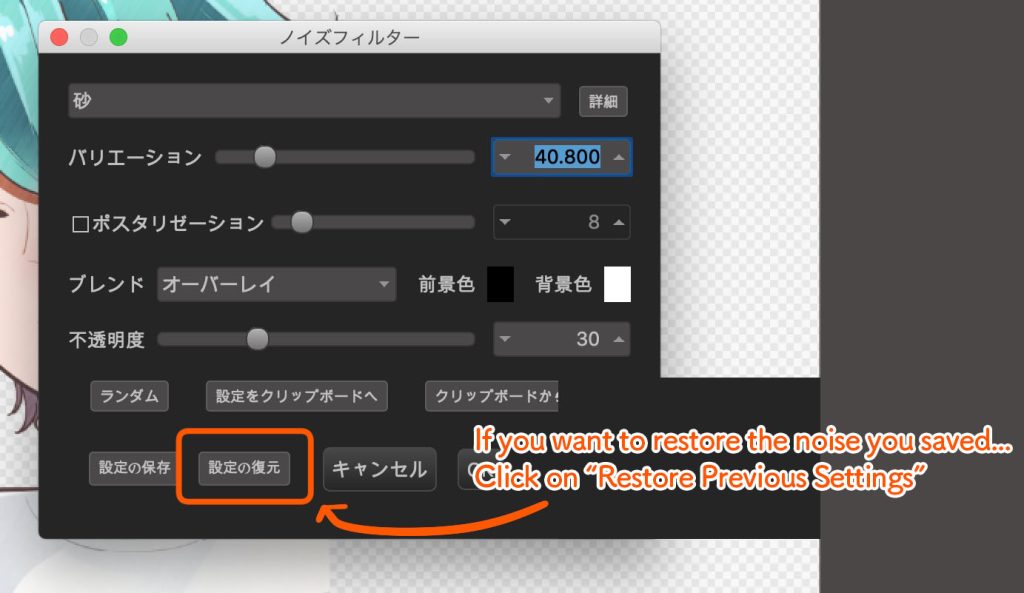
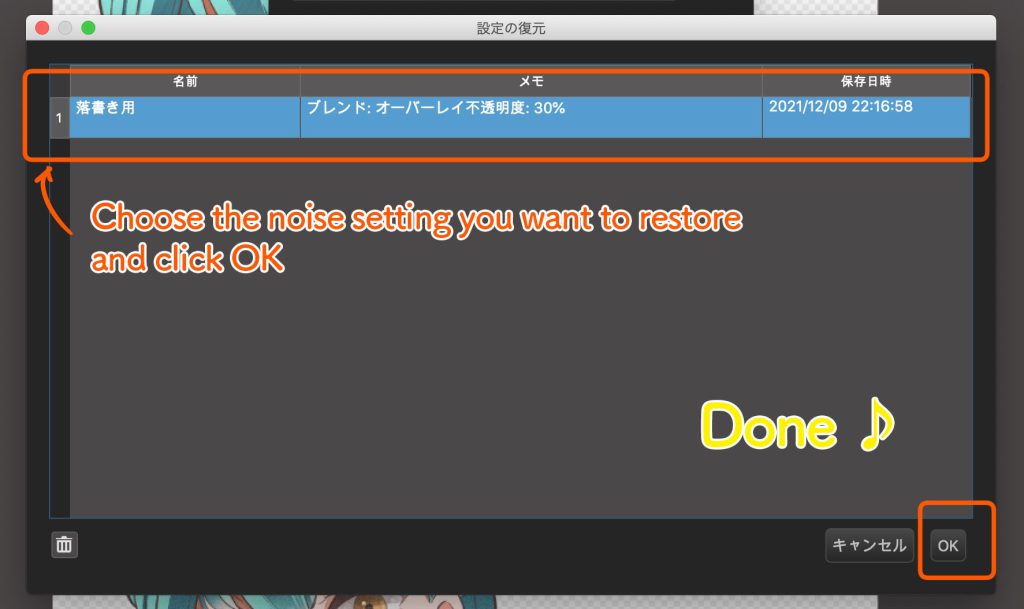
If you want to restore the settings you have saved, click the “Restore Previous Settings” button at the bottom and choose the setting you want to restore before clicking OK.
Now, the noise you have created previously has been restored!
You can also save time by registering the noise filter settings you might use often♪
The “Custom Noise Filter” allows you to achieve a gorgeous and trendy look very easily with just a couple clicks.
I hope you make use of this function for your future illustrations!
(Text・Illustration/はらなおこ)
NAOまんが製作室
twitter:@nao_comic
\ We are accepting requests for articles on how to use /

