2022.10.14
【Drawing Food】Let’s use MediBang brushes to draw a strawberry shortcake【For Beginners】
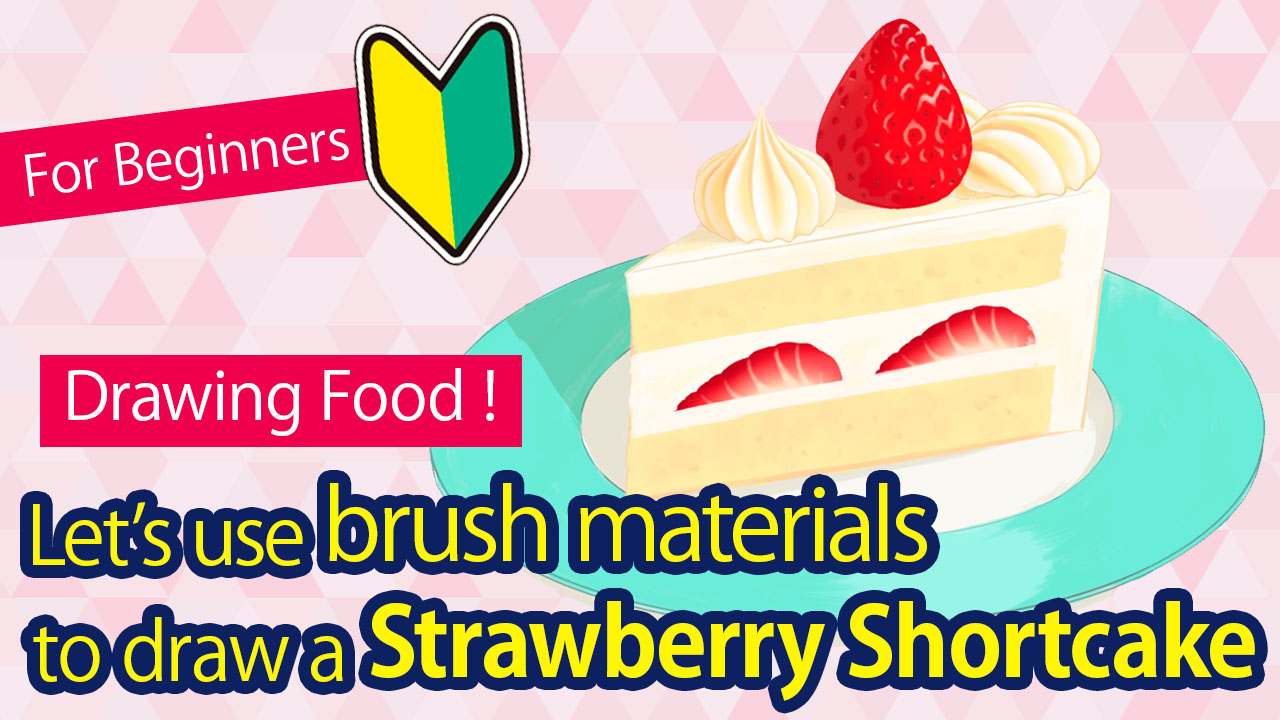
Cakes that appear on birthday or Christmas scenes can be a very useful accessory to decorate your illustrations.
But when you actually want to draw them, you might be confused as to what color you need to use for the cream or the proper way to draw a strawberry etc.
In this tutorial, I will be helping you with that problem by introducing an easy way to draw a strawberry shortcake using the Strawberry M and Cream M brushes. (on MediBang Paint for iPad)

Drawing the strawberry
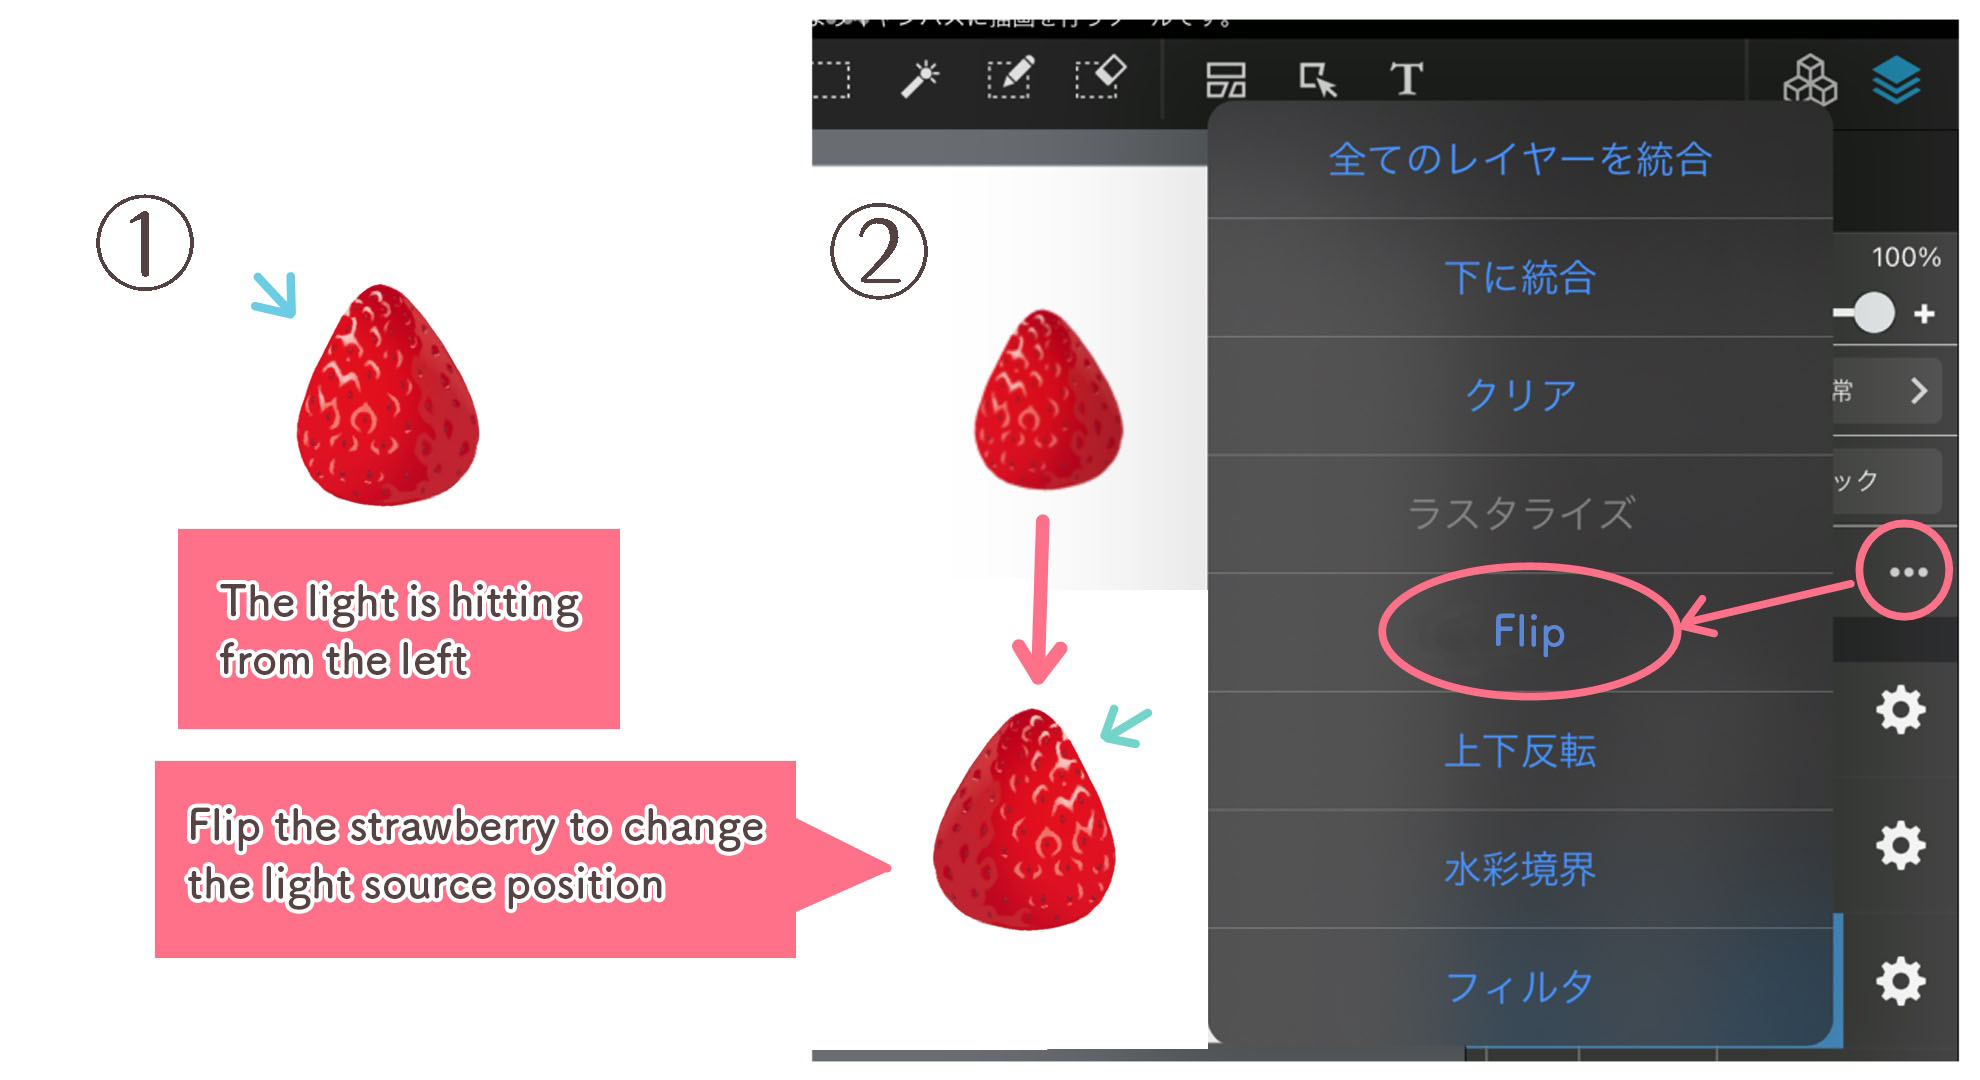
First, let’s start off by drawing a strawberry using the Strawberry M brush.
The light source is placed on the left by default. Since I want the light to be hitting the right side of the strawberry, I will do a horizontal flip to switch the light source position.
▶︎The brush I used:Strawberry M
※When you zoom into the strawberry, you can see that the outline is a little pixelated so I adjusted the outline by taking the edge color of the strawberry using the eyedropper tool.
Drawing the whipped cream on top
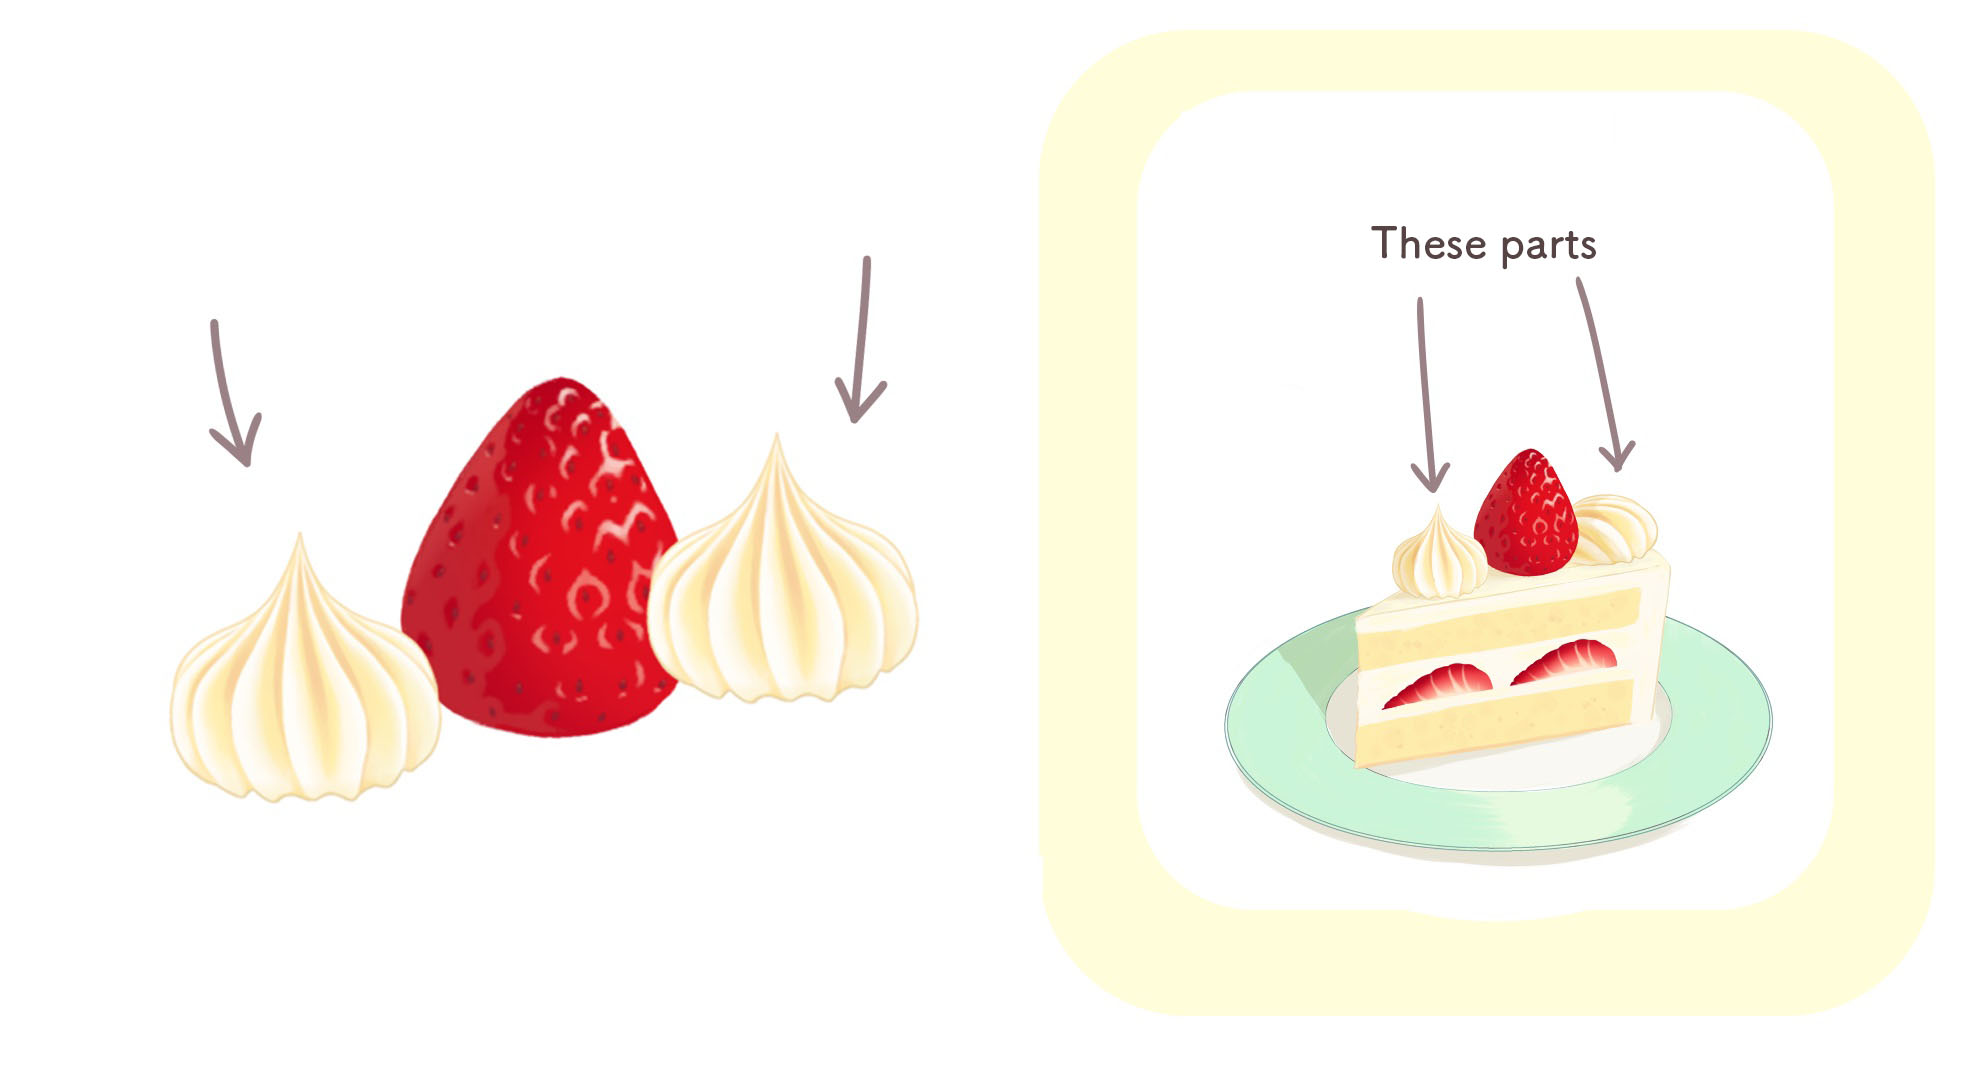
Next, I will be using the Cream M brush to draw the whipped cream on top of the shortcake.
For this tutorial, I created a new layer to draw the whipped cream so it will be easier to make adjustments at a later stage.
▶︎The brush I used:Cream M
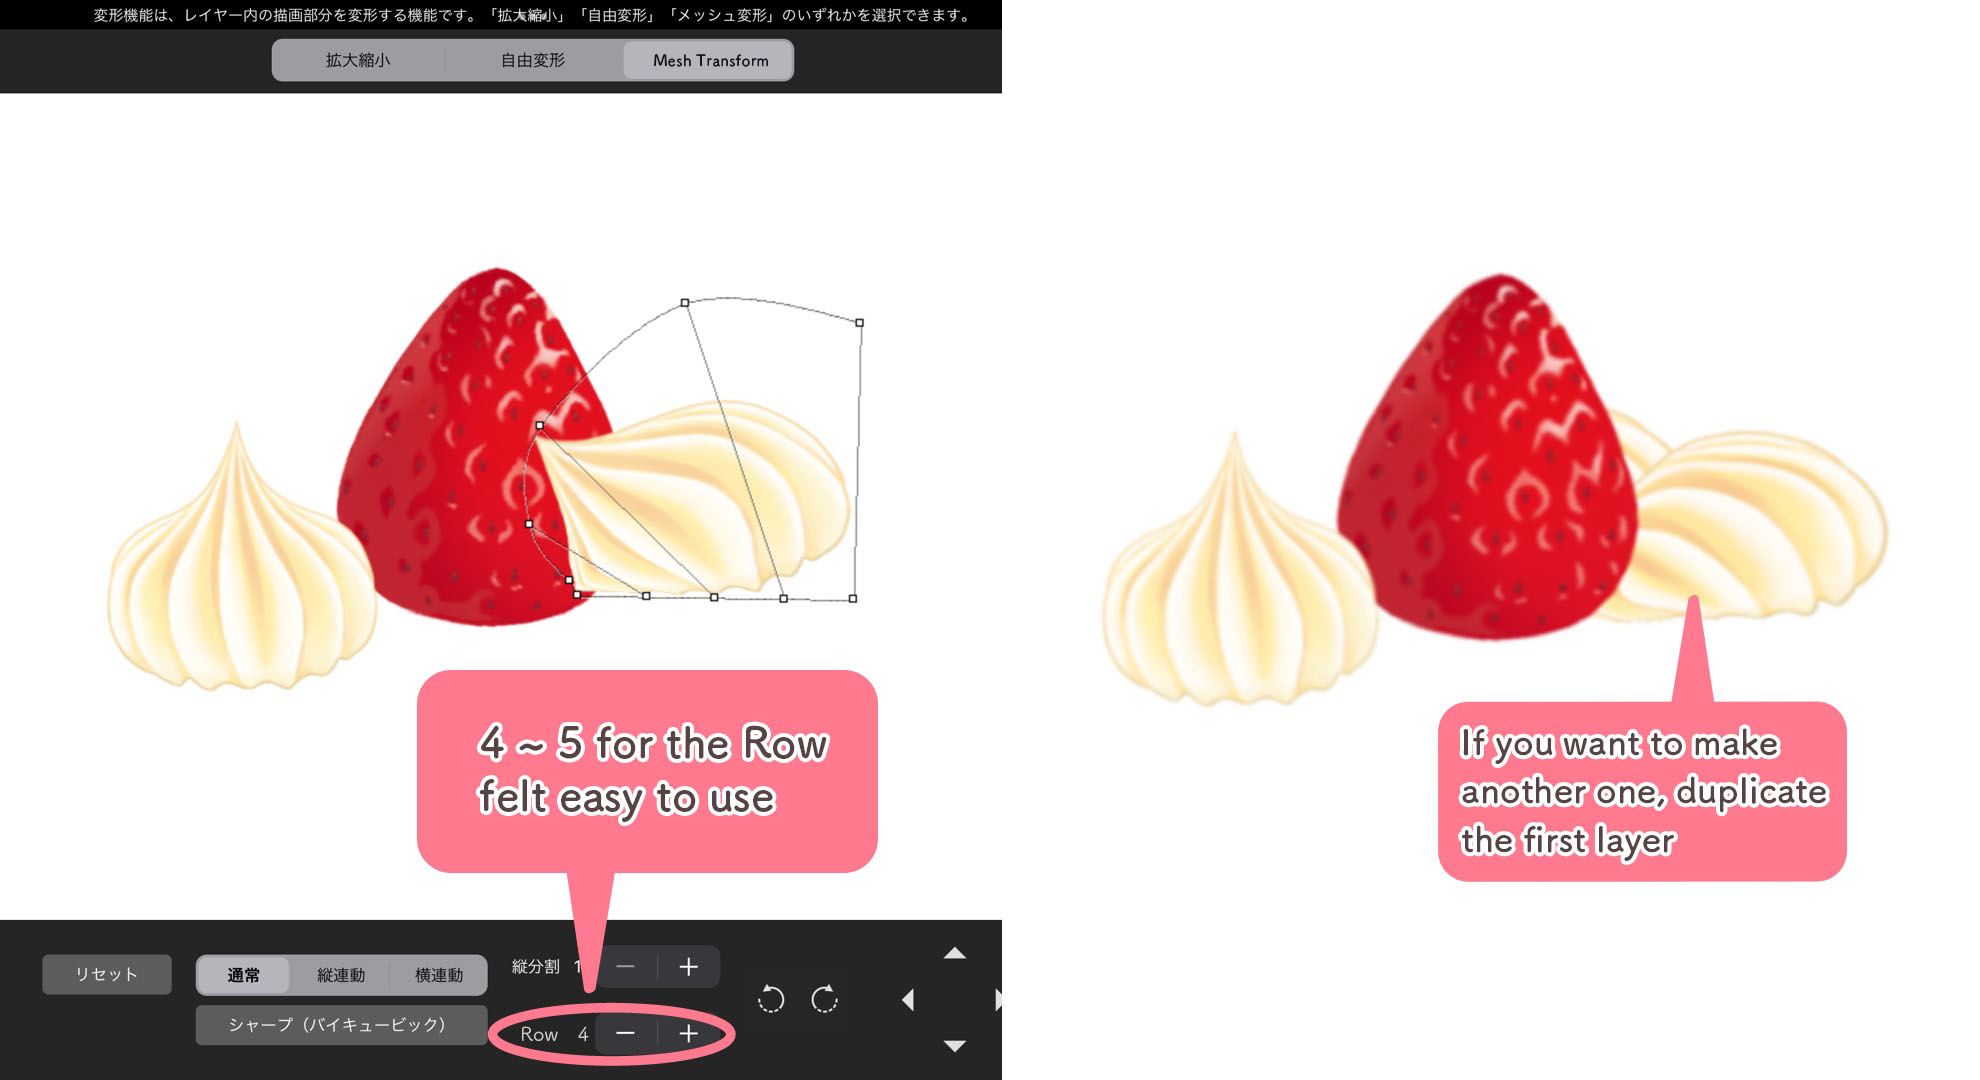
For the cream on the right of the strawberry, I changed its shape using the “Mesh Transform” tool.
I want the whipped tip to bend forward and turn the cream into a round shape so I chose 4~5 for the “Row” section.
Once you are done with adjusting the shape of the whipped cream, duplicate the layer and align the second cream on the left.
Drawing the cake shape
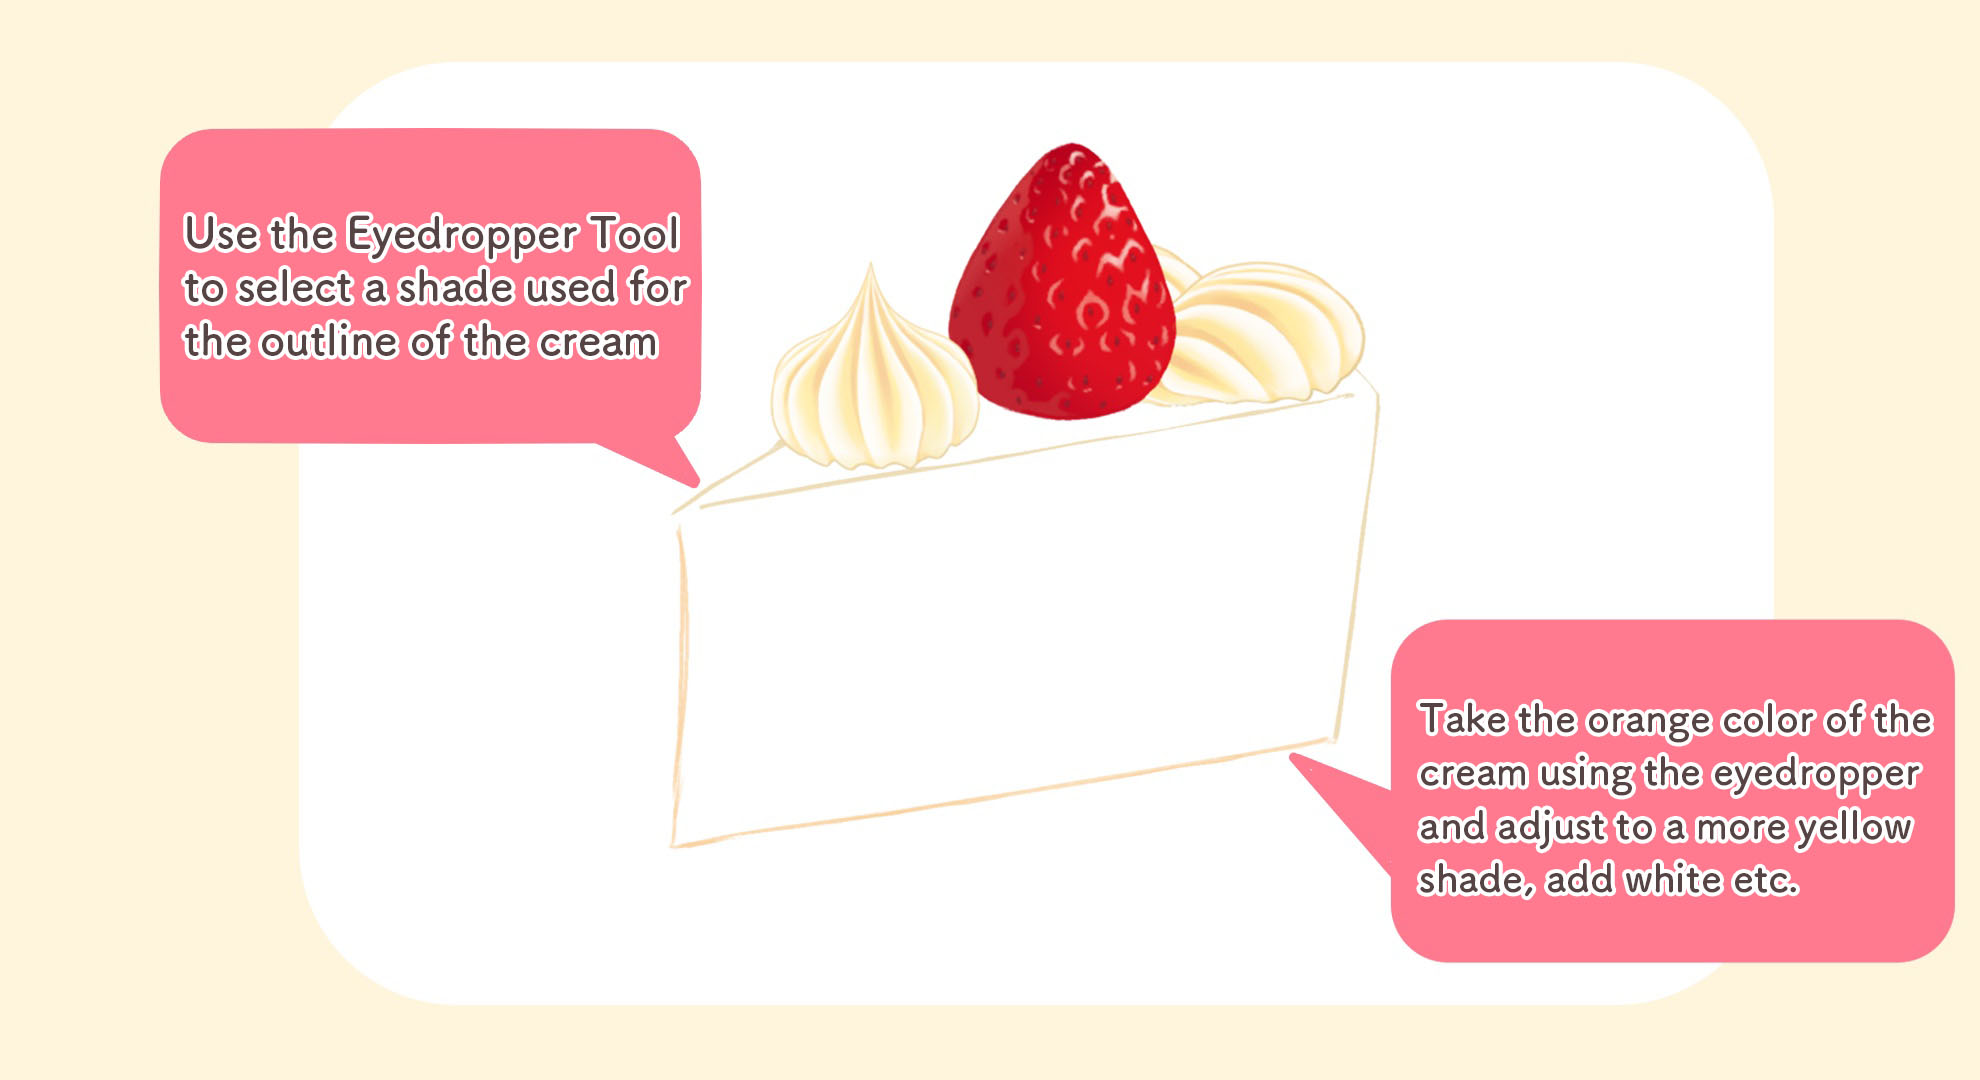
Now create a new layer to start drawing the sponge cake base.
I chose the “Acrylic” brush this time.
As for the color, select a shade from the lines or the orange parts of the cream with the eyedropper tool and start drawing the basic shape.
【Cream brush helps with choosing colors】
One of the benefits of using the Cream M brush is that you already have a color scheme for the cream.
Since you can decide on the rest of the colors (sponge, cream in the cake base) based on the cream color used for the Cream M brush, I recommend using existing patterned brushes for those of you who struggle with choosing the right colors.
Drawing whipped cream for the cake base
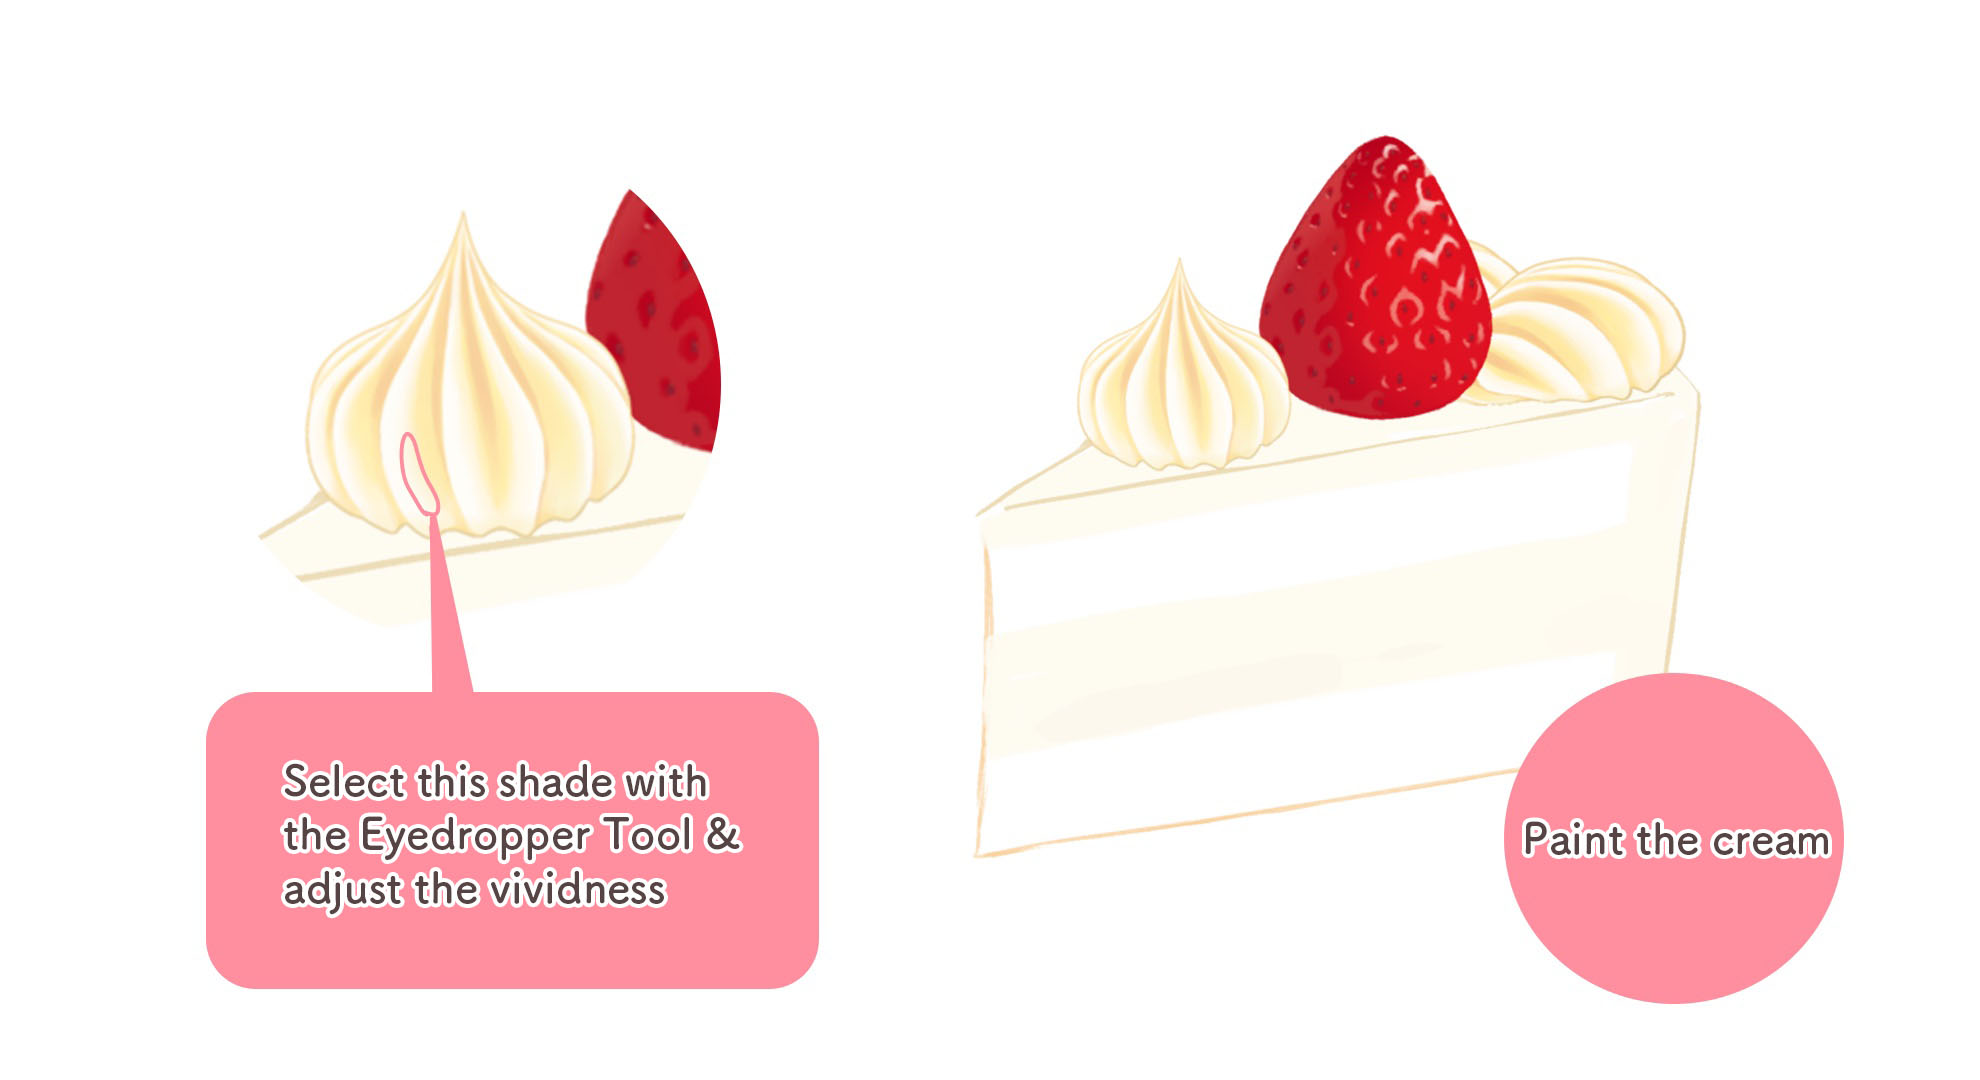
Once you’ve drawn the shape of the cake, select a soft yellow shade from the whipped cream and paint the cream parts of the cake base.
Don’t try to paint in perfect straight lines, leave it natural so it looks more realistic.
※When drawing a cake, you should draw it freehand without shape tools that help you draw perfect straight lines.
However, for a full sized cake, I sometimes use the ellipse shape tool as it needs to be a perfect circle.
Drawing the cake sponge
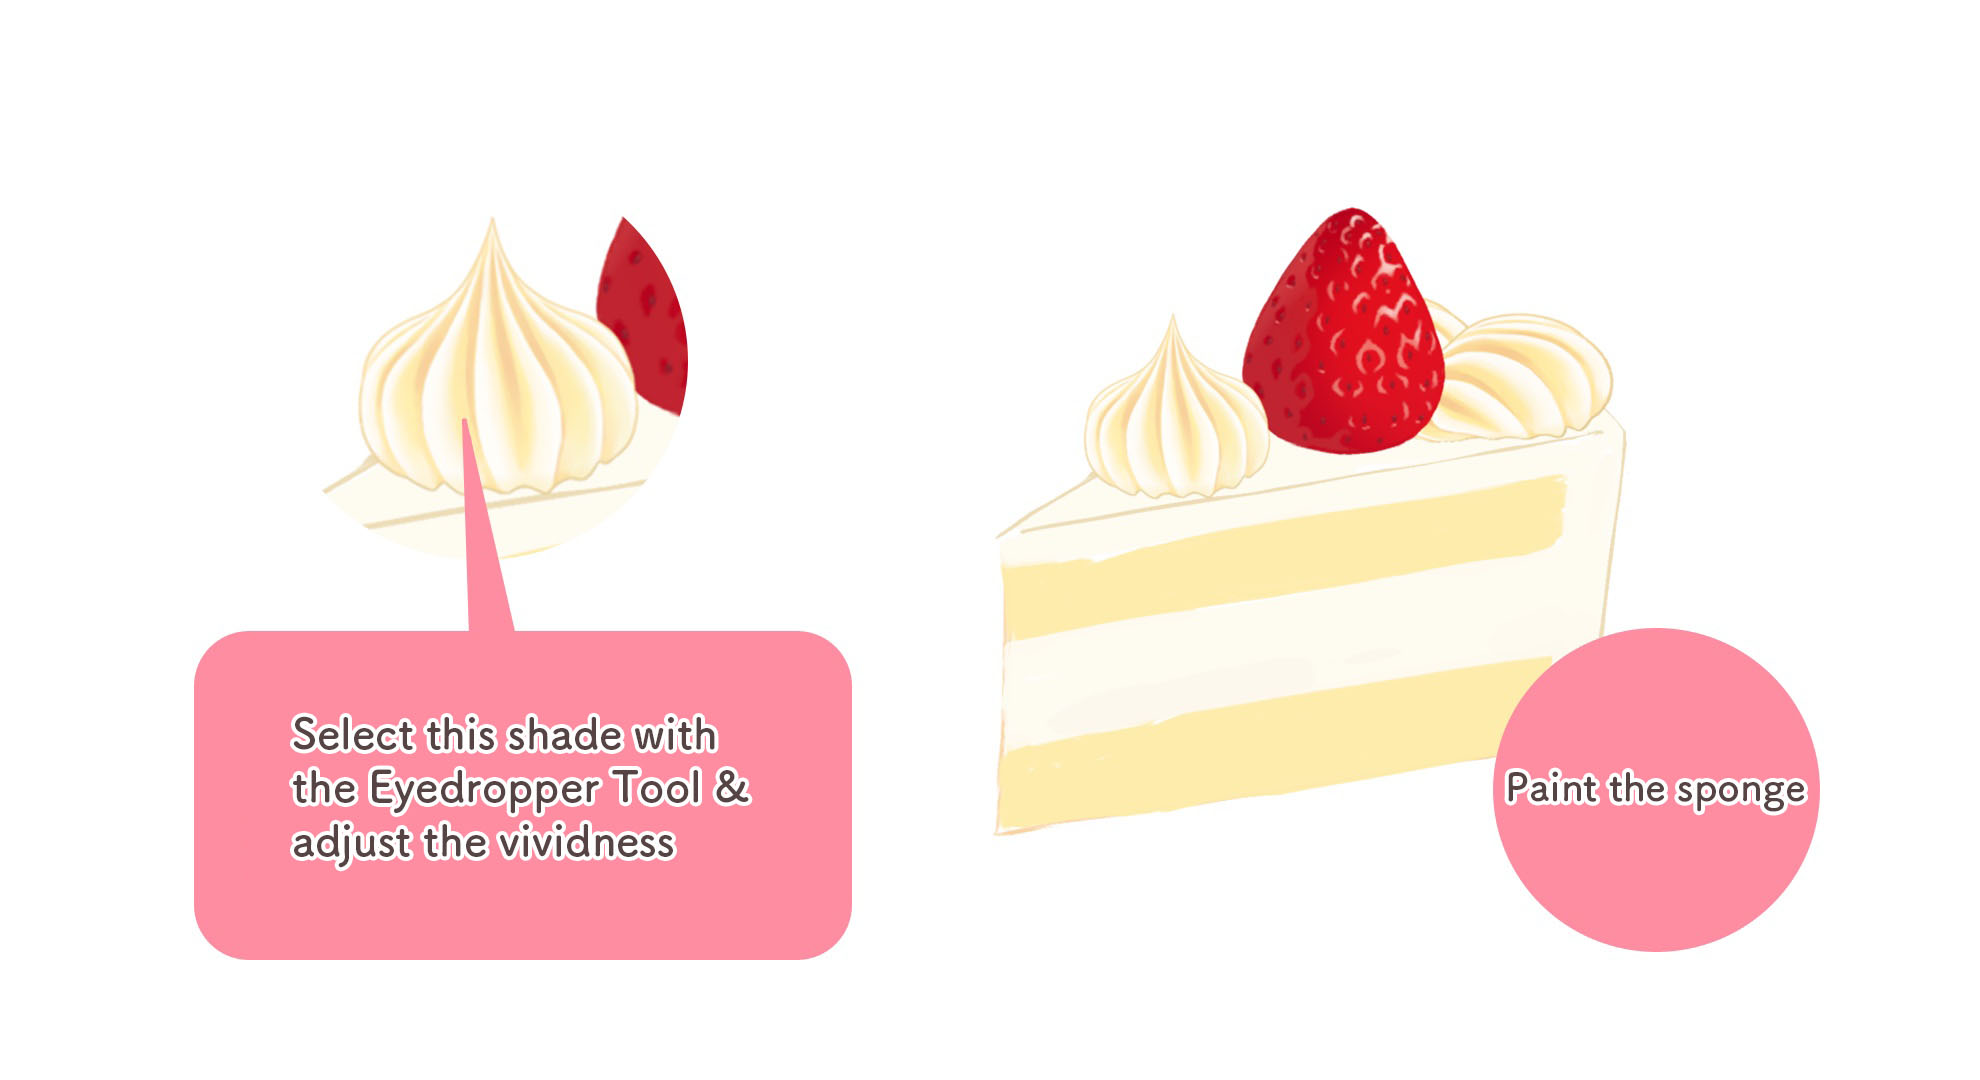
Now that the cream has been painted, create another layer to draw the sponge parts of the cake base.
From the top cream, use the eyedropper to select a relatively strong yellow shade and adjust the thickness of the color.
Once you have chosen the right shade, paint roughly using the Acrylic brush.
Drawing the strawberries in between the sponges
You can use the Strawberry M (cross-sectional) brush to draw the cross section of a strawberry.
▶︎The brush I used:Strawberry M (cross-sectional)
【Drawing the strawberry】
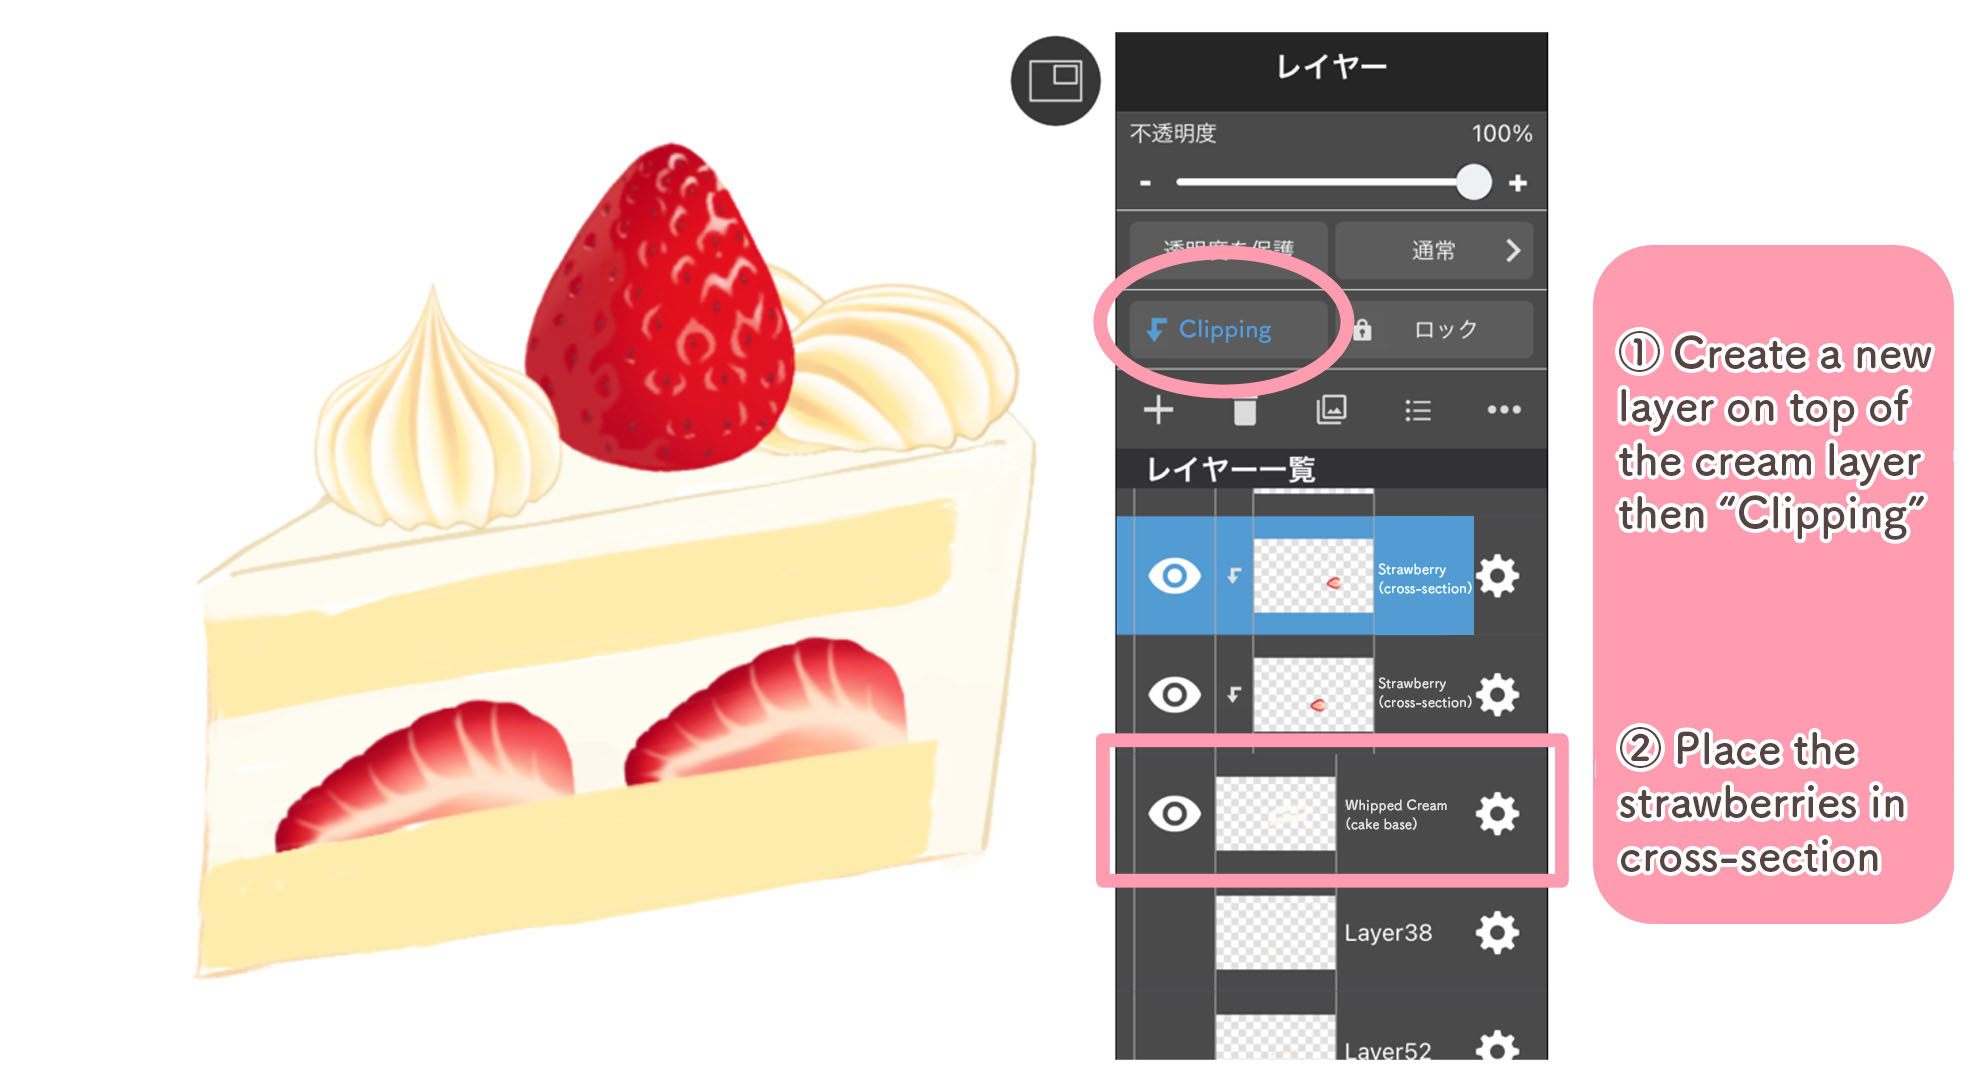
①Create a new layer on top of the cream layer (cake base) and select Clipping.
②Use the Strawberry M (cross-sectional) brush on the layer you created in ①.
【Drawing the cream】
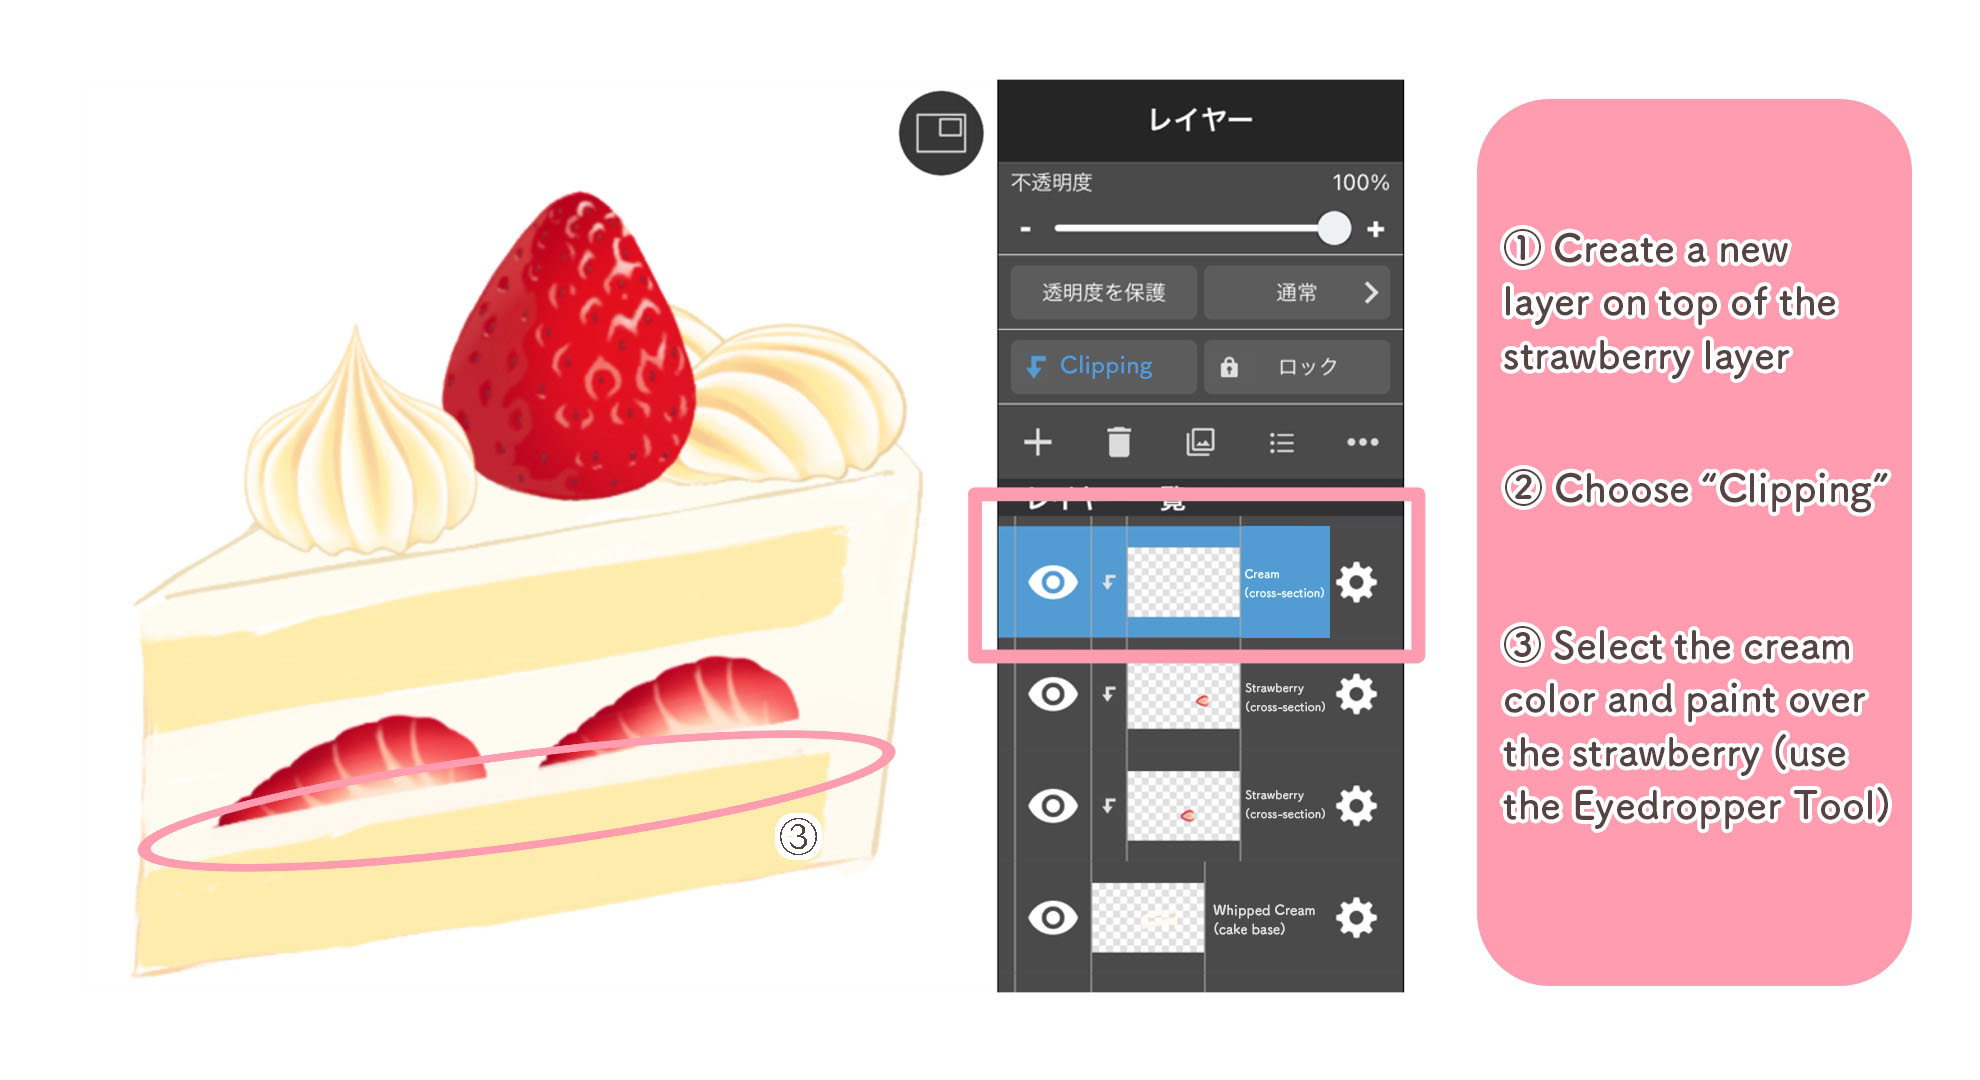
①Create a new layer on top of the “Strawberry (cross-sectional)” layer.
②Choose Clipping for the new layer you just created.
③Use the Eyedropper tool to pick the color of the cream used for the cake base and paint partially on top of the strawberries.
Now I am done drawing the strawberries in between the sponge layers.
Drawing the holes (air bubbles) inside the sponge cake

Without the air bubbles, the sponge layers looked very plain so I will be drawing in small holes.
Let’s create a new layer for the air bubbles and follow the steps below;
①Pick the color orange shade from the cream drawn on top of the cake and start placing dots randomly with the Acrylic brush.
②Drop the opacity of the current layer so it blends with the sponge color.
③Create another layer and start drawing a few air bubbles, smaller than the ones earlier.
You can recreate a “hand-made” feel of the cake by drawing large/many air bubbles while with smaller air bubble holes, you can recreate a smooth and soft feel of the sponge cake.
Drawing the shadows

Now that the cake shape and decorations are complete, I will start adding shadows.
①Select a color of the outline of the cream (drawn with the Cream M brush) using the eyedropper and start shading.
②As for the whipped cream on top, I want to make use of the shadows drawn in by default so once you draw the shadows, change the Blending to “Multiply” and lower the opacity to adjust the hue.
※If you want it to look more three-dimensional, layer soft yellow on the top and frontal parts of the cake base and adjust the touch of the cake.
In this tutorial, I added and made adjustments to the details so I hope you take a look at the last illustration as well.
Drawing the plate

If you are done with the cake, move on to drawing the plates next.
First, as always, create a new layer for the plates and start drawing there.
①Choose “Ellipse” from the Shape Tool and draw a horizontal oval shape.
②Duplicate the layer from ①, together with the ellipse and contract the new ellipse using the Transform Tool.
③Duplicate the layer from ① once again and move it downwards a little to illustrate the thickness of the plate.
Color the plate and draw the shadow of the cake piece on the plate and now it’s complete.

Final Notes
How was this tutorial ?
In my instructions, I kept the default color of the Cream M brush but you can also change its hue from “Hue” inside the Filters function.
You can change the color of the cream to suit the overall atmosphere of your illustration so I hope you try drawing with different shades too.
(Text・Illustrations/Amane)
\ We are accepting requests for articles on how to use /

