2023.05.26
How to draw cute animal ears easily!
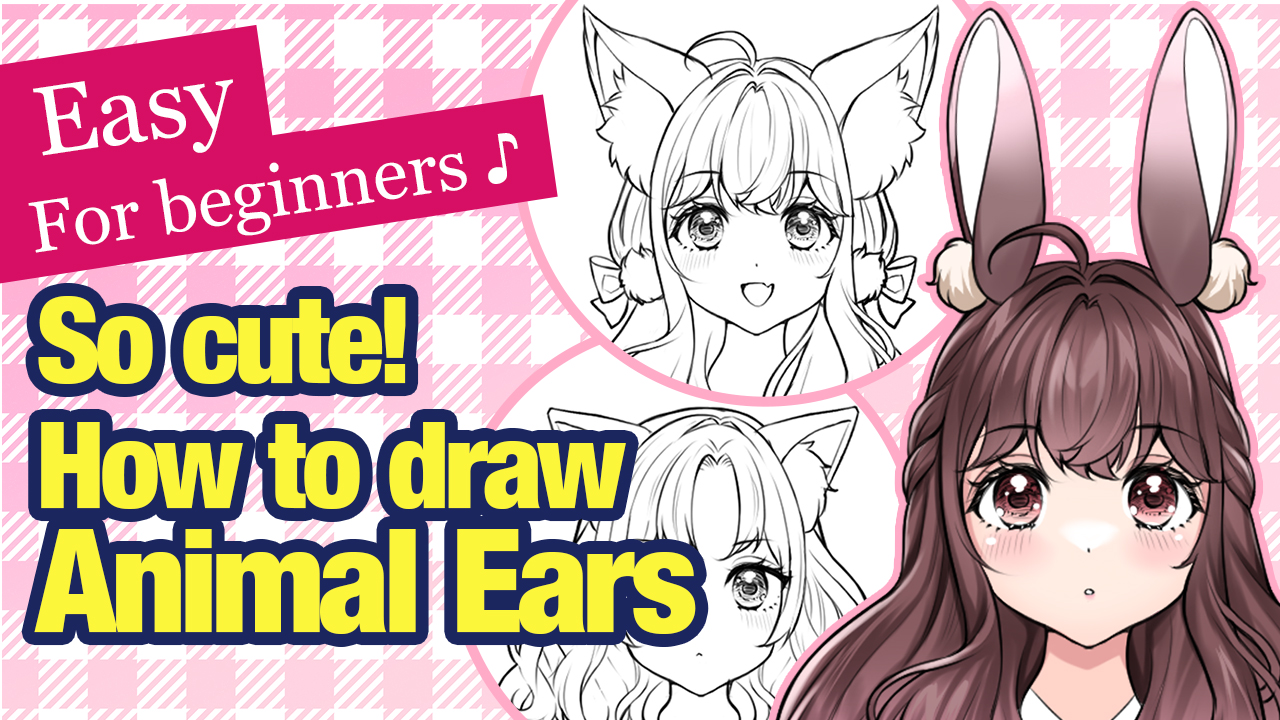
Animal ears are unbearable for those who like them. Their cuteness is irresistible! I like rabbit and fox ears and I often play with drawing them!
However, I remember that at the beginning I had some problems with it, like I wasn’t sure what size or balance to draw in which ears to make them look cuter.
It would have been great if I could draw with the momentum of my passion or impulse, but I had always failed to draw what I wanted. However, after I found the key to avoiding failure and easily adjusting, I can draw animal ears quickly and without hesitation!
The key to drawing furry animal ears is to follow the simple steps below. Today we are going to learn how to draw characters with animal ears. It’s so easy, I hope you’ll read this tutorial to create a large number of characters with animal ears☆
Prepare the characters you want to add animal ears to
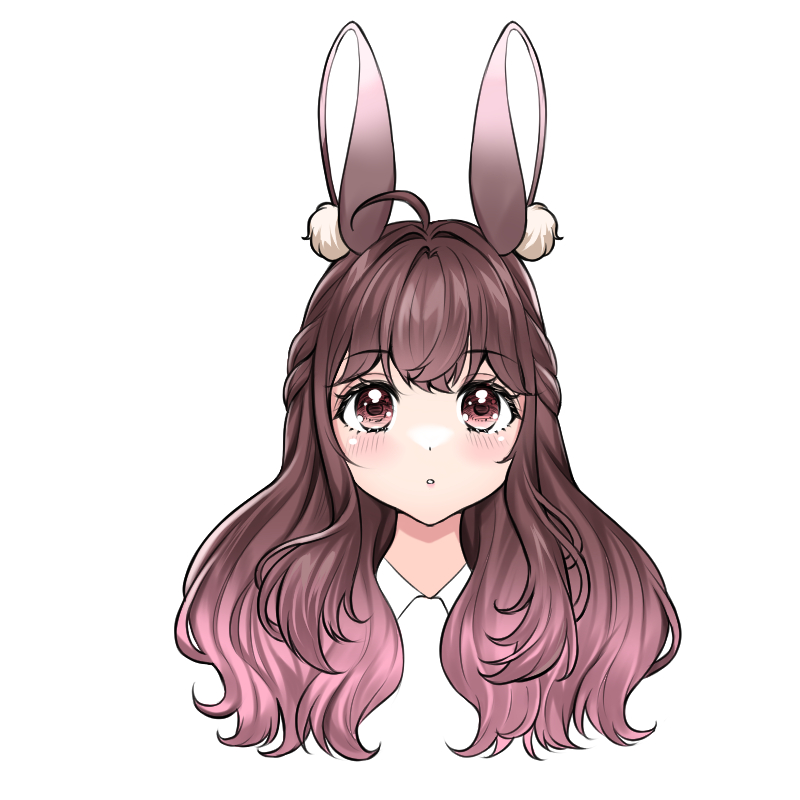
First, prepare a character illustration without ears.
This time I have drawn a character from the front, as it is easier to add animal ears. However, you can also draw a face from the side or from a diagonal angle. Just remember that changing angles changes the way you draw, so you don’t need to start with angles you’re not good at.
This time I am going to draw the rabbit’s ears. The key is to create faces that match the animal ears you want to draw. Rabbit ears are perfect for girls with a kind, comforting and fluffy atmosphere. So I have drawn a hairstyle with fluffy long half up and droopy eyes to create a comforting expression!
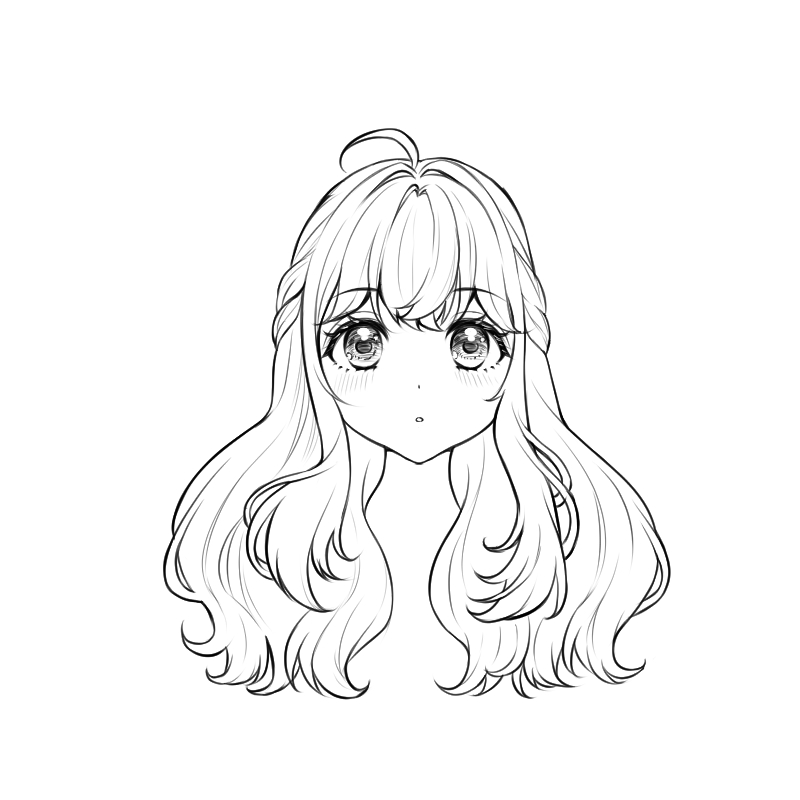
This is the illustration I created with a sense of fluffy comfort that suits rabbit ears. I also added movement and curls to the tips or volume of the hairstyle. Define hairstyles or facial expressions while thinking about balance with the ears you are drawing.
Define the position of the ears
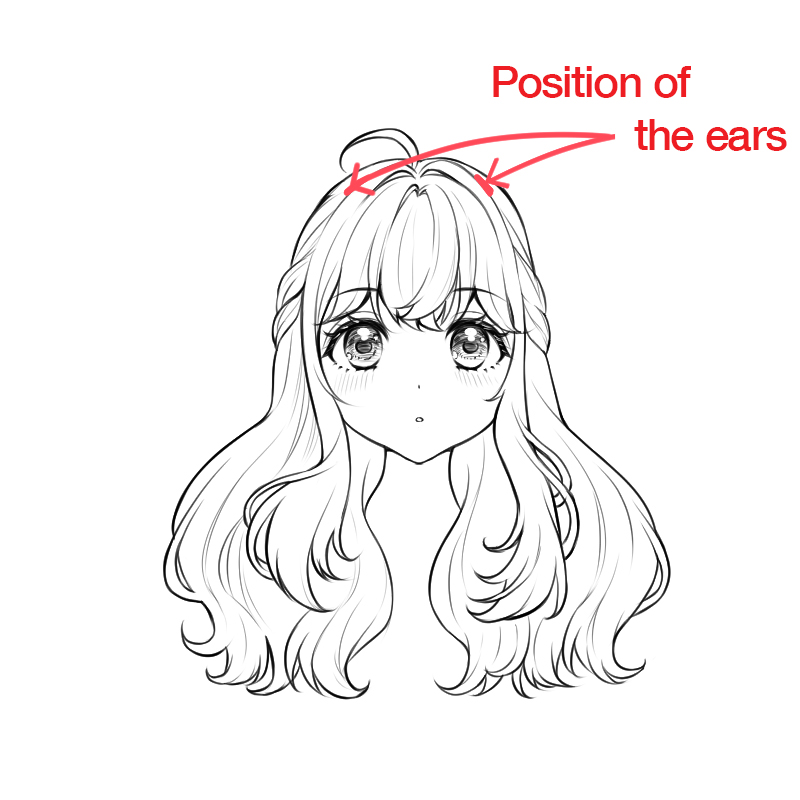
Now let’s decide where to put the ears.
The position of the ears varies according to the animal. Rabbit ears are close to the curved area of the top of the head. It is even easier to draw them from the side or diagonally, as you can see the position of the ears clearly. When viewed from the side, the ears are on the vertical line that separates the front and back of the head.
If you find it difficult to locate the ears, look for pictures of people wearing headbands, which are available in theme parks and shops, and use them as a guide!
Define the size of the ears
Move on and prepare for painting. Decide the size of the ears first.
Determine the size of the ears taking into account the height of the face. You can create illustrations with a good overall balance by drawing larger ears on larger faces and smaller ears on smaller faces.
The height of the face can be set as below.
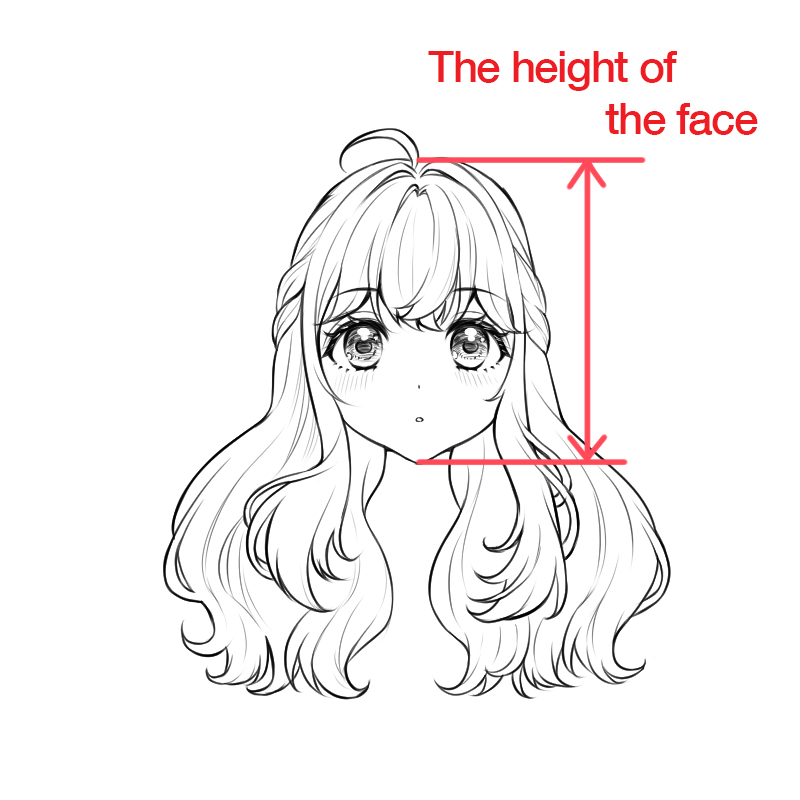
Use this height as a guide when adjusting the ear size.
Define the length of the ears
Let’s decide on the length of the ears. This time I am going to make the length of the rabbit’s ears a little shorter. When you draw shorter rabbit ears, set their length at two-thirds of the height of the face. You don’t have to be exact, it’s no problem to decide the length roughly!
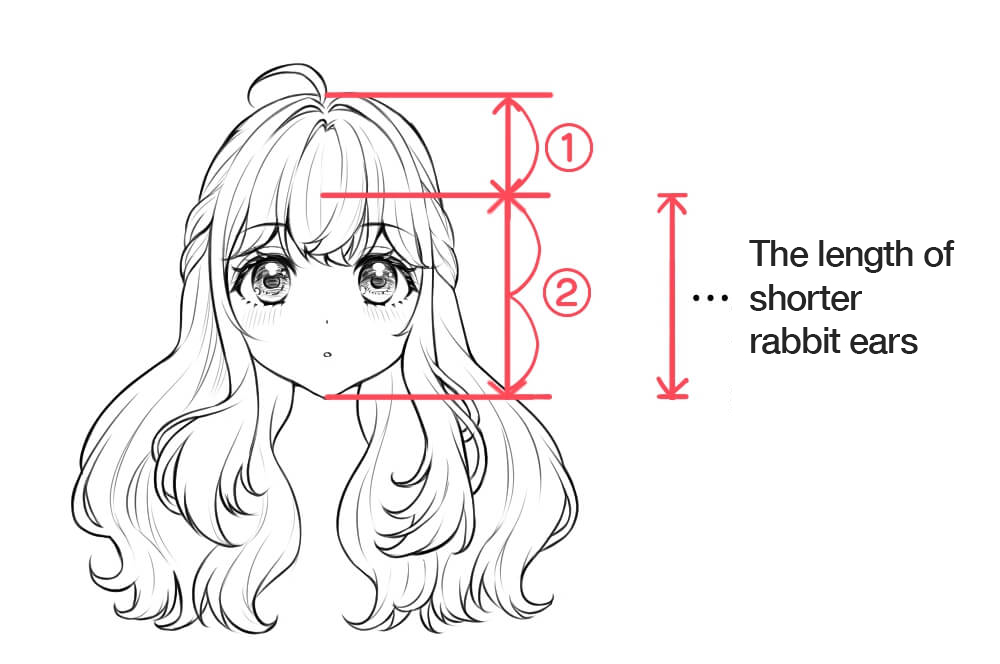
Although it depends on the size of the characters’ faces, you can think of two-thirds of the height of the face as being around the top of the eyes.
If you are drawing longer, larger ears, set their size to the same length as the height of the face. Too long ears will make the whole drawing look longer vertically, which looks bad.
The picture on the right shows what it looks like when the size of the ears is set at the same length as the height of the face. Can you see how the impression they make has changed surprisingly? By changing the length of the ears according to the illustrations you want to draw, you can create illustrations that are closer to your ideal image.
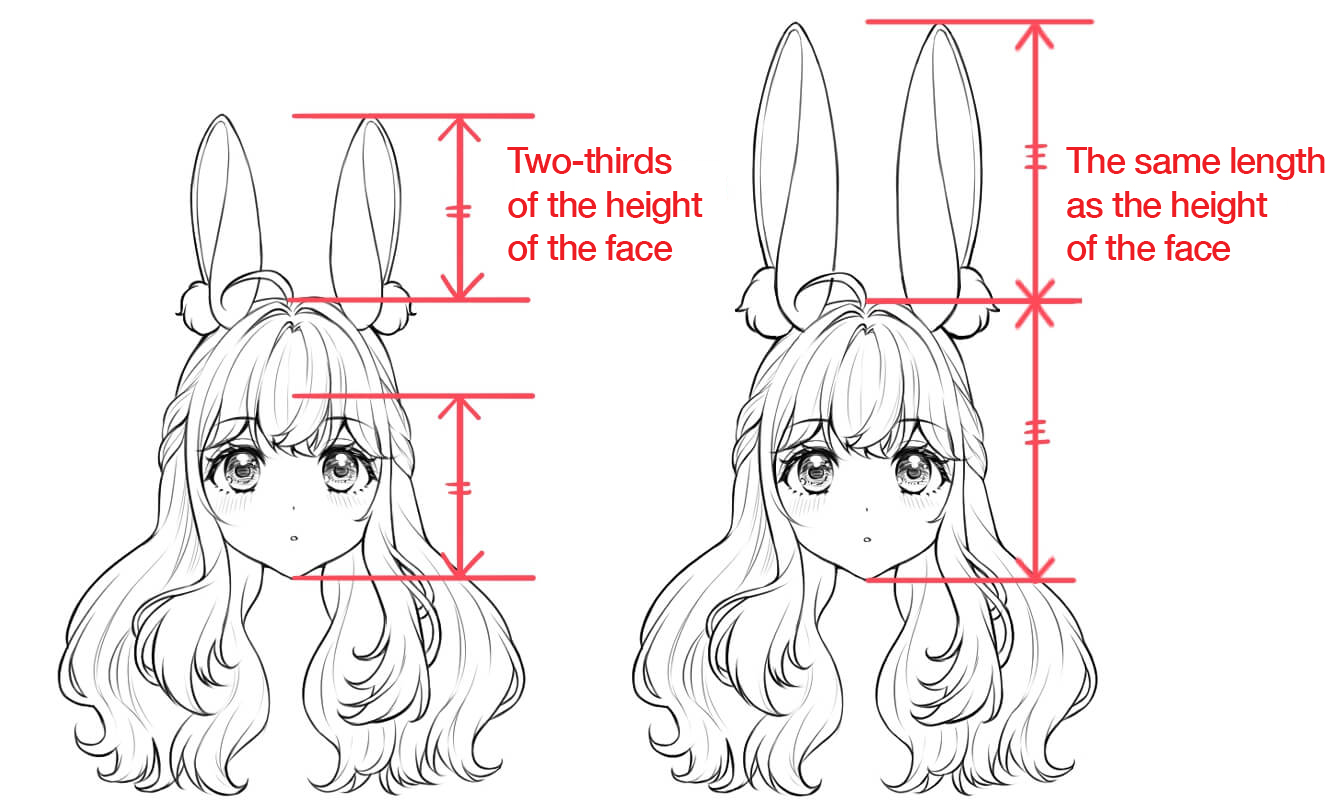
However, this ratio only works when drawing rabbit ears. If you are drawing the ears of other animals, you should refer to the actual size and length of the animals’ ears. Whatever animal’s ears you are drawing, you need to think about the size of the ear in relation to the length of the face. Try to find the best ratio for each animal’s ears.
Draw the ears
Now let’s start drawing.
By getting a rough idea of the size and length of the ears, you can establish the general shape of the ears at the rough drawing stage. After that, all you need to do is draw along the lines and there will be no tedious adjustment at the end.
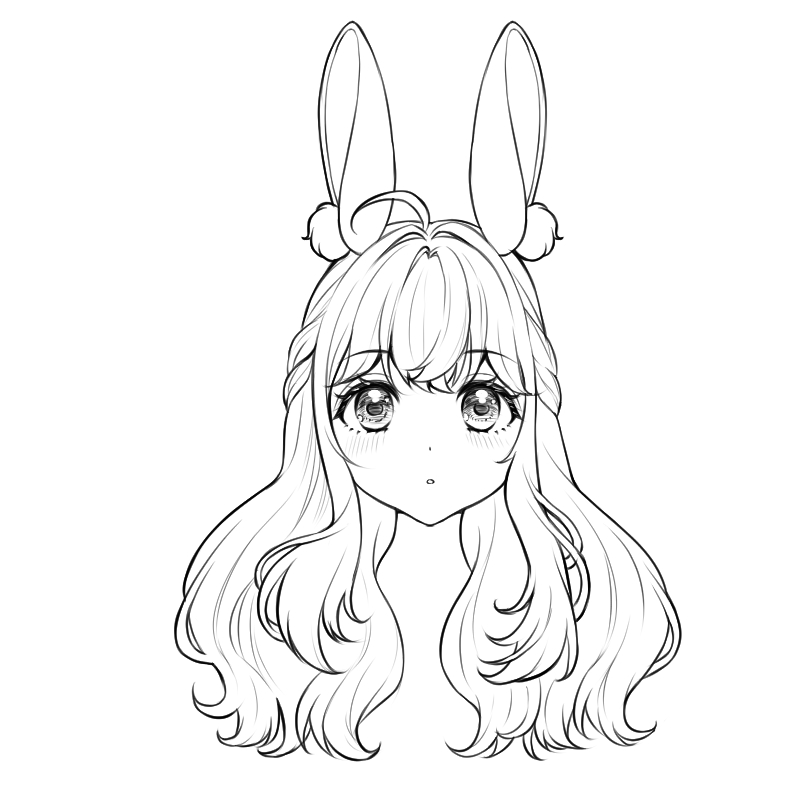
When drawing the ears, look at the actual animals to see how the ears are placed. The ears of animals such as rabbits and foxes are not exactly vertical. If you draw them vertically, the ears will look like headbands, which is not good.
Most animals have their ears tilted forward. Keep this in mind when drawing the ears.
If you draw the ears from the side, you won’t have too much trouble making them look naturally tilted forward. On the other hand, if you draw them from the front, you will have to work a little harder to make them look like they are tilted forward. Add three-dimensionality to the ears so that they are tilted forward. The depth created will help the ears to look natural.
You must also remember to give them a fluffy feel. Some animals have smooth ears, but if you illustrate them as they are, they look flat and don’t give an animal expression.
When all the work is done, start painting the colors. At this point you can make the ears more realistic by giving them a color close to the hair color. If the color of the hair and the ears are completely different, the whole balance of the illustration will collapse and the audience will feel uncomfortable. Since the character has pink-brown hair, you can paint the ears with a light pink-brown to create natural animal ears.

Draw animal ears other than rabbit ears
Popular animal ears other than rabbit ears are fox ears and cat ears. Both animals have shorter ears than rabbits, that means the ear length ratio is different.
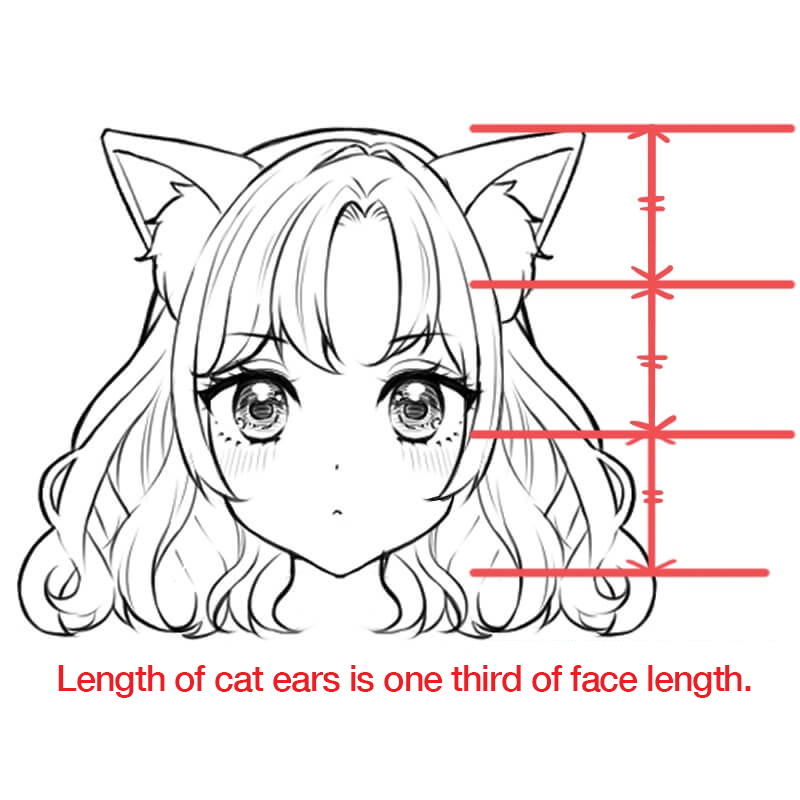
The ideal ear length ratio in cats is one third of the face length. Unlike rabbits, cats have ears closer to the sides of the head. Draw lines to create nice triangles. Like rabbit ears, cat ears are set diagonally. Draw them tilted forward to create three-dimensionality.
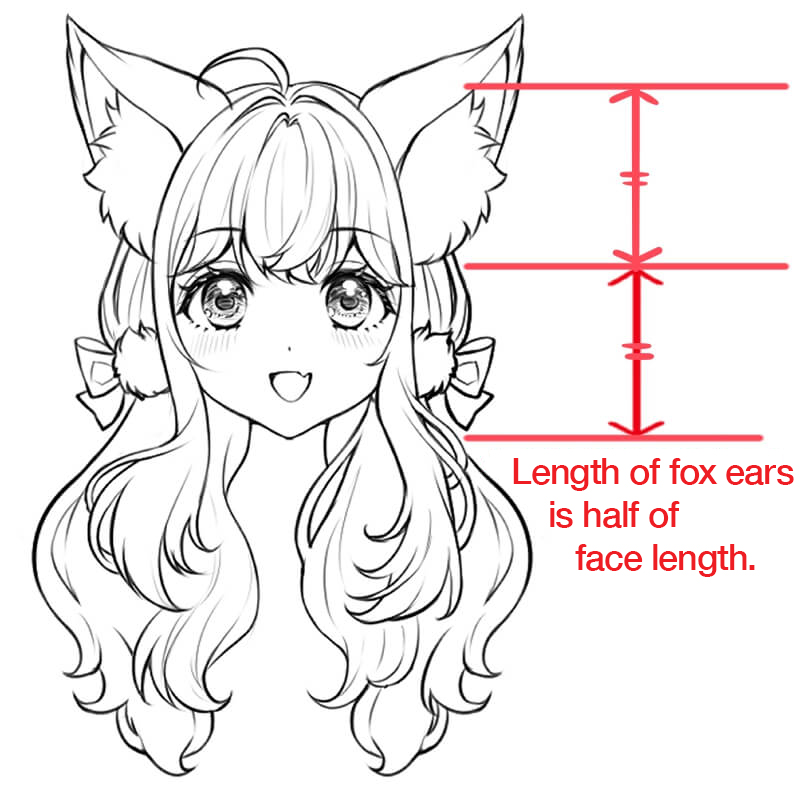
Foxes have larger ears than cats, and the ideal ear length is half the length of the face. The fluffiness of the fox’s ears is even more important than that of other animals, so decide on the outline of the ears, including the tips of the hairs on the edges of the ears.
Arrange the ears on the side of the head. Draw large ears as if they covered the entire area of the side of the head. Of course, make sure you draw the ears tilted forward. And make the edge of the ears curl back a little to make them look more like fox ears.
You can create more elaborate illustrations by adding fluffy hair accessories or by being creative with the hairstyle, such as curling or waving, and the illustrations will integrate animal ears and characters.
Conclusion
We have created three types of animal ears: rabbit, cat and fox. All the ears have a cute finish. Let’s take a look back at what you need to remember when drawing animal ears.
- Place the ears where the line divides the front and back of the head.
- Set the ratio of ear length to face length to two-thirds for rabbits, one-third for cats and one-half for foxes.
- Draw the ears tilted forward like real animal ears.
Keep these points in mind and you can draw characters with cute animal ears. Characters with animal ears can be adapted to many situations, including anthropomorphic art or love stories. I hope you will try them.
(Text・Illustrations / アニー)
Twitter:https://twitter.com/annie_pinkpom
\ We are accepting requests for articles on how to use /

