2023.09.25
MediBang Library 02 Try out “For App Beginners”

Are you wondering what to do after downloading MediBang Paint?
If so, a content called “If you are using the app for the first time, click here” loaded in MediBang Paint is ideal for you.
You can learn the basic usage of the app by using it practically.
Let’s get started!
Try out MediBang Paint
Open the app and you’ll see this menu page.
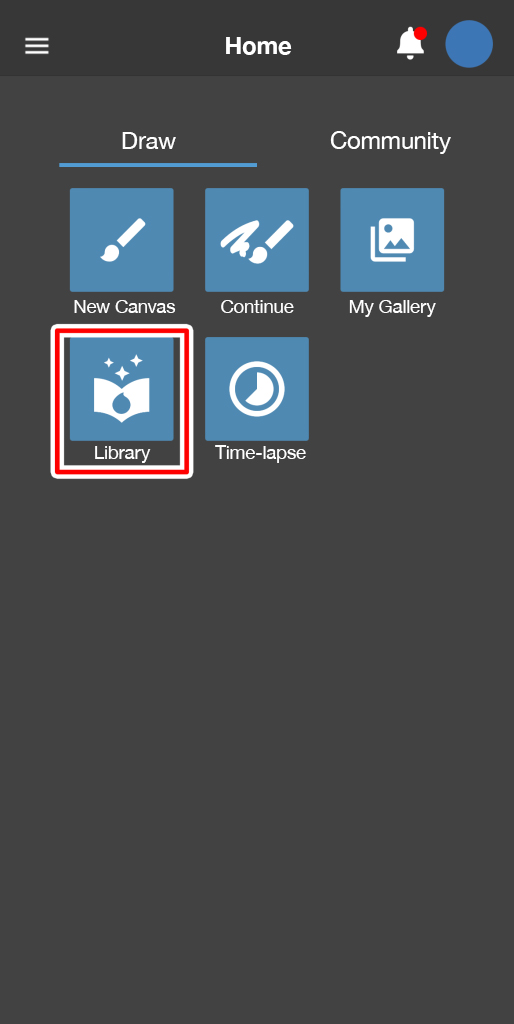
Tap on Library.
Now you can access the variety of content in MediBang Library.
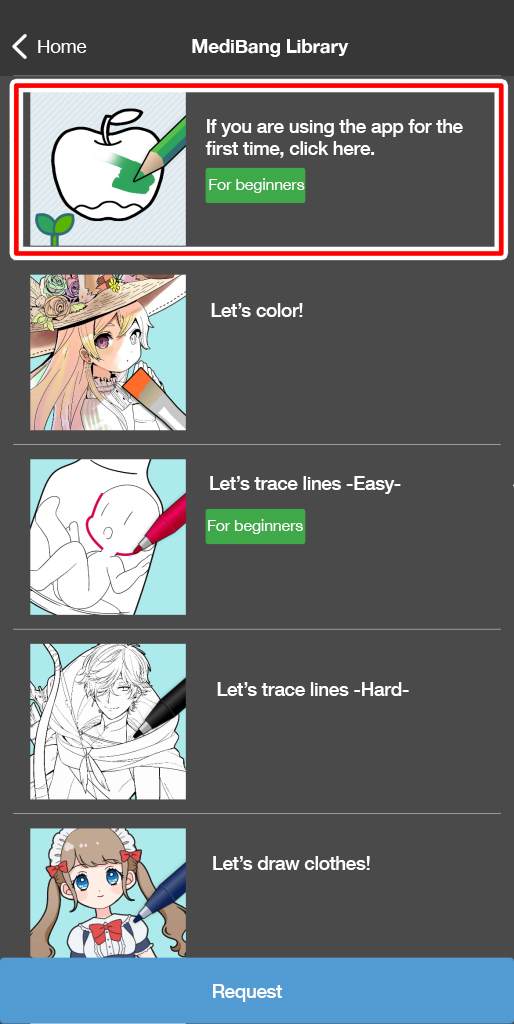
The app shows the list of contents.
Oooh so many.
Tap on If you are using the app for the first time, click here.
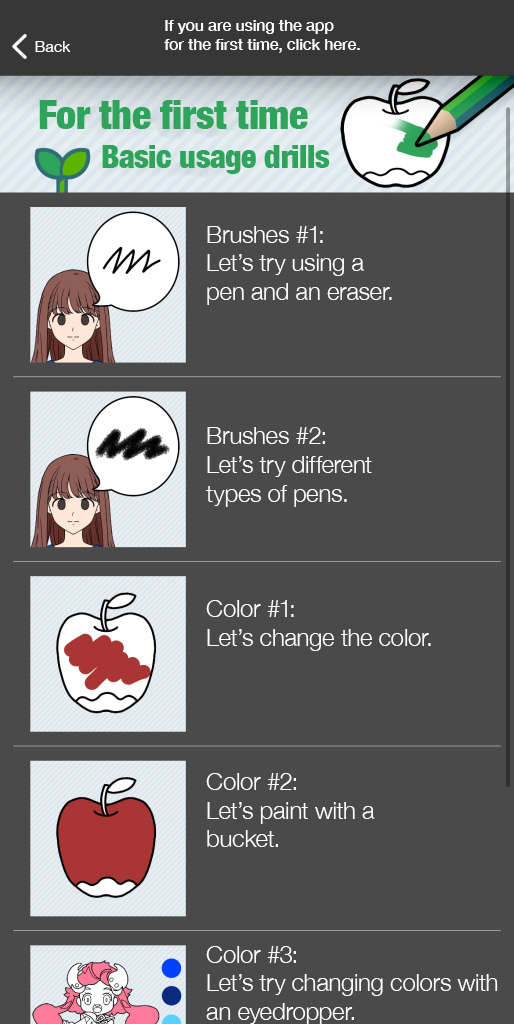
Then again, you’ll see the list of contents.
Let’s look at the contents one by one, starting from the top.
Tap the content and you will see a screen like this.
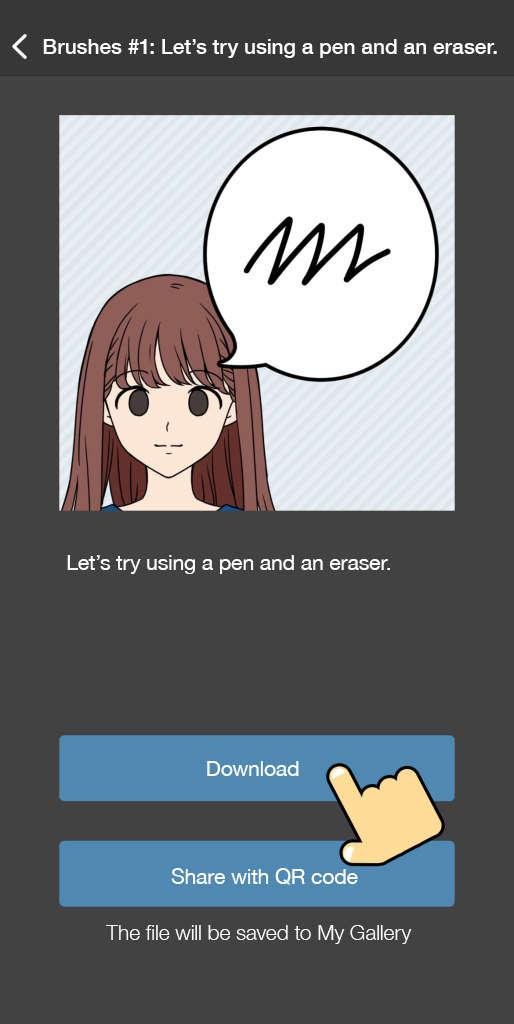
Basically, you need to download the content data to your device to start the exercises.
Tap on Download and let’s get started.
Brushes
Brushes #1 Use pens and erasers
The canvas will open once the download is complete.
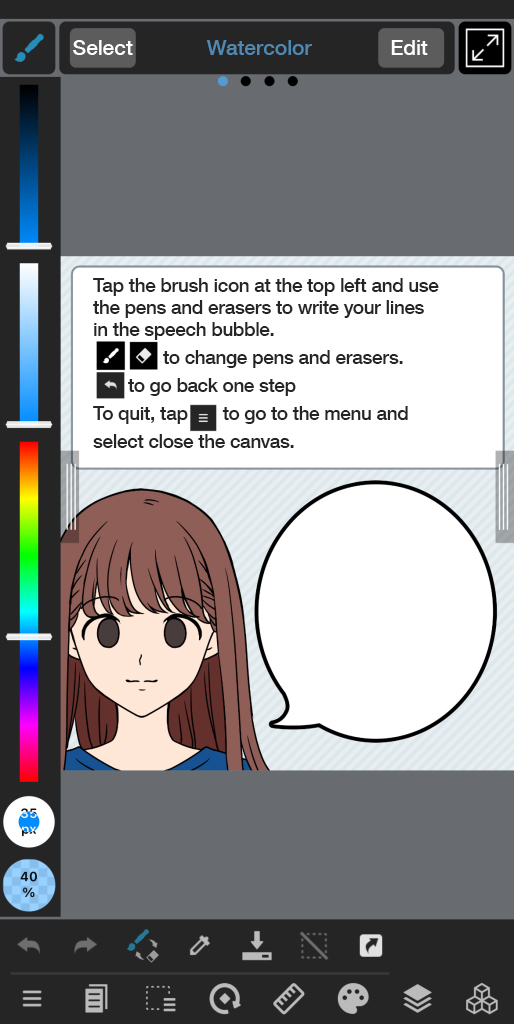
Wow, there are so many buttons and things!
But it’s OK, we’ve got a helpful description, so follow it and start drawing.
The Brush tool is selected by default, so draw something.
If the bubble is too small to draw, pinch to zoom in.
Adjust the canvas size to your liking.
Wait, where is the Eraser tool?
To use the Eraser tool, switch the Brush tool to the Eraser tool.
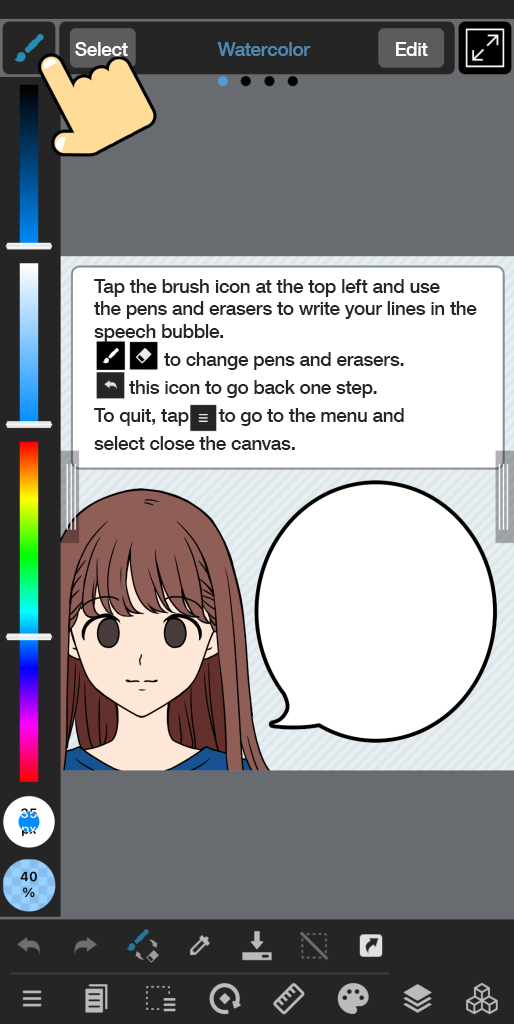
Tap the brush icon in the top left corner.
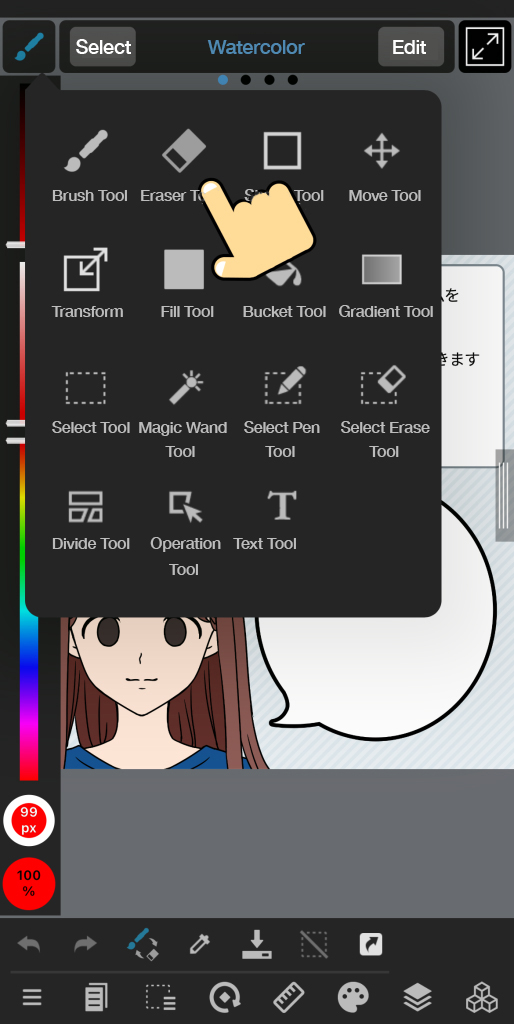
There it is, the Eraser tool!
Tap it and you’ve switched to the Eraser tool.
Do the same if you want to switch back to the Brush tool.
All the tools you need for basic drawing are here, so keep this in mind.
Or you can…
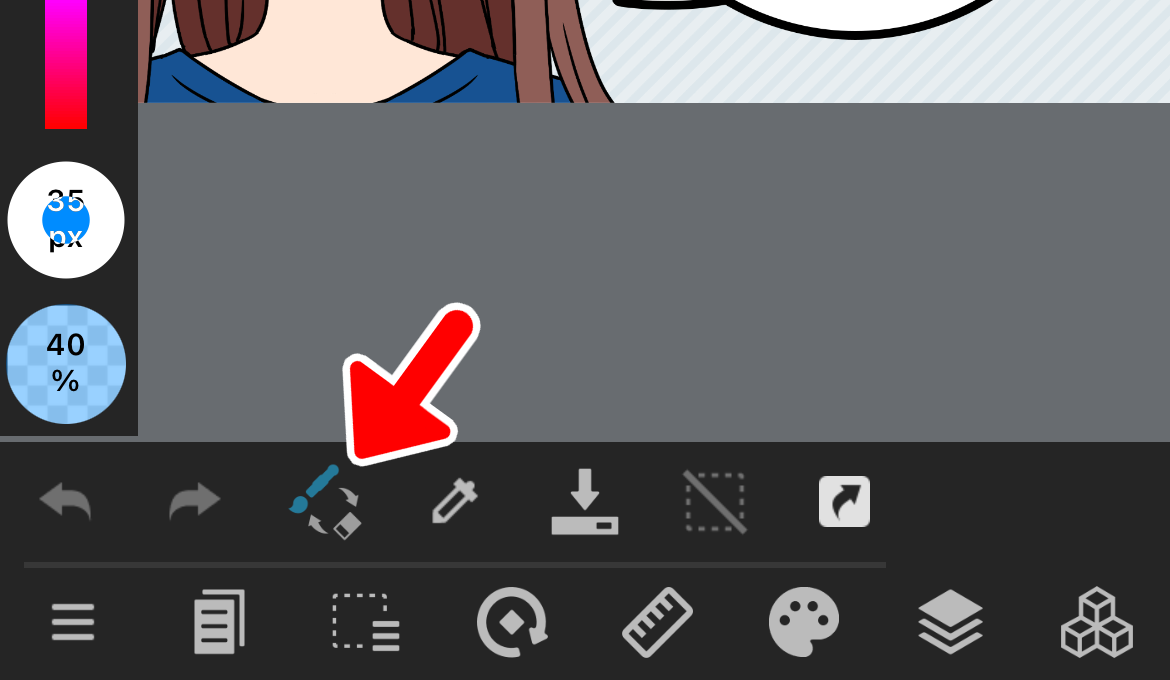
Tap this icon and the brush and eraser will switch instantly. So simple!
When you are drawing, you may draw incorrect lines. In this case, tap the arrow icon in the bottom left corner.
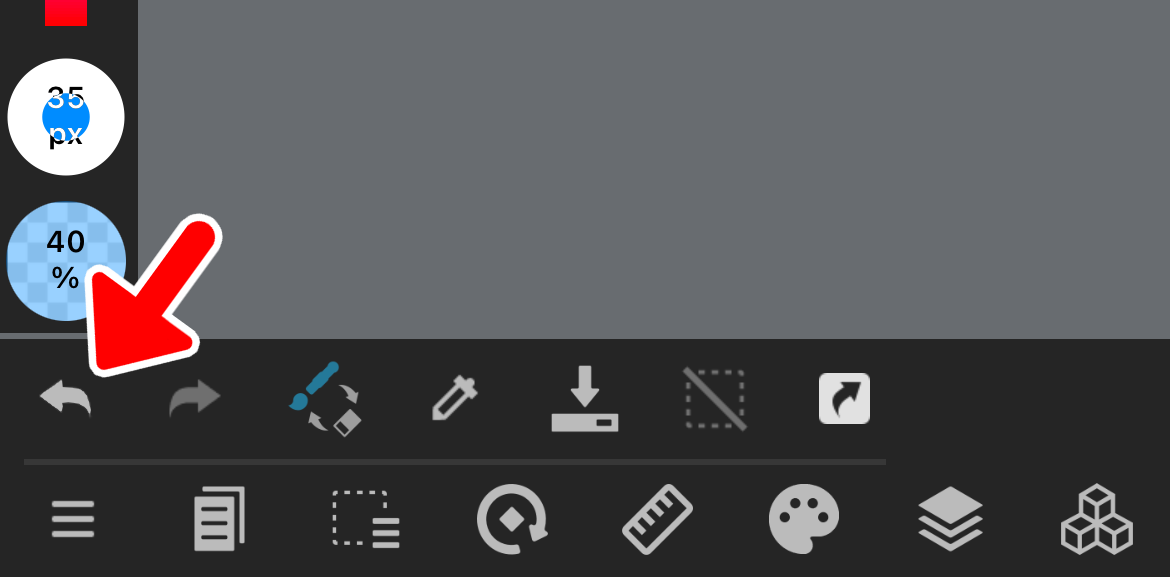
You can go back before you draw the line!
You will go back one step each time you tap.
Remember this tool is so helpful when you make a mistake.
If you have gone back too far, tap the right arrow next to the back tool to undo the back.
Now let’s start drawing!
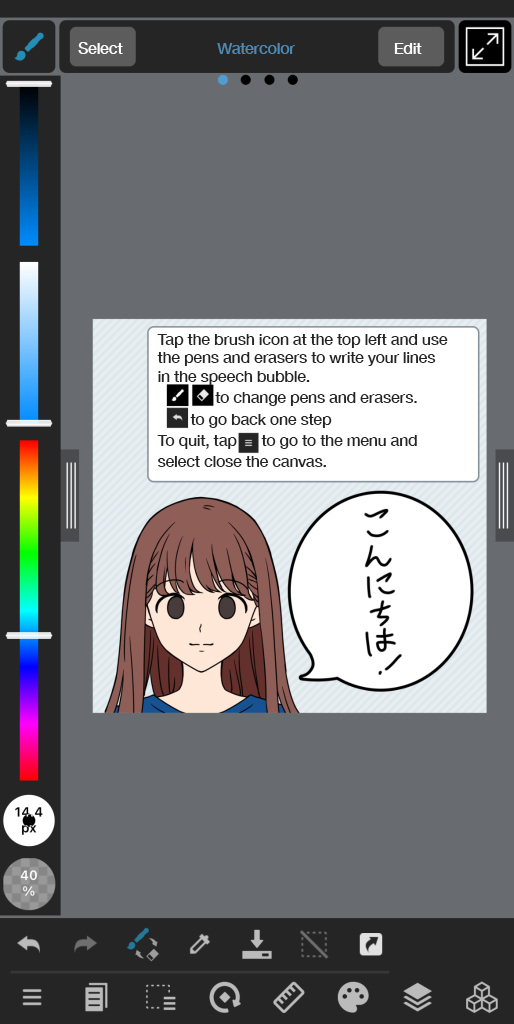
Now we’re done!
Brushes #2 Try different types of Brushes
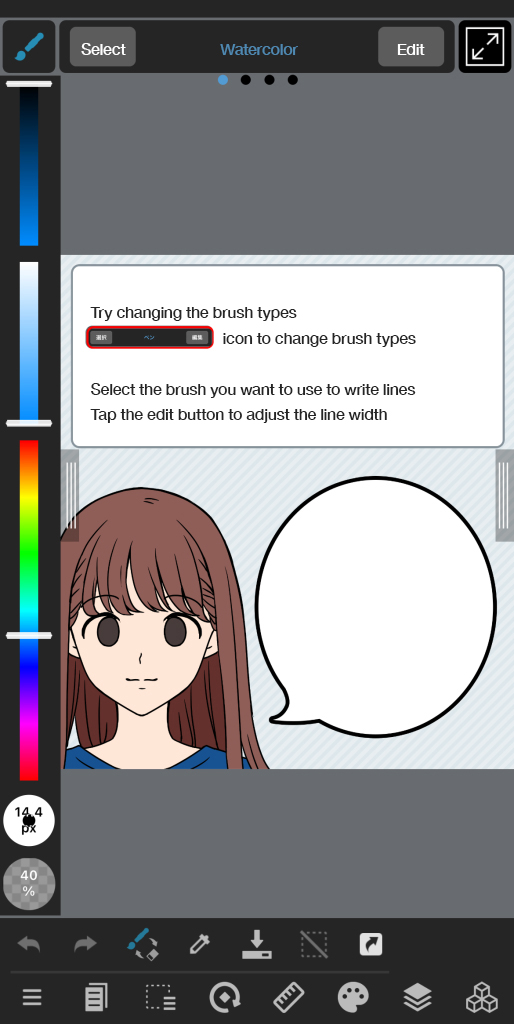
Follow the instructions on the canvas and change the brush types.
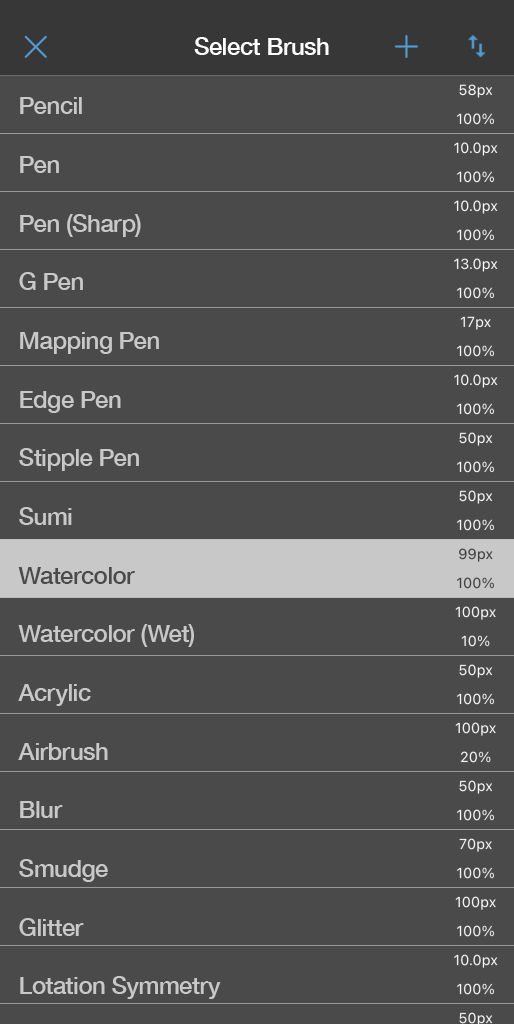
There are so many types of brushes.
You can choose whatever you like.
Try lots of different brushes and have fun!
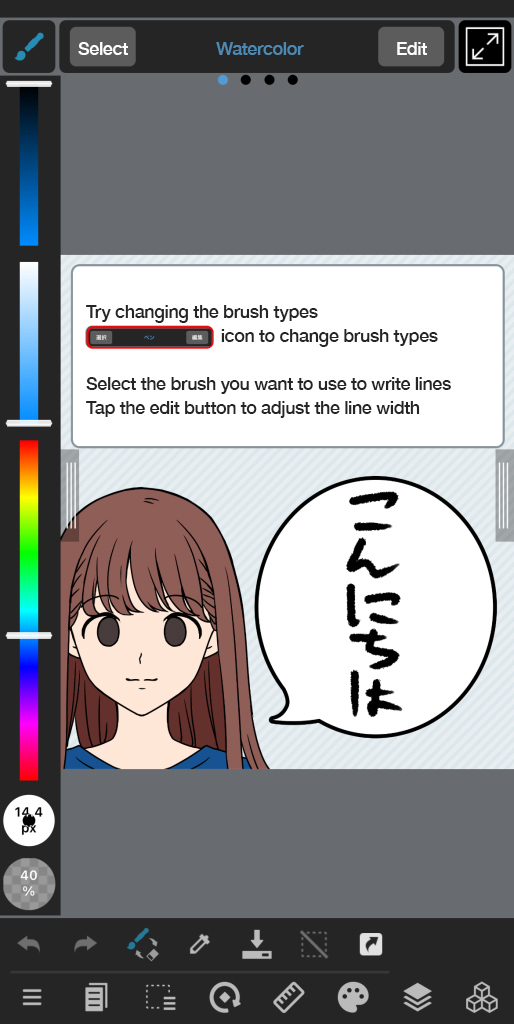
The line in the picture above was written with the Sumi brush.
You can see that it has a different feel to the brush we used before!
Color
Color #1 Change colors
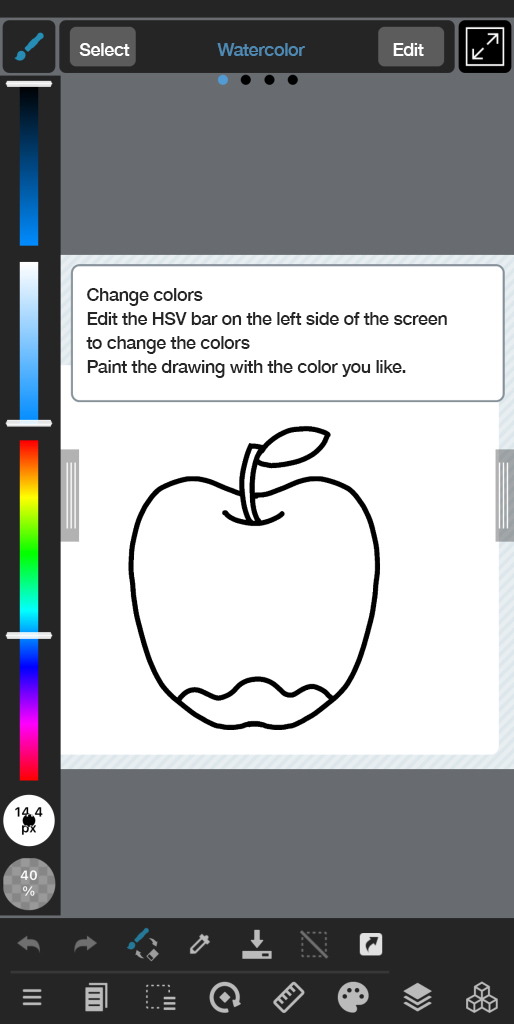
You can change the color of your brush using the colorful HSV bar on the left.
Move the bar in different directions.
There are three bars, each of which controls a different element: brightness, saturation and hue from top to bottom.
The color of the bar changes as you move it, so you can see what each bar defines.
Master the HSV bar and you will be able to create many colors to your liking!
The current color settings are displayed as shown below, so check them as you adjust.
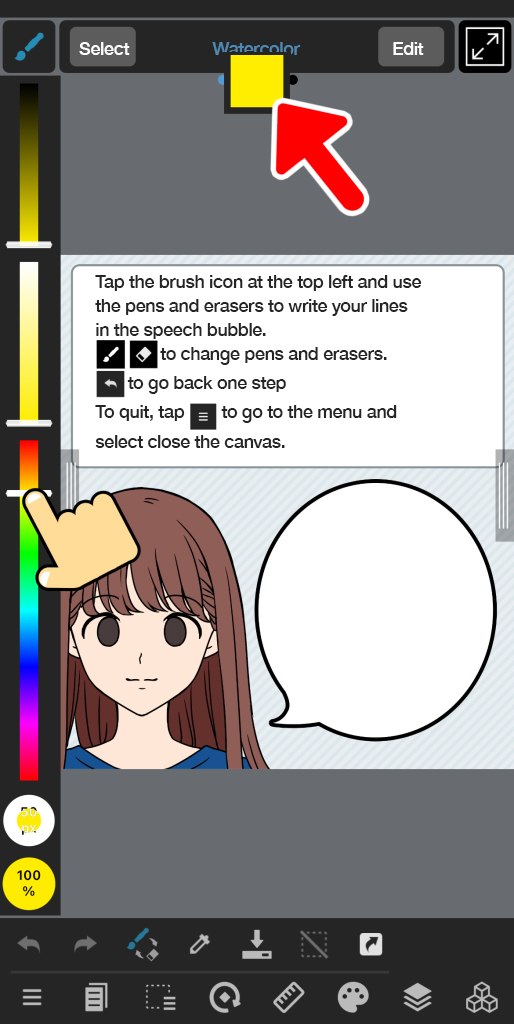
Once you’ve created your favorite color, start painting.
Changing the width of the pen makes it easier to paint finer areas.
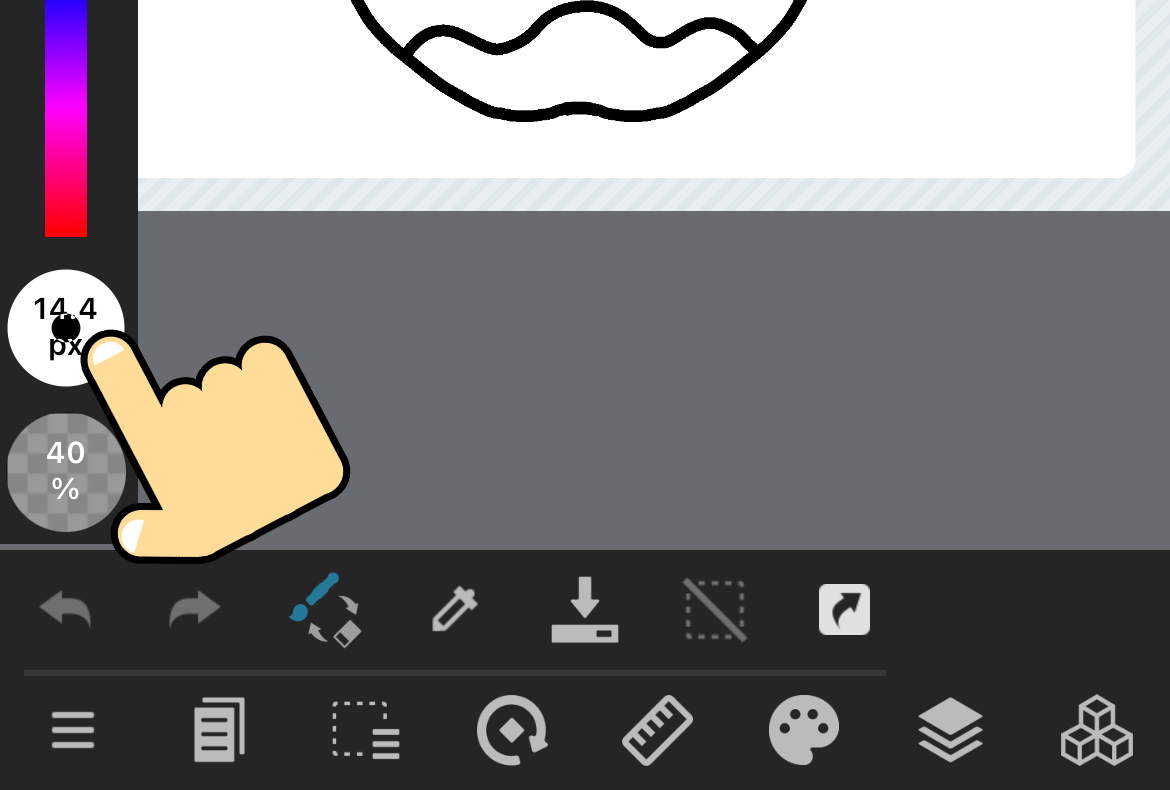
Slide it up to make the pen thicker and down to make it thinner.
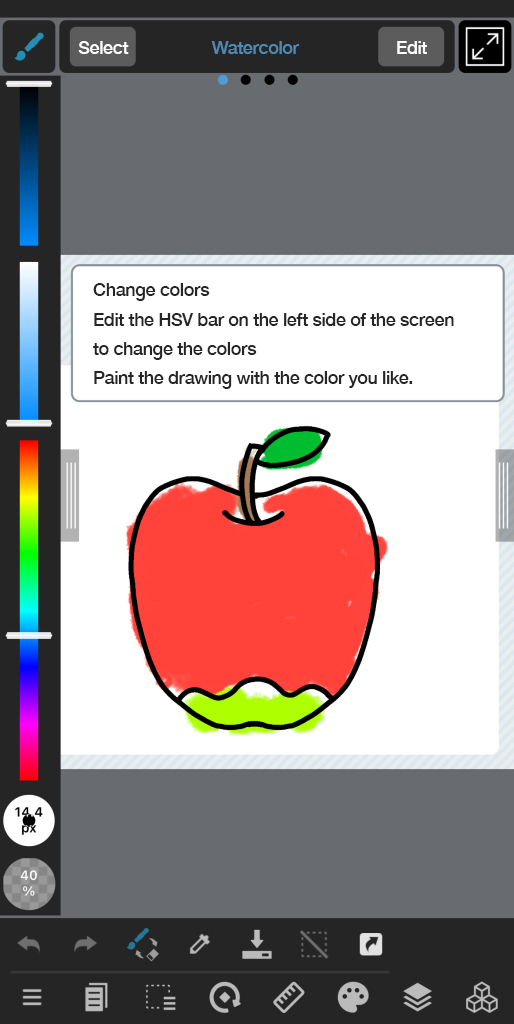
Now we’re done!
It’s just as much fun as coloring, isn’t it?
Color #2 Paint with the bucket
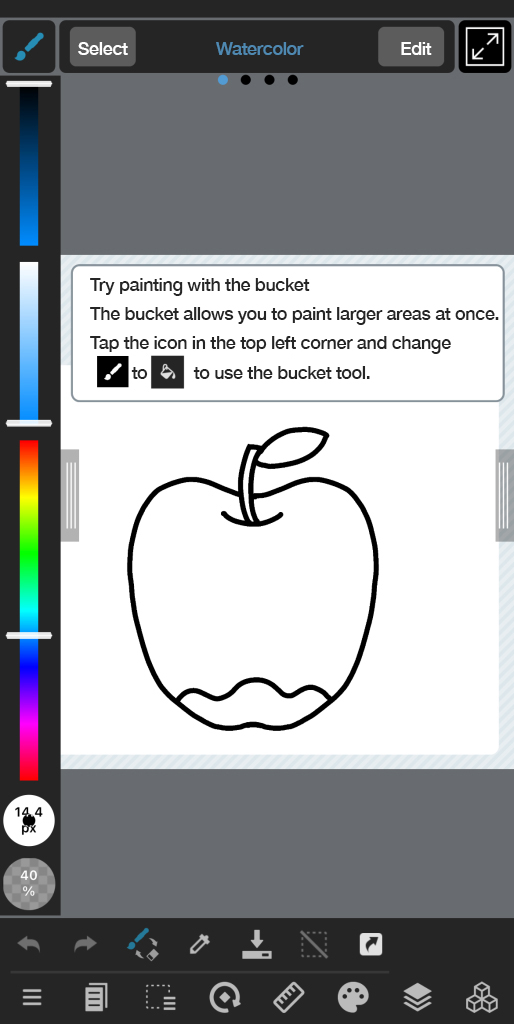
In Color #1 we used brushes to paint the apple, and I’m sure you’ve found it difficult to paint beautifully with brushes.
That’s where the bucket tool comes in.
Activate the bucket from the top left button.
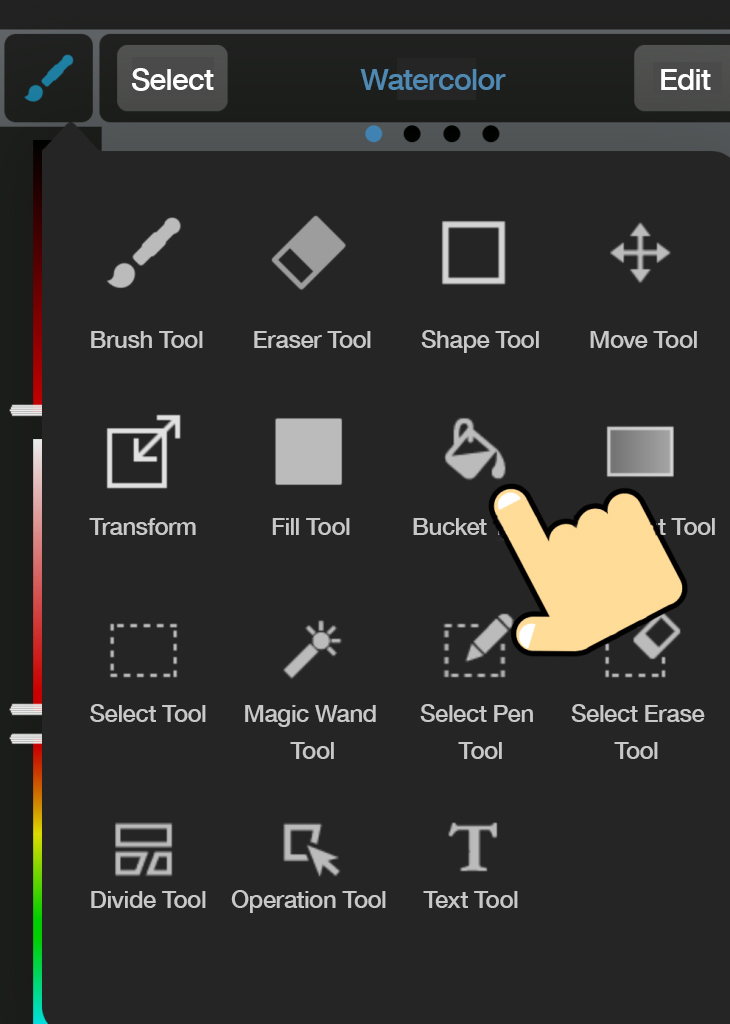
It’s OK if you miss, you can undo and paint again, so play with colors to find your favorite.
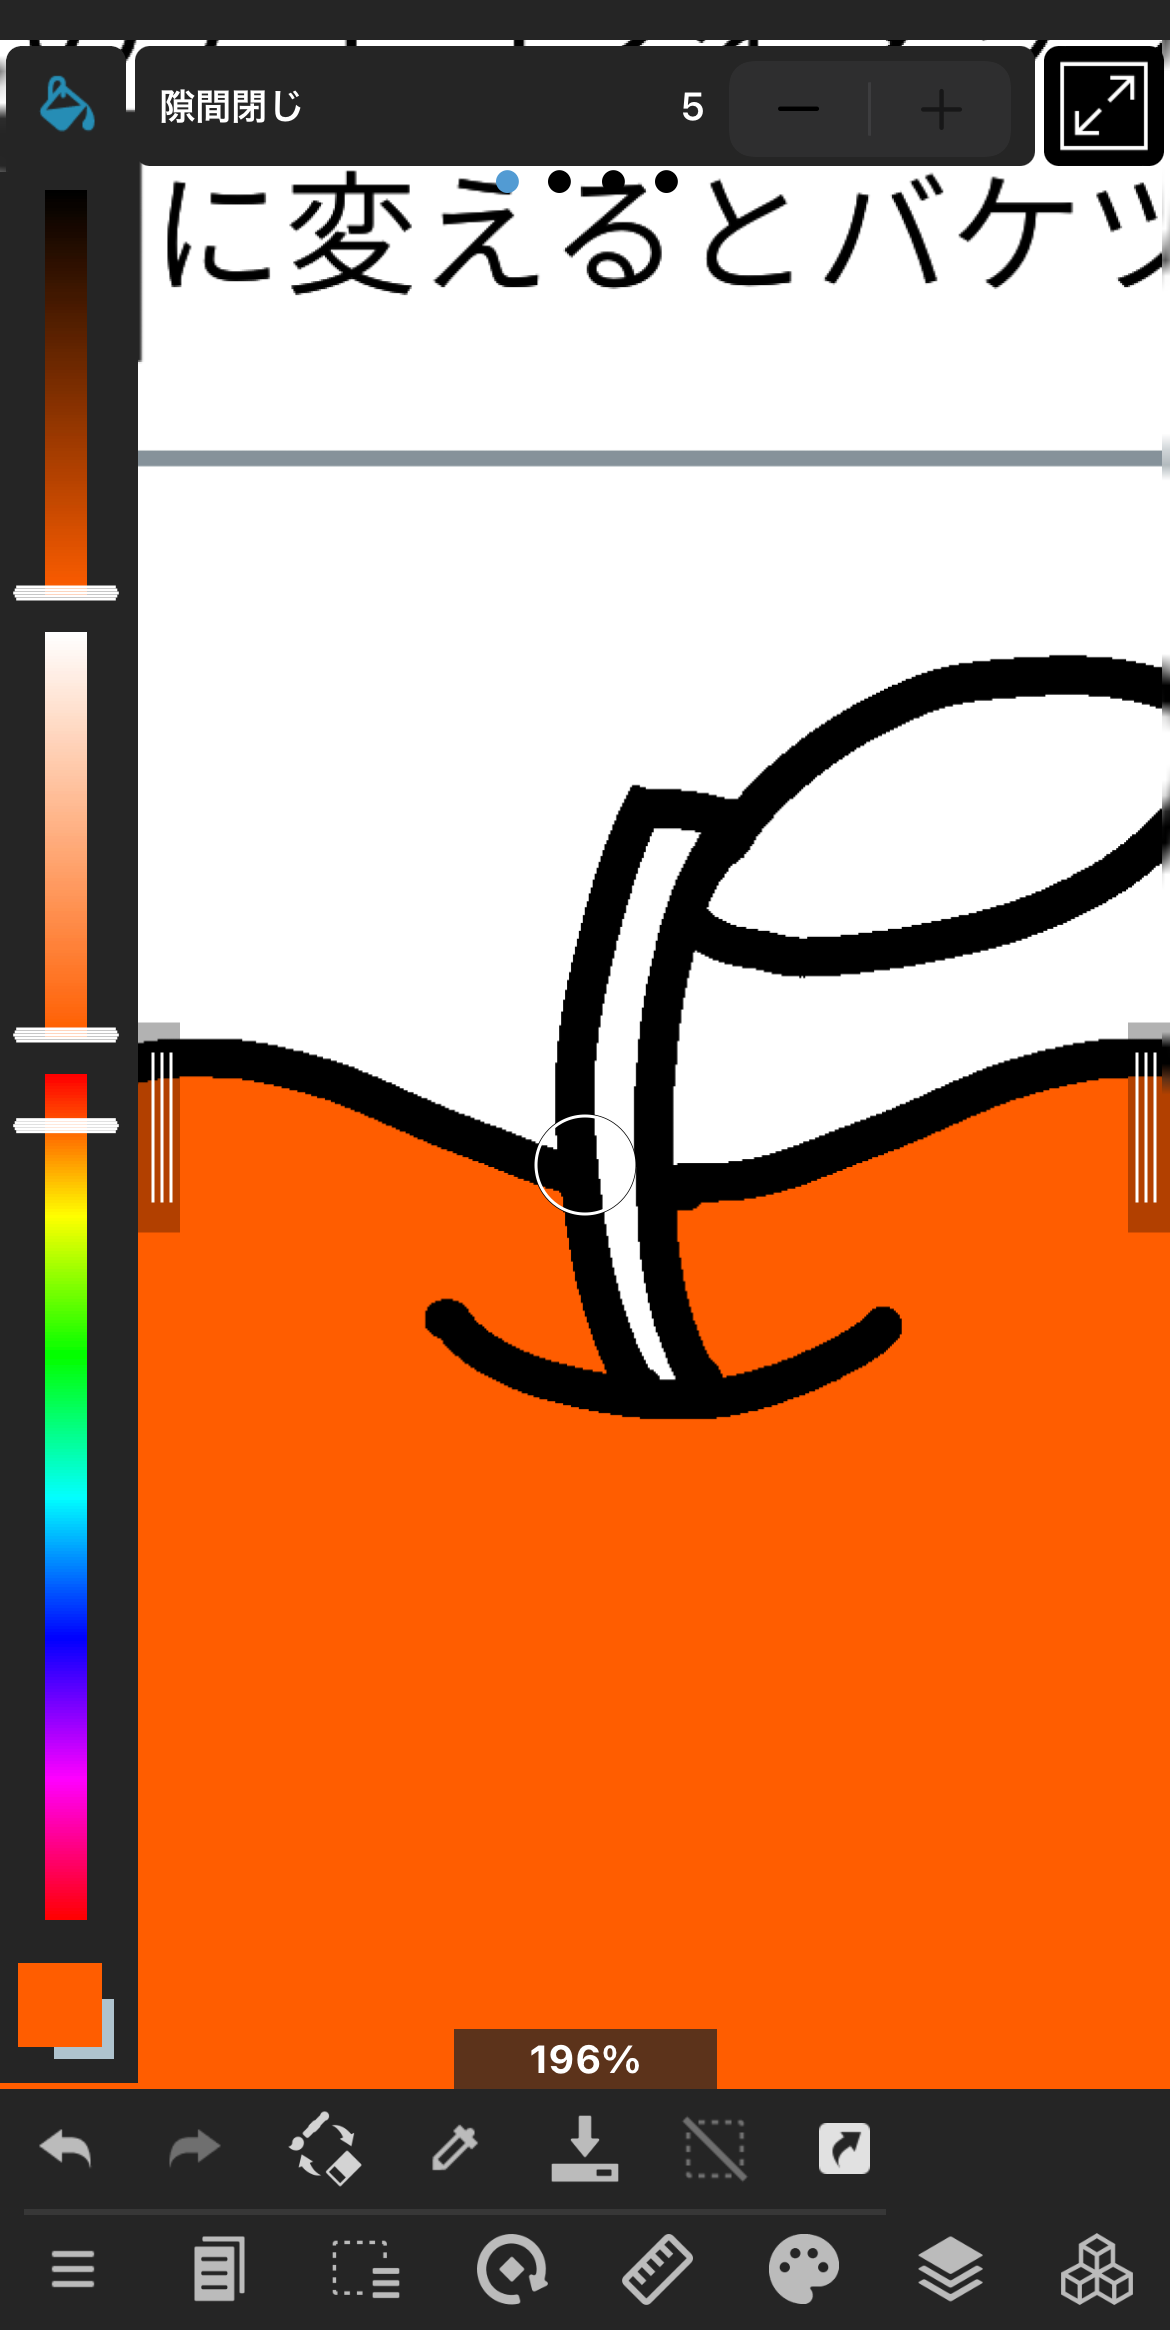
Areas that are difficult to paint, especially the end of the apple stem, can be made easier by zooming in.
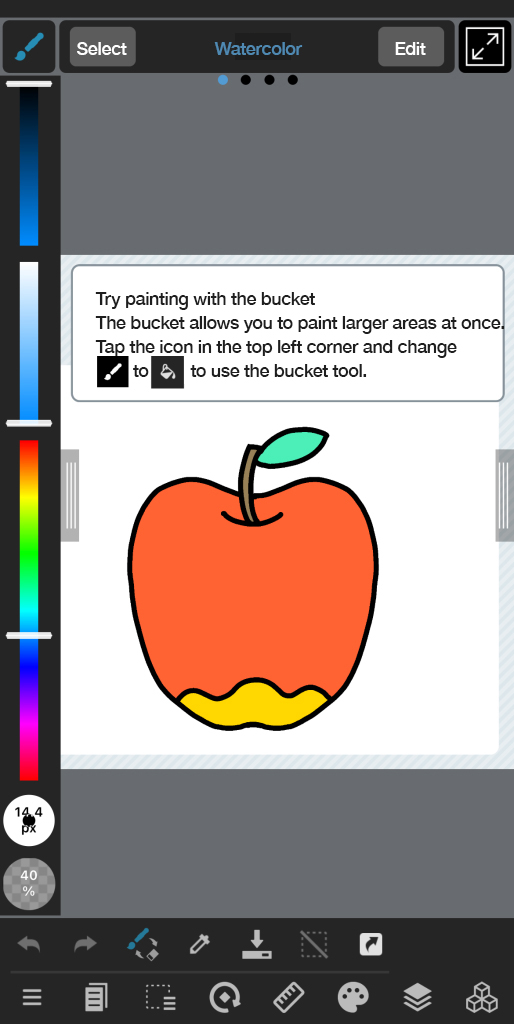
It’s more beautiful than when you did it with the brushes!
Color #3 Change colors with the eyedropper
The eyedropper tool allows you to instantly change pen colors to colors on the canvas.
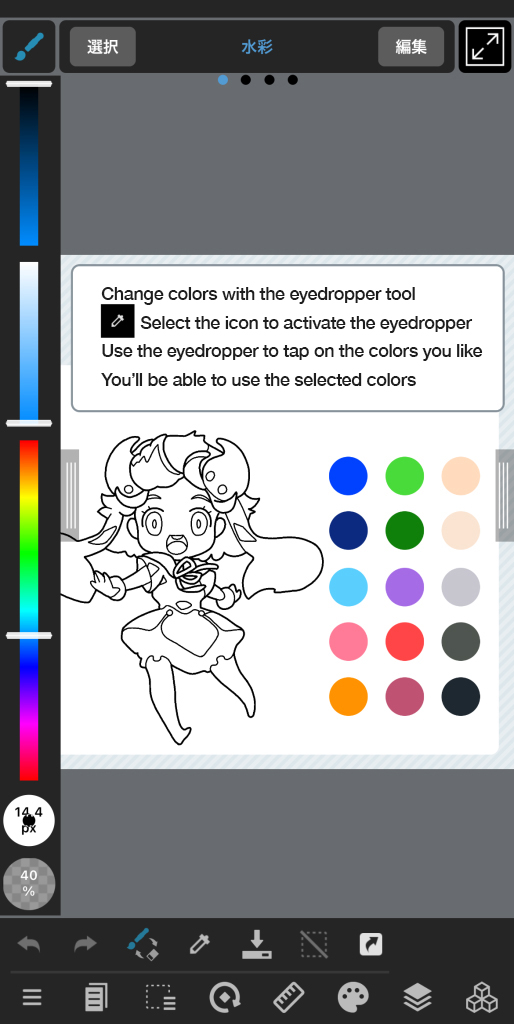
On the right side of the canvas you’ll see a palette with many colors.
Extract the color you want to use for the painting.
You can find the eyedropper here.
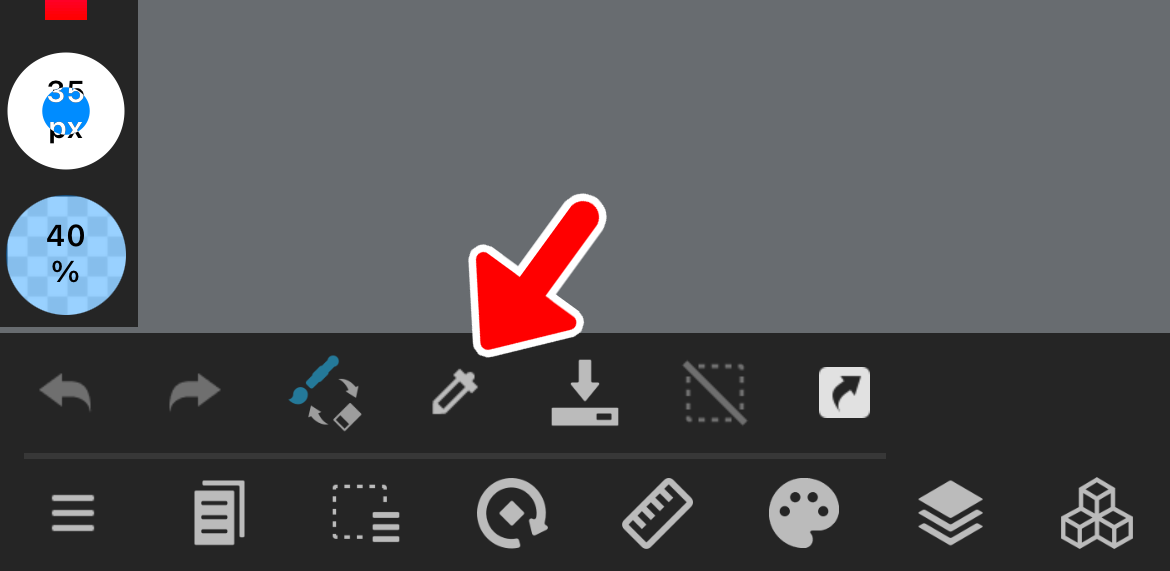
Tap and hold your finger and a ring will appear around your finger.
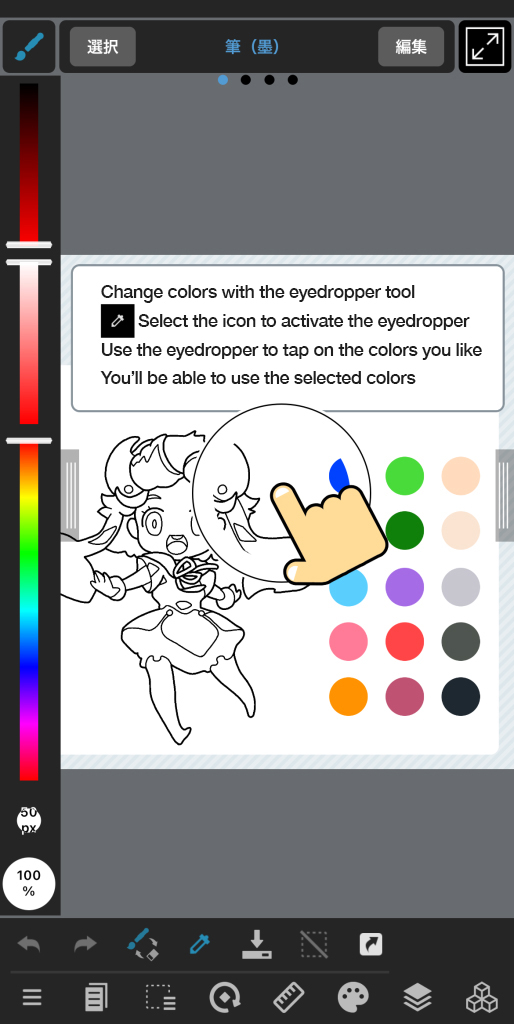
Drag the ring to adjust the area you want to pick from.
Move your finger to the palette.
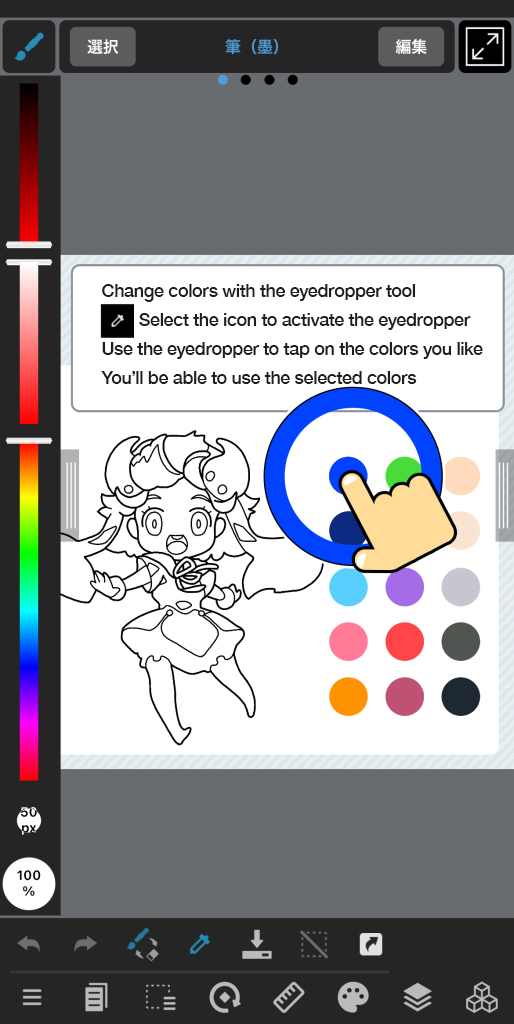
The color of the ring will change to the one you are touching.
Release your finger when the ring has changed to the color you want.
Now the color has changed to the one you’ve extracted with the eyedropper.
Let’s use the bucket tool to paint Medi-Chan on the left!
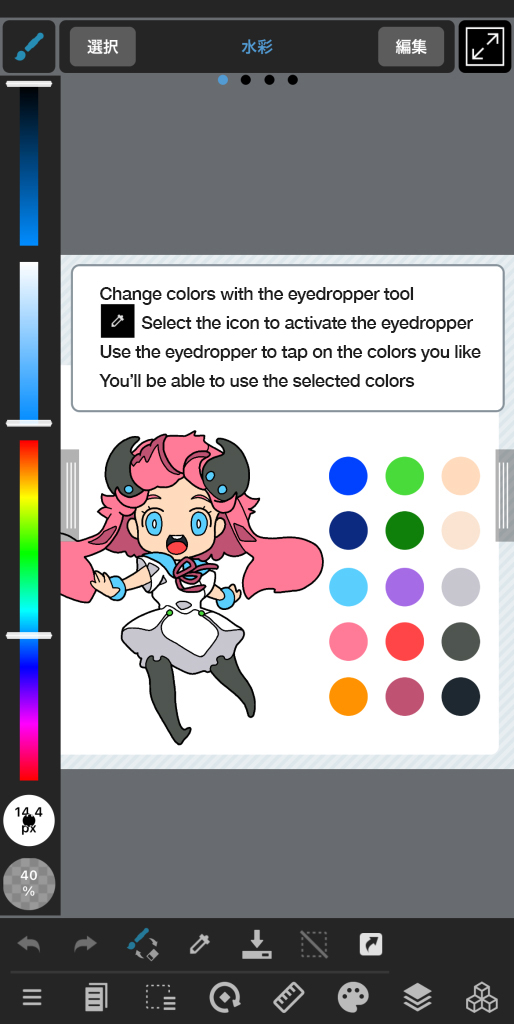
Now we’re done!
Layers
Layer #1 Check your layer settings
Think of a layer as a transparent film with drawings on it.
Basically, most illustrations are made up of many layers piled up.
All the letters and colors we’ve drawn so far in this exercise are painted on the layers.
Layers are a convenient feature for creating art, so there’s no way not to know how to use them.
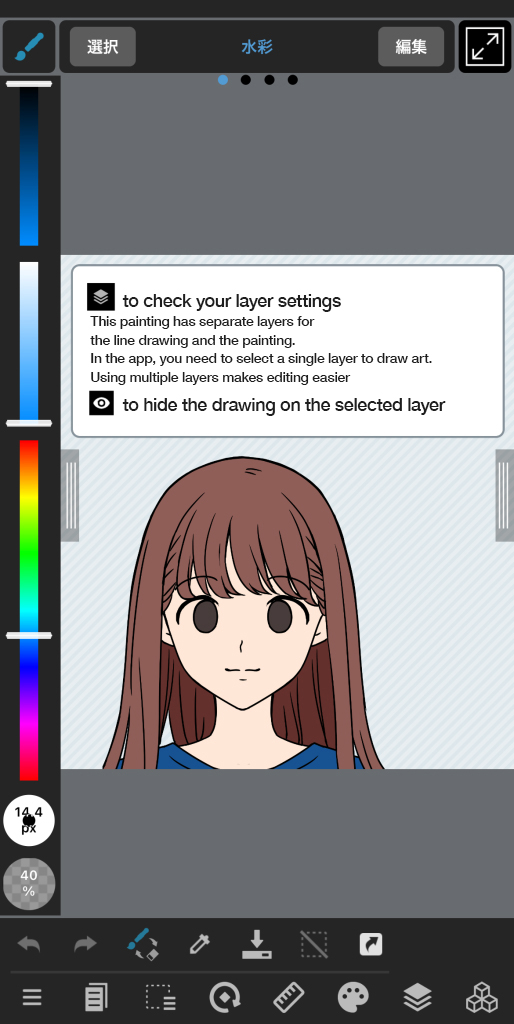
At the bottom right is the layers icon.
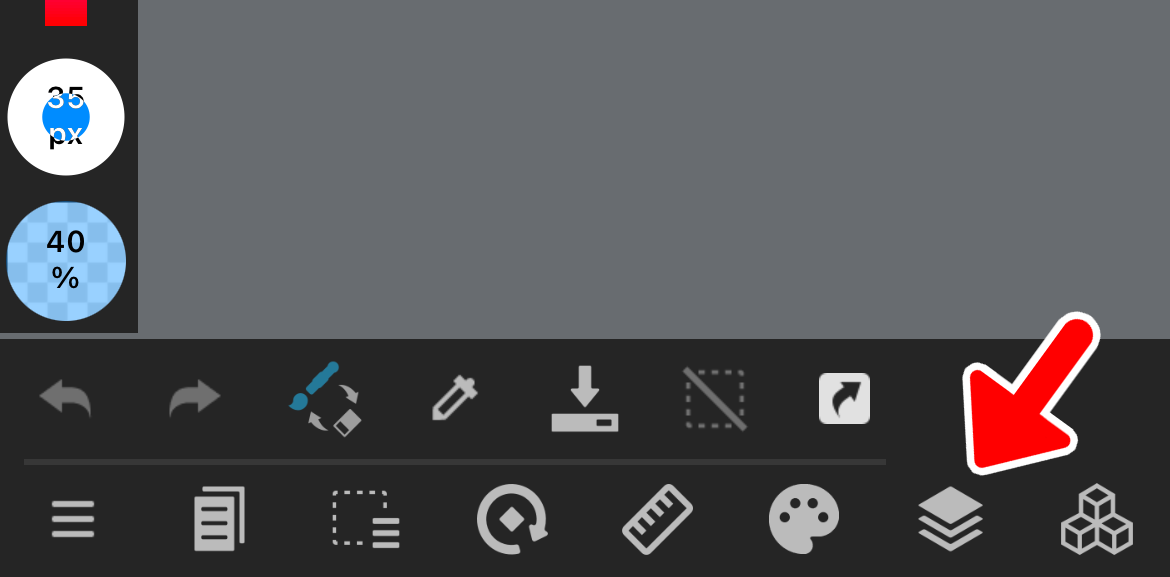
Tap it to display the list of layers.
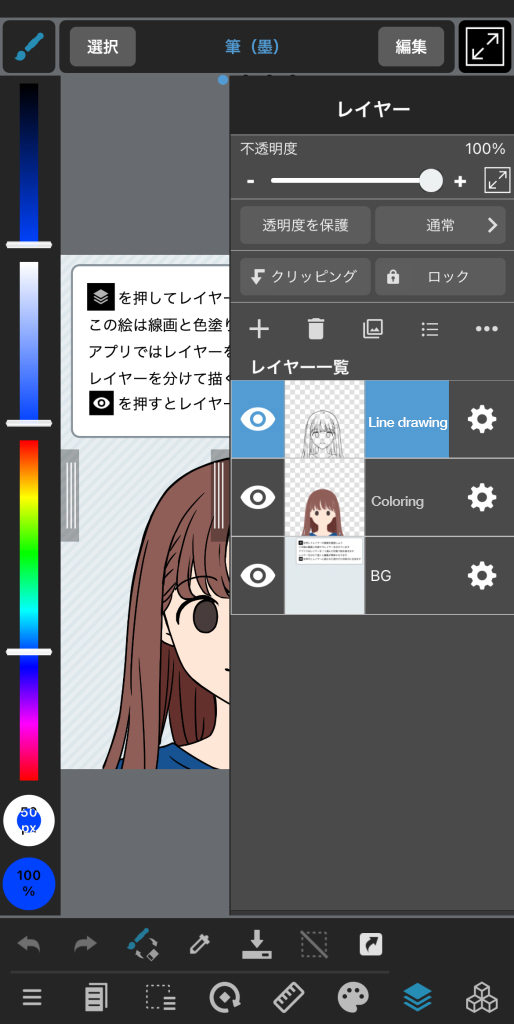
You can see that the layers for this art are separated like this.
Separating layers for line art and coloring makes it easier to change colors later.
You can hide drawings on the selected layer by tapping the eye icon to the left of each layer.
Switch between show and hide to check which drawings are on which layers.
Layer #2 Rearrange layer order
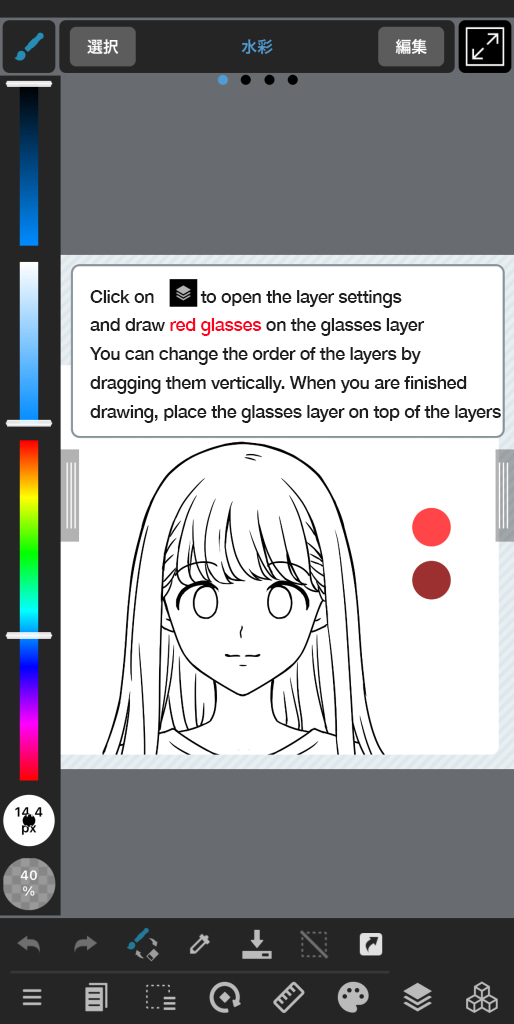
Use the layers to draw the painting.
Having the glasses layer below the line art layer is a bit weird.
So move the glasses layer to the top.
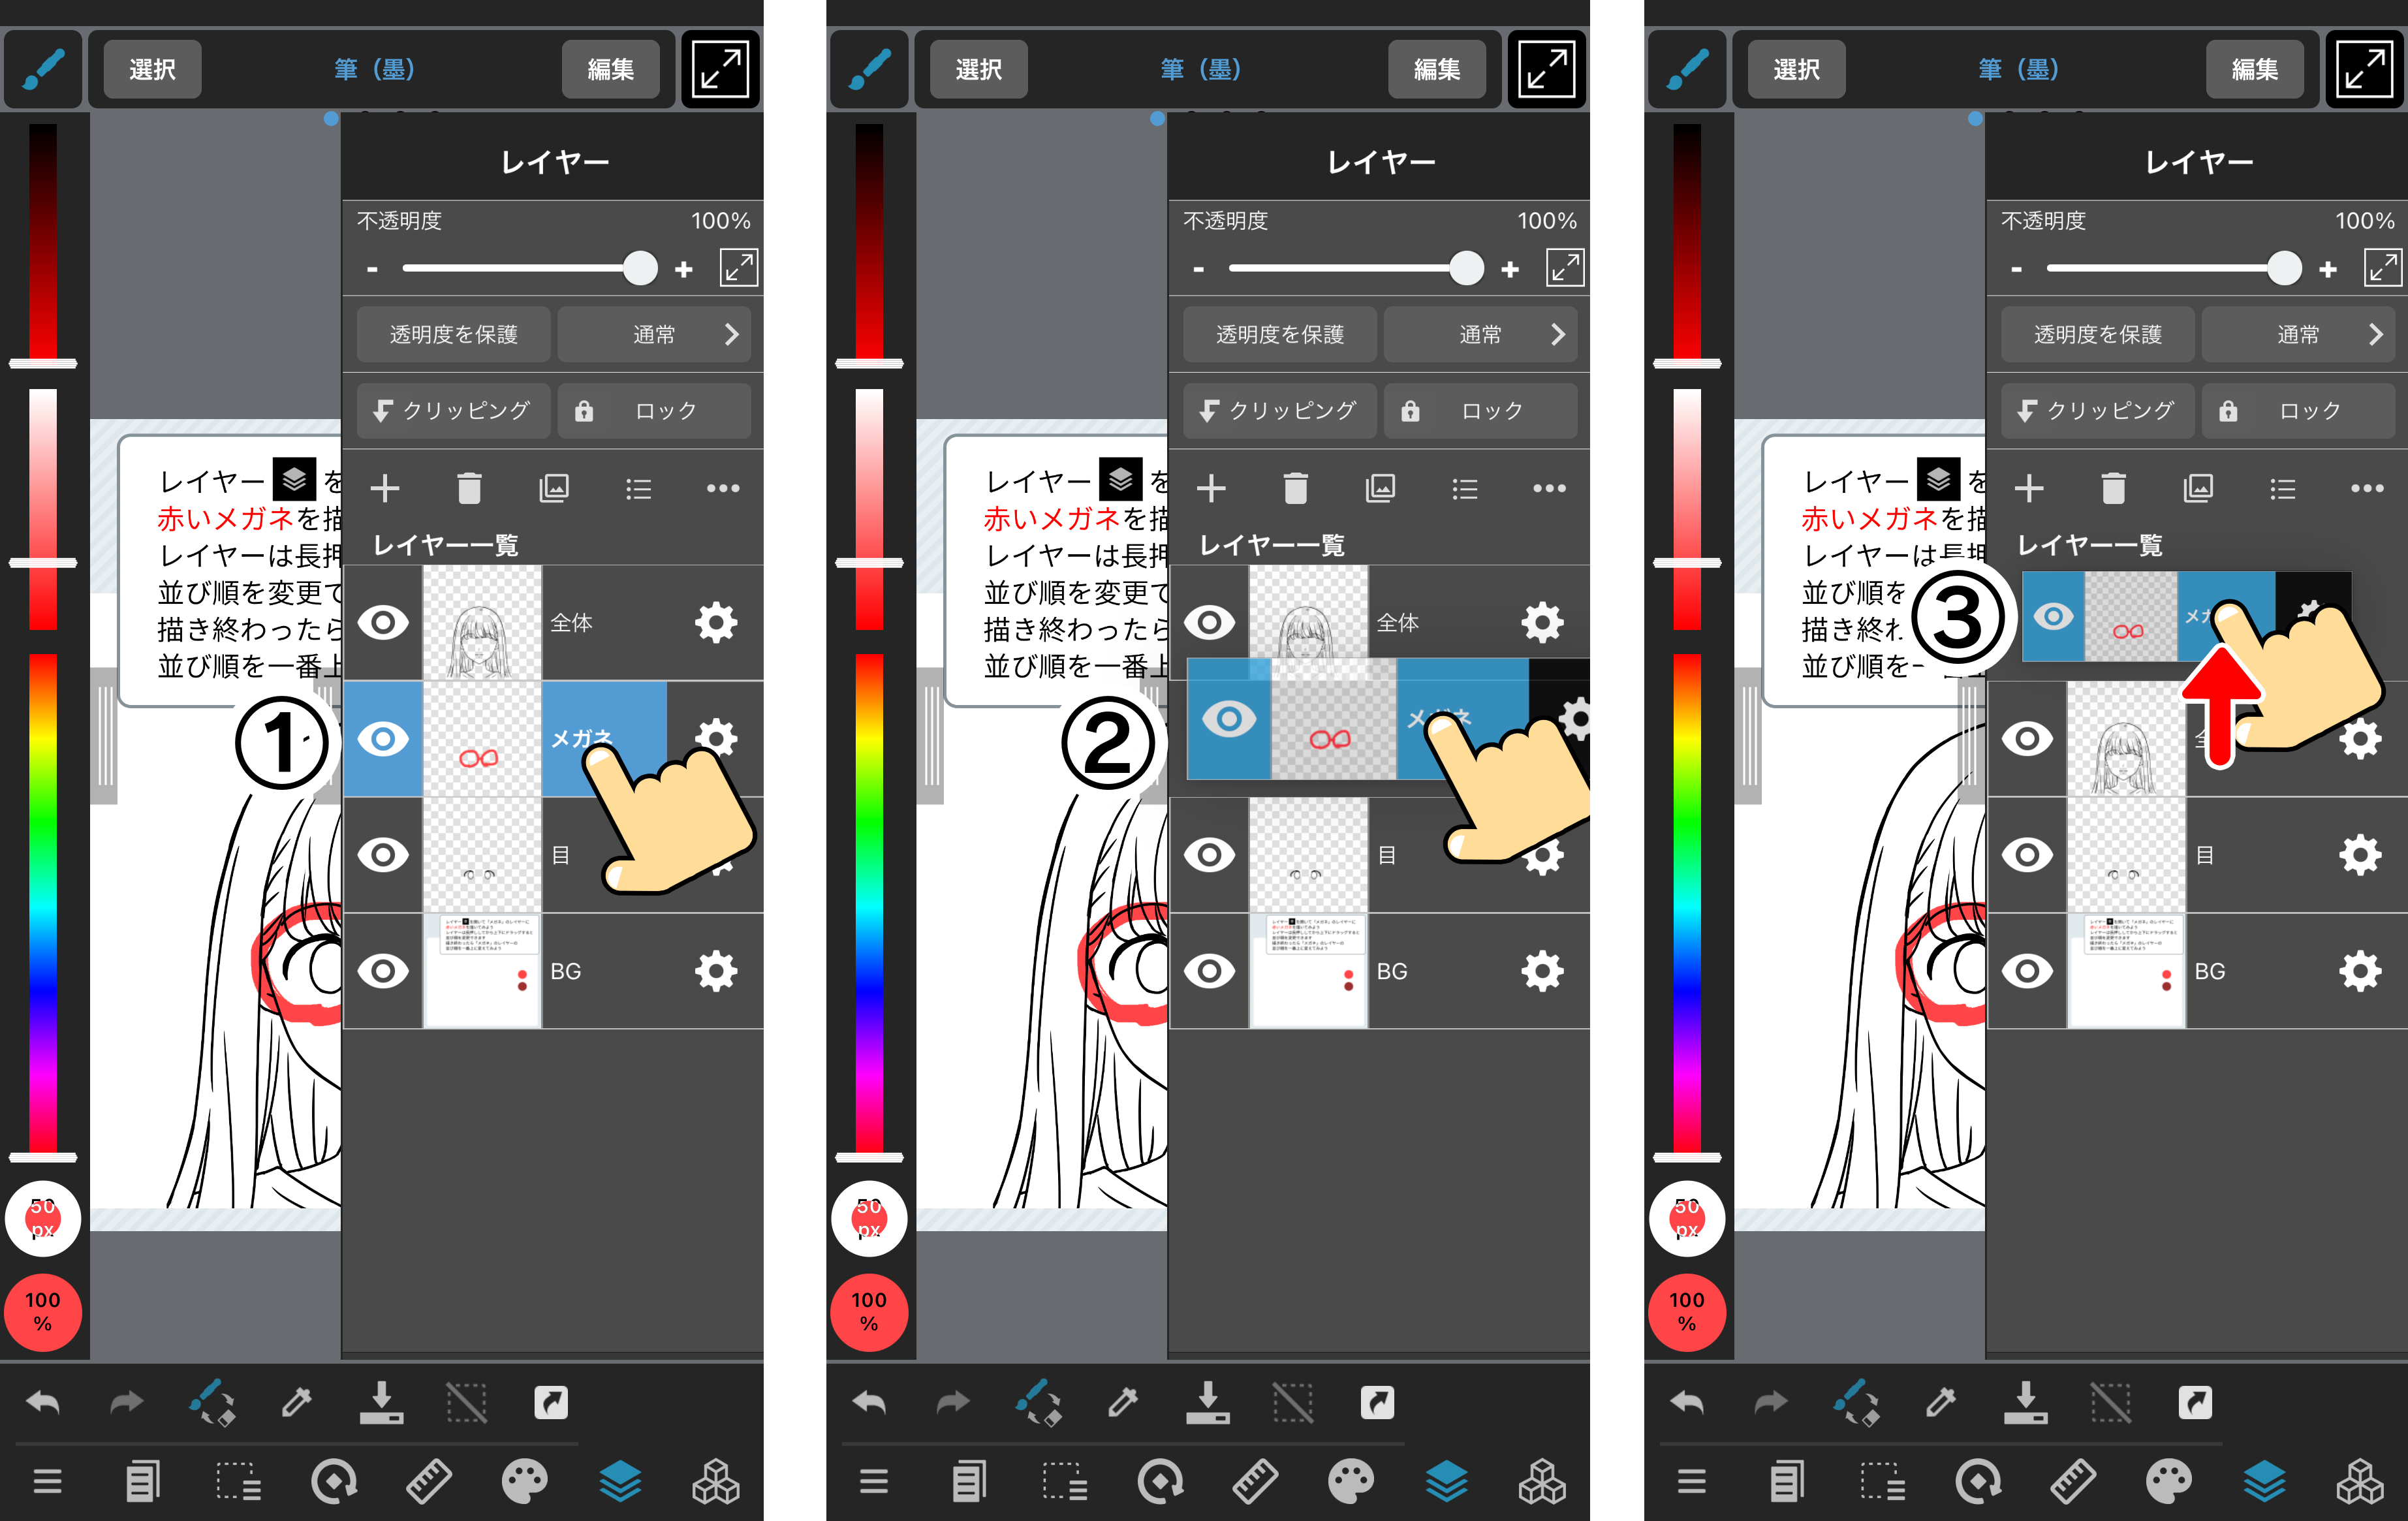
As before, open the layer list and hold down the layer you want to move.
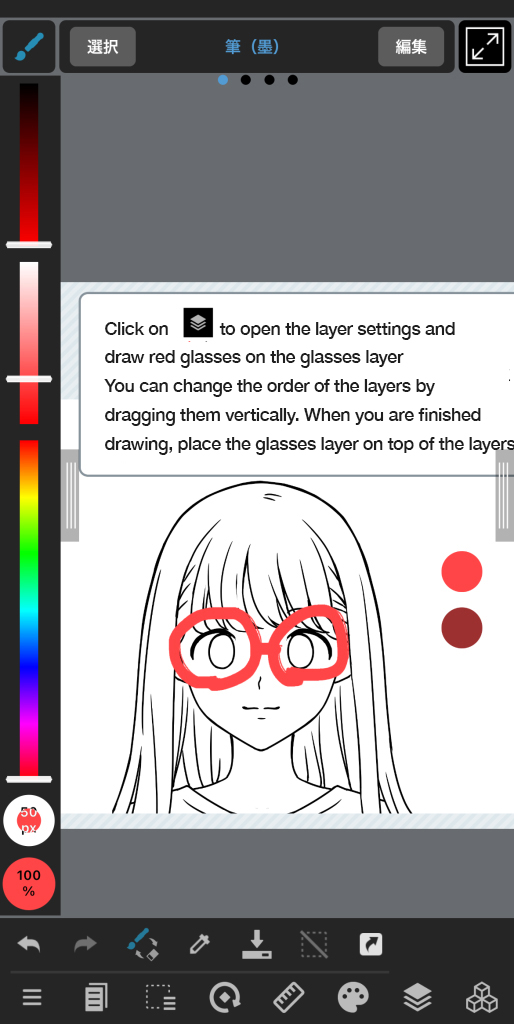
If you have the glasses layer above the character layer, it’s perfect!
Layer #3 Add a new layer
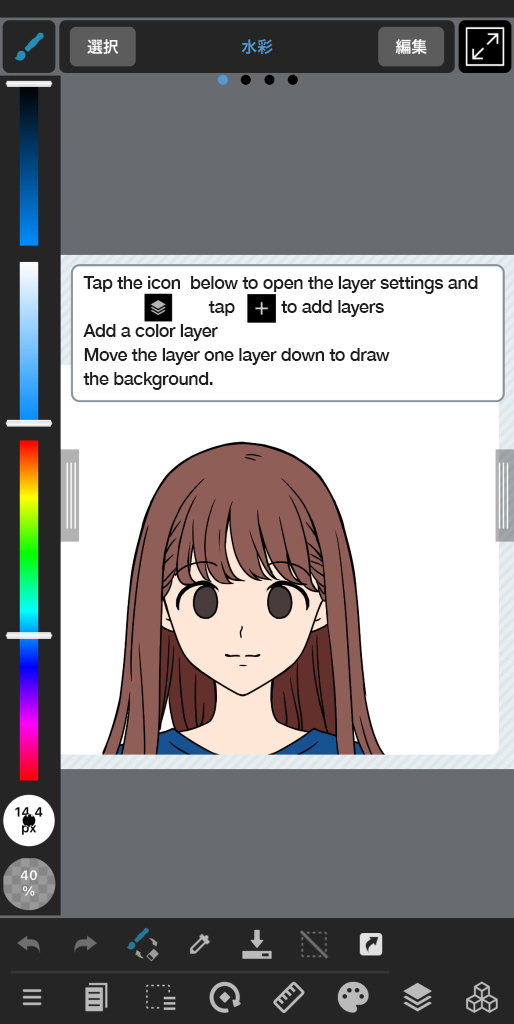
Add a new layer to draw the background.
Tap on the “+” icon to display the menu for adding layers.
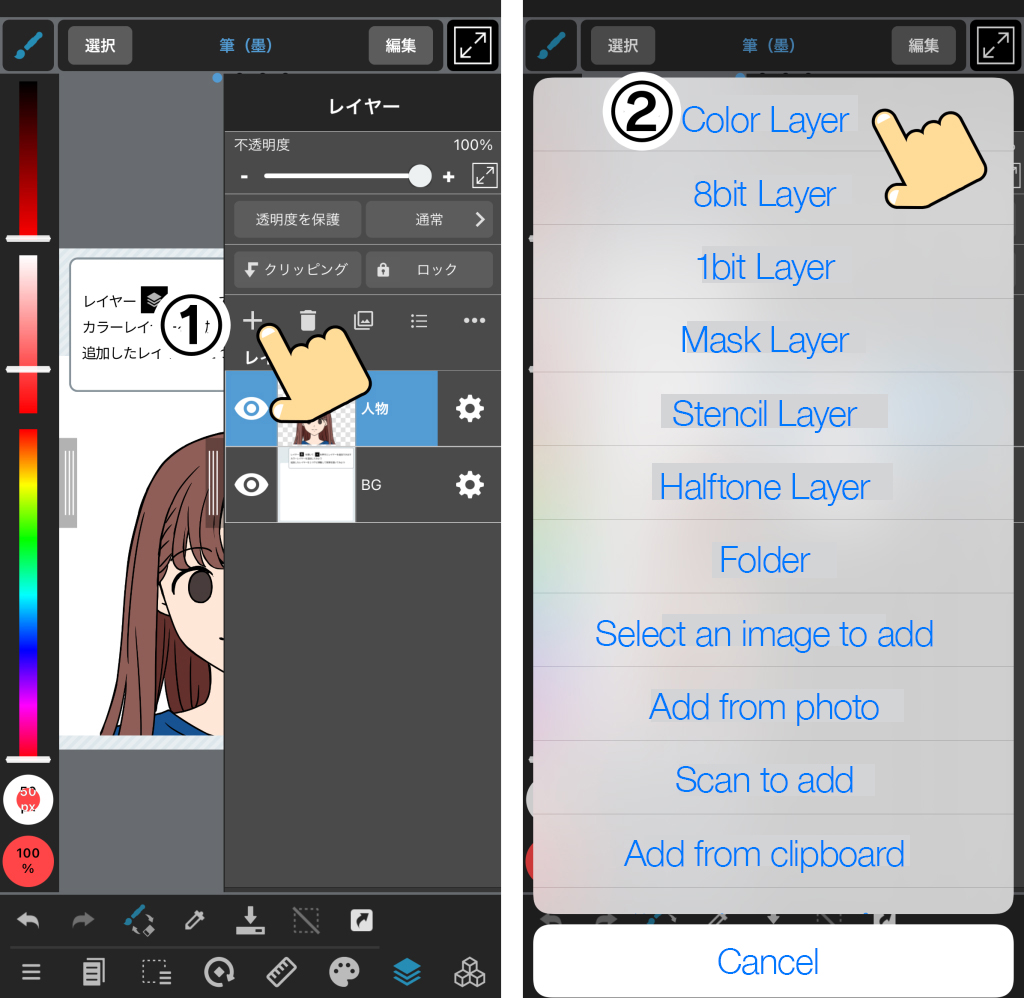
Select Color Layer from the many options.
New layers will be added on top of the existing layers, so don’t forget to move the new layer under the character layer.
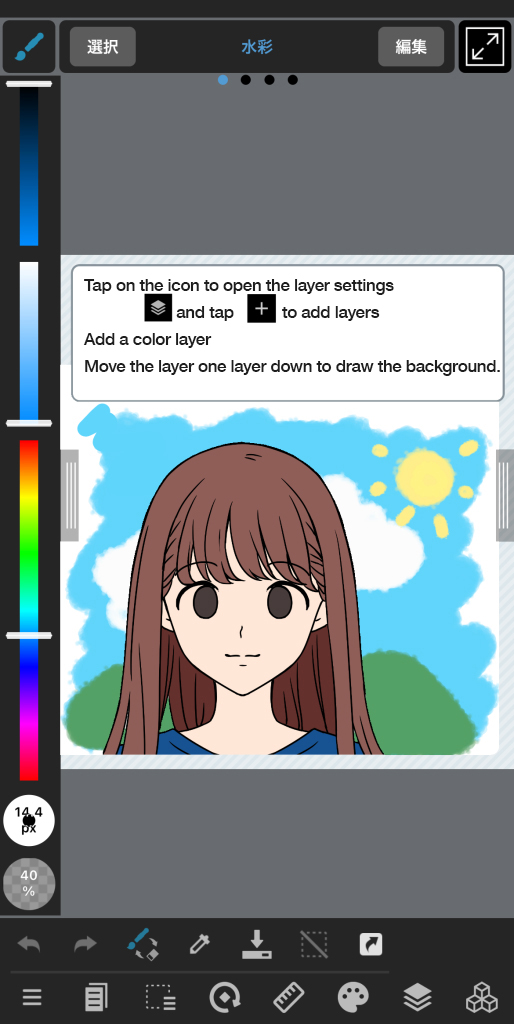
Just by adding the background, the drawing looks more like a piece of art!
Trace the lines to add color
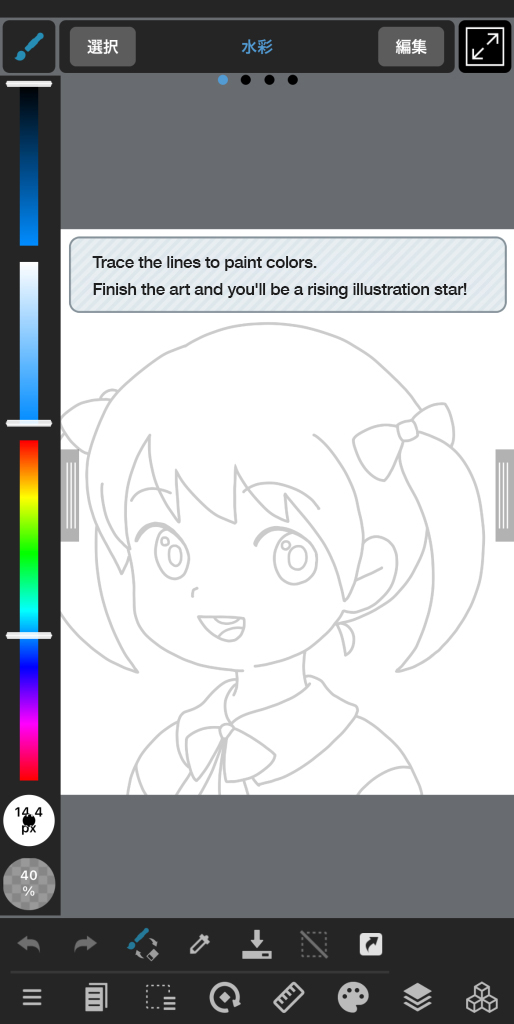
This is the final exercise.
Remember what you’ve learnt in these exercises so far and try to paint!
Don’t be rushed, take your time to paint the colors.
If you make a mistake, you can go back by clicking the arrow button in the bottom left corner.
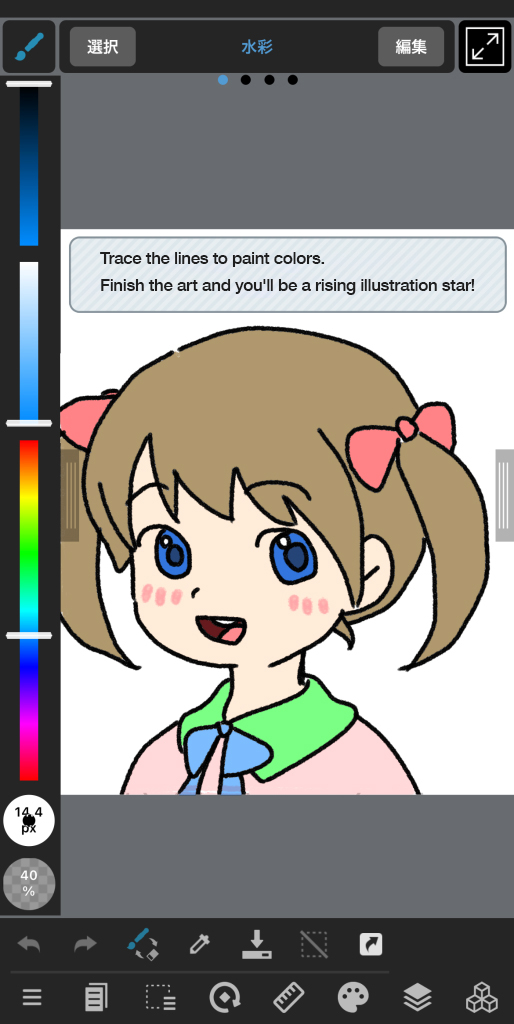
Now we’re done! You’ve done a great job!
Now you’ve learned the basic features of MediBang Paint.
If you have forgotten any of them, you can just go back and learn the one you are worried about from this exercise!
There are many more features in MediBang Paint than the ones mentioned here. Use it to find out more with your own eyes!
(Text/つかさん)
Twitter:https://twitter.com/Tsukasan0823
\ We are accepting requests for articles on how to use /


