2015.03.31
(1)Drawing Manga

Index
Table of Contents
(1)New Cloud Project Creation~Draft Creation
(2)Making Panels
※About Rasterization
(3)Word Balloons
(1)New Cloud Project Creation~Draft Creation
1First you need to open a canvas.
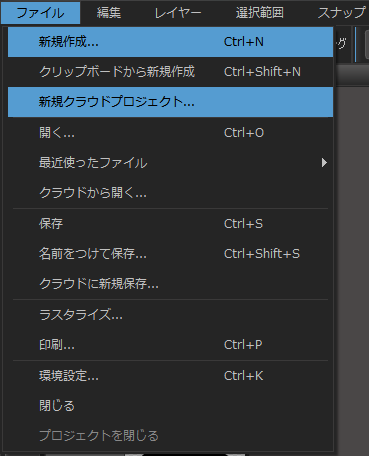
Go to 「File」> 「New」and make a new canvas.
When you want to make a 「Cloud Project」select 「New Cloud Project」
※By making a 「Cloud Project」you can save several pages to cloud in one file. It’s very useful for managing manga pages.
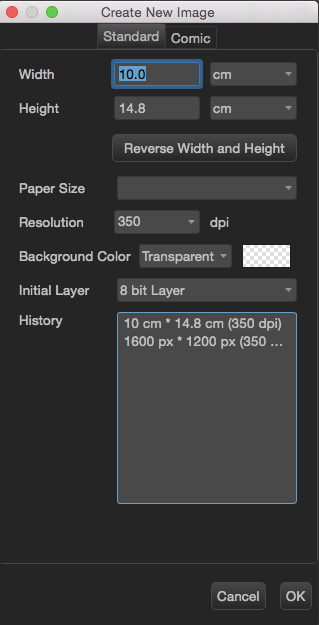
2After you create a new file this window should appear.
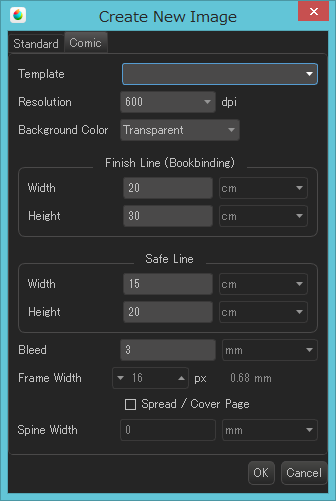
※When setting your canvas size, you can choose from pixel,cm,inch.
Under 「Paper Size」you can choose from various commonly used size templates.
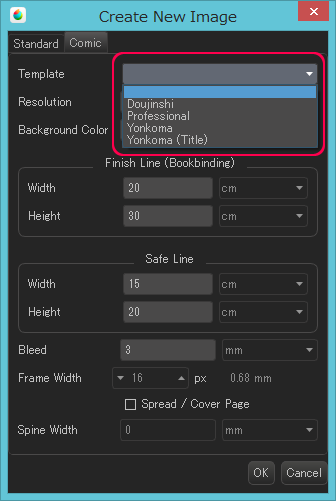
Doujinshi, Professional, Yonkoma, Yonkoma(Title) templates have been created for you.
「Initial Layer」allows you to choose from a Color Layer or an 8bit Layer.
An 8bit Layer only allows you to paint in greyscale. In addition to this on the bottom of the layer menu you can choose 「1Layer」which is a pure black and white layer. These settings are recommended for people who want to make black and white pictures or manga.
(You can add different types of layers in the same image after choosing the initial layer settings.)
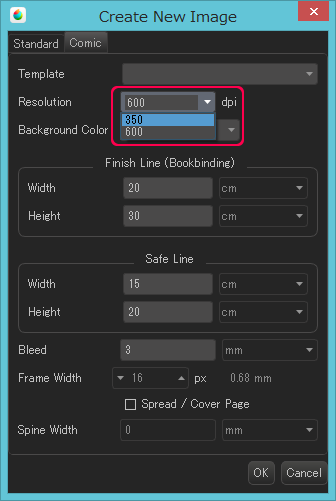
※dpi allows you to change the file’s image resolution (quality).
Typically images for black and white print use「600dpi」, color printing 「350dpi」,and web images 「72」dpi.
Large the resolution, larger the image is.
3Now you can finally begin to draw.
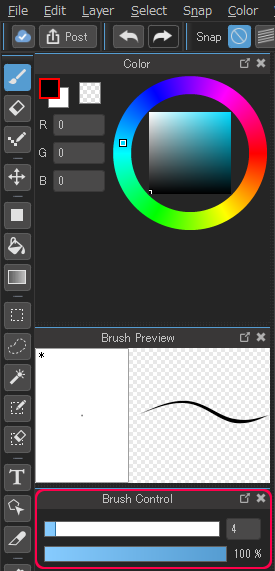
To use the brush tool, select the pencil icon at the top of the tool menu.
Below that in the 「Brush Control」section you can adjust the size and opacity of your brush.
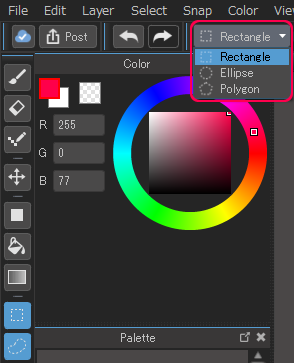
To change the size, shape and location of the things you’re drawing, you can use the Select Tool.
To use it, select the dotted line square shaped icon from the tool menu. From the above dropdown menu, you can choose the shape the Select Tool will make. You can choose from a rectangle, elipse or polygon.
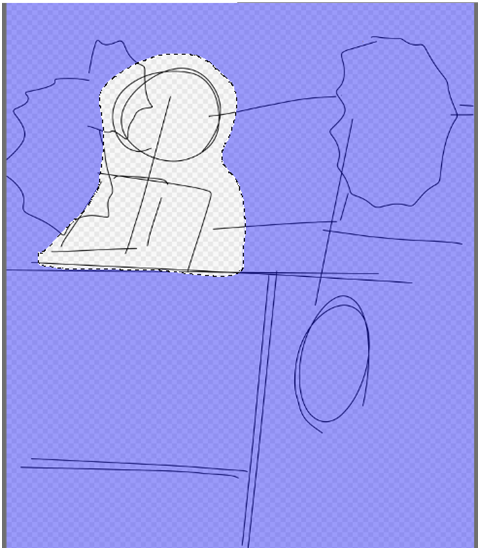
In this picture on the left, if you use the rectangle selection, you won’t just select the character but the word balloon next to it as well.
In this situation you would want to use the Lasso Tool. With the Lasso Tool you can draw the shape you want to select freehand. That way you only select what you want.
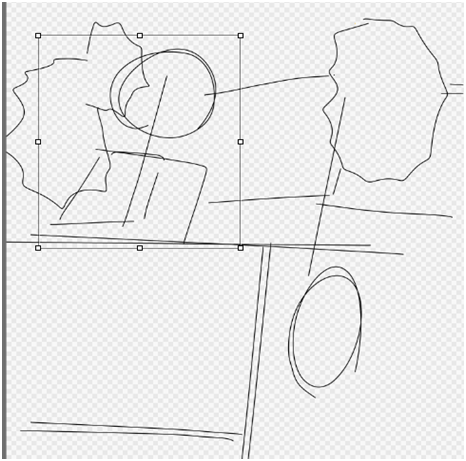
You can also transform things that you have selected.
In Windows 「Ctrl+T」, Mac 「Command +T」are the shortcuts you can use to enter transform mode. Now you can make the object you have selected bigger or smaller. You can also make it wider or taller. Or you can simply move it around.
After you’ve finished, you can click the 「OK」 button on the bottom of the canvas to confirm and complete the transformation.
![]()
4Using the Navigator Icon
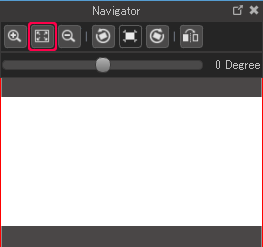
On the upper right side of the screen is the Navigator Window which lets you 「Zoom In![]() 」 or 「Zoom Out
」 or 「Zoom Out![]() 」 or move the canvas. If you click the
」 or move the canvas. If you click the![]() icon it will adjust the canvas to Fit to Window Size.
icon it will adjust the canvas to Fit to Window Size.
To the right the and buttons allow you to rotate the canvas left![]() or right
or right![]() .
.
The button![]() allows you to reset the canvas to it’s orginal position after rotating it.
allows you to reset the canvas to it’s orginal position after rotating it.
(2)Making Panels
1First lets create a new layer for our panels.
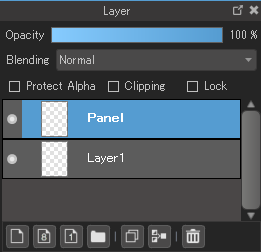
On the bottom left part of the Layer menu click the ![]() icon to create a color layer or the 「8」or「1」for a greyscale or black and white layer. When creating panels you can use any of these layer types.
icon to create a color layer or the 「8」or「1」for a greyscale or black and white layer. When creating panels you can use any of these layer types.
For now, we will make normal color layer.
Now a new layer has been created above your older layer. Whenever you create a new layer, it will automatically be named 「Layer #」.
Double clickiing on the window will bring the Layer Property Window. There, you can change the name of your new window to whatever you like.
2Make a panel
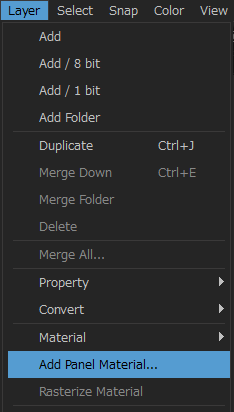
Under the 「Layer」 menu choose 「Add Koma Material」.
In the window that appears, you can select the 「Line Width」of your panel.
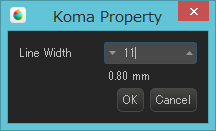
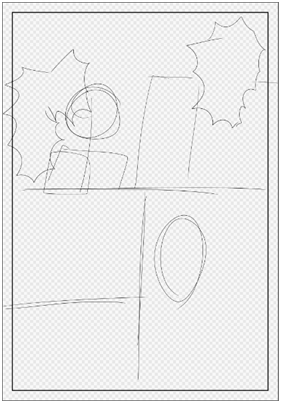
After you click 「OK」you’ll now have a black border running around your canvas.
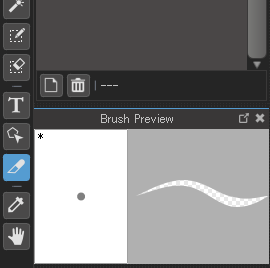
3The next step is to split this panel into smaller panels. To do this, you’ll need to use the Divide Tool. It’s the icon shaped like a knife on the bottom left side of your window.
Now, when you’ve decided where you want to create your first panel, you can drag from left to right or right to left across your canvas to slice it. Make sure you start and stop outside the panel border or else it won’t cut.
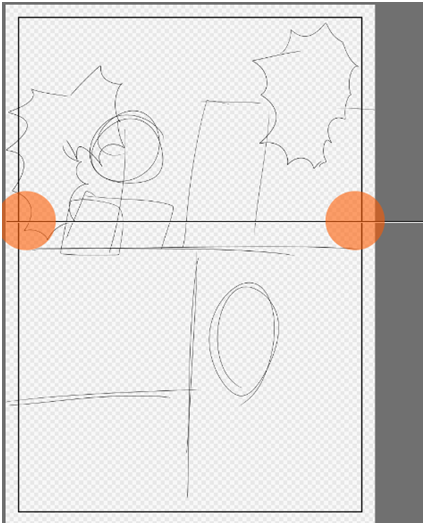
A panel has been created.
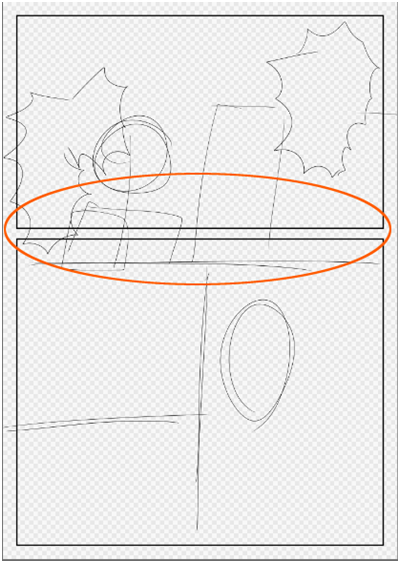
If you want to slice diagonally, hold the 「Shift」key as you drag. If you release the shift button too soon, it will revert back to a straight line.
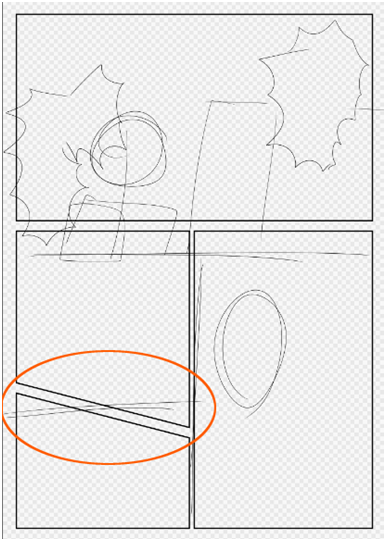
If you want to adjust the space between the panel, you can adjust the
By using the column dispalyed below the menu bar, you can adjust the space between the panel. If you set the space before splitting the panel, you can split panel as you set it.

4If you want to move or transform your panels, you can do it with the Operation Tool. This is the white arrow shapped icon above the Divde Tool.
When you select the panel you’d like to move or transform, a tool bar will appear.
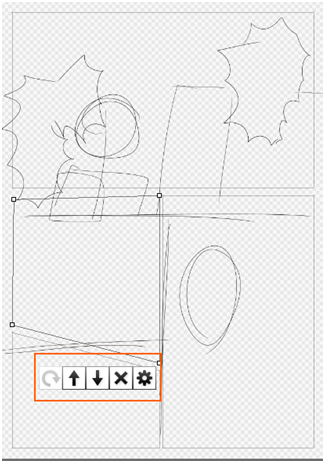
To transform panels, you can select the white squares on their corners and drag them in the manner that you like.
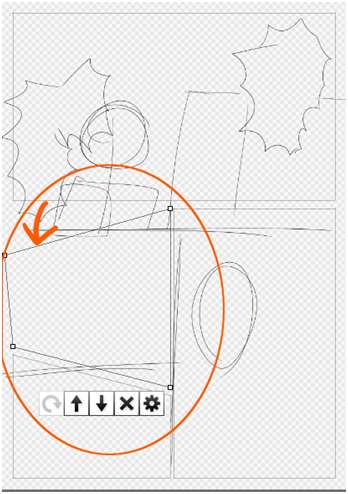
Panel shape successfully changed.
When you want to delete a panel, simply click the X on the tool bar.
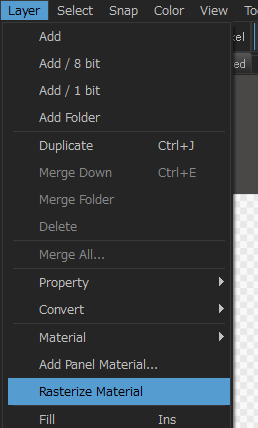
These aren’t the only ways to edit your panels. If you want to use the Erase parts of your panels or change their color, you can go back to the 「Layer」menu and select 「Rasterize Material」
(3)Word Balloons
1Just like when creating panels, you should create a new layer for your word balloons.
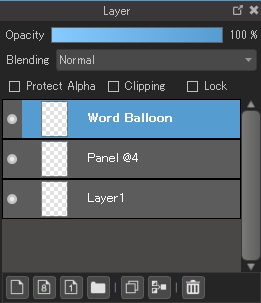
Just like when creating panels, the type of layer you create doesn’t matter. Color layers, 8bit or 1bit layers are all fine.
For now we will use a regular color layer again.
Now a new layer has been created above your older layer. Whenever you create a new layer, it will automatically be named 「Layer #」.
Double clickiing on the window will bring the Layer Property Window. There, you can change the name of your new window to whatever you like. We suggest something easy to remember.
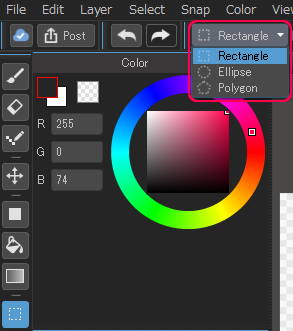
2First we will make a balloon tail for the person who is speaking. Select the Select Tool and then choose the 「Polygon」from the dropdown menu on the menu bar.
Now match the tail up to the balloon.
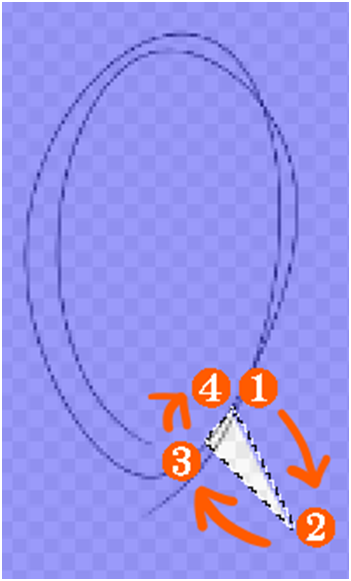
Now click in the shape of a triangle like in the example. It should take 4 clicks. The fourth click will be in the same spot as the first click. Doubleclick on that location to create the selection.
3Now we will create the portion of the balloon, where the dialog goes. To do this, you can use the Select Tool’s Ellipse setting.

While holding the 「Shift」 key down, create an ellipse shaped selection over your word balloon sketch and connect it to your balloon tail selection you made earlier.
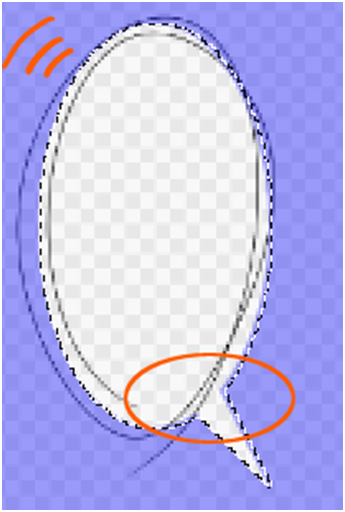
Holding the 「Shift」key will make sure both selections attach to each other automatically.
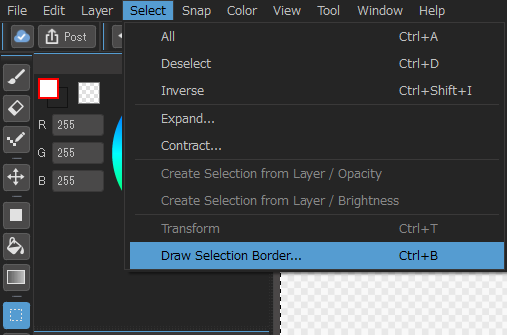
After you’ve finished your balloon shape in the menu, go to「Select」and then 「Draw Selection Border」.
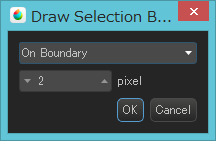
After you decide the thickness of the outline you want, click 「OK」
4There are other ways to make word balloons . You can even use the premade word balloons in「MediBang Paint」.
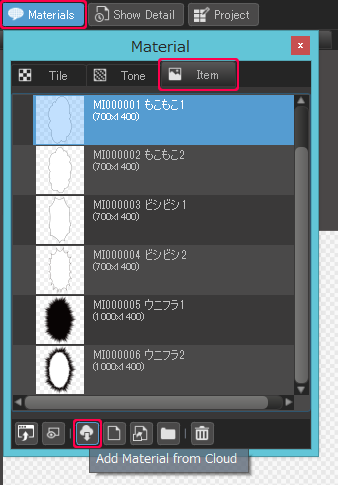
Below are instructions for downloading the 「MediBang Paint」premade word balloons.
First, click on the icon in the upper right of this example picture marked as ①. Now the Material Window should open.
Select Item from the right most tab ②.
Next click on the Cloud Icon ③ and in the window that appears select word ballon, select the one you’d like to download and click 「OK」.
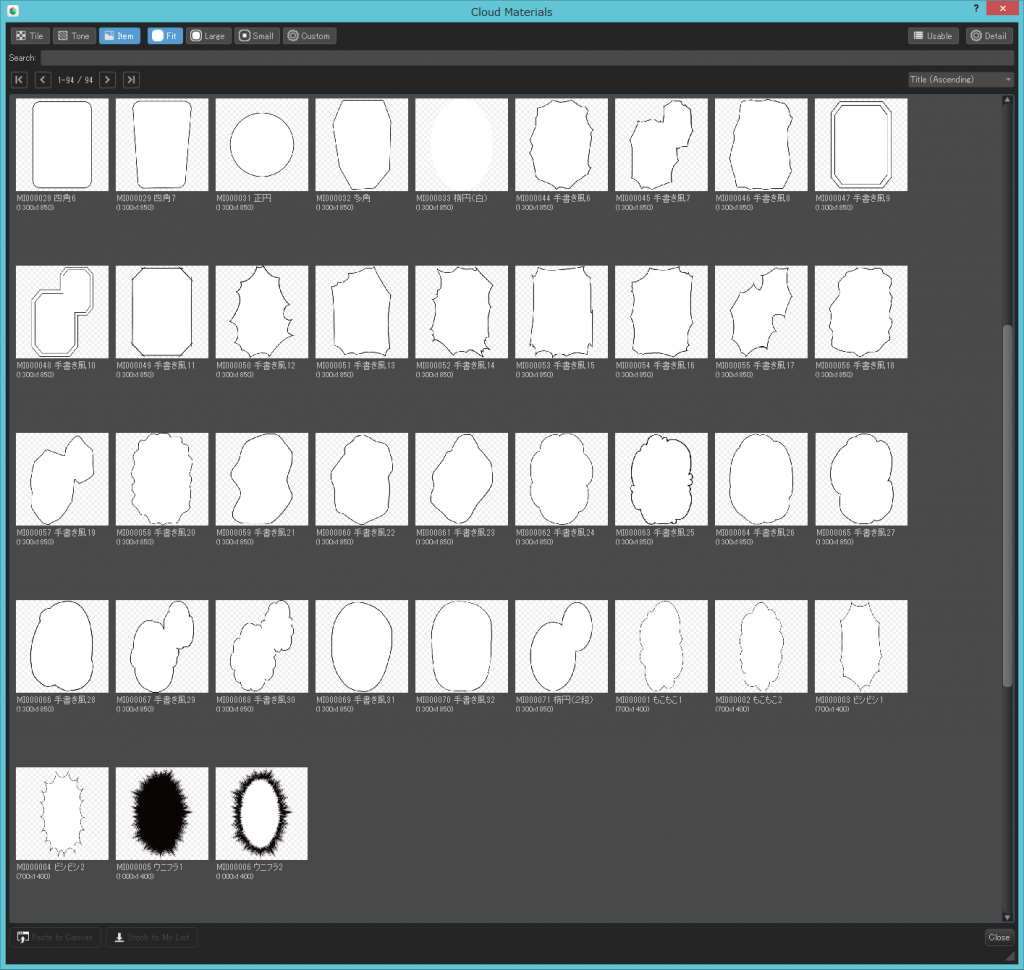
Here are the balloons we have available for download at this point.
Now you’ll be able to select the balloons you’ve downloaded from the Material Window and drag and drop them on to the canvas.
Like the panels, things from the 「Items」tab need to be Rasterized before you can edit them with the Brush or Eraser tools or add dialog to them.
\ We are accepting requests for articles on how to use /

