2020.07.20
Something anyone can draw! How to draw lace

Today, I will talk about how to draw lace using the rotation symmetry pen tool.
Lace has detailed patterns, making it look like it would be difficult to draw, but the rotation symmetry pen tool allows you to copy something that you have drawn as many times as you like. This makes complicated patterns surprisingly easy to draw.
For example, to create this lace, the only part I drew, apart from the guide lines, is the part that I’ve colored red.

So, let me explain how to draw lace.
First of all, create guides that will allow you to draw the lace beautifully.
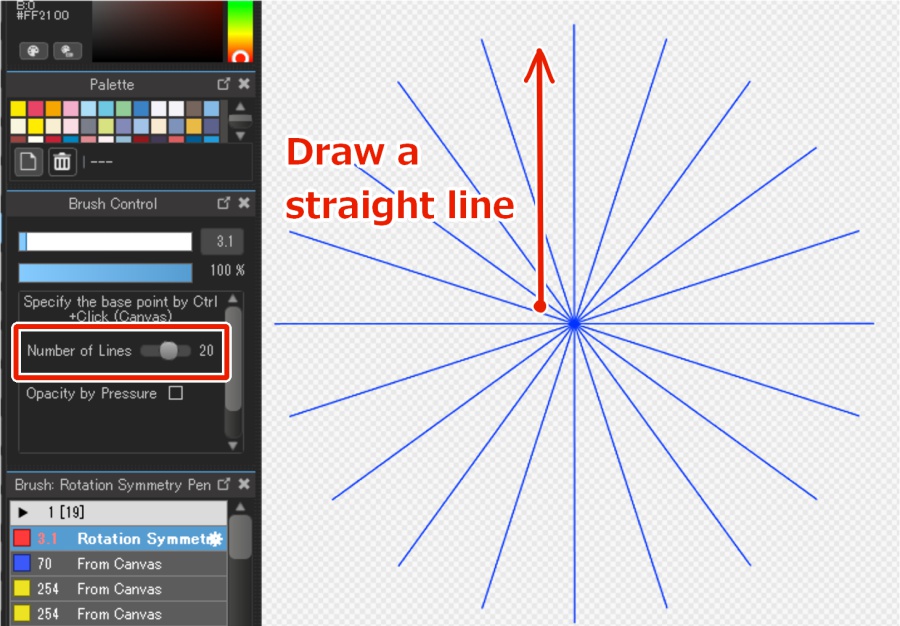
You will be using the rotation symmetry pen. Set the numerical value of “number” to 20 and draw a straight line from the center of the screen to the top in order to create 20 radial lines.
▼ Click here for details on how to make guide lines.
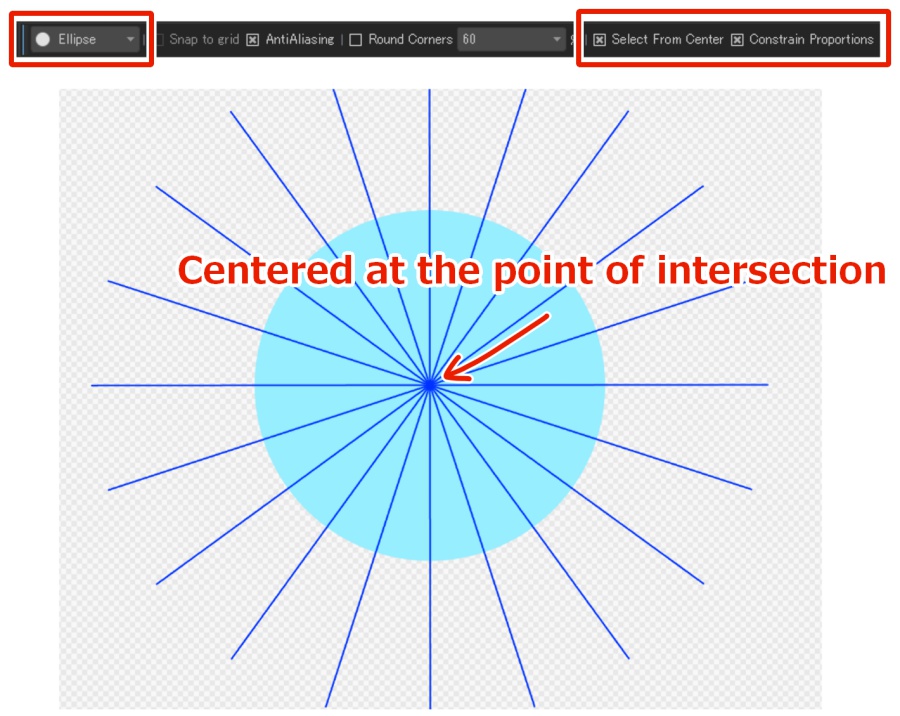
Create a new layer under the layer with the lines, select “ellipse” from the fill tools, and check “select from center” and “fix aspect ratio.”
A circle will be created, with its center at the point where the guide lines intersect. Now you have your guides.
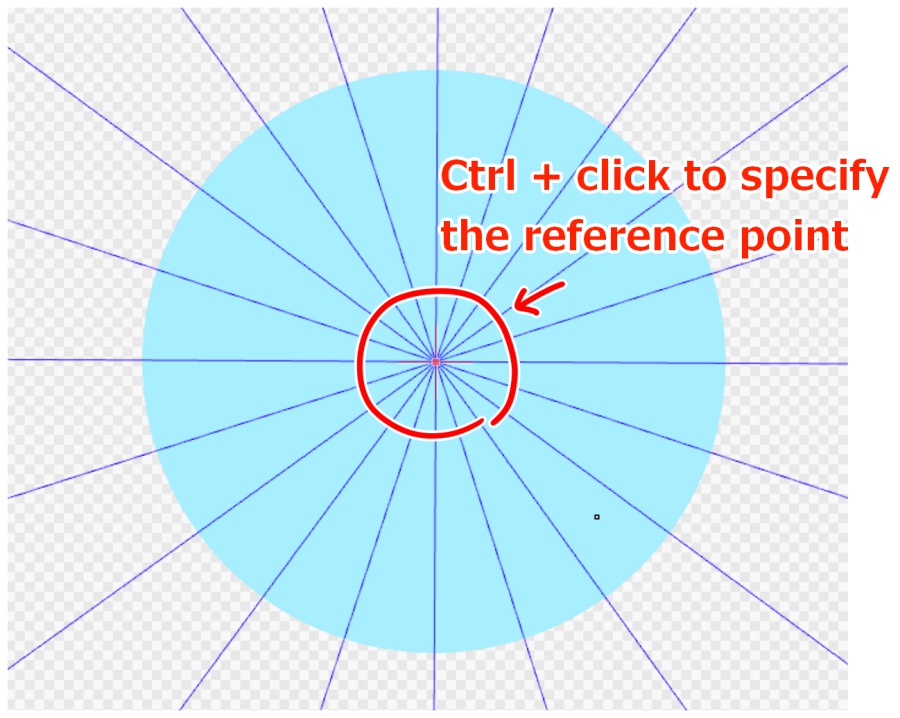
Working with the rotation symmetry pen, Ctrl + click to specify the reference point. Let’s make the point where the guide lines intersect our reference point.
Whatever you draw centered on this point is what will be copied.
Now, let’s draw the lace.
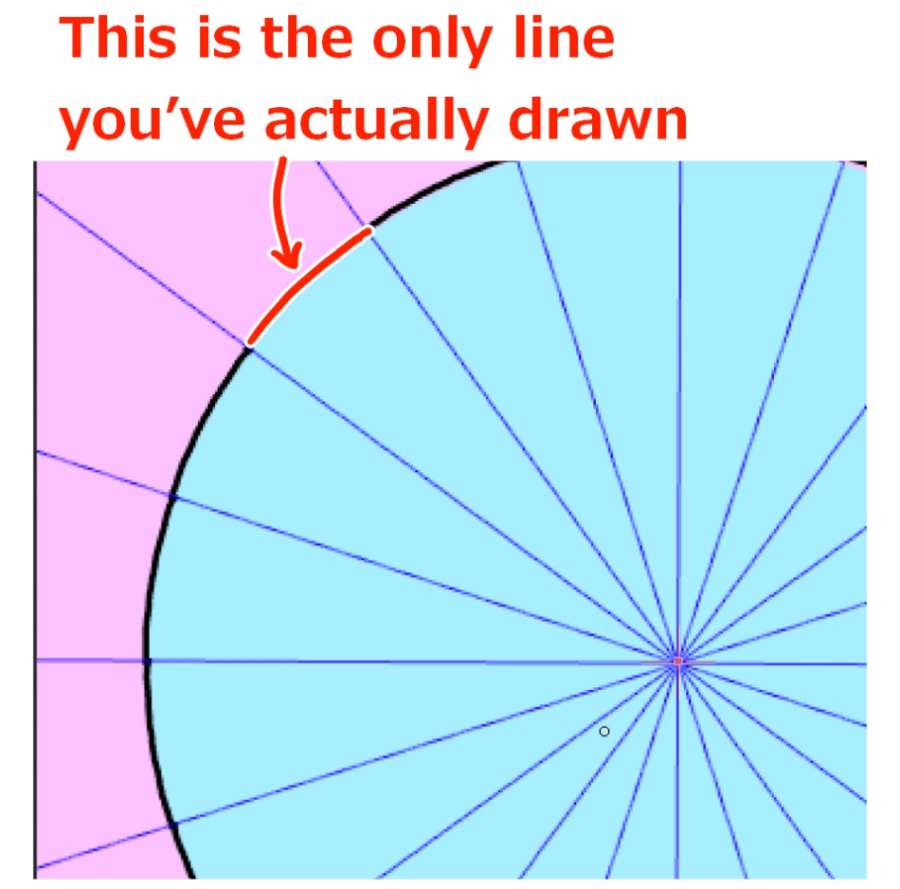
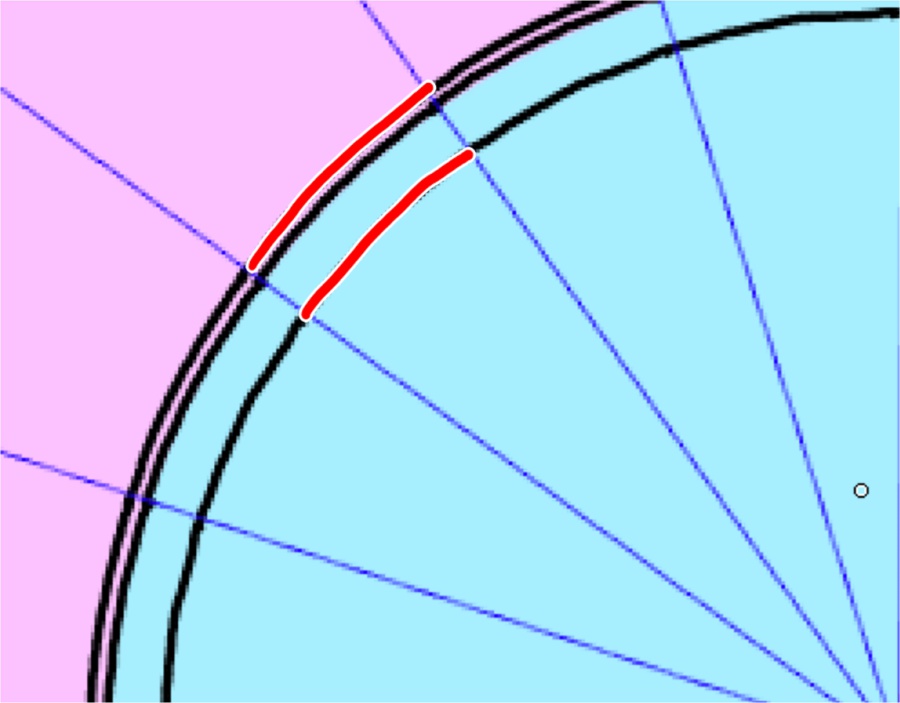
Create a new layer and draw a line as if you were tracing the edge of the circle. If you draw only one section, it will be copied to the other sections, so the only section that you actually draw is the one you see in this image.
Draw two more lines, one inside and one outside the line that you just drew. Make the inner line a little more distant from the edge of the circle, and the outer line a little closer.
You are going to apply color afterwards, so if the lines are connected, there is no problem if they are not quite the perfect shape.
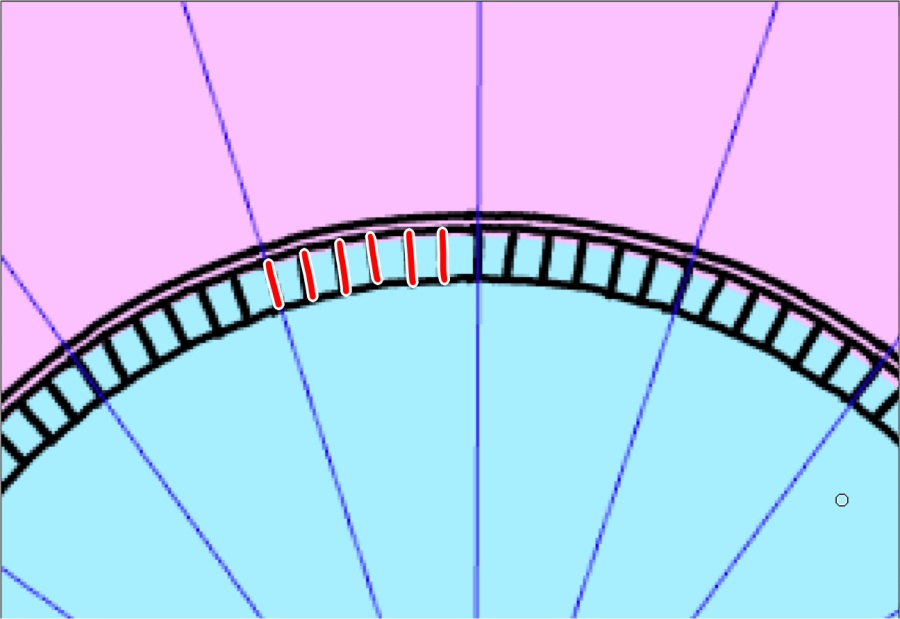
Draw a few vertical lines, at approximately equal intervals, between the line that forms the edge of the circle and the inner line.
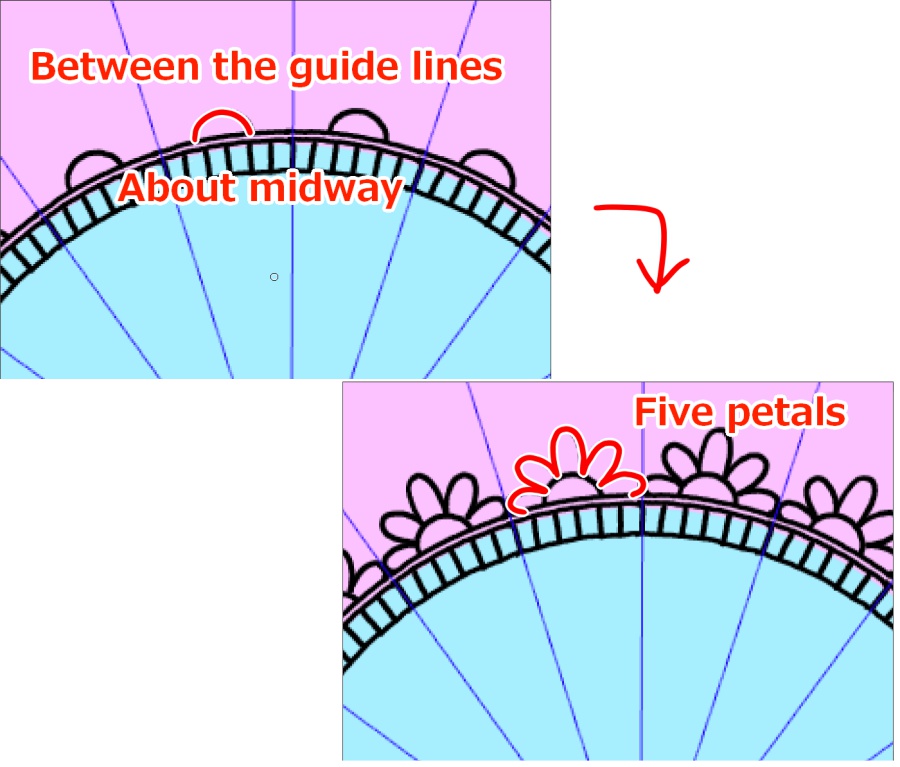
Draw a semicircle on the outside, about midway between the two guide lines. Then draw five petals around this semicircle.
If you find it difficult to draw the petals on the side of your dominant hand, flip the image horizontally first.
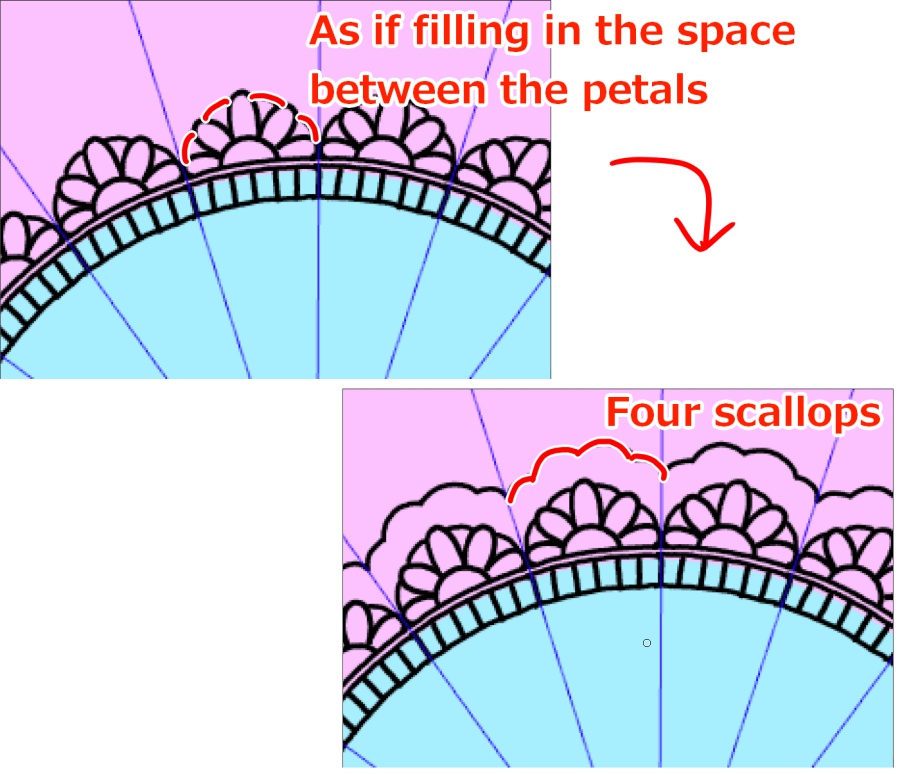
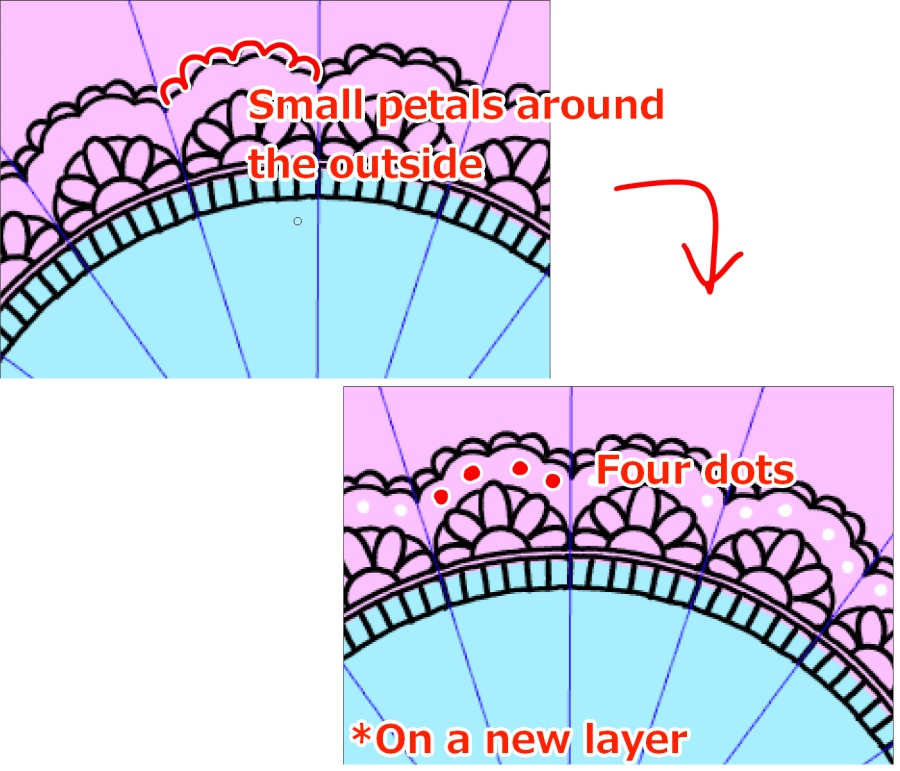
Draw four more petals to fill in the space between the five petals you drew first. Draw four scallops around the flower to frame it, keeping a bit of distance between the scallops and the flower.
Draw small petals around the scallops.Create a new layer and draw four dots between the flower and the scallops to complete the line drawing.
Fill the middle and outer sections with the bucket tool, then hide or delete the layer with the dots that you just drew. Preserve the opacity of the layer with the lines and coloring, then re-color it in white, and you’re done.
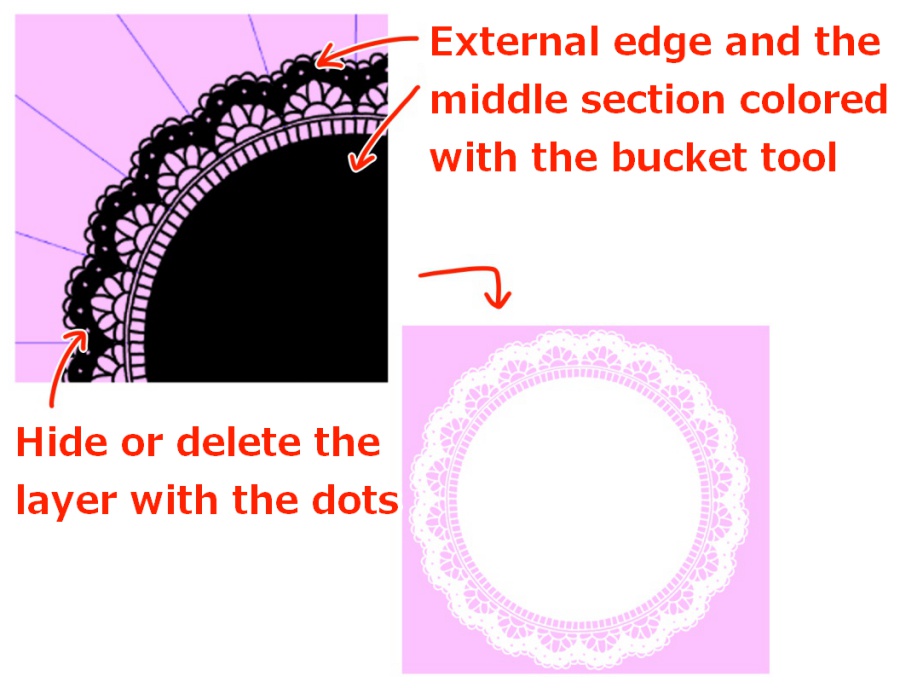
If using it as a background, duplicate the lace layer, reduce the opacity, and adjust the size, then arrange it in your desired position.

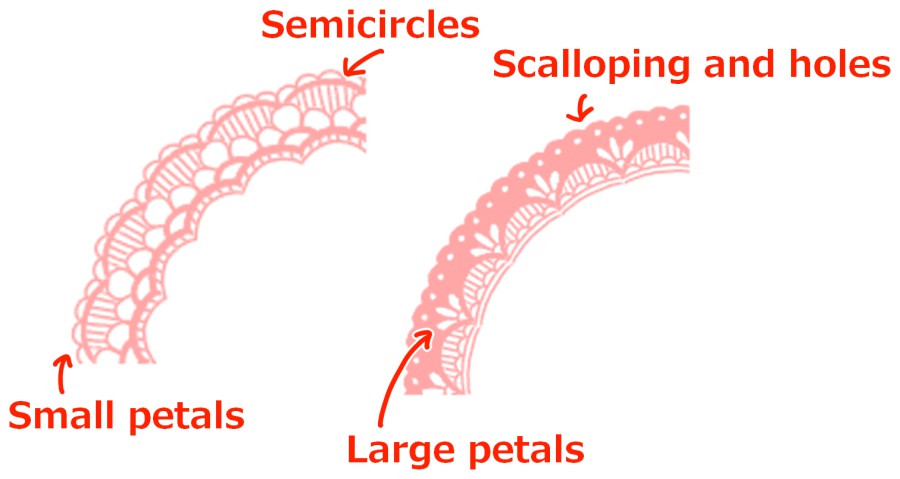
There are many types of lace patterns, so if you are having trouble coming up with ideas, try combining the scalloping, semicircles, large petals, small petals, and holes that I explained above. It will look like lace.
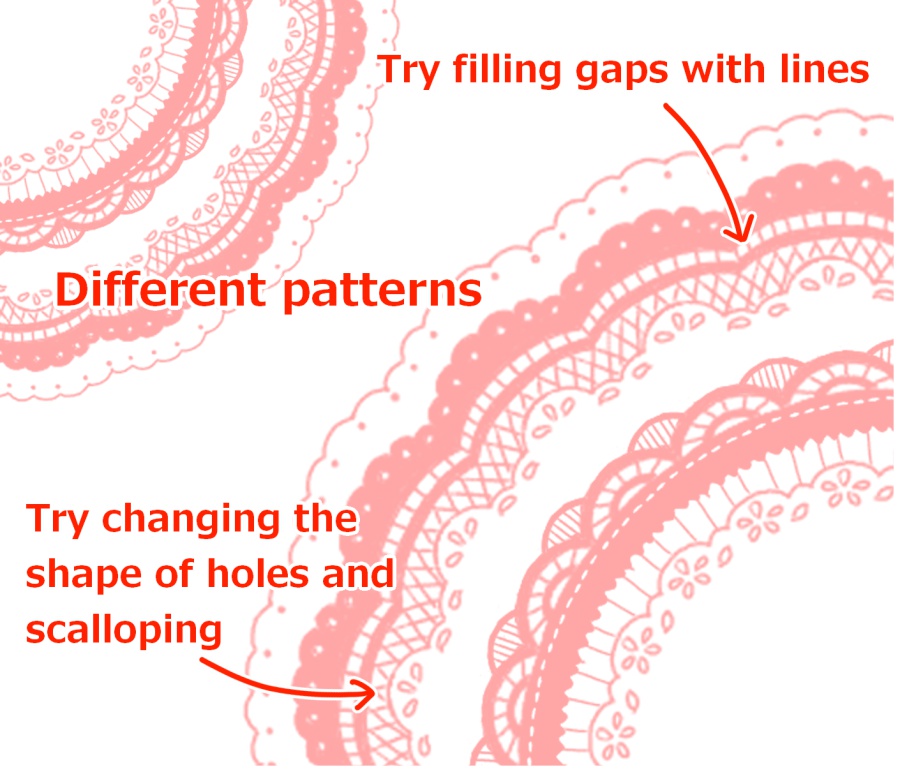
You can also draw different kinds of lace by arranging elements: filling gaps with vertical or oblique lines, or making the shape of the holes semicircular or teardrop shaped.
Do give it a try!
\ We are accepting requests for articles on how to use /

