2020.10.26
Convenient and quick! The secret to drawing the eyes symmetrically
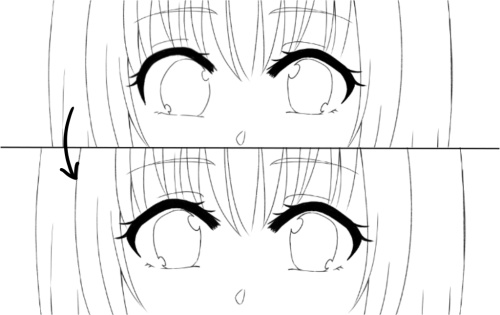
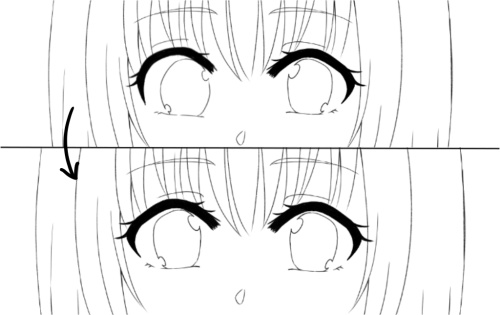
It’s very difficult to draw eyes symmetrically, isn’t it?
You may have trouble drawing one eye well but not the other, or you may be worried that the left and right eyes are not balanced even though they should be the same size.
In this article, I’d like to introduce a trick that allows you to draw both eyes at the same size!
It’s a handy and quick technique that only digital technology can provide, so if you’re a beginner or an experienced illustrator, take a look!
Introduction
In this article, I’m going to use an illustration that has been pencilled in and cleaned up to make the explanation easier to read, but I also recommend using this technique when you’re doing preliminary drawings!
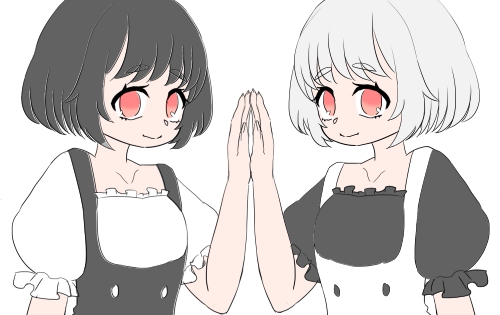
You can use it not only for eyes, but also when you want to draw arms and legs of the same length or breasts of the same size, and in many other situations where you are concerned about the balance between left and right.

Frontal Face
First, draw the eye which is easier for you to draw.
The key point is to separate the layers of the eyelid and the pupil, which are the frames of the eyes.

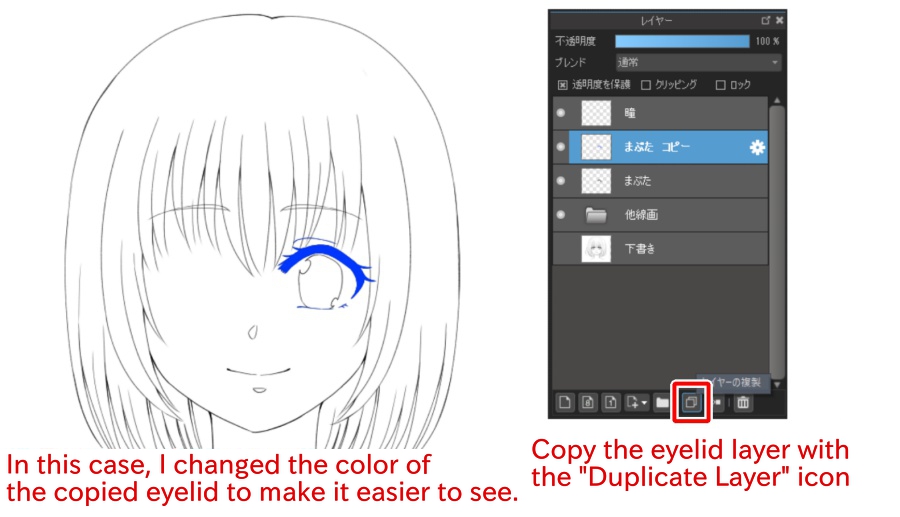
Duplicate the eyelid layer by pressing the Duplicate icon at the bottom of the layer window.
In this case, I changed the color of the copied eyelid to make it easier to see.
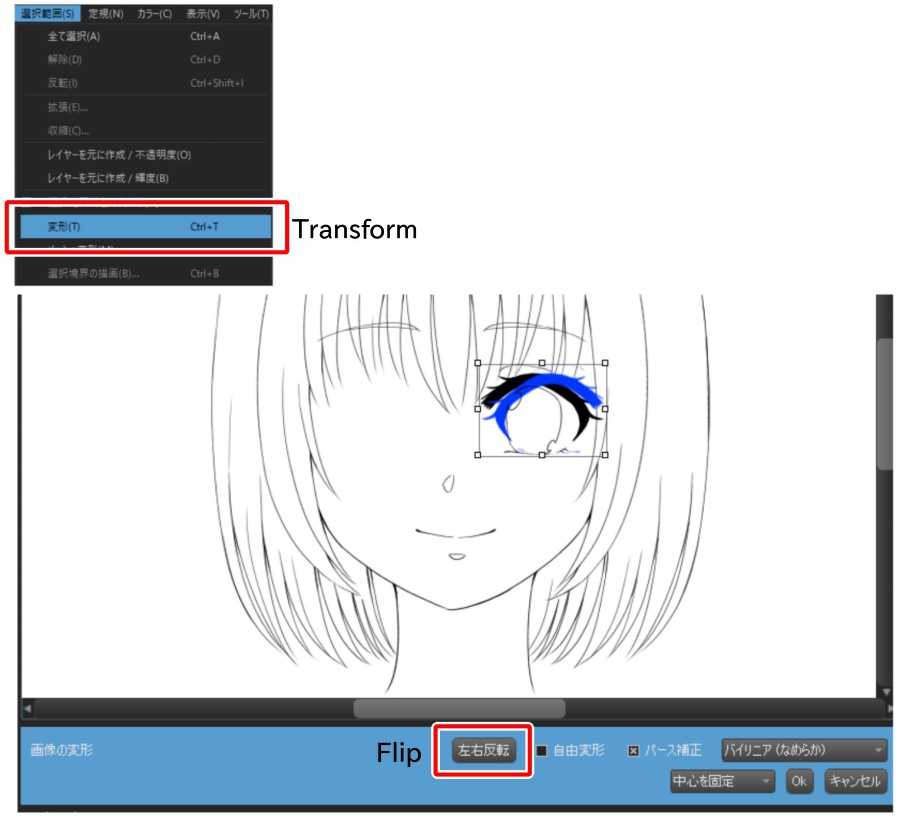
Select “Transform” from the “Selection” tab and select “Flip Left/Right” from the menu at the bottom of the canvas to flip it.
Drag the inverted eyelid to a symmetrical position and press the OK button.
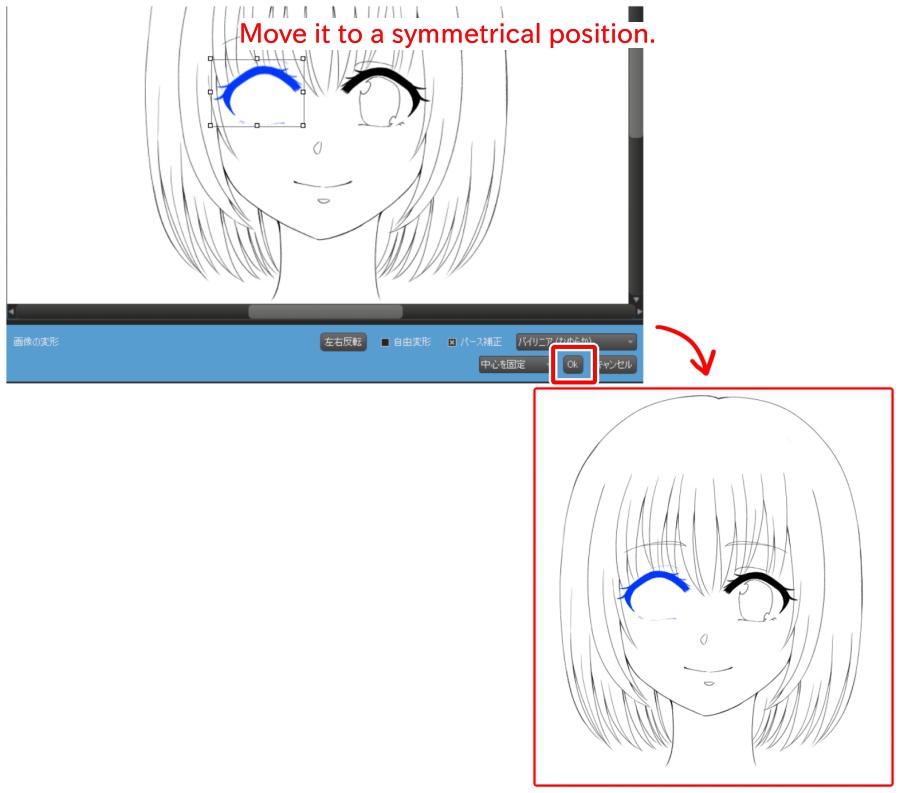
Duplicate, flip and move the eye layer in the same way, and that’s it.

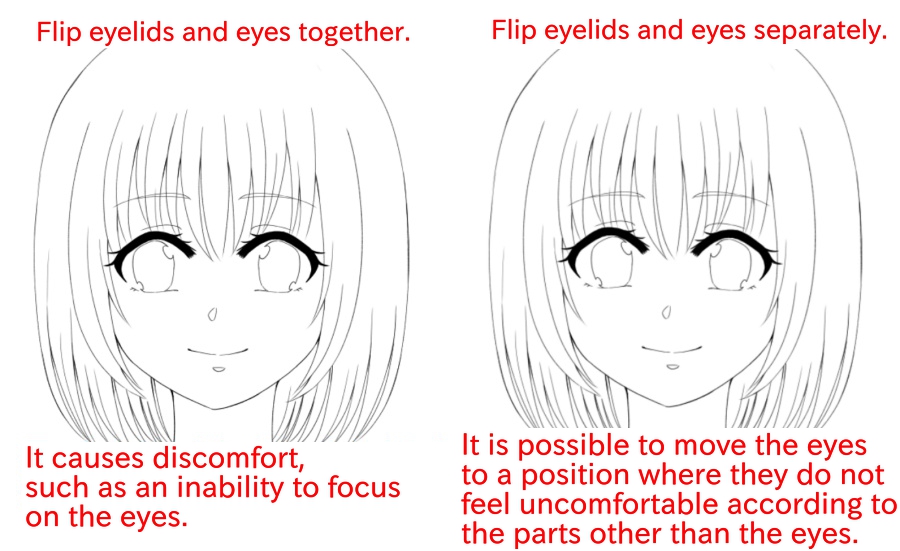
When the eyelids and eyes are flipped together, the eyes can become unfocused and uncomfortable like this.
This is because the eyes are not in front of you, or the rest of the body is asymmetrical.
If the drawing is too tightly symmetrical, the hand-drawn image will not look right, so it is better to draw the image with some asymmetry.
Slanted Face
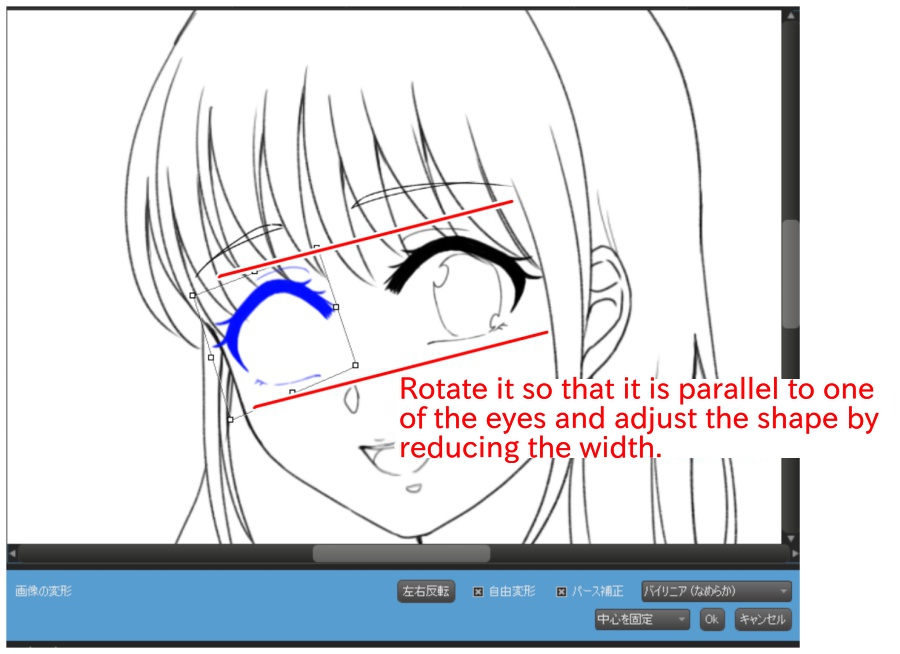
If you don’t have a front face, duplicate the eyelid layer, flip it left and right using the Transform tool, then check the “Free Transform” box in the Transform menu to adjust the width.

Rotate it so that it is parallel to one of the eyes, shrinking its width and adjusting its shape.
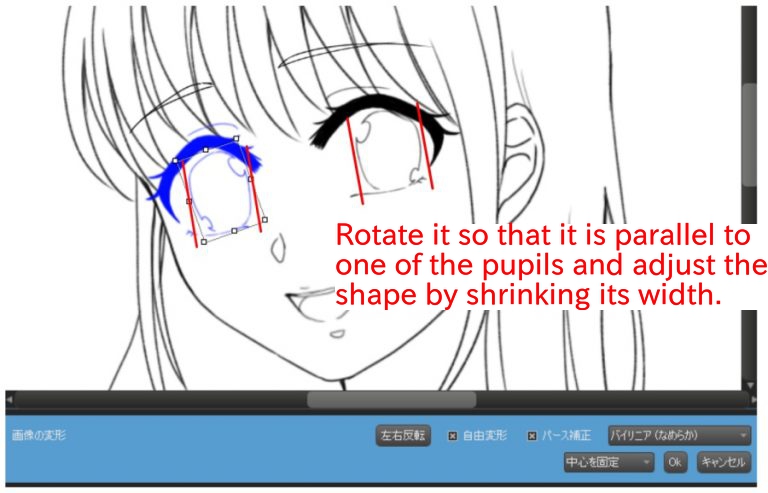
Duplicate, flip, and move the pupil layer in the same way, rotate it so that it is parallel to one pupil, and then shrink the width of the layer.
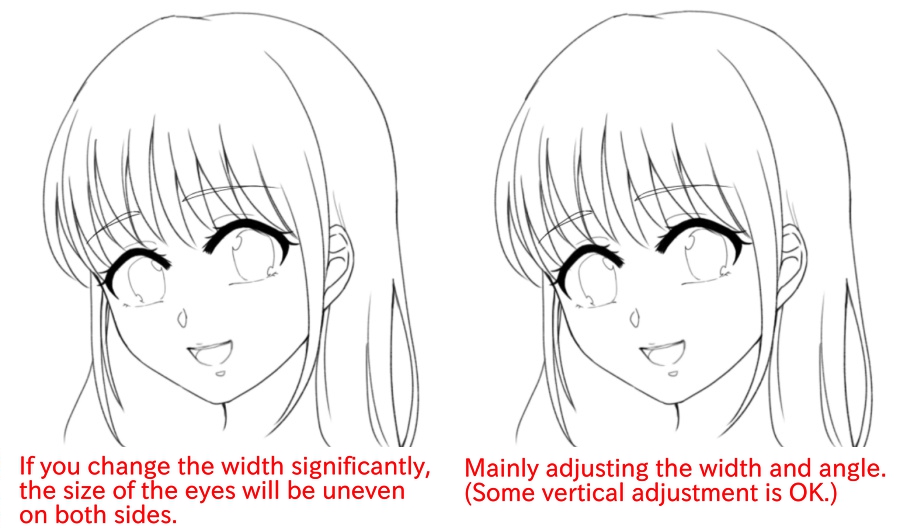
When you adjust the shape, be careful not to change the height of the eyes too much.
If you change the height too much, the size of the eyes will be uneven and unbalanced, so make minor adjustments to the height, mainly by changing the width and angle.
What did you think?
If you use this technique, you can save a lot of time because you don’t have to think about the other parts once you have drawn one part.
It may seem like a trivial task to duplicate parts, but it’s a great technique used by professionals.
But it’s a great technique used by professionals.
(Text/Artwork/Mozukuni)
\ We are accepting requests for articles on how to use /

