2020.10.05
An easy technique to fill in the gaps in a bucket of paint
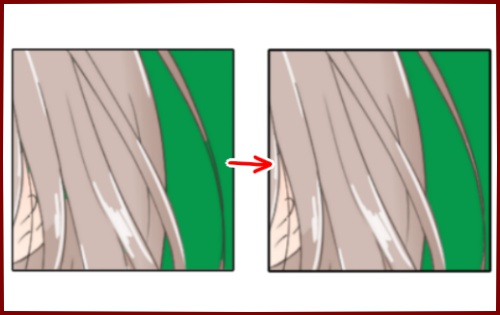
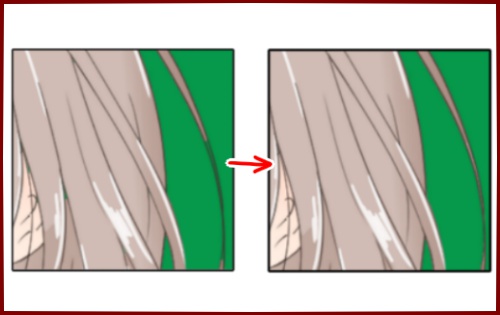
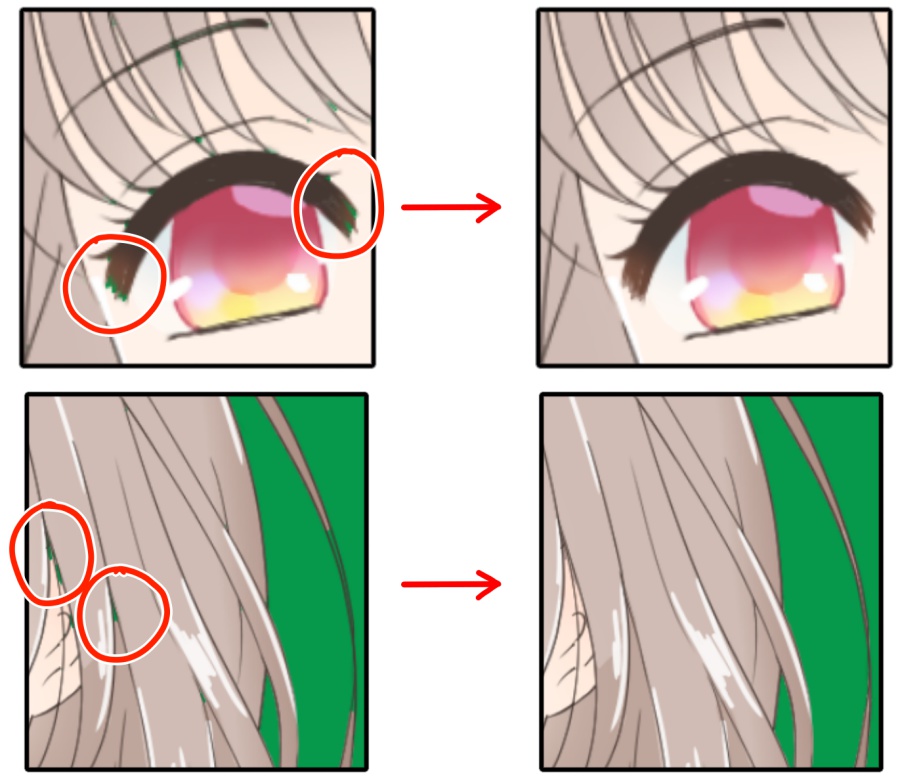
Many of you may have left gaps in the bucket tool when you painted the color on it like this.
If there are too many gaps, the color of the background will be visible through the gaps and it will look bad.
I’ll show you how to get rid of those gaps easily with this illustration.
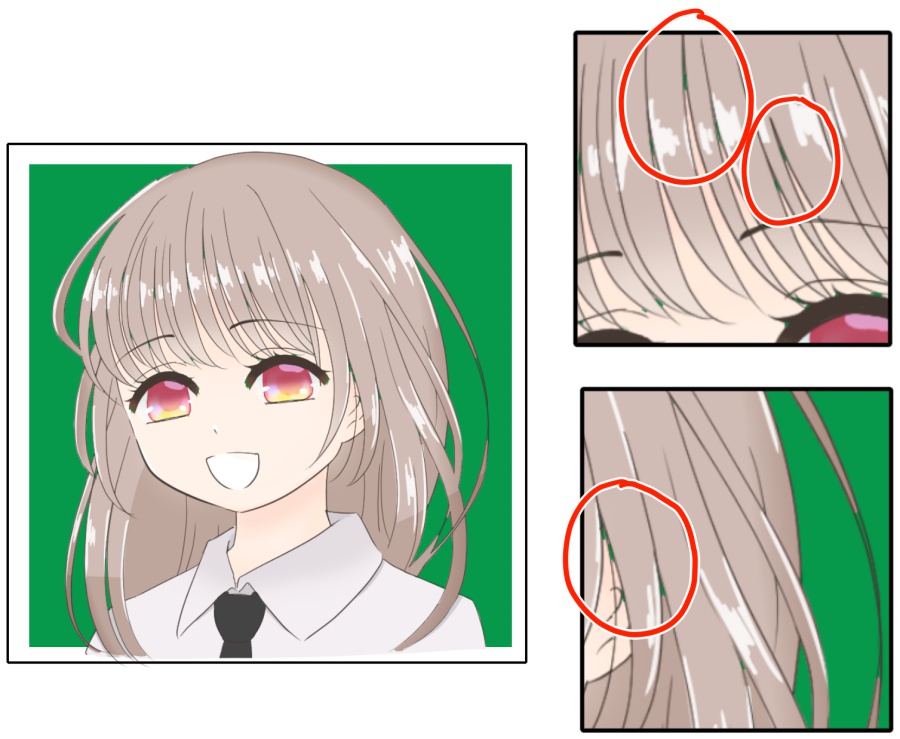
Let’s take a look at the steps.
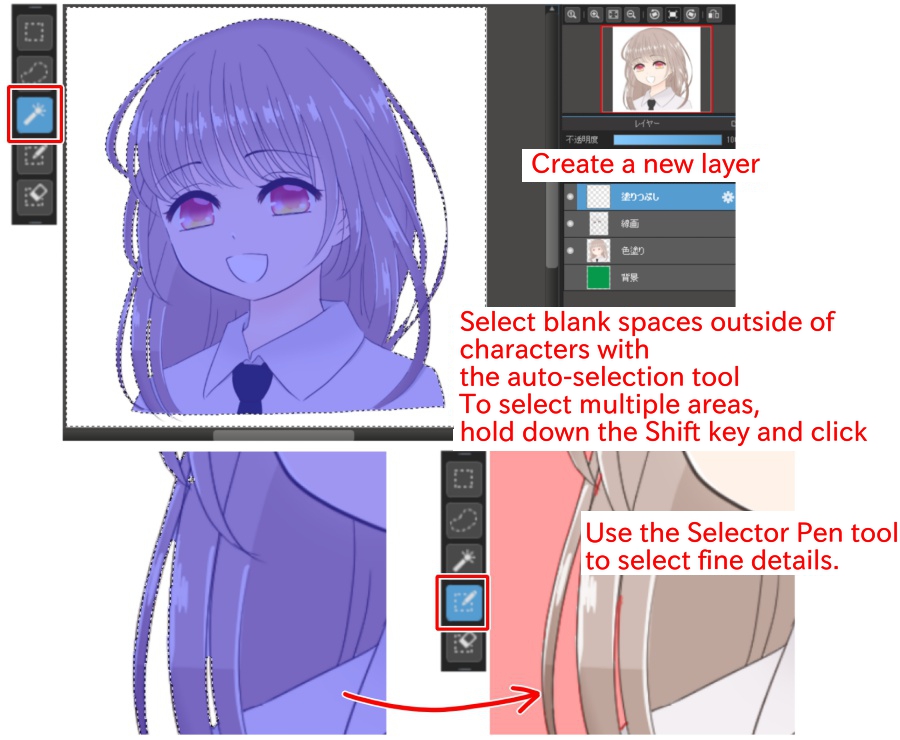
First, create a new layer, select a new layer, and then select the area outside of your character by holding down the Shift key and clicking on a blank area.
If you can’t select all the details with the Auto Select tool, use the Selector Pen tool to select them.
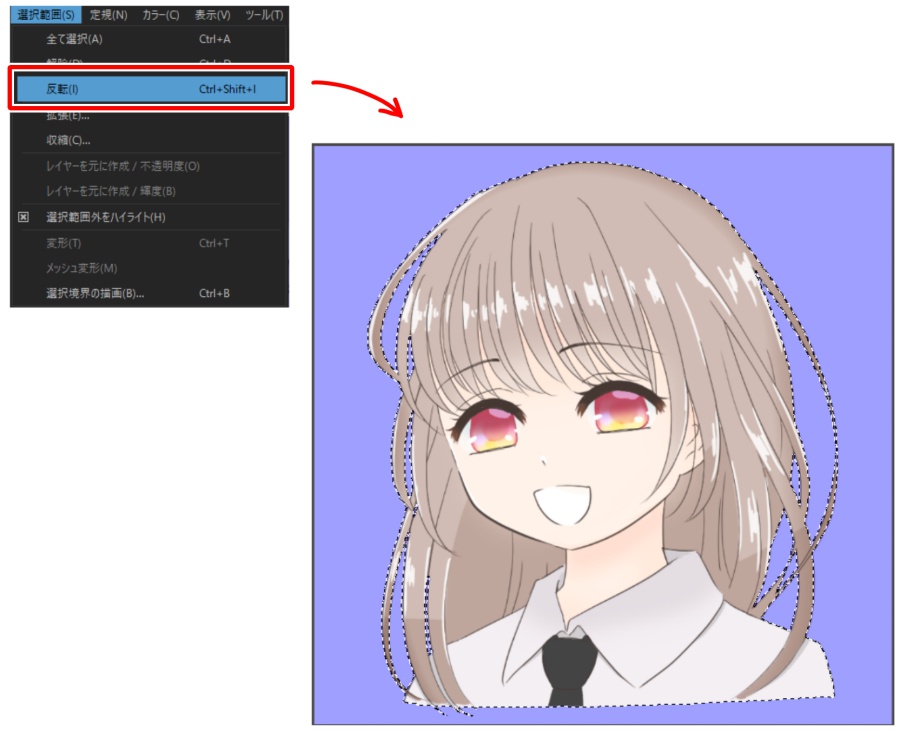
Select “Invert” in the “Selection” tab.
This reverses the selection and selects the area within the character.
Select the Eyedropper tool and extract the darkest color in the illustration (except for the line drawing).
Select the Bucket tool and change the reference in the top menu to “Layers” and fill in the selection.
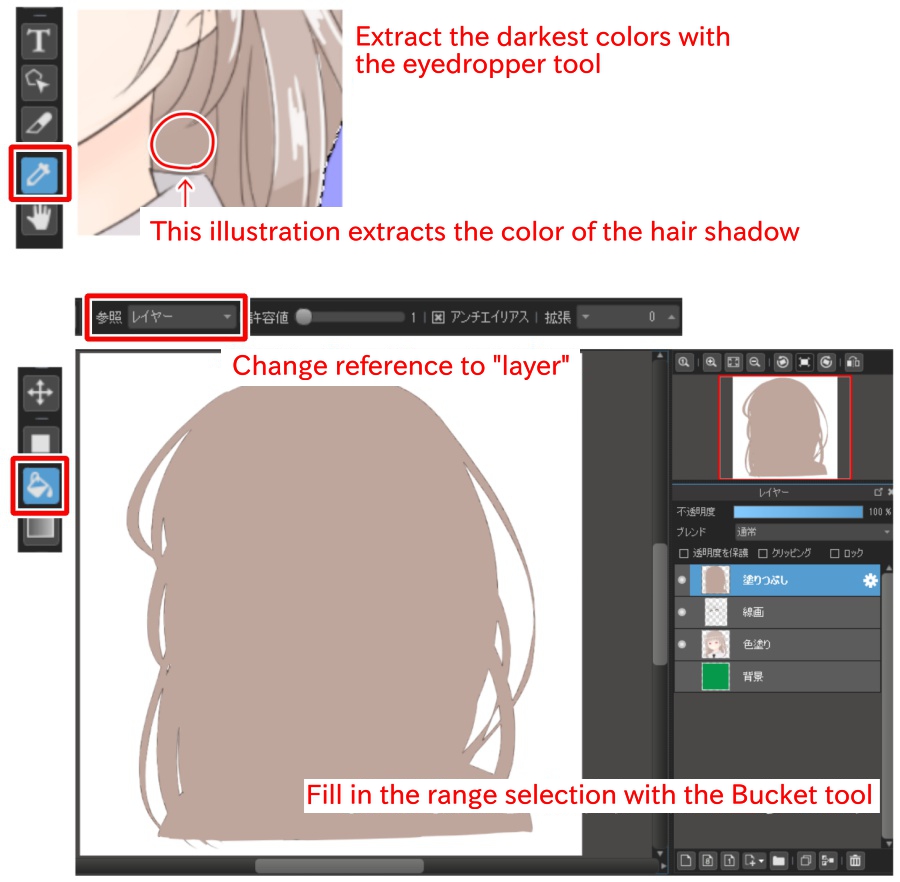
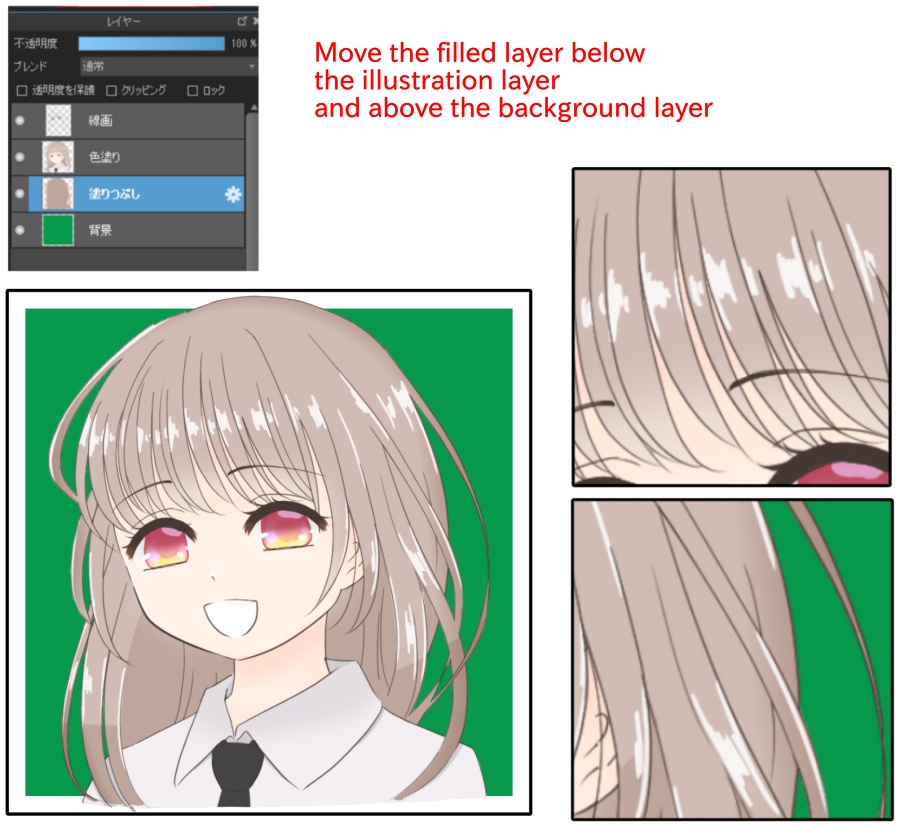
I moved the filled layer below the illustration layer and above the background layer to finish.
I was able to insert the color in the gaps without any discomfort.
What did you think?
This method is much easier to fill in than looking for gaps and painting frequently.
Please make use of it.
\ We are accepting requests for articles on how to use /

