2020.11.13
[For Beginners] Learn how to balance your face & get the basic ‘Atari’!
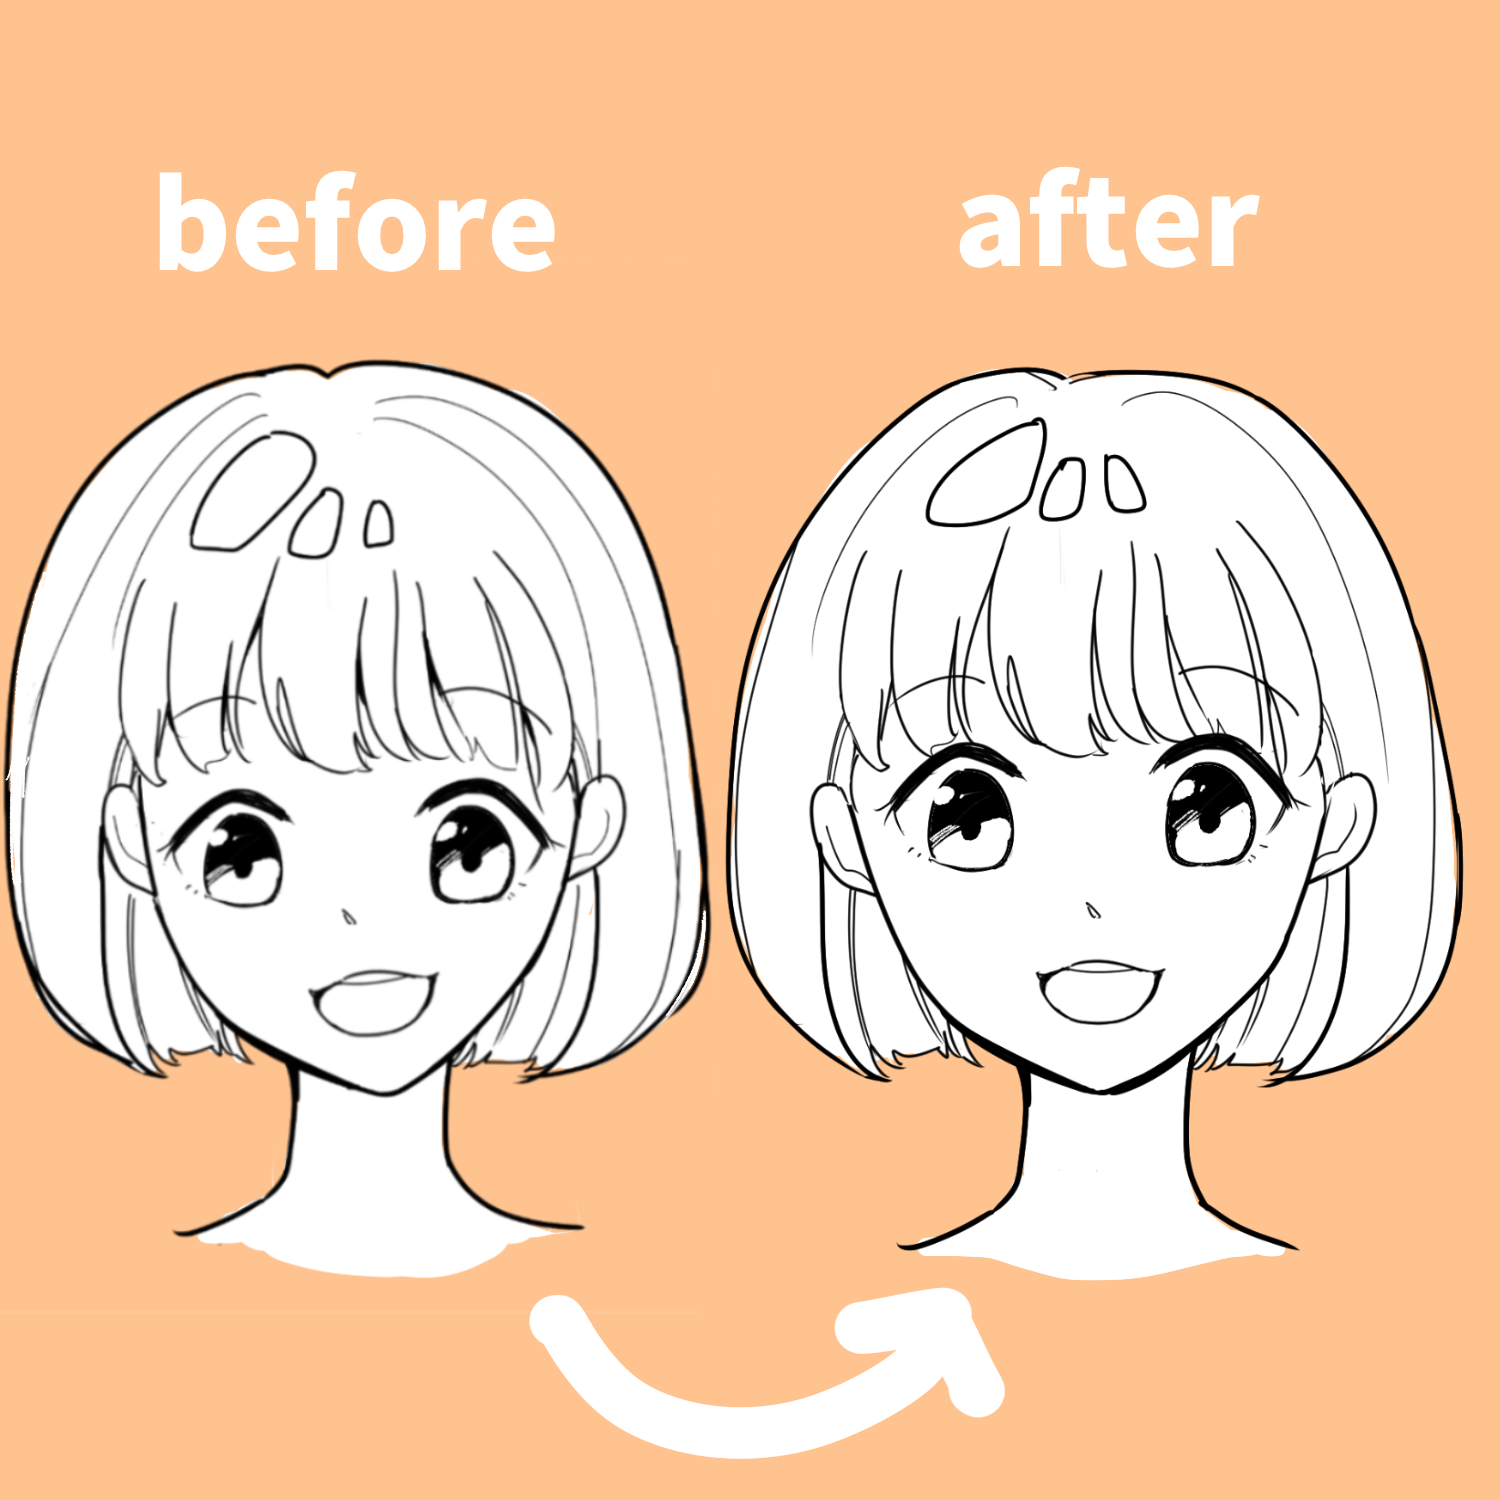
In this article, I’m going to talk about [how to draw a well-balanced face] and [how to get the basic “Atari”]!
I want to draw that character I love! Have you ever had the experience of starting to draw, only to find that the shape of your face looks strange?
With a few tips and pointers, you’ll be able to draw a well-balanced face.
Let’s follow the steps and practice together!
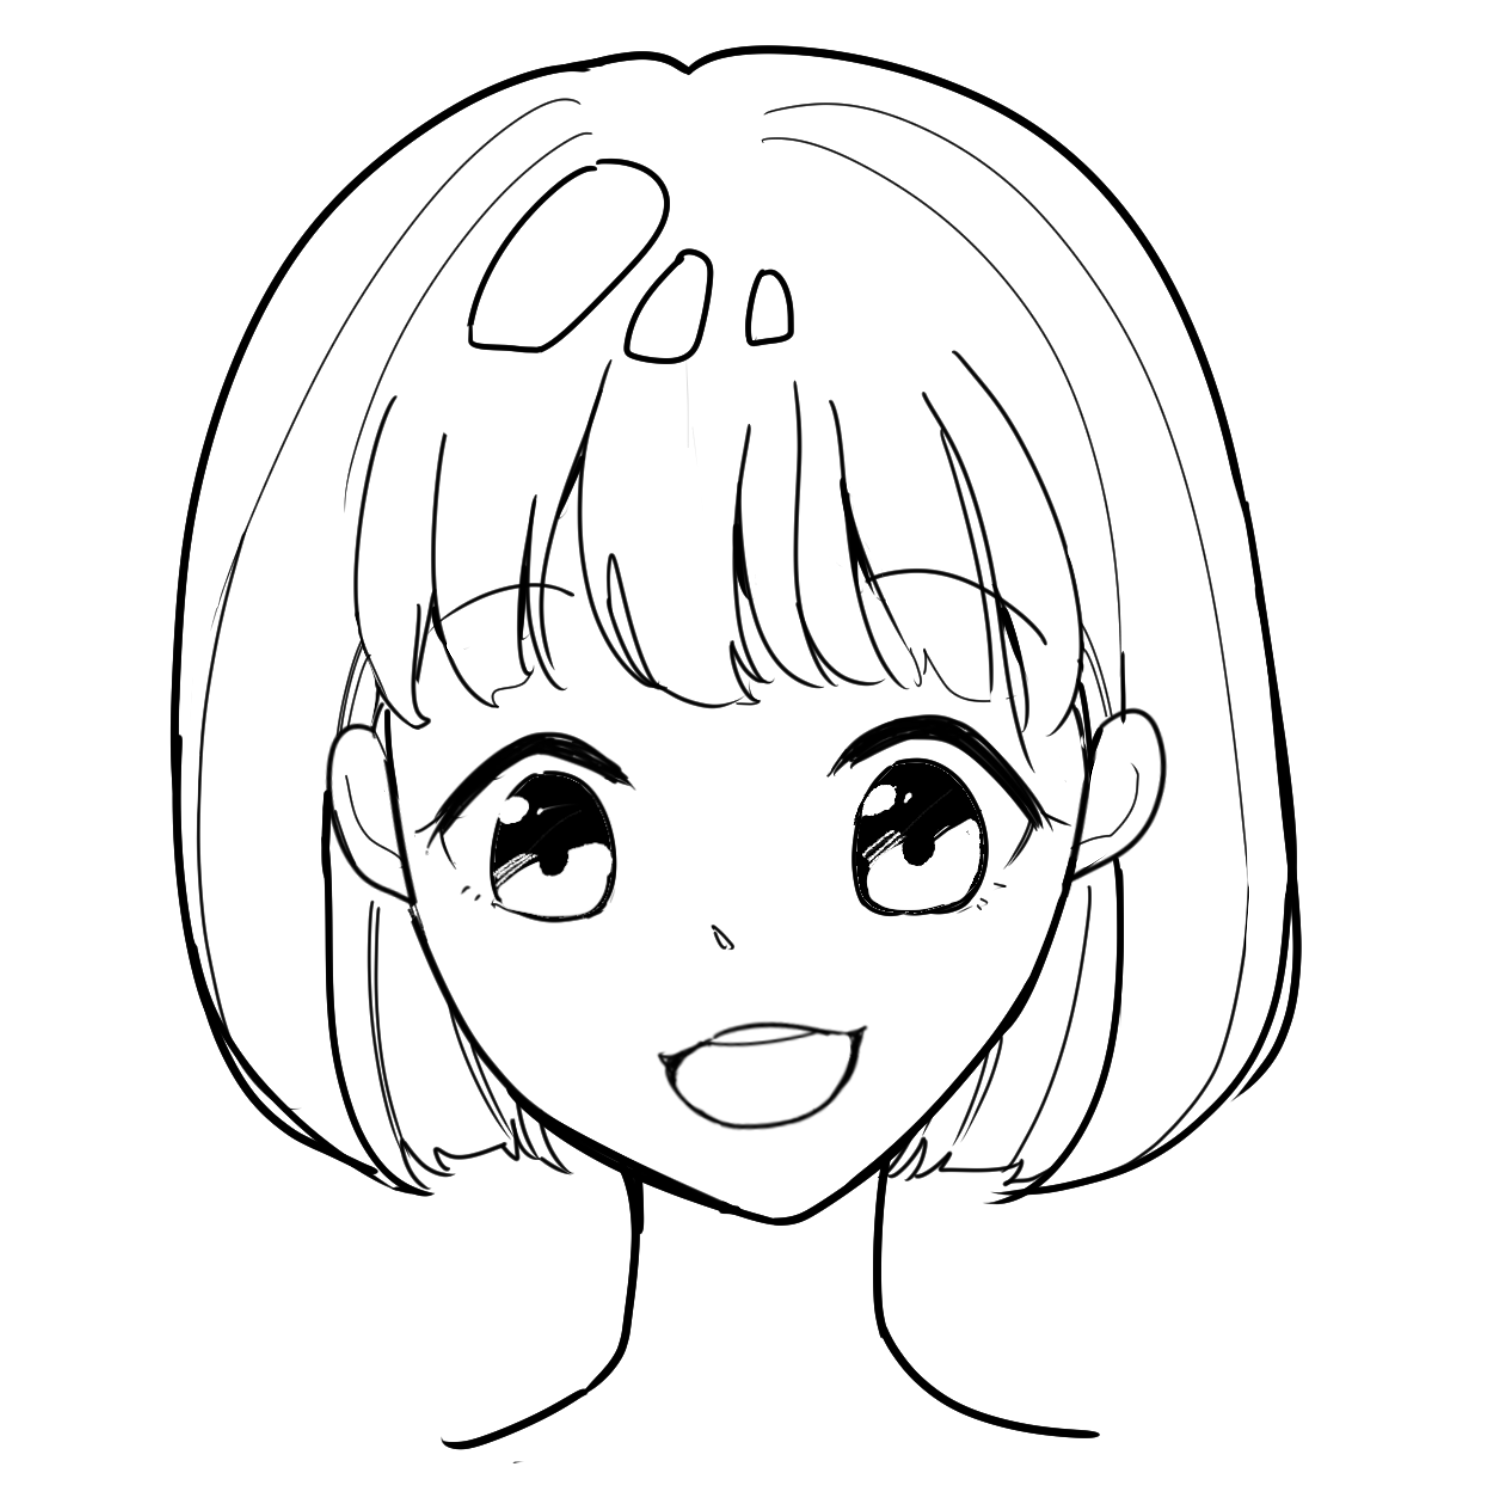
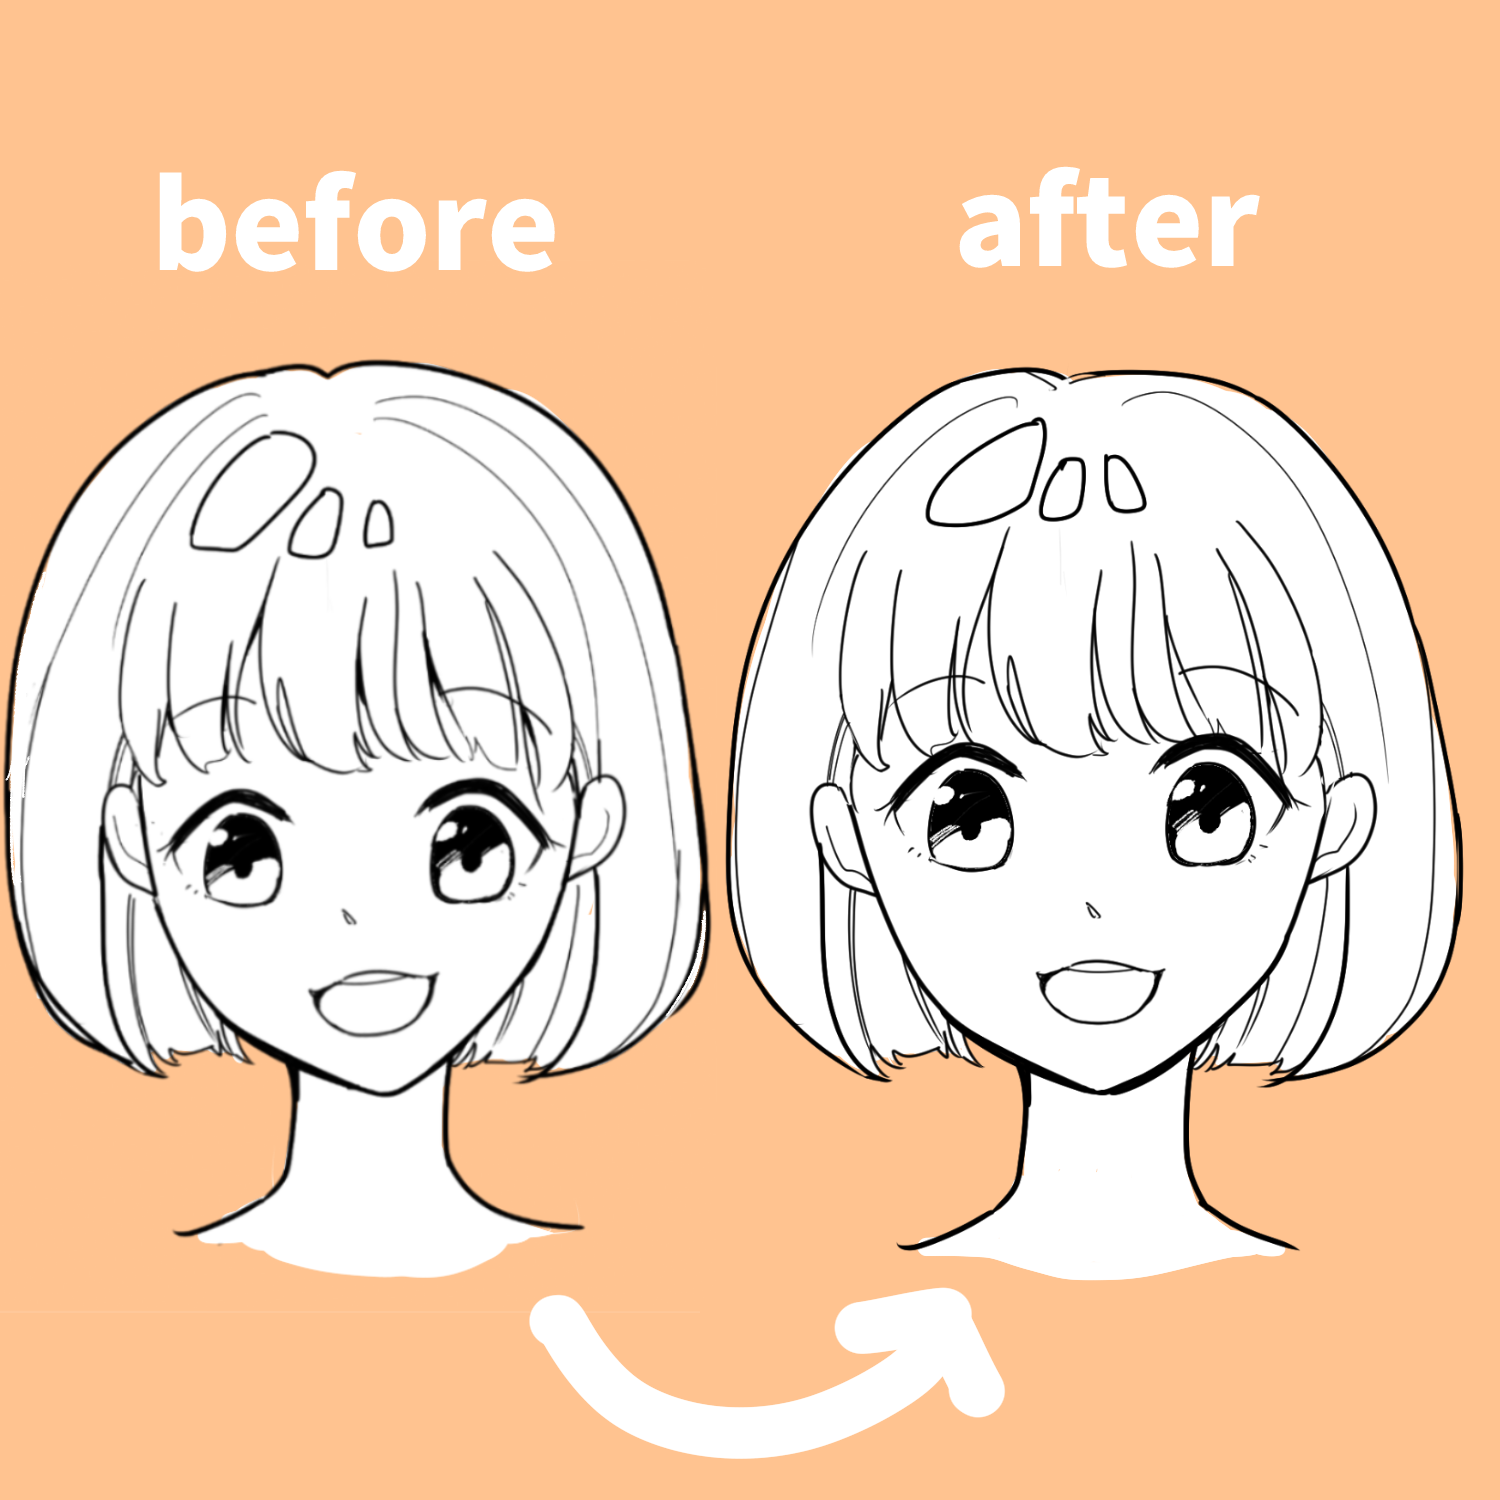
First, take a look at this drawing.
It looks like it is well drawn, but there is something wrong with it.
Let’s rebalance this drawing.
There are three important points to balance the face.
1) Ears and eyes should be parallel to each other.
(2) Nose, mouth and chin are in line
(3) Size of the head
Let’s draw these points with attention.
(1) Ears and eyes are parallel.
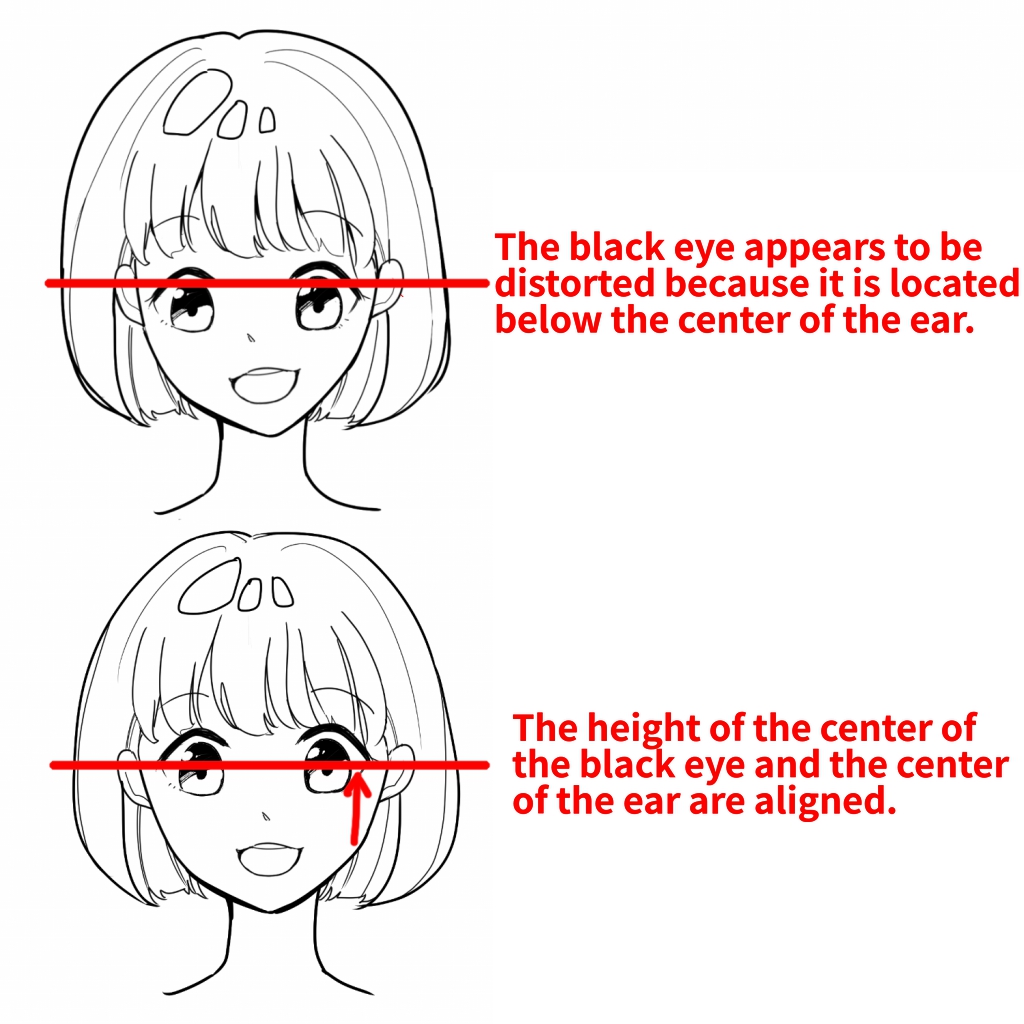
The ears and eyes are on a parallel line.
This remains the same no matter what angle you draw the face from.
Also, no matter how large the eyes are in the picture, their position in relation to the ears doesn’t change.
In the previous picture, the black eyes are lower than the ears.
(2) Nose, mouth and chin are in line with each other
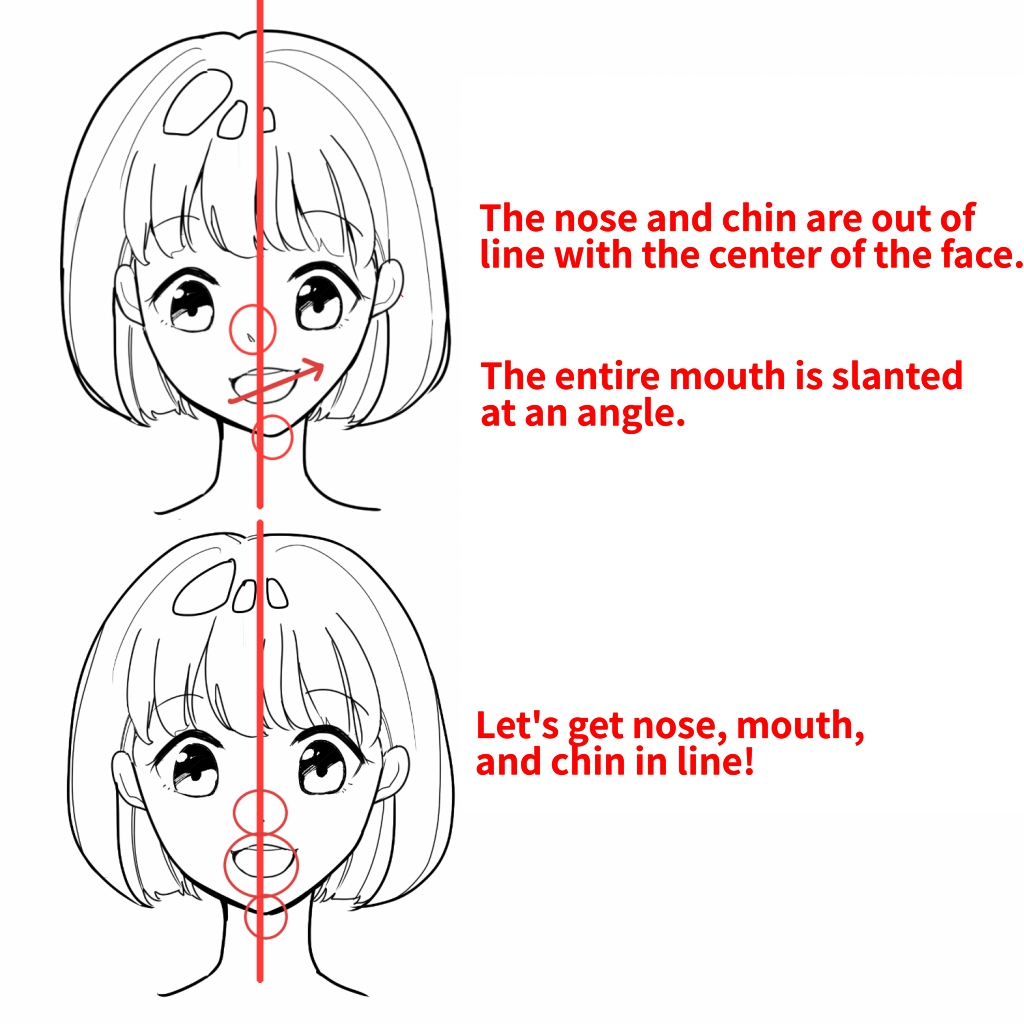
The most pointy part of the nose, mouth and chin is on a straight line vertically.
If these parts are distorted, the overall balance will be imbalanced, so make sure they are straight.
In the case of the front face, this straight line is not easily broken, but if you try to draw the face at an angle, such as at a slant, downward or upward, the balance may be lost immediately.
No matter the angle, the straight line between the nose, mouth, and chin will remain the same.
Get a feel for the front face first, and then try to keep these straight lines in mind when you draw the angled face.
Also, depending on the design, the nose may be omitted or the center of the mouth may be intentionally shifted depending on the expression.
(3) Size of the head
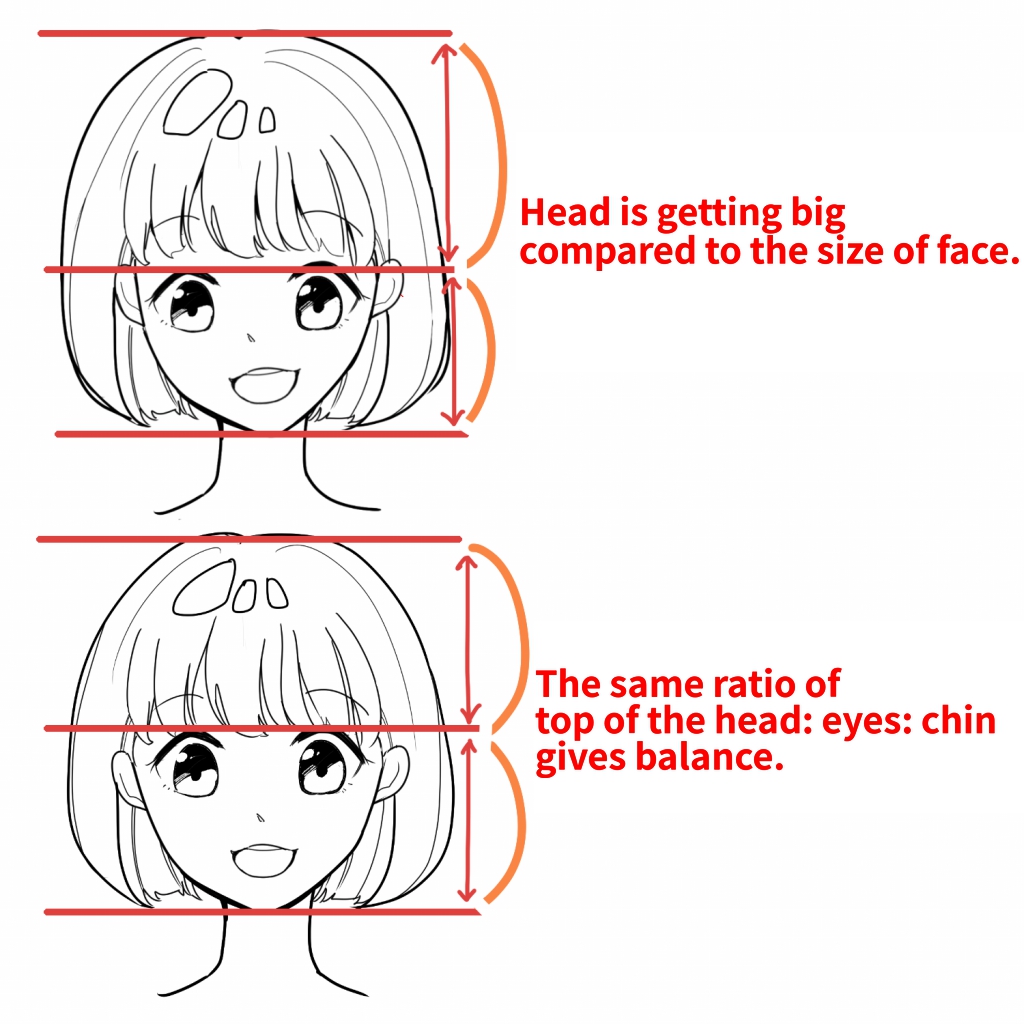
In the previous illustration, the head is too big.
It is tempting to draw the hair bigger to give it more volume, but I don’t want to draw it too big because of the position of the eyes.
Check the balance as you draw.
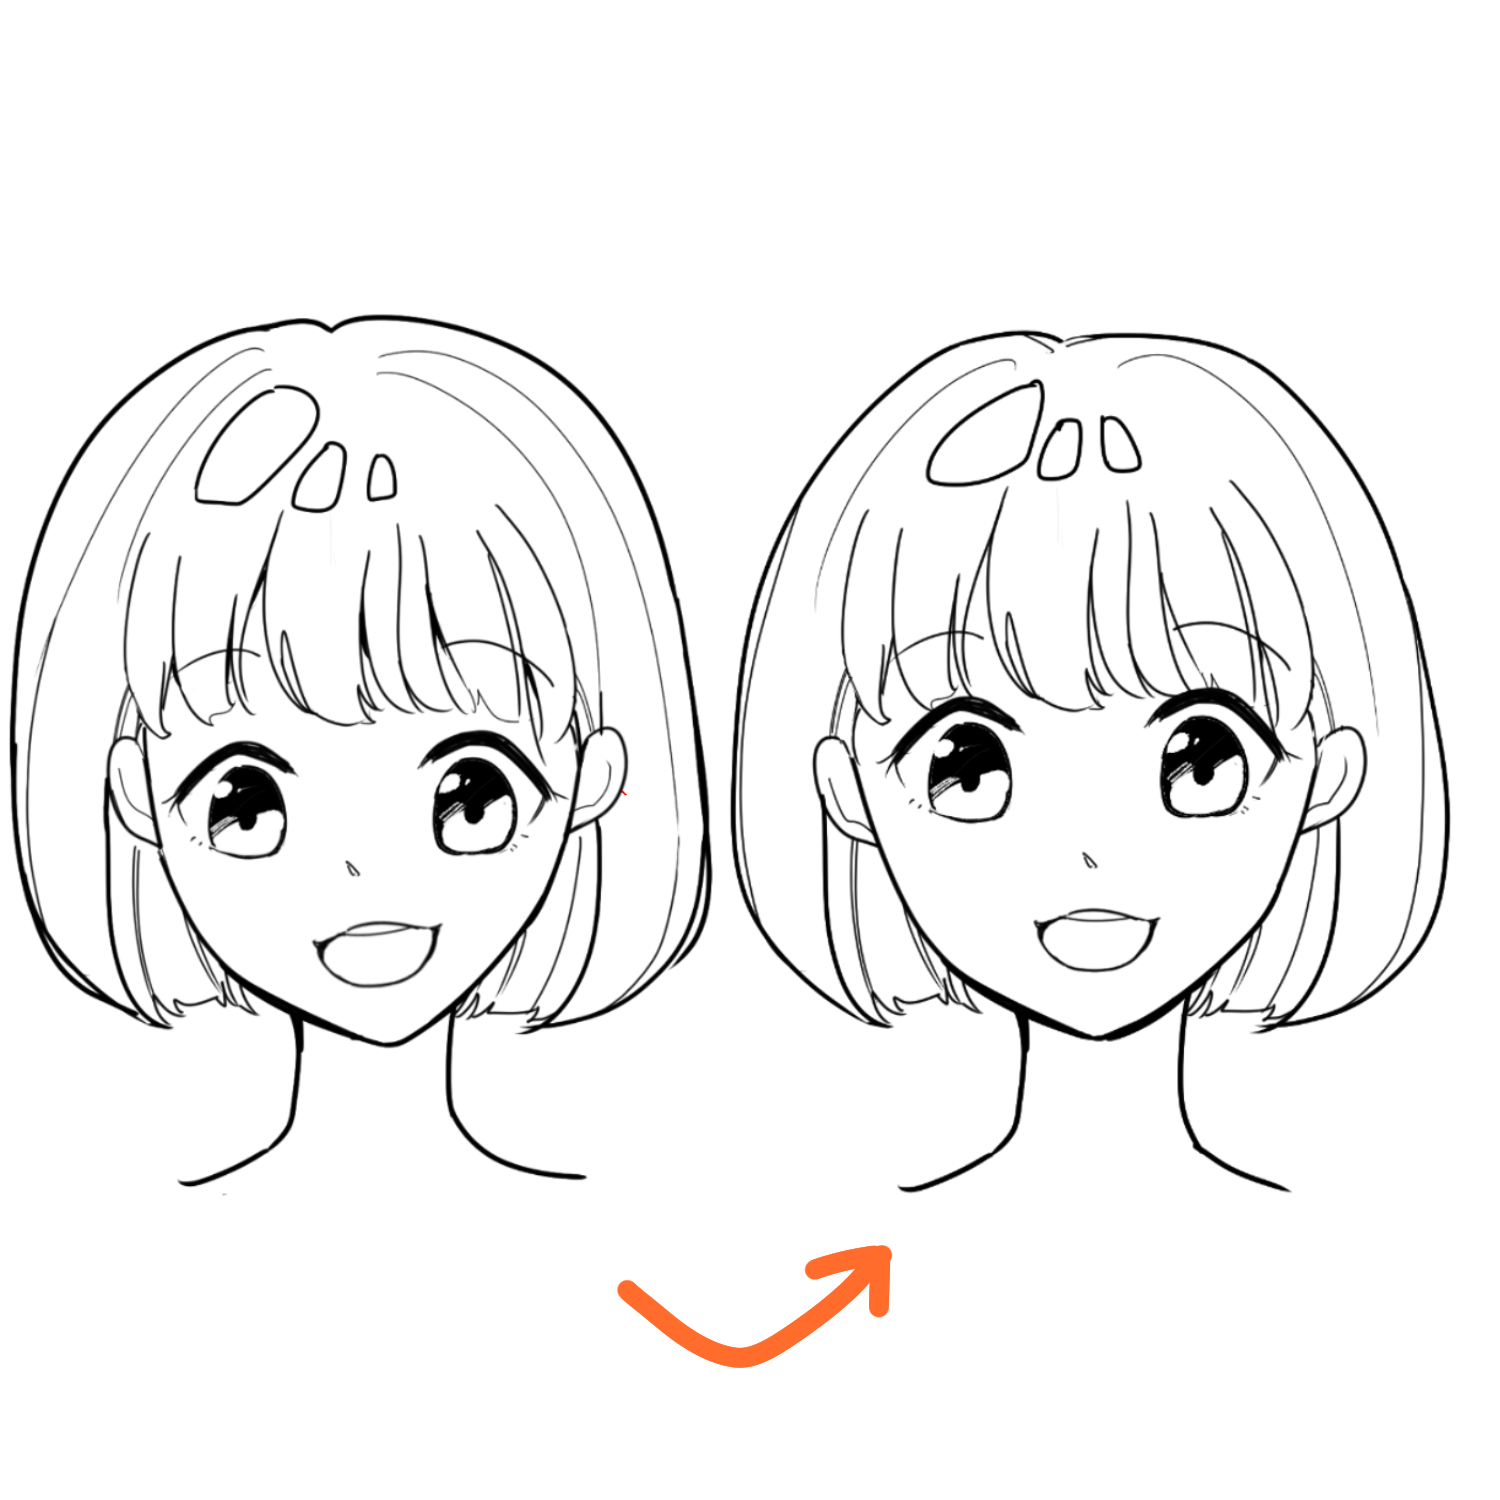
I just fixed it with three points in mind and it’s aligned to take a path!
●Let’s take “Atari”!
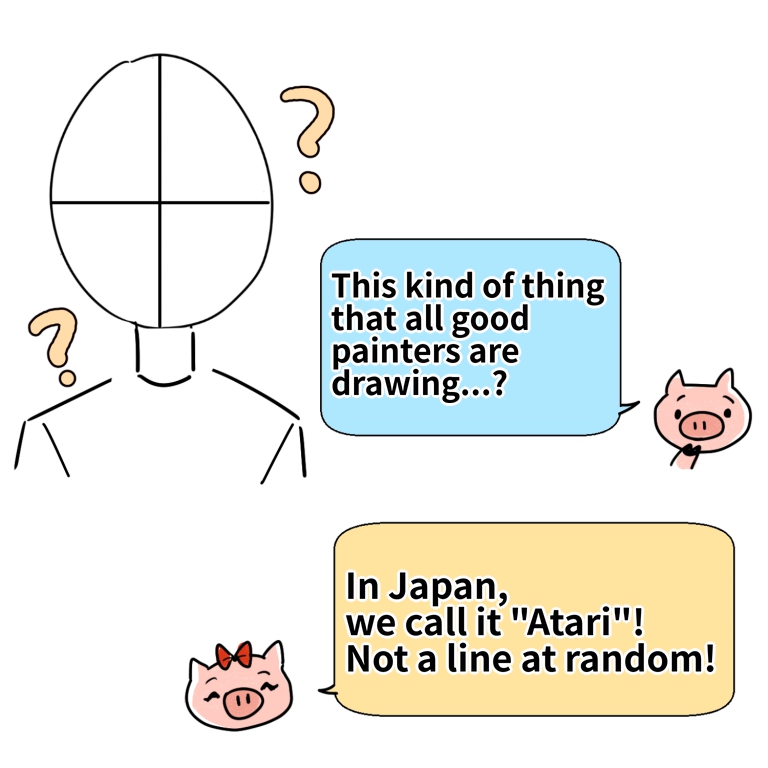
An essential part of an illustration is “Atari”.
An “atari” is like a blueprint that determines the general framework of what you want to draw.
When you draw an illustration of a face, you often start by drawing a cross inside a circle, right? That’s the “Atari”.
It’s not just a simple cross, but it has a meaning.
It’s a very important process that determines the finish of your illustration. Let’s master it.
■What happens if you don’t use “Atari”?
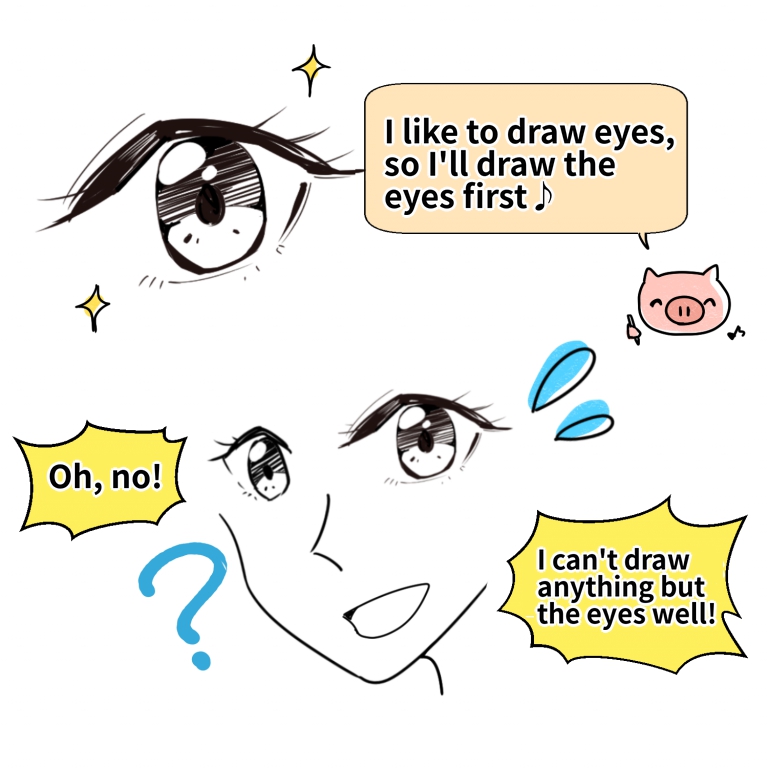
Beginners often make the mistake of drawing the eyes first and then adding the outline of the face or the hair later and it looks weird.
Drawing the eyes is fun, so I tend to do it (I did it too).
First of all, take “Atari” and decide in advance what you want the whole face to look like before you draw it, so you can get a well-balanced picture!
●Let’s start here! How to get “Atari” in the frontal face
First, draw a circle.
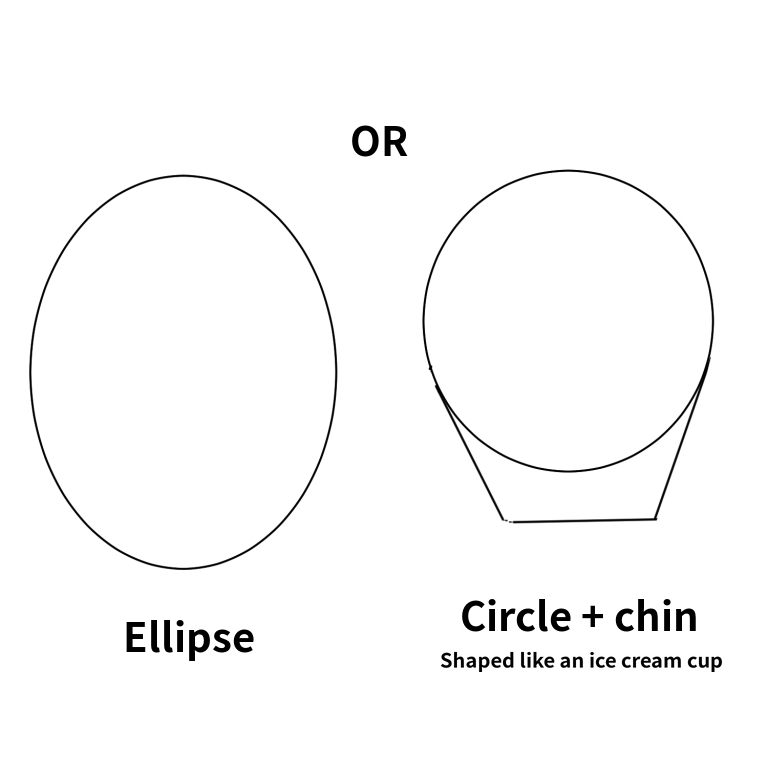
Instead of drawing a round circle, draw a slightly vertical oval.
If an oval is difficult, you can draw an oval and then draw a trapezoid underneath the circle as a guide for your chin.
Next, draw a line in the middle of the circle.
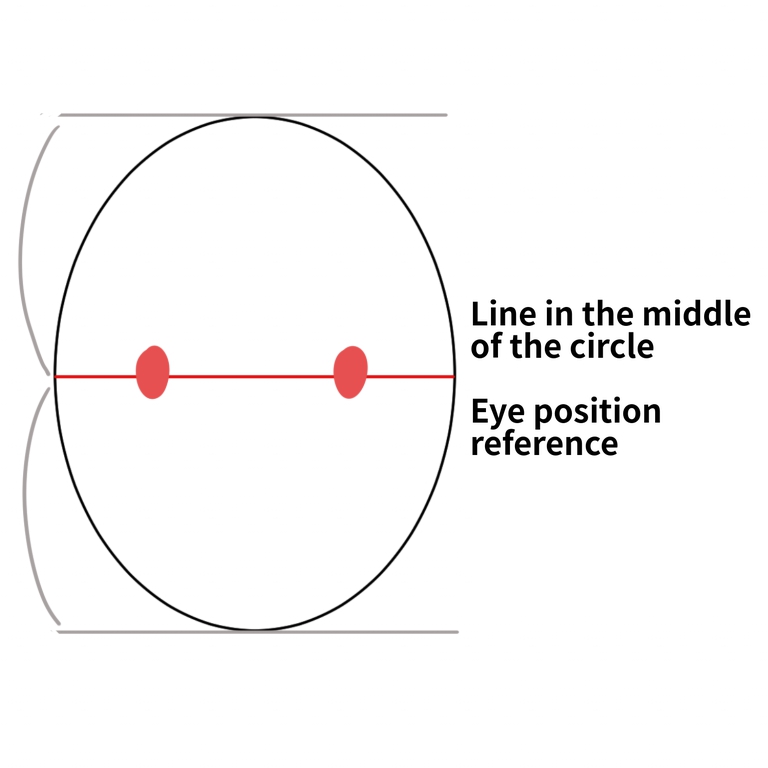
This is the height of the eyes.
Next, draw a line to divide the circle vertically.
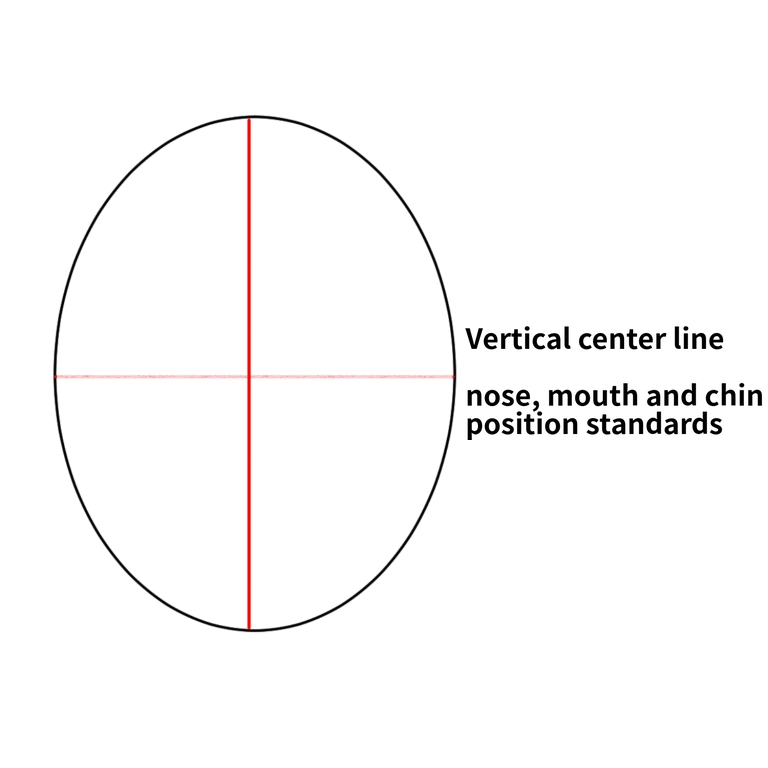
This is the center of the face. The tips of the nose, mouth and chin are on this straight line.
Draw a line in the middle of the eyes and chin.
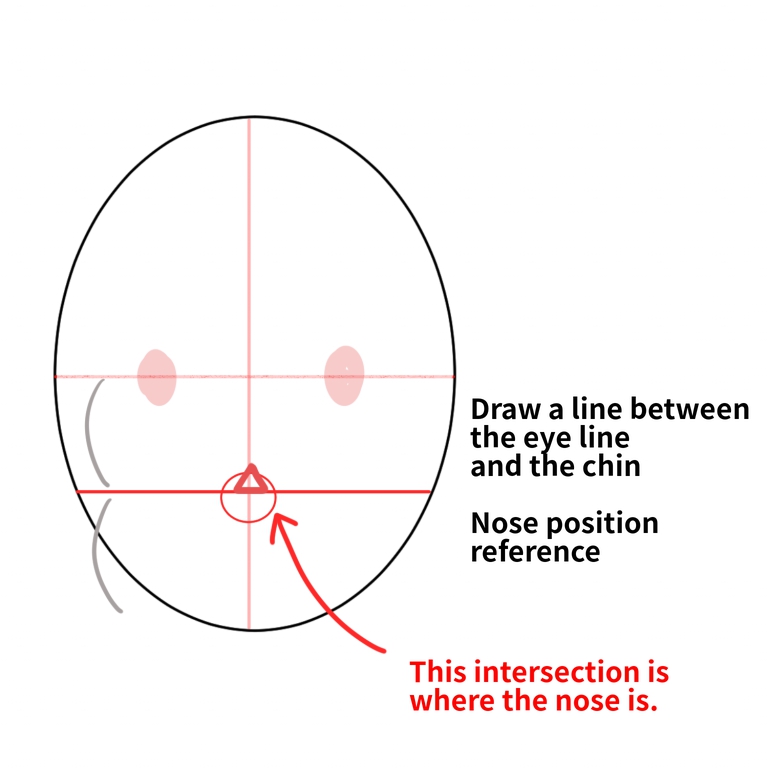
This is the position of the nose.
Draw a line in the middle of the nose and chin.
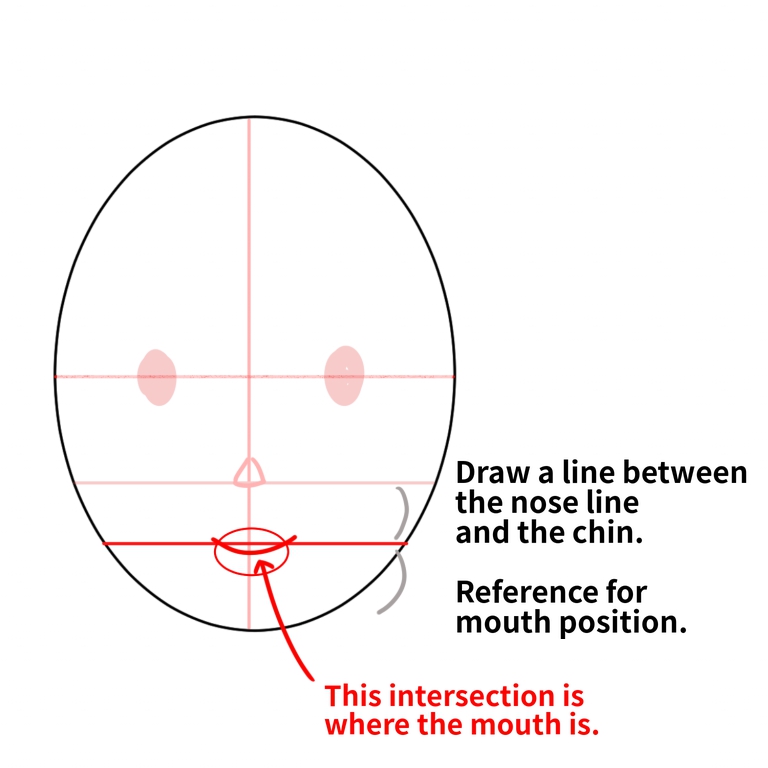
This is the position of the mouth.
Draw the ears next to the eyes.
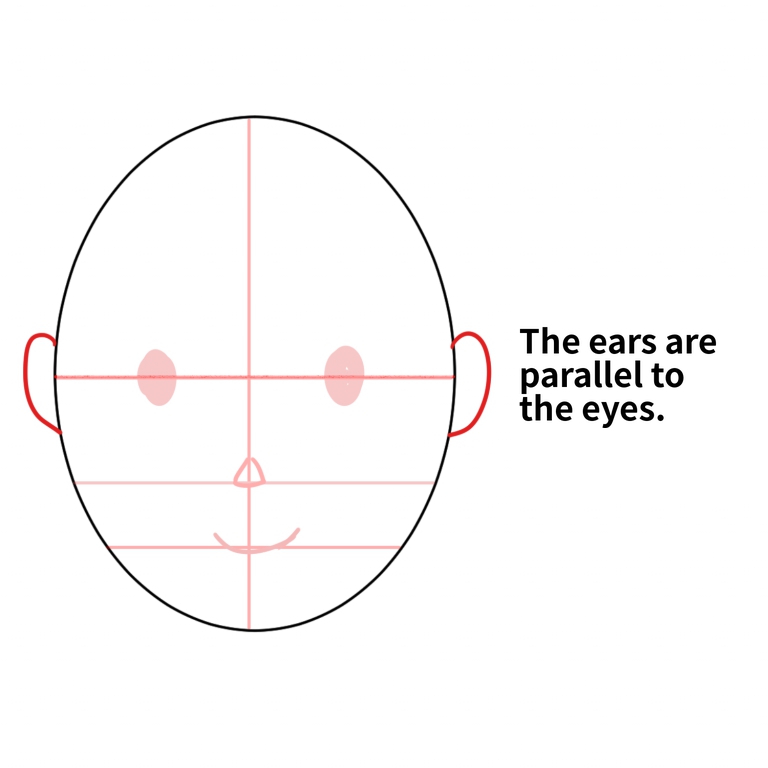
We got a well-balanced “Atari”.
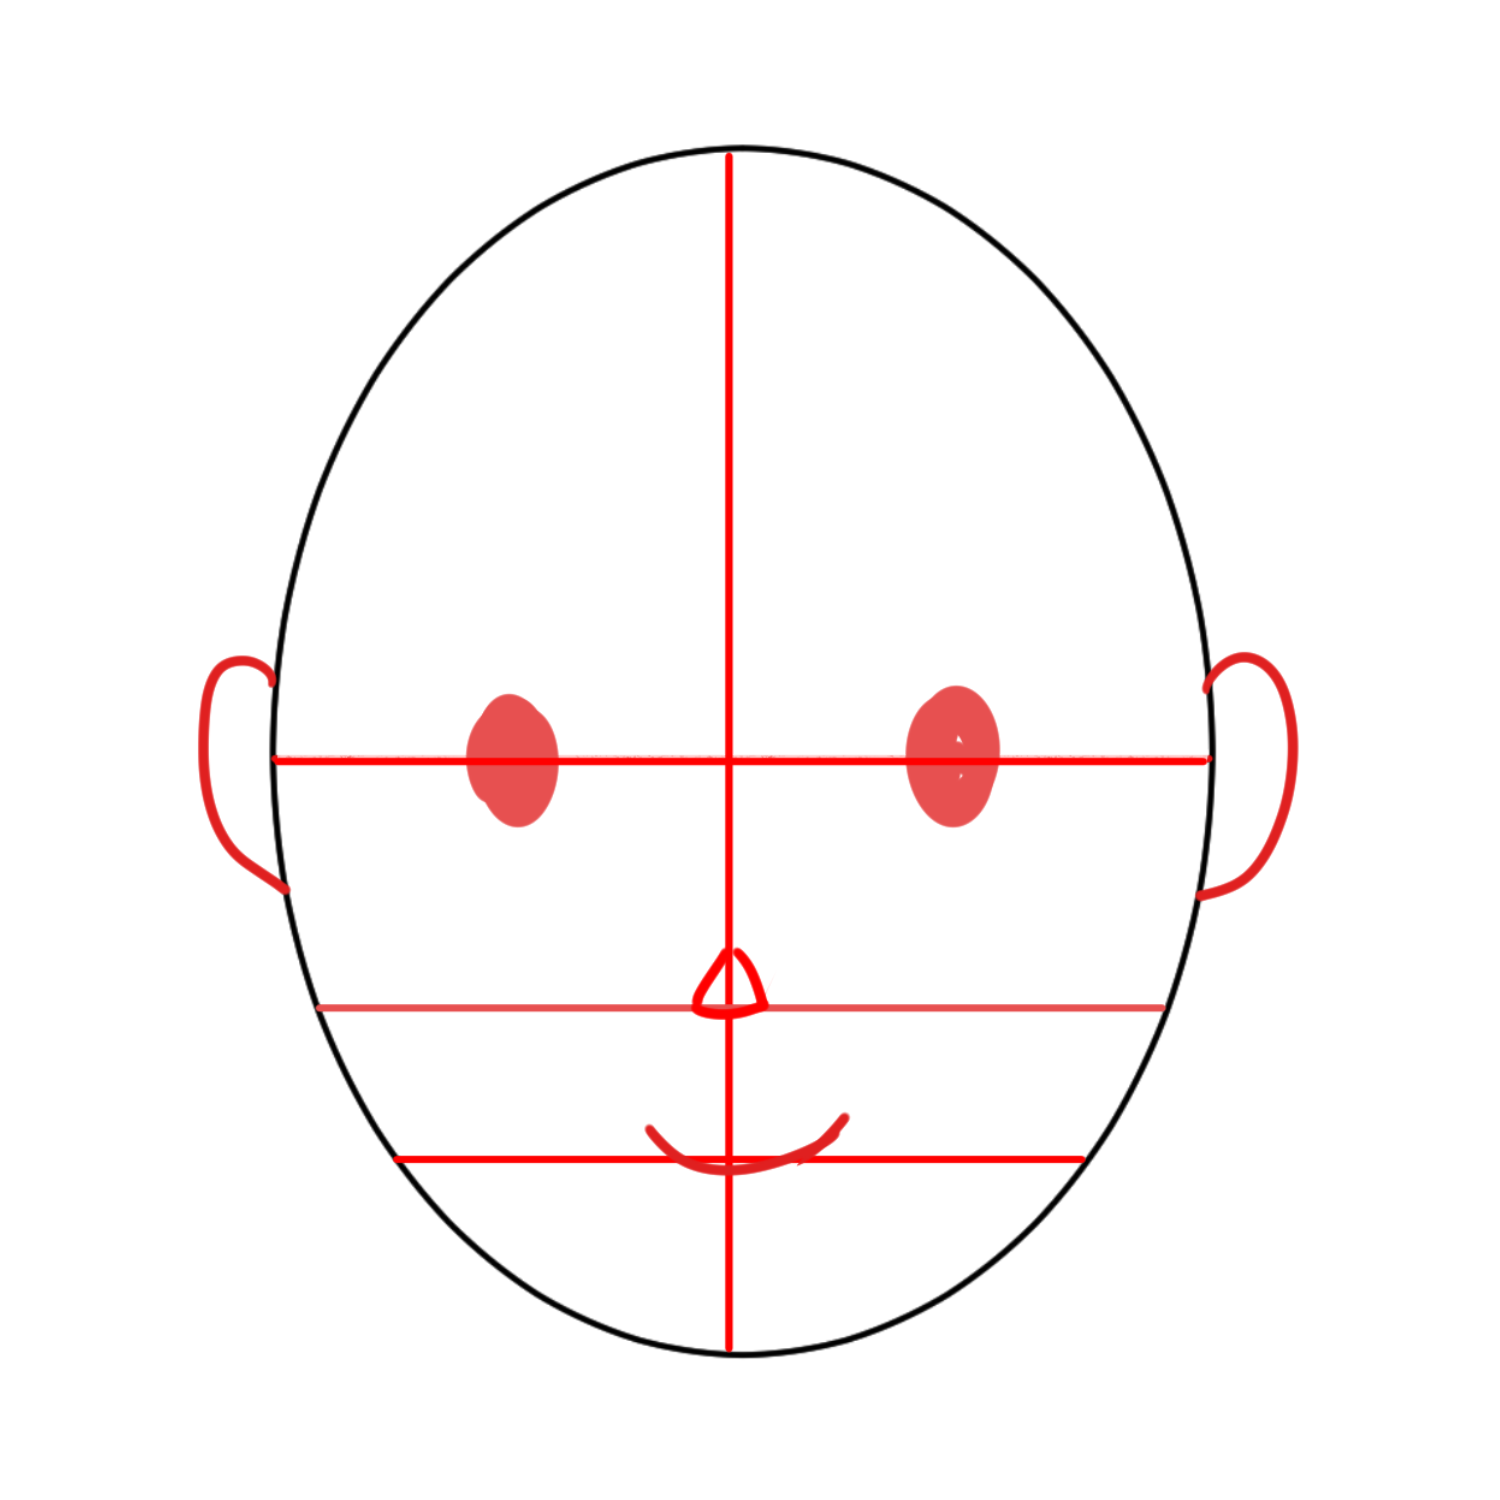
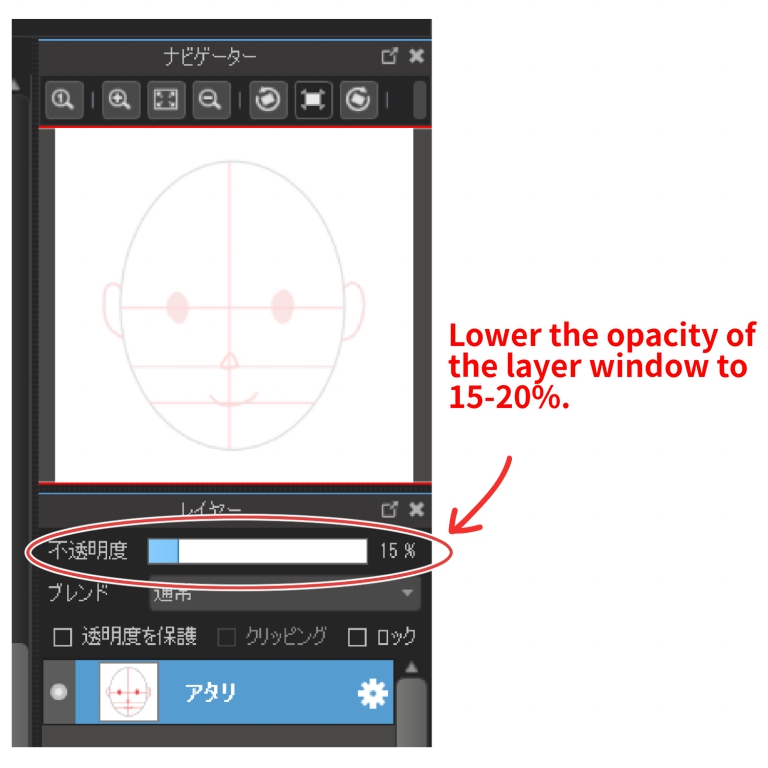
When the “Atari” is completed, I will draw a draft based on this “Atari”.
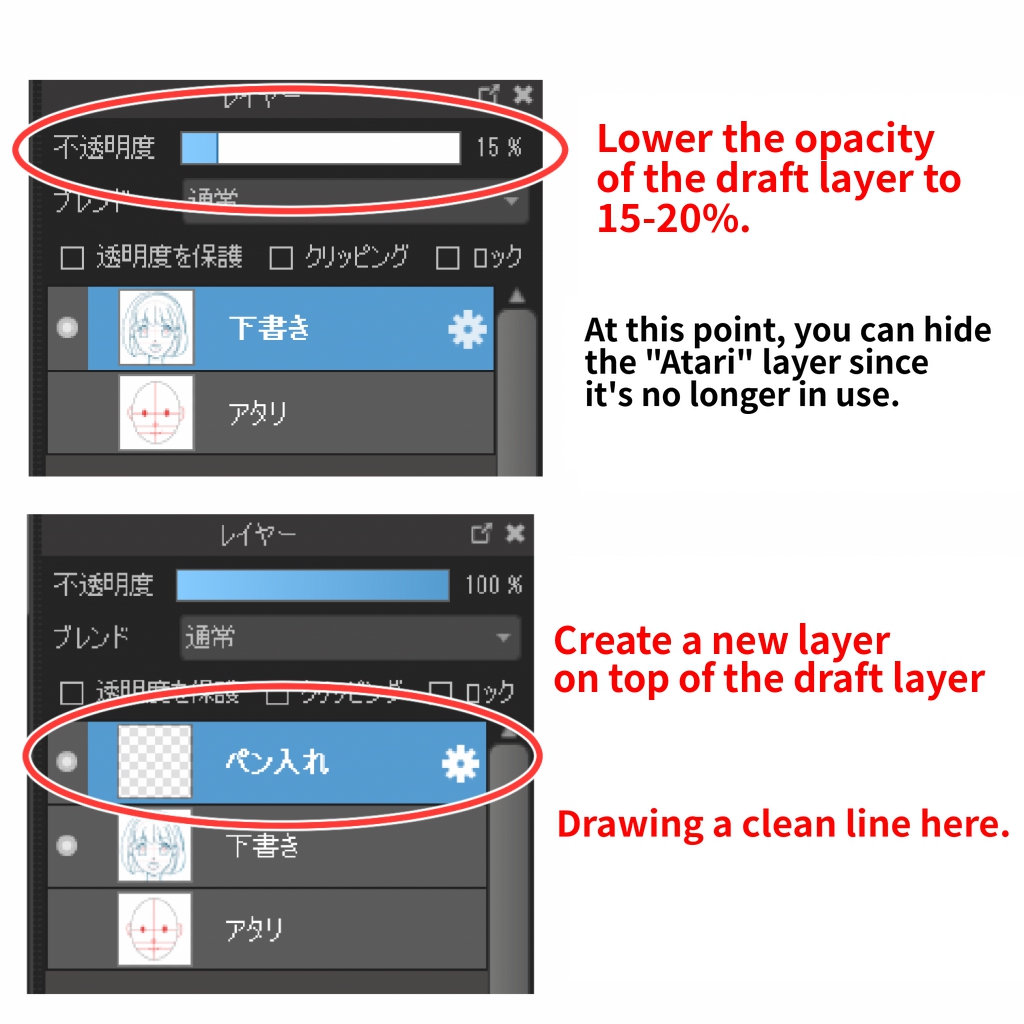
Lower the opacity of the layer on which you drew the “Atari” to 15-20%.
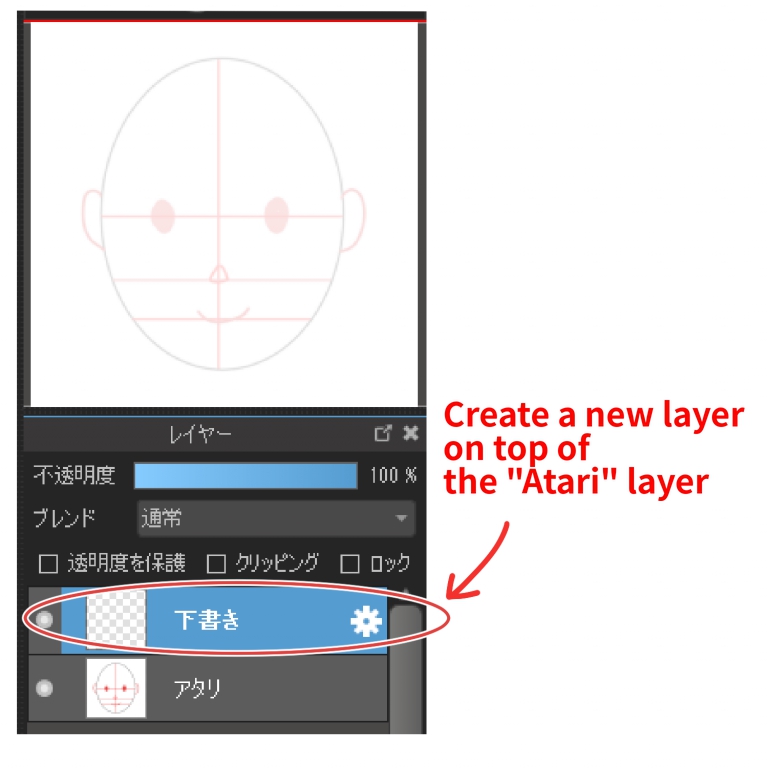
Create a new layer on top and draft it based on the “Atari” you made transparent below.
I can’t draw 100% of the picture as “Atari”, so I’ll draft it with some minor adjustments.
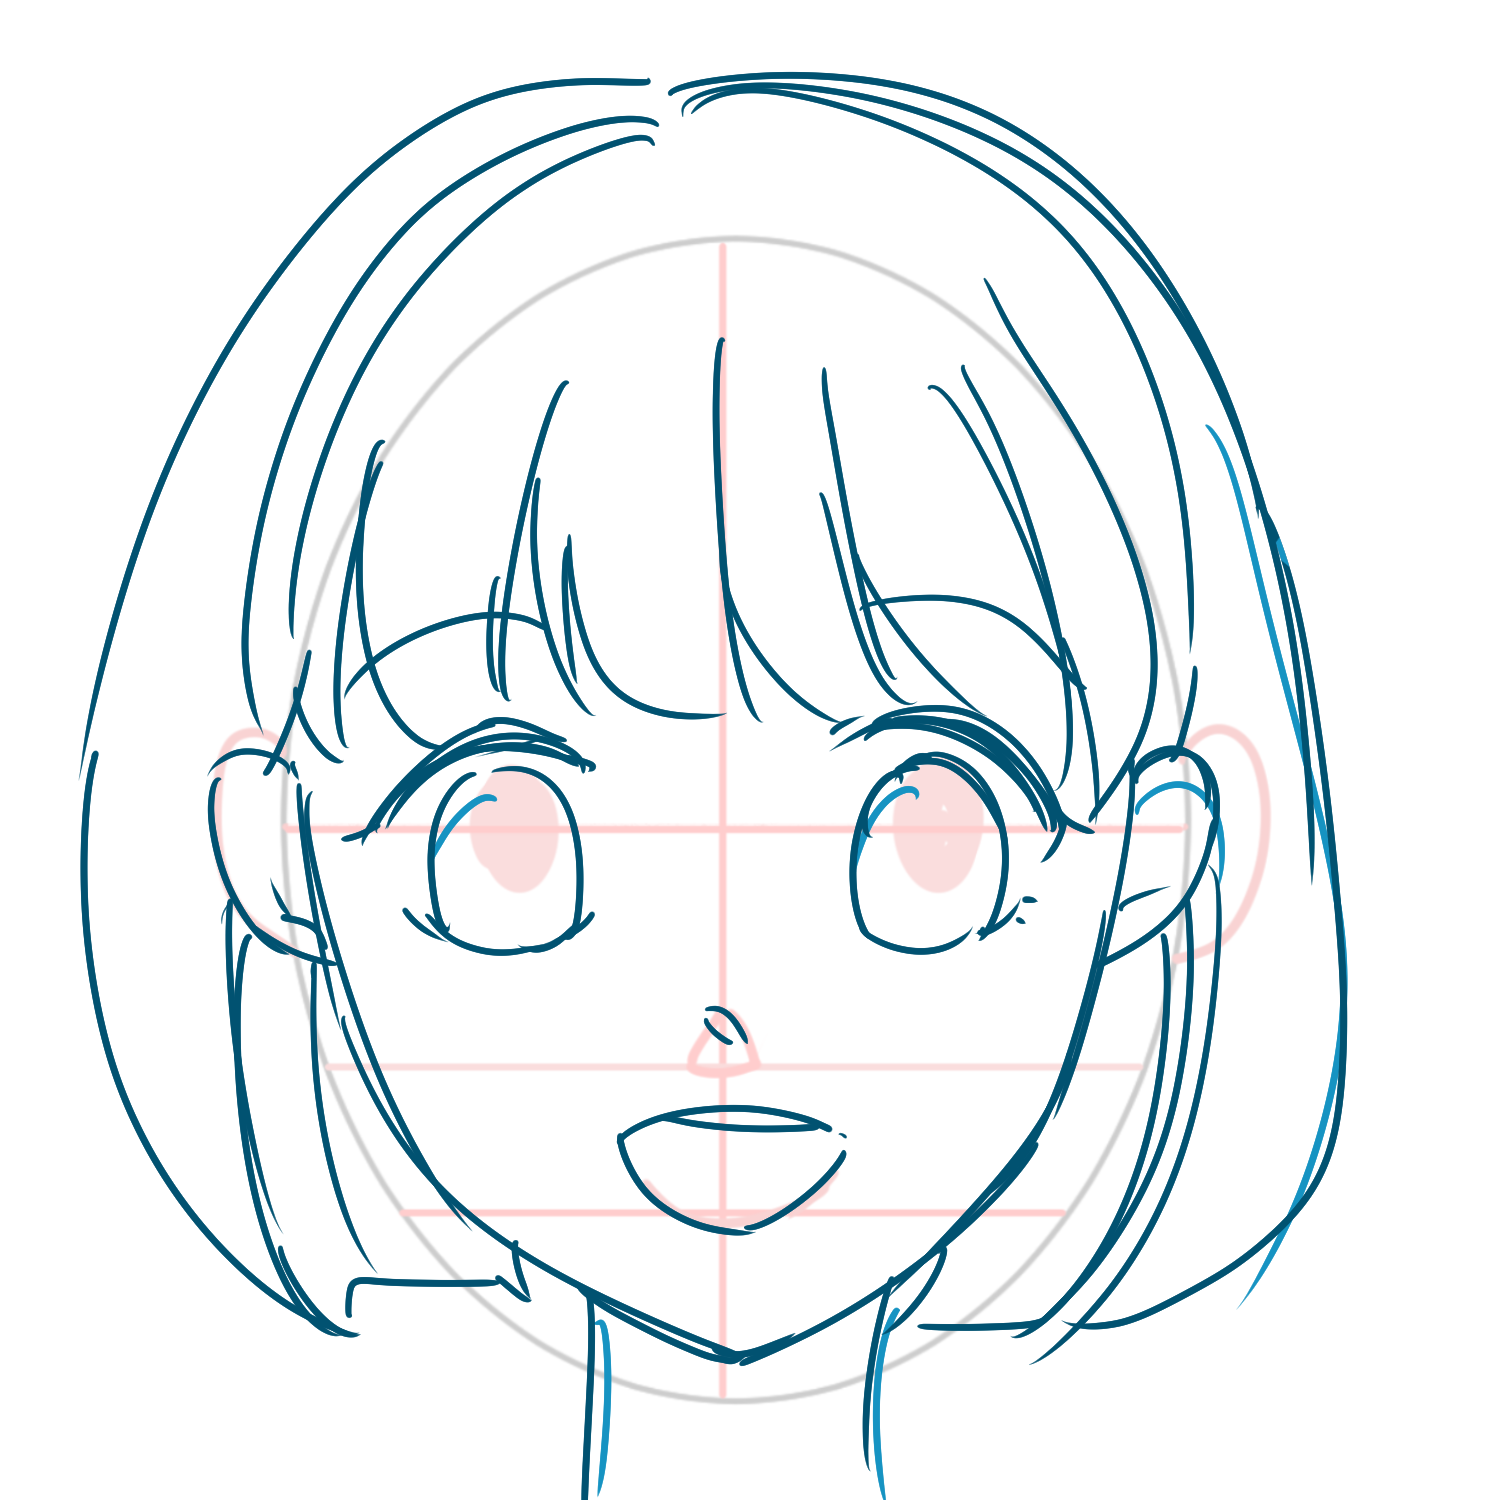
Once the draft is ready, create a new layer on top of it and pen it in.
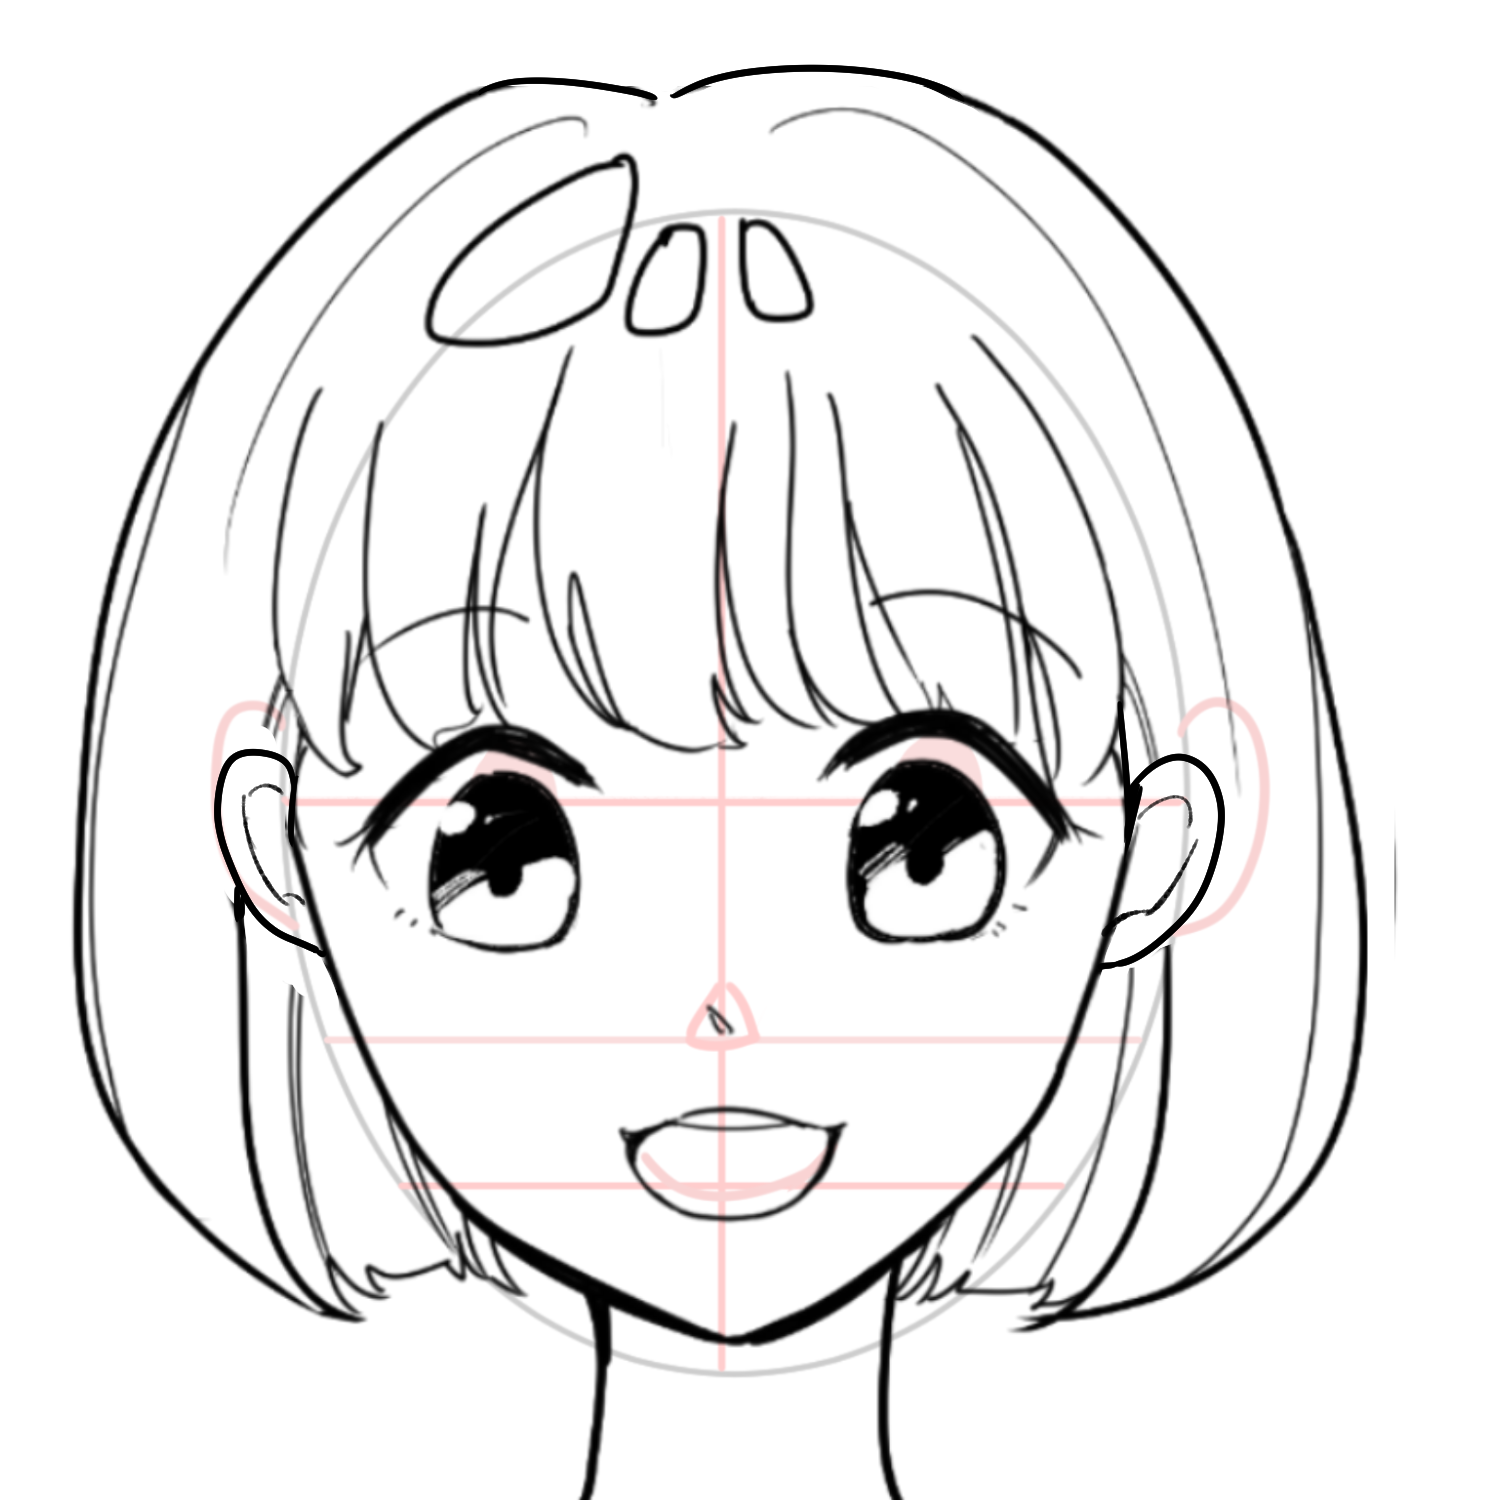
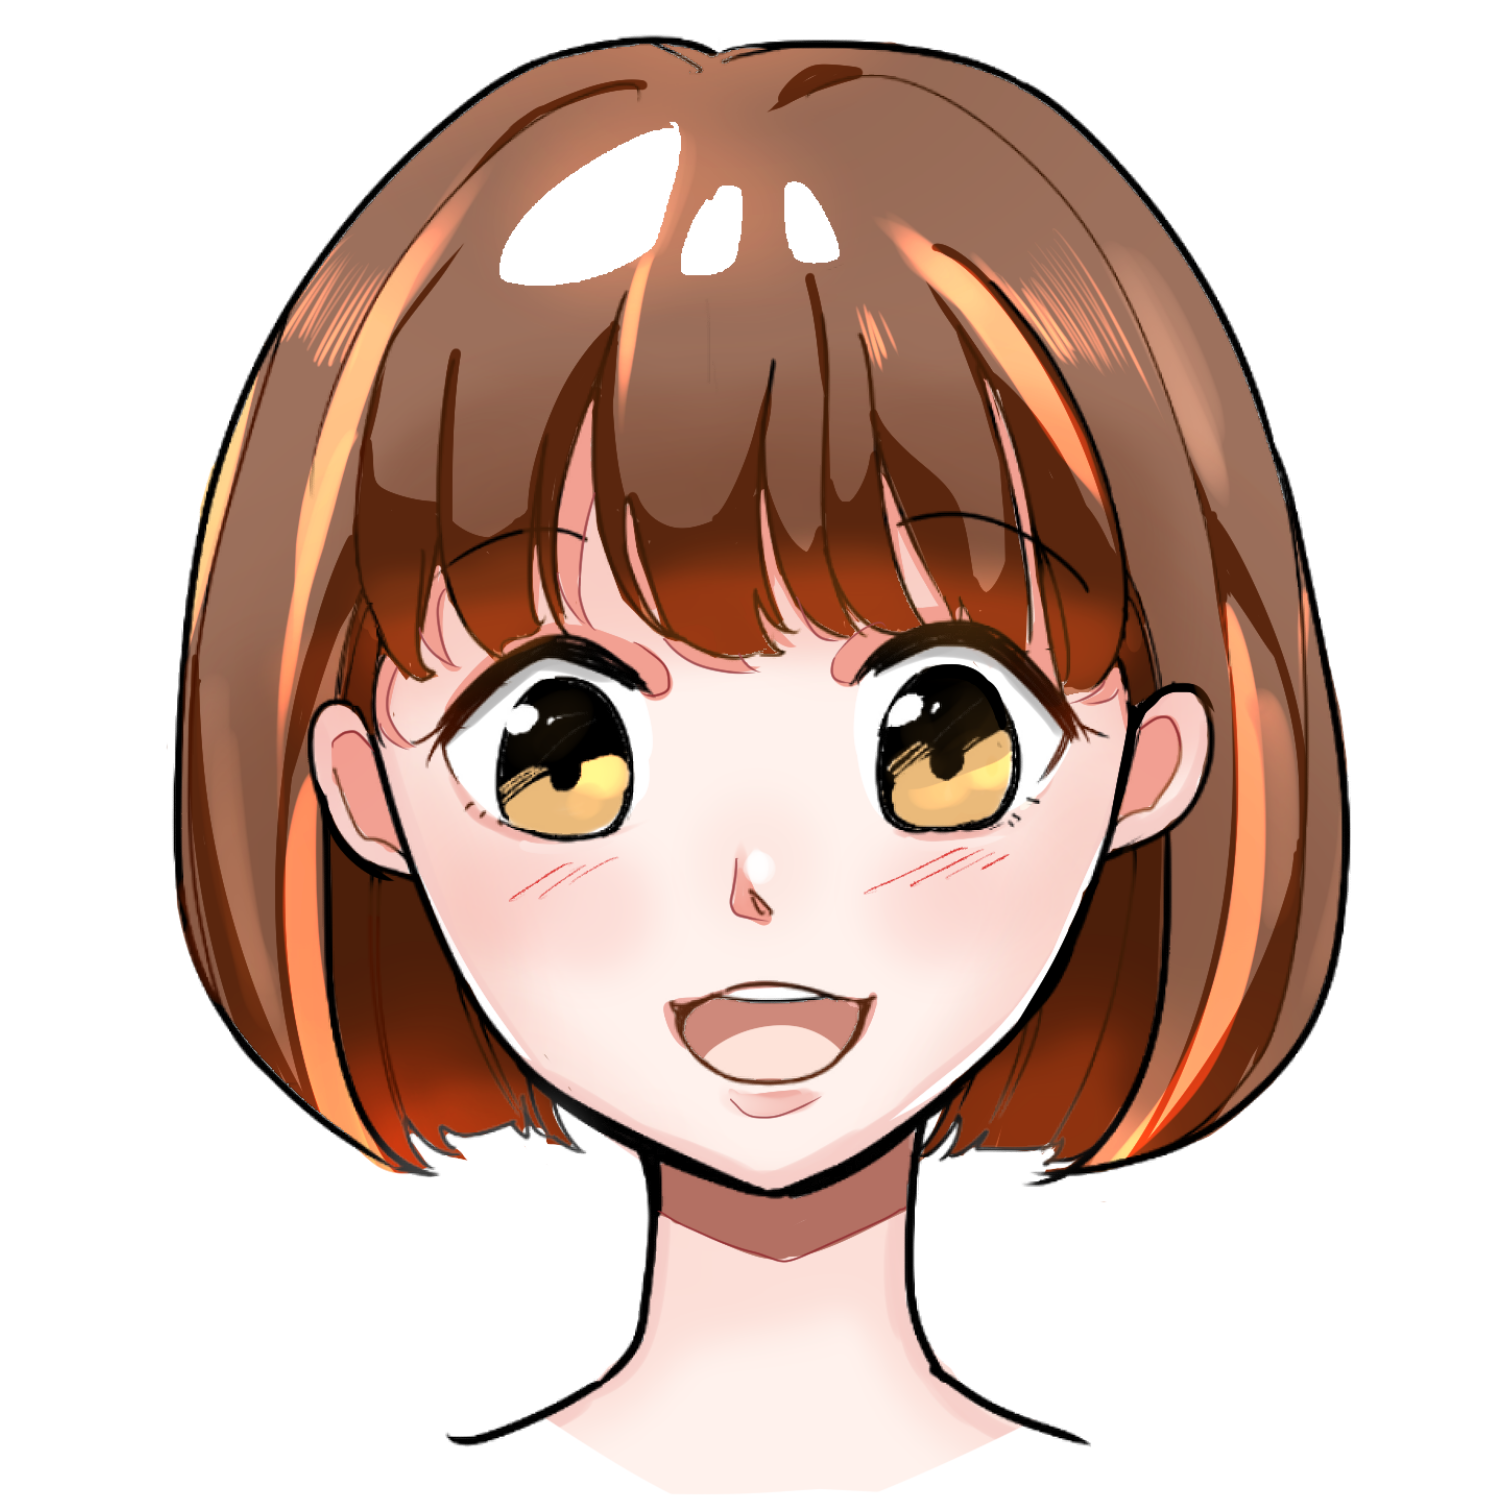
Color and you’re done!
What did you think?
Be aware of where each part of your face is located, and although it may seem a bit tedious, you’ll make much faster progress if you try to get a bite before you draw!
You must try it!
(Text and pictures by Naoko Harada)
・How to draw faces from different perspectives [overhead perspective]
・[Smile, cry, angry face] The key to drawing facial expressions and how to distinguish them.
\ We are accepting requests for articles on how to use /

