2020.11.18
First Digital Painting: What You Need to Know! What’s possible because of digital (rough and line drawings)
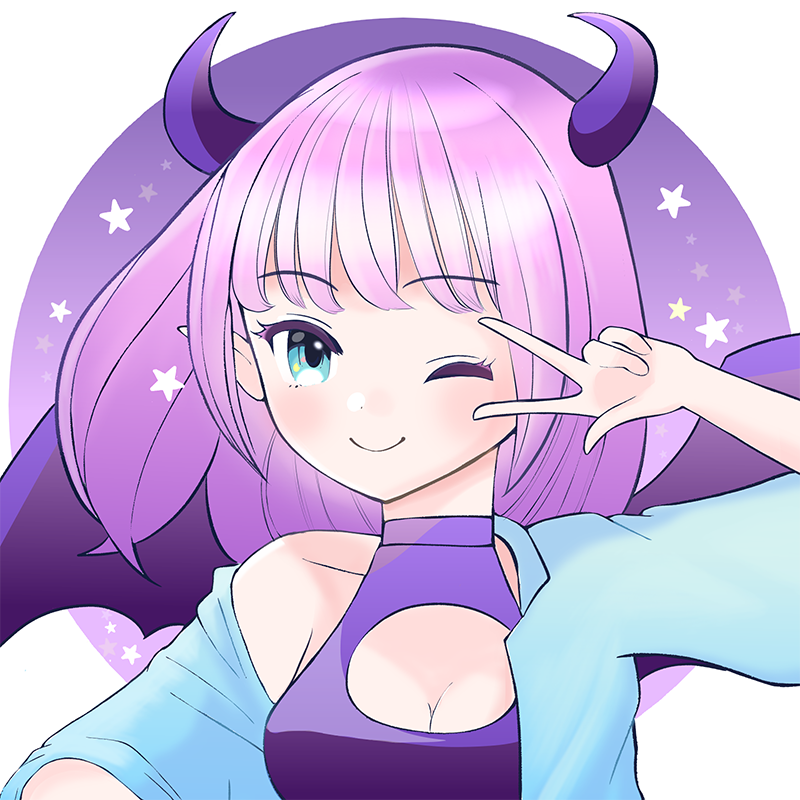
When you install Mediban Paint and start drawing digital illustrations, you may be wondering about “the difference between digital and analog”.
There are certain things that digital and analog can and cannot be done respectively.
One of the advantages of digital illustration is the convenient functions that can be used when drawing an illustration.
You can paint a wide range of areas at once, or easily change the color of the painted area.
Such convenient functions that only digital can provide make drawing an illustration easier and smoother.
Also, you can change the atmosphere of the picture by processing in the way that only digital technology can.
So, In this article, I’m going to take a look at the making of the illustration below and introduce the “Useful features that come with each step of the process because it’s digital”.
In this article, we’ll introduce the basic functions of the digital drawing process, so whether you’ve drawn an analog illustration before or you’re a newcomer to the field, please check it out.

1. Draw a rough draft
The first step is to draw a rough sketch in the same way as the analog illustration.
You can use “Layers” as a convenient feature to draw the rough draft.
【What you can do digitally: 1. You can lighten or easily erase just the rough draft.】
Mediban Paint and many other drawing software programs have a feature called “Layers”.
The Layers function allows you to draw on top of a transparent sheet, just like an animated celluloid.
If you use this function to draw the rough draft and the line drawing separately, you can make the rough draft lighter or erase it.
(1) A rough sketch has been drawn.

(2)Lower the opacity to make the roughness lighter and create a new layer.
【ipad】Layer Palette > “+” to create a new layer
【PC】Layer Palette > New Layer with the left-most paper symbol at the bottom
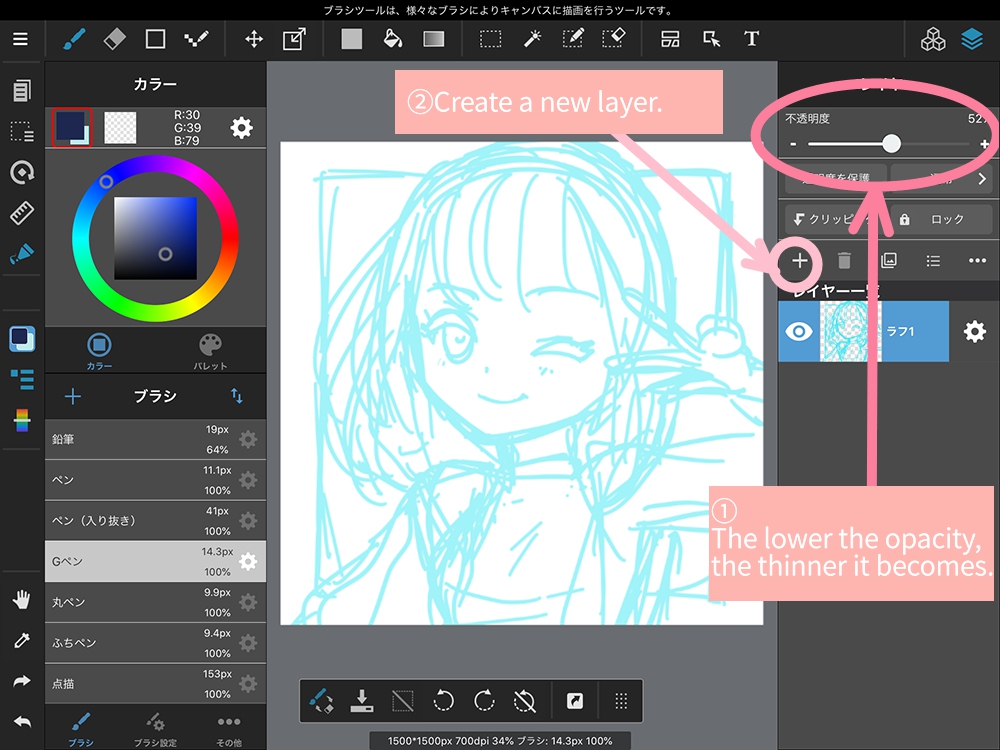
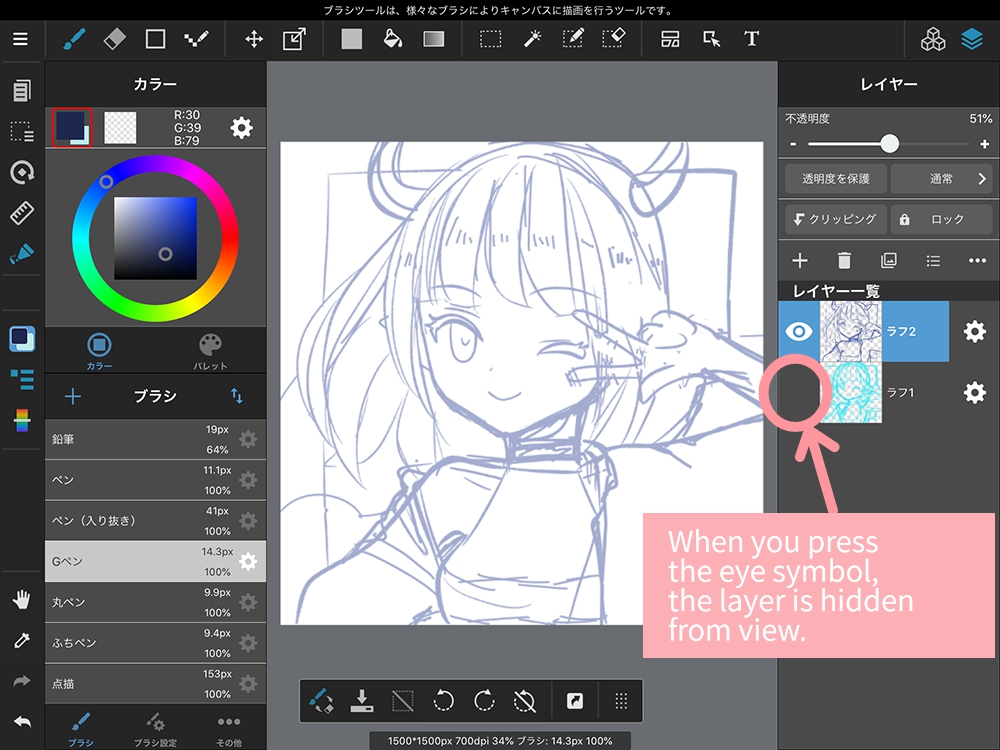
(3) Draw a more detailed line drawing on the new layer.

(4)Press the eye mark to erase the first rough, reduce the opacity and prepare to draw a line drawing.
※Press the eye mark again to view the erased roughness.
2. Draw a line drawing
Once the rough sketch has been drawn, it is time to draw a line drawing.
(1) Draw a line drawing.

【What you can do digitally: 2. You can choose from a variety of brushes even if you don’t have them on hand】
With digital, you don’t need to have a variety of brushes on hand, such as pens, G-pen, and round pens, to use them.
For line drawings, pens, pens (without inserts), G-pen, round pens and edge pens are probably the easiest to use.
Please try them all and choose the one that is easiest for you to draw.
By the way, I used the G Pen and the Round Pen in this illustration.
(2) Adjust or modify line drawings
Once the line drawing is completed, I will adjust and modify the parts that I am concerned about.
Here, I adjusted not only the lines but also the size of the characters.
Before Adjustment

after adjustment

【What you can do digitally: 3. Easy to redraw and correct lines.】
One of the features of digital illustration is that you can redraw or delete a line that has been drawn once.
You can draw a line first and adjust the shape of the line by using the eraser tool, which makes it easy for people who have difficulty drawing a line in one go to draw an illustration.
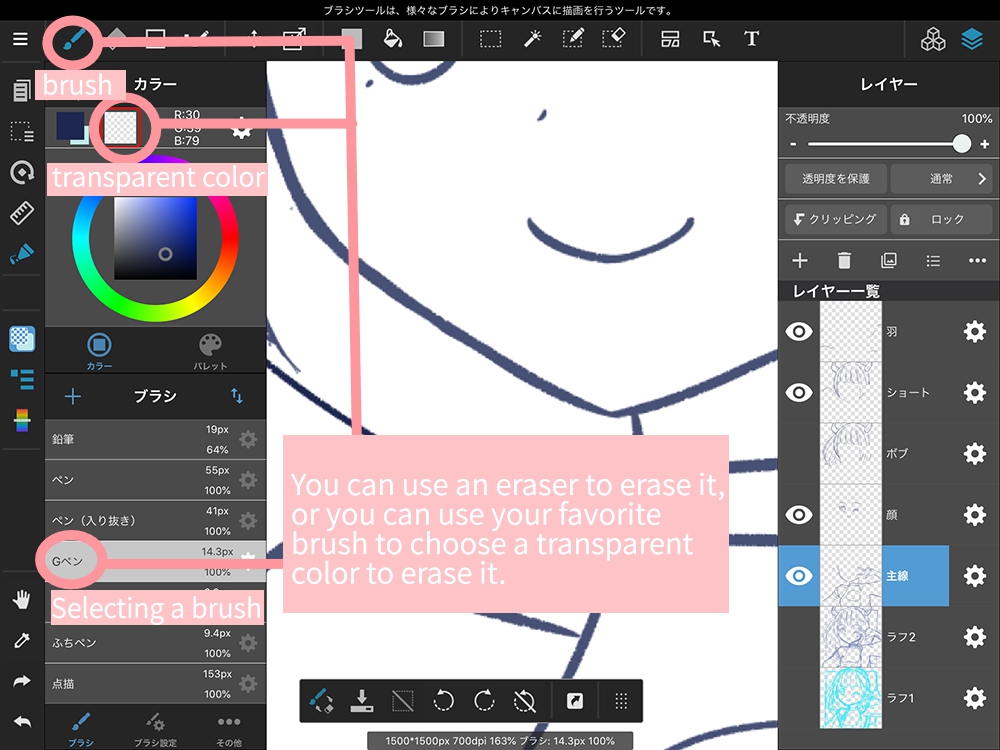
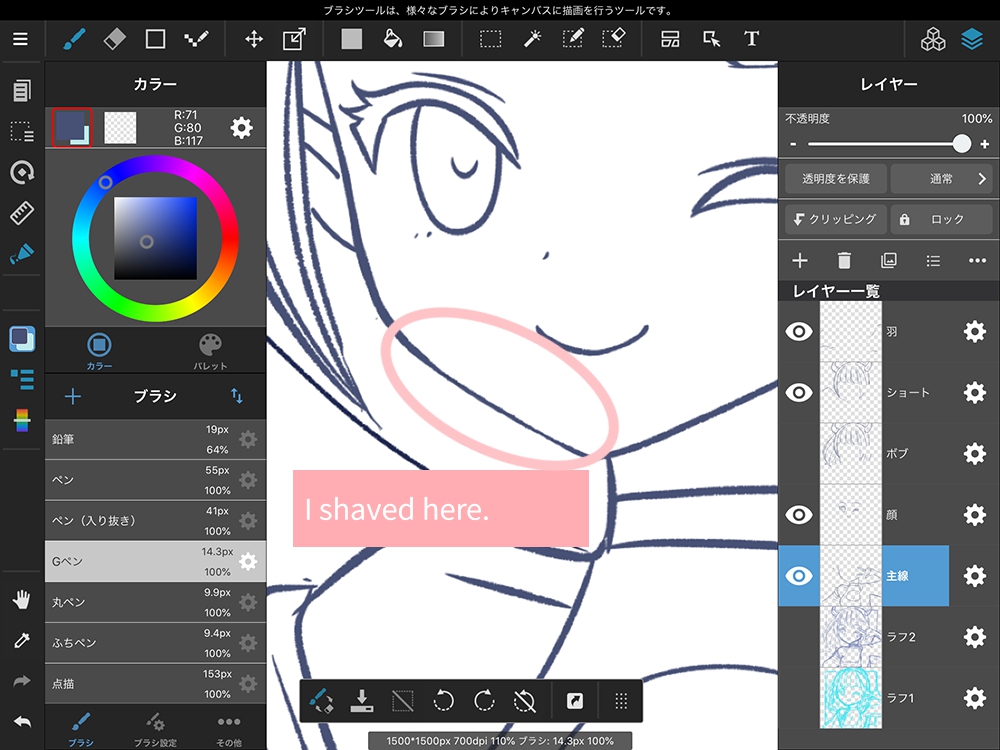
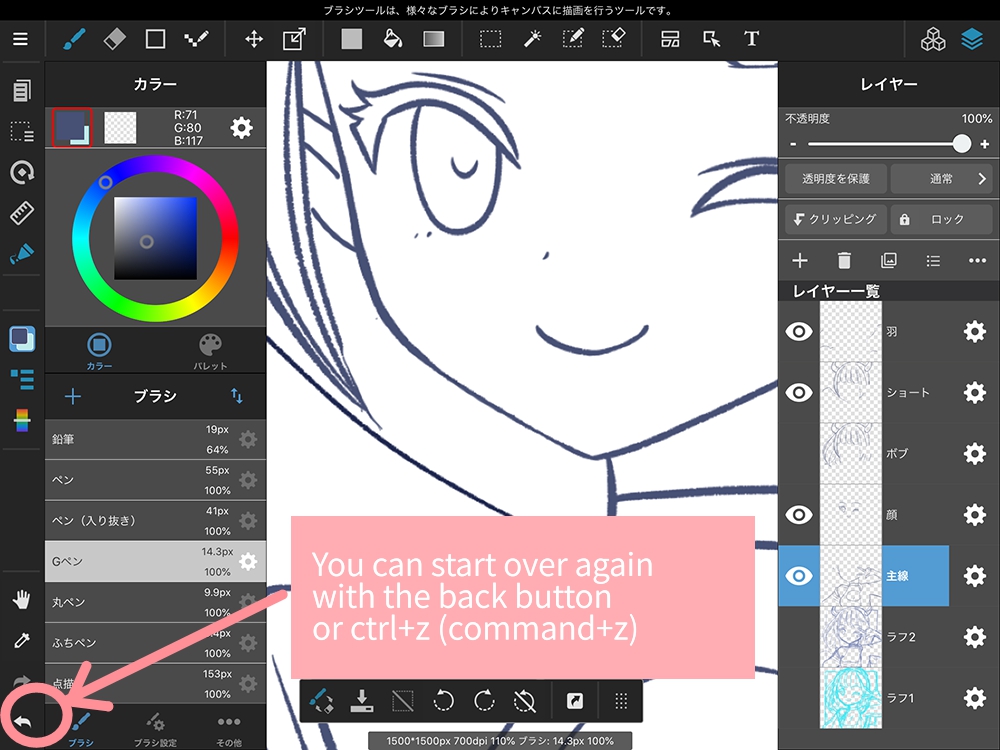
If you want to redraw it, you can use the back button or ctrl+z (commnad+z) to return it to the previous state.
If you want to adjust the shape and size of the line drawing, you can use the “Transform tool” or “Scale tool” to easily modify the shape and size.
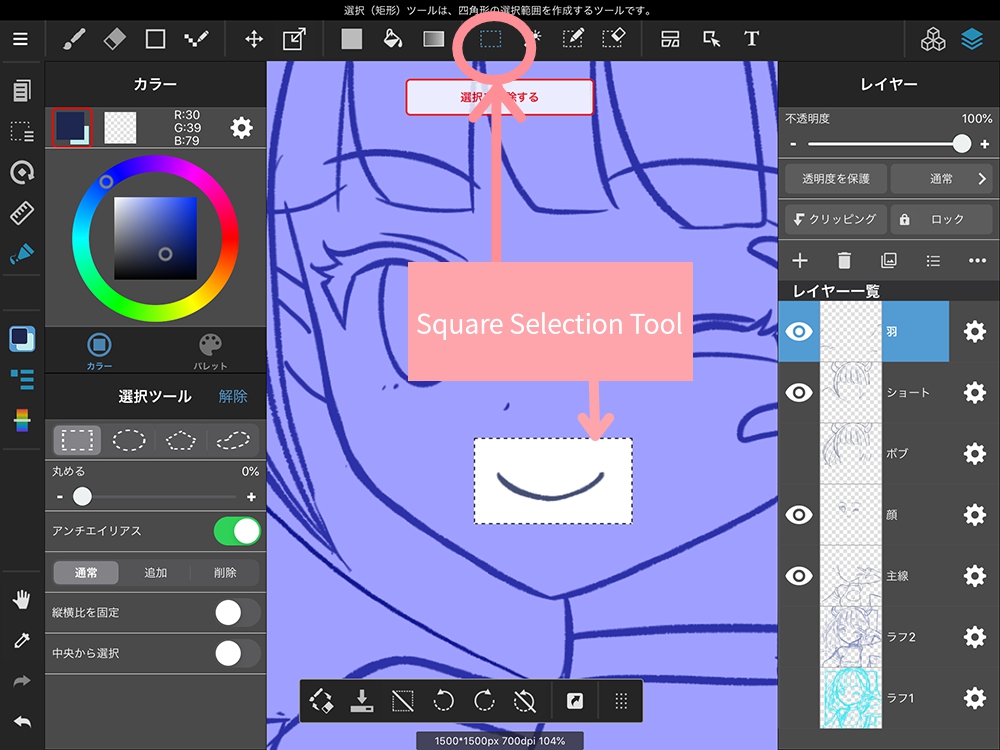
(1) Use the [ Selection Tool ] to select the area to be adjusted.
If there is nothing around you and it is easy to select, you can easily use the square selection tool.
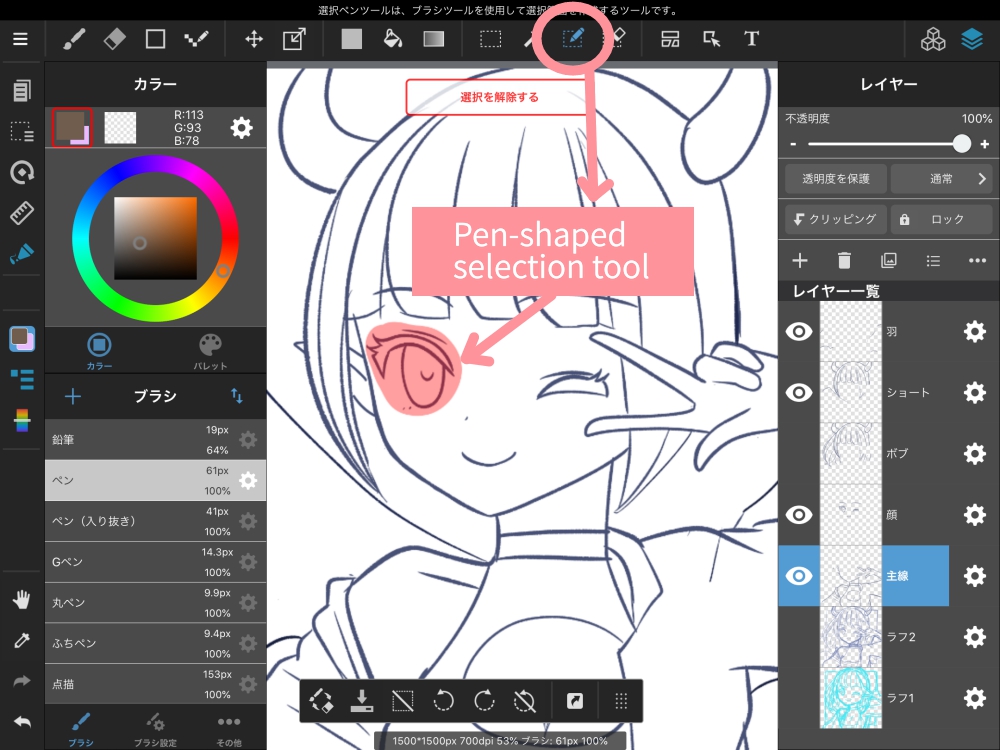
Use the pen-shaped selection tool if you’re likely to select things around it as well.
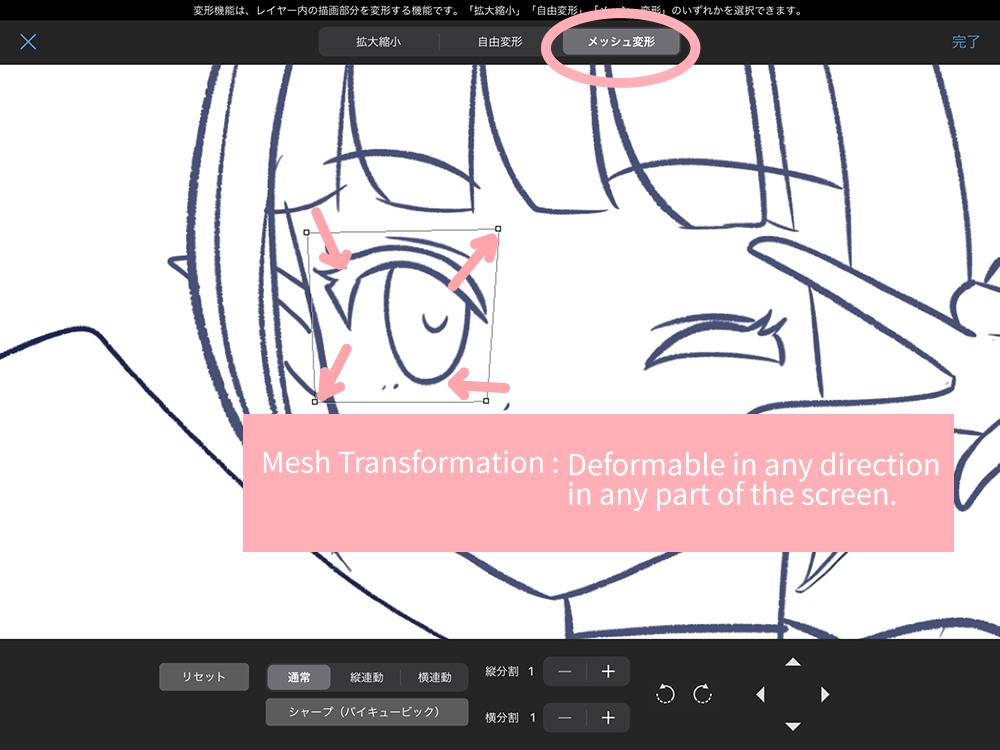
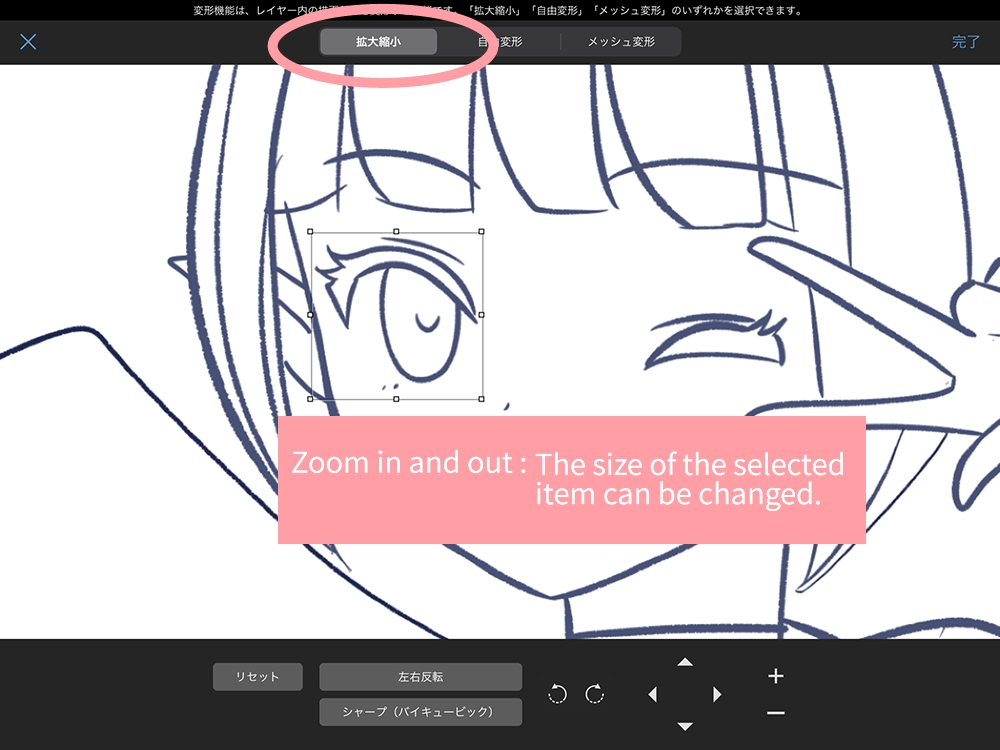
(2) After you select the area you want to transform, use the [Transform Tool] and [Scale Tool] to transform it.
<Transformation Tool>
The deforming tools include Mesh Deformation and Free Transformation, which are very useful when you want to modify a shape a bit.
<The Scaling Tool>
If you feel that the balance of your body or face is not quite right after drawing a line drawing, you can correct the size of the body or face by zooming in or out.
【What you can do digitally: 4. Can try different patterns.】
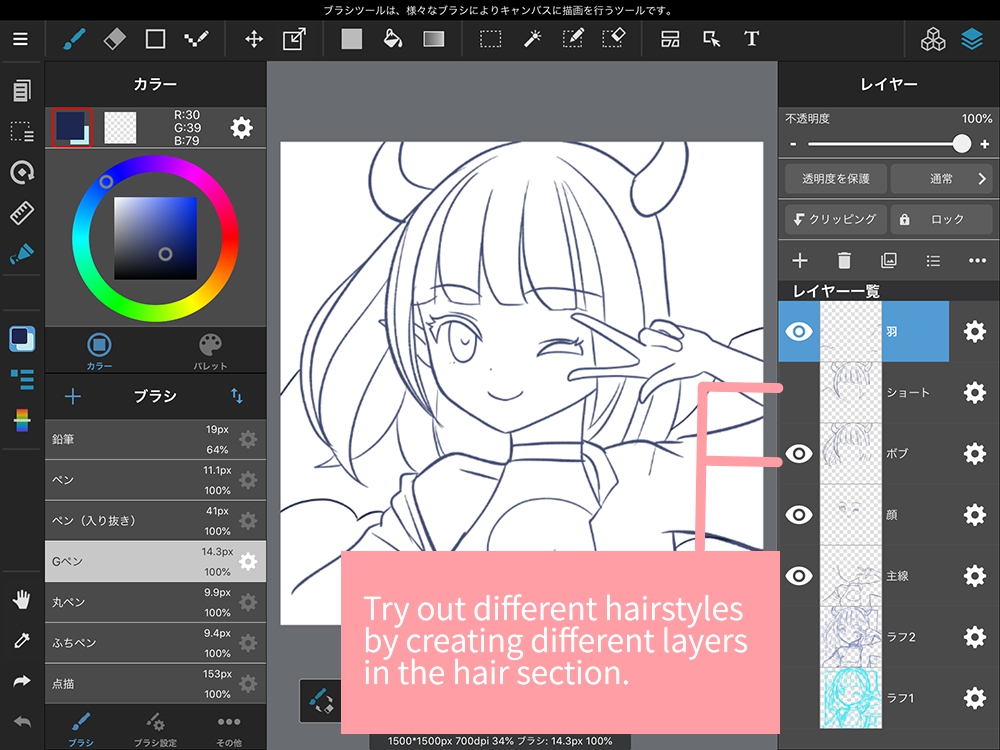
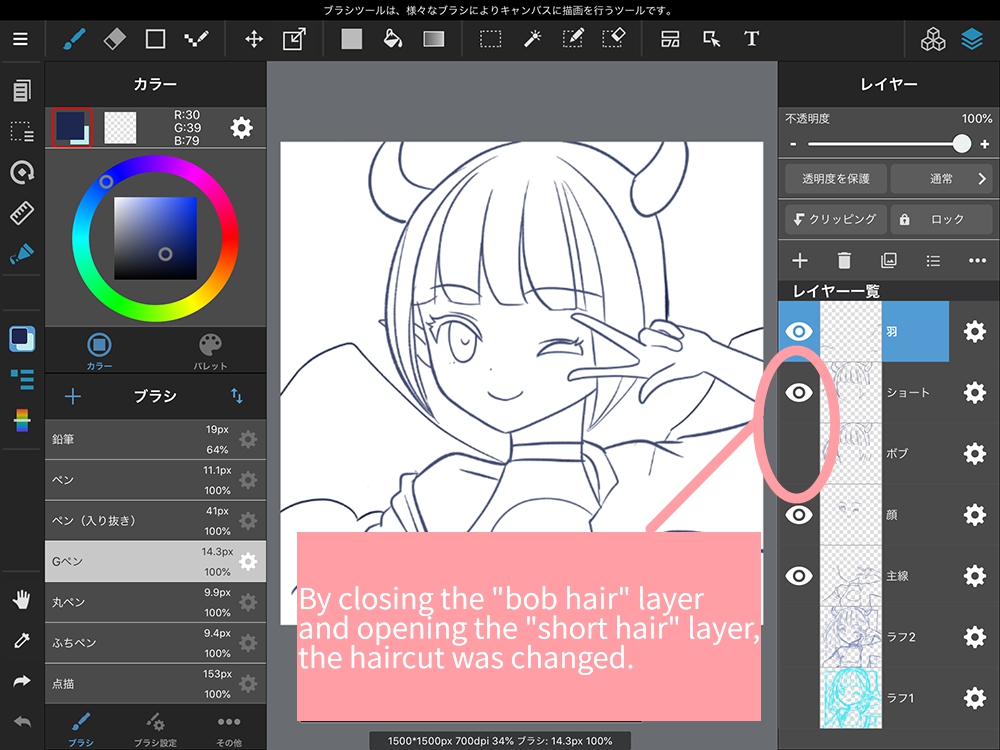
If you find yourself thinking, “I drew a line drawing, but I think my hair would have been better with that haircut,” you can try different patterns by drawing the part you want to change on a different layer.
For example, you can duplicate a layer and only redraw the arms on the upper layer. (The bottom layer should be hidden from view by pressing the eye symbol.)
Also, if you want to change the hairstyle or pose later, you can create different layers for different parts.
Layers can be merged later, so if you are prone to changing poses and other aspects of your image, I recommend separating them.
In this article, I will introduce the line drawing process.
In the next article, I will continue to show you what you can do with the coloring and finishing process because it’s digital.
If you find it useful, please check back next time.
(Text & Pictures by sakaki)
\ We are accepting requests for articles on how to use /


