2022.07.20
Burst into Flames! Let’s draw realistic flame effects using the Watercolor Brush!
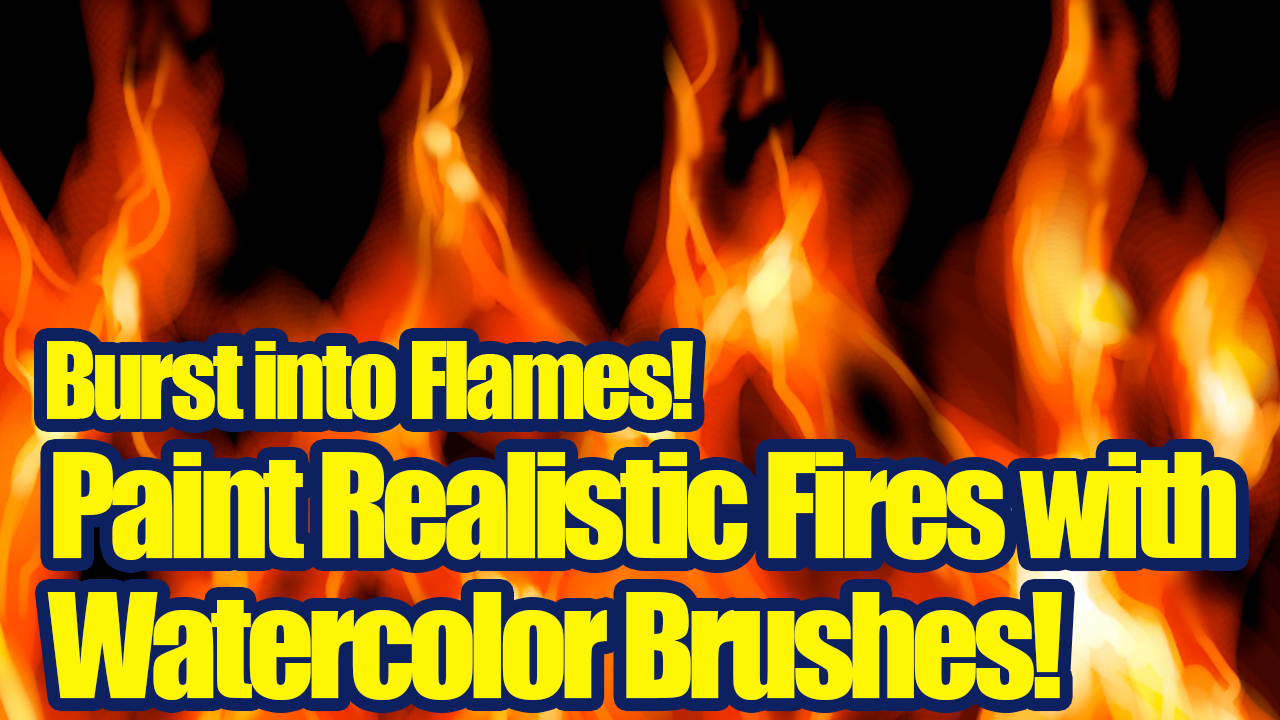

It’s always nice to add various elemental effects to your illustrations.
They are also useful in backgrounds, depicting characters’ emotions and filling empty spaces!
For this tutorial, I will be explaining how to draw realistic flames that can be used in many areas.
If you follow the steps I show you, anyone will be able to draw the realistic effects ♪
1.Import the image as a layer
Once you get used to it, you can draw the effects without a draft but I recommend that you practice using a sample image. Let’s import an image of the burning flame.
Before you start off, download your favorite image of a fire and save it on your device.
Let’s create a new canvas.
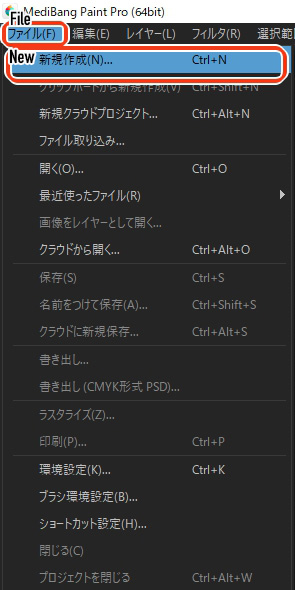
Open the MediBang Paint application, click on the File tab to choose “New”.
Adjust the settings to your liking, click OK and now you have a new canvas.
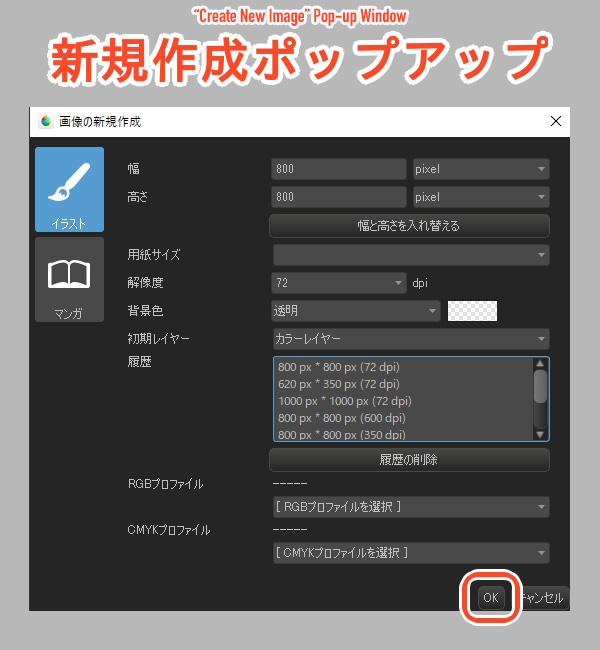
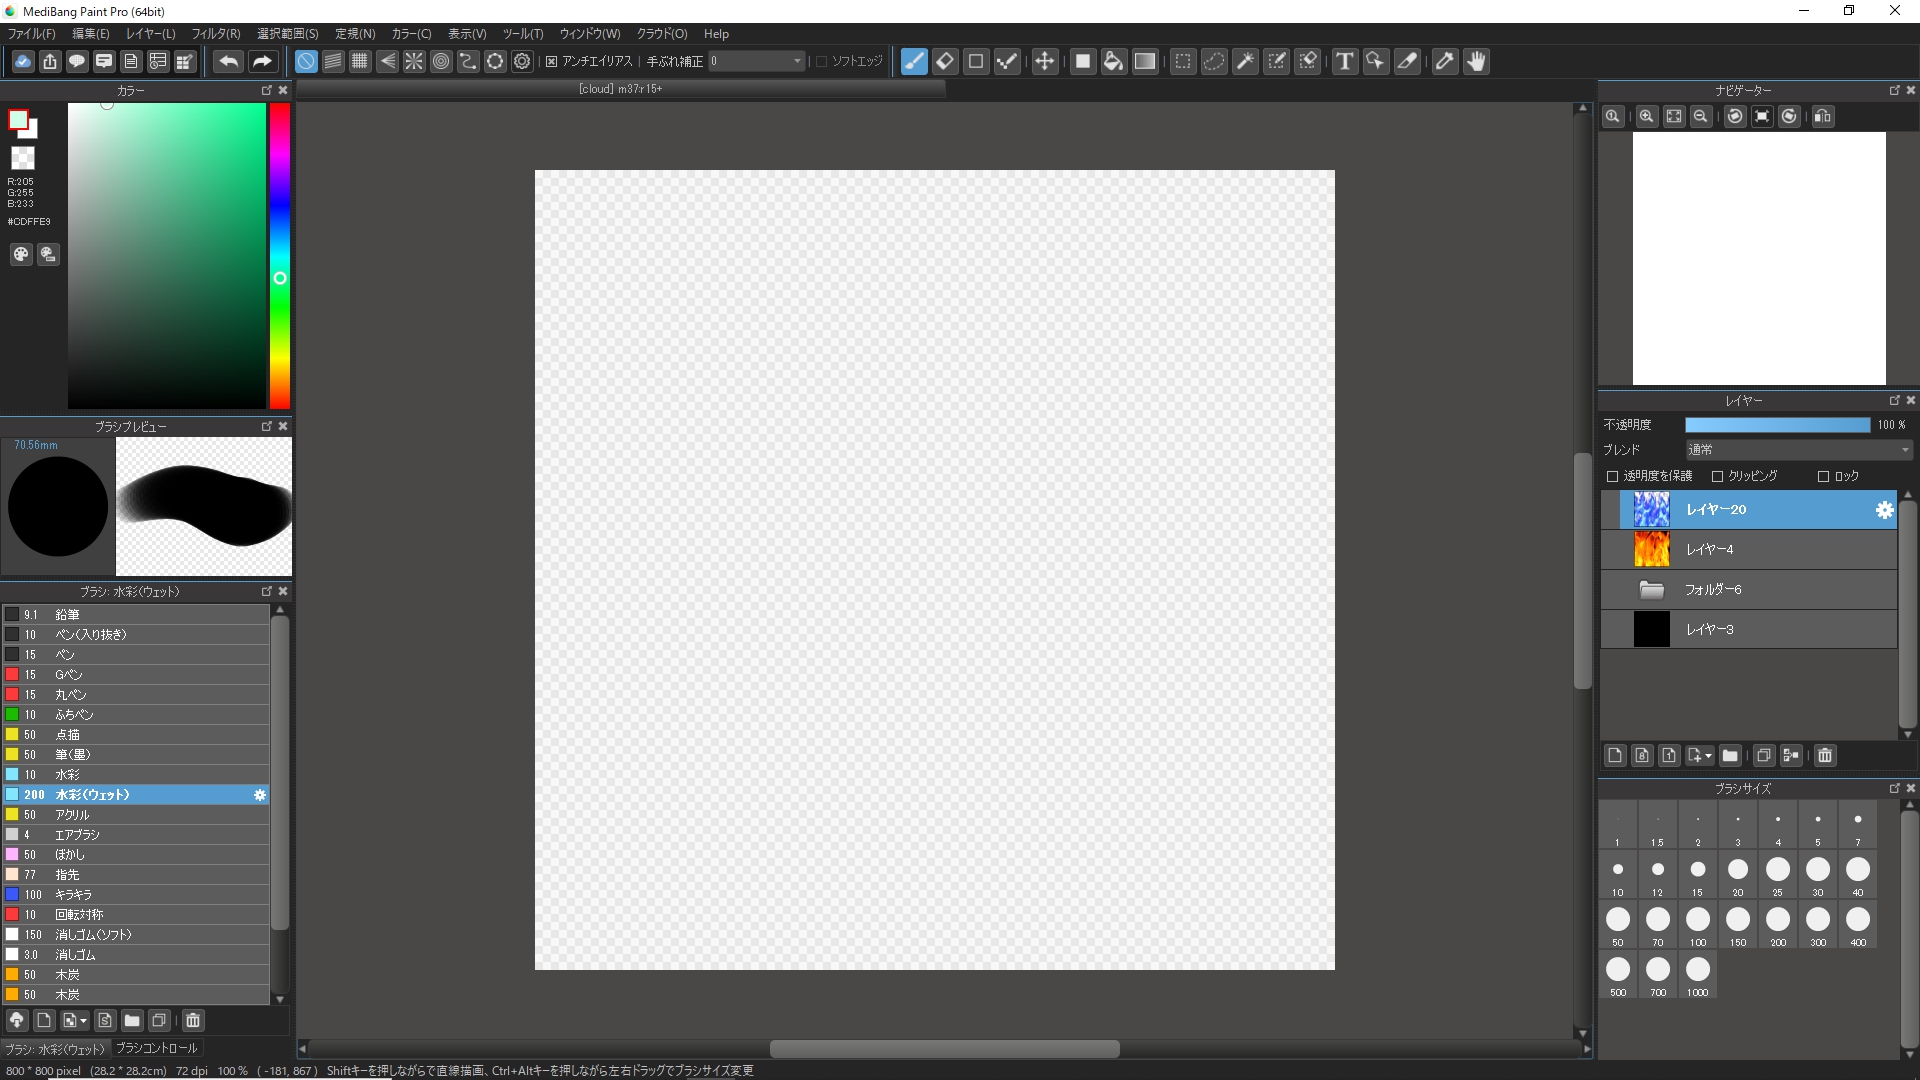
Next, import the image of flame you want to use for reference.
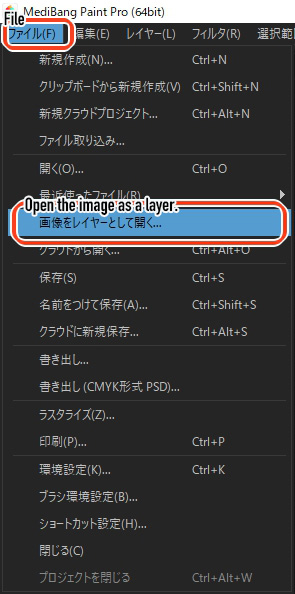
Go to the File tab again and this time, click on “Open the image as a layer.”
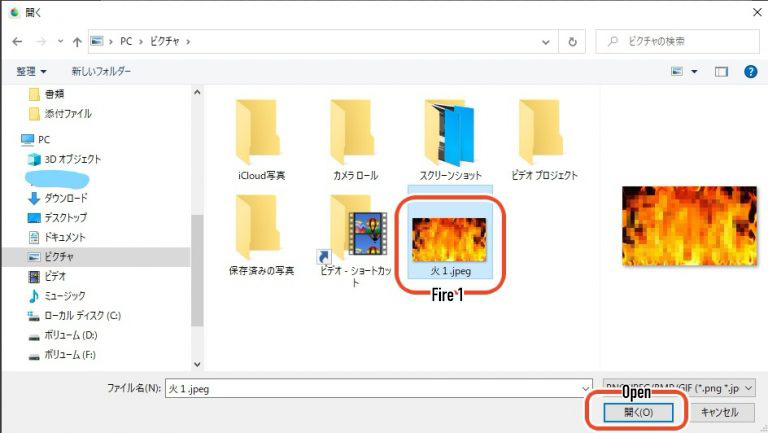
Then a window will open and you can select the photo you downloaded. Proceed to the next step with “Open”.
(※The image is slightly blurred since I retrieved it from the web.)
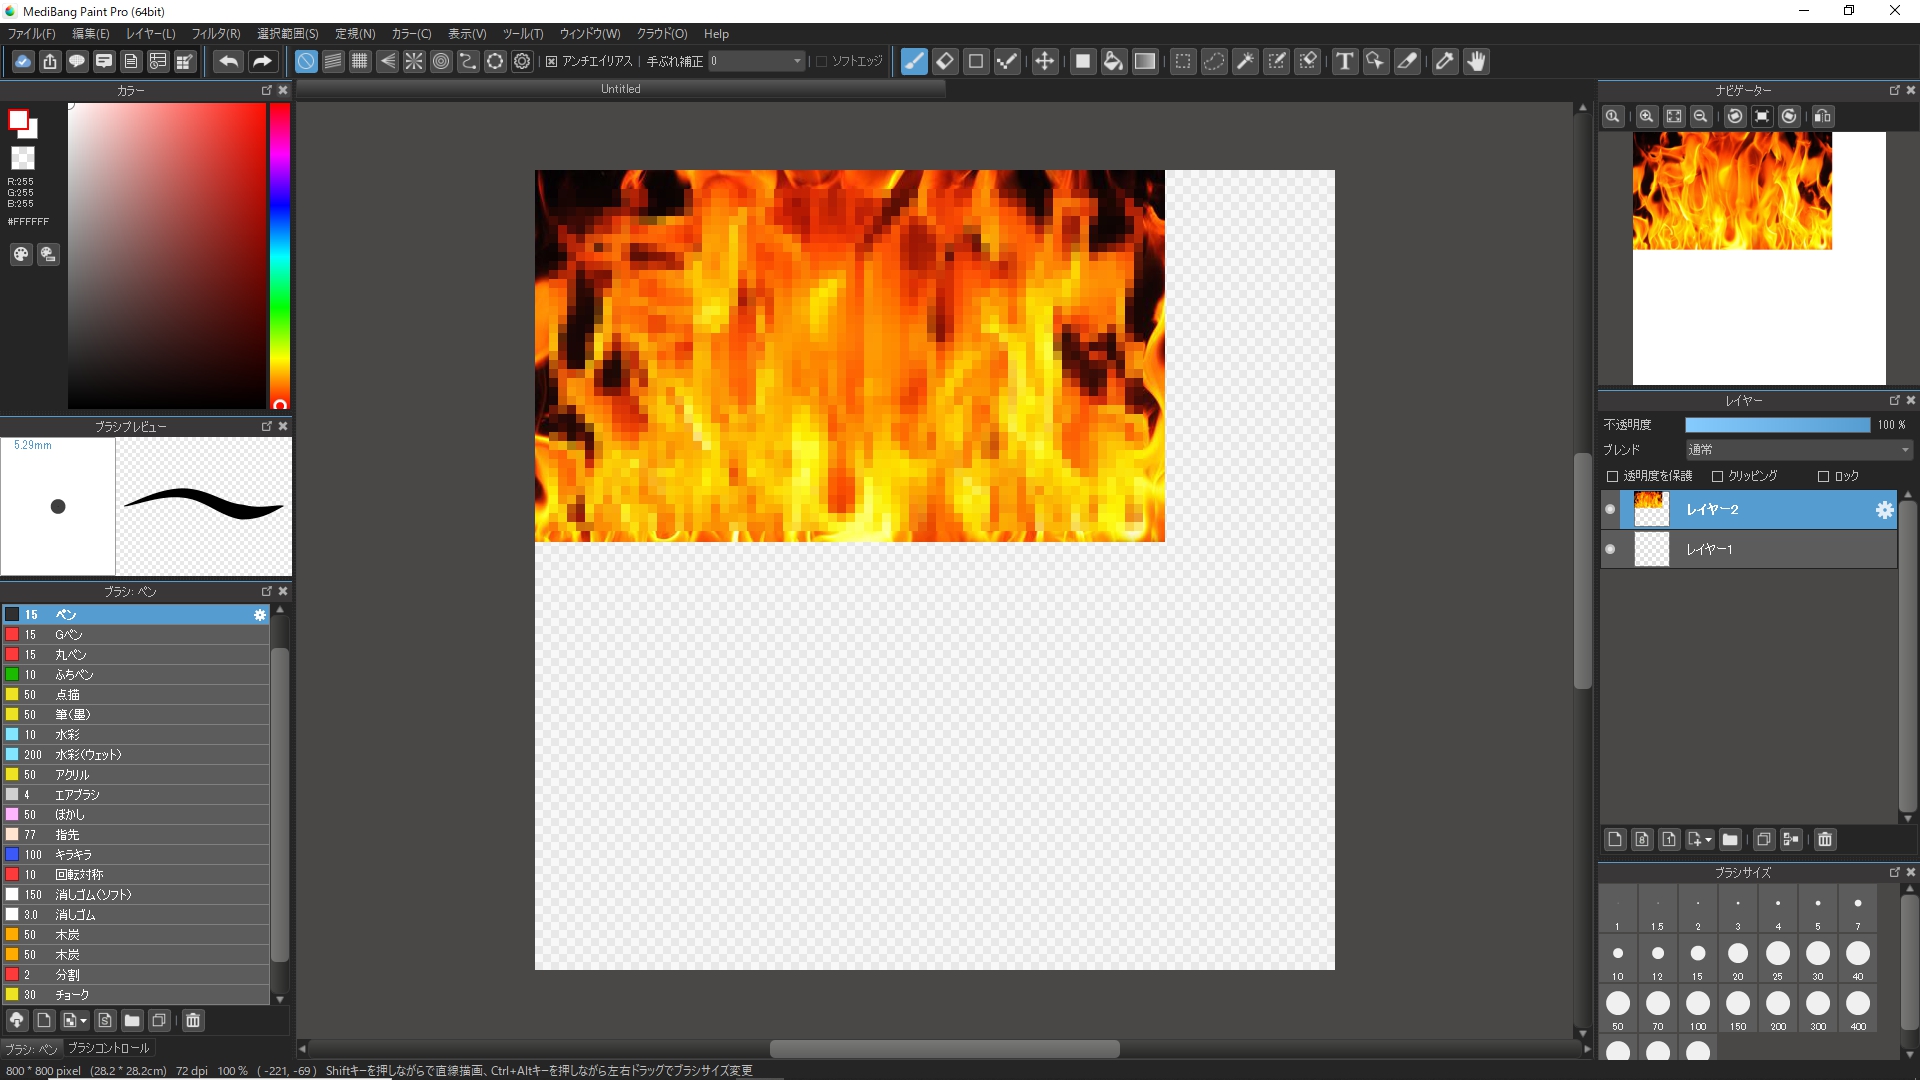
Now the importing process is complete.
The image is a little smaller than the canvas size so let’s make it bigger.
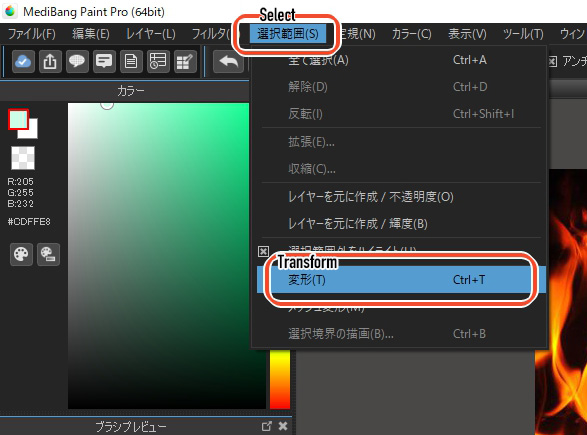
Go to the Select tab and click on “Transform”.
Then a rectangular window will appear below your sample image as shown in the following screenshot.
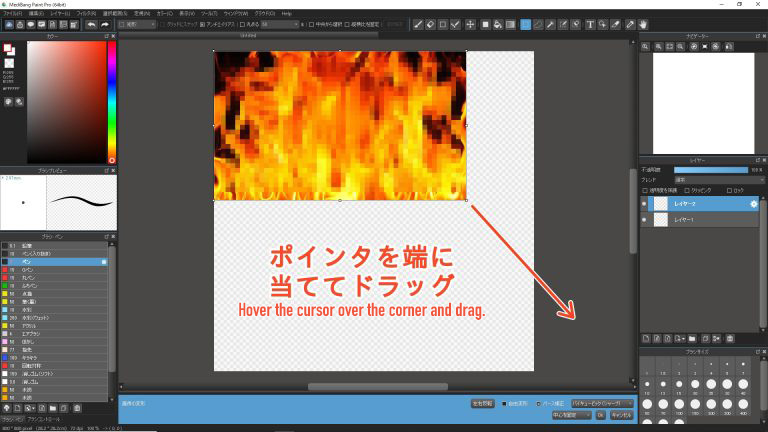
When you hover your mouse to the corner of the image, the cursor will change to an arrow cross. Drag your image diagonally with the cursor on arrow cross mode.
Once it’s large enough to fit the canvas, click “Ok”.
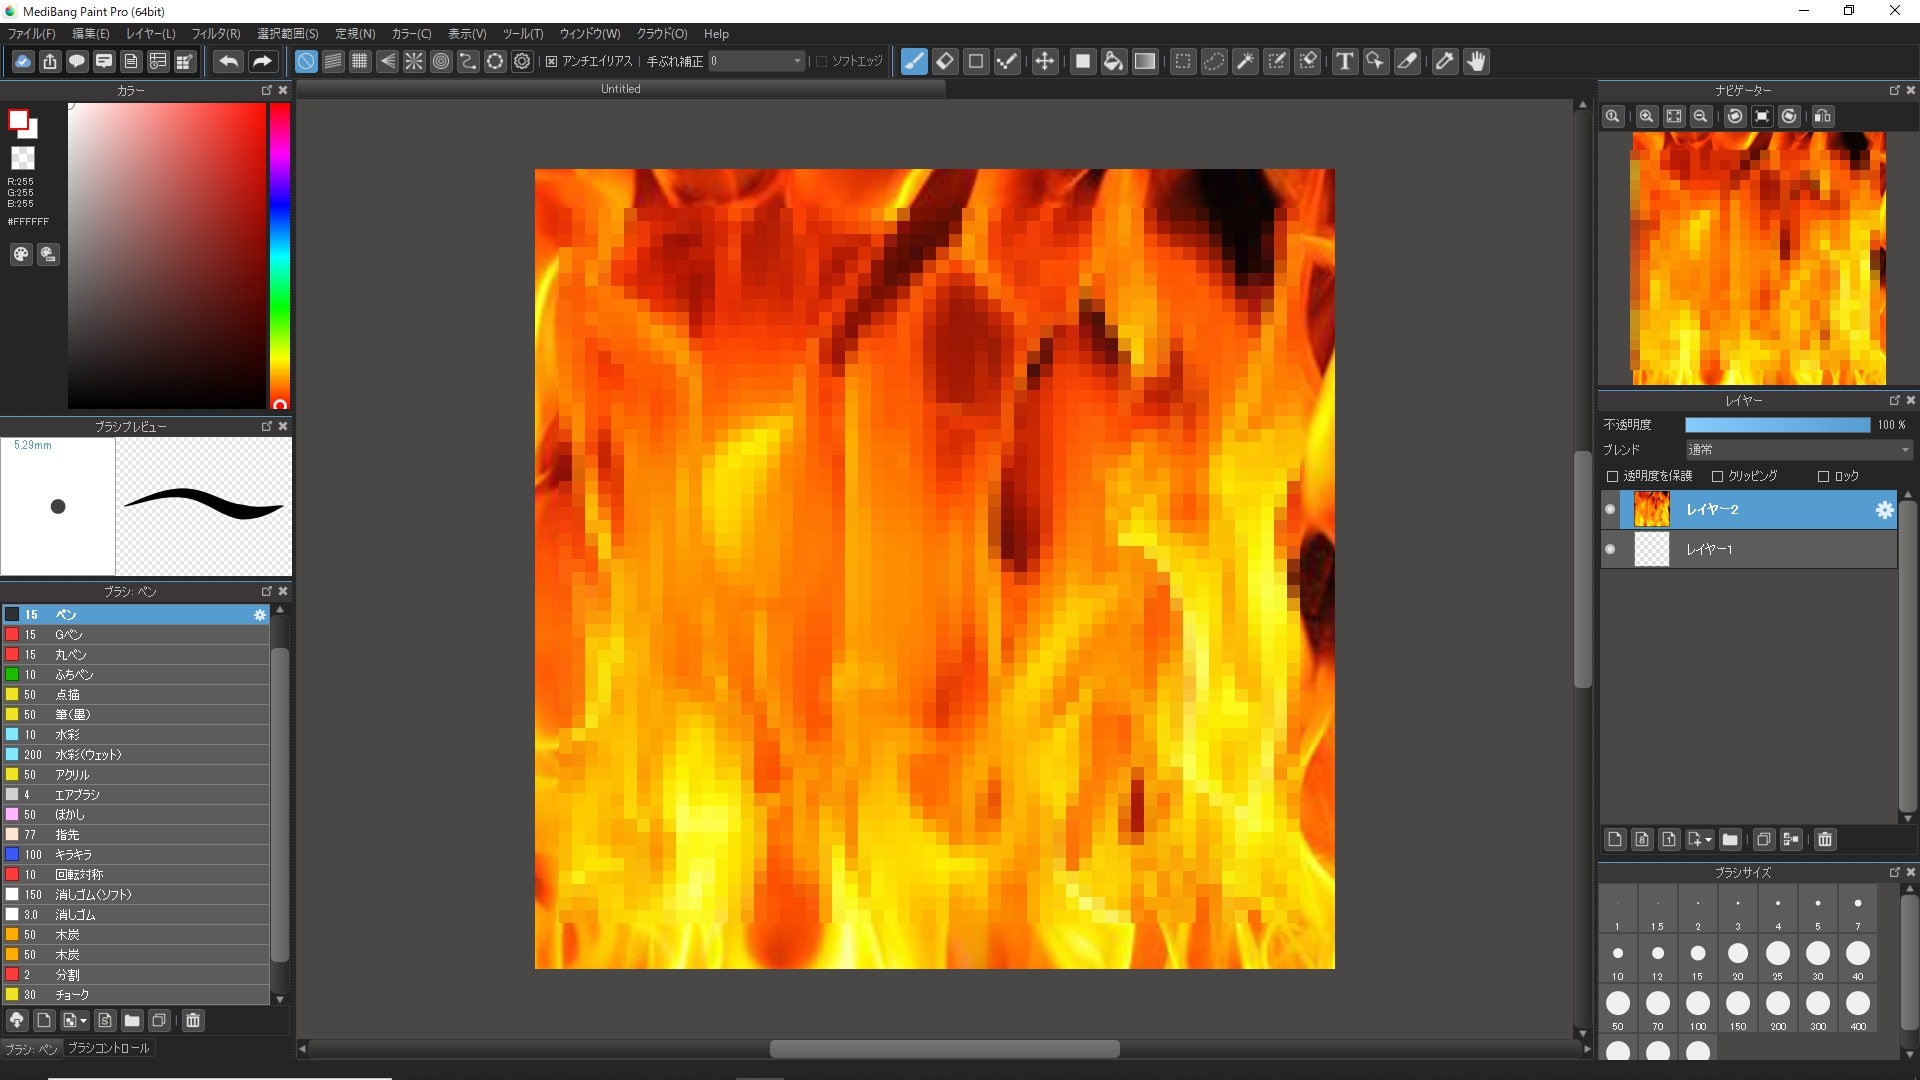
The image has been enlarged enough to fill up the canvas.
2.Draw flames using the Watercolor Brush
Now that the sample image has been imported, let’s start drawing the flames.
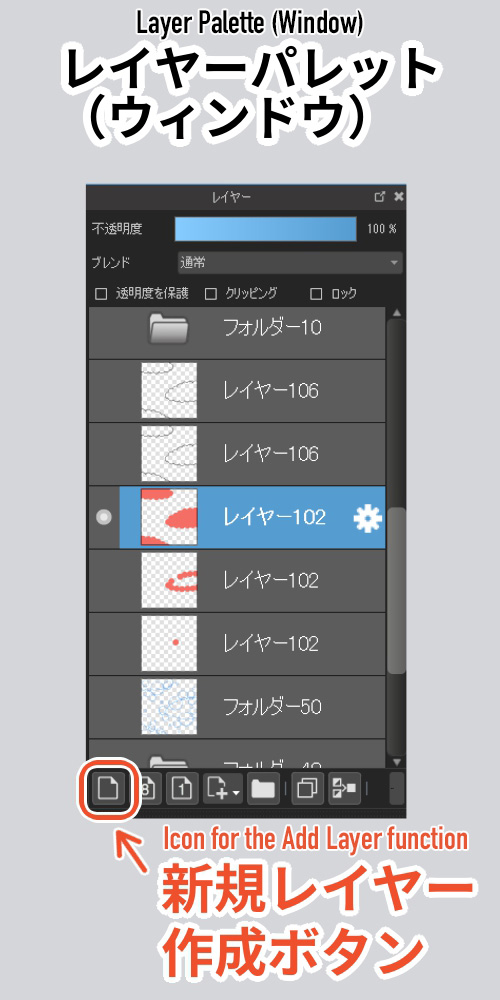
First, begin by adding a new layer.
You can create a new layer quickly from the layer window!
Return to the previous layer with the sample image and using the “Eyedropper Tool”, hover your cursor to the image to click on a dark red color.
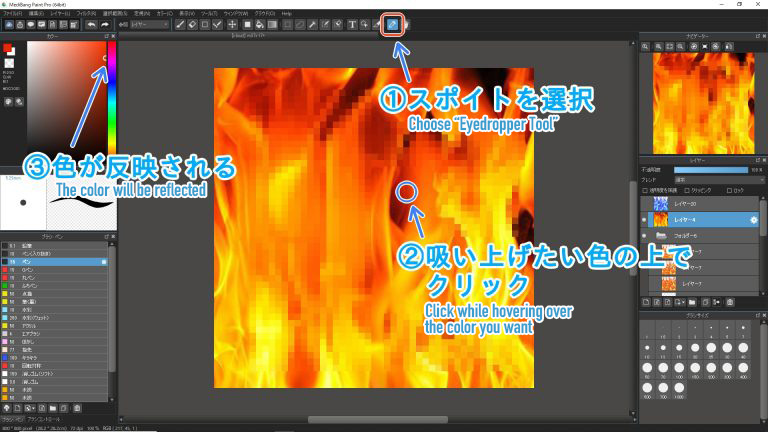
The Eyedropper Tool lets you choose any color available on your screen. (You must have the Color window open to see if your chosen color has been reflected properly)
Once you have selected the color you want, hide the layer containing the sample image.
I will now start drawing the base of the flame effect on the newly created layer, using the dark red color I selected.
Choose “Watercolor (Wet)” from the Brush Tool.
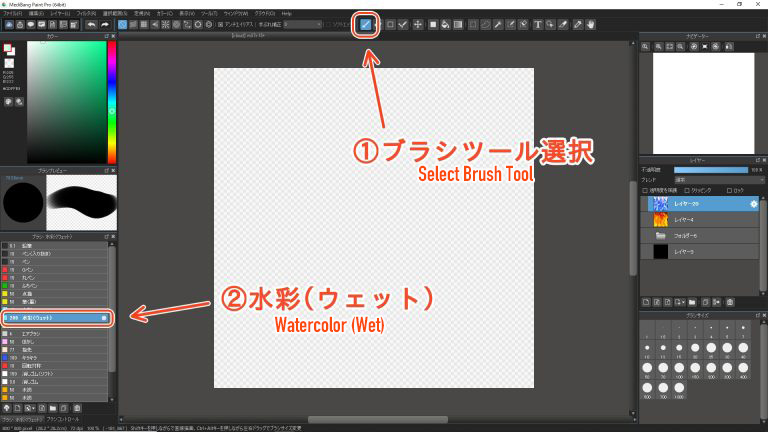
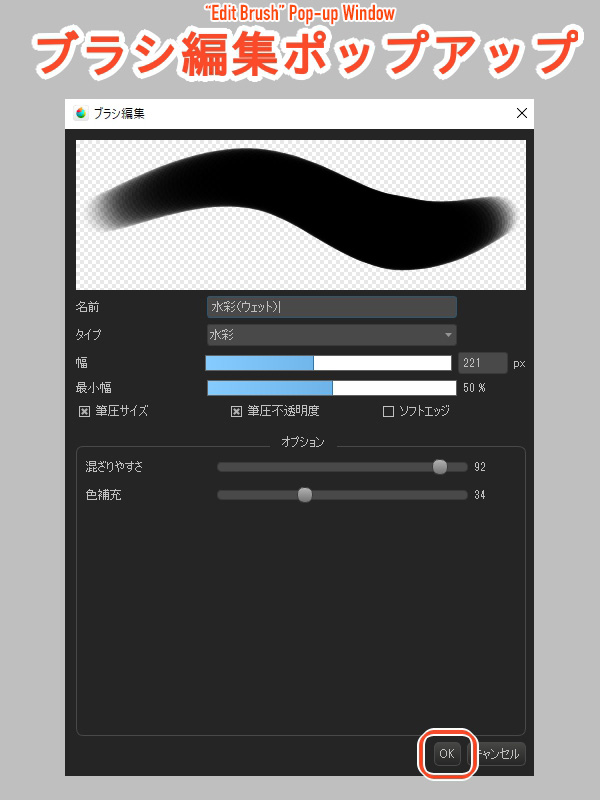
When you click on the gear icon next, a settings window will pop-up. Set your brush size to a fairly large width, adjust your options and click OK.
First, draw a few lines of the wavering flame.
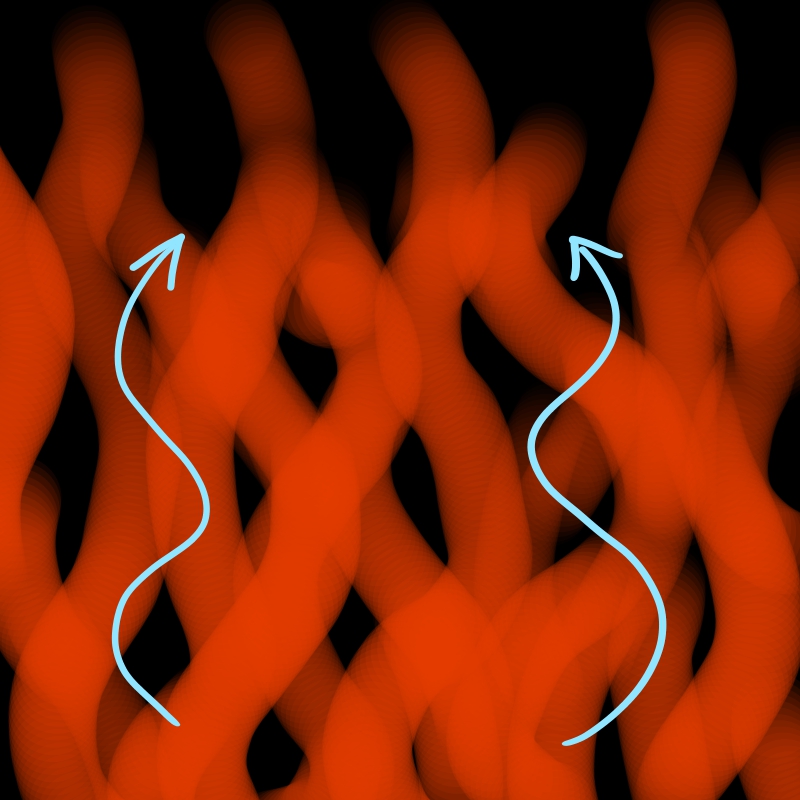 Don’t focus on the details yet, just draw the lines roughly.
Leave the texture of the brush by releasing the pressure on your pen near the ends of each stroke !
(I’ve set the background to black for the purpose of this tutorial)
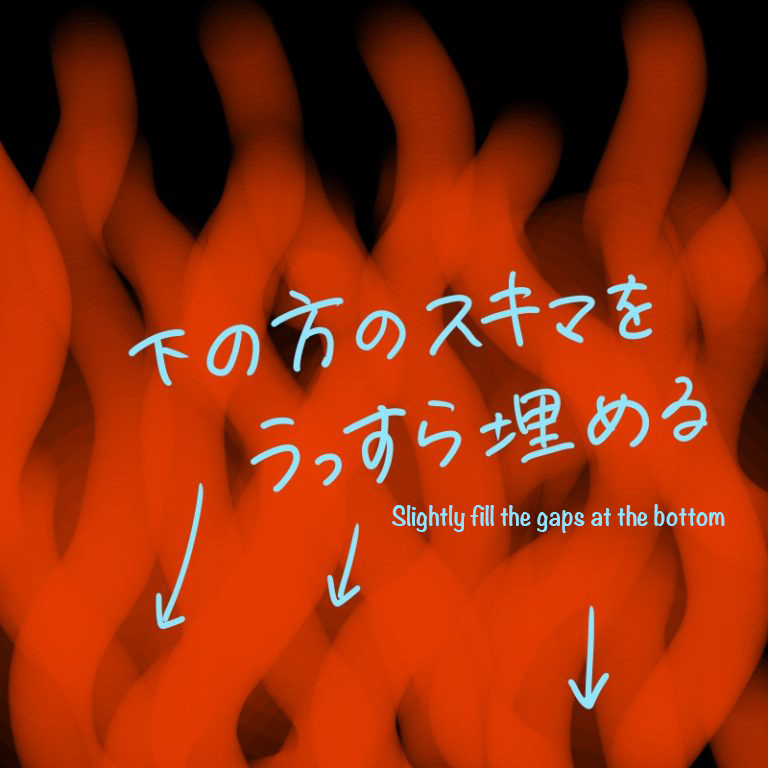
You can portray the burning picture by filling up the bottom part of the canvas.
Don’t add too much pressure and trace softly so you can still see the line strokes.
(If you are drawing on a device without brush pressure sensitivity, lower the opacity of the pencil / pen brushes when drawing.)
Next, unhide the sample image layer and choose a color using the Eyedropper Tool again.
Let’s select a red color closer to orange, and make your brush a little smaller by adjusting the brush width.
Return to the layer containing your drawing…
Focus on tracing over the parts where the red strokes cross and overlap.
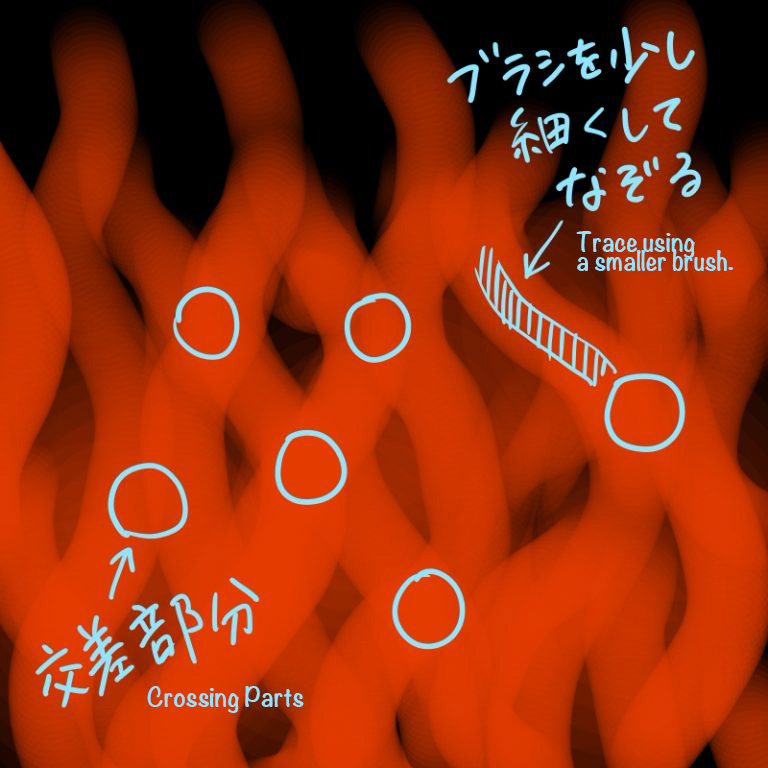
Continue to trace the strokes you’ve drawn previously,
but you don’t have to think of tracing everything.
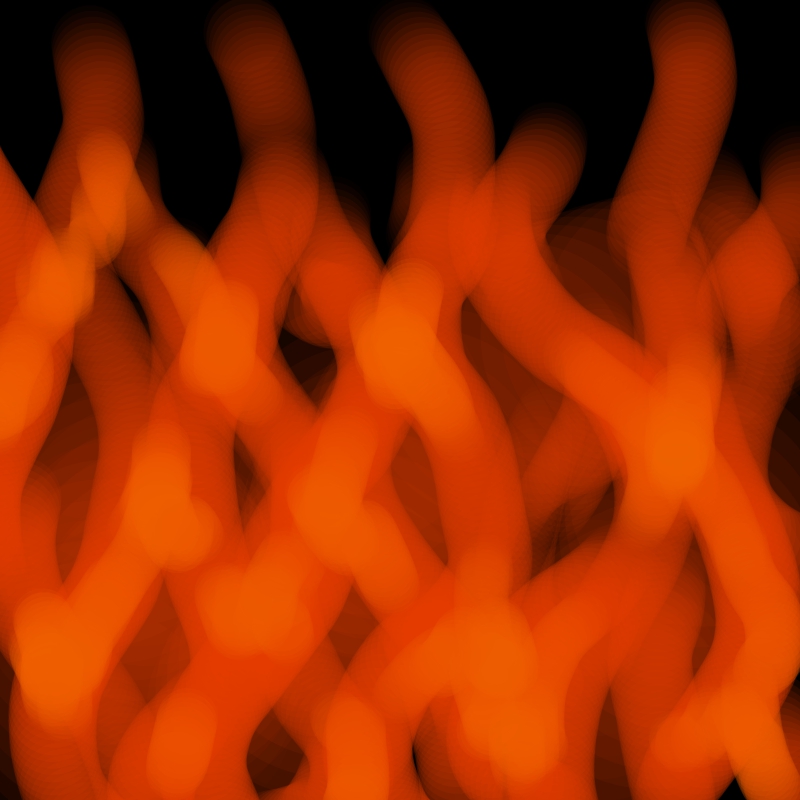
It starts to show a dim glow.
Repeat this tracing process by selecting a brighter color and lowering the brush size.
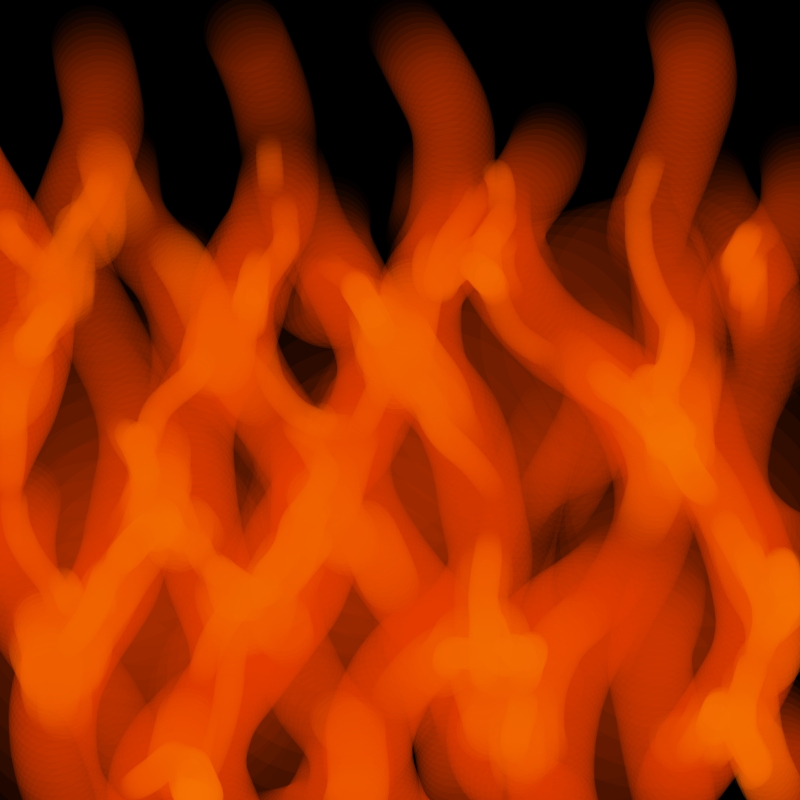
Lastly, select bright yellow from the sample image and trace over the flame strokes using a thin brush. Repeat this numerous times.
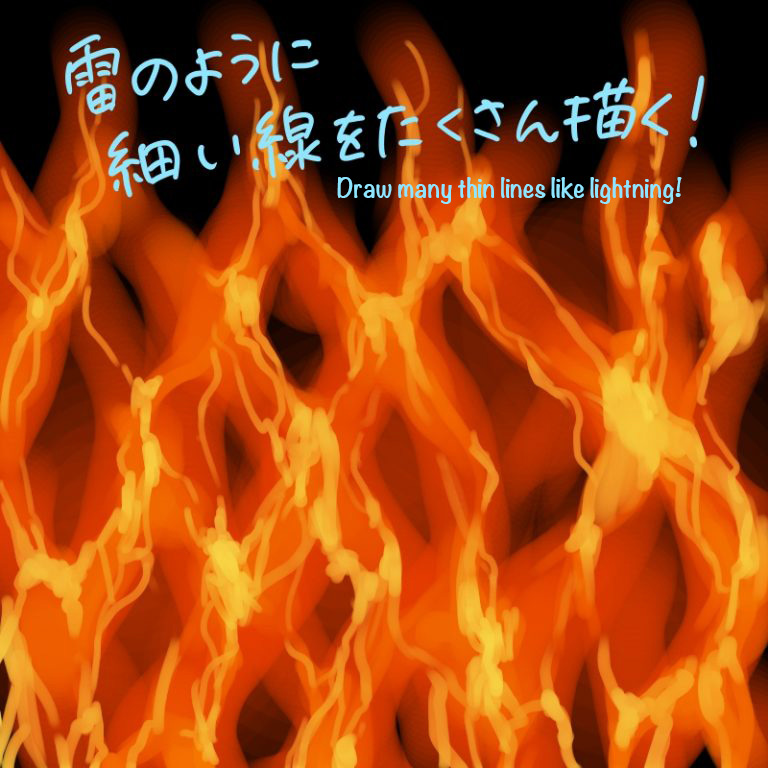
Shake your hand a little bit and draw wobbly lines that look like lightning.
Don’t be too particular about this either, make use of the random strokes drawn carelessly.
Now make your brush size bigger and trace over the lightning-like lines to fill in the gaps while leaving the touch of your thin strokes visible.
Keep the brush pressure soft.
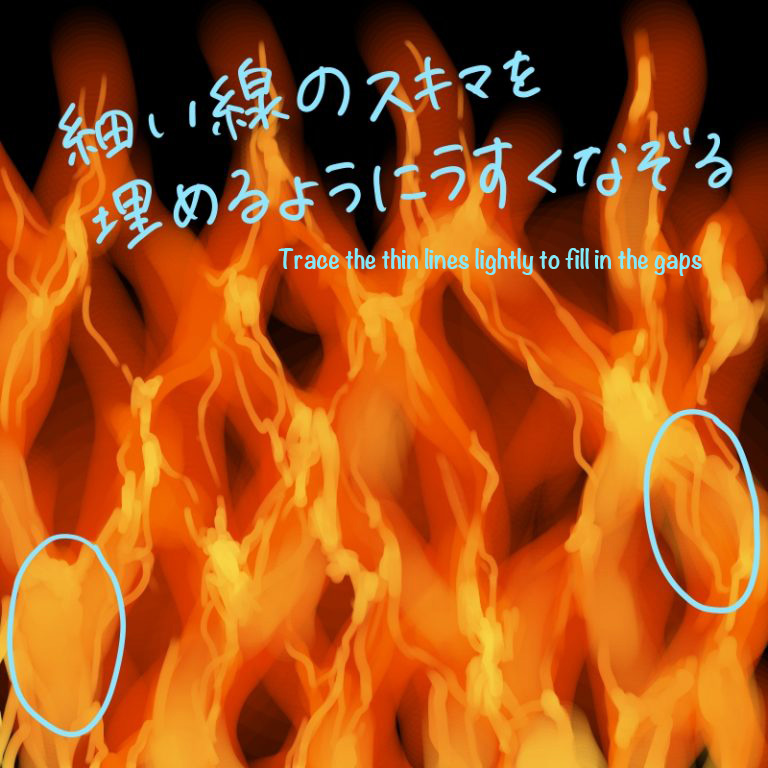
Let’s get to the polishing stage!
3.Change the Blending of your layer
Next, I will add a glowing effect to the flames.
With the steps I explained above, add a new layer.
Select your new layer and change the “Blending” from the Layer window.
This function lets you change the layer property.
Click on “Blending” and select “Dodge”.
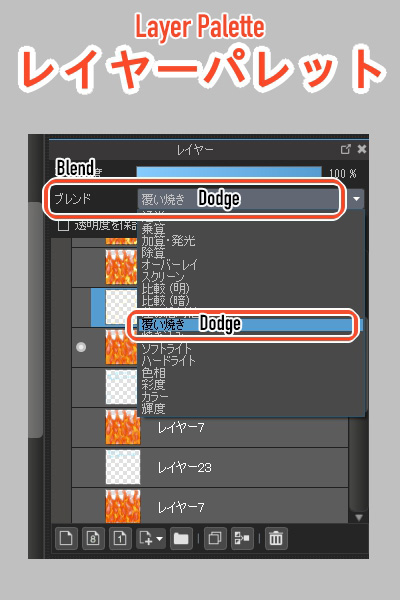
You can’t see the difference at first but the effect starts to show up if you continue to draw with multiple layers.
Change the color of your brush to a near-white cream color.
Keep your drawing layer unhidden to draw in more strokes on the new layer (with Dodge).
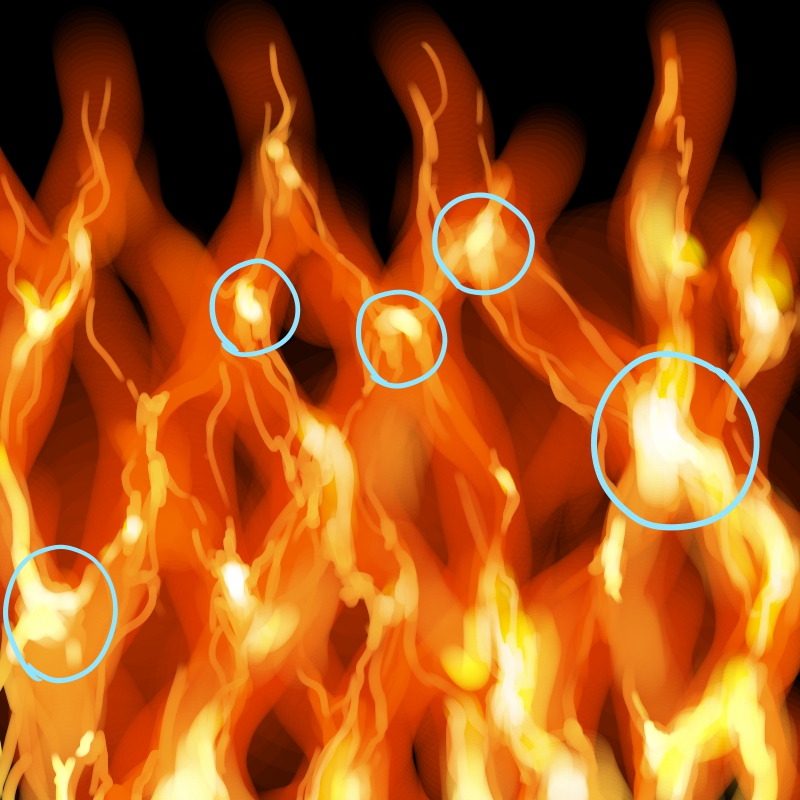
Concentrate on tracing all the parts of flame lines that overlap.
Now you can see that I’ve created a glowing look on the flames!
Don’t over do it and only add traces to make the brightest parts stand out.
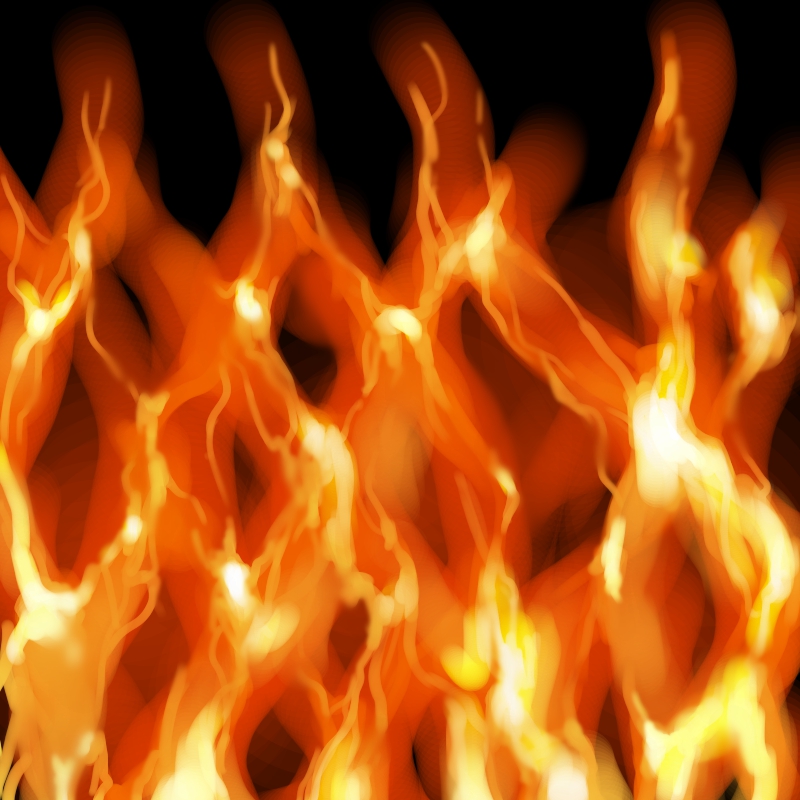
As you can see from above, I’ve added a lot to the bottom part this time.
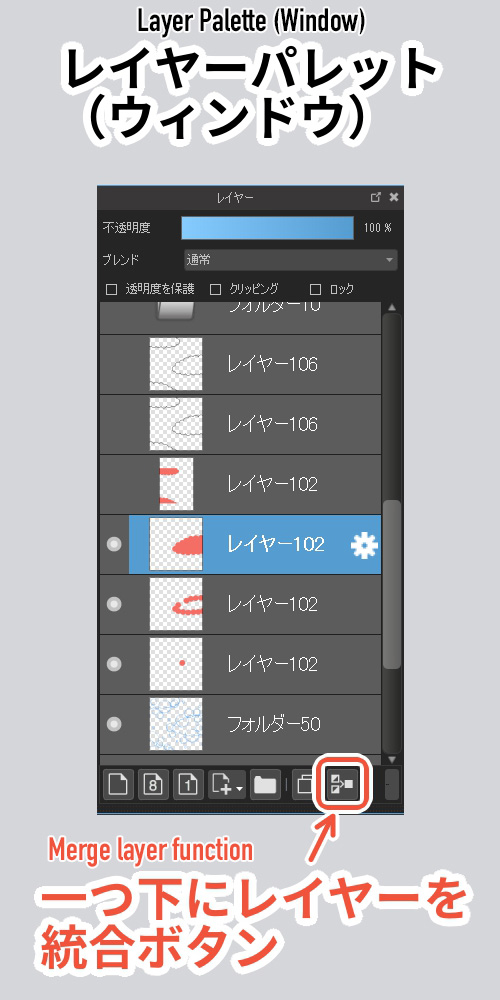
Once you are done, merge your Dodge layer and your drawing layer.
It looks too raw right now, so I will erase some parts.
Choose “Eraser (Soft)” from the Brush tool and set the width similarly to the brush size you used for the dark red flame (from step 1).
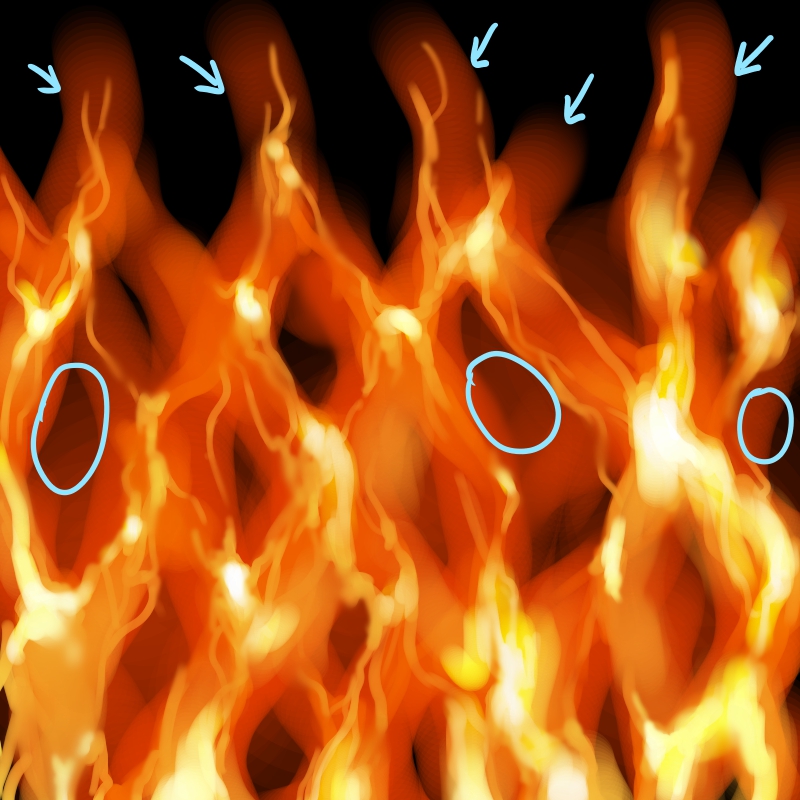
With the Eraser (Soft) brush, trace over the gaps between each flame stroke to sharpen them and also erase the top part where the flame fades.
Move your brush softly without pressure.
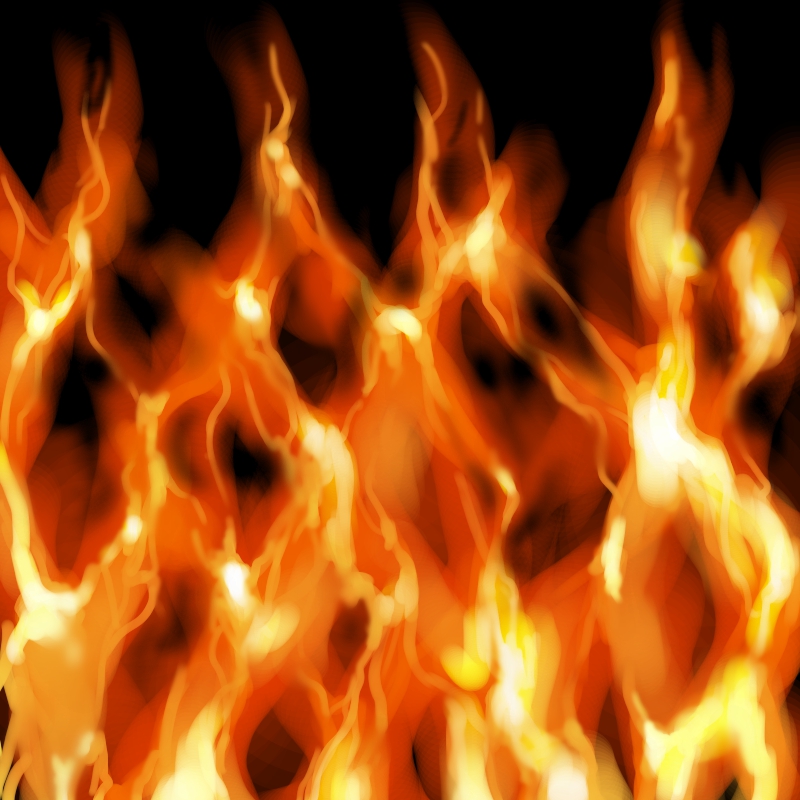
You can see now that I’ve recreated the bursting effect.
For some parts, use the “Blur” (brush) to blend your brush traces visible in each stroke.
Repeat the same processes and strengthen the effect by checking the overall balance.
The bursting flame effect is now complete!
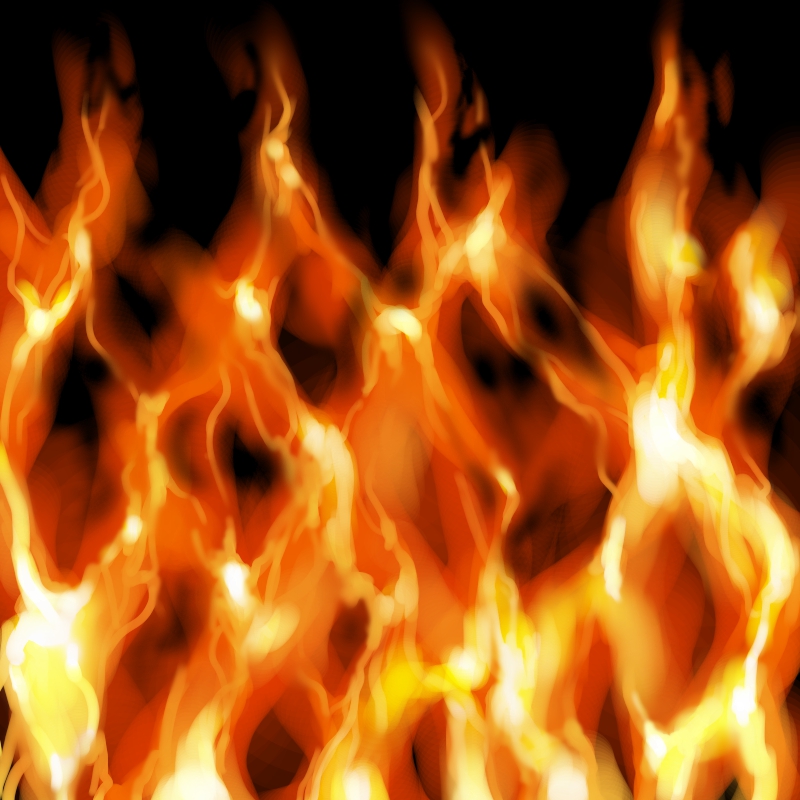
4.Arrange by changing colors
You can arrange the image using a different color, following the steps I explained in this tutorial.
Here is a flame I drew using blue.
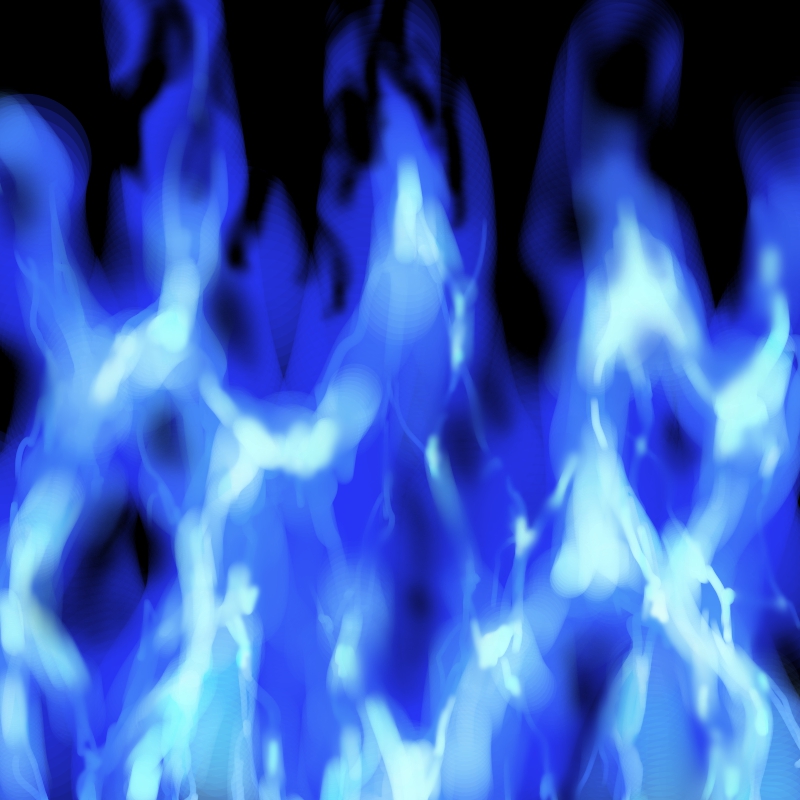
You can arrange the bursting flame effect to your liking by using colors like green or orange ♪
With different colors, you can create a strange atmosphere or portray quiet burns.
The bursting flame effect can be applied to many illustrations, including Japanese patterns!
I hope you try various combinations to upgrade the flame effect!
(Text・Illustrations/竹内 洋)
\ We are accepting requests for articles on how to use /


