2022.07.29
【For Beginners】Let’s use drop shadows for a more 3D look.
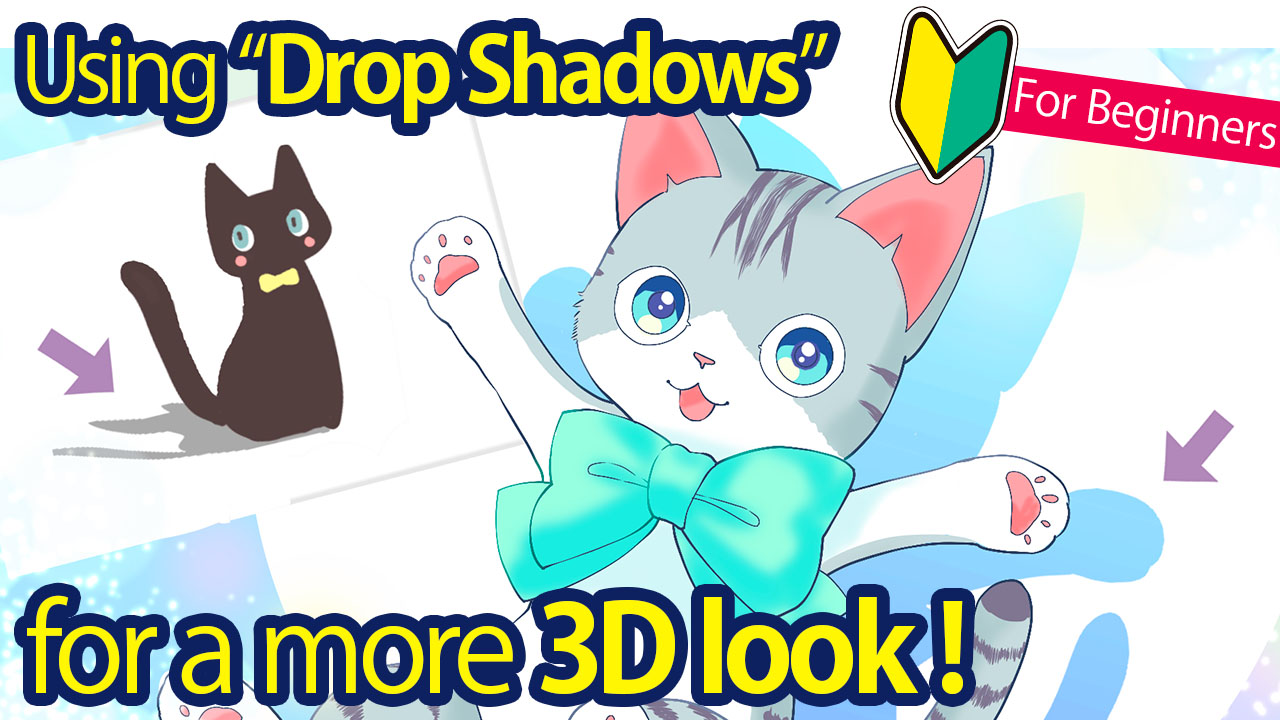
Are you having trouble drawing shadows for your characters, because you don’t know where to start?
In this article, I’ll show you how to make simple drop shadows for people like you!

1. What is Drop Shadow?
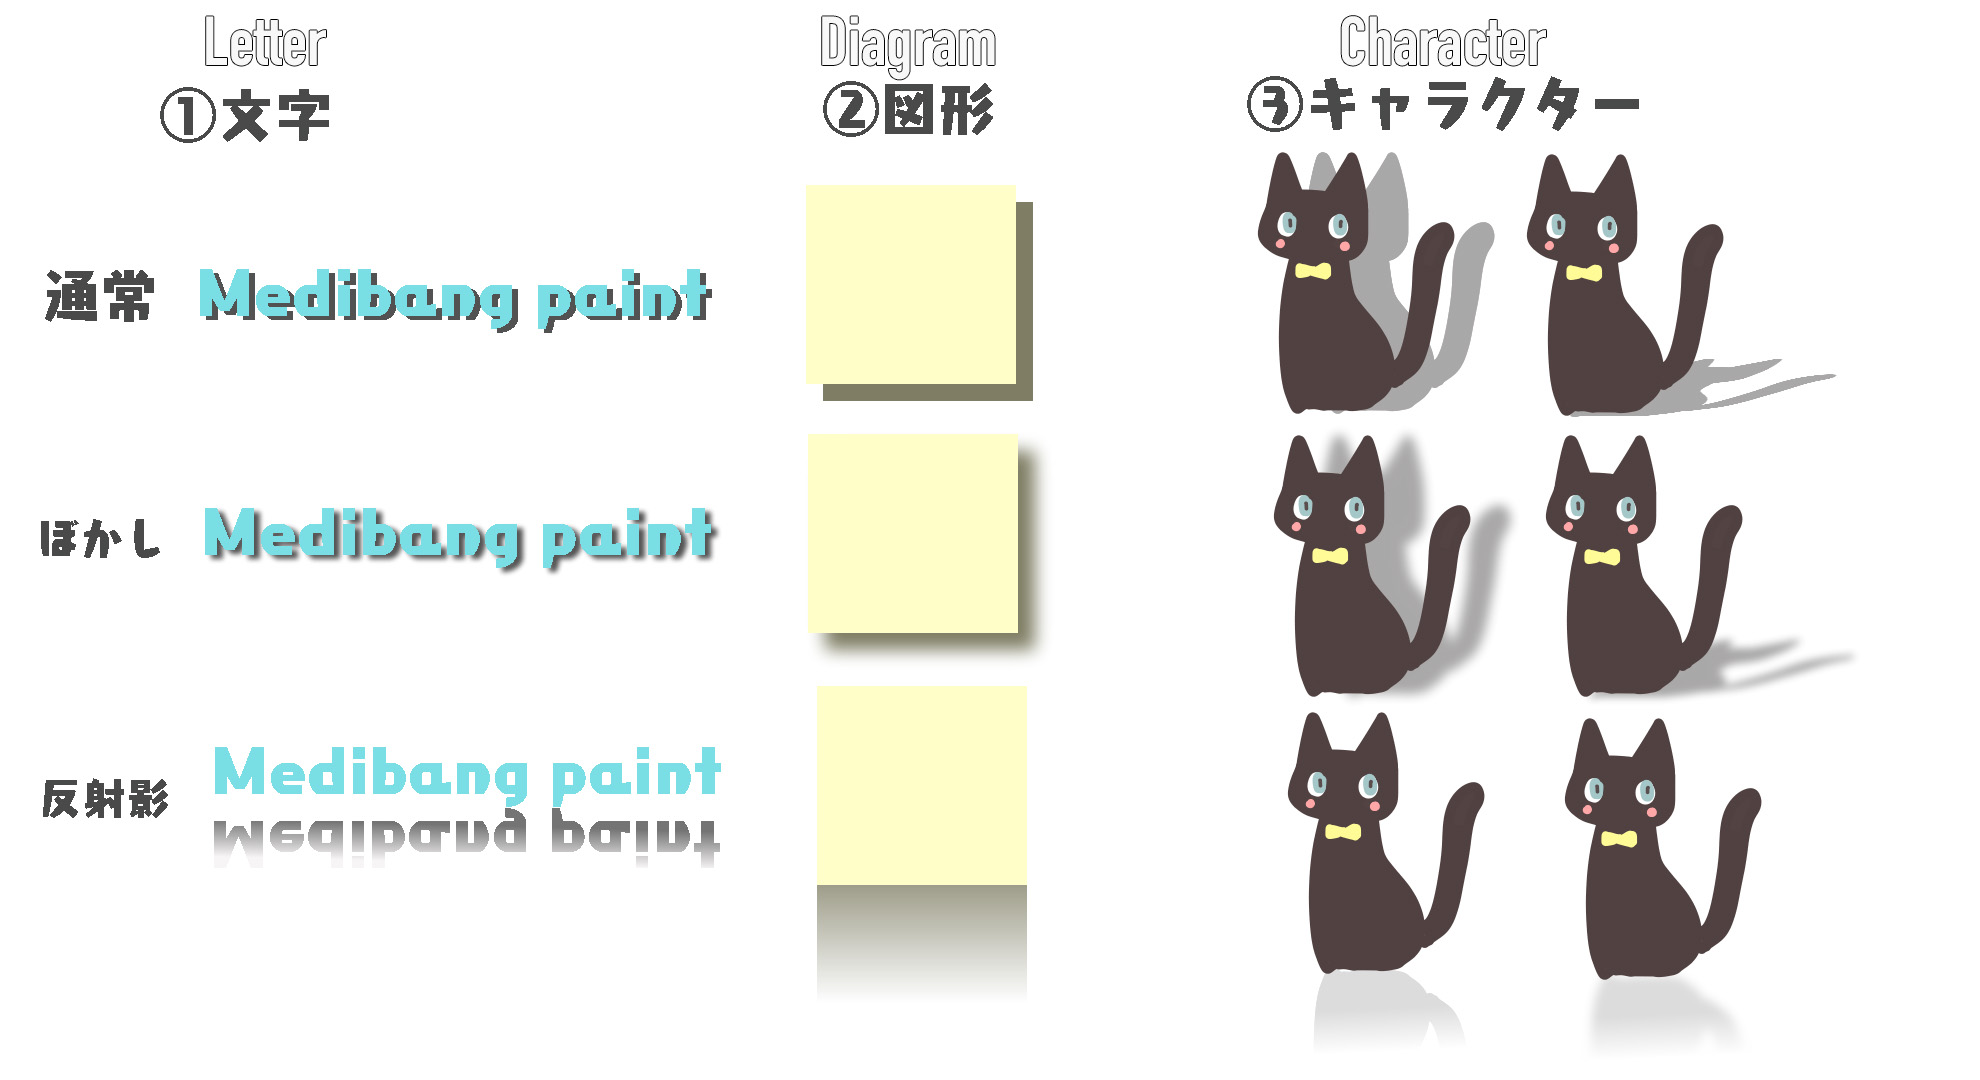
Drop shadow means “to drop a shadow” in Japanese.
Softwares such as Illustrator and Photoshop have a function called “drop shadow” that automatically creates a shadow like the one in the picture above.
MediBang Paint does not have a drop shadow function, but you can easily create a similar effect as a drop shadow in 3 steps.
Now let’s see how to make it!
2. How to make a drop shadow
STEP1:Create the shadow
First, let’s create the part that will be the shadow.
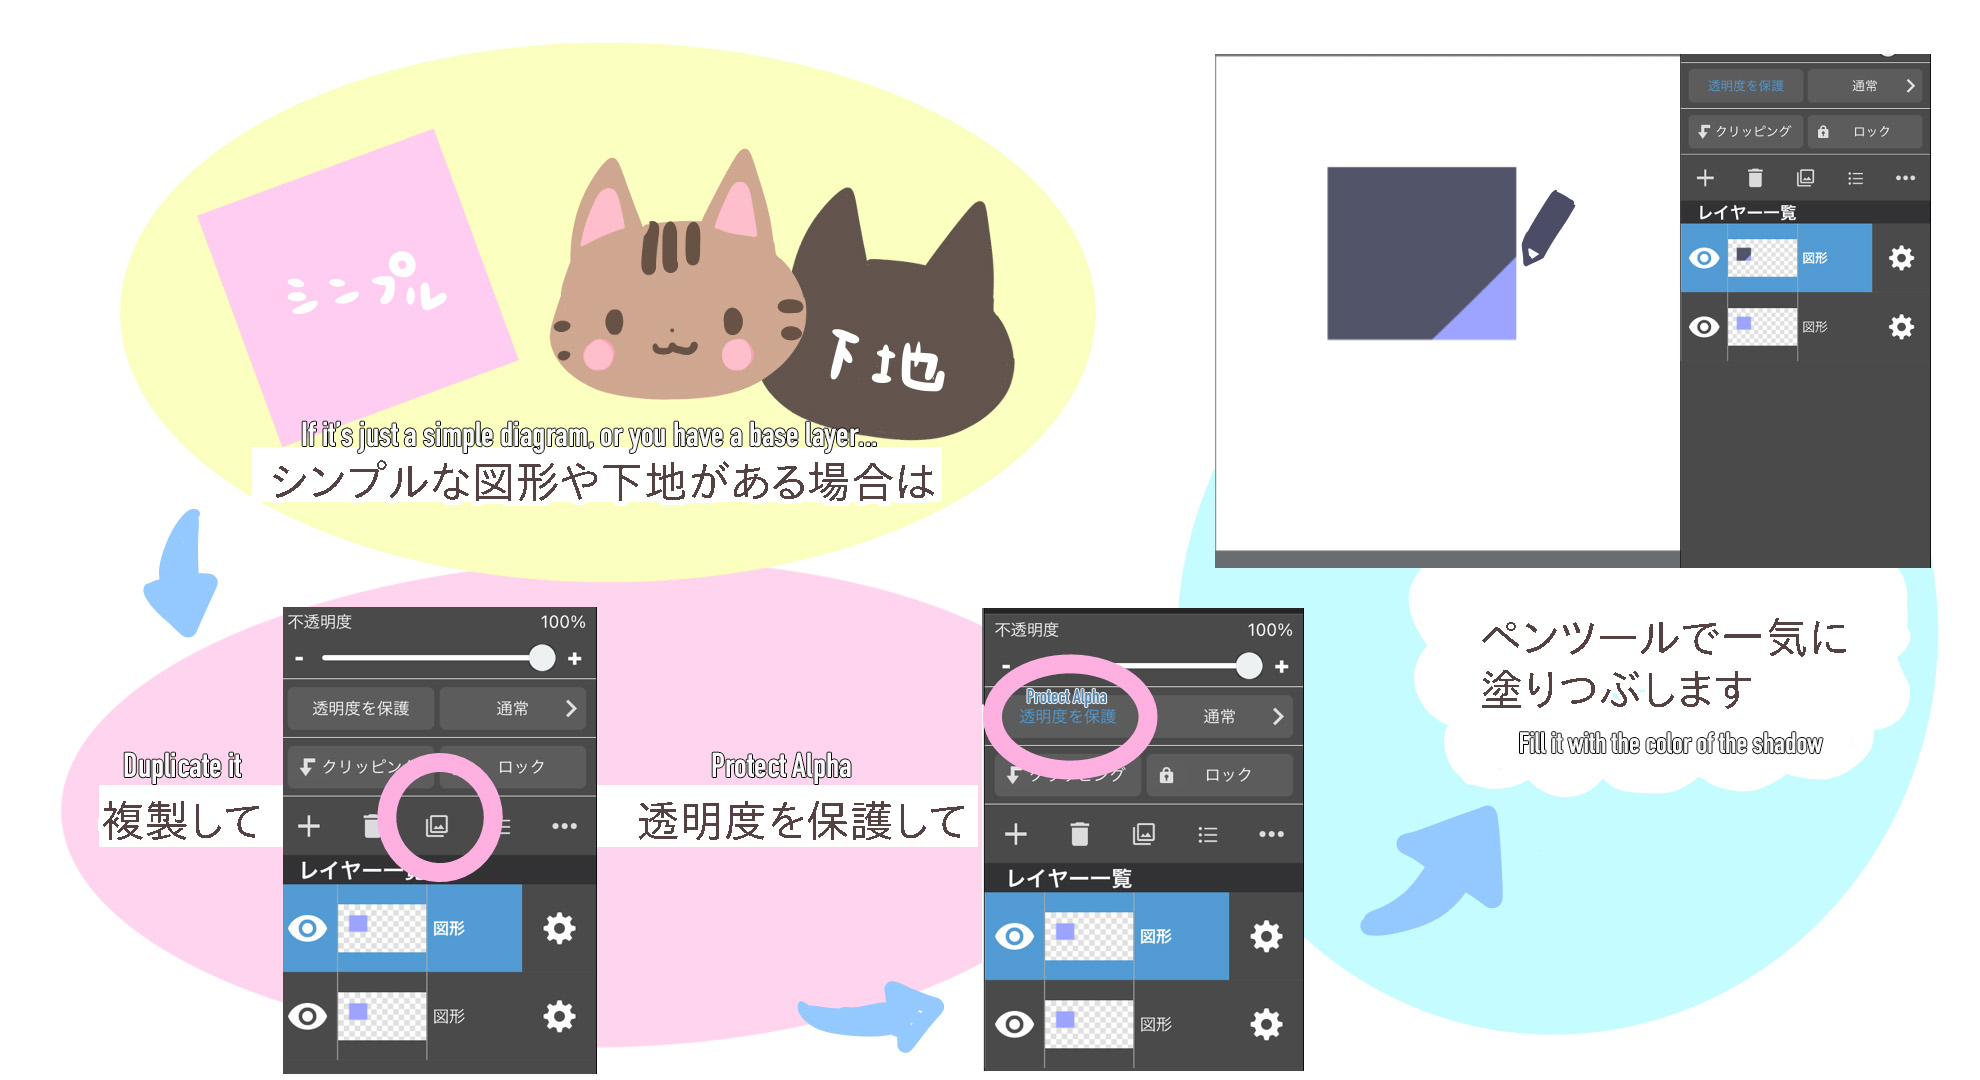
・A simple shape
・Has a base layer
・Layers are merged only for the shape/character part
If your illustration satisfies any of the above,
(1) Duplicate the layer you want to create the shadow on.
(2) Select “Protect Alpha”.
(3) Fill it with the color of the shadow.
Paint the shadows in these three steps.
【If you want to keep the layers separate…】
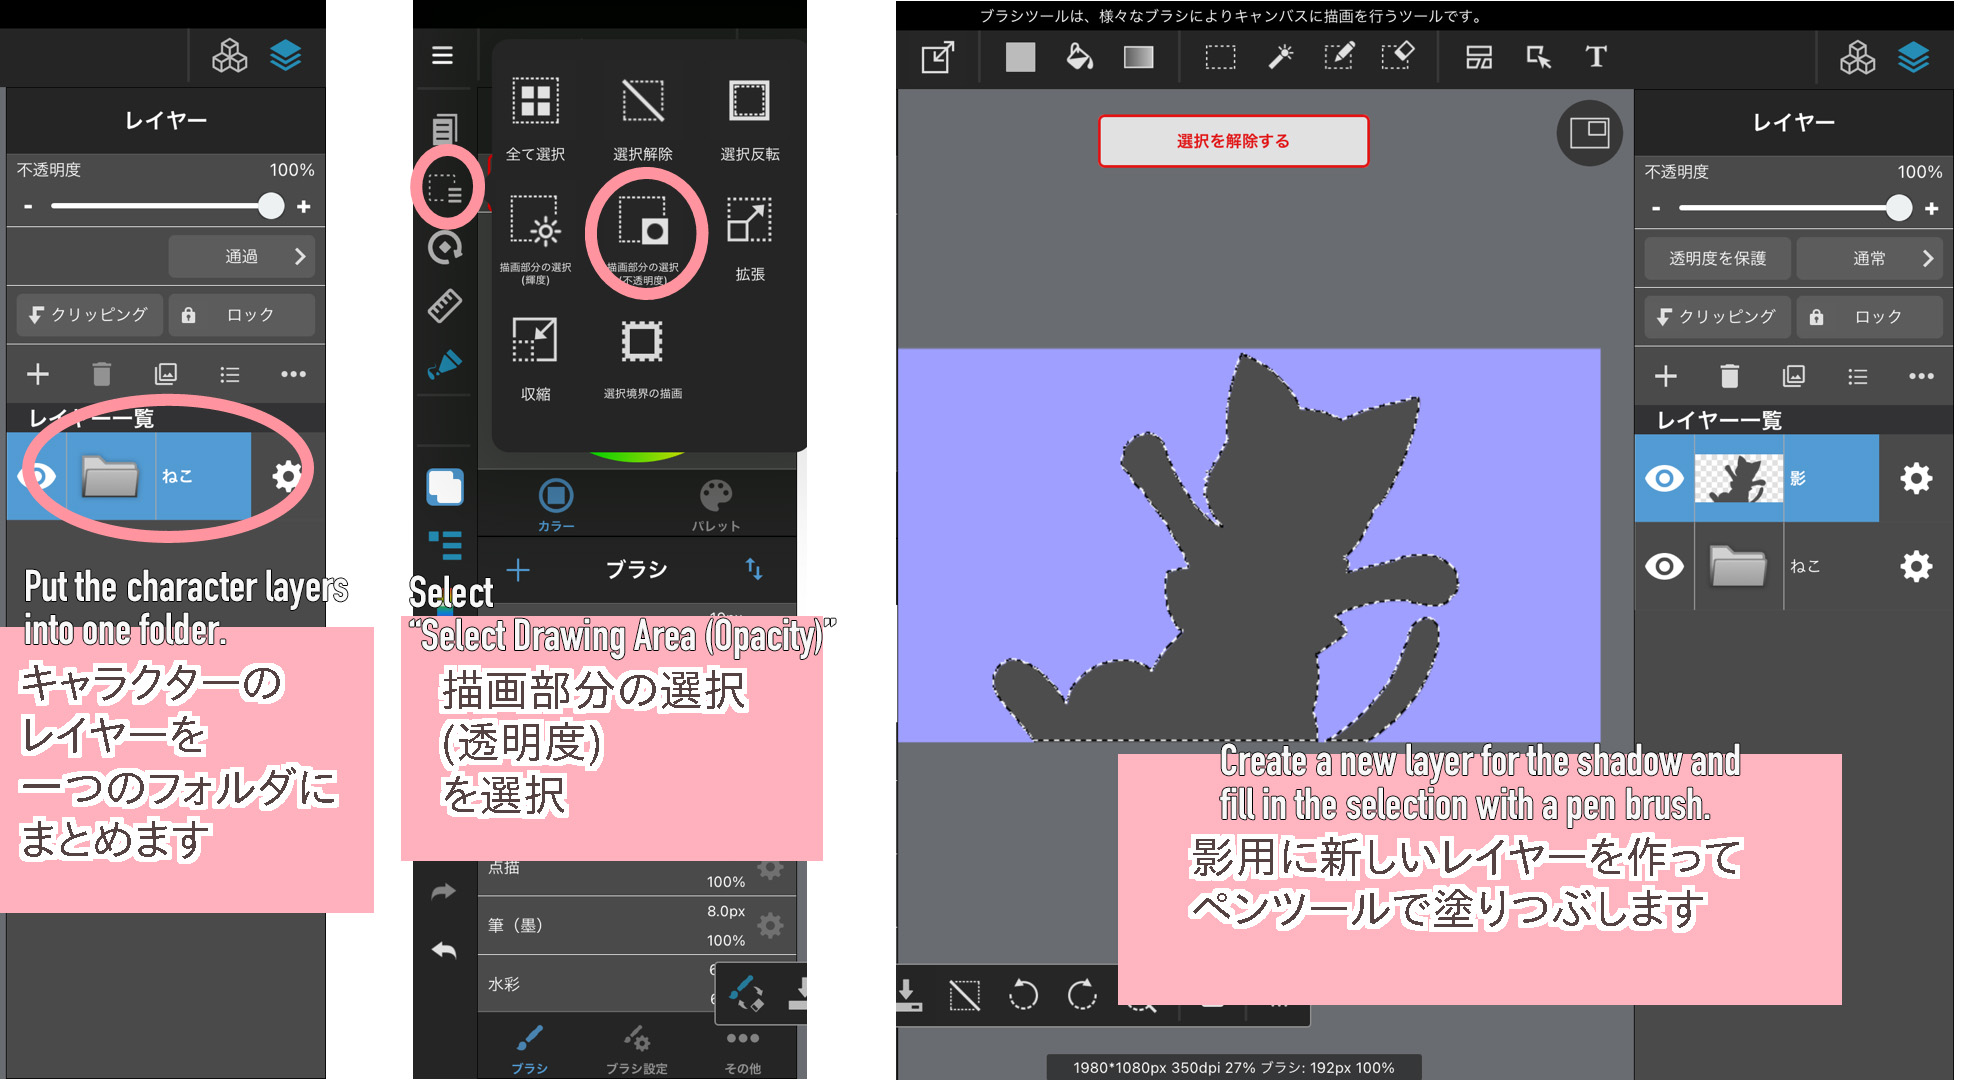
If you don’t have a base layer, but you don’t want to merge the character layers, put those character layers into one folder.
You can also combine only the painted ones.
With this method, you will be able to combine the layers easily in later steps
▶︎ How to Put Multiple Layers in the Layer Folder at Once
Next, select the folder and create a selection by choosing “Select Drawing Area (Opacity)” from “Selection”.
Finally, create a new layer for the shadow and fill in the selection with a Pen Brush.
STEP2:Shift the shadows
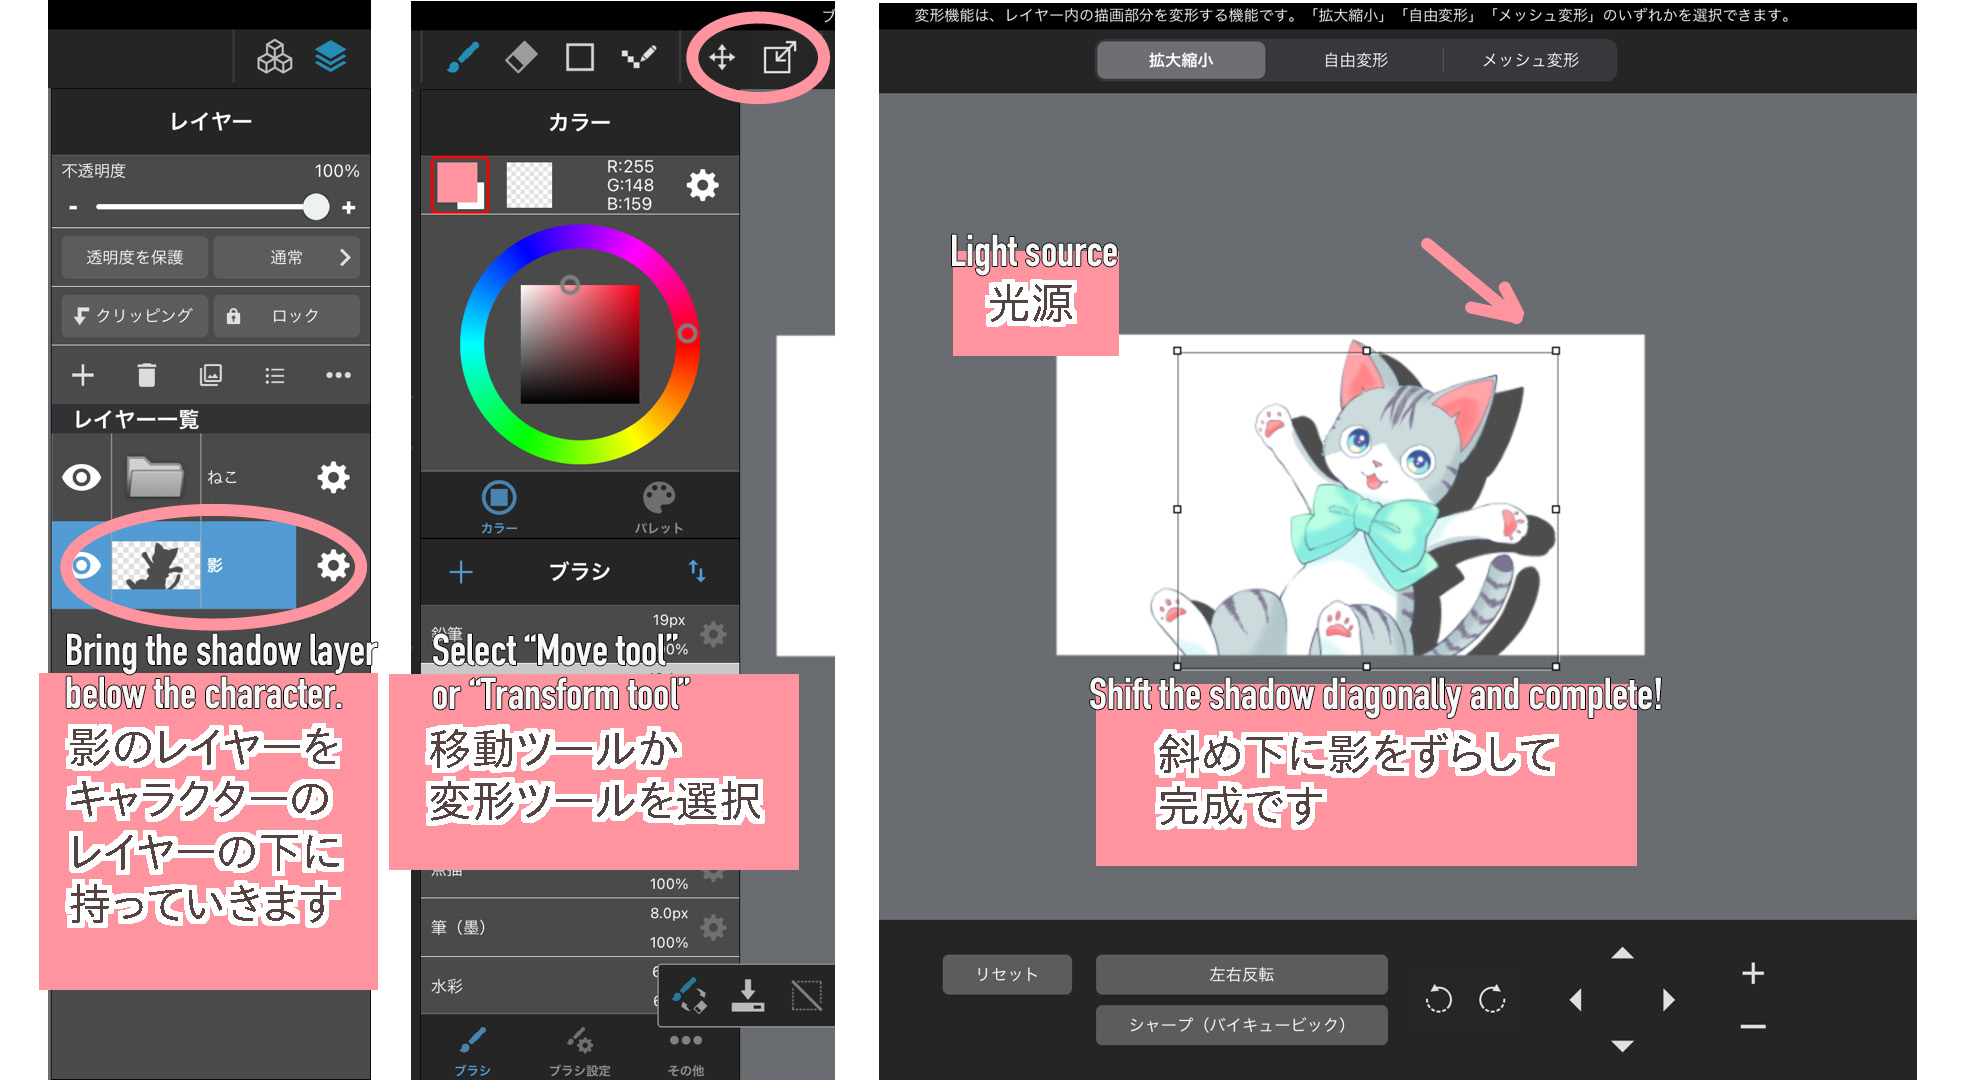
Bring the shadow layer created in STEP 1, below the character.
Use the Move tool to shift the shadow diagonally downward to complete the simplest drop shadow.
The key is to make sure that the shadow is in the opposite direction of the light source.
If the shadow is in the same direction as the light source, it will be inconsistent with the character’s shadow.
This type of drop shadow can be used when there is a wall right behind the character or as part of the design by making the shadow color more vivid.
STEP3:Arrange the shadows
If necessary, arrange the shape of the shadow.
In this tutorial,
・A shadow falling on the ground
・Blurred shadow
・Reflective shadow
I will be making these three types of shadows.
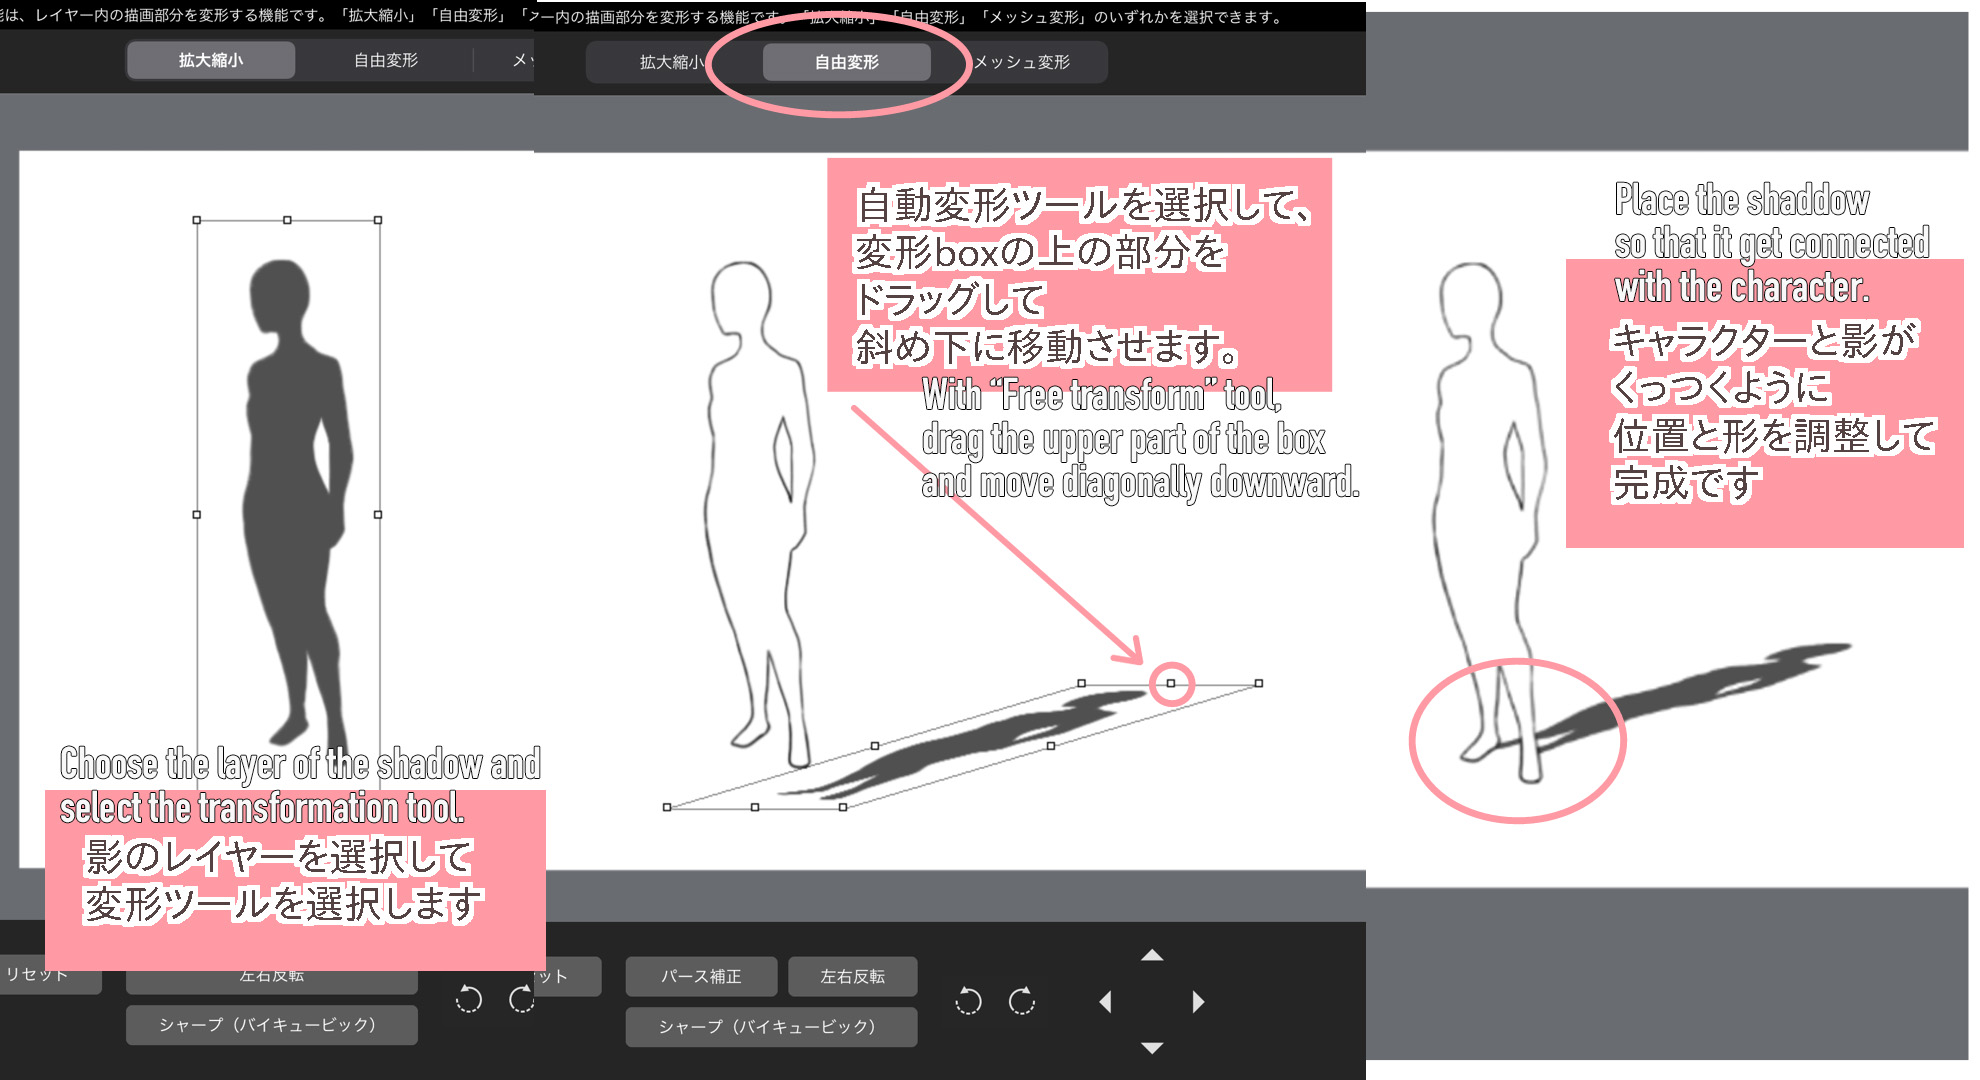
① Shadows falling on the ground
From the Selection tools, choose Free Transform then Perspective Transform to reshape the shadow as if it were squashed diagonally downwards.
② Blurred Shadows
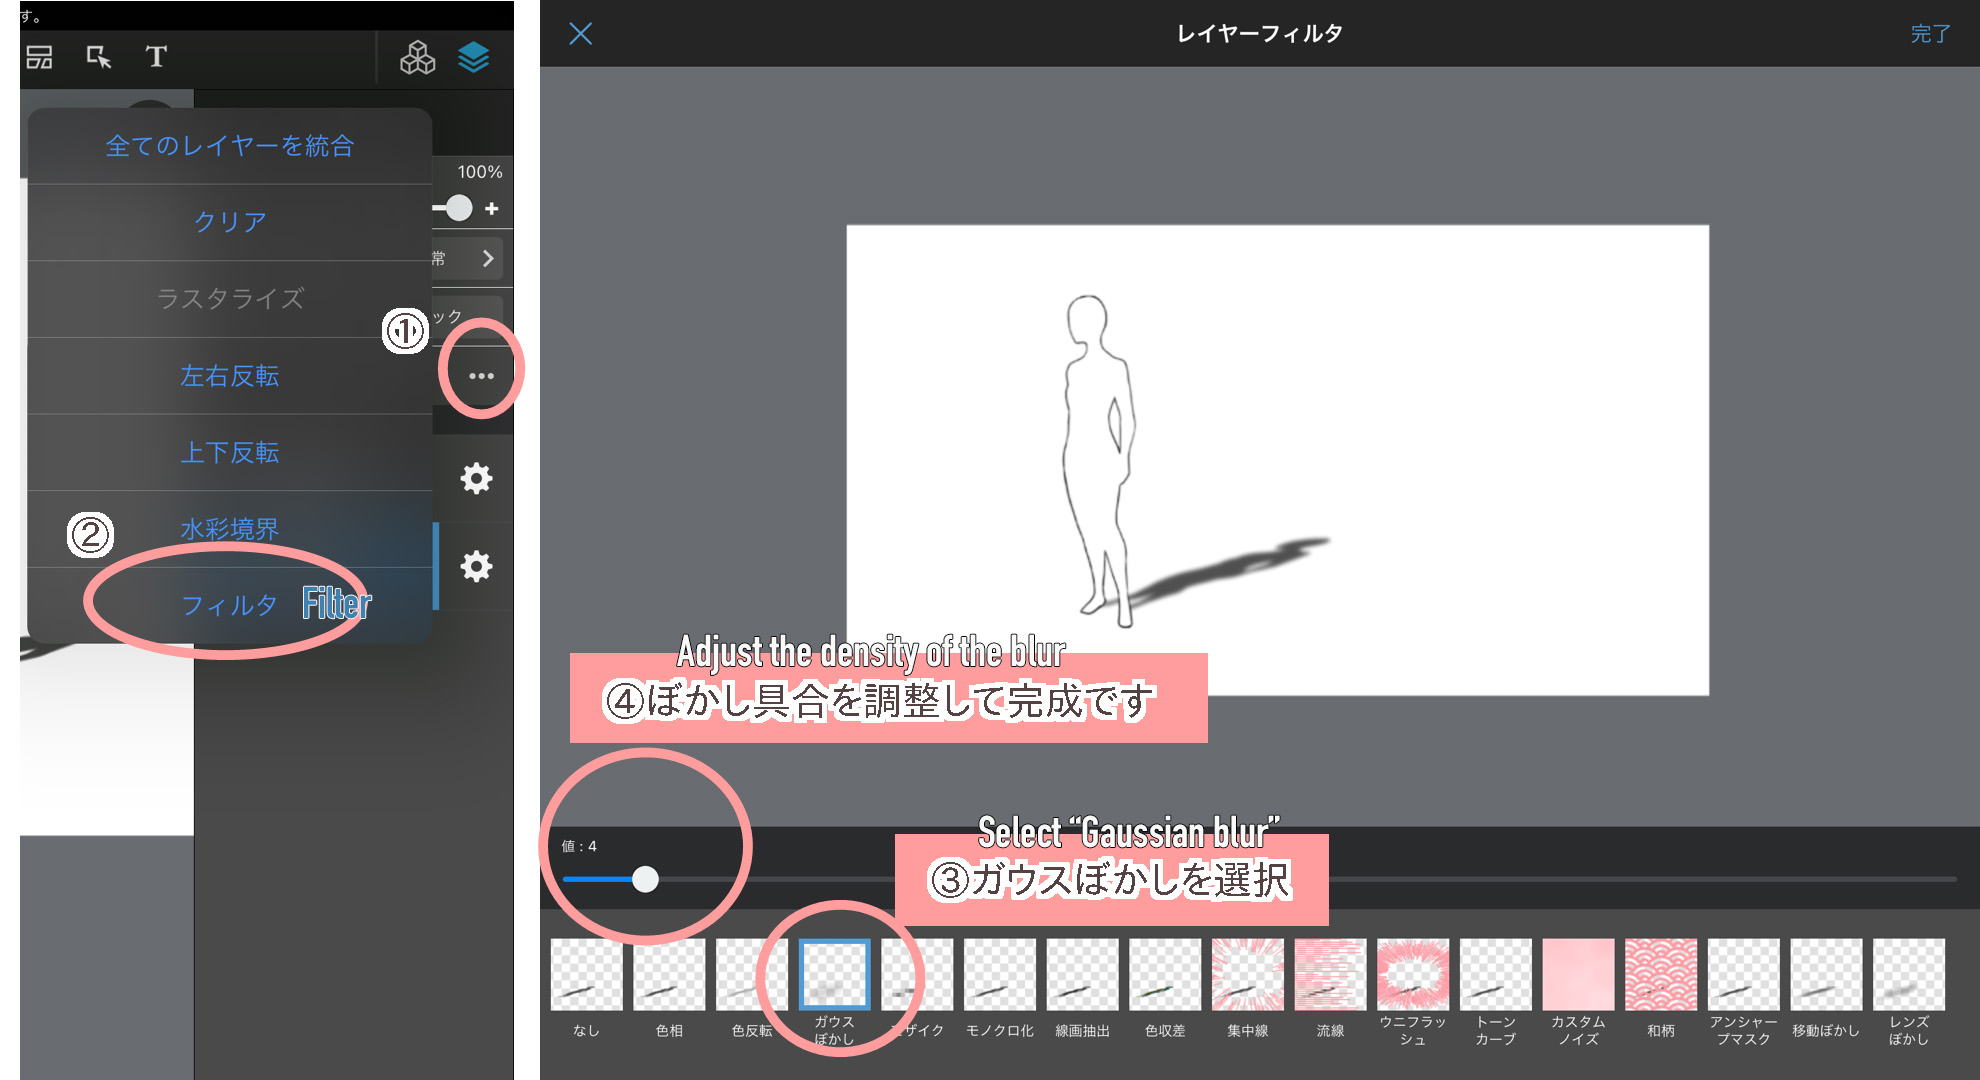
【How to blur all of the shadow】
From “Filter” choose “Gaussian Blur” and blur everything on the layer you have selected.
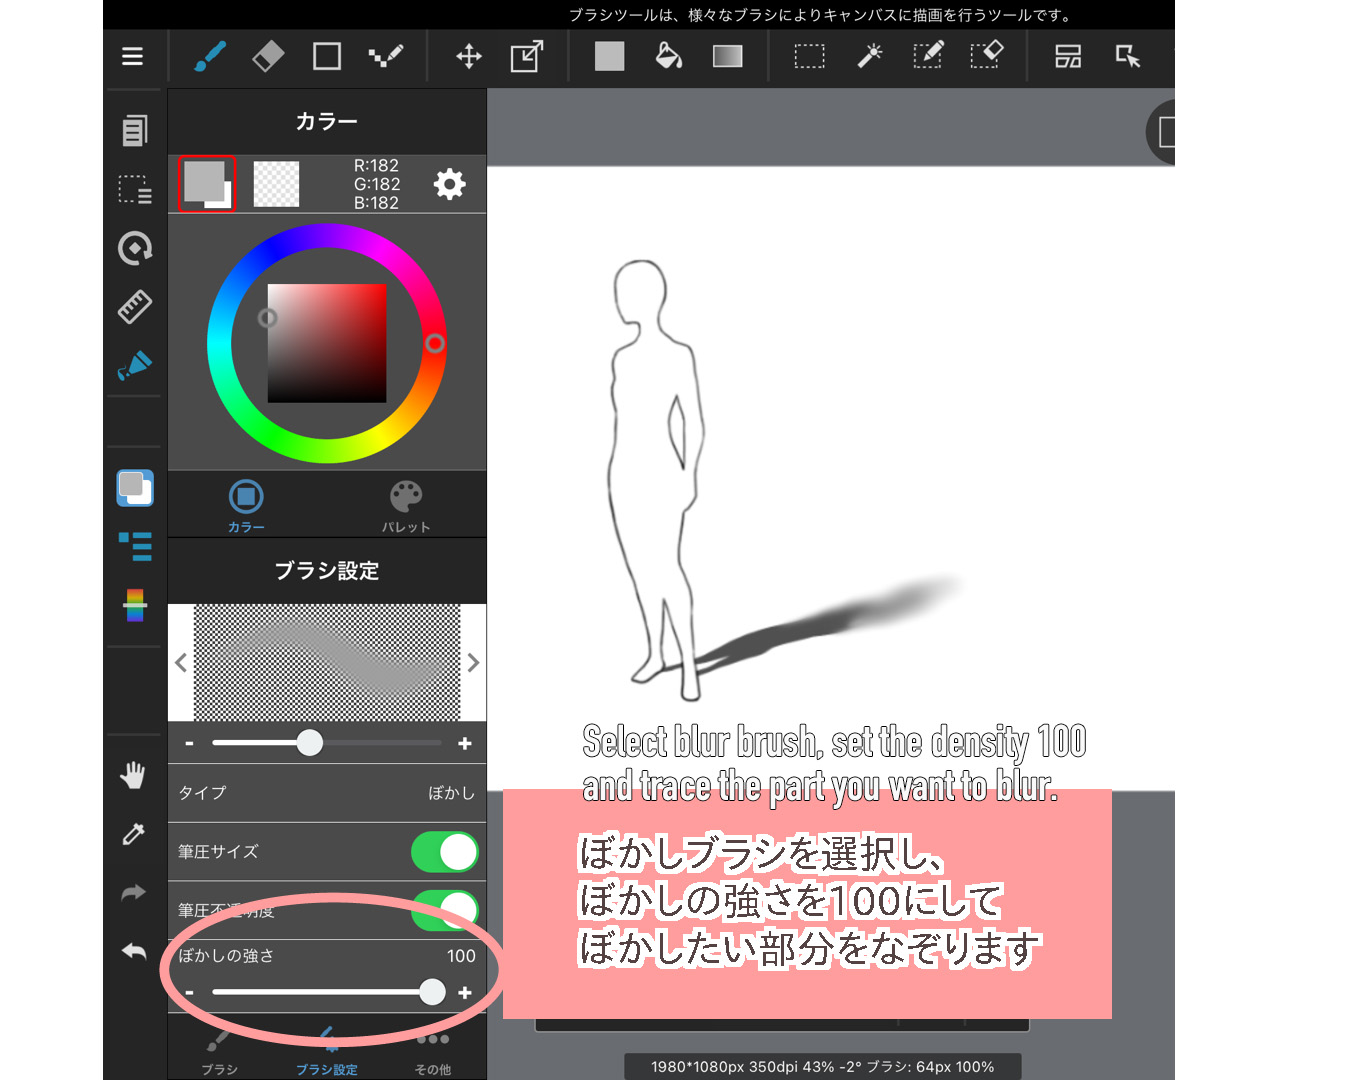
【How to blur a part of the shadow】
Use the Blur Brush to blur the area you want to blur.
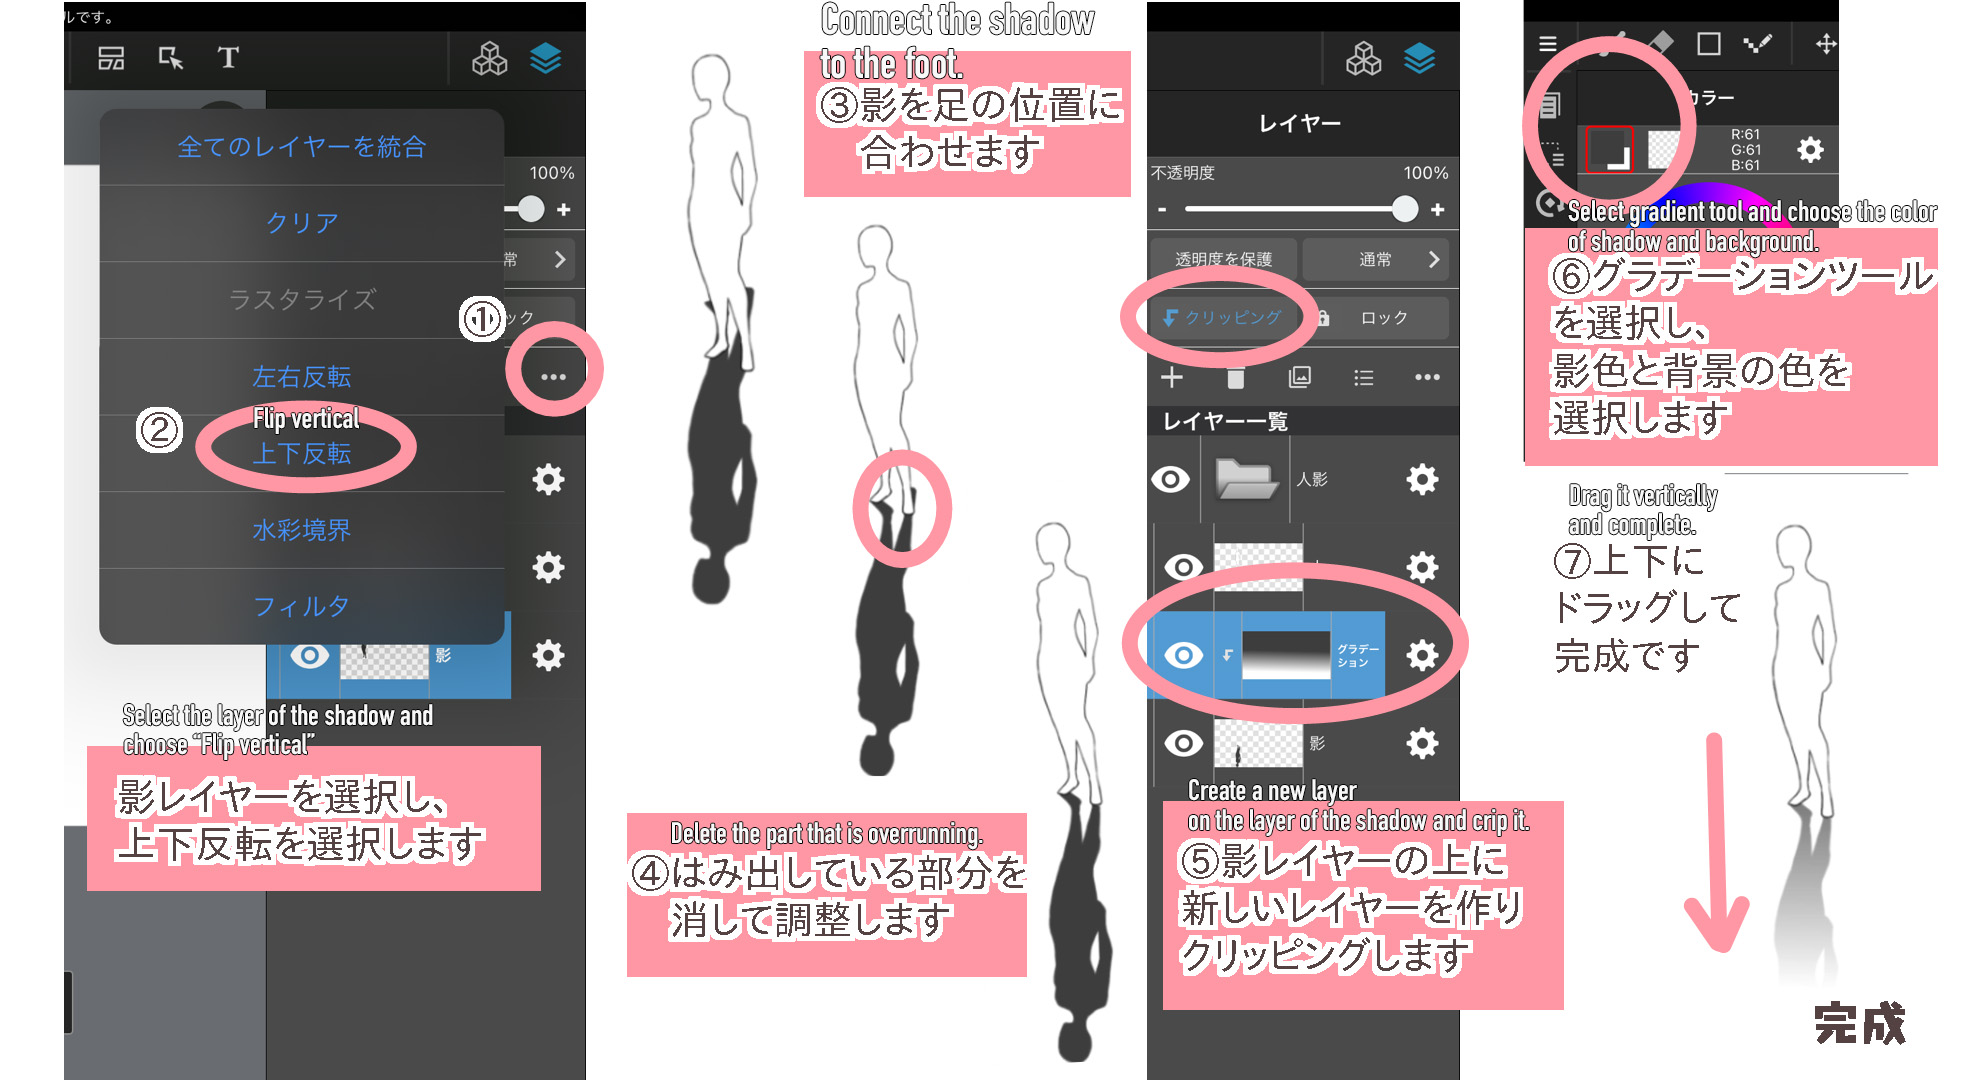
③ Reflection
Turn the shadow upside down using the rotation function of the layer, and blend the color of the shadow with the floor using a gradient.
3. Closing
How was this tutorial?
If you know how to create shadows, you can add depth to your illustrations.
All of them can be done in a few simple steps, so please give them a try!
(Text・Illustrations/Amane)
\ We are accepting requests for articles on how to use /

