2022.07.27
Let’s Start Painting!【For iPad】
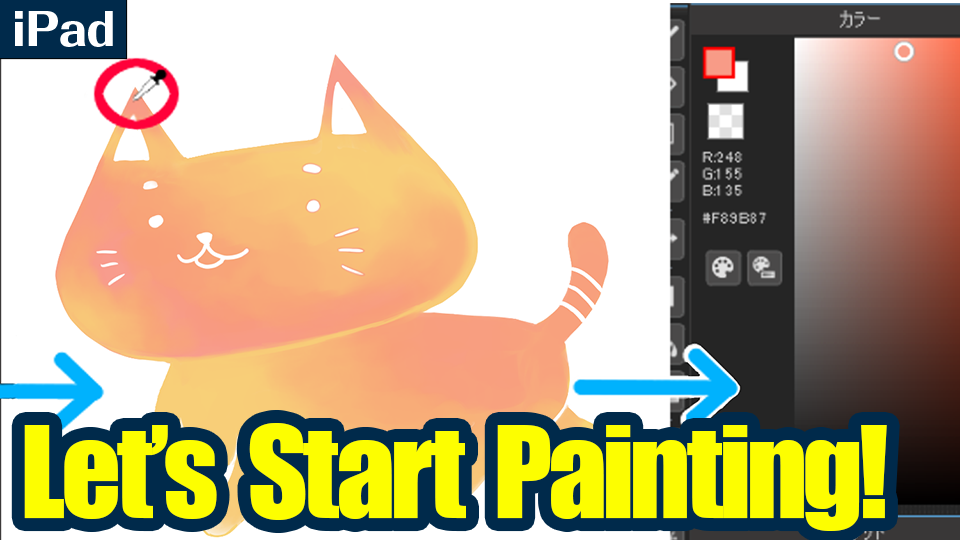
In this section, we will explain some useful tools to use when coloring.
Preparation
(1) Register a color in the palette
You can register colors in the “Palette”.
Registering frequently used colors in advance will make your work easier.
The palette ![]() appears when you tap the
appears when you tap the ![]() icon.
icon.
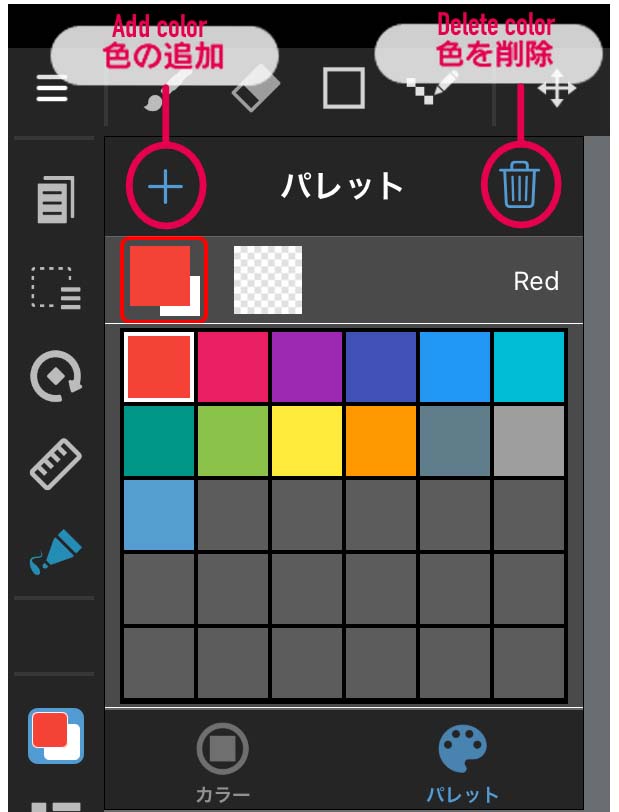
Tap “Add Color” to open the window.
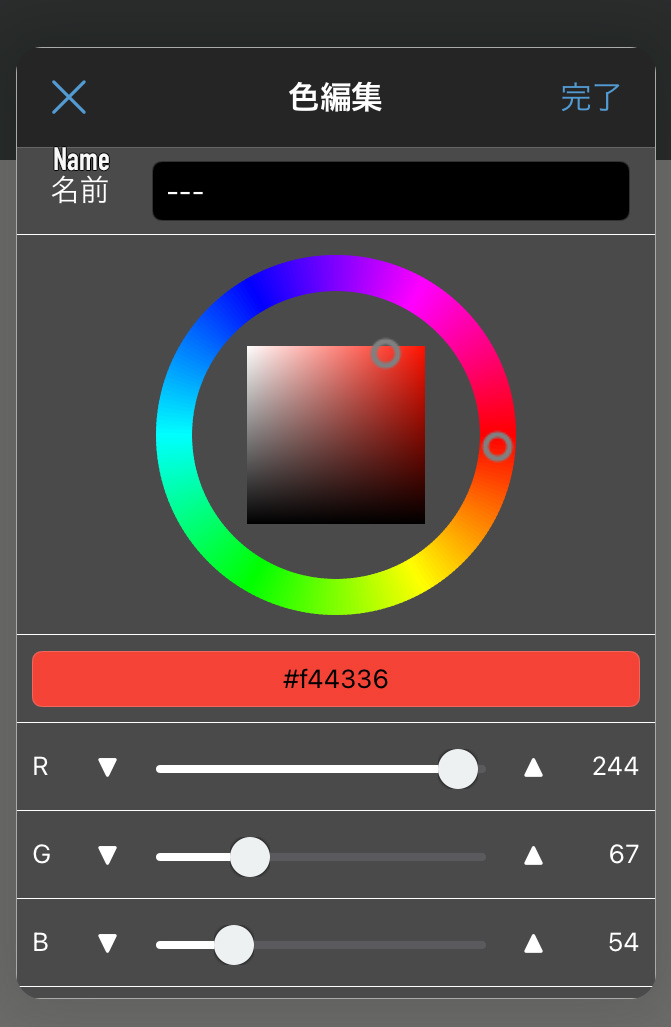
You can name the color freely.
When you tap ![]() “Add Color”, the RGB* values of the foreground (foreground color) will be automatically entered.
“Add Color”, the RGB* values of the foreground (foreground color) will be automatically entered.
(It is also possible to register the color by entering it directly.)
Click “Finish” to complete the addition.
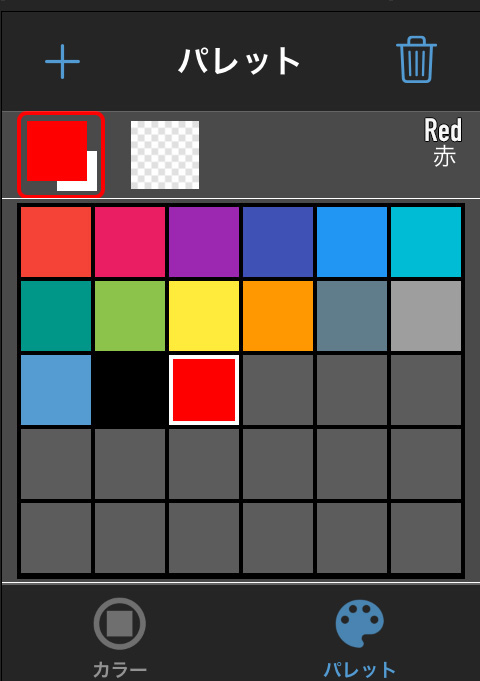
The color is now registered in the palette.
The name of the currently selected color will be displayed at the top of the palette.
To delete a color, select the color you want to delete and tap the Delete button.
(2) Eyedropper tool
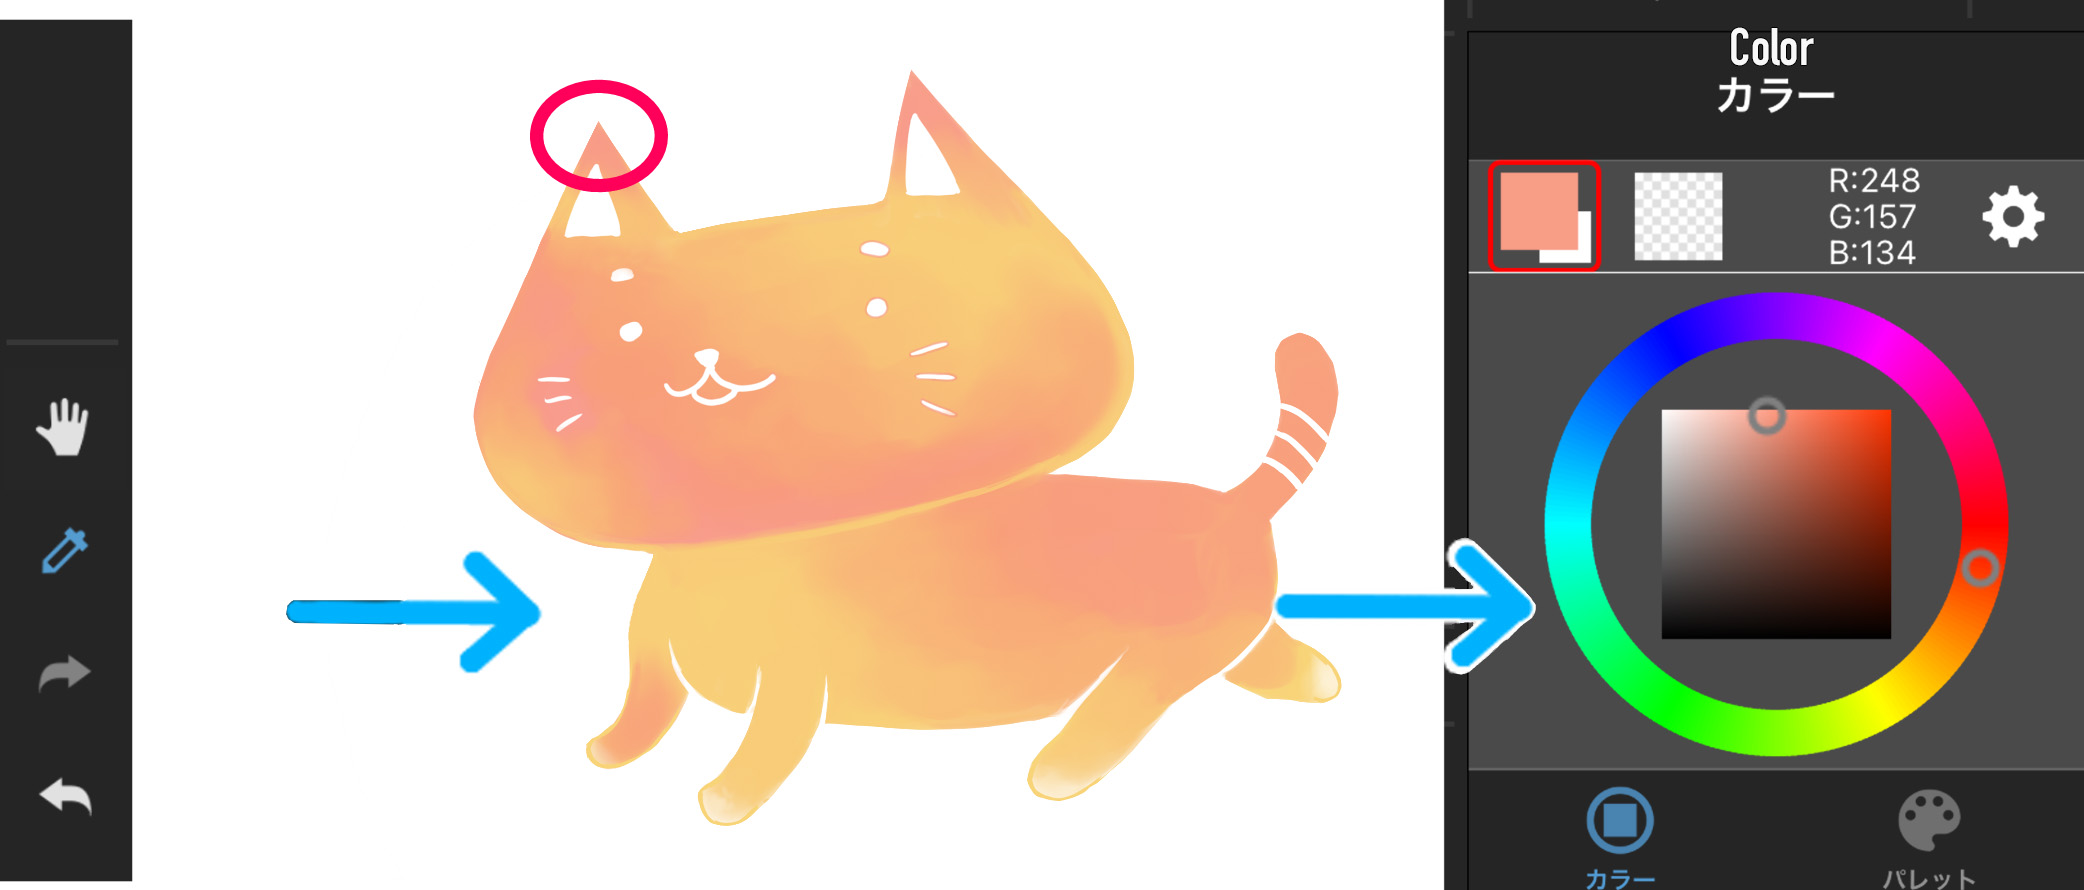
The eyedropper tool ![]() allows you to specify a color on the canvas.
allows you to specify a color on the canvas.
When you tap the part of the color you want to use with the eyedropper tool, the “foreground (foreground color)” of the color will be the color you tapped.
Painting the colors
(3) Painting all at once
There is an easier way to paint colors at once than using a pen.
Bucket tool
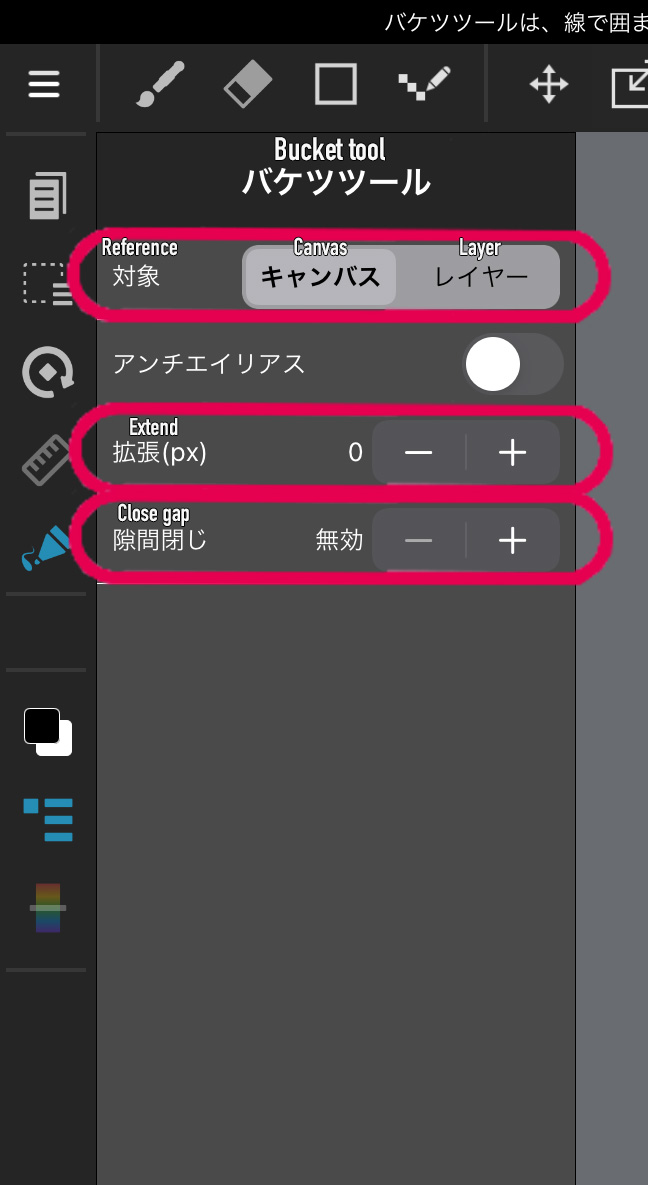
With the Bucket tool, you can paint the area surrounded by a line or a selected area at once.
Just like the Magic Wand tool, you can select a reference from “Canvas” or “Layer” and “expand” the area to be filled between -32 and 32 pixels.
(4) Select tool
If you select the area to be painted in advance, you can paint it quickly without overflowing.
Here we will show you how to select various ranges.
The select tool ![]() allows you to select a range in the shape of a rectangle, ellipse, or polygon.
allows you to select a range in the shape of a rectangle, ellipse, or polygon.
Other tools include the Lasso tool, which allows you to specify a selection by freehand, the Magic Wand tool which automatically specifies a selection with a single click, and the Select Pen tool, which allows you to specify a selection by painting with a pen.
1 Selecting a range automatically
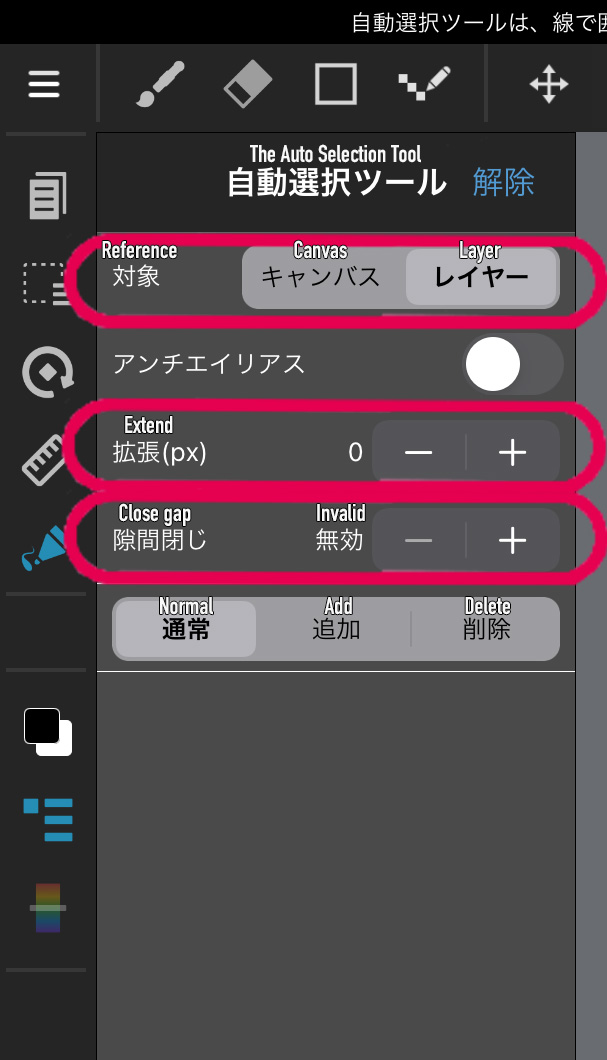
The Magic Wand tool ![]() automatically specifies a selection when you click on the inner part of the boundary.
automatically specifies a selection when you click on the inner part of the boundary.
You can also expand the selected range.
You can choose the extension width from -32 to 32 pixels.
You can also select either “Canvas” or “Layer” as the reference.
If you set the “Allowed Value”, you can select a range of different colors at once.
2 Draw the selected area with a pen
You can draw a selection by hand using the Select Pen tool ![]() ・Select Erase tool
・Select Erase tool ![]() .
.
Unlike the Lasso tool, the Selection Pen tool does not need to be enclosed, and is useful for specifying a detailed area.
The Eraser tool can also erase selections made with tools other than the Select Pen tool.
3 Expand/Contract the selection
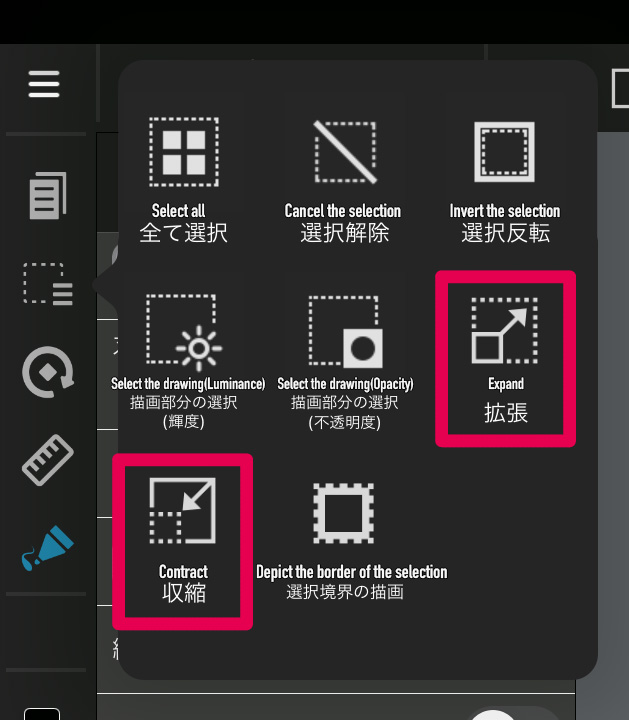
It is also possible to expand and contract the specified selection.
With the selection area chosen, from ![]() select “Expand” or “Contract”.
select “Expand” or “Contract”.
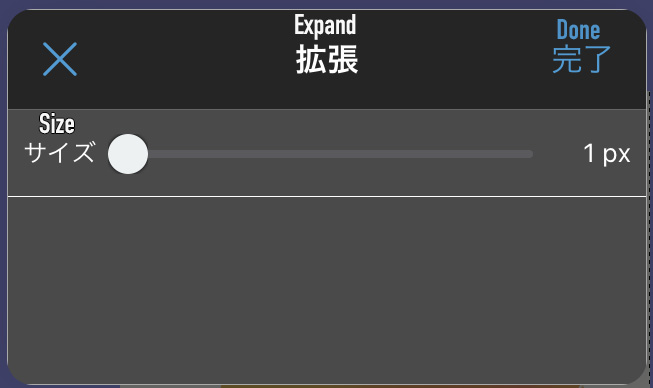
Enter the number of pixels you want to expand or contract, and tap “Done”.
4 Flip・Deselect the selected area
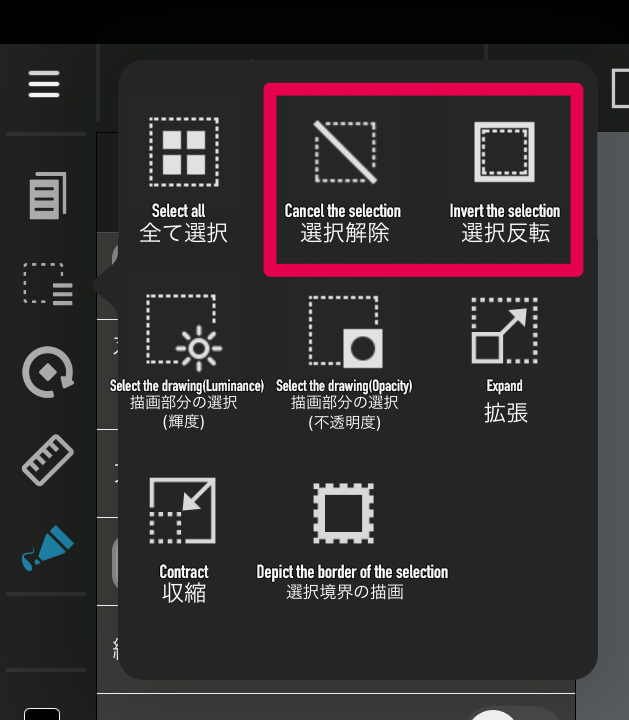
To invert the selection and the outside of the selection, select “Selection” > “Flip” from the menu while specifying the selection.
If you want to cancel the selection, select “Deselect” above it.
(5) Gradation
Using the Gradation tool ![]() you can create a gradient by simply dragging the canvas.
you can create a gradient by simply dragging the canvas.
The range of the gradient is the entire layer, but if you specify a selection in advance, you can draw the gradient only on the selected area.
With the Gradation tool, you can choose between two types of gradients: “Linear or Circular” and “Foreground – Background or Foreground”.
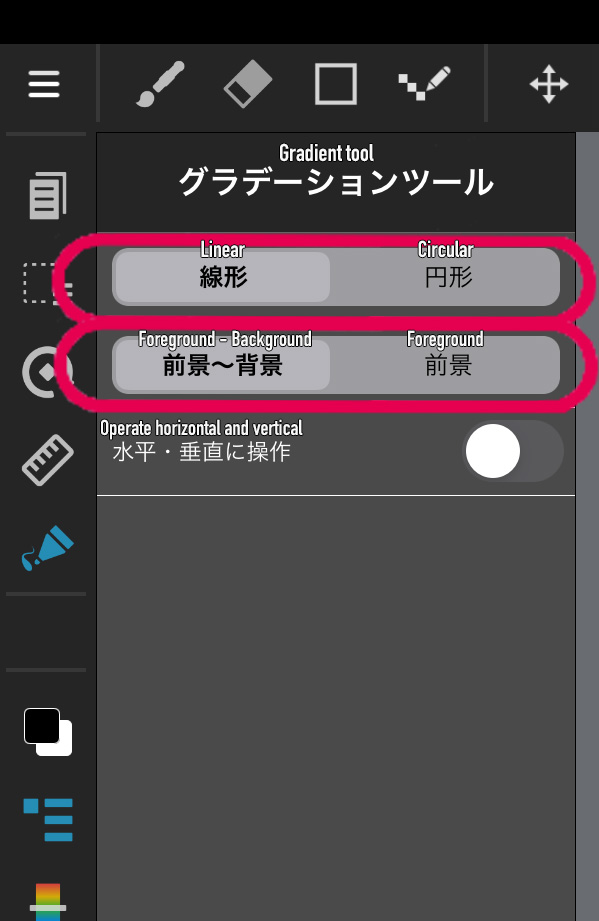
1 “Linear” and “Circular”
Linear: Creates a gradient where the color changes in the direction you drag.
Circular: Creates a circular gradient that spreads out around the starting point of the drag.
2 “Foreground – Background” and “Foreground”
Foregound-Background… Creates a gradient where the starting point of the cursor is the foreground color and the ending point is the background color.
Foreground… Creates a gradient where the starting point of the cursor is the foreground color and the ending point is transparent.
Since the color of the gradient is placed at the start and end points, dragging for a long time creates a familiar gradient with gradual color changes, while dragging for a short time creates a gradient with distinct colors.
<Example> A gradient is created with the foreground color set to “blue” and the background color set to “orange”.
You can use both types for either shape.

Linear + Foreground-Background

Circular + Foreground
\ We are accepting requests for articles on how to use /


