2022.07.04
Let’s Paint Colors【For iPhone】
In this article, I will explain the features you need to know when painting colors in MediBang Paint using the iPhone.
Preparation
You can choose the color to be painted from the color window, but it is more convenient to use the palette.
Register the colors in your palette
The palette function allows you to register and save colors.
Tap the “Color Panel” palette icon at the bottom of the screen.
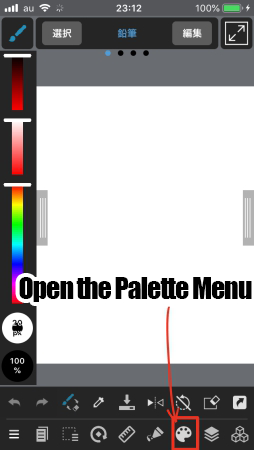
Open the color circle.
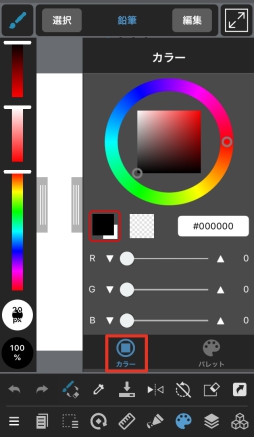
Tap the palette to bring up the color swatches.
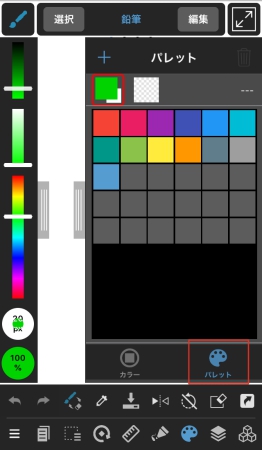
By registering your favorite/frequently used colors in the palette, you can save yourself the trouble of searching for them.
HSV Bar
You can use the HSV bar on the left side of the screen to change colors without bringing up the color circle or palette.
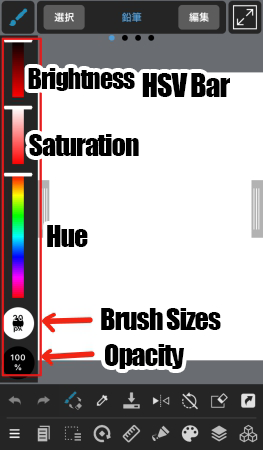
To change the brush size and opacity, press and hold the icon and move it up or down.
Eyedropper Tool
The eyedropper tool allows you to change the color of the canvas to the foreground color.
When you tap on the screen, the foreground color will change to the color of the selected area.
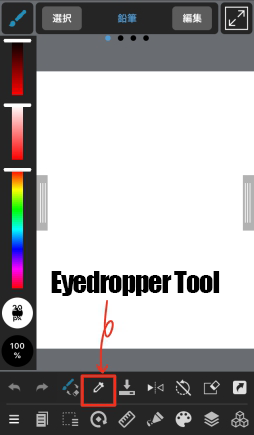
Hold to use Eyedropper
In MediBang Paint for iPhone, you can also set up the eyedropper tool by pressing and holding it.
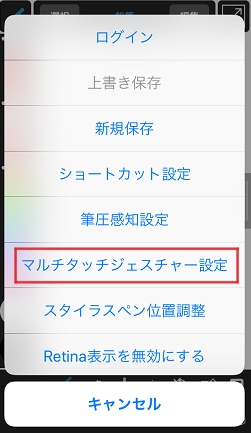
Select “Settings” from the three-line menu in the lower left corner.
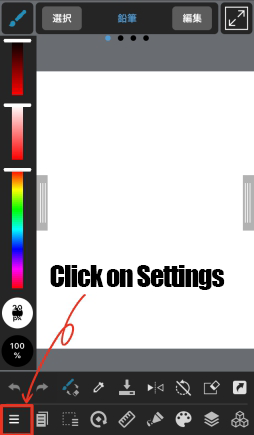
Select the “Multi Touch Gesture Settings”.
Turn on the “Eyedropper: One-finger long press” item.
You can also adjust the duration of the long press in “Long press time”.
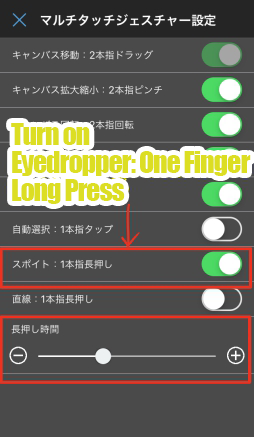
Now, when you press and hold on the canvas, it will switch to the eyedropper.
Selection Tools
One of the most important tools in digital painting is the selection tool.
Tap the icon in the upper left corner to bring up the tools menu.
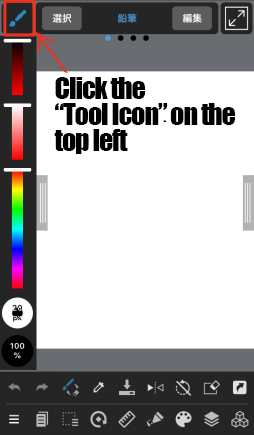
The functions related to the Selection Tool are
- Selection tool
- Magic Wand Tool
- Selection Pen Tool
- Selection Eraser tool
the above four tools.
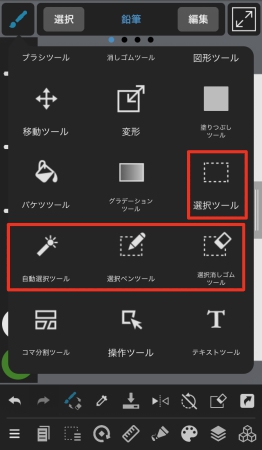
1. Selection Tool
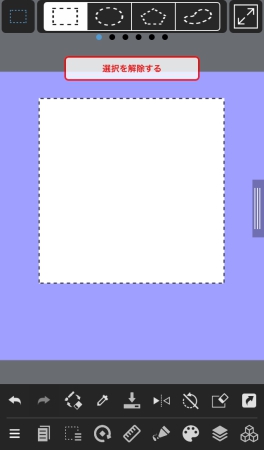
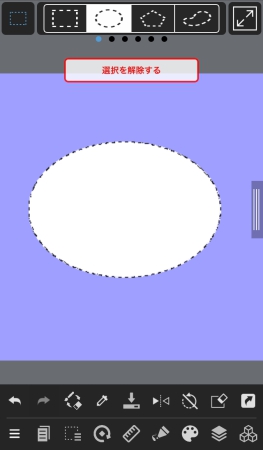
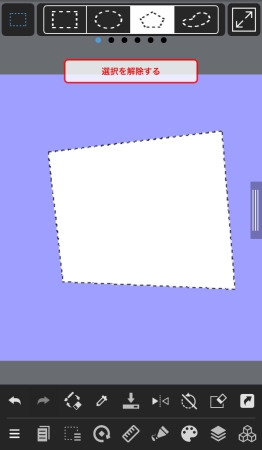
The selection tool allows you to specify the selection area in any shape.
You can choose from the following four shapes.
(1)Rectangle
(2)Ellipse
(3)Polygon
(4)Lasso
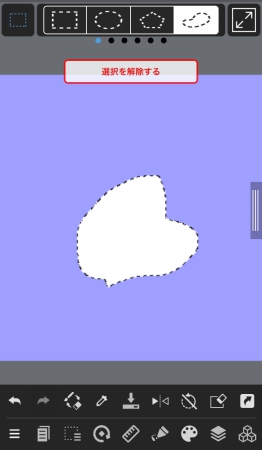
You can slide your finger on where the arrow is, to open detailed settings.
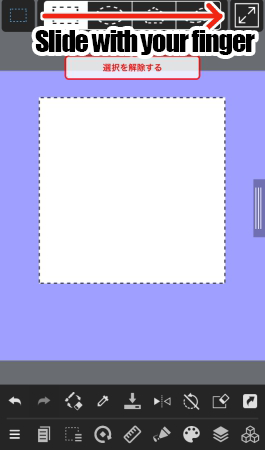
The settings include
- Normal, Add, Delete
- Rounding
- Fixed aspect ratio
- Select from center
these four.
(1)Normal, Add, Delete
“Normal” can only take a selection once.
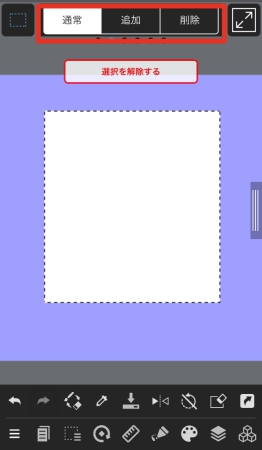
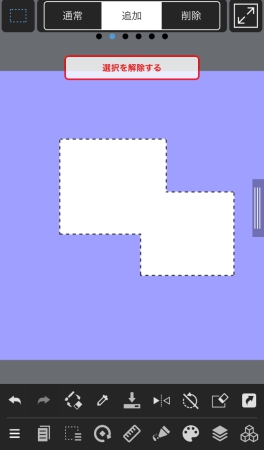
If you select “Add”, you can add more areas of selection.
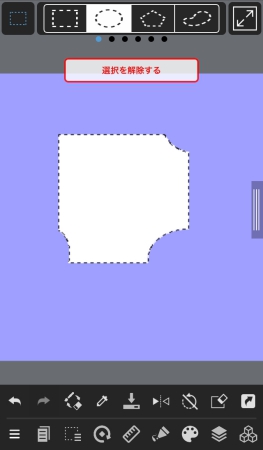
If you select “Delete,” you can remove the selected area.
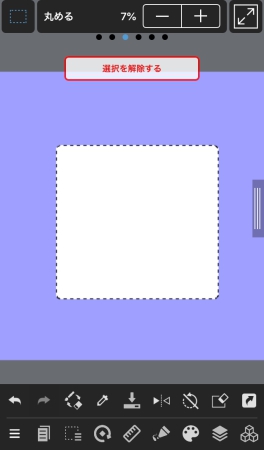
(2)Rounding
If you increase the value of “Round”, you can round the corners.
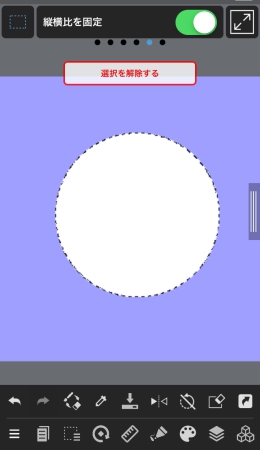
(3)Fix Aspect Ratio
If you check the “Fix aspect ratio” checkbox, you can get select an area in the shape of a perfect square or circle.
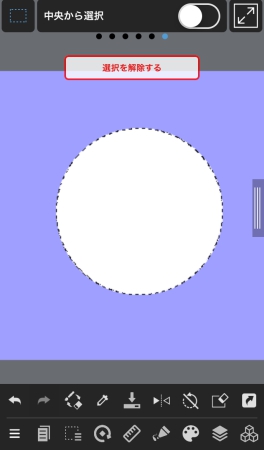
(4)Select from Center
Turn on “Select from Center” to draw a square or circle selection around the point you tap.
2. Magic Wand Tool
The Magic Wand Tool creates a selection according to the shape of the line, the color of the area surrounded by the line, or the line itself.
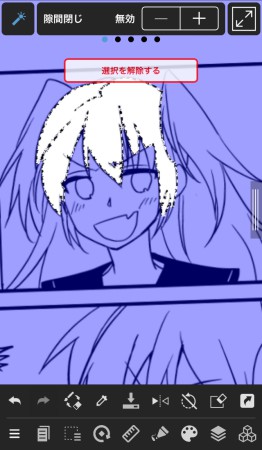
The Magic Wand Tool allows you to make more detailed settings for the following items.
- Close gaps
- Target
- Add / Delete
- Expansion
- Anti-aliasing
Let’s look at them one by one below.
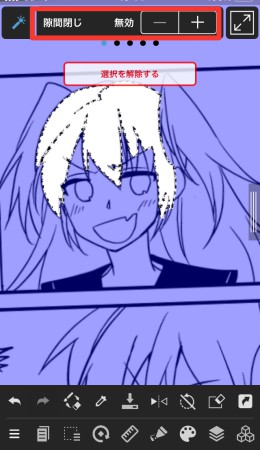
(1)Close Gaps
If you increase the value for Close Gaps, the area of selection will be judged as be closed even if the line is not closed.
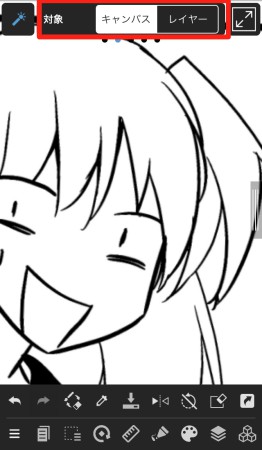
(2)Target
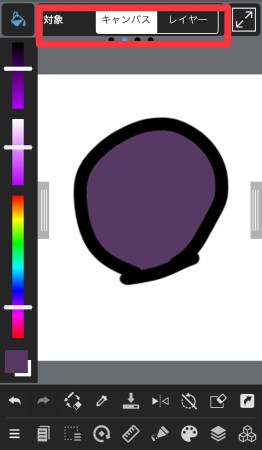
Choose whether you want to select the entire canvas or a layer.
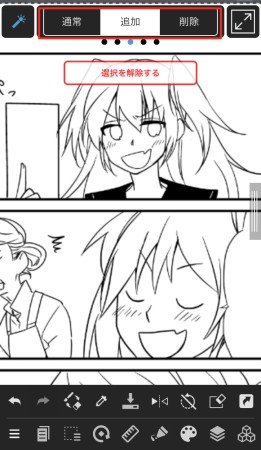
(3)Add・Delete
Select “Add” if you want to make multiple selections, or “Delete” if you want to delete some of them.
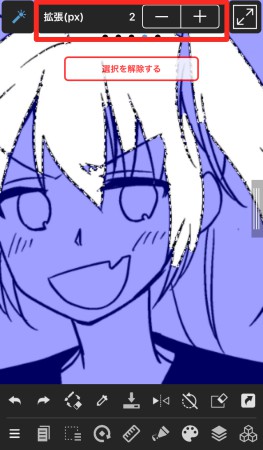
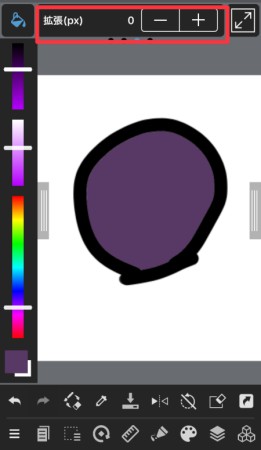
(4)Expand
Expand or shrink the selected area by pixels.
To expand the selection, tap the plus button.
If you want to reduce the size of the selection, tap the minus (-) sign and set the number below 0 (e.g. -2).
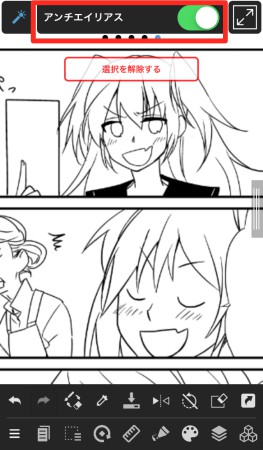
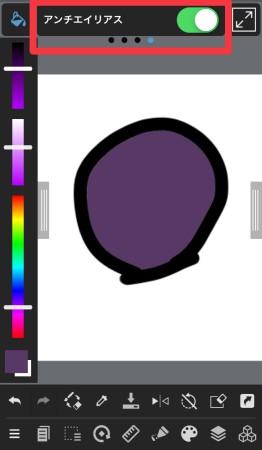
(5)Anti-aliasing
Turn on anti-aliasing to make the lines smoother.
▼Click here for an explanation of anti-aliasing.
・About anti-aliasing
3. Selection Pen Tool and Eraser Tool
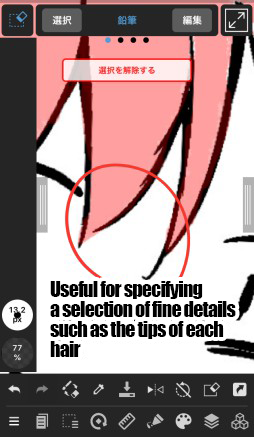
The Select Pen tool creates a selection where you paint with the brush.
This tool is useful when you want to select a small area such as the tip of a hair.
On the other hand, if you want to erase small detailed areas, use the Select Erase Tool.
Selection Menu
The selection specified by the Selection Tool can be manipulated from the Selection Menu.
The selection menu can be opened from the menu bar at the bottom of the screen.
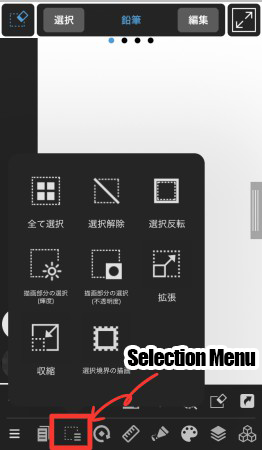
In the Selection menu, you can perform the following seven operations:
(1)Select All
You can select the entire canvas
(2)Deselect
Deselect the selected area.
(3)Flip Selection
Invert the selected area.
(4)Create a Selection from Layer (Brightness)
Select a drawing area based on its brightness.
This creates a selection based on the brightness of the picture on the illustration layer.
The lighter the color, the lighter the selection will be, and the darker the color, the darker the selection will be.
▼Click here for an explanatory article on Create a Selection from Layer (Brightness)
・Useful usage of “Create a Selection from Layer (Brightness)”
(5)Create a Selection from Layer (Opacity)
Select a drawing area based on its opacity.
The selected area will reflect the opacity of the drawing on the layer.
If the opacity is small, the opacity of the color to be filled in the selected area will also be small.
For example, let’s choose the brightness and opacity of the selection in the drawing area with the brightness as shown in the image below, and fill it with black.
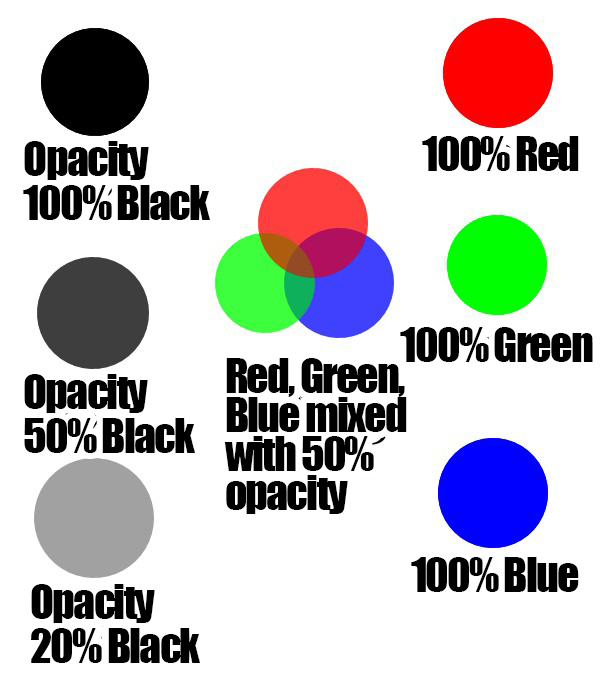
The following images show how the black and blue colors are poured in.
In the case of black
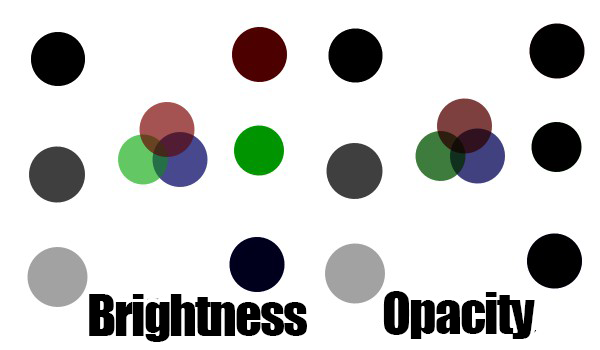
In the case of 100% brightness
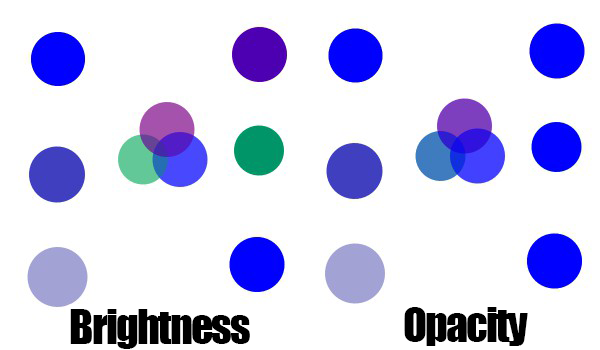
In terms of luminance, the darker the color, the more it is affected by the color poured, while the lighter the color, the less it is affected by the color poured.
In terms of opacity, the lower the opacity, the less the influence of the filled color, and the higher the opacity, the greater the influence of the filled color.
(6)Expand・Contract
Expands or contracts the selected area by the specified pixels.
(7)Drawing Selection Boundaries
You can draw the boundary of a selection.
This is useful for bordering.
Bucket Tool
The Bucket Tool is a tool that allows you to fill an area specified by the Selection Tool in one go.
The Bucket Tool is located in the toolbar at the top of the screen.
Tap the bucket icon to switch to the Bucket Tool.
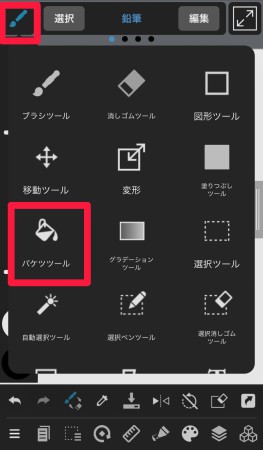
Like the Magic Wand Tool, the Bucket Tool also allows you to make detailed settings in the following areas.
(1)Close Gaps
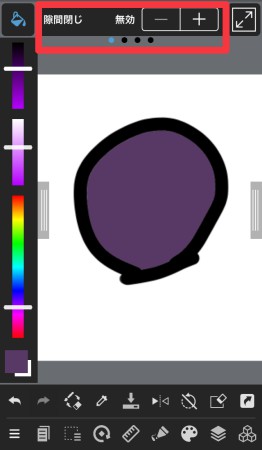
(2)Target
(3)Expand
(4)Anti-aliasing
▼Click here for tips on how to use the bucket tool
・Let’s master the bucket tool! How to avoid gaps and bleeding
Gradation
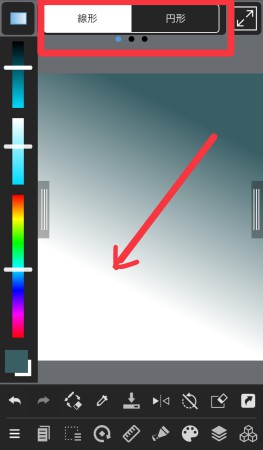
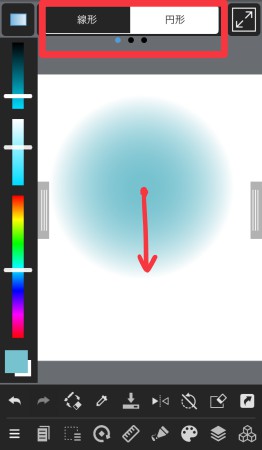
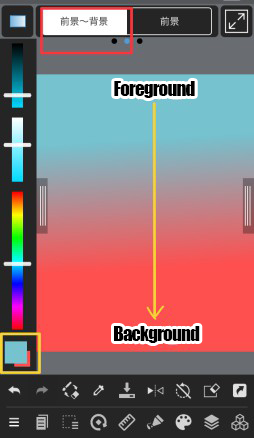
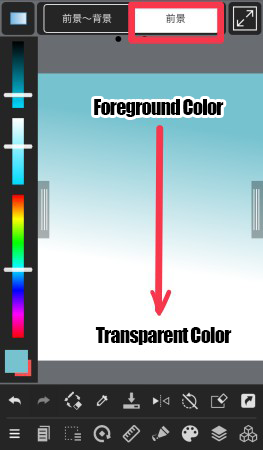
The Gradation Tool allows you to change the shape and the way the color is applied.
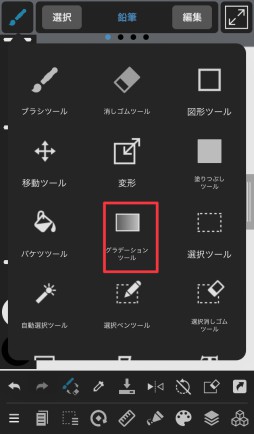
Select “Linear” to apply the gradient in a straight line.
Select “Radial” to create a circular gradient.
You can also select “Fore ~ Back” to create a two-color gradient.
You can create a gradation from the foreground color to transparent by choosing “Foreground”.
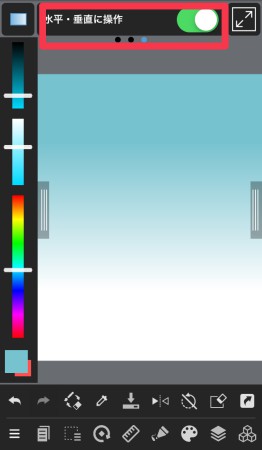
The “Horizontal・Perpendicular” option allows you to apply gradients only in the horizontal and vertical directions.
This concludes the brief explanation of the basic functions of coloring in MediBang Paint for iPhone.
I hope you’ll try painting with MediBang Paint!
(Text・Illustrations/吉田セツ)
\ We are accepting requests for articles on how to use /

