2022.08.01
【Let’s Try!】You can do it on MediBang Paint♪ Trendy way to paint! ~Eyes Edition~
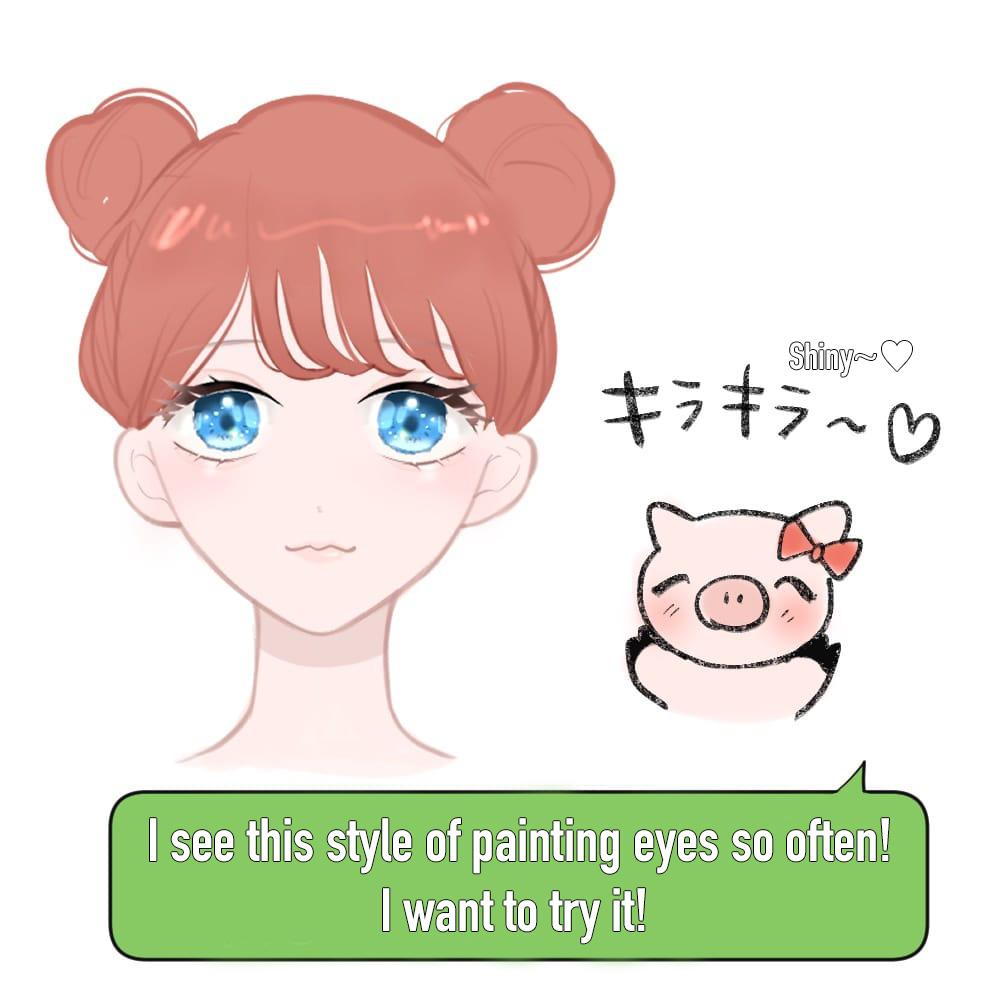
Have you ever thought “I know the basics of how to paint but it ends up looking boring…”?
Did you know that there are trends in ways to paint for illustrations ?!
“I want to paint like my favorite artist!” “I see this style often, how do I do it ?”
Let’s try the painting trend from 2021, using MediBang Paint!
In this tutorial, I will be explaining about the current trends in drawing “eyes” and “eye parts”.
・Comparing recent trends!
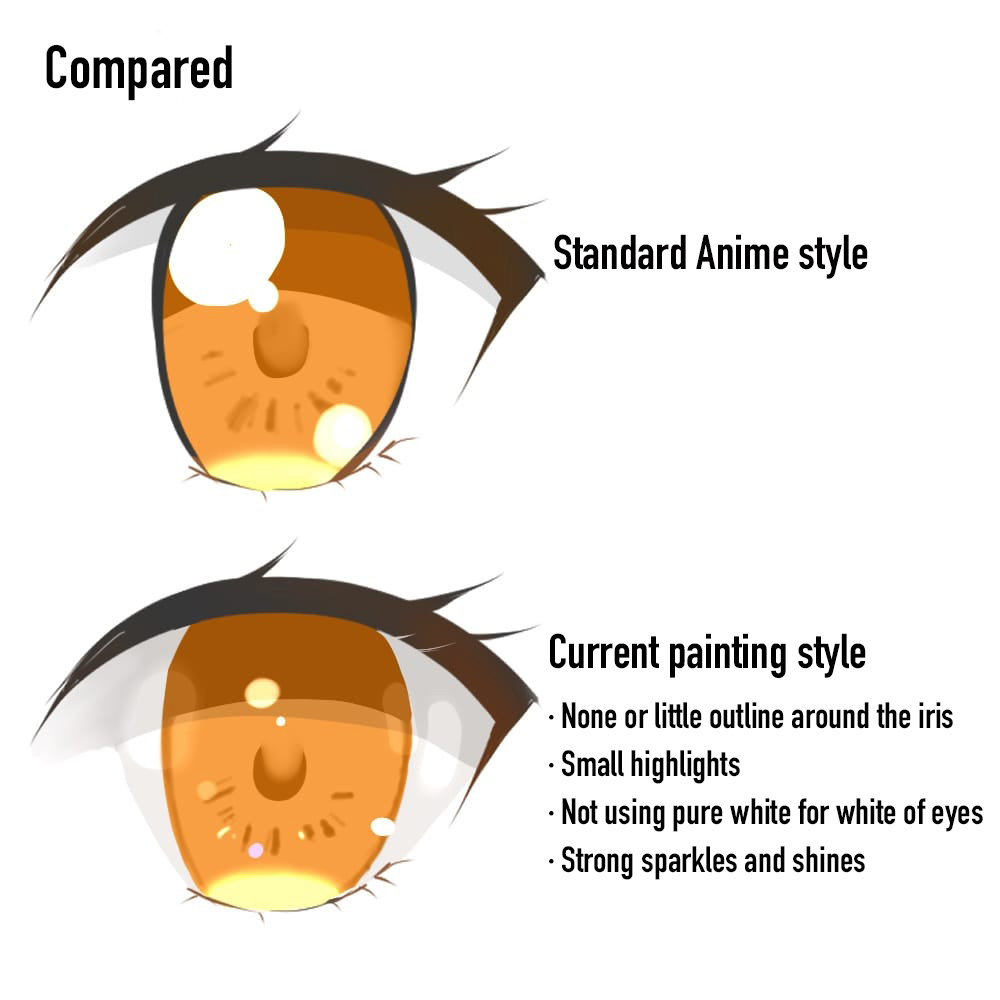
There isn’t a definite pattern but I’ve been seeing a lot of…
・Strong sparkles and shines
・None or little outline around the iris
・Additional drawings inside the eyes
・Not using pure white for the white of the eyes
・Small highlights
in the recent painting styles.
You can see the clear difference in the comparison above.
Regardless of the gender of the characters, recent illustrations seem to be drawn with large and vivid eyes.
I will be explaining this painting method step by step!
Let’s achieve the trendy look using MediBang Paint!
① Decide the eye shape and start a line drawing
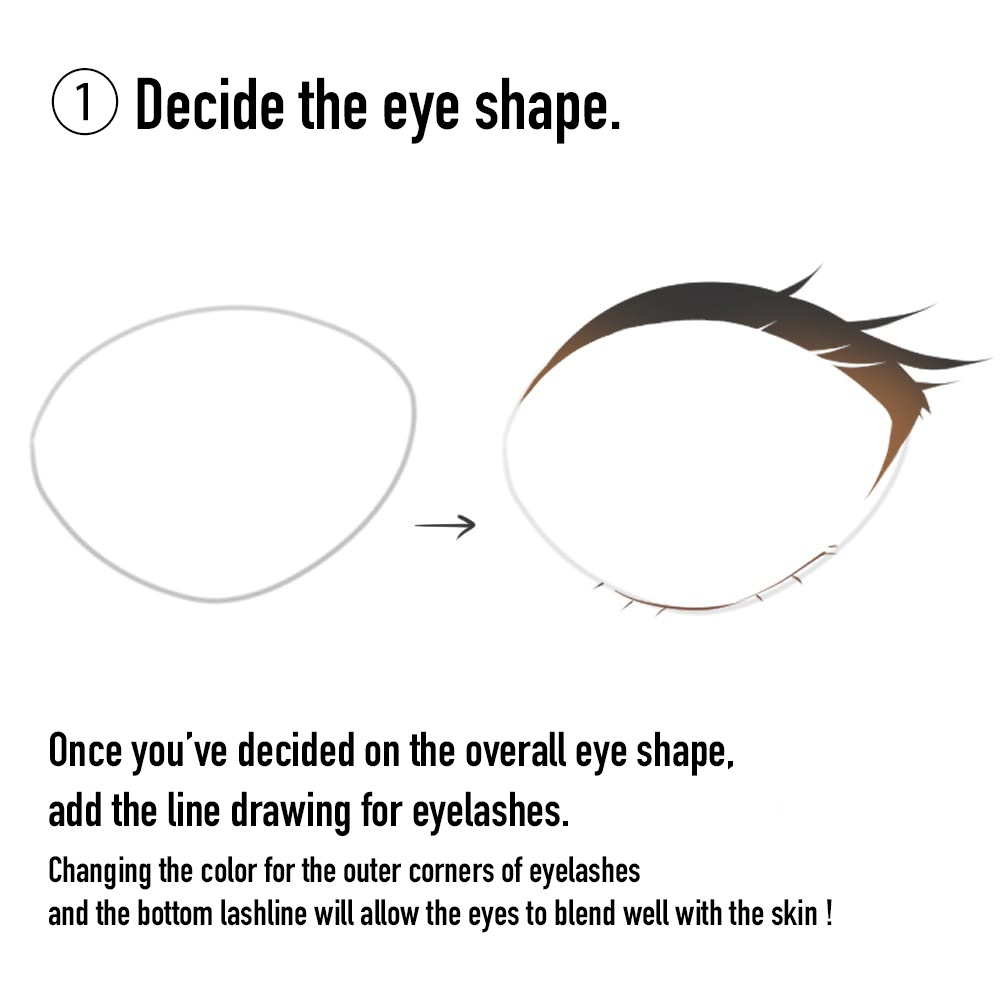
Let’s start off with deciding on the eye shape.
After you’ve chosen the size and shape in a sketch, create a line drawing for the upper and bottom eyelashes.
Create the “Line Drawing” layer.
You can use your favorite pen for this process.
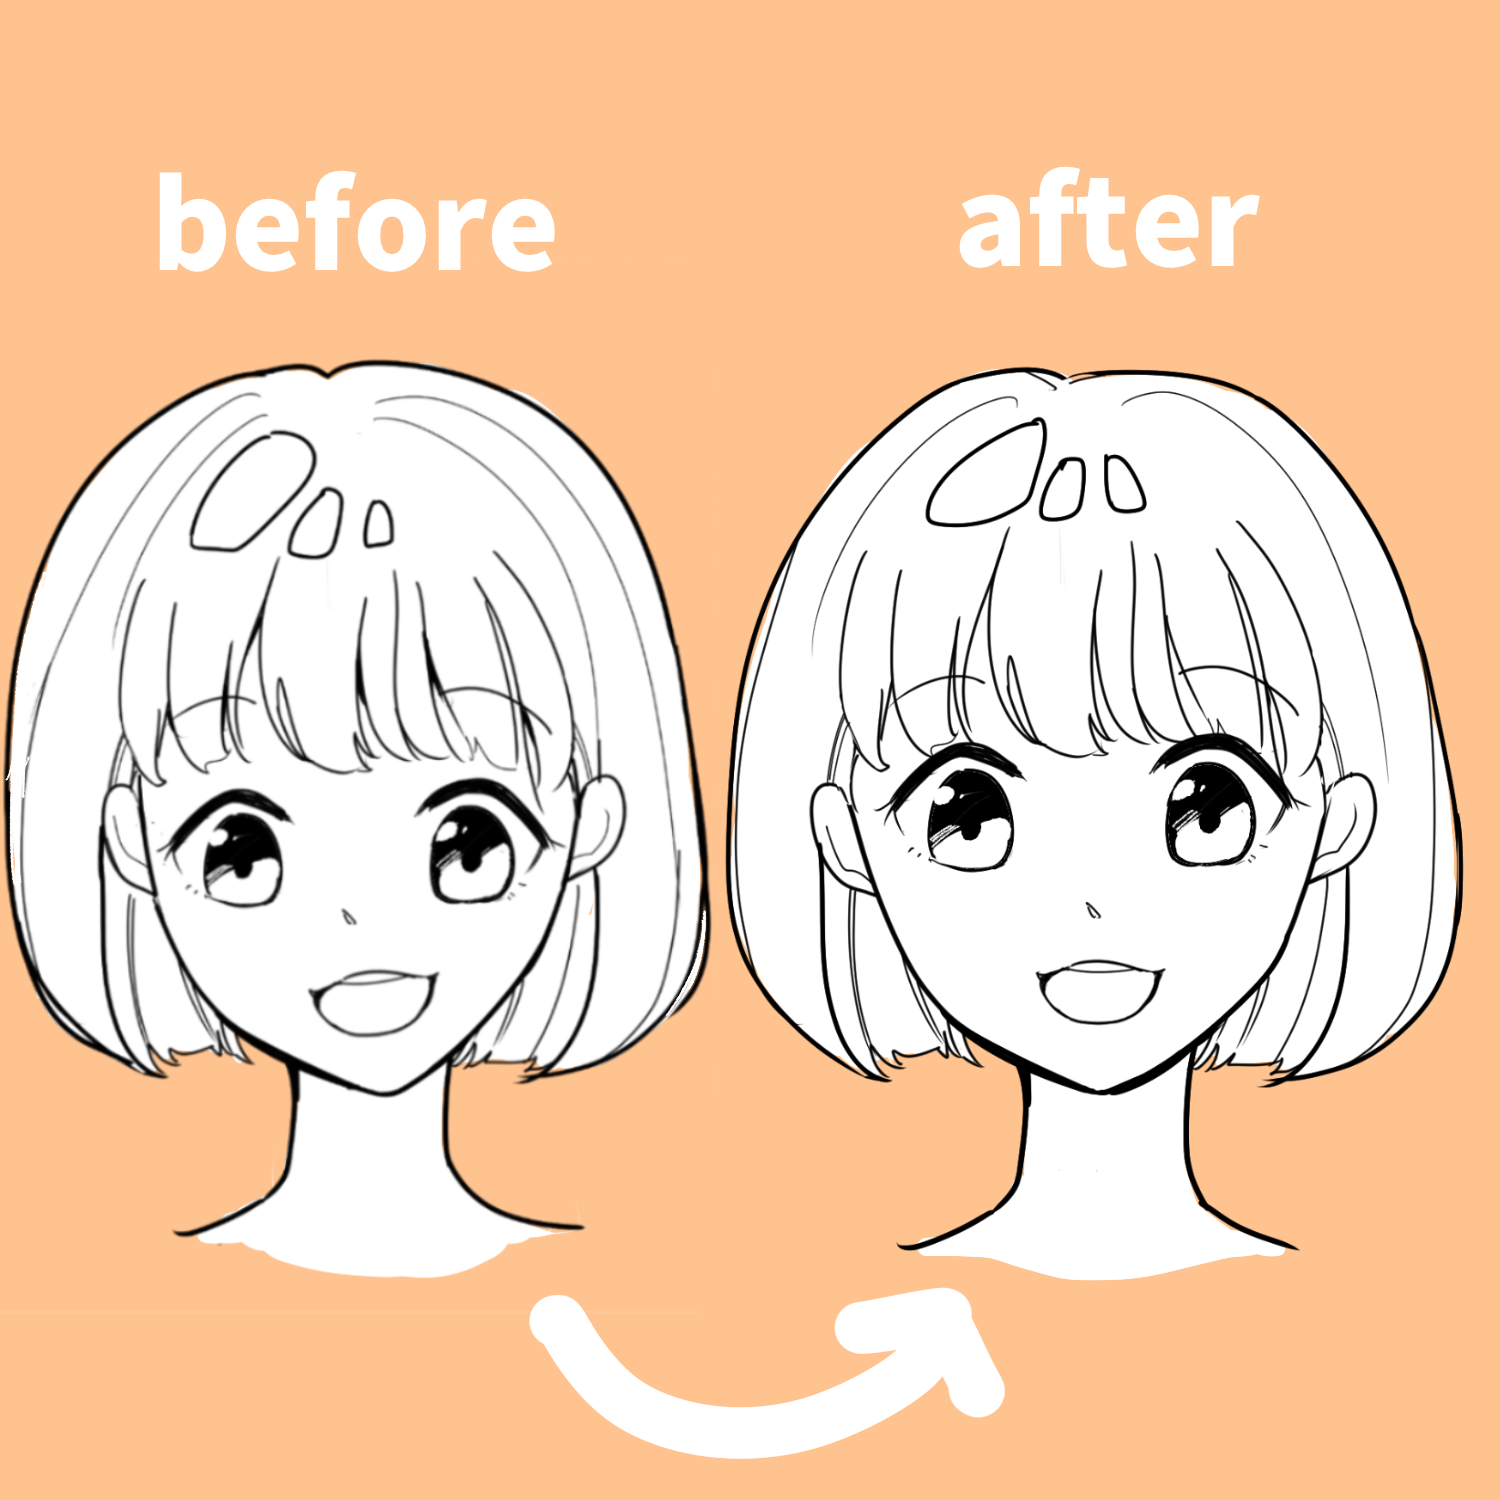
To make the eyes look trendy, add white strokes to the eyelash line using the eraser.
Add a lighter color to the outer corner and double eyelid line to soften the rigid impression.
Check the box for【Protect Alpha】and color in the parts using the “Watercolor” brush.
I recommend skin tone colors like light brown or shades of orange.
Now the eyes look much more tender!
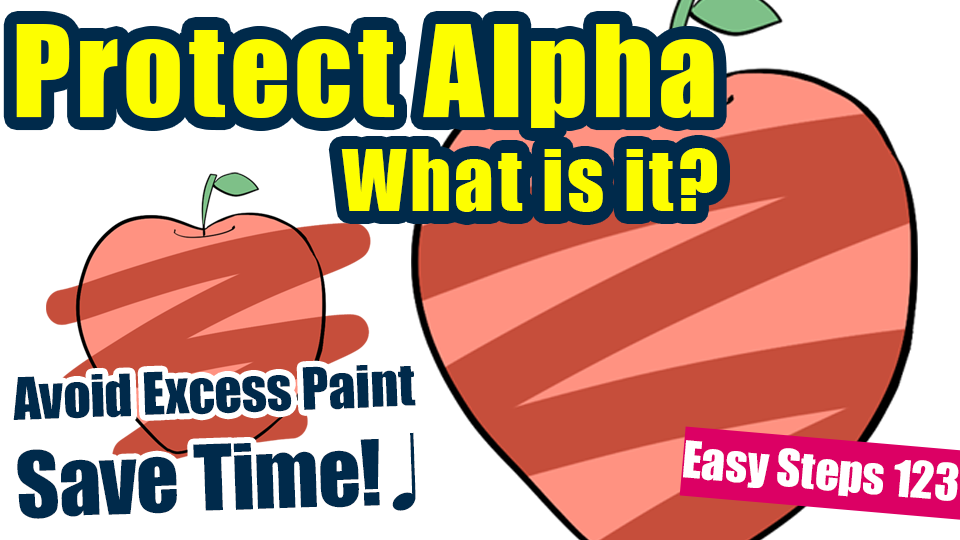
☆ Read the below article for more details on【Protect Alpha】
【Easy Steps 123!】Save time from cleaning excess paint♩ What is “Protect Alpha”?
② Draw the white of the eye
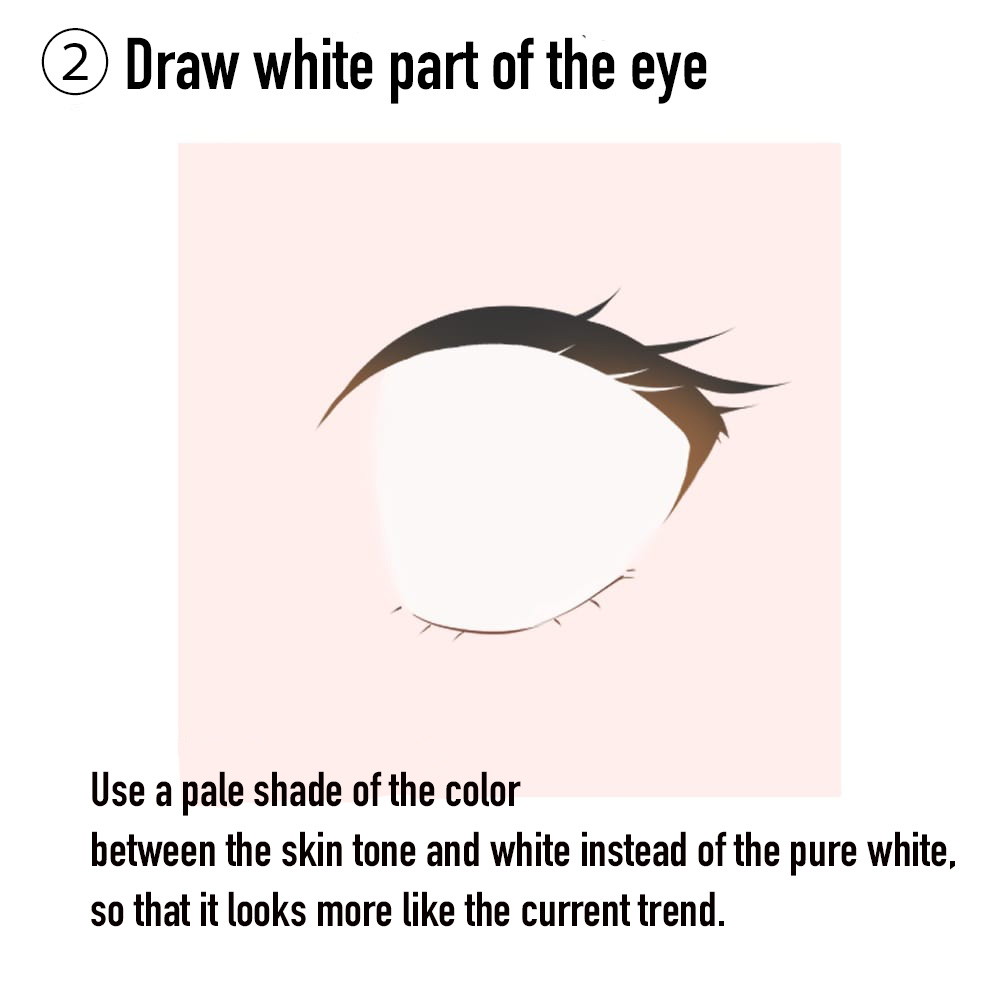
First, start with filling the white of the eye.
Create a layer for “White of the Eye”.
The recent painting method uses a shade a little darker than pure white.
As shown in the image above, select a middle shade between the skin tone, gray and white on the color palette.
Some artists use a bluish shade to portray transparency of the eyes.
You can adjust the color later so for now, fill in with a shade that seems to fit well.
Use the “Blur” brush to blend in the color at the edges.
③ Draw the base of the iris
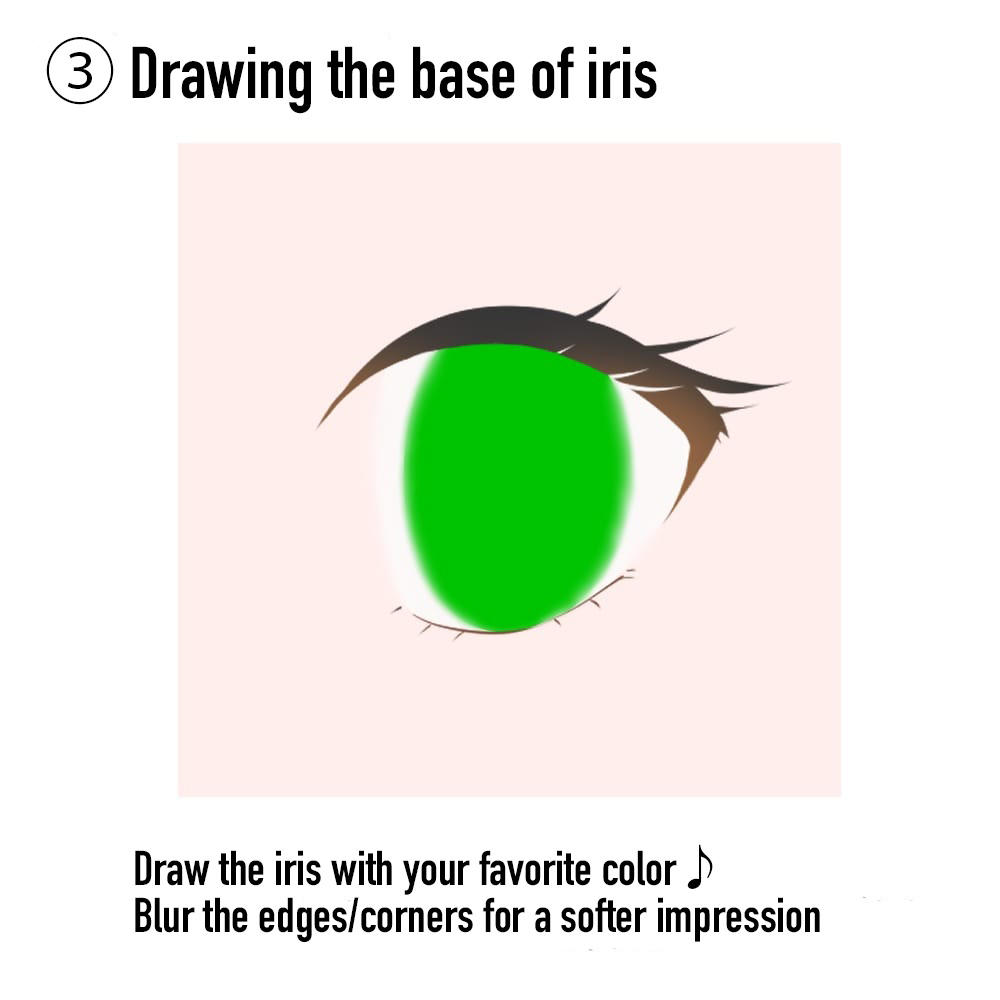
Now create a layer for “Iris”.
Let’s decide on the base color for the iris. I enjoy the color choosing process a lot ♪
I will be using green for this tutorial.
In the later steps, you will be adding sparkling lights and effects so the base color shouldn’t be too light.
Use the “Blur” brush for the edges again.
④ Drawing the insides of the iris
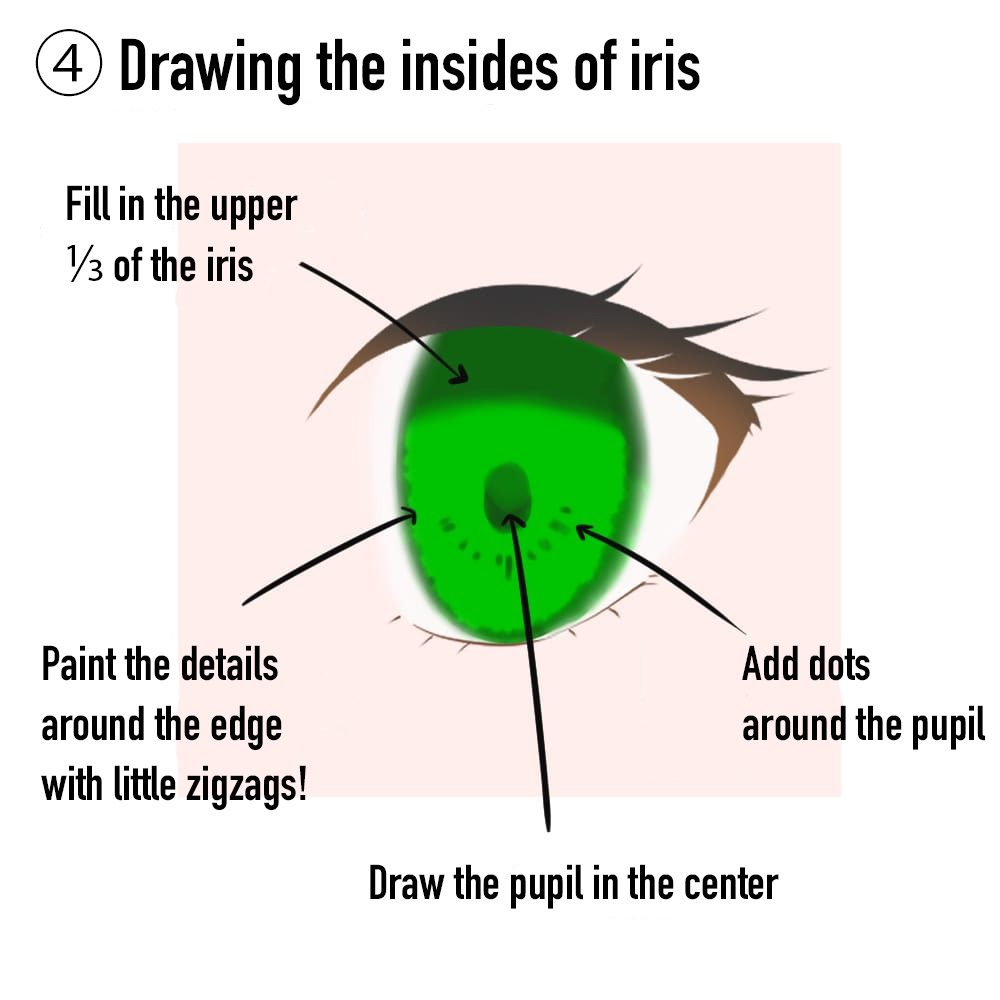
I will start drawing in shadows and the pupil inside the iris.
You can either draw on the same “Iris” layer or create and draw on a new layer.
From the color palette, choose a darker shade than the color you chose for the iris.
Using the “Watercolor” brush, paint the following parts;
・Upper half of the iris
・Pupil (Center circle of the eye)
・Details around the pupil
・Outline for the pupil
If you draw with a straight line, the eyes will end up looking flat. The tip here is to paint the details with little zigzags.
Now it looks much closer to a proper eye!
⑤ Add shadows to the eyes
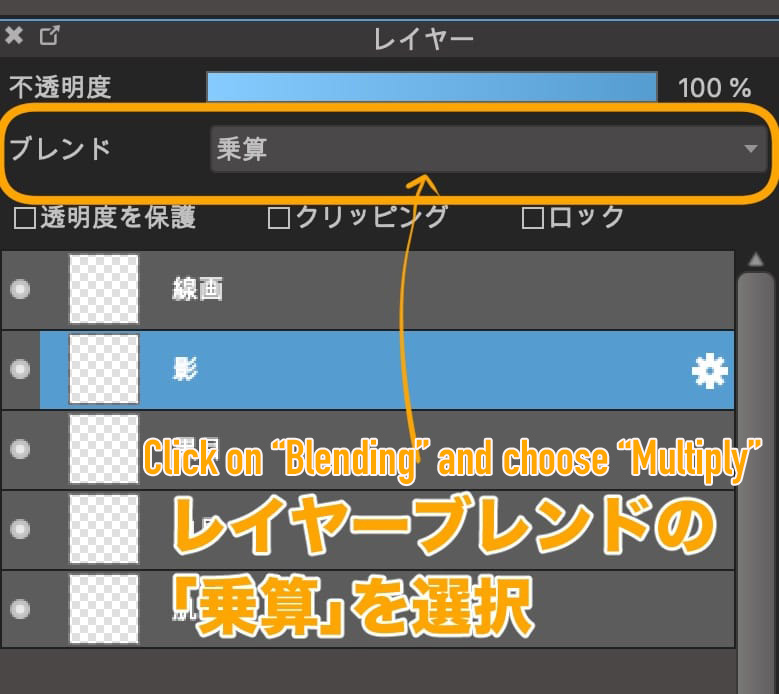
Create a new layer on top with【Multiply】from the Blending option.
At the top of the layer dialogue, click on “Blending” and choose “Multiply”.
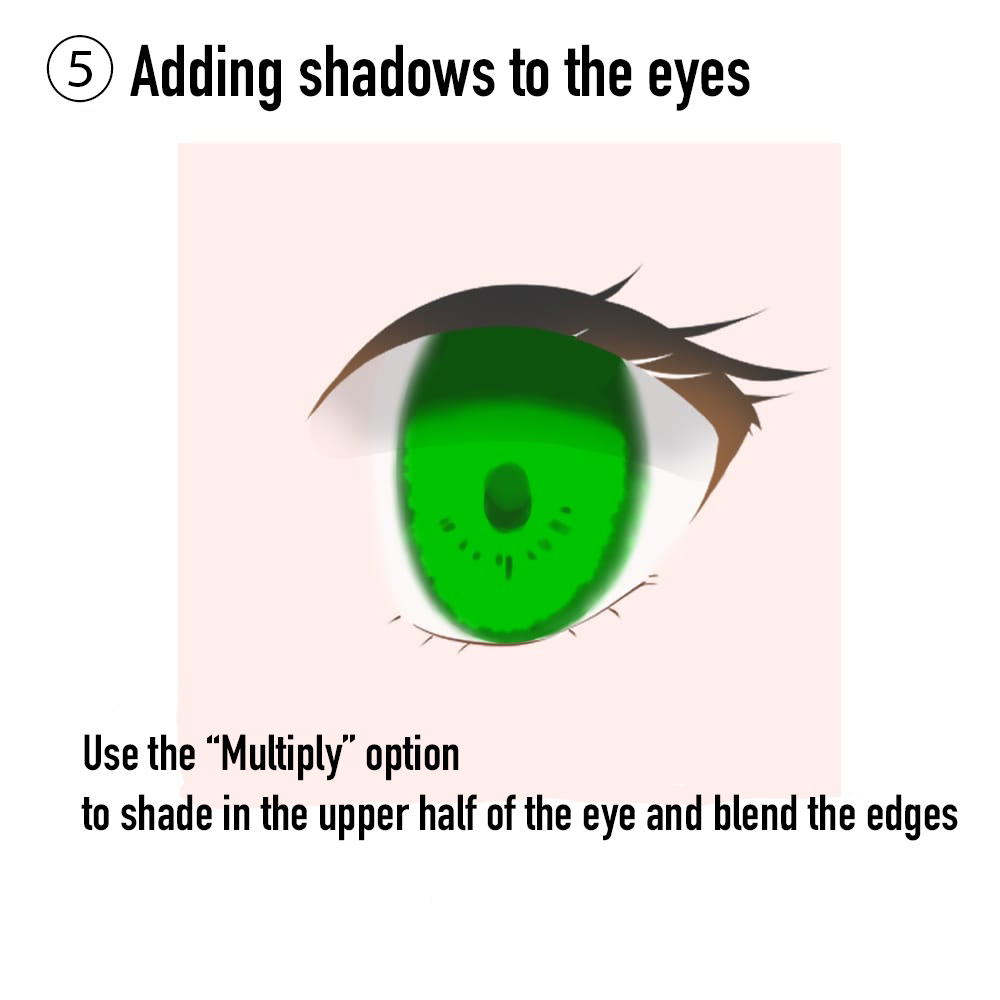
Select a shade a little darker than the eye color.
Along the line of the upper eyelash, shade the upper half of the white and iris of the eye with the darker color.
Use the “Blur” brush to blur out the edges.
With this step, you can portray the shadow of the upper eyelid.
☆ What is “Multiply”?
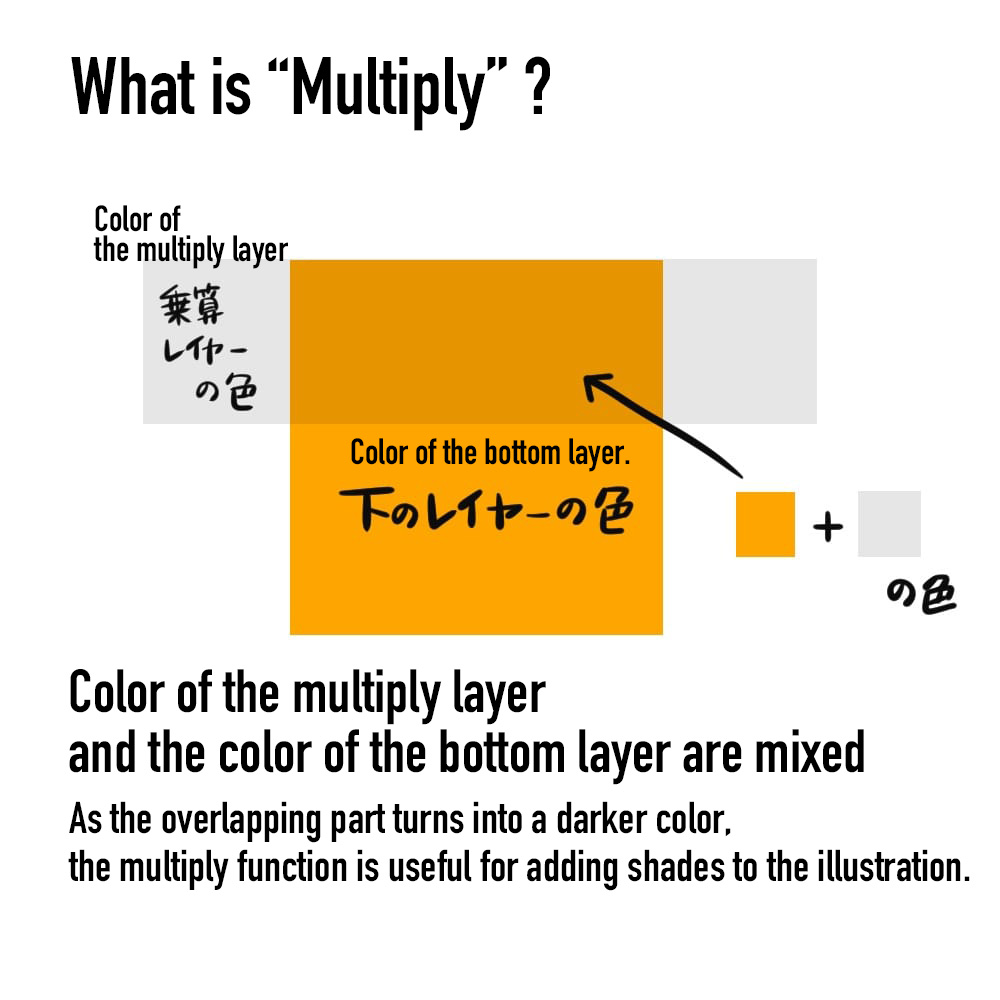
With a multiply layer, the colors from the bottom layer and the chosen color of the multiply layer mix together.
As the overlapping part turns into a darker color, the multiply function is useful for adding shades to the illustration.
⑥ Draw the gloss of the eyes
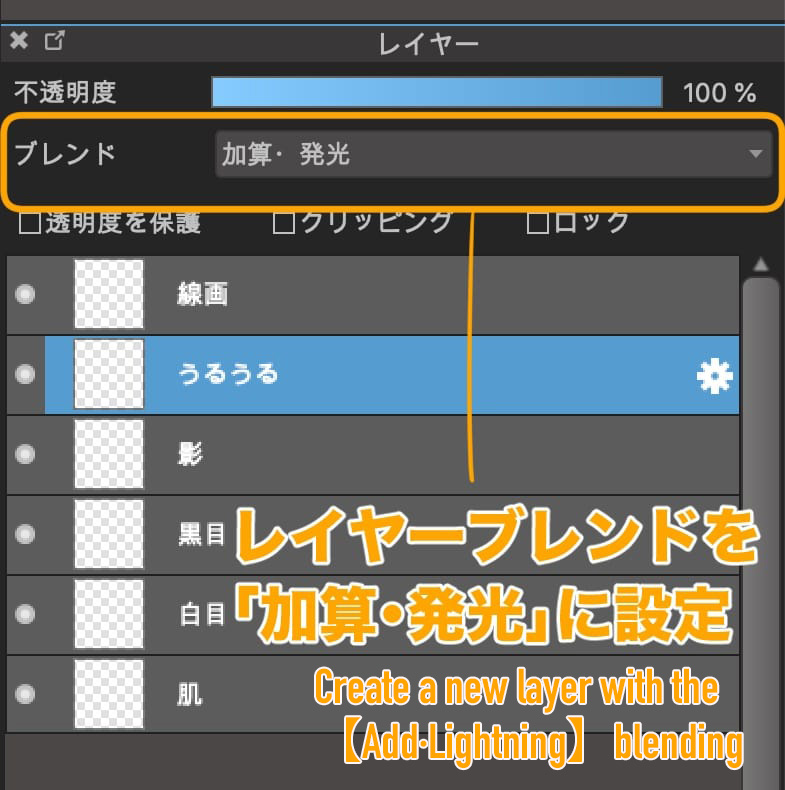
Create a new layer with the【Add】blending at the very top.
From the layer dialogue, click “Blending” and choose “Add”.
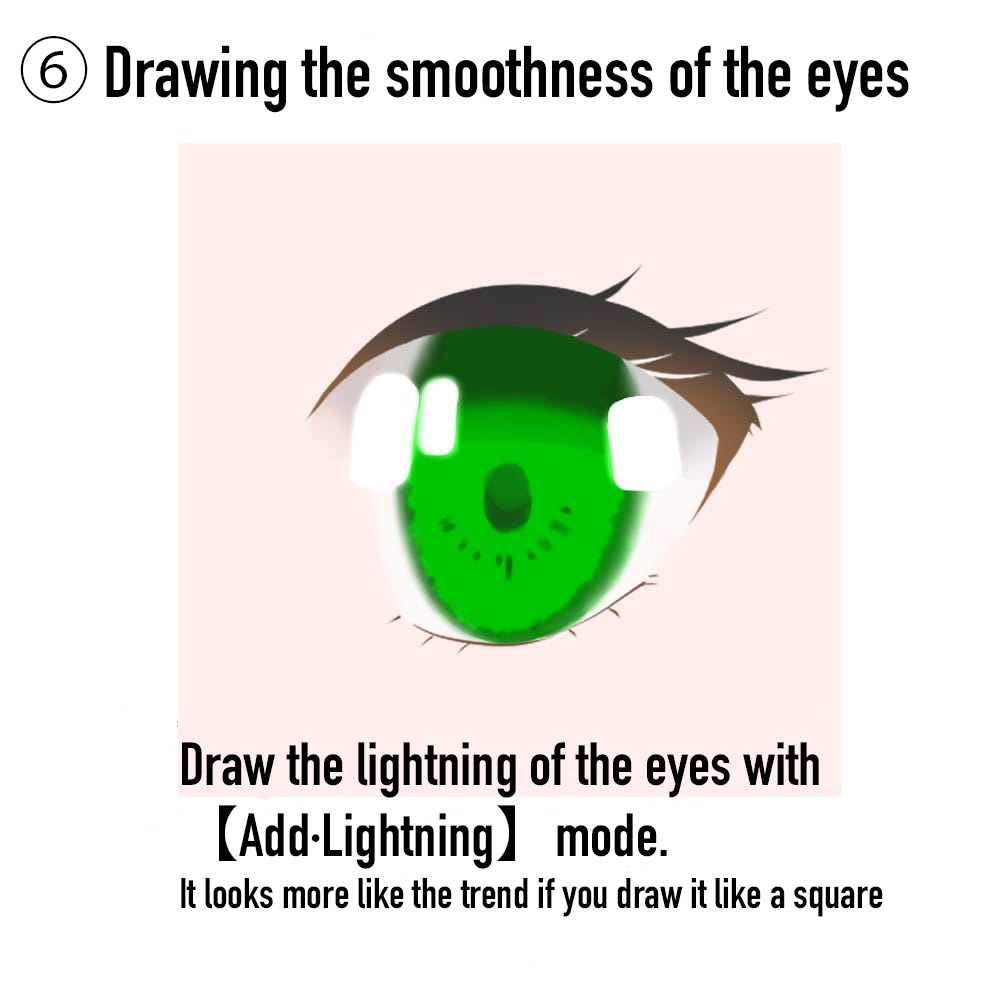
Use the “Pen” brush to draw some lights.
You can make the brush strokes look like lights by drawing rectangular shapes.
Now choose the “Blur” brush and trace to blur out the lights you’ve just drawn.

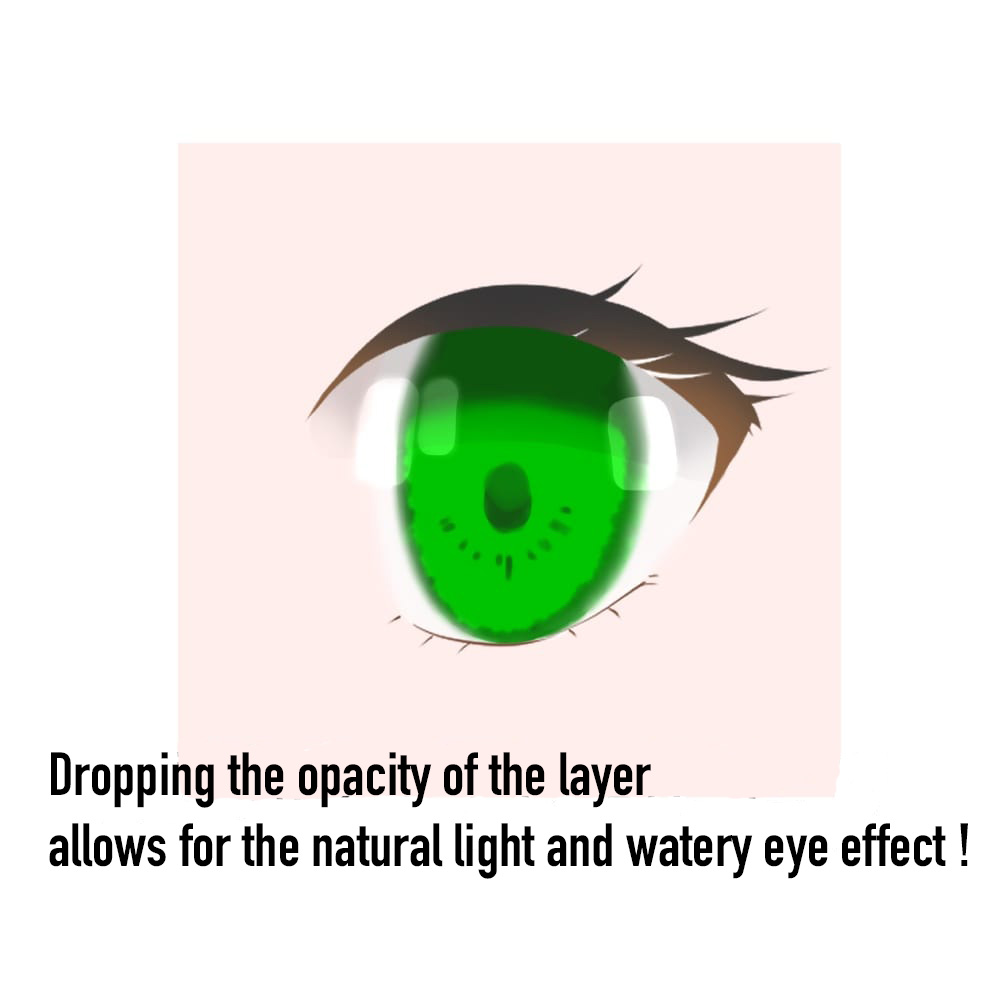
Drop the “Opacity” of the layer to about 15% and leave the lights faint.
Now you have the shiny and watery look of the eyes!
⑦ Add the highlights
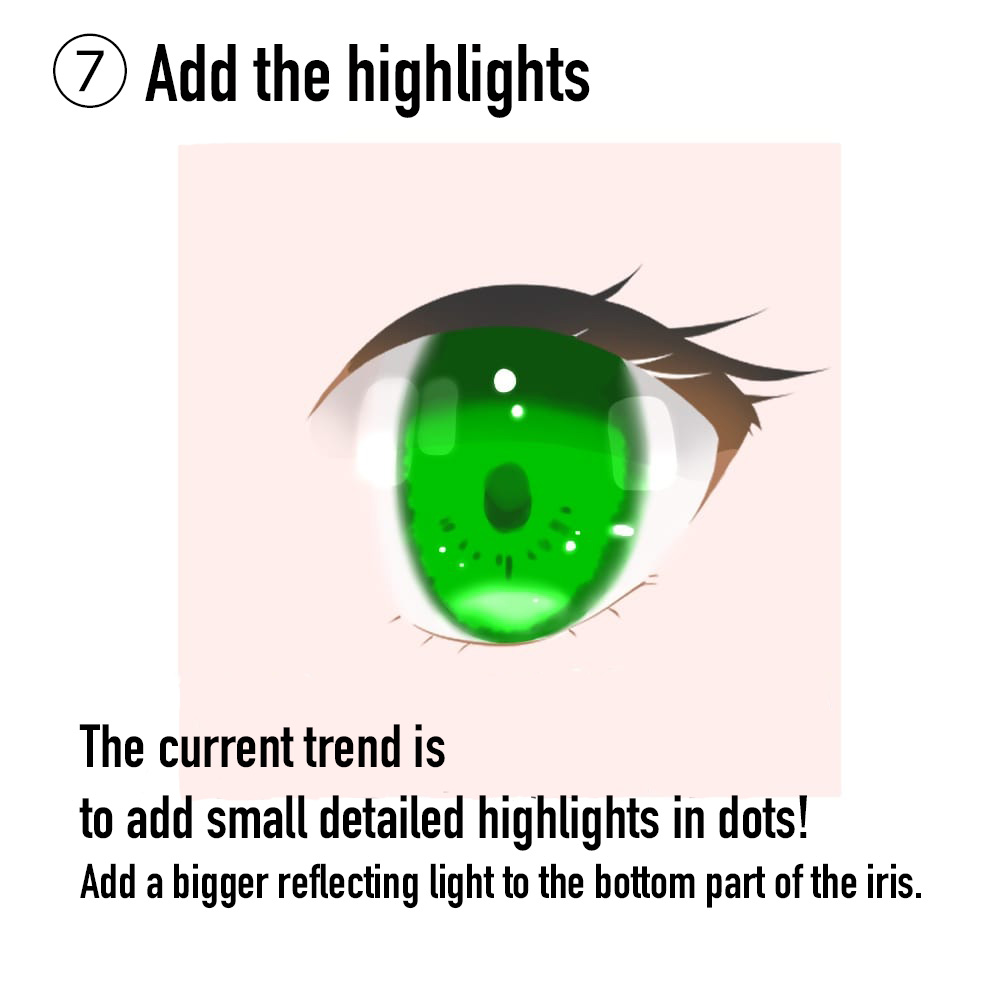
Create a new layer at the top with the “Add” blending.
Using white, add highlights to the iris.
You will see that the position and sizes of the highlights can change the impression of the eyes drastically. Try drawing various looks and find your favorite option.
The drawing styles used in old trends or for characters targeting children, artists tend to draw big highlights.
In recent illustration patterns, the highlights seem to be drawn with fine and small details.
You can achieve the trendy look by adding dots of highlights.
Adding the highlights creates a gorgeous and captivating look!
⑧ Add color highlights
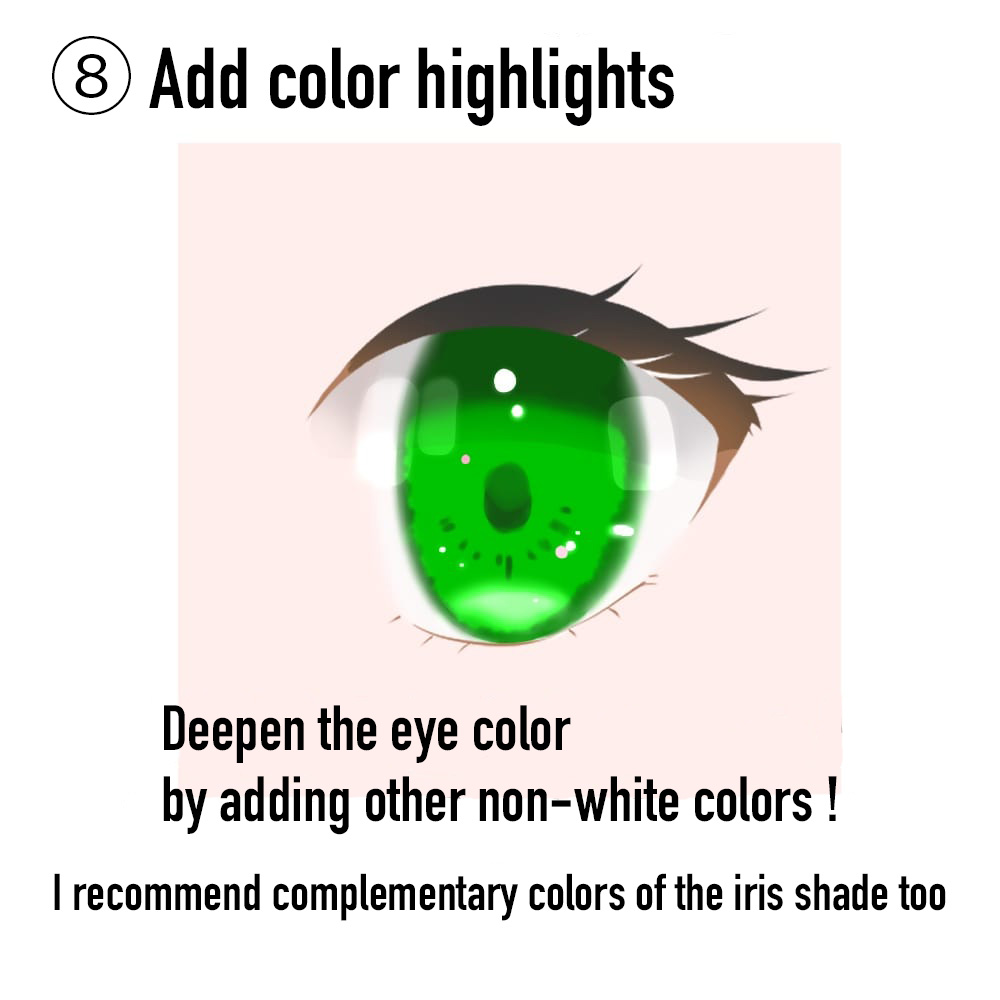
Finally, let’s add the final touches.
Draw tiny dots on the top, using a vivid color other than the one you chose for the iris.
For this look, I used red/pink, the complementary color of the base green.
These are very tiny details but the eyes look much deeper, compared to the single colored (green) eye!
The highlights are complete!
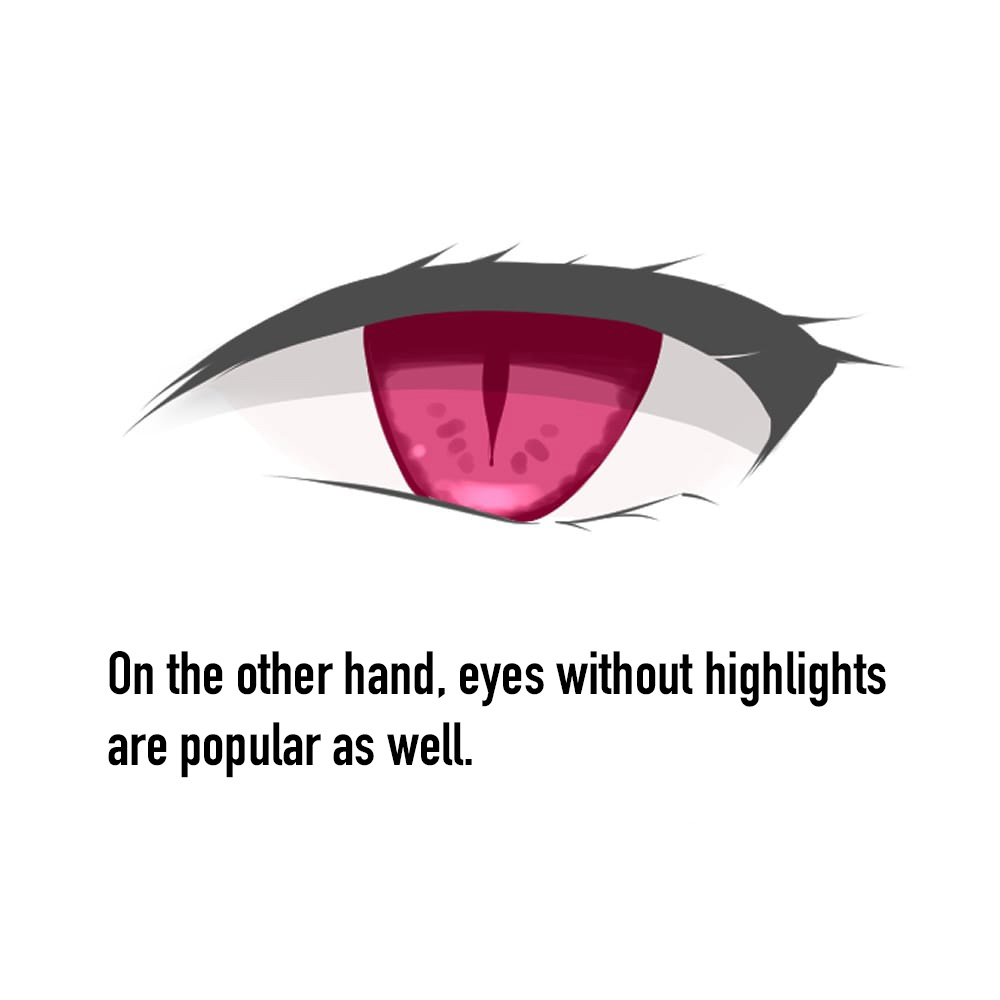
On the other hand, eyes without highlights are popular as well.
They are often used for male characters or characters with cool impressions.
If you want to portray this style, highlight only a small portion at the bottom of the iris.
⑨ Draw the eyelids and eyebags
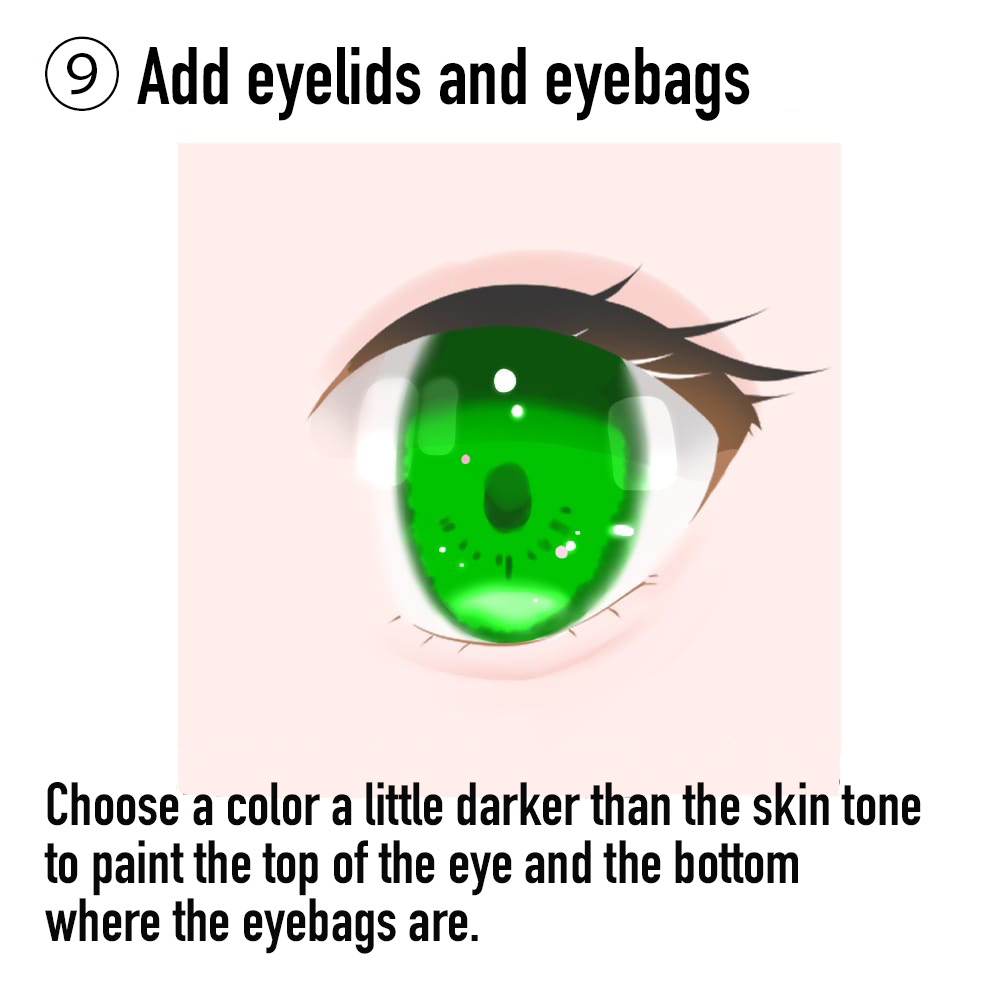
The recent illustrations seem to also draw in eyelids and eyebags with a sparkly touch.
Choose a color a little darker than the skin tone to paint the top of the eye (double-lid line to eyelid line, to your preference) and the bottom where the eyebags are.
Then select a color lighter than the skin tone and add some lights. I recommend you to leave a bit of the darker tone around the edges.
Once you color them in, use the “Blur” brush to blur the entire eye.
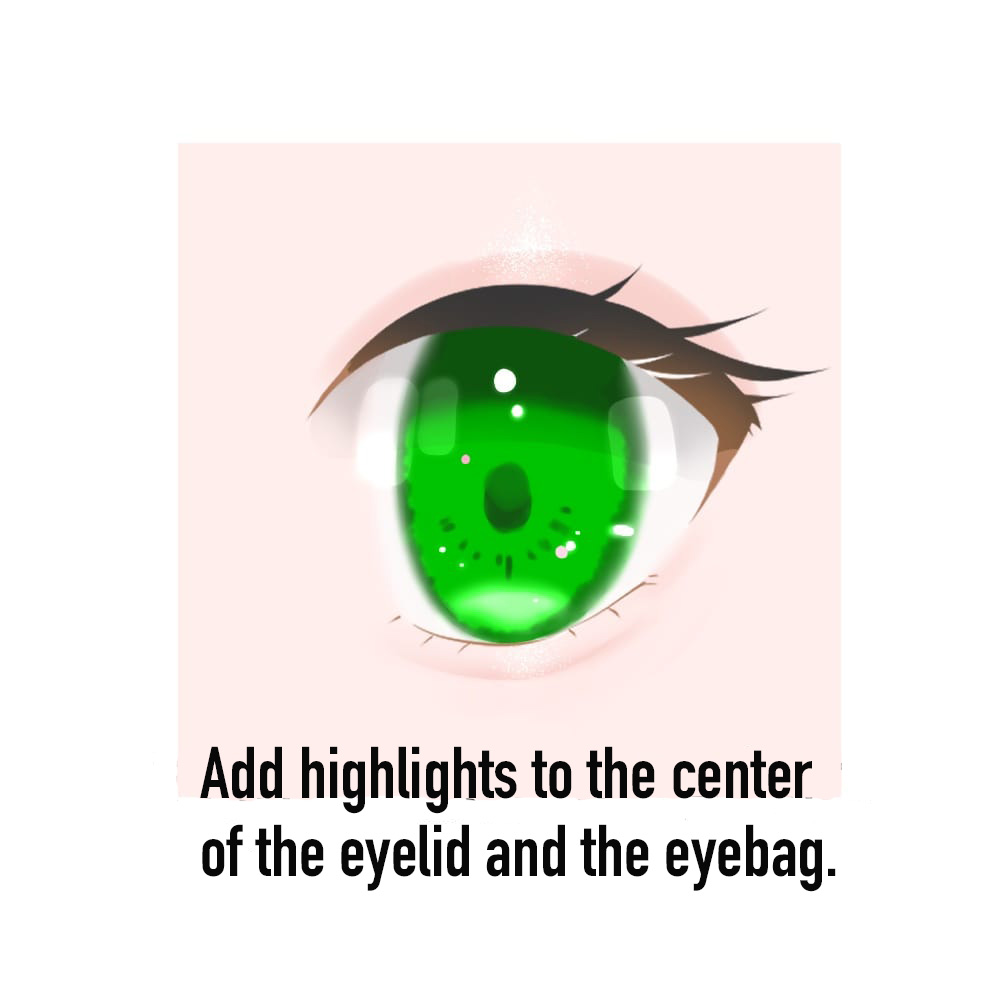
Complete the final touches in the new layer set to【Add】blending, by adding highlights to the center of the eyelid and the eyebag.
☆ Tip: Use the “Stipple Pen” in MediBang Paint to add pretty highlights!
Adjust the strength of the light by dropping the opacity of the layer.
It’s complete!
I introduced an example for the recent trendy illustration styles.
The trends in art communities change quite often but I hope you can create your own painting style by mastering your favorite drawing techniques ! ♪
(Text・Illustrations by はらなおこ)
twitter:@nao_comic
\ We are accepting requests for articles on how to use /

