2022.09.09
Let’s Draw Manga For Beginners (4) – Final Touches【iPad】

11. Convert the panel materials
Once all the processes have been completed, erase the overlapping parts of the panel frames.

1 Keep the panel division layer selected and tap on ![]() from the Layer Menu.
from the Layer Menu.

Choose “Rasterize”.
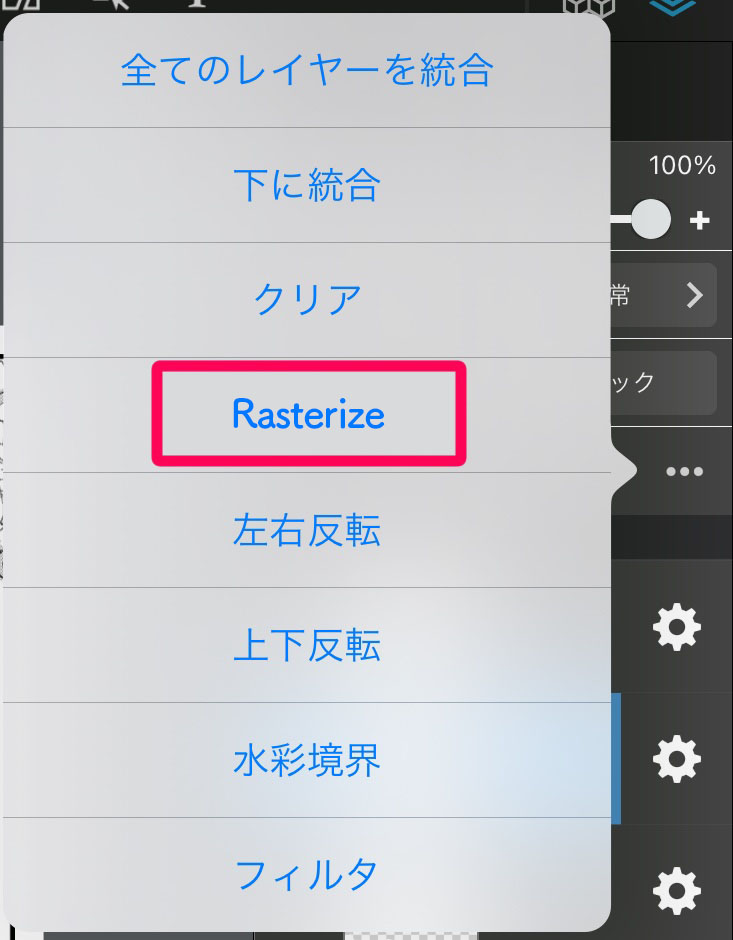
※By rasterizing this layer, the panel materials have been converted to a single image and now you can erase parts of it as you like. (However, you will not be able to divide the panels anymore.)
2 From the toolbar, select the Eraser Tool ![]() and erase the lines of the panel frames overlapping with the character and the flowers.
and erase the lines of the panel frames overlapping with the character and the flowers.

3 Completed

※The above has been drawn using MediBang Paint Pro.
12. Final Step (Size & Save)
Lastly, I will explain how to change the size and how to save the data.
【Changing Size】
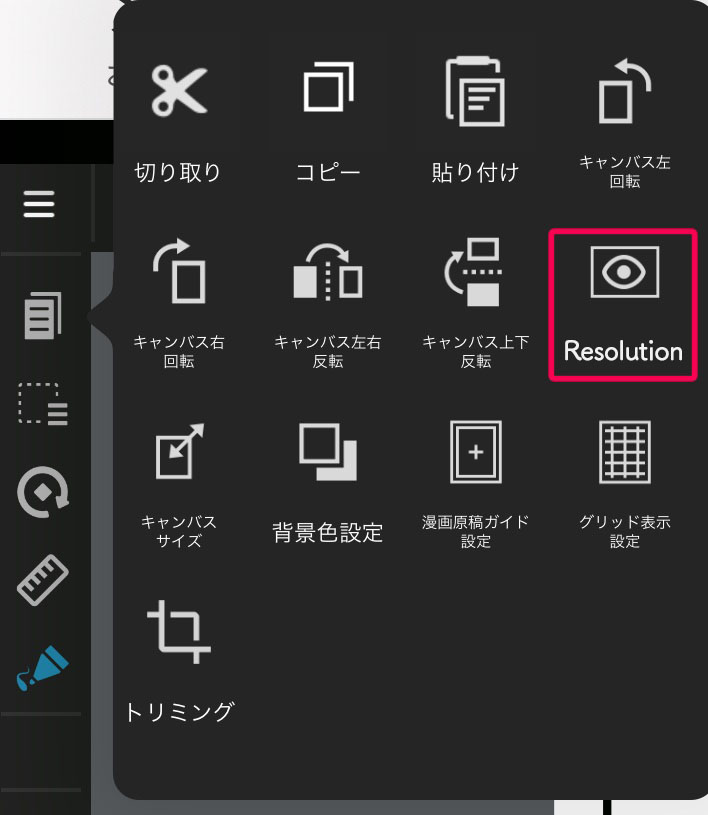
1 Tap the ![]() icon from the left side of the screen.
icon from the left side of the screen.

Choose “Resolution”.
2 A window for Resolution will open so enter the value for height/width as you like it to be.
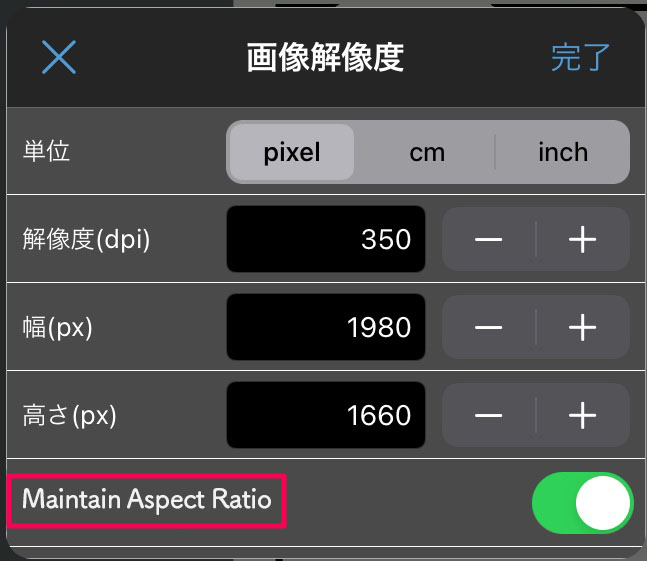
※If you have the “Maintain Aspect Ratio” turned on, entering the value for either the width or the height adjusts the other value to keep the same ratio.
Please note that if you turn off the Maintain Aspect Ratio, the canvas might distort depending on the value you enter.
【Saving Data】
If you are logged into your MediBang account already, tap on ![]() , tap “Save” and choose “New Cloud Save” to save your data to the cloud space.
, tap “Save” and choose “New Cloud Save” to save your data to the cloud space.

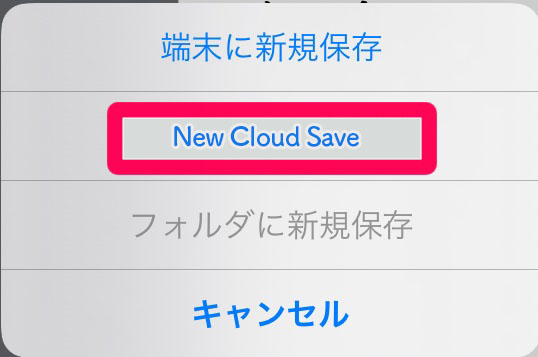
(If you have been working on the canvas from “My Gallery”, choosing “Overwrite File” allows for automatic save on the cloud)

※The above has been drawn using MediBang Paint Pro.
For anyone just starting to use MediBang Paint, you can do a variety of things by memorizing the basics so I hope you try the tools and functions I introduced.
Go to the top page; “Using MediBang Paint for the first time For Beginners”
\ We are accepting requests for articles on how to use /

