2022.10.14
Beautiful Luster! Techniques for Drawing Fabric Textures!

In this article, I will show you how to use fabric textures (silk satin).
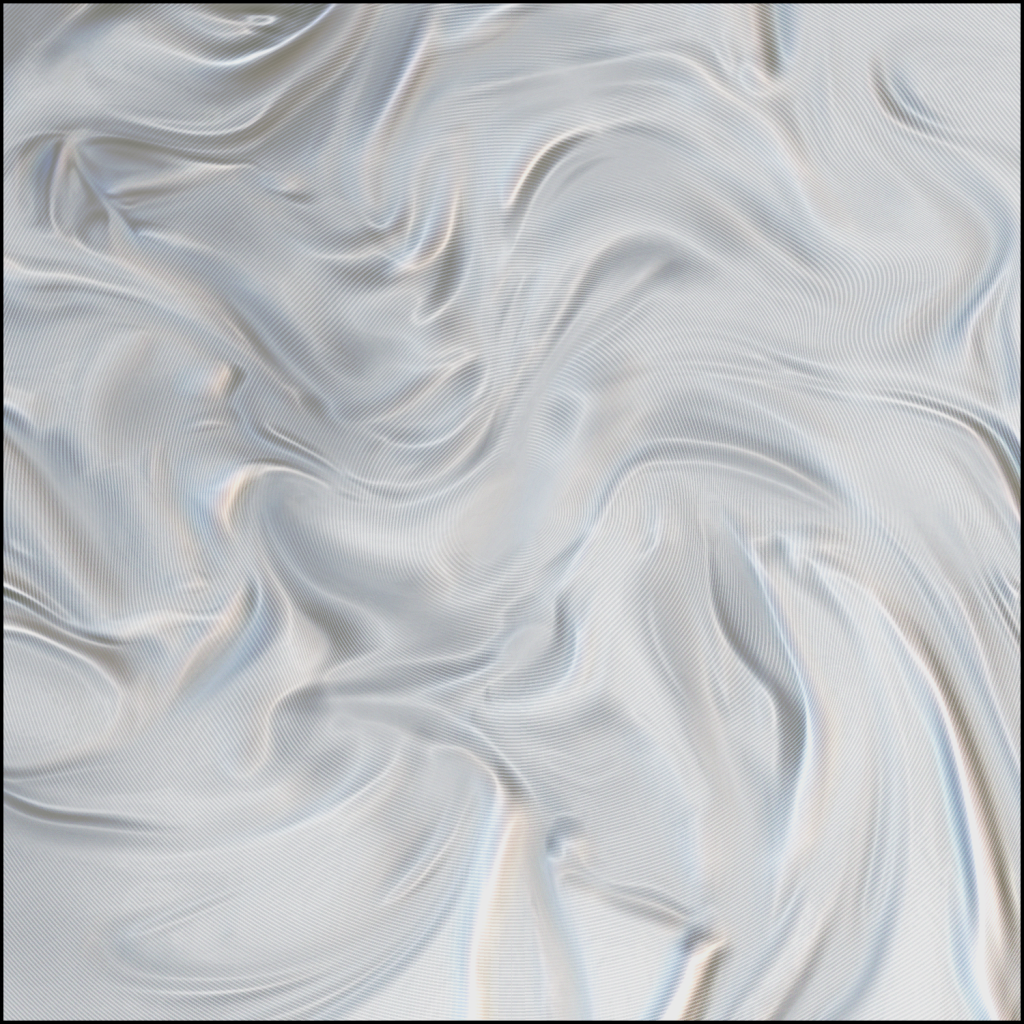
The weft is emphasized in this texture, giving it a three-dimensional feel.
It can be used by cutting and pasting it into a shape that suits your purpose.
It can also be used in a wide range of ways by modifying it.
Index
Coloring
There are many ways to paint color, but here are a few recommendations.
Clip a solid layer with the “bucket tool” to a texture layer.
Let’s try a dark red (maximum saturation).
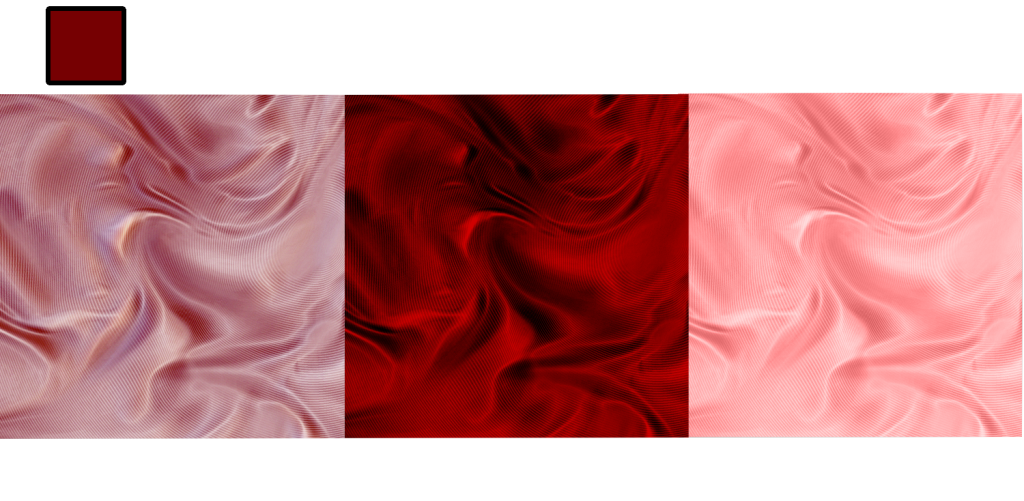
Depending on the blending of the layers, the way the color is painted changes.
In the reference image, from left to right, we have Overlay, Burn, and Color.
“Overlay” and “Burn” increase the contrast, and “Burn” in particular makes the selected color more vivid.
The first four colors in the first image also use “Burn”.
“Color” expresses the darkest areas in color instead of black, and makes wrinkles look softer.
Experiment according to your needs.
Lighting Effects using Gradients
Using the Gradient tool, you can easily create the effect of lighting.
As an example, select black and white as the background color and selection color, respectively.
With the Gradient tool selected, drag and drop the selected color from outside the canvas to the direction of the light.
If the selected color is white, the area where you start dragging the point will be the light source.
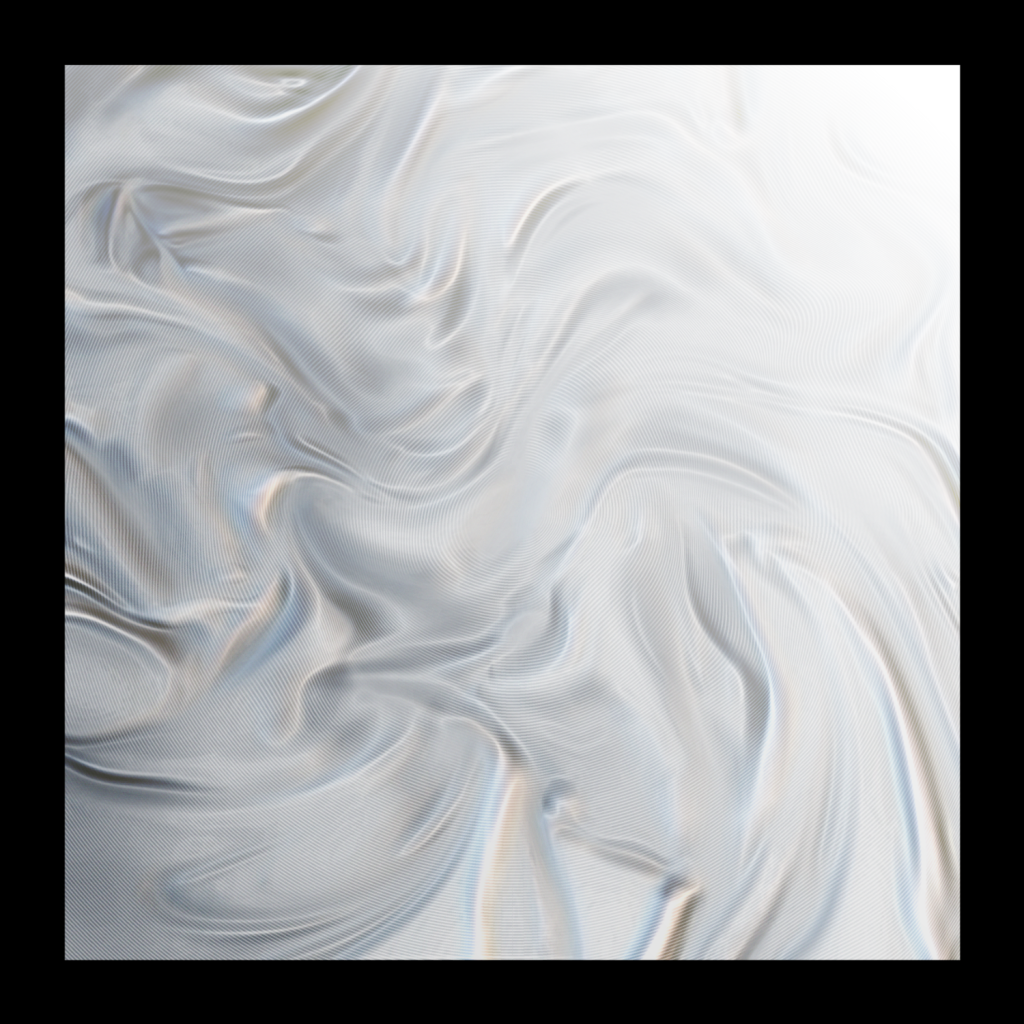
This is the effect when the layer blend is set to “Overlay”.
A long gradient is applied from the upper right to the lower left.
This is recommended because it provides a good balance of light and shadow and emphasizes the luster of the texture.
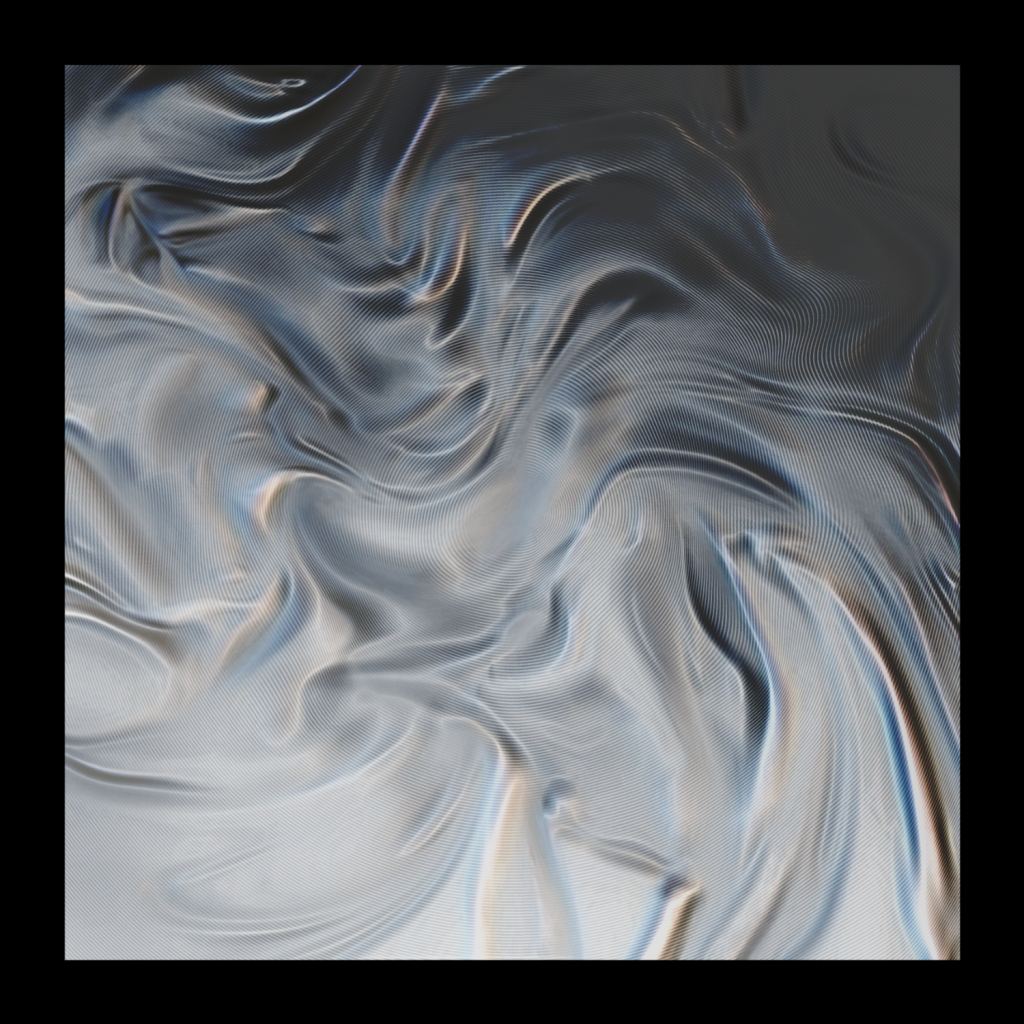
This is the “burn-in” blend. (Light source is from the lower left)
The shadows, the weft, and the shimmering of the fabric (blue and orange) are emphasized, giving the image a metallic look.
If the glare is too strong, you can reduce the saturation of the texture.
Transform
You can change the shape of the fabric and wrinkles with “Mesh Transform”.
Let’s add a “twist” to the fabric to create radial wrinkles.
First, select [Selection] -> [Mesh Transform] and enter the settings.
Set the vertical and horizontal divisions to 3×3, and select [Bilinear (Smooth)].
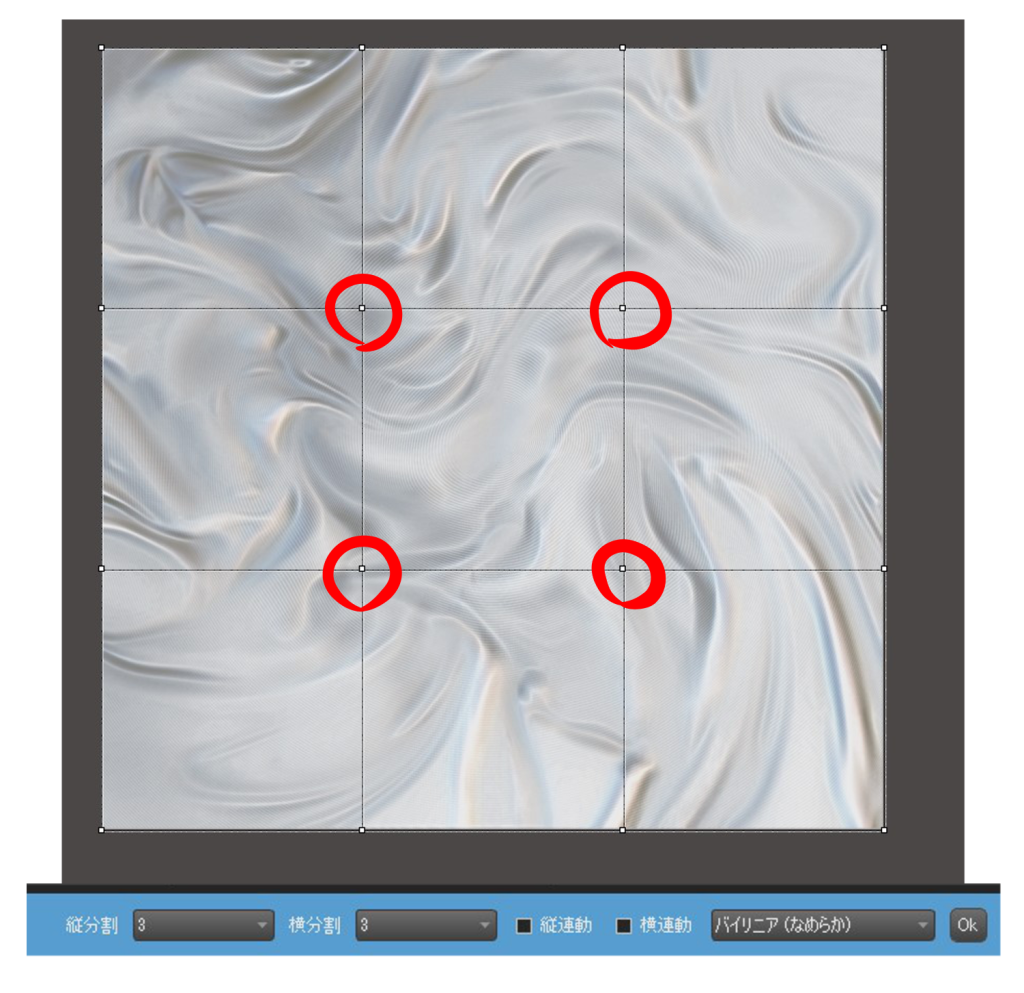
You can see a lot of vertices in the mesh, but we will only move the four points closest to the center.
Let’s move each of the four points counterclockwise inward.
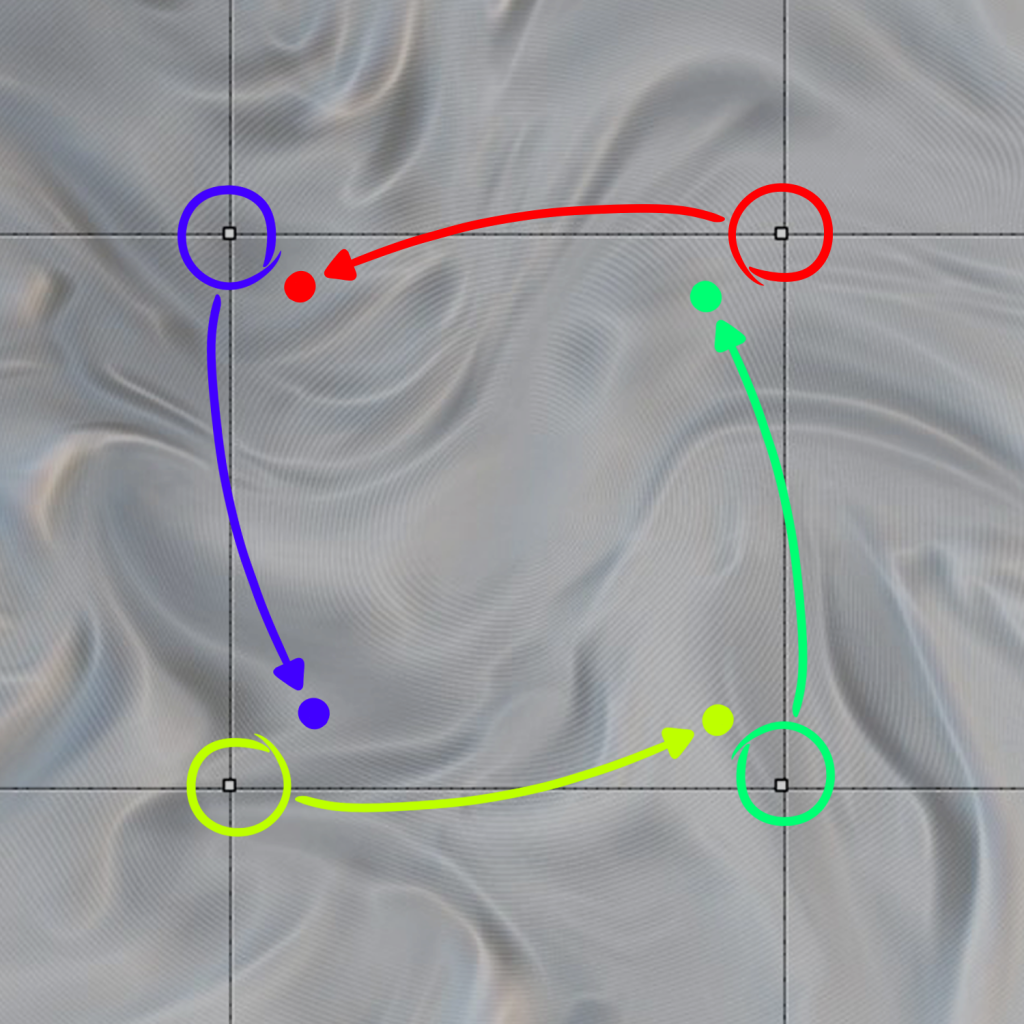
Aim a little inward from the original position so that the rectangle becomes smaller.
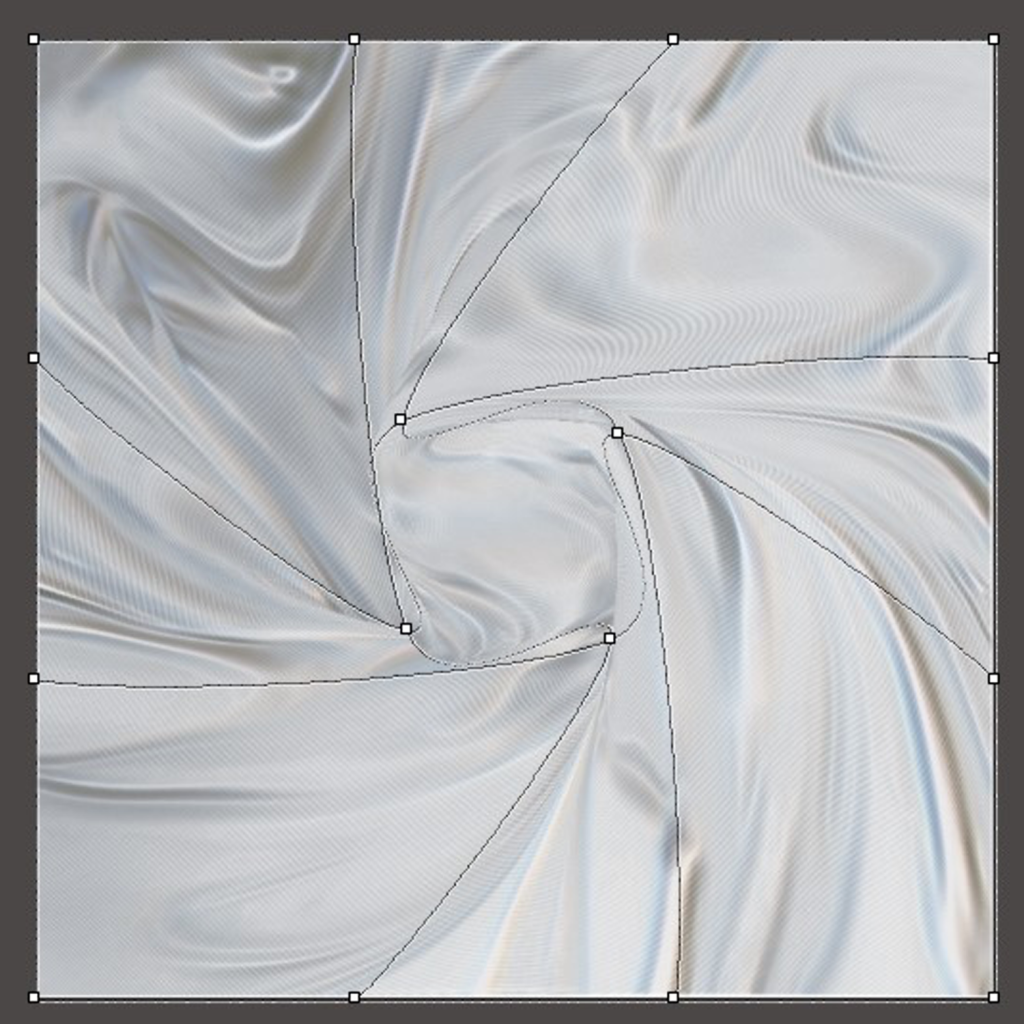
Adjust the position of the vertices while watching the wrinkles form.
Click “OK” to finish.
This is a simple process, so you may want to try it a few times until you get the shape you want.

This is an example of use in a background.
In this illustration, a dark blue “Multiply” layer (30% opacity) is placed on the area where the sun does not shine to illustrate shadows, and a dark blue “Dodge” layer (50% opacity) is placed on the entire screen with some additional adjustments to the image.
“Dodging” is useful for expressing light, but it is especially handy when you want to lighten the wrinkles while preserving their color and texture.
The wrinkles of the cloth in an illustration also serve to guide the eye.
The “twisted” fabric introduced here makes it easier to draw the eye to where the center of the wrinkle is placed.
We hope you will find this useful as an aid to your layout planning.
Complex Deformation
More complex deformations can be achieved by increasing the number of divisions in the mesh deformation.
As an example, let’s try to deform the fabric into steps.
Here we will use only the bottom half of the texture.
Select the top half with the Selection tool and cut it out.
Next, stretch the remaining bottom half vertically using the normal “Transform” tool.
The size of the cut and the amount of stretching do not need to be exact.
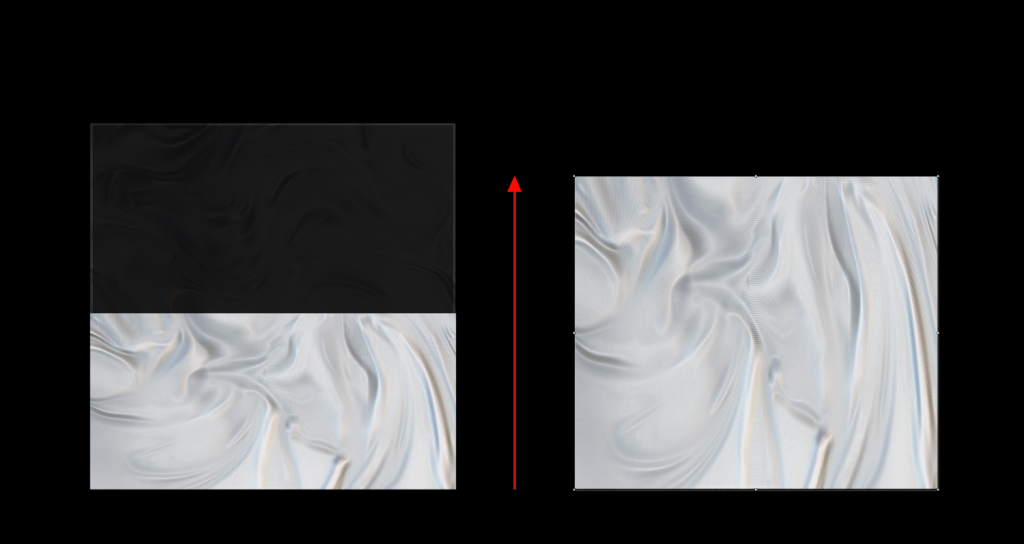
Next, open the “Mesh Transform” window.
For the settings, change the number of vertical and horizontal divisions to 6 x 6.
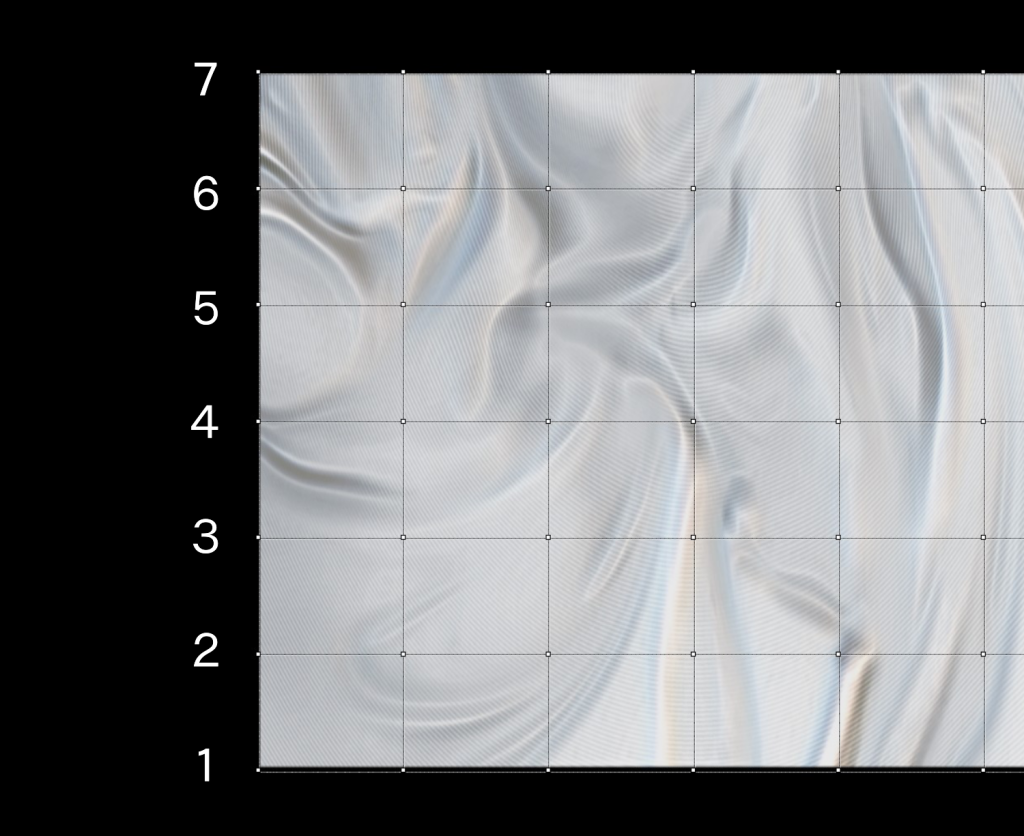
In a division of 6, 7 vertices will be displayed.
Check the “Horizontal Link” checkbox.
The “Horizontal Link” and “Vertical Link” functions are useful for transformations with a large number of segments.
If you use “Horizontal Linking,” you can move all the vertices of the horizontal axis at the same time.
Now, let’s move horizontal axis 3 to the bottom.
Please refer to the image for the amount of movement.
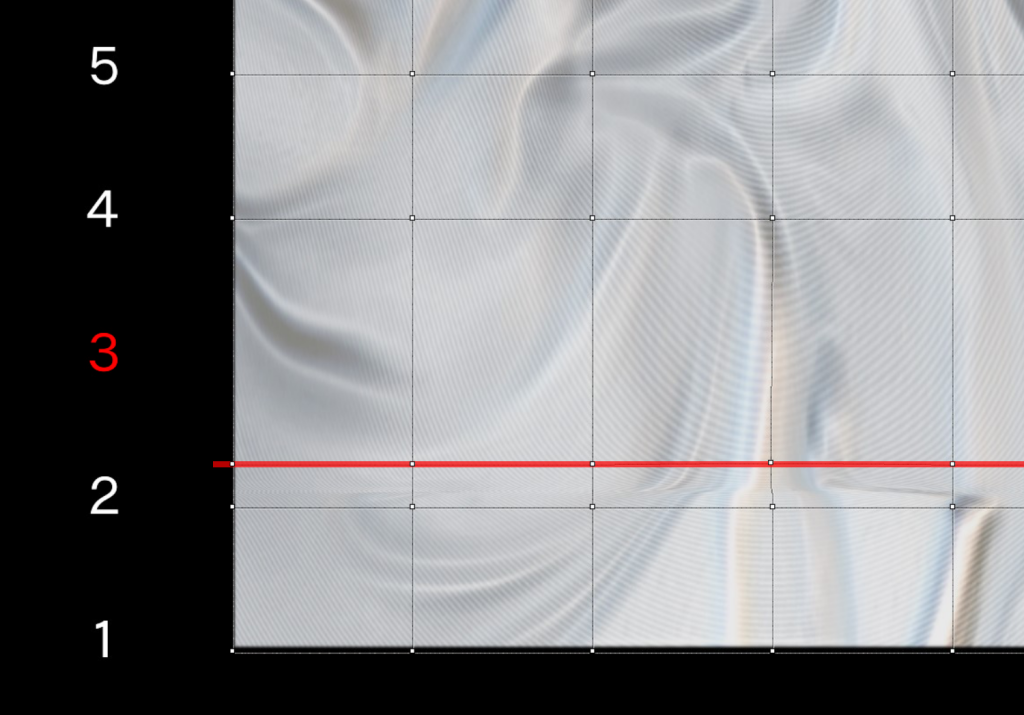
The line shown in red is the horizontal axis 3 after the move.
Move it down until there is a gap between it and horizontal axis 2.
Next, move the horizontal axes 5 and 7 down in the same way.
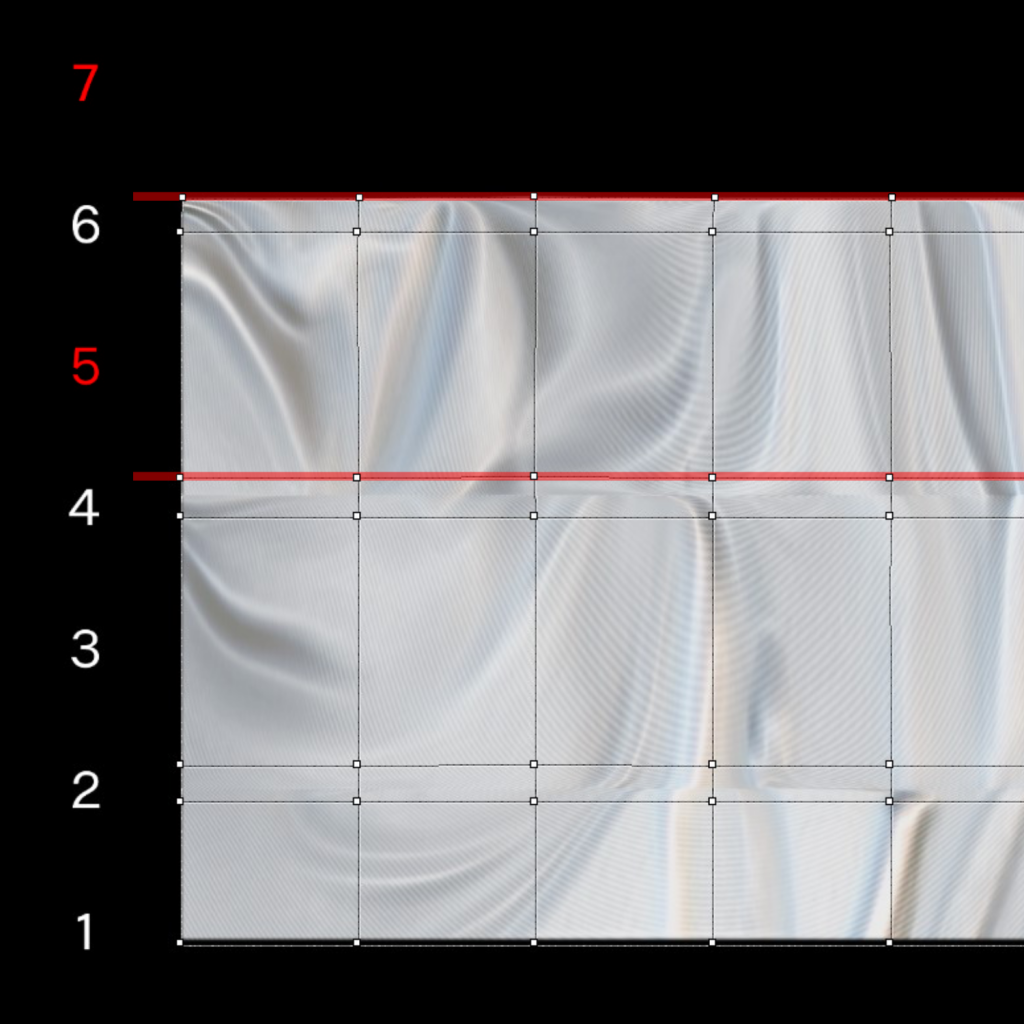
This method produces a stair-stepped cloth texture seen from the front. (Left image)
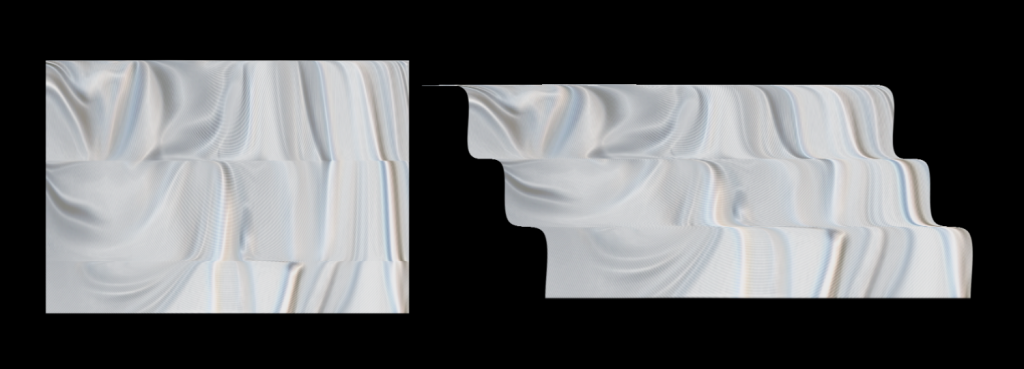
The image on the right is one that has been moved diagonally downward instead of straight down.
The next example is an application of staircase deformation.
Now let’s try shifting the vertical axis with “Vertical Linking”.
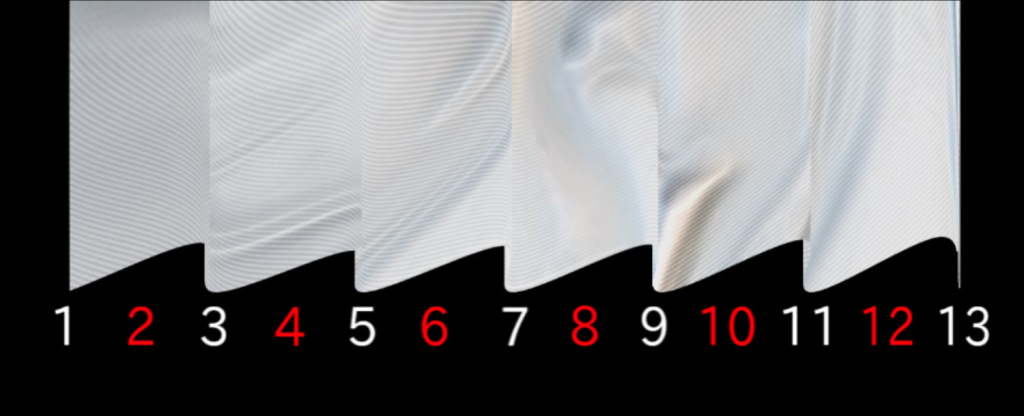
Change the vertical division to 12, and shift every other vertical axis (even axis) to the upper right.
After shifting the vertical axis, release the “vertical linkage” and move the vertices individually.
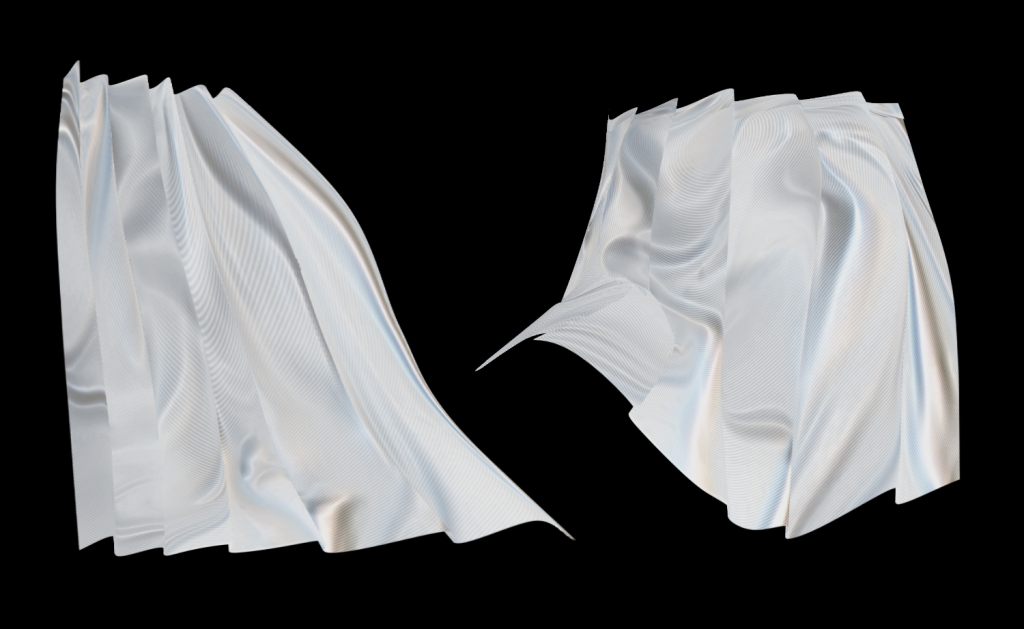
Narrow the distance between the vertices on the top edge and widen it toward the bottom.
This process of transformation is easier to work with if the number of vertices is reduced.
It can be shaped like a curtain or a pleated skirt.
Let’s add another deformation to the fabric with the vertical axis shifted.
Change the number of divisions to 2 x 2.
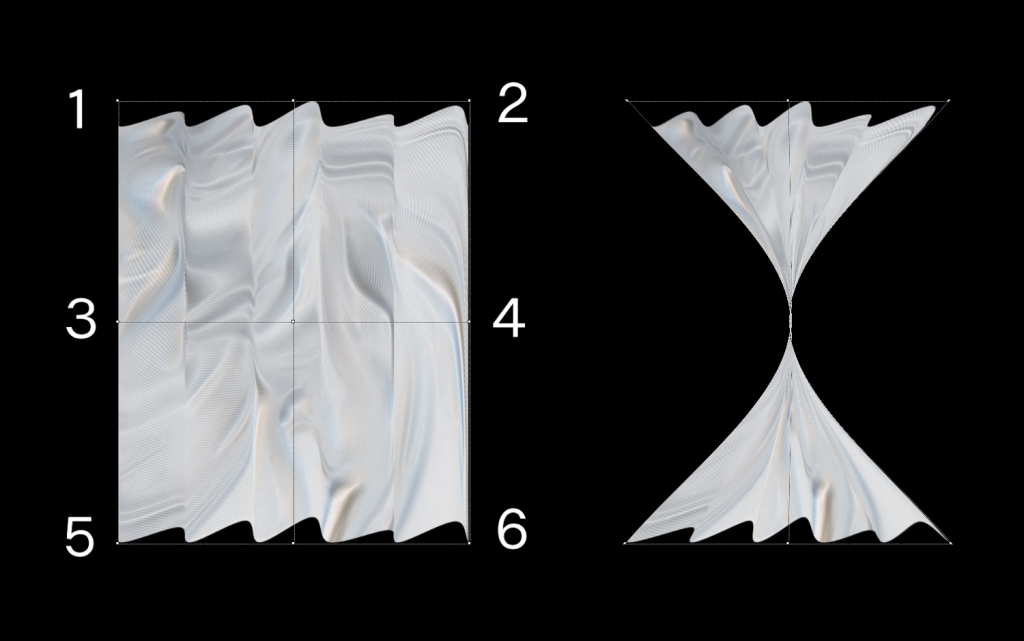
Stack vertices 3 and 4 on top of the center vertex.
Next, stack vertices 1 and 5 on the left side, and vertices 2 and 6 on the right side.
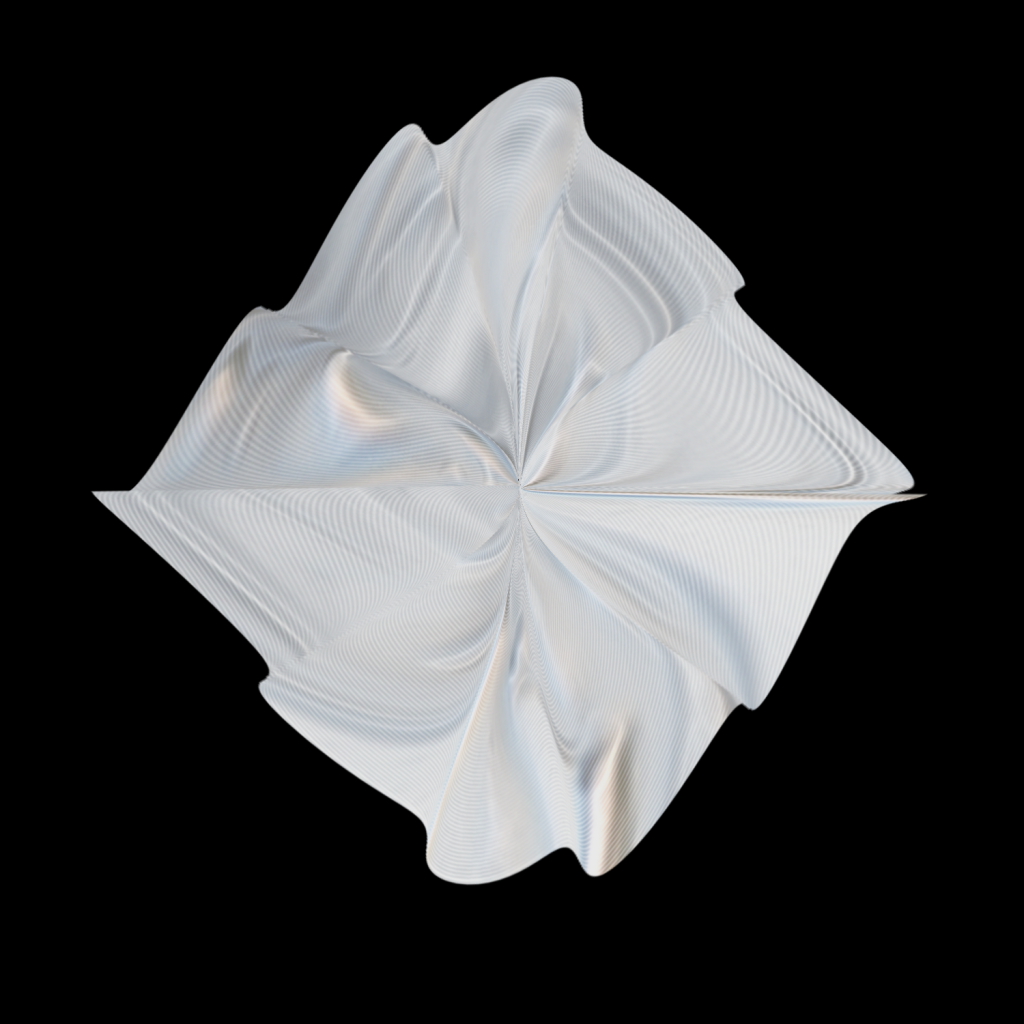
If you overlap them at the 3-4 horizontal axis, you can create a ruffle-like shape.
This can be used in conjunction with the curtain and skirt shapes described earlier.
FInal Step.
How to weaken the weft
Weft is effective in expressing a three-dimensional effect.
However, when the texture is greatly deformed, the weft may become too wide in some parts, and the intended expression may not be obtained.
In other cases, the weft itself may not be necessary.
In these cases, applying “Gaussian Blur” to the entire texture will reduce the problem considerably.
For the original size, a Gaussian Blur value of 3 to 4 will make it much weaker, and 5 will make it almost invisible.
After blurring, use “Unsharp Mask” to restore weakened gloss and wrinkle outlines.
Radius: Approx. 5.0 – 8.0
Amount applied: approx. 120 – 160
If you blur too strongly, it will be difficult to restore the outline, so it is best to keep the value below 4 as much as possible.
This method is not perfect, as it slightly degrades the texture, but it is effective unless the texture is to be used at a very large scale.
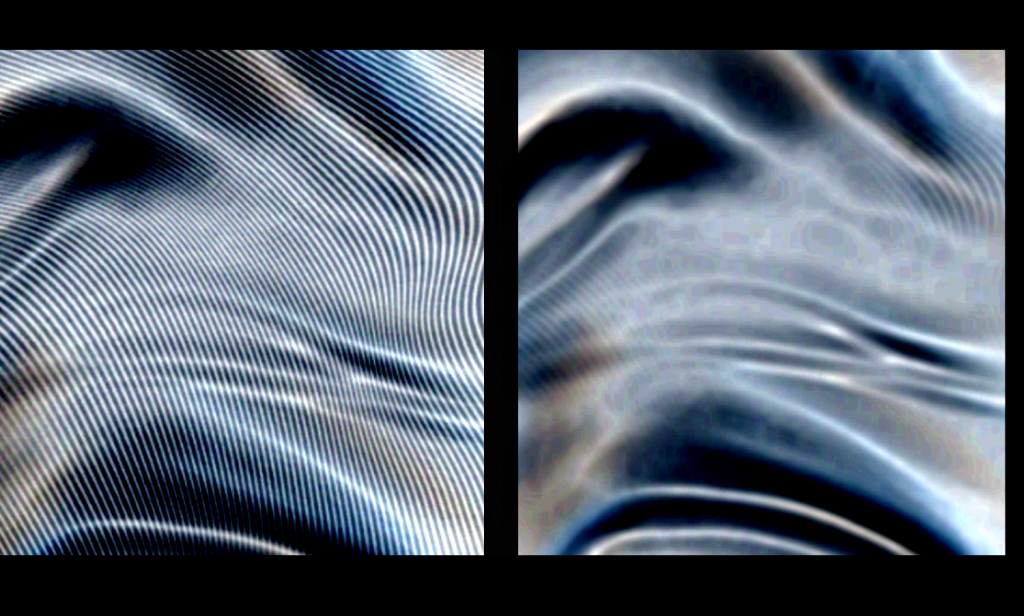
The image on the right is after treatment. (Gaussian blur 4)
The cloth texture (silk satin) used in this project is available for sale at ART street!
Please check it out!
ART street material:https://medibang.com/materials/
ーーーーーーーーー
Creator Rank Benefits
https://medibang.com/page/about-creatorrank/
“Illustration work introduction” work
ーーーーーーーーー
「Tow Tateoka」
ART street
The collection of his works is here:https://medibang.com/u/towtateoka/
Read the interview here:https://medibang.com/page/interview/TowTateoka009/
twitter:@Tow_Tateoka
https://twitter.com/tow_tateoka
\ We are accepting requests for articles on how to use /

