2022.11.09
How to use the “Cloud(Tall) Brush”

One of the many premium brushes inside MediBang Paint is the “Cloud(Tall) Brush” for drawing cumulonimbus clouds.
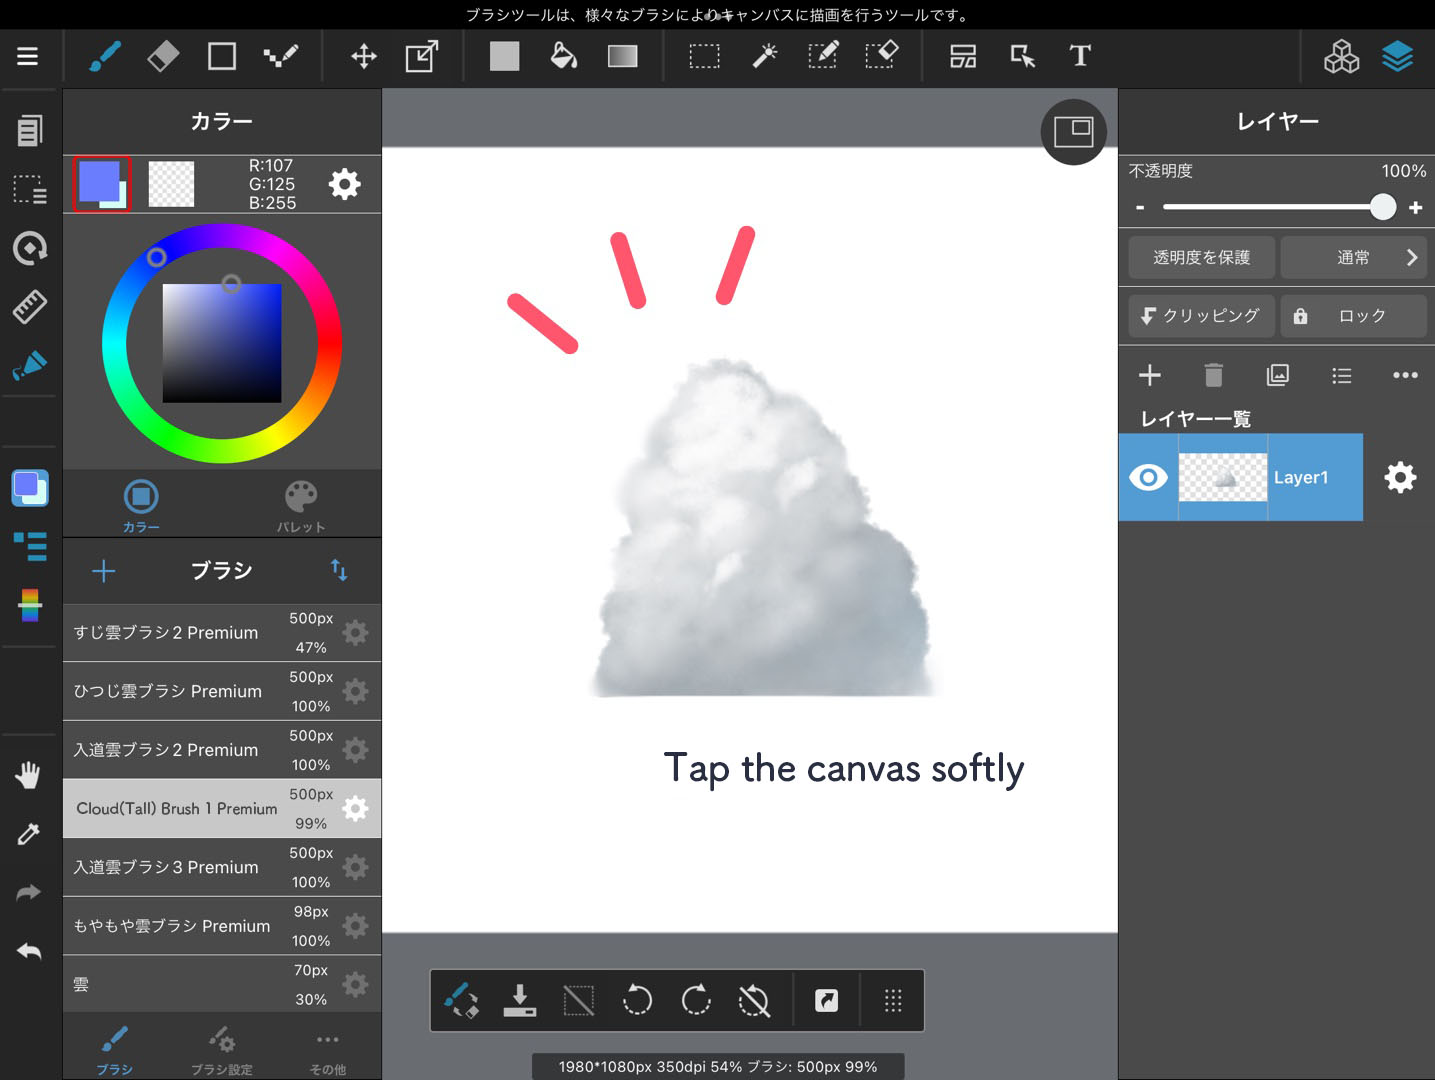
You can draw cumulonimbus clouds just by simply tapping the canvas so it becomes super useful for when you want to draw cloudy skies.
In this tutorial, I will be explaining how to use the “Cloud(Tall) Brush”.

Preparing the brush
First, download the brush following the article from below.
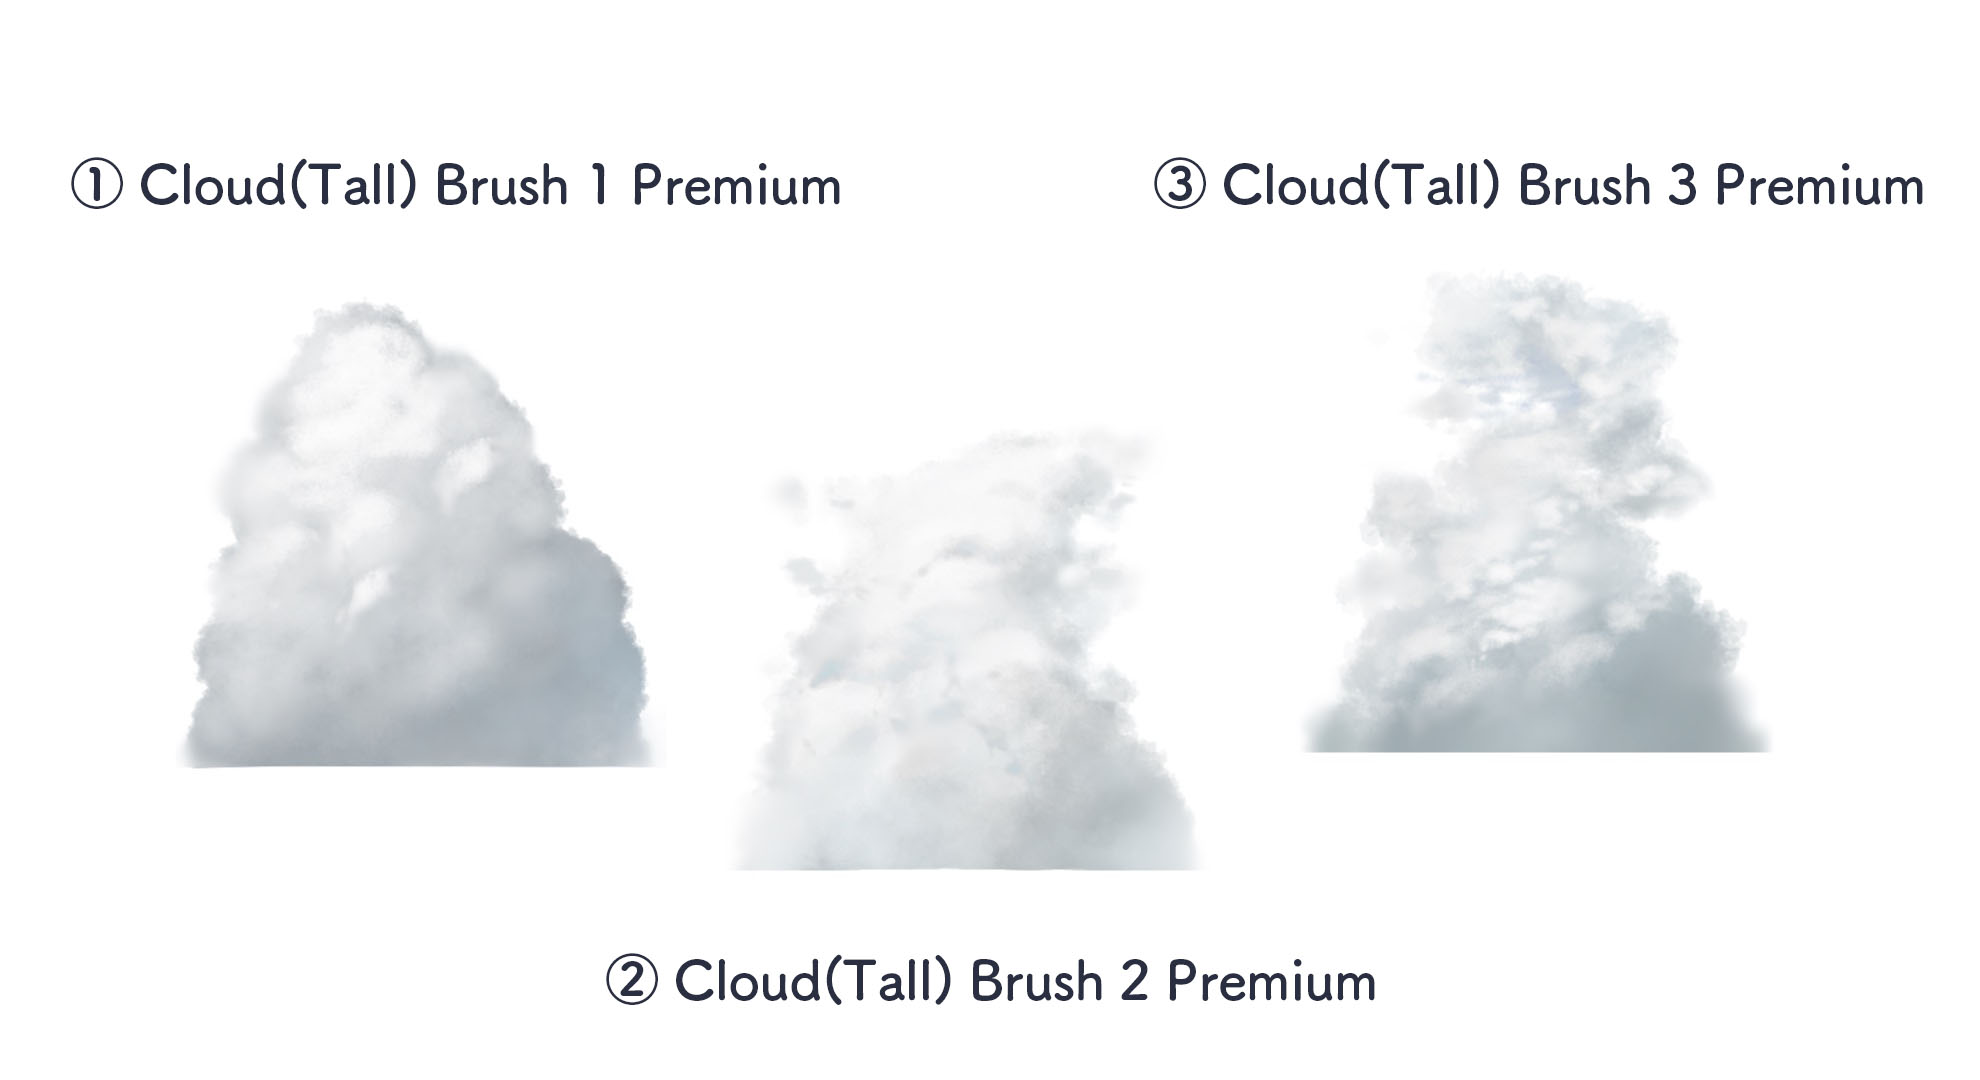
By Jan 2022, there are 3 types of tall clouds available so choose the one you want to use.
▶︎How to download cloud brushes (for iPad)
※The cloud brush I introduce in this tutorial is for the paid premium plan but there are free brushes for drawing clouds as well so if you are a free user, please read this article as well.
▶︎【Technique】Drawing different clouds for every season
Using the brush
Once you have downloaded the brush, let’s actually use it.
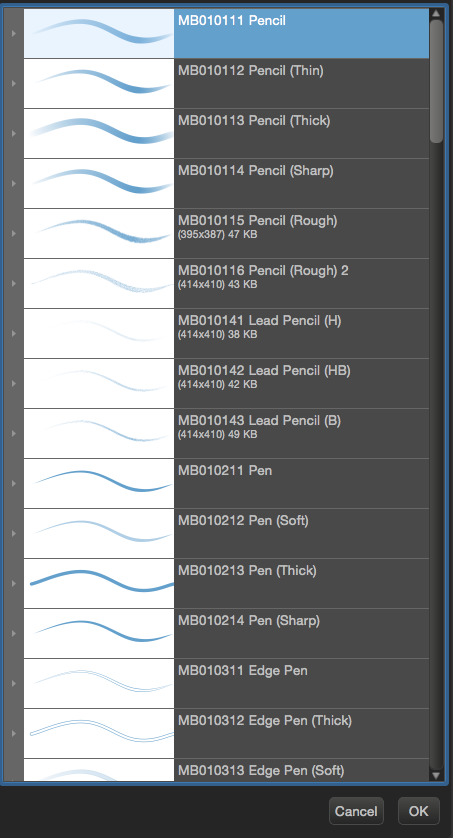
①Tap on the brush icon and select the brush you want to use
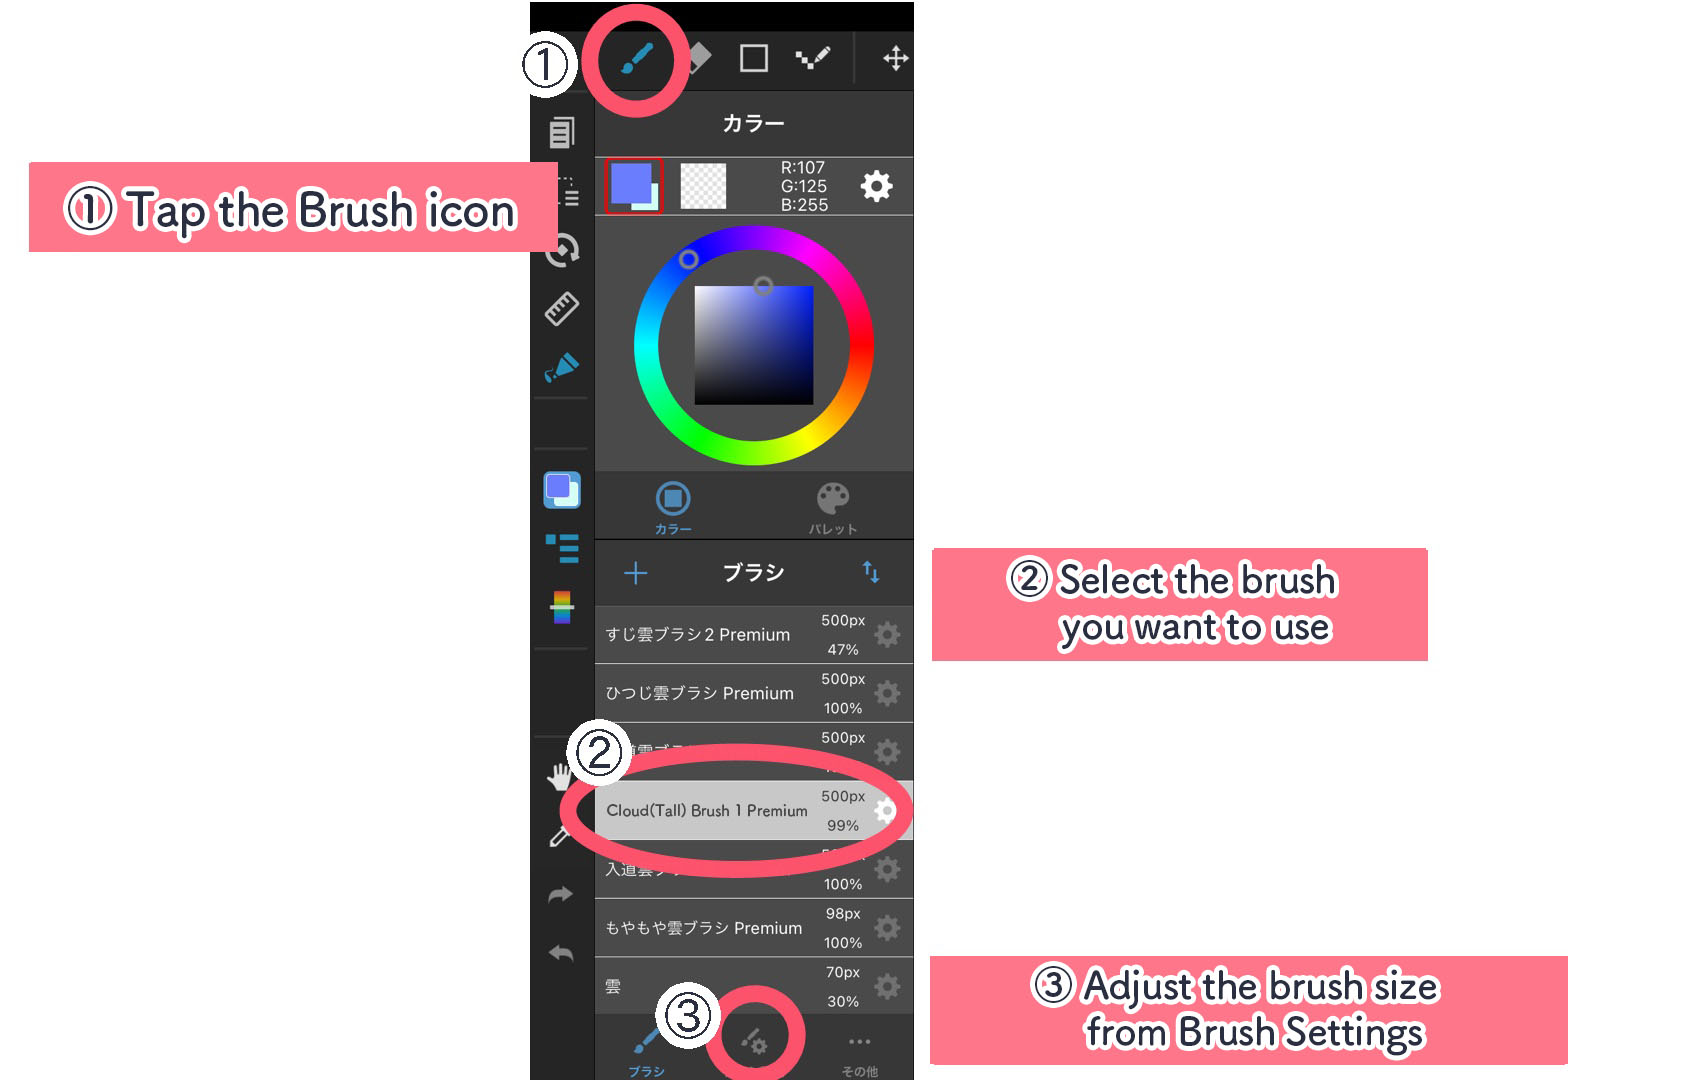
※The above screenshot is from MediBang Paint for iPad
② Tap the canvas
【Adjusting the size】
You can change the size of the cloud from “Size” inside “Brush Settings”.
There is another way to adjust the size of the cloud after drawing with the “Alter” tool, but the quality may drop if you expand the cloud drawn in small pixels.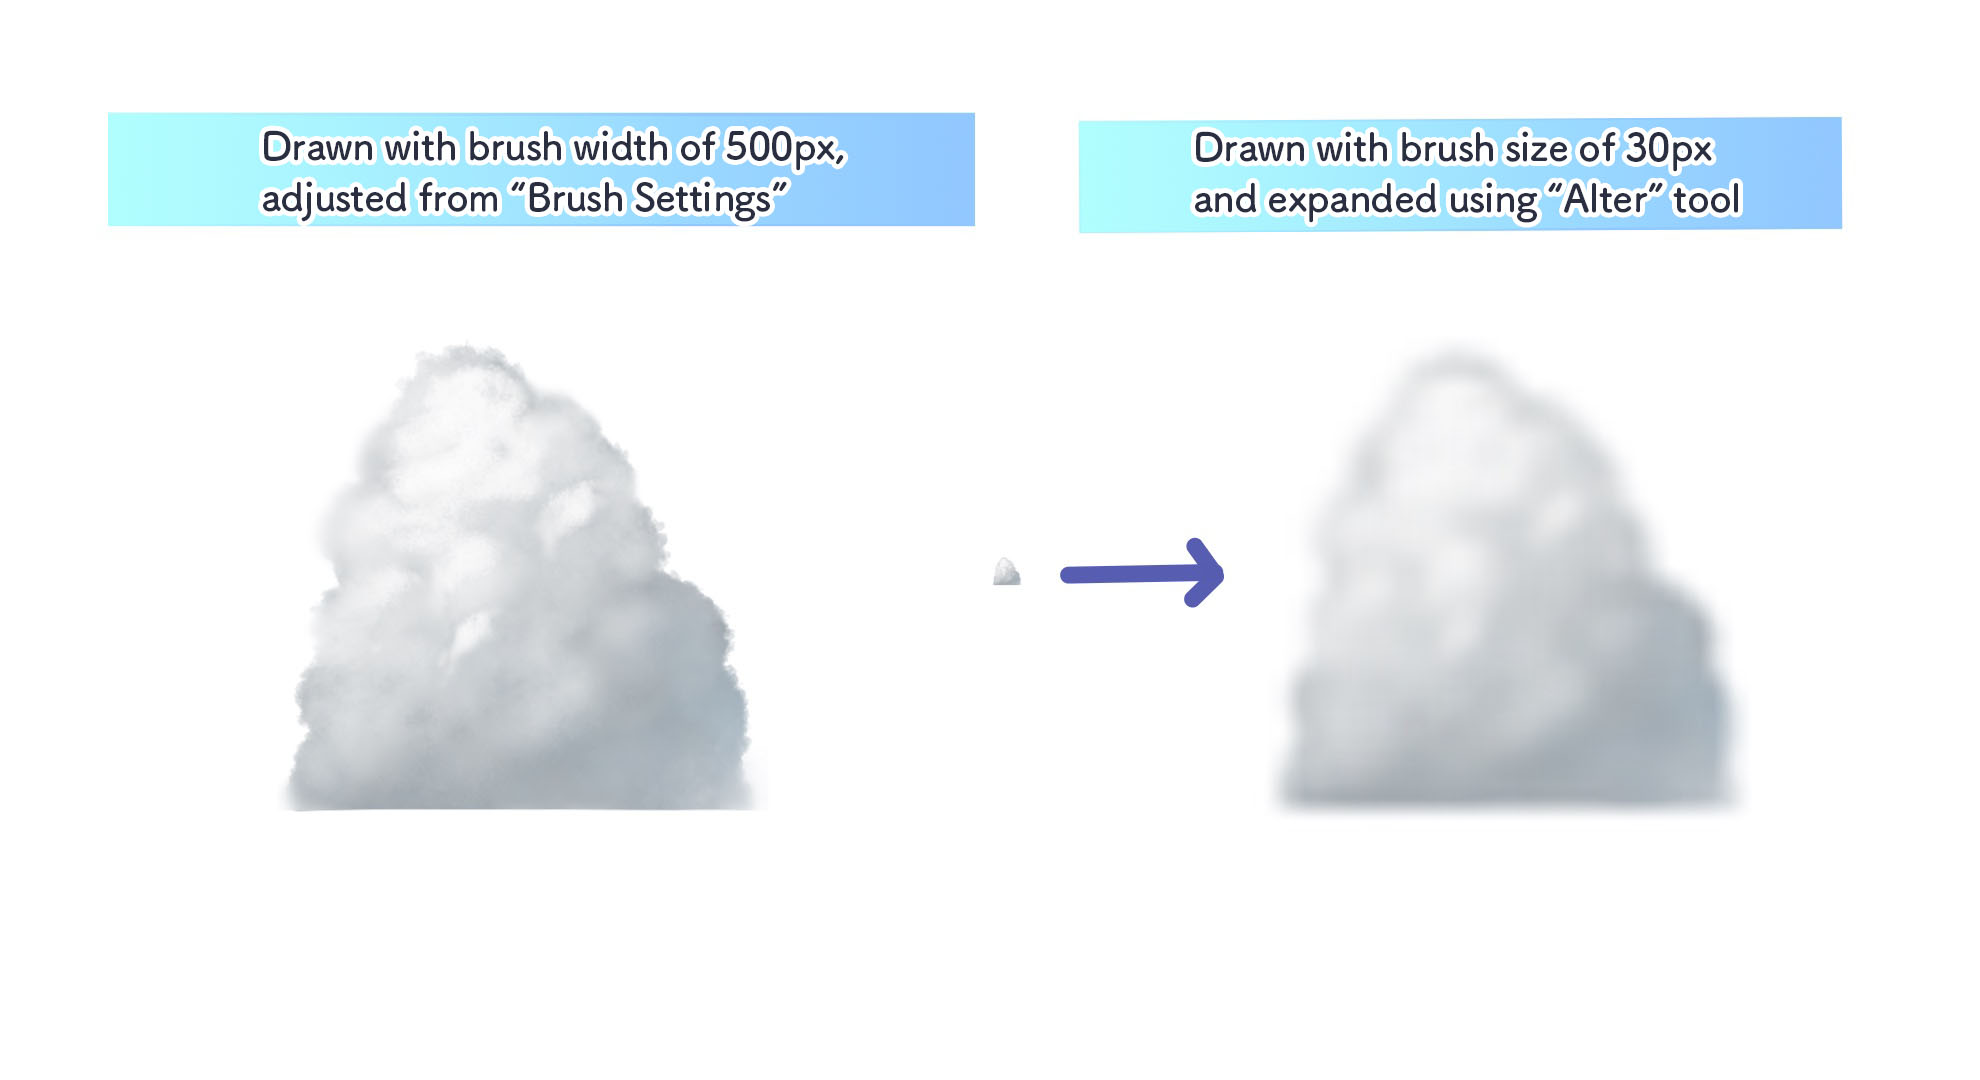
Arrange the brush
If you want to “make the cloud a little brighter” or “make the shadows blue”, arrange the cumulonimbus cloud to change its color.
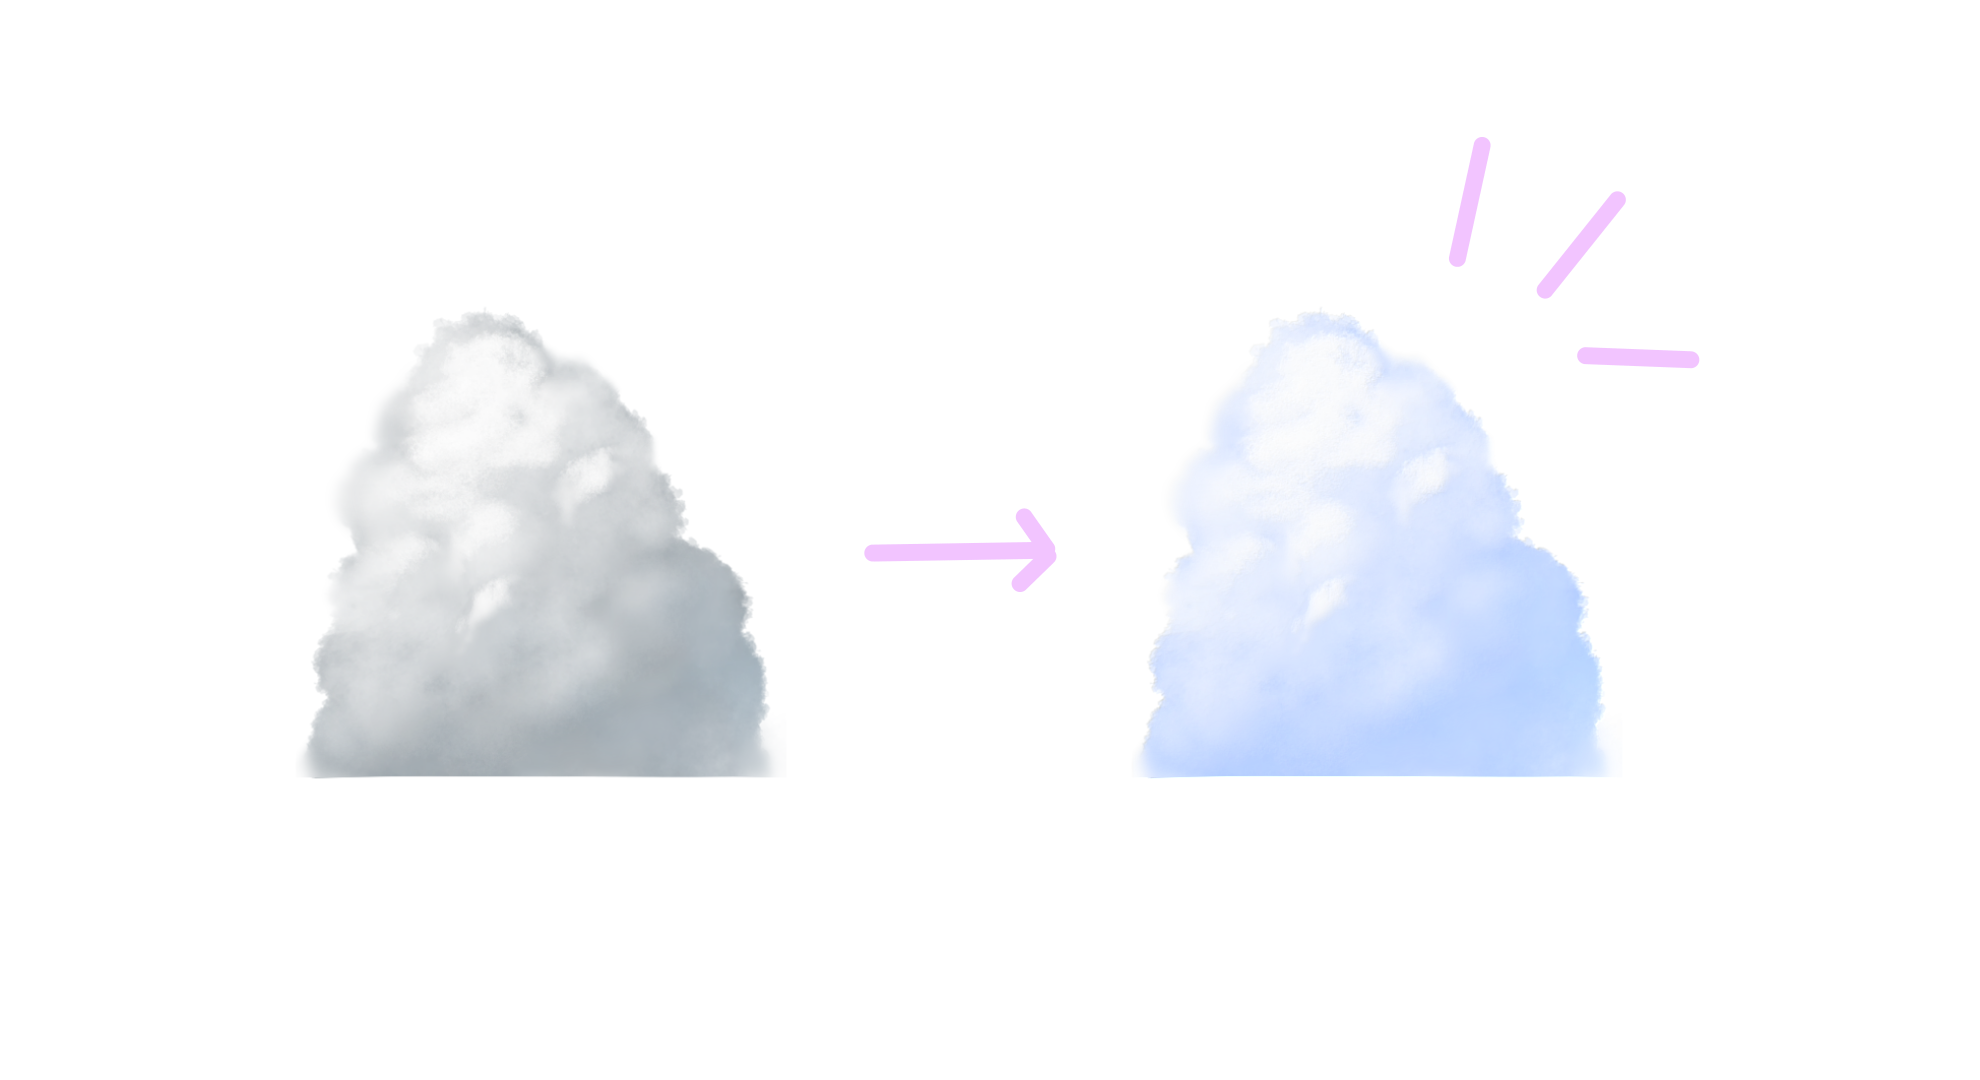
Adding a little bit of hue
If you want to add a little more hue to the shadows, follow the steps below.
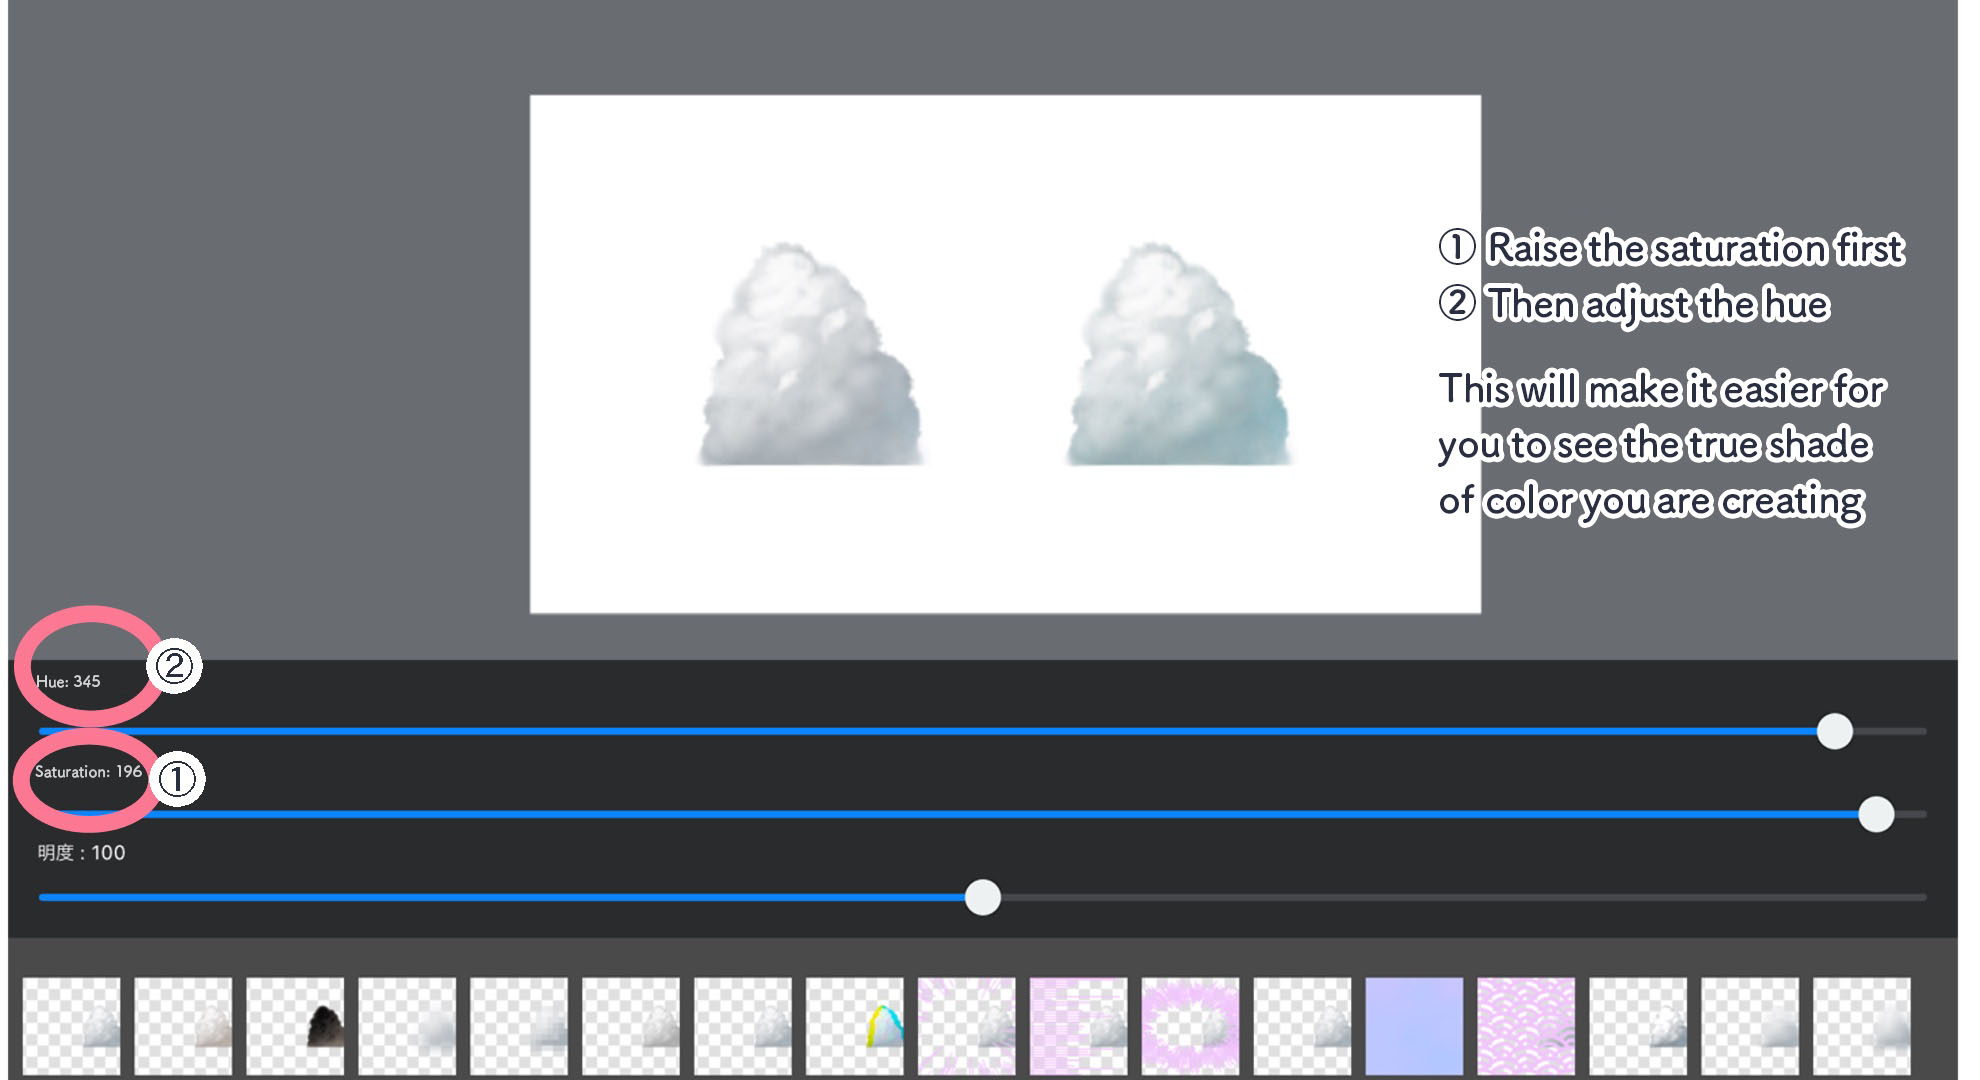
① Select “Hue from Filter” then raise the “Saturation” before adjusting the color with “Hue”
②If you want to make everything brighter, raise the “brightness”
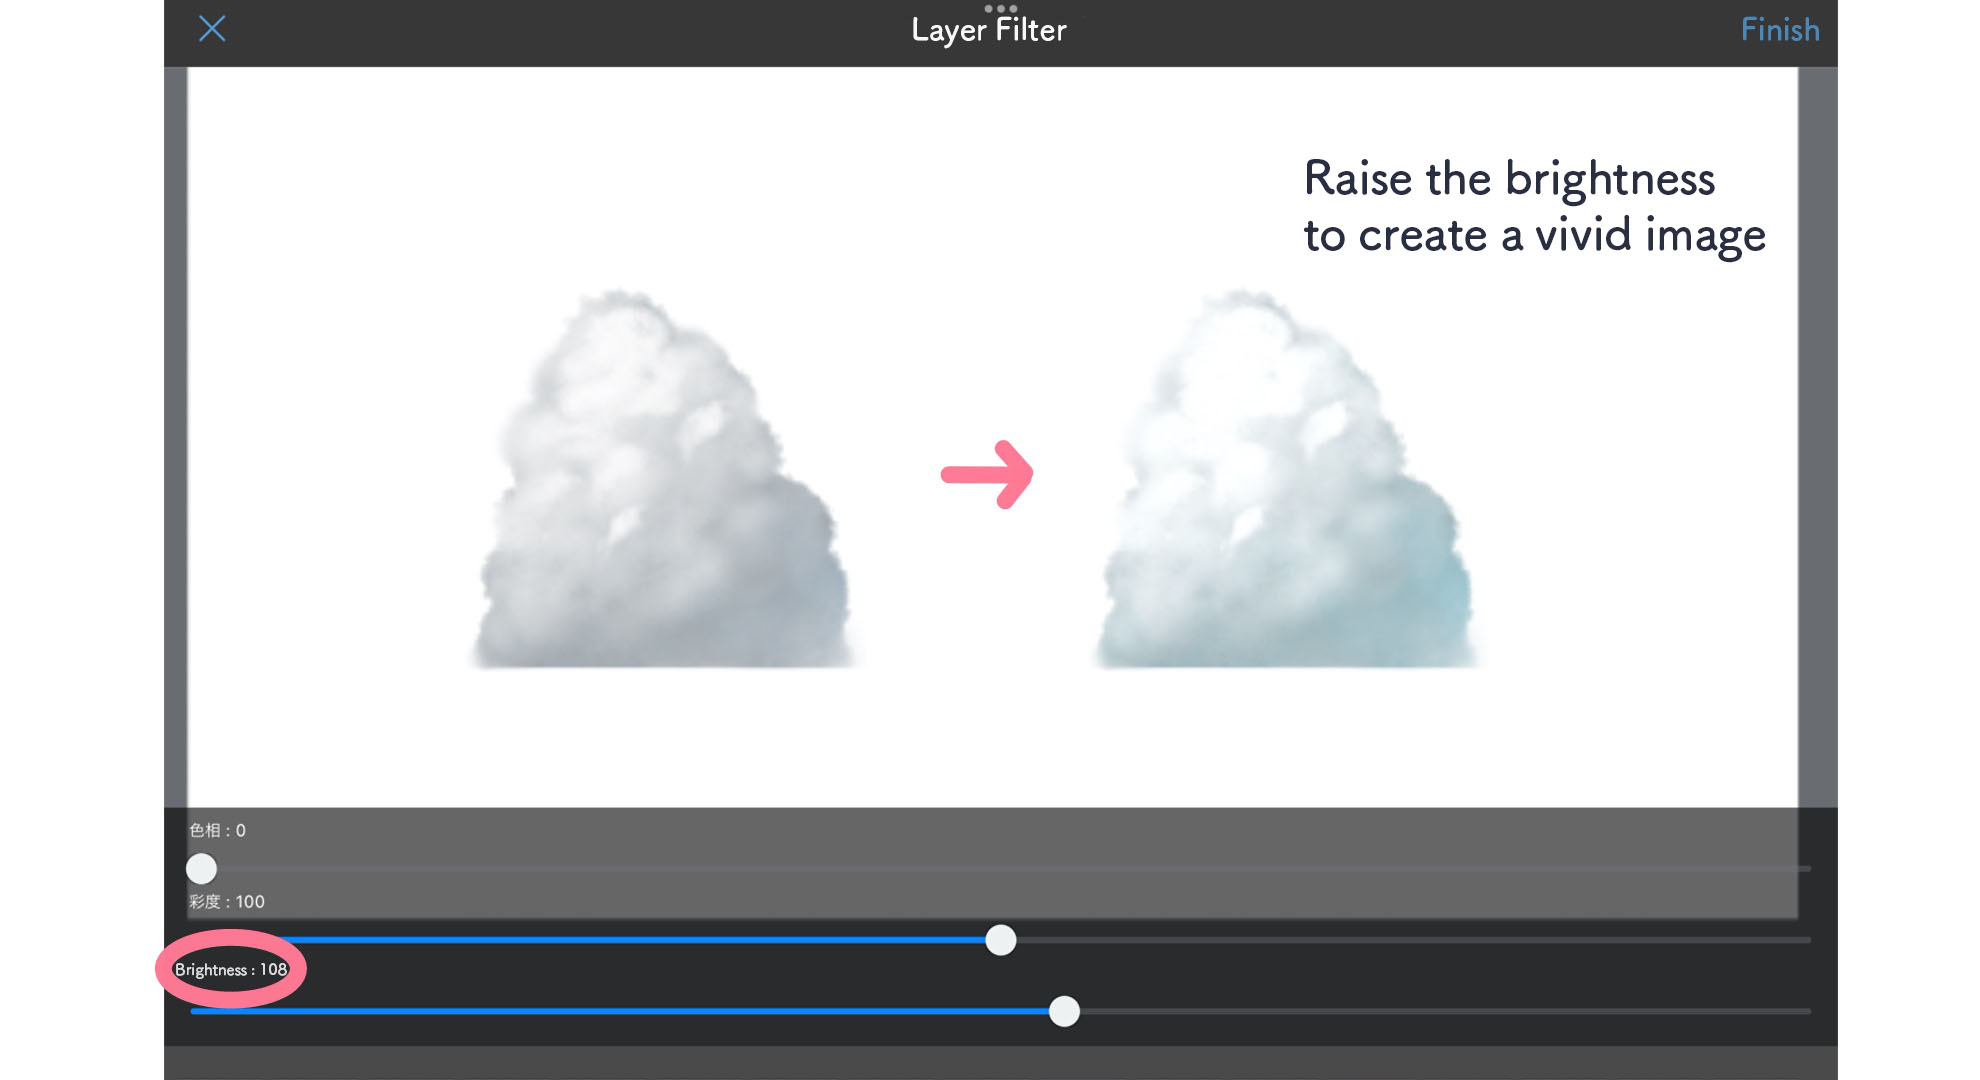
With the above method, the shadows won’t be as bright. If you want to achieve a brighter color, follow the one below.
Brightening and adding color
If you want to brighten the shadows and add a little bit of color, follow the two steps below.
① Duplicate the layer of the tall cloud, change the blending of the duplicated layer to “Divide”

② Control the color inside “Hue” and choose the right brightness by raising “Brightness”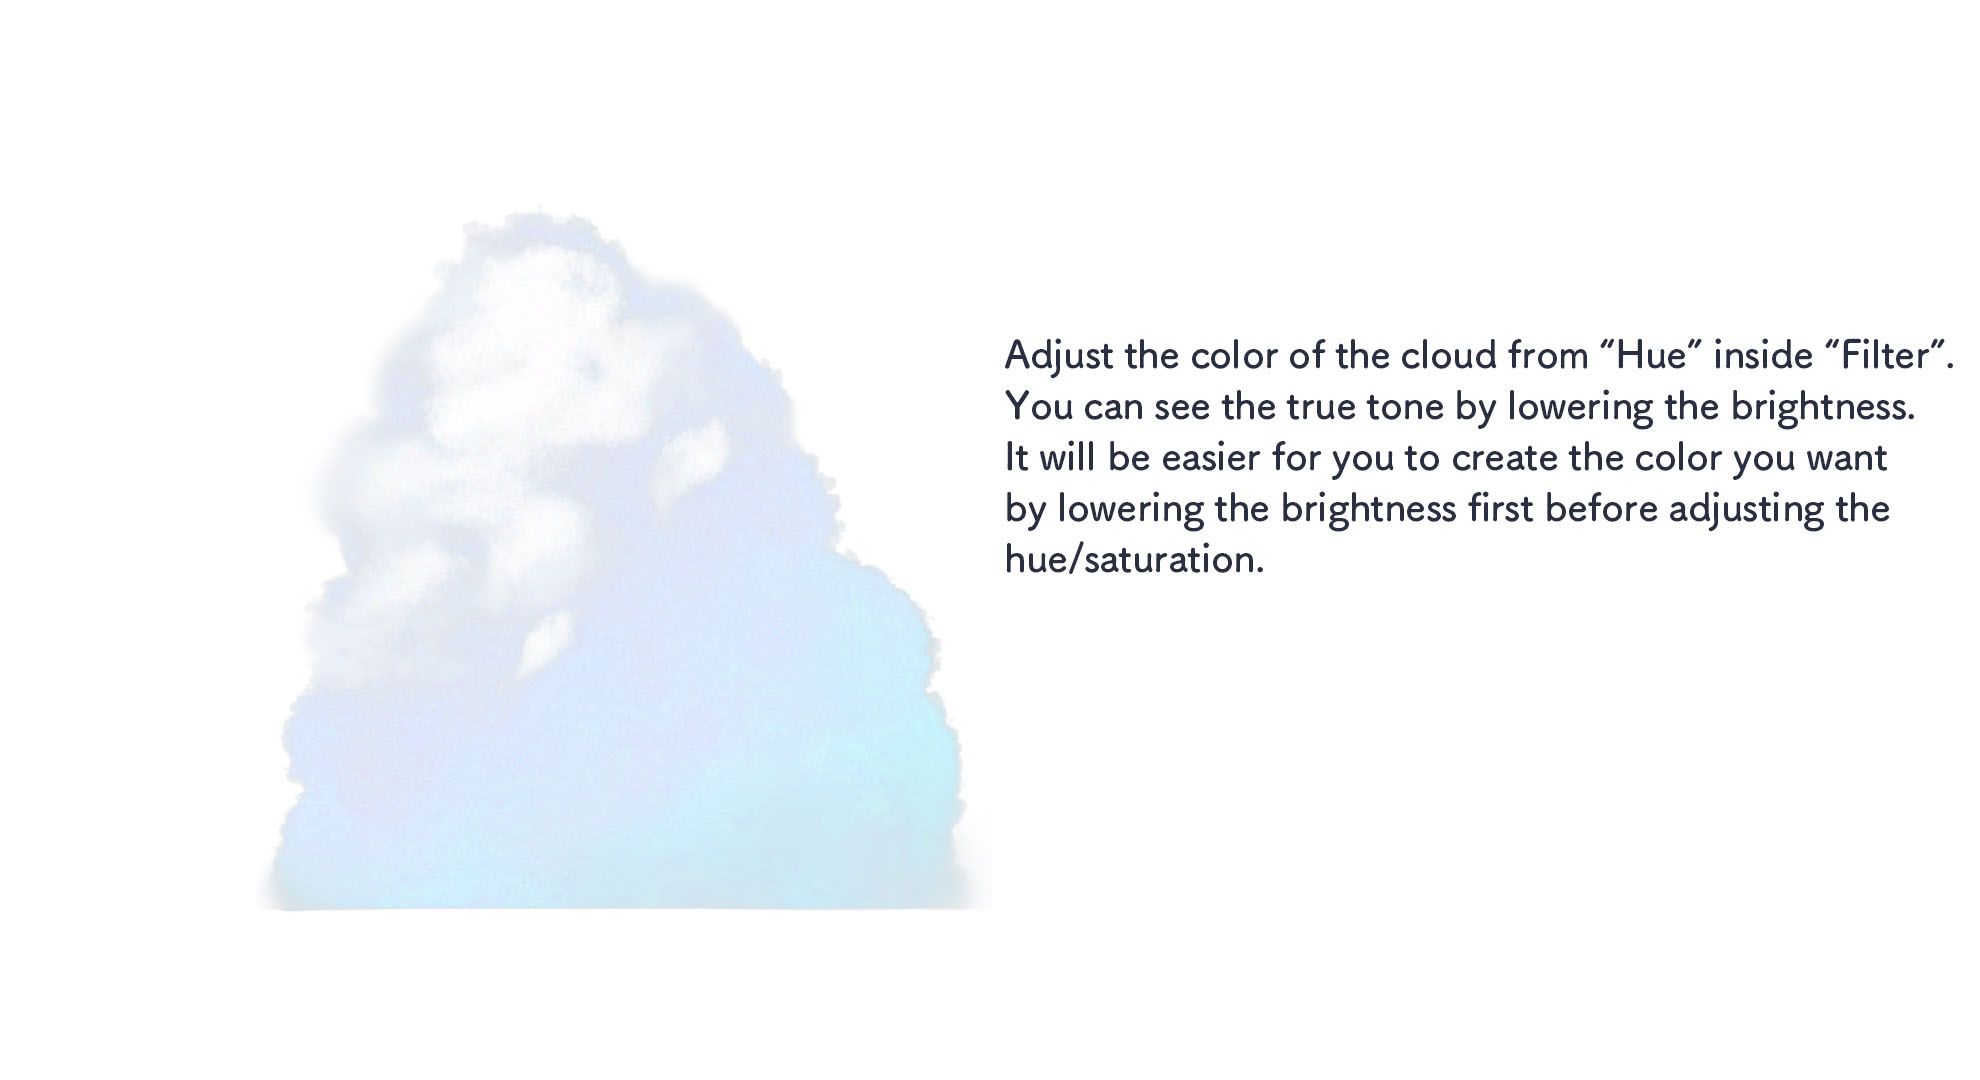
The “Divide” blending brightens the dark parts and darkens the bright parts.
You can raise the brightness of its shadows without the problem of overly white clouds.
With this method, you can brighten the whole cloud a little bit more and also add color, still keeping the gray shadow.
This also makes a much softer look so I recommend this method the most for those who want to create a soft shade for the cloud.
Changing the color of the shadows
If you want to change the shadow to other colors than gray, I recommend the below method although it’s more time consuming.
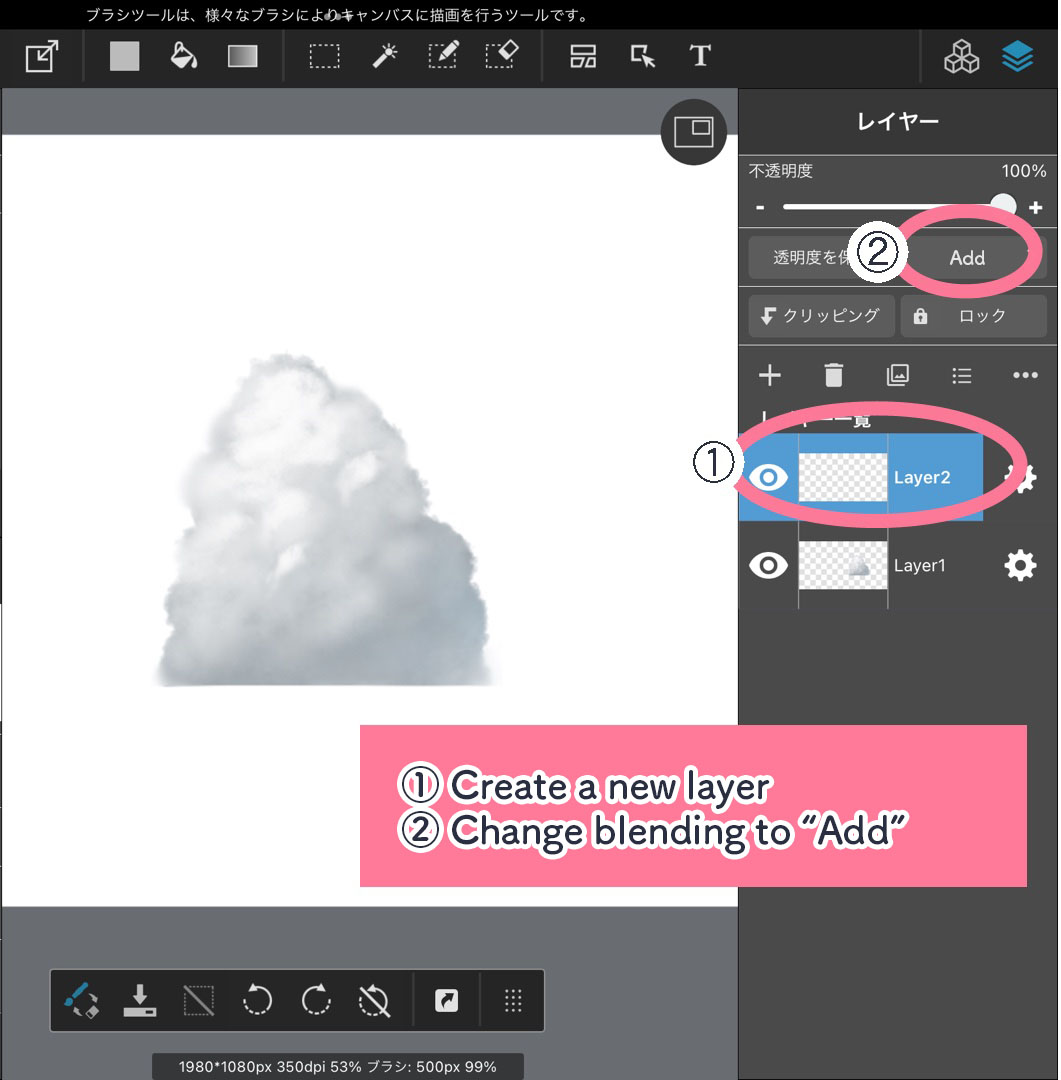
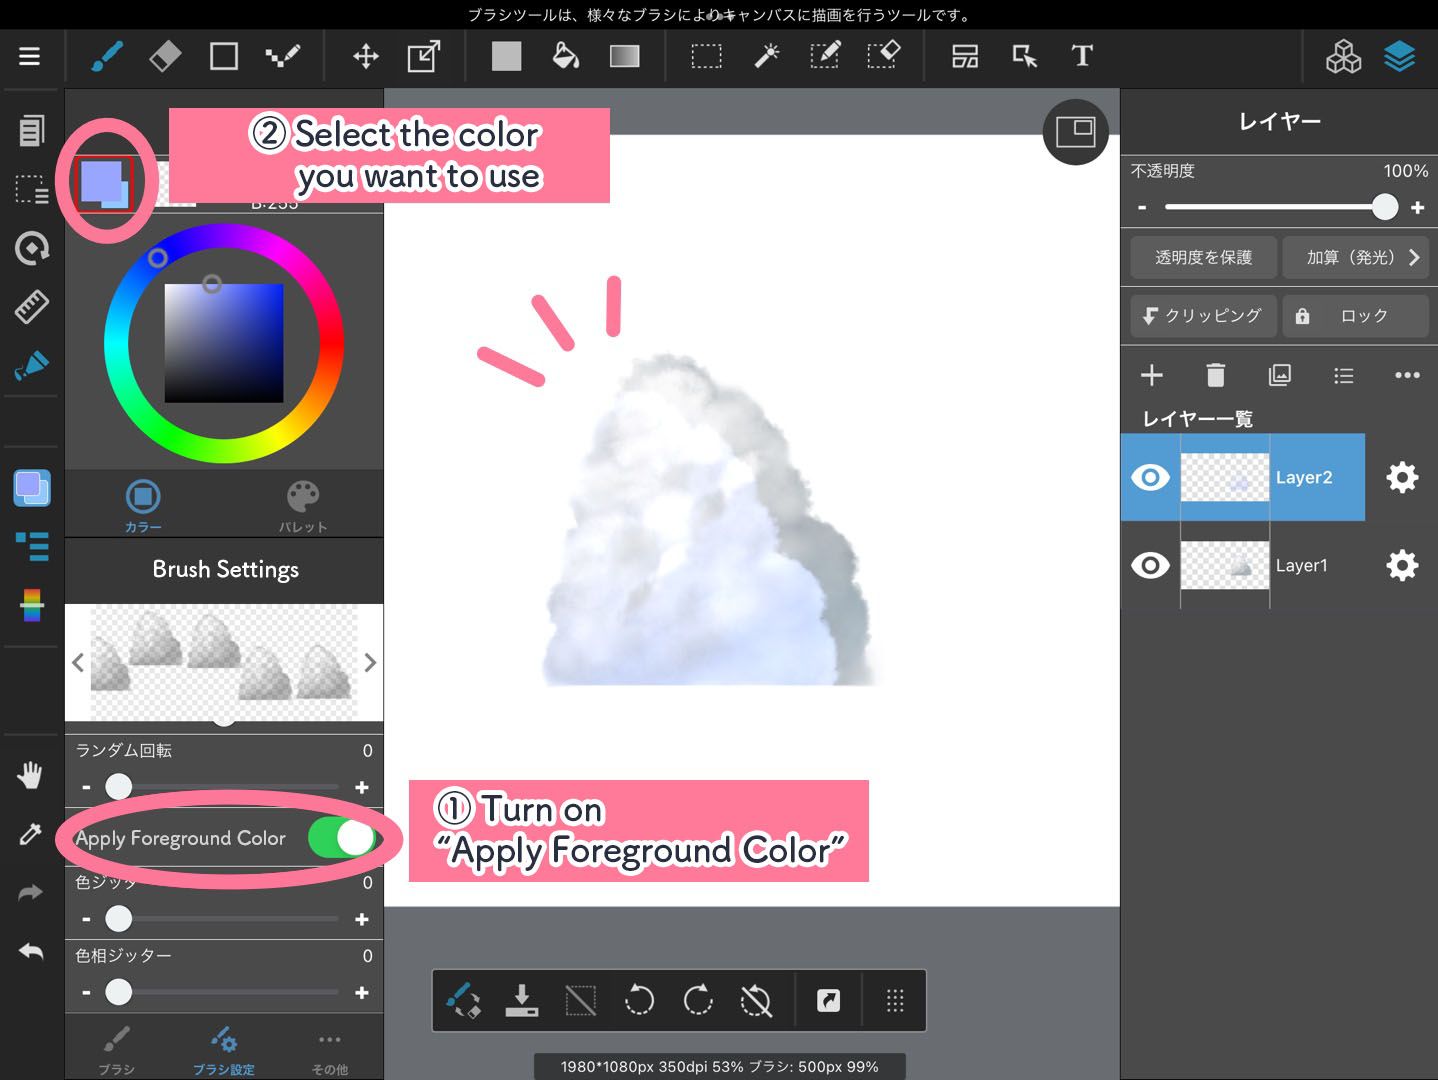
① Draw the cloud, create a new layer and change the layer blending to “Add”
② From “Brush Settings”, turn on “Apply Foreground Color” and choose the color you want to use to draw the cloud (with the same brush size)
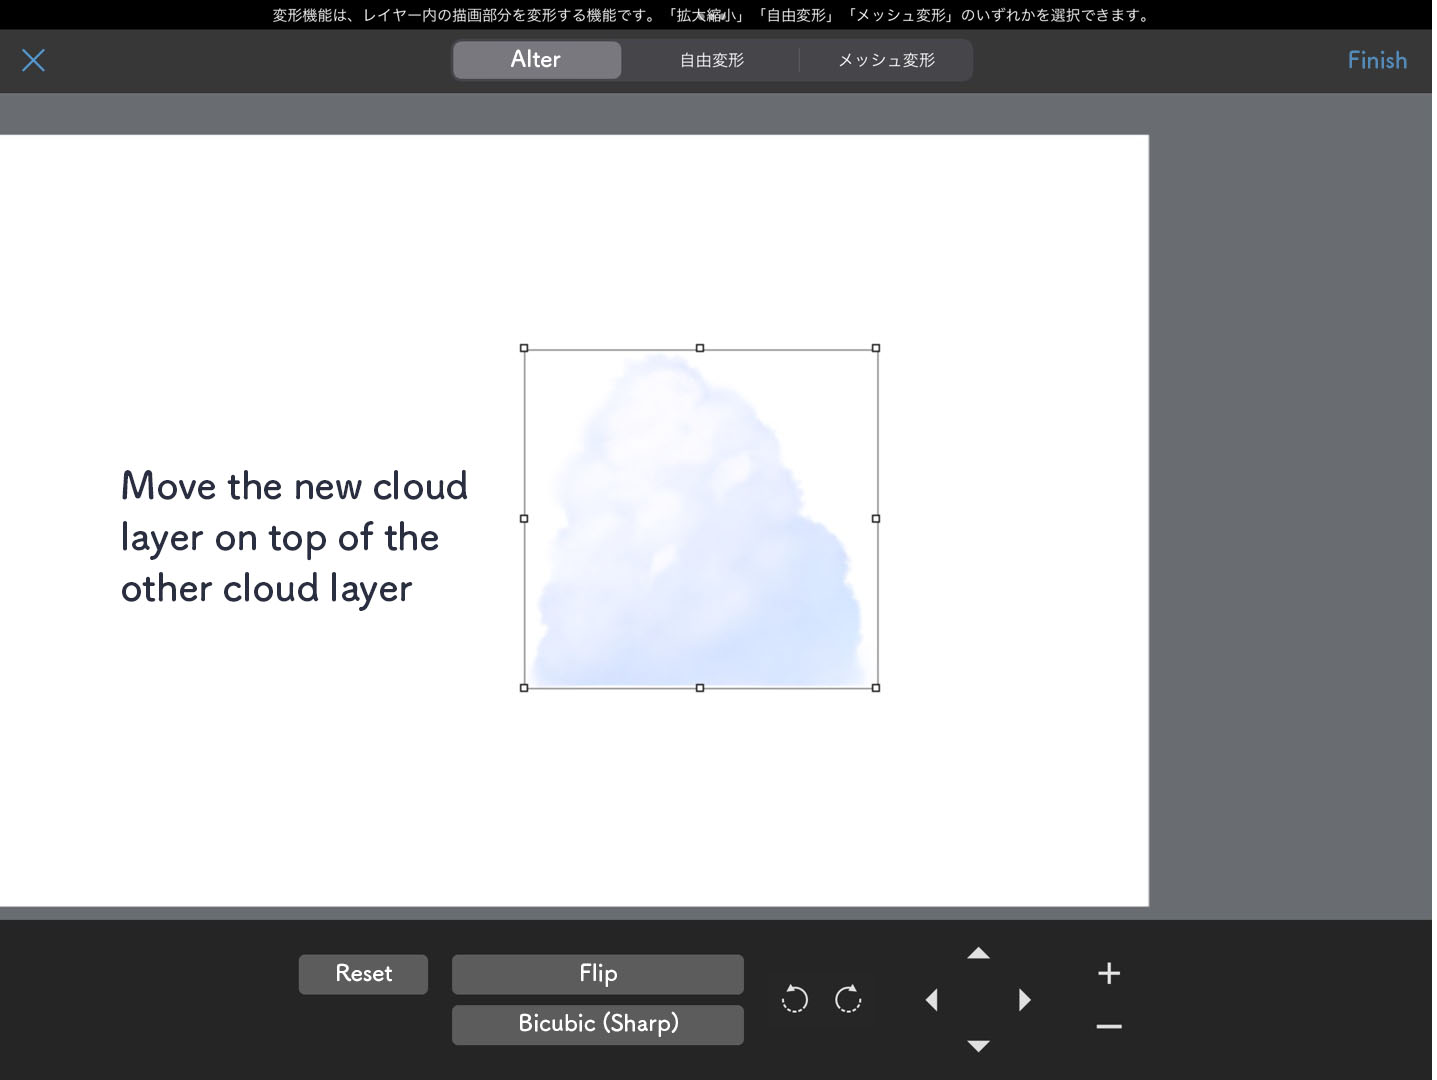
③ Use either the “Move” or “Alter” tool to move the new cloud so it overlaps with the other layer
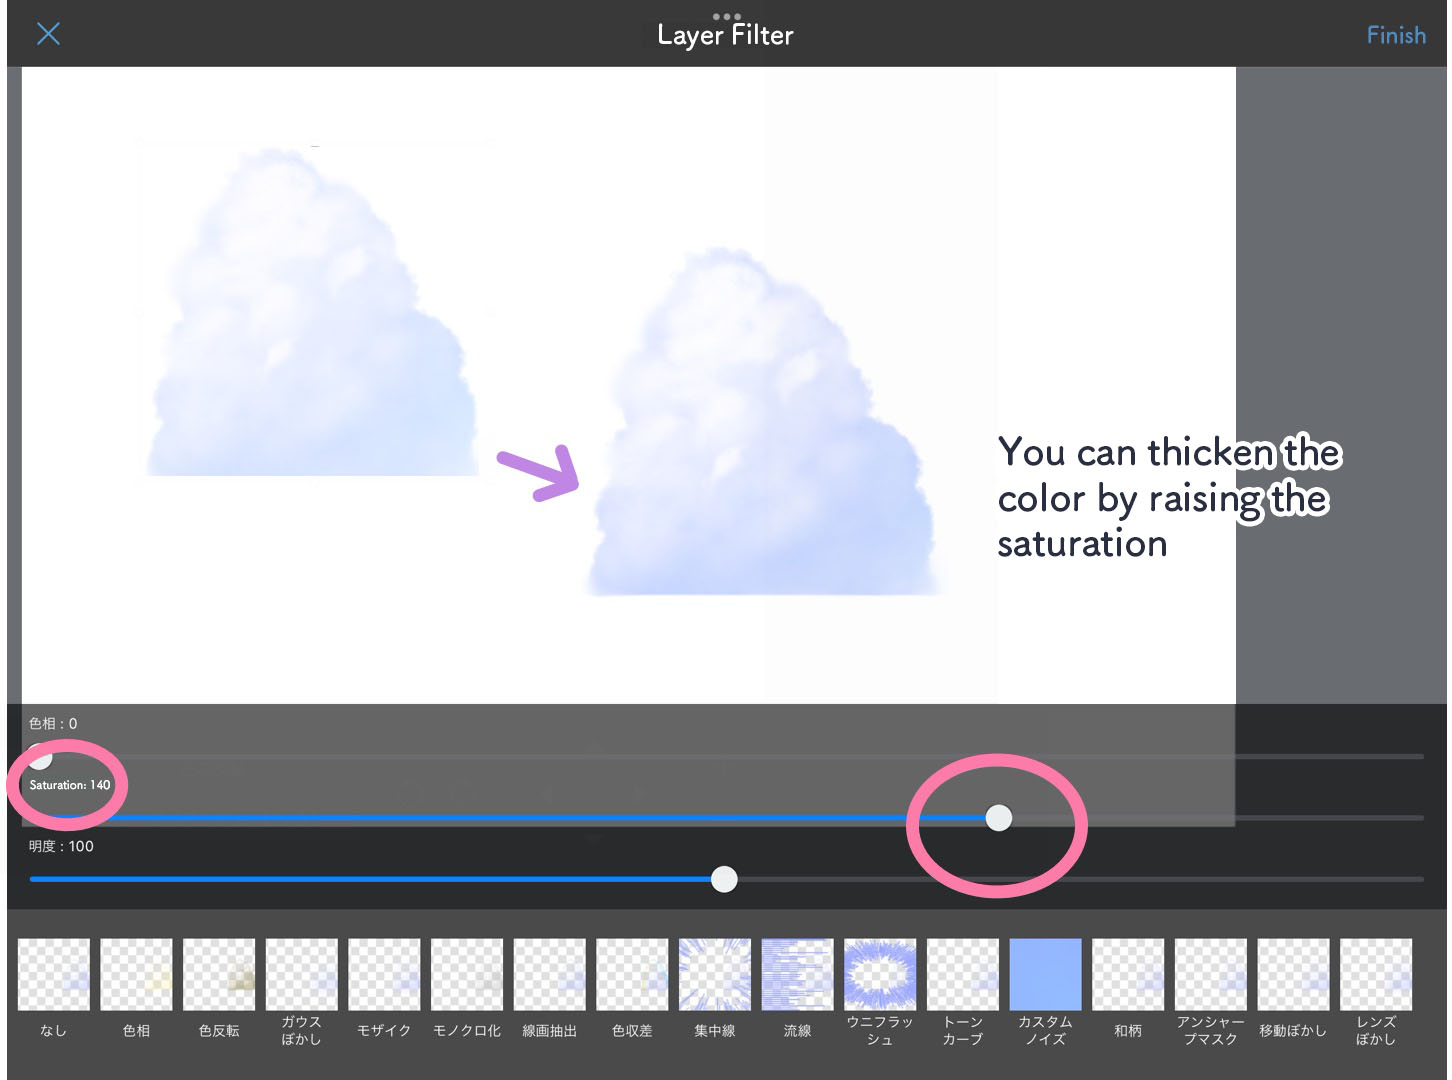
④ If you want to change the color, go to “Hue” inside “Filter” and adjust the Hue scale. If you want to make the color more vivid, adjust the Saturation scale instead.
The illustration below was drawn using the method with “Add” blending (3-3) to adjust the color of the clouds.
Although it’s time consuming, I personally prefer the “Add” blending method since it will make it easy for you to achieve the color you want.

Summary
The cloud brushes are super useful for when you want to draw clouds for the background.
It becomes easy to blend the clouds with your illustration and background by adjusting their colors, so I hope you try using the methods I explained.
(Text・Illustration/Amane)
\ We are accepting requests for articles on how to use /

