2023.07.31
This is a must see! 3 brushes to draw HAIR GLOSS in the blink of an eye
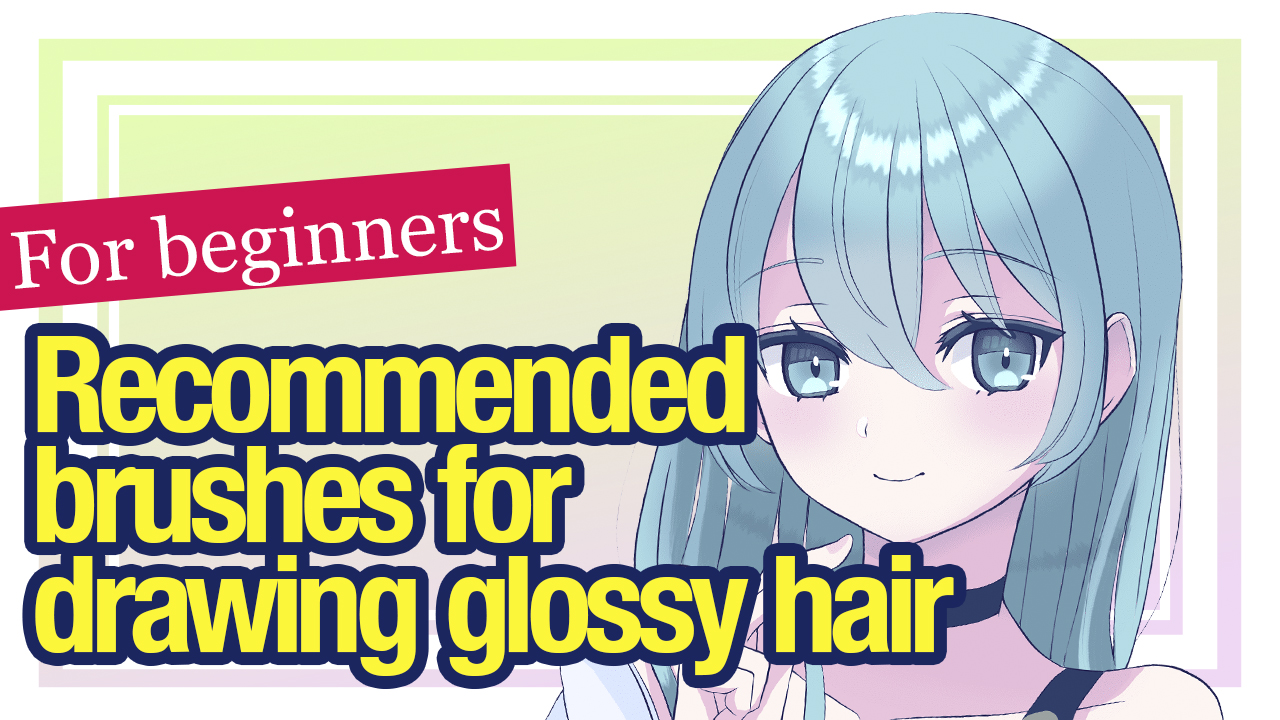
How do you always draw the shine of hair? Isn’t it difficult to draw?
I think many beginner artists face a problem like “what sense should I draw the hair shine with” or “how can I make it look natural”.
To eliminate worries about hair gloss, there are 3 brushes available in MediBang Paint!
With the Medibang Paint brushes, you can draw beautiful hair gloss. In this article, I will explain the details and use of the three recommended brushes for drawing hair shine. Don’t miss it if you want to draw shiny hair to make your female character look more beautiful.

Recommended brushes for easy highlighting
Let me show you my recommendation brushes that allow you to draw hair highlights with ease! The three brushes are as follows.
- Highlight・Gloss
- Highlight・Shiny Hair
- Hair Highlight F
Highlight・Gloss (Premium)

The Highlight・Gloss brush allows you to draw round highlights. It’s perfect for illustrations with simple paintings, such as those with an anime feel.
Its characteristic is its roundness. Round highlights give illustrations a cute look. The highlight has a random size, so the brush will render the natural highlights of the hair.
This is how it looks when the Highlight Gloss is used for an illustration.
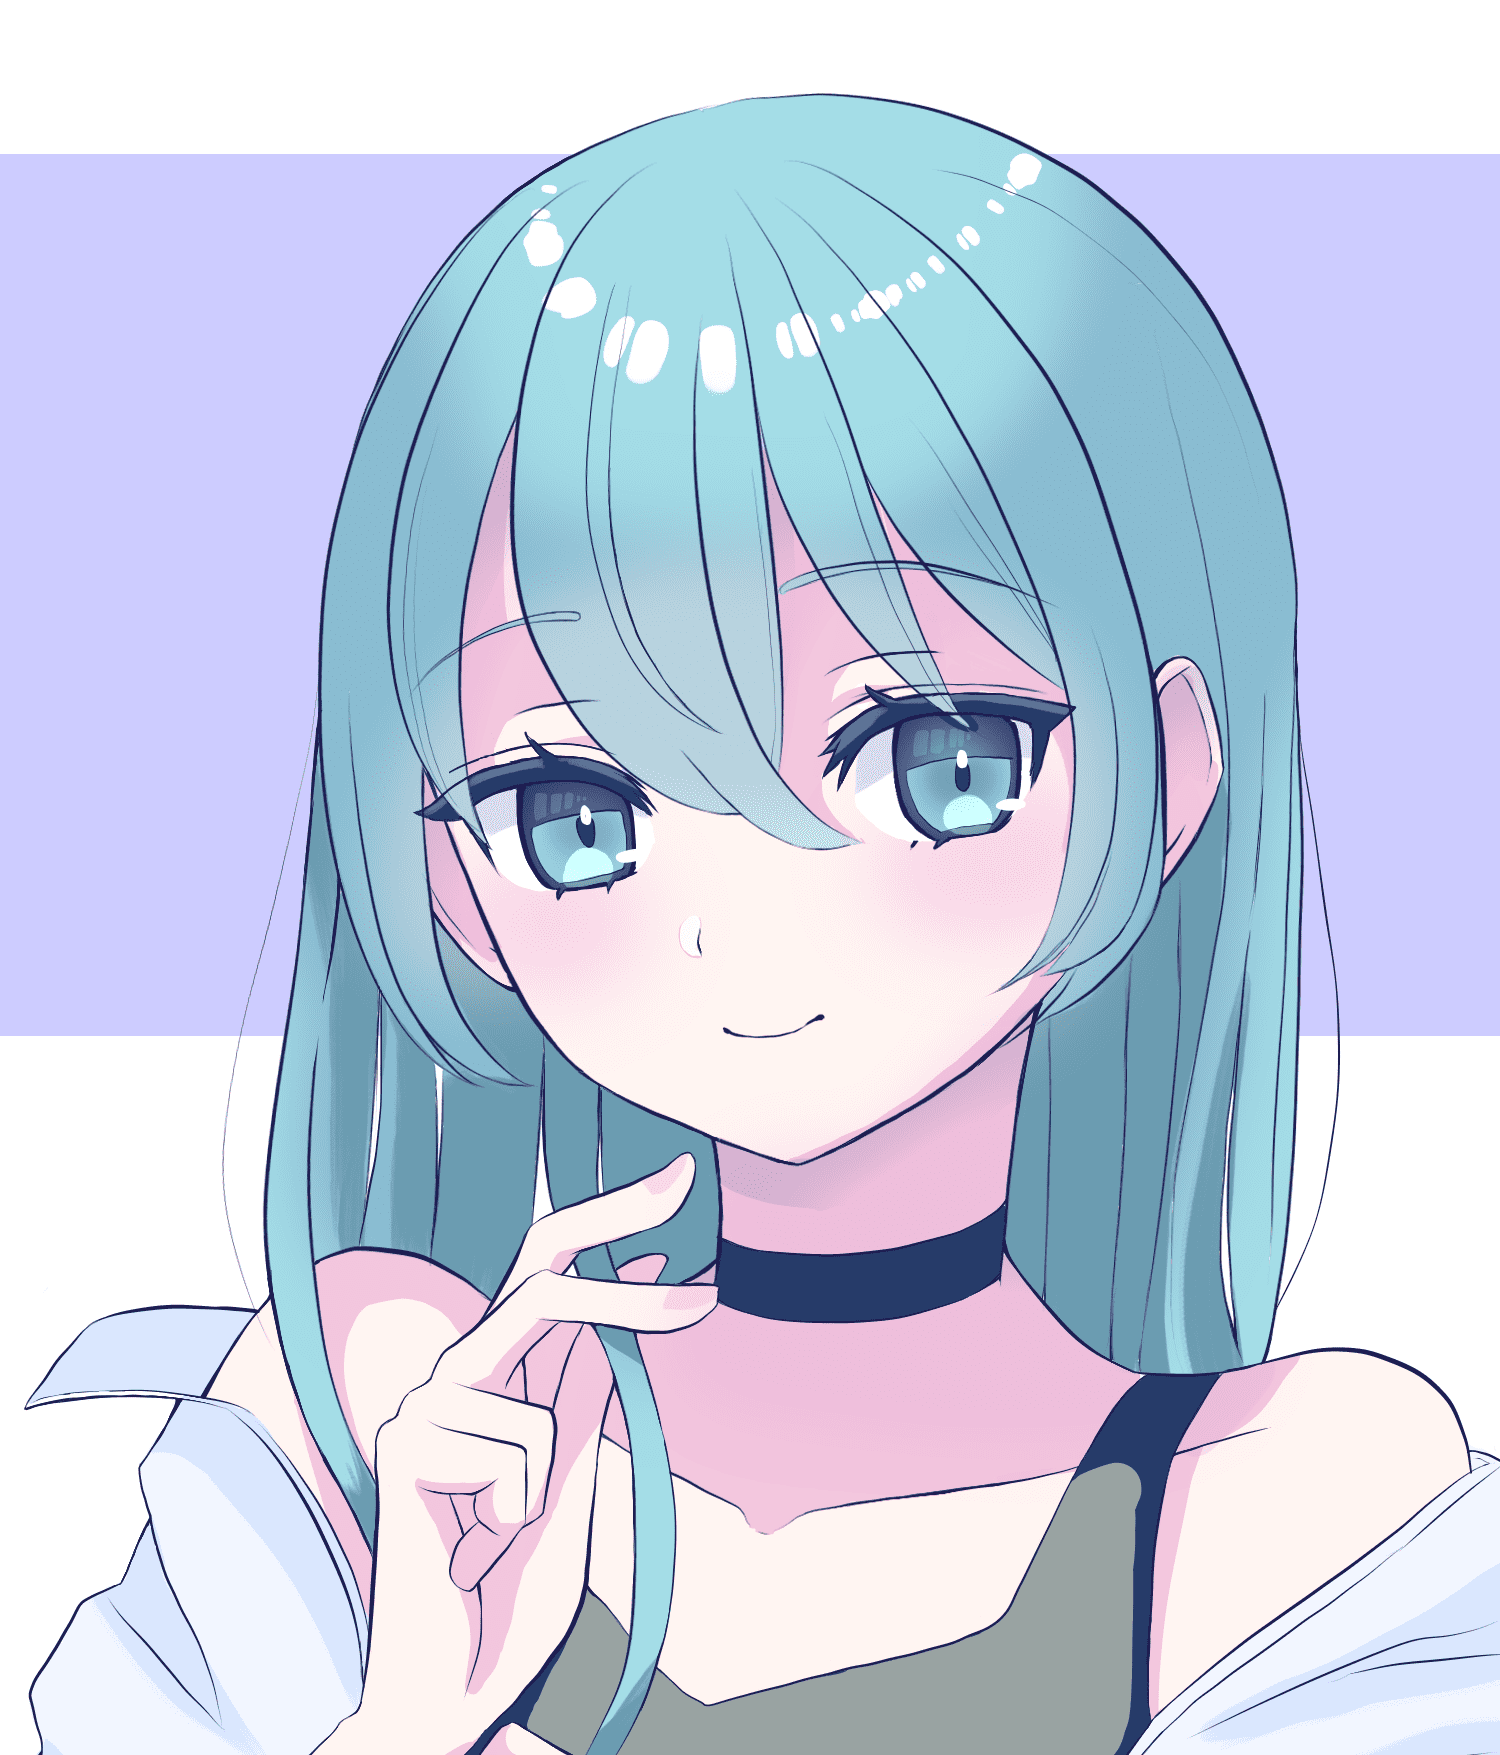
Where the light shines like a wreath on the head, the Highlight・Gloss is used. Its rough, not too detailed highlights naturally attract the audience’s attention.
This type of highlight goes well with illustrations with an anime feel. As well as hair gloss, the brush can be used to highlight solid objects such as fruit, or even food or sweets such as cakes.
Highlight・Shiny Hair (Premium)

The Highlight・Shiny Hair brush allows you to create slightly sharper highlights. It has a straighter shape than the Highlight・Gloss brush and gives a spiky, sharp feel that works well with a short hairstyle, so this brush is recommended for both male and female characters.
This is what it looks like when the Highlight・Shiny Hair is used for the illustration.
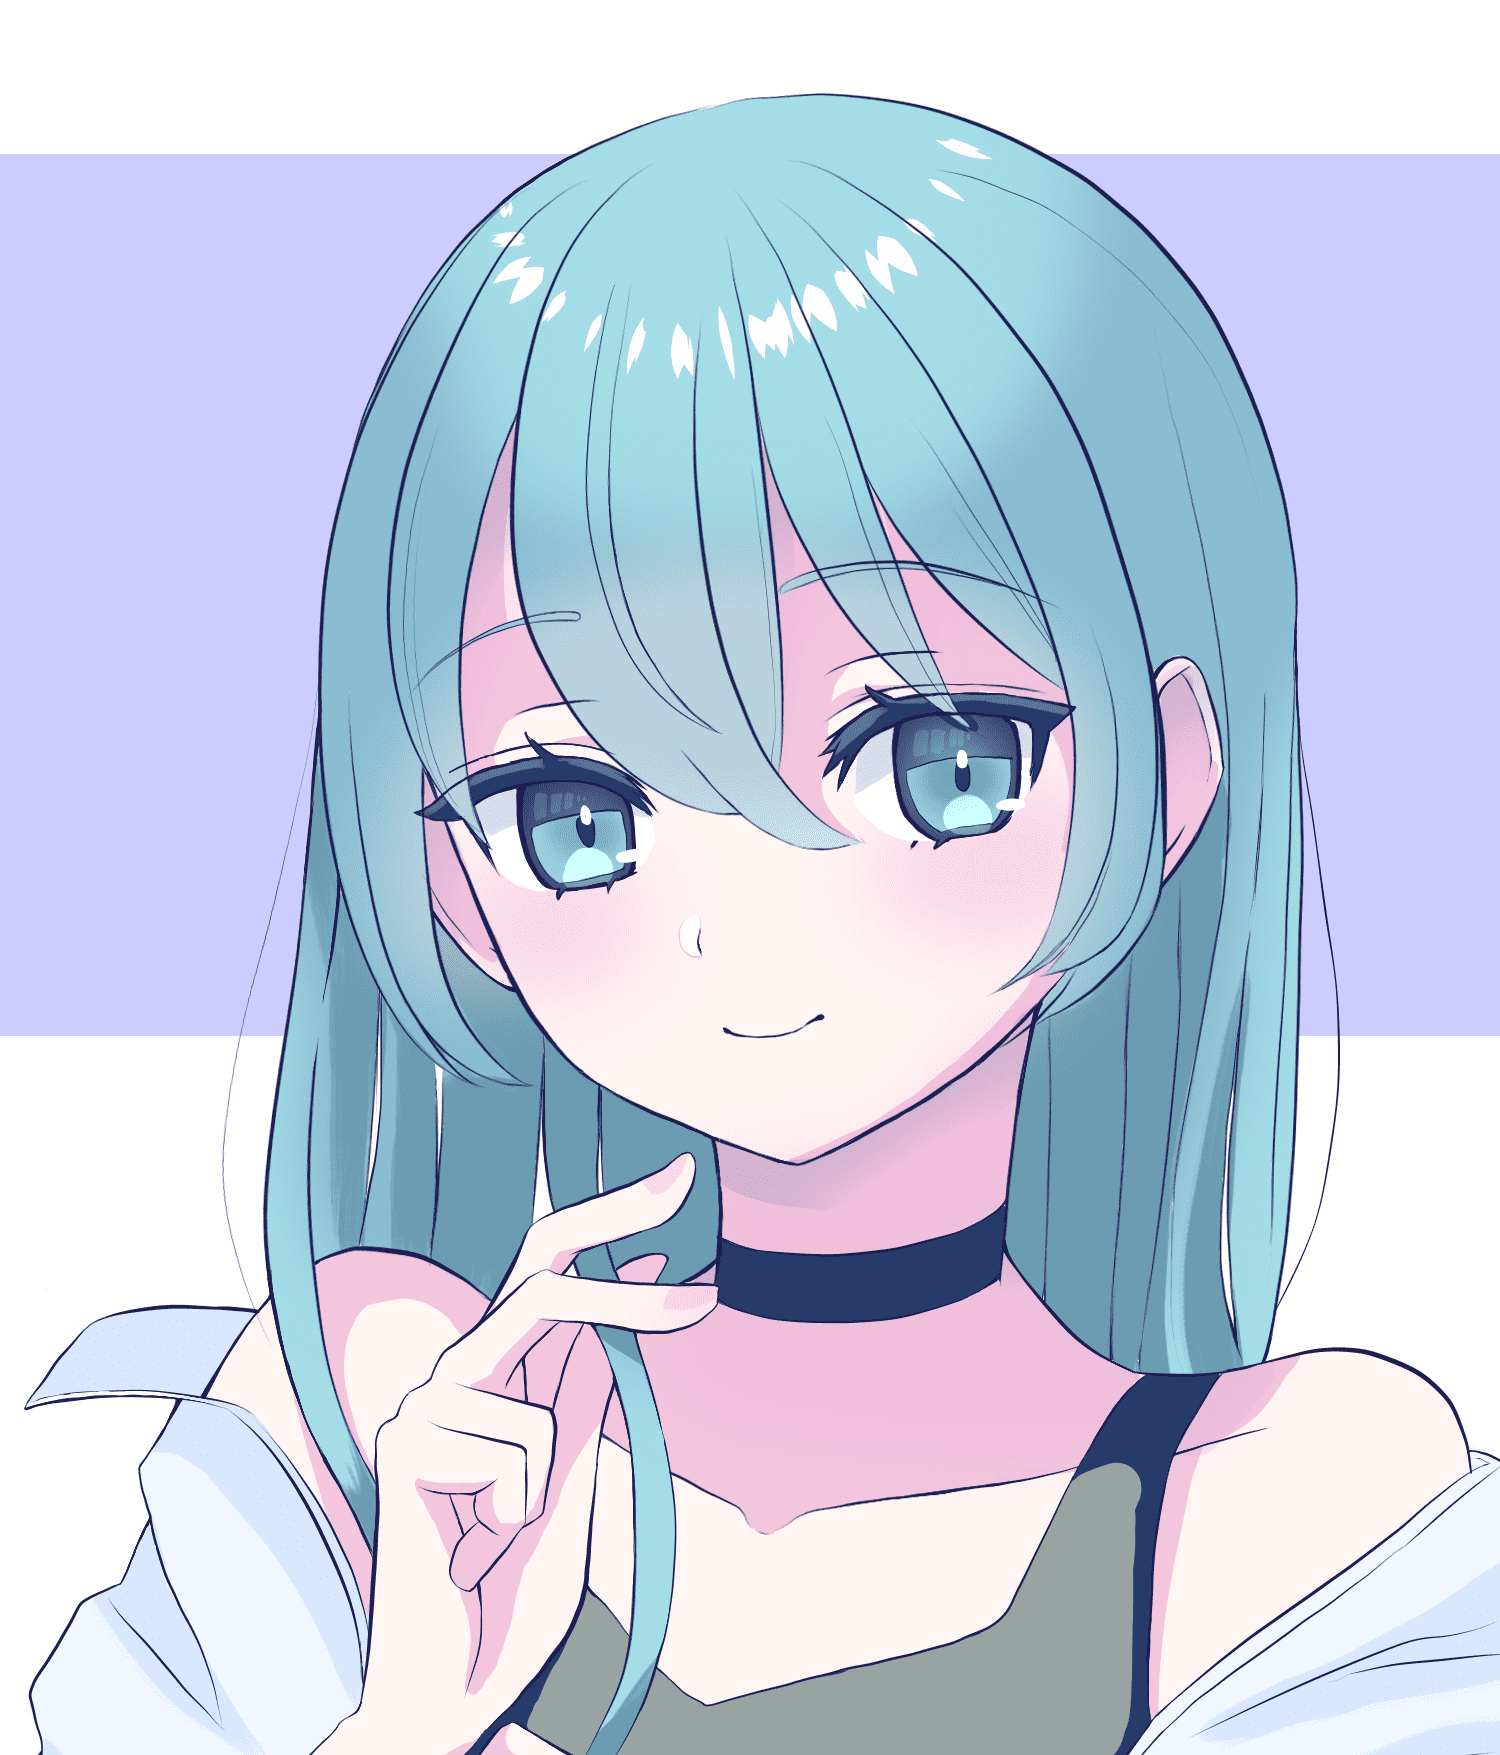
As before, where the white light shines on the top of the head is where the Highlight・Shiny Hair brush is used. The effect of the highlight is slightly sharper than before, working as an accent rather than a shine. This brush can be used to highlight hair and facial details, helping to integrate the details of the entire image.
Hair Highlight F (Premium)

The Hair Highlight F brush allows you to create highlights with a more realistic look. It has a jagged shape that is quite different from the Highlight・Gloss brush and Highlight・Shiny Hair brush. You can use it for simple paintings, of course, but also for paintings that leave brush textures, such as a thick painting, or for more realistic paintings.
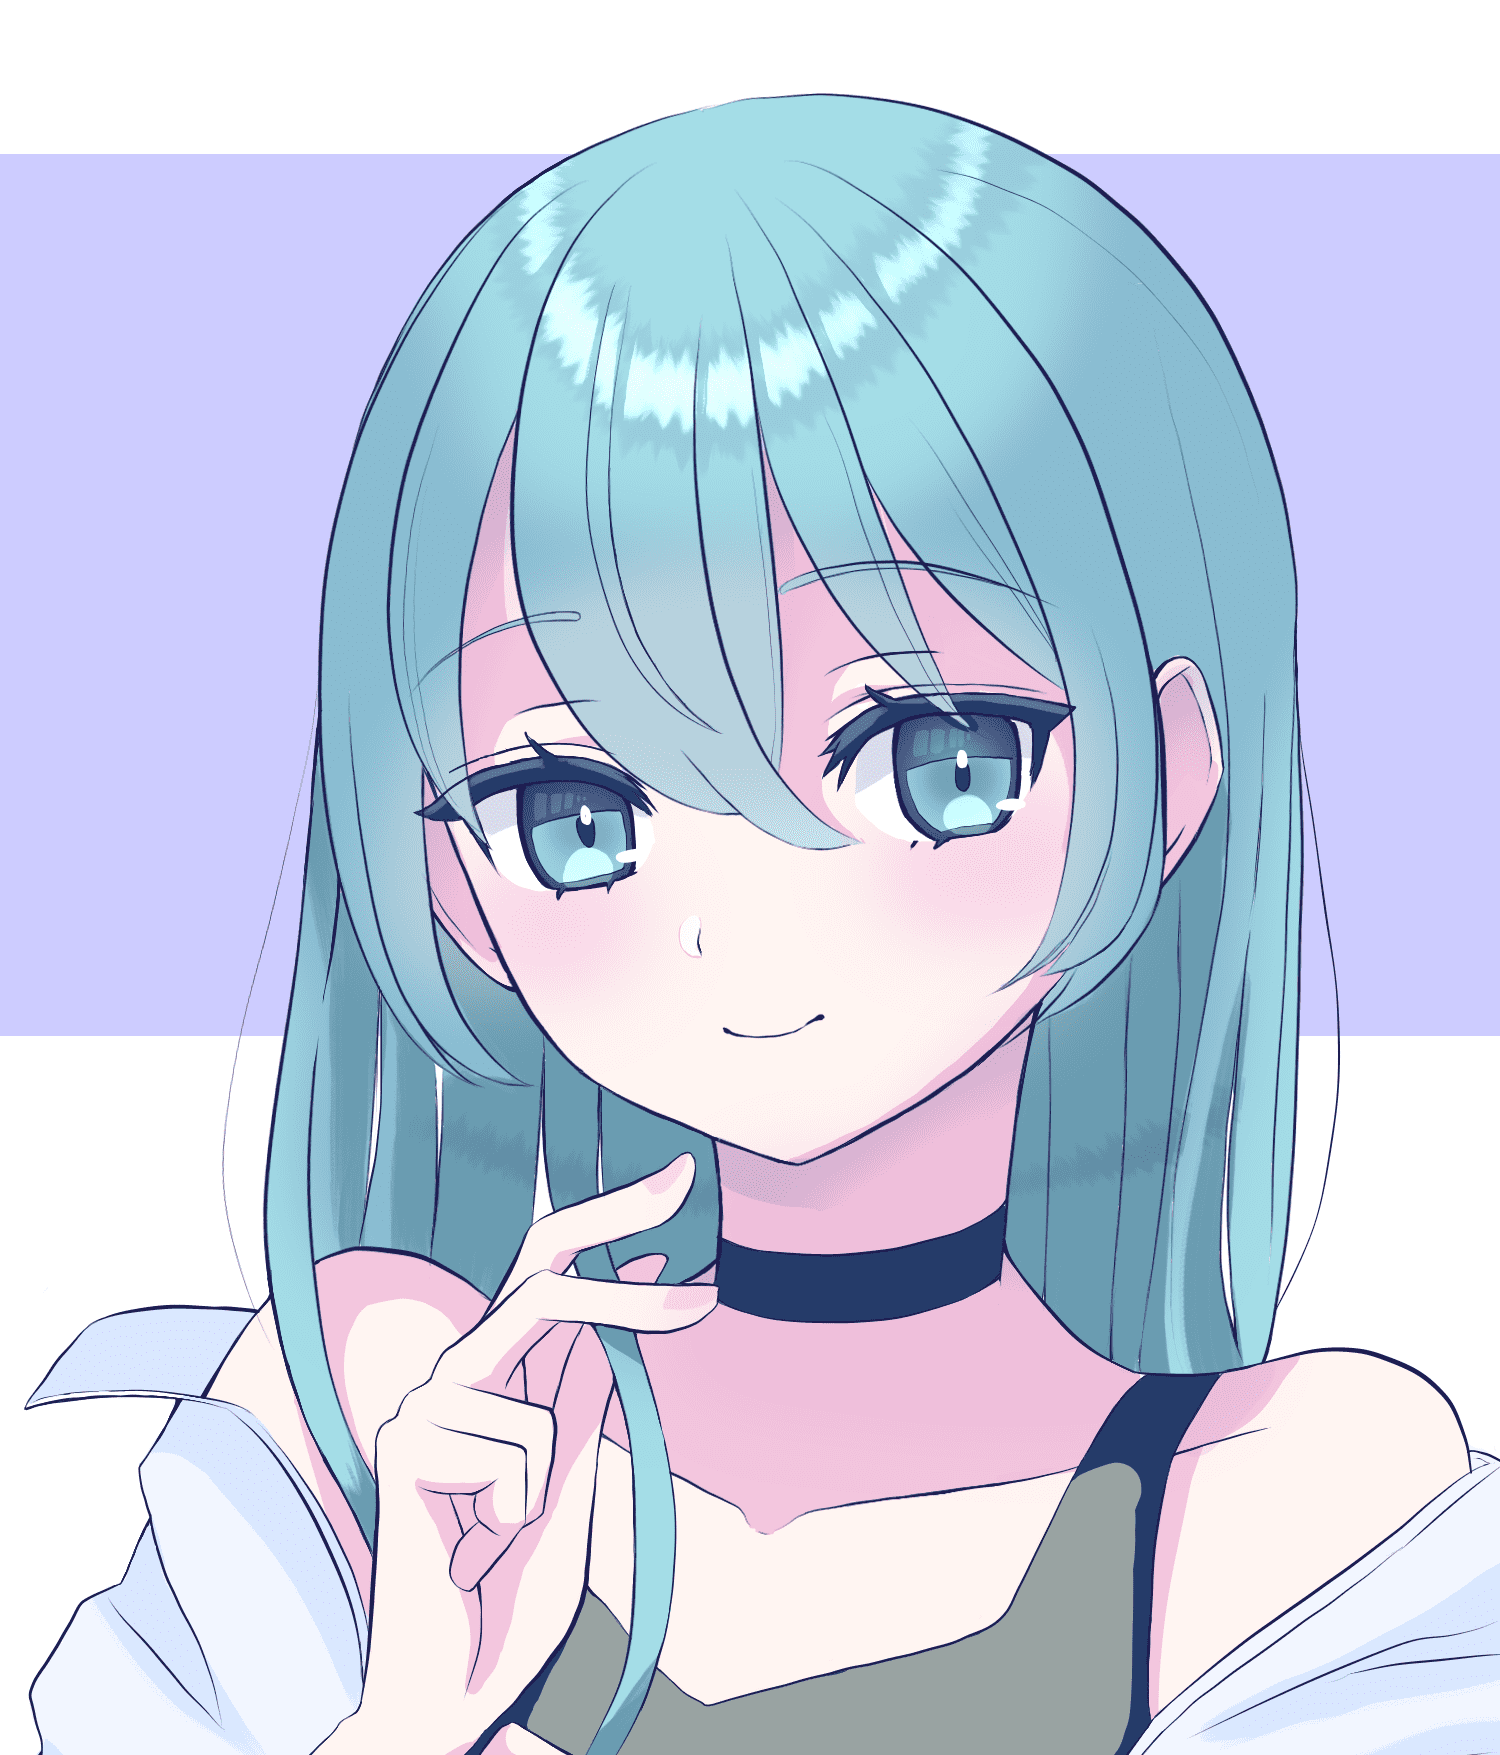
This is what it looks like when the Hair Highlight F brush is used for the illustration.
In this image, highlights in white are added over highlights in a color of the shadow of the hair to make the edge of the highlight stand out.
The brush may look too sharp and spiky when seen on its own, but it creates a natural gloss when added to the illustration. The brush can express the subtle nuances of light and dark, making the whole art more realistic.
All three brushes featured in this article are paid features available by subscribing to the Premium service. However, these brushes are discounted to 99 JPY each when the shop is on special sale. Definitely worth paying for! You should subscribe to MediBang Premium if you want to use other Premium brushes, and you might as well just buy these brushes if you are a portrait artist and only need brushes for hair highlights.
Medibang brushes are open for commercial/doujinshi use, age rated or not, so you can use these brushes for a variety of purposes, such as illustrations for commercial, hobby or your original manga.
The Hair Highlight F brush is my favorite of the three. I used to add highlights with the acrylic brush, but with this brush I can add highlights in no time at all. There is no choice but to use it.
▽Buy the Premium brushes
Highlight・Gloss
https://medibang.com/materials/detail/2g71q2npaiyovf3y6bhfqqbxxbp/
Highlight・Shiny Hair
https://medibang.com/materials/detail/iy71ywzzv7i0s9u6qw0948q00l2/
Hair Highlight F
https://medibang.com/materials/detail/5p71o40n5g9r8i9hvcrhb1771yo/
Tips for using hair shine brushes
From now on, let’s learn tips on how to use highlighting brushes wisely! Hair highlight brushes are useful for rendering beautiful hair if you know how to use them. However, if you use them carelessly, the highlights will stand out weirdly, ruining the balance of the whole picture. To use them correctly, learn these three tips.
- Adjust the brush size
- Get conscious of drawing a circle
- Never mind if the brush sticks out
Adjust the brush size
If the brush size is too small or too large, the shine of the hair will be somewhat unnatural. You will need to adjust the brush size in the brush settings to match the size of your image.
A brush that is too large will take up too much space in the hair for highlights, making it look bleached. On the other hand, if the brush is too small, the highlights will not stand out enough.
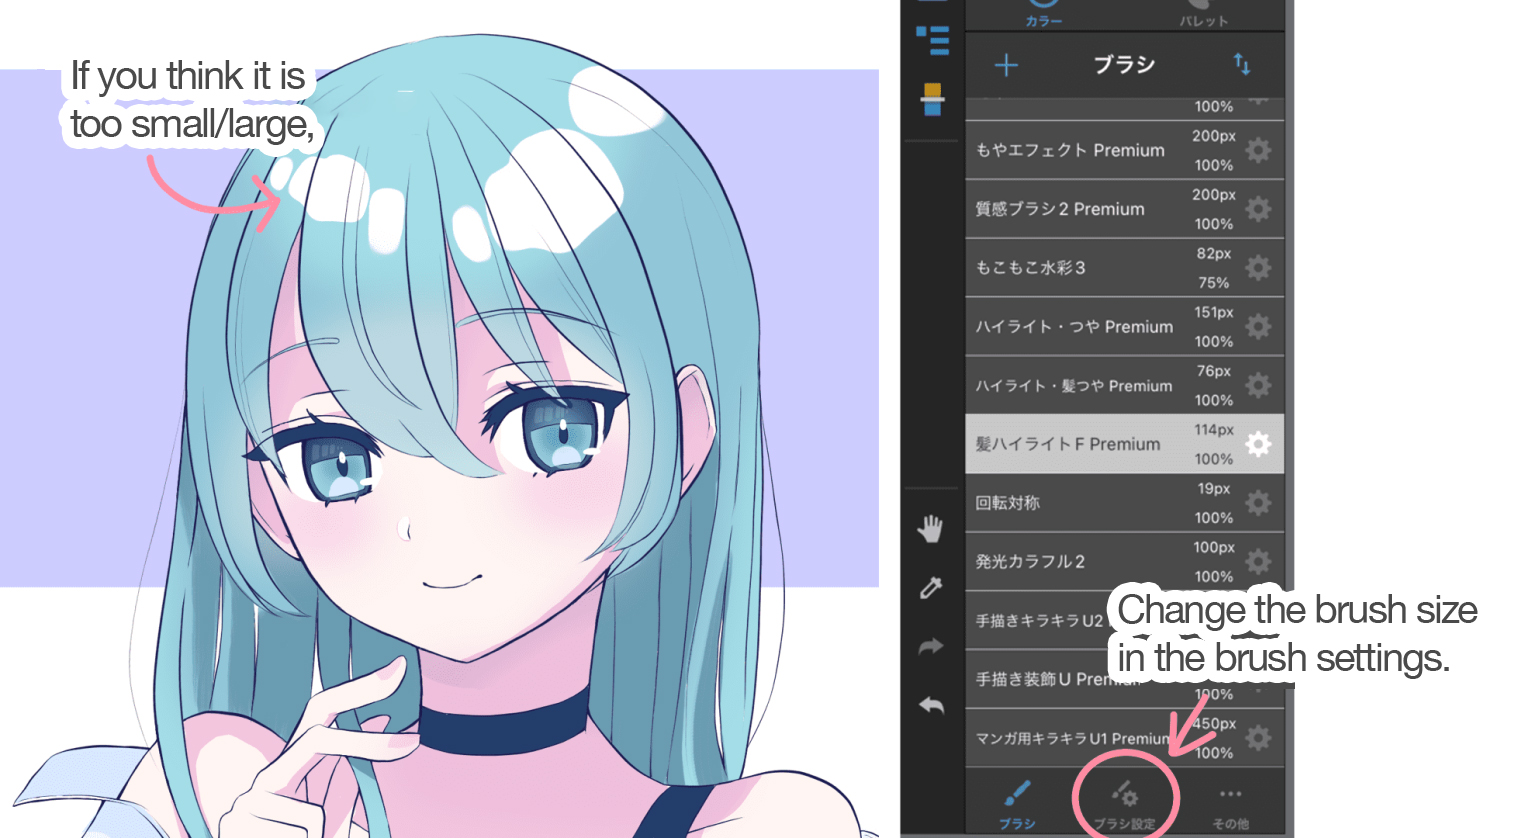
You can redraw it as many times as you like, so try to find the size you think is right. The balance of the whole illustration will be better to look at if you adjust the brush size according to the angle or intensity of light and dark.
Get conscious of drawing a circle
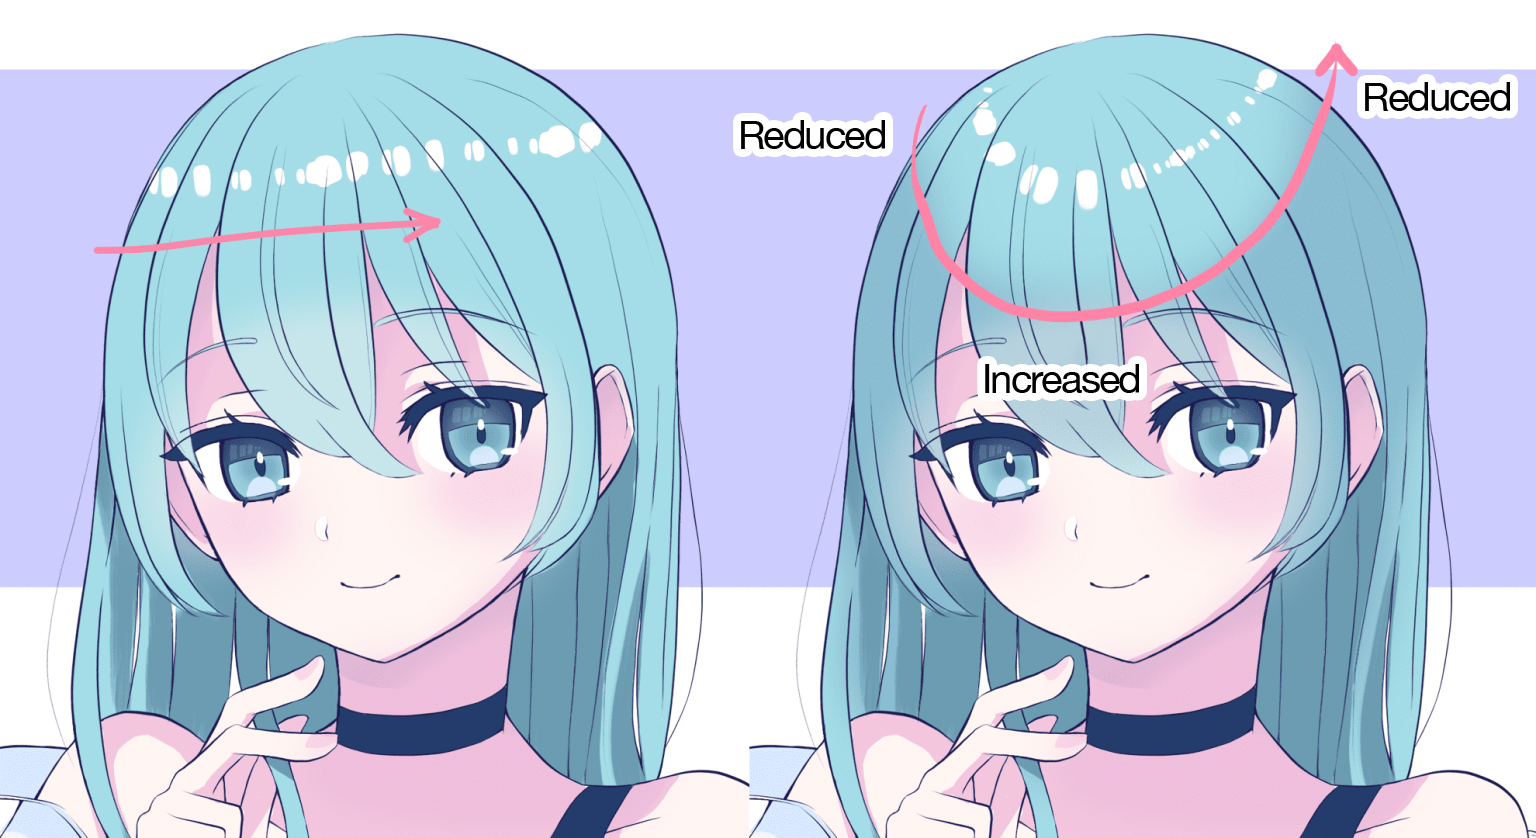
If you want to easily render the roundness of characters’ heads, it’s a good idea to draw highlights in a round shape. You can create highlights that look more natural by being aware of the shape of the heads. Rather than drawing a straight highlight, a round highlight is more useful for rendering three-dimensionality.
In addition, reducing the pen pressure at the beginning and end of a stroke adds contrast, which is good for creating three-dimensionality. You can improve the overall balance of the image by increasing the pressure at the front.
Never mind if the brush sticks out
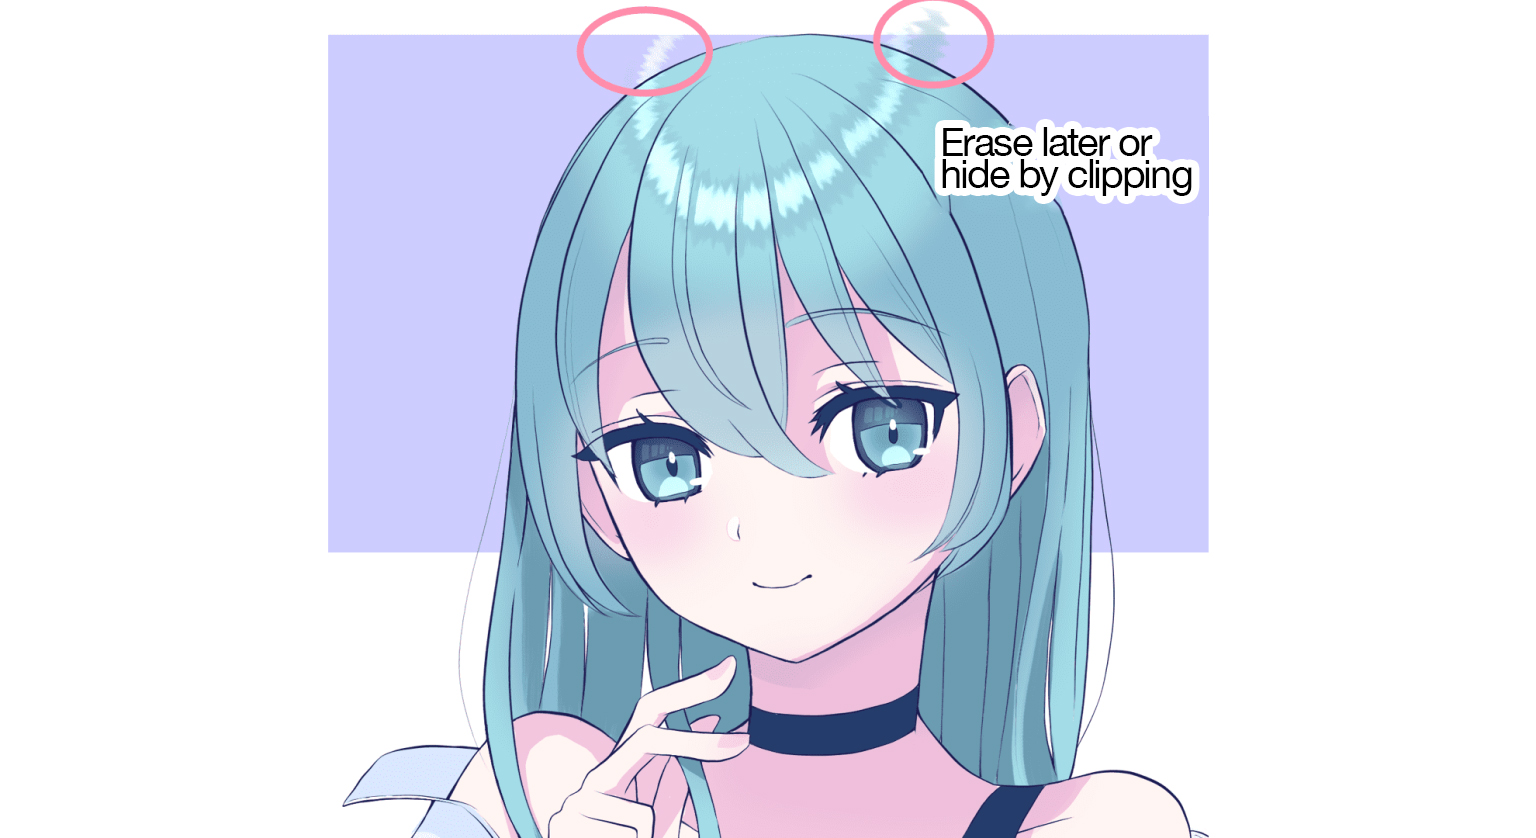
When you use brushes to add highlights to hair, it is inevitable that the beginning and end of the brush strokes will stick out from the outline of the head.
It will take a lot of time if you try to make sure they do not stick out, besides your mind will be focused on “not sticking out” instead of “adding beautiful highlights”, making the process seem much more tedious and annoying.
Use the Clipping function or the Eraser tool to hide or erase the protruding area later. There’s no need to be careful that it doesn’t stick out. The best thing about digital drawing is that you can easily hide or erase unnecessary areas. Streamline the process.
Learn more about the clipping function
Conclusion
Today’s article was about three brushes that make it easy to add shine to hair. All three are exceptionally high quality brushes that are available as a benefit of the Premium service or as paid-for brushes.
Let’s review the tips for using highlighting brushes!
- Adjust the brush size
- Get conscious of drawing a circle
- Never mind if the brush sticks out
If you use these three brushes thoughtfully and differently for different scenes, you will create highlights that are perfect for your work. I hope you will give these three brushes a try.
For your information, the ways of adding highlights and drawing hair are explained in detail in the following tutorials.
Add highlights to enhance the quality of your illustrations!
[For Beginners] How to paint your character’s hair easily!
(Text・Illustrations / Amane)
\ We are accepting requests for articles on how to use /


