2020.01.28
How to draw faces from different perspectives [overhead perspective]
When taking photographs, positioning the camera above or below eye level creates a variety of compositions and expressions. This also applies to illustrations.
However, many people have experienced wanting to draw a character gazing up at the viewer or a composition shown from below, yetnot knowing how to draw a face from a different perspective.
Thus, I would like to introduce how to draw an [overhead perspective] as if the character was being looked down at from above.
There are many ways to draw a face from an overhead perspective, but I would like to introduce just one of those ways here, so if you are troubled over how to draw this perspective, please refer to this introduction.
1. What to focus on when drawing a face from an overhead perspective
An overhead perspective refers to an angle from above.
Other than directly overhead, even being a little higher than the subject is also considered an overhead perspective angle.
When drawing a face from an overhead perspective, you should focus on knowing how its shape changes from looking at it from the front when looking at it from above.
First, let us take a look at the most basic shape, the cuboid, from above.
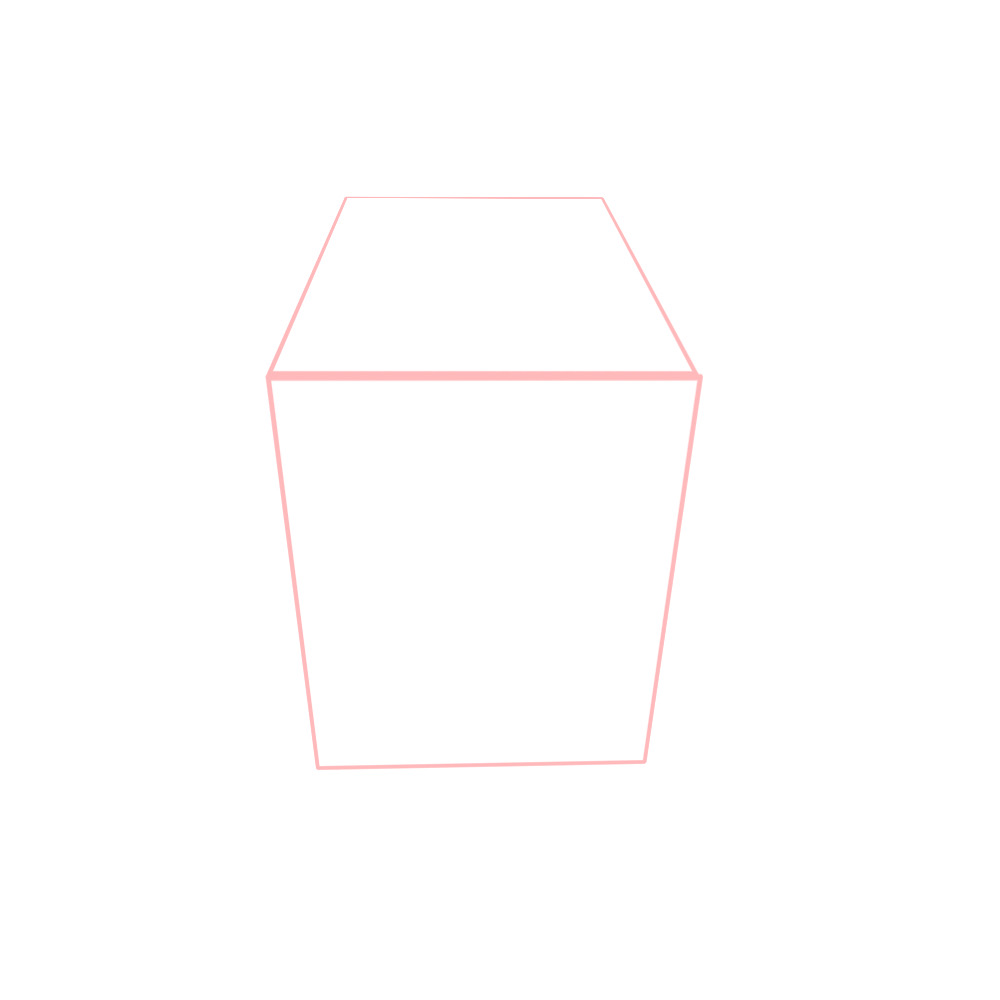
When looking at the rectangular part in front, you can see that it takes the shape of a trapezoid that gradually narrows towards the bottom.
This narrowing towards the bottom will be important when drawing a face from an overhead perspective, so please remember it.
2.How to draw a face from an overhead perspective
When drawing an overhead perspective angle, position the ‘+’ marking the dimensions of the face a little lower than normal.
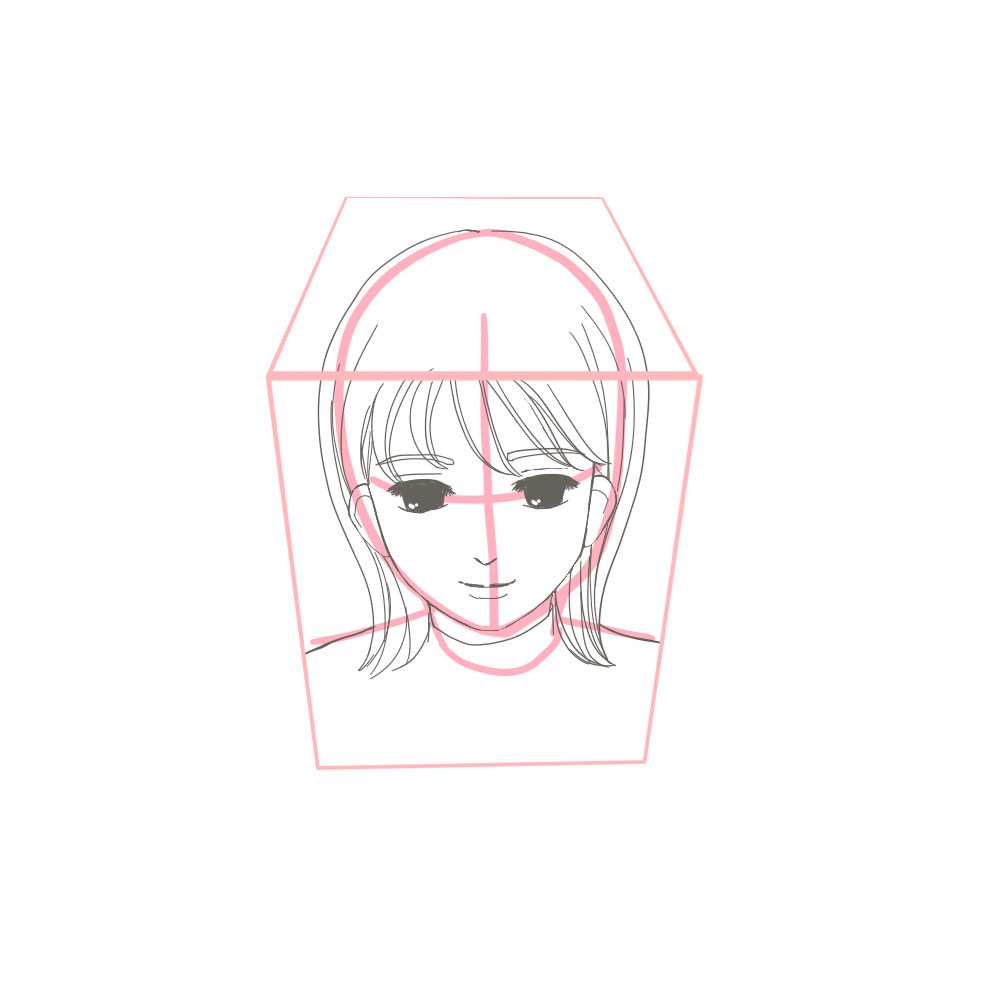
When drawing each part of the face such as the eyes and the nose, there are some areas you should pay attention to.
If you cannot imagine what the face looks like when seen from above, please try using a photograph as a reference.
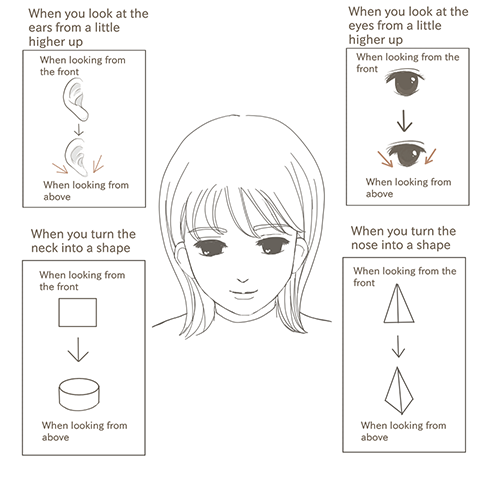
Instead of leaving them as they is, switching temporarily to simple shapes such as “cylinders” and “triangles” will make it easier for you to imagine how they will change when the perspective is changed.
Now then,let us take a detailed look at what you should focus on for each part.
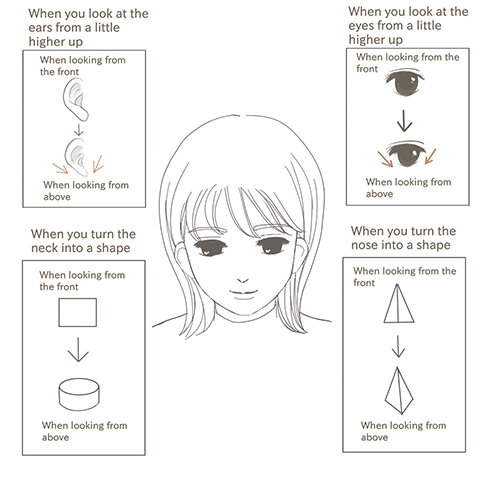
- Nose
It is easier if you change the nose to a triangle. When looking at a triangle from above, as shown in the illustration, it will look like a triangle facing down. Thus, you should keep a downward-facing triangle in mind when drawing the nose.
*As it looks different depending on how high up you are looking from, please find the angle that you wnt to draw. It might also be good for you to make an actual trangle with paper, etc.
- Eyes
The eyes especially affect the impression that a face gives, so let us add an angle to them as well. Just like the illustration, make the bottom part become narrower in width than when looked at from the front to make them look as if you are looking at them from above.
When looking from a little higher up, it becomes easier to see the eyelids and eyelashes than the eyes. Thus, draw the eyelashes properly over the eyes to make your illustration seem more realistic.
- Neck
It might be easier if you imagine the neck as a cylinder. When looking at a cylinder from the front, it looks like a rectangle, but when looked at from a little higher up, the round line of the side comes into view. If there is something wrapped around the neck, draw this round line to make it look like an overhead perspective.
- Ears
Replacing them with cuboids might make it easier for you. When looking the cuboid from earlier on, in addition to the width becoming narrower towards the bottom, more of the top surfaces can be seen. Thus, for the ears as well, make the bottom part a little narrower and draw the top part a little thicker than normal.
- Hair whorl
In the case of an overhead perspective angle, when looking from even higher up, there will be a greater area of the top of the head that is visible. Thus, be aware of the position of the hair whorl to make it easier for you to draw the hair.
An illustration drawn with the above in mind will turn out as follows as compared to an illustration facing the front.
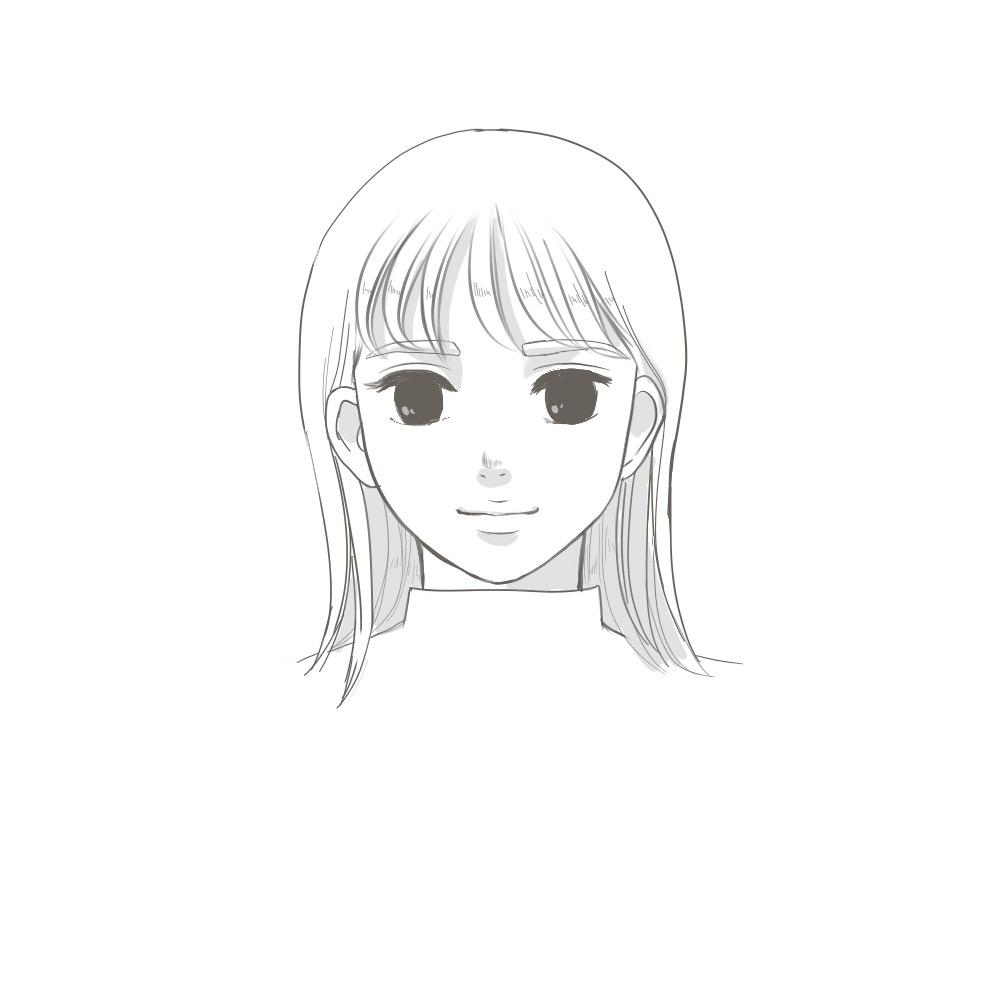
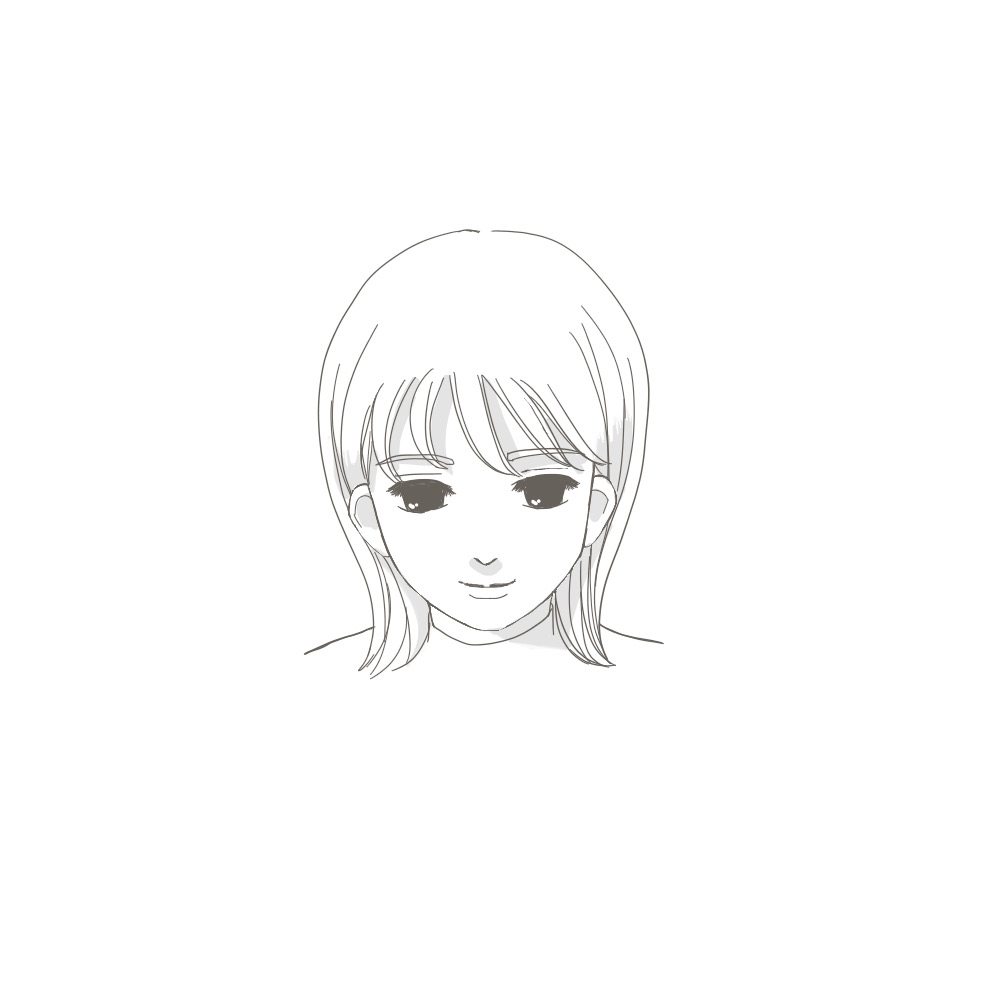
Each part looks different depending on how high up the perspective is.
Look at many photographs and illustrations as references to start with to see how each part looks from the angle from which you want to draw.
Drawing many illustrations from various angles will gradually enable you to grasp that “from this angle, it will look like this,” so please refer to illustrations and photographs by various people and draw many illustrations.
\ We are accepting requests for articles on how to use /

