2020.10.09
Let’s try drawing clouds (1) [How to draw basic clouds]


The pure white clouds in the blue sky are very familiar to us.
When illustrating an outdoor scene such as a meadow or the sea, clouds can be a very refreshing and nice accent.
However, since clouds are spindly and not uniform in shape, many people may wonder how to draw them.
So, in this article, I’ll show you how to draw clouds in a basic way.
If you’re interested in drawing clouds, check it out.
1. Draw the positioning
Here, we’ll look at how to draw a single cloud purely without considering angles and placement first.
Clouds are one of the hardest materials to capture the shape of because they are not solid, but rather firmer, like smoke or cotton candy.
With these non-solid materials, it’s easier to draw them if you replace them in your mind with a lump (a solid object).
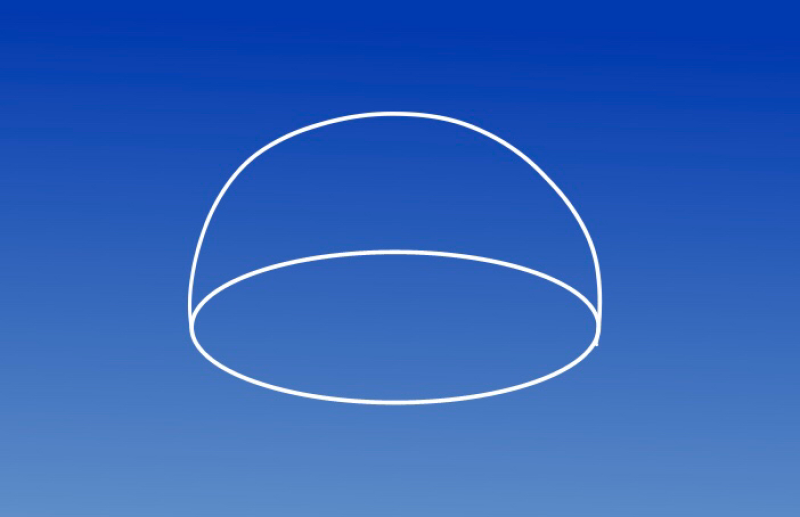
In the case of clouds, it’s easier to grasp the shape of the cloud if you capture the large silhouette as a dome-shaped object and replace the firmer parts with slightly collapsed spheres.
Now, let’s draw the position of the cloud as a lump.
(1) Draw the outermost silhouette
The first step is to roughly determine the outermost silhouette.
What we are going to paint here is positioning, so make a positioning layer and paint roughly with a brush of your choice.
As for the shape, it’s good to imagine a dome-shaped shape.
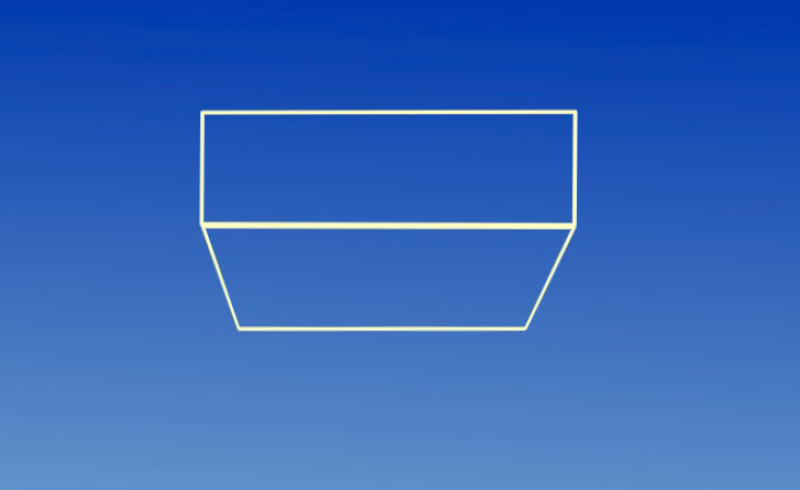
If you are conscious of depth, it’s easier to draw a square box shape.
It’s easier to get an idea of the shape if you see lots of photos of clouds and actual objects.
It’s a good idea, especially in the beginning, to look at cloud shapes and shadows from photographs of clouds that you have taken yourself.
(2) Draw a spherical shape of the parts to make them fluffy
Once you have decided on a general shape, draw the stumpy part of the picture, imagining it as a ball.
Draw the position of the ball as you go along, imagining it’s a perfect circle or a slightly collapsed ball like a manjuu.
There are no rules for the number of balls, etc., but since it is difficult to draw them in a complicated way, I think it’s a good idea to start out with three to five.

(3) Roughly deciding the position of the shadow
At this point, I think it is easy to draw if you think about how to put the shadow.
Decide on the direction of the light and draw the positioning of the shadow in the order of the whole cloud, then the sphere.
When casting shadows on the entire cloud, keep in mind that the cloud’s shape is dome-shaped, and the bottom part of the cloud is basically a shadow.

It might be easier to draw a quick line drawing like the one below if you decide on some shapes and shadows.

2. actually painting with the brush
Once you’ve drawn the position, it’s time to use the brushes to paint the clouds.
There are two types of brushes available in Mediban Paints, Cloud and Cloud 2, but there are also two other brushes that can be used for painting clouds.
I will mainly use the “Moko Moko Watercolor 3” brush in this article.
If you’re curious about the different types of cloud brushes and how to download the brushes, please check out the article below for more information.
“How to Paint Clouds 2: [Types of Brushes and Points to Watch Out For]”</a
Now, let’s actually paint the clouds.
There are various ways to paint with a brush. I will paint the white part as a foundation, draw the shadow and adjust it afterwards.
(1) Draw the white part
First, I’m going to draw the main white part of the picture.
Here I used the Fluffy Watercolour Brush 3 to draw an arc, little by little.
It’s easier to get the fluffy look of the clouds if you make good use of the characteristic shading of this brush instead of trying to paint in a solid color.
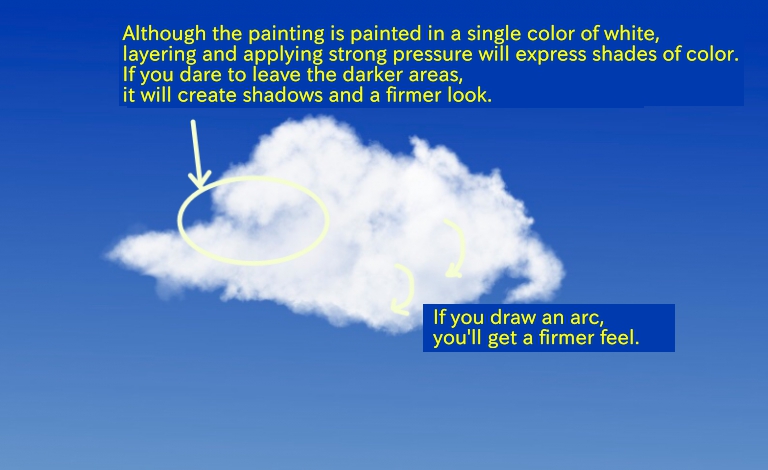
After the white part as a base, draw the shadow.
(2) Draw the entire shadow with a slightly bluish gray color
Since these are white clouds floating in a blue sky, we’ll draw the shadows in a slightly bluish gray.
First, I’ll create a new layer on top of the white cloud layer I just painted and clipping it.
Now we can paint in the color without it sticking out of the cloud.
Choose the “Airbrush” brush and paint the shadows all over, focusing on the bottom.
I used a slightly darker color and lowered the opacity to make it easier to blend in with the white area I just painted.
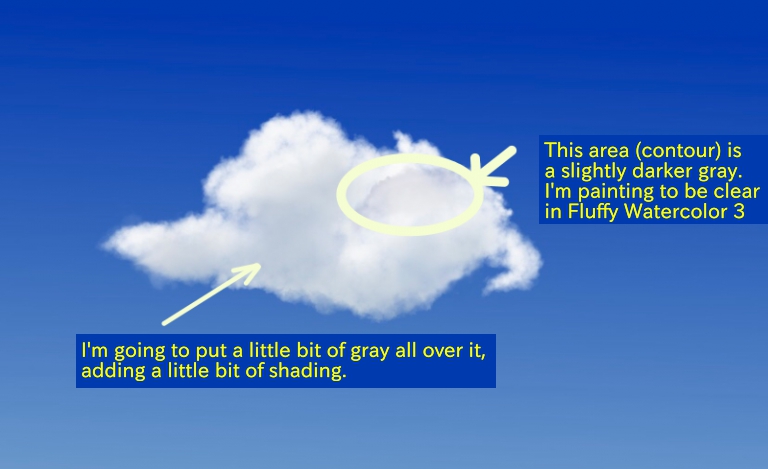
I reduced the size of the Moko Moko Watercolor 3 brush for the protruding area in front and painted the contour area in gray.
I created a new layer without clipping and painted these areas where I wanted to adjust the transparency.
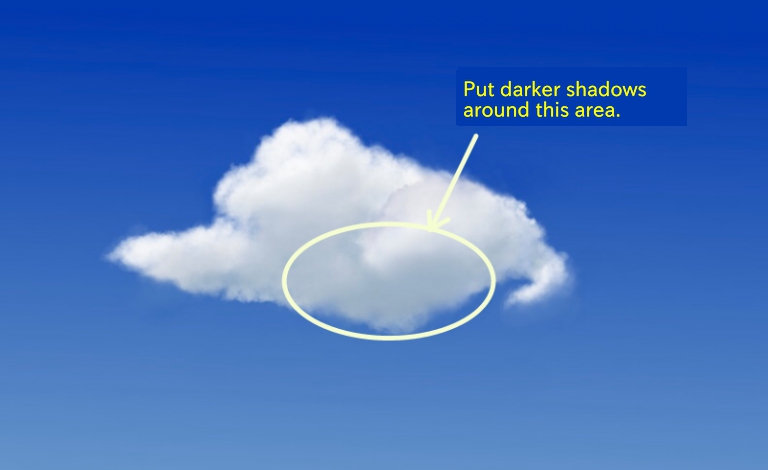
3) Painting the darkest part
Because the clouds are lit from above, the domed bottom part of the cloud will be especially dark.
So the next step is to add more blues and grays to the areas that hit the bottom and the areas we want to darken.
First, we’re going to create a new layer and add the same color as before, then lower the opacity to blend it in.
I’m mainly using the airbrush here, but I also used the Moko Moko Watercolor 3 brush to layer the colors in areas where I want to add texture.
4) Adjust the shape of the shadow by overlapping the white color
Once the shadows have been drawn, I add a layer of white to the areas I want to brighten.
For the areas I want to brighten in particular, I made the layer luminous after painting the color and blended it in by lowering the opacity significantly.
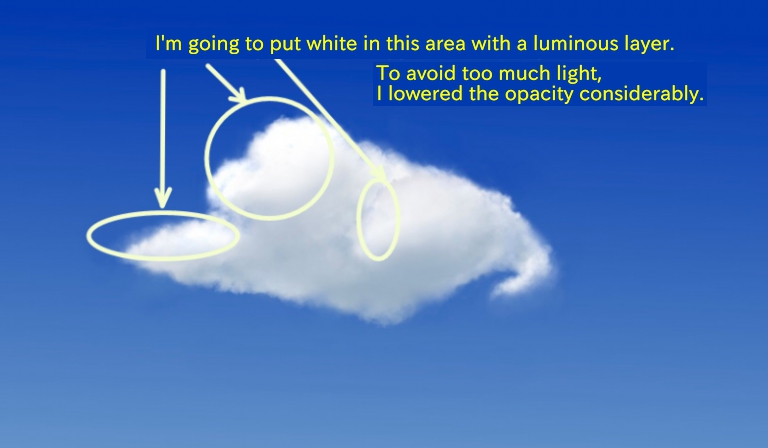
Once you’ve drawn the brighter areas, adjust the other areas of concern and you’re done.

3. Summary
What did you think? Clouds seem fluffy and elusive, but they can be very easy to paint with a brush or other tools.
Mediban Paints also has brushes for clouds, so I encourage you to try your hand at drawing clouds.
(Text and picture by sakaki)
\ We are accepting requests for articles on how to use /

