2021.10.01
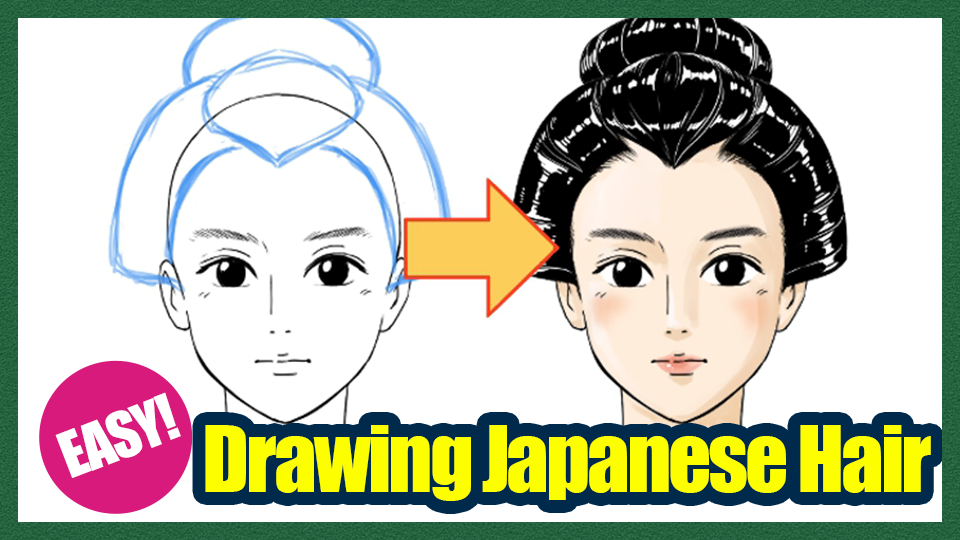
EASY! Drawing Japanese Hair ♪
2021-08-01
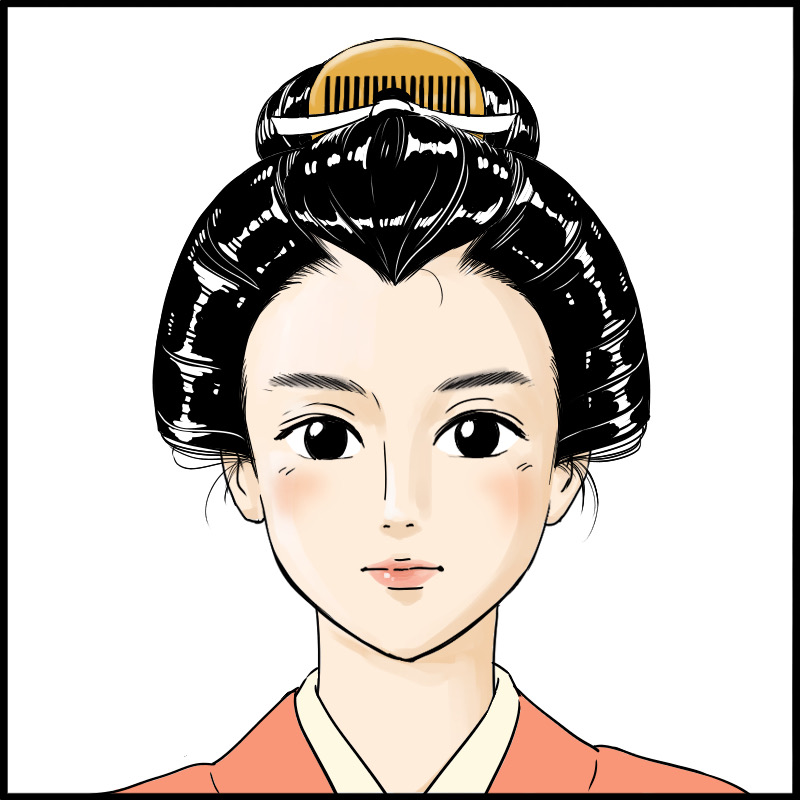
You want to draw historical Japanese hair, but how do you figure out the mechanism of this hairstyle?
This probably is the question that many creators have wondered about at one time or another.
It may look complicated, but once you study the parts it’s actually quite simple.
Let’s take a look at it right away!
Index
1. How Japanese hair are made
Let me explain how Japanese hair is tied up in a step-by-step manner.
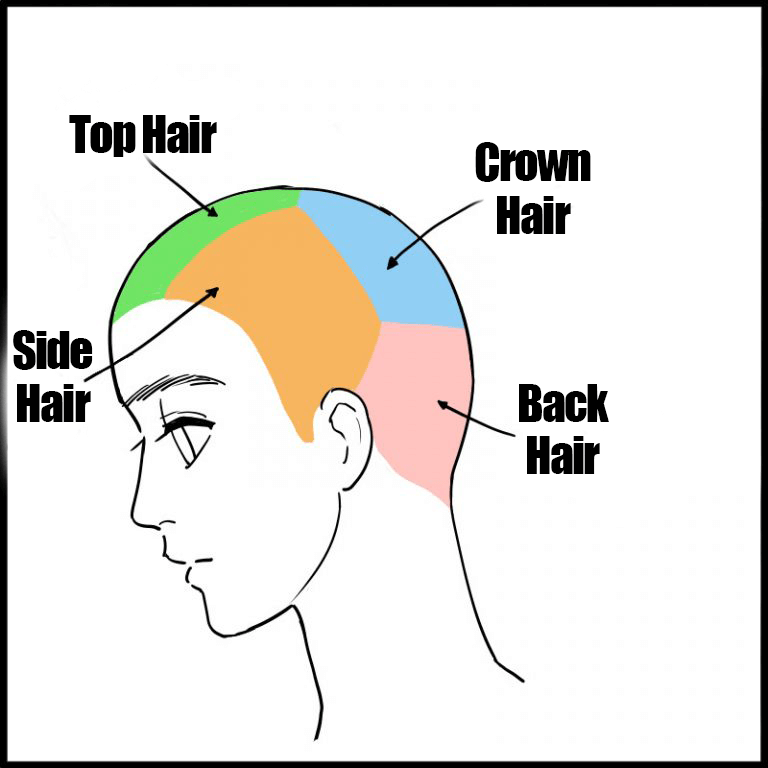
First, please look at the following diagram.
Here we can see the head is divided into four parts. From left to right; top hair, left side hair, crown hair, and back hair. Japanese hair parts are tied at each end to create volume, and tied together in one.
These are of course symmetrical, so there is one more “side hair” part on the other side.
You add that piece together and there are a total of five hair parts.
Now that we know the parts, let’s look at the tying order.
First, tie the “crown hair” part at the top.
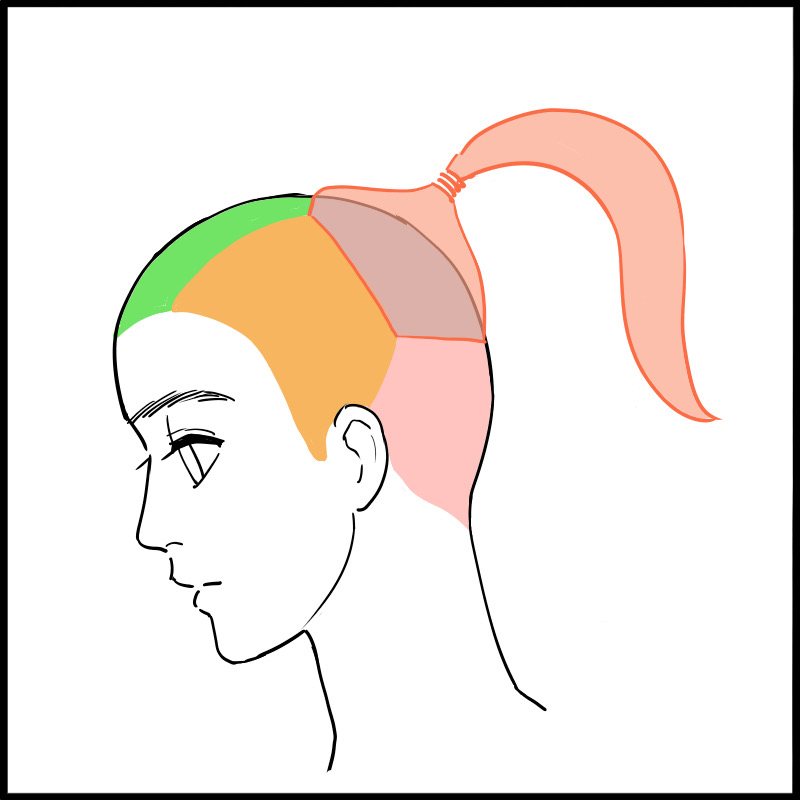
Then, tie the “back” hair into a knot and combine it with the “crown” bundle.
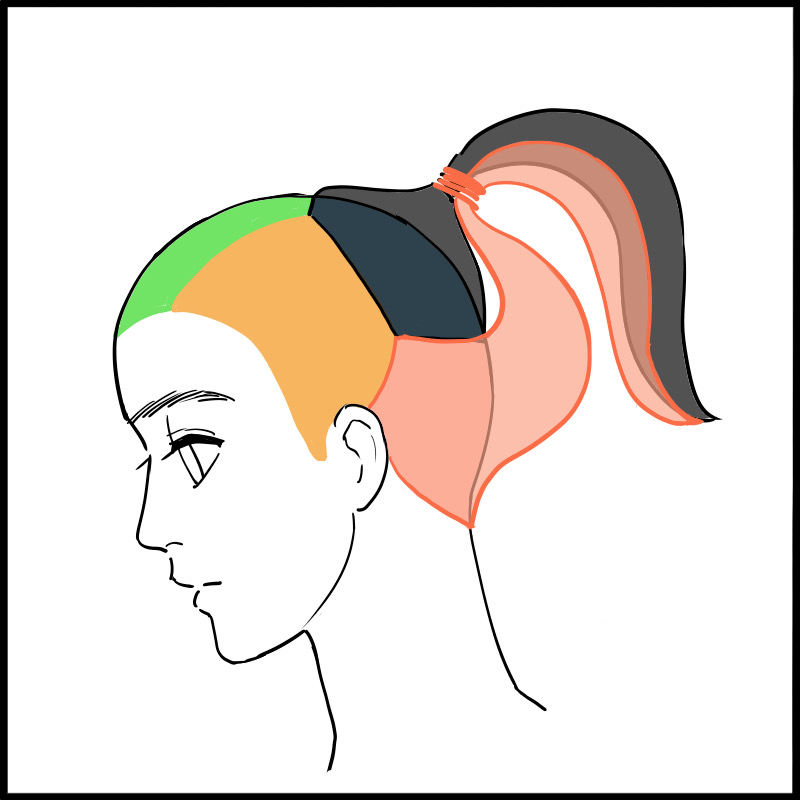
Tie the side hair in the same way and tie it together with the “crown”.
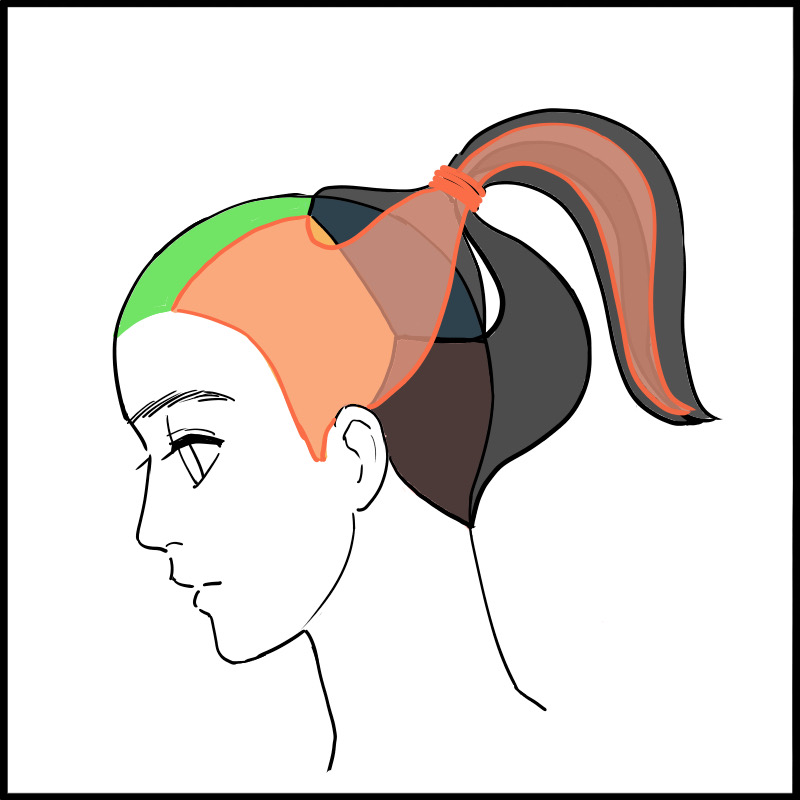
Finally, tie the “front hair” together as well, and make a bun with the crown area hair.
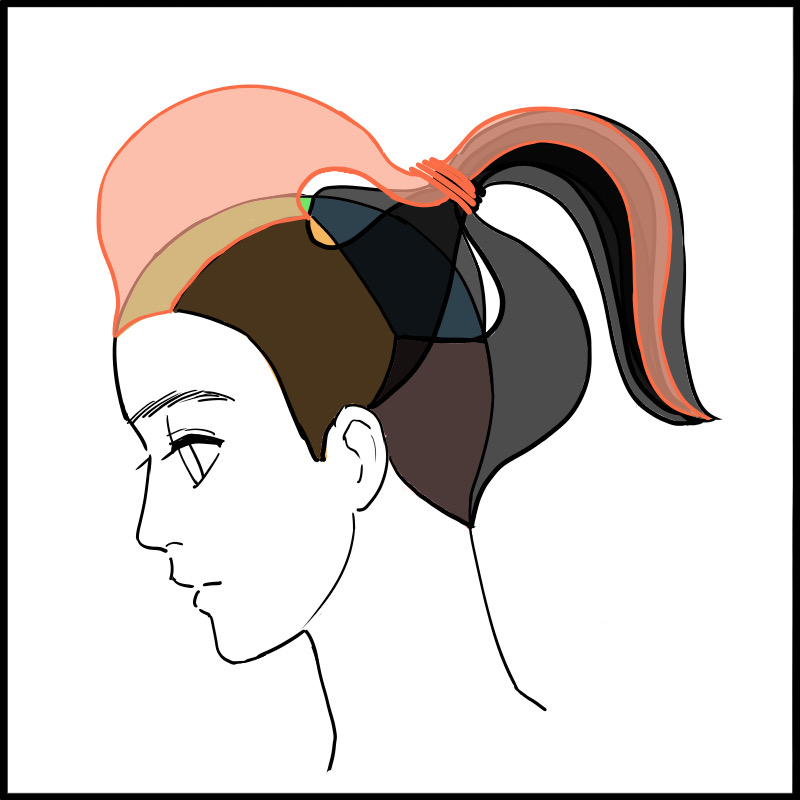
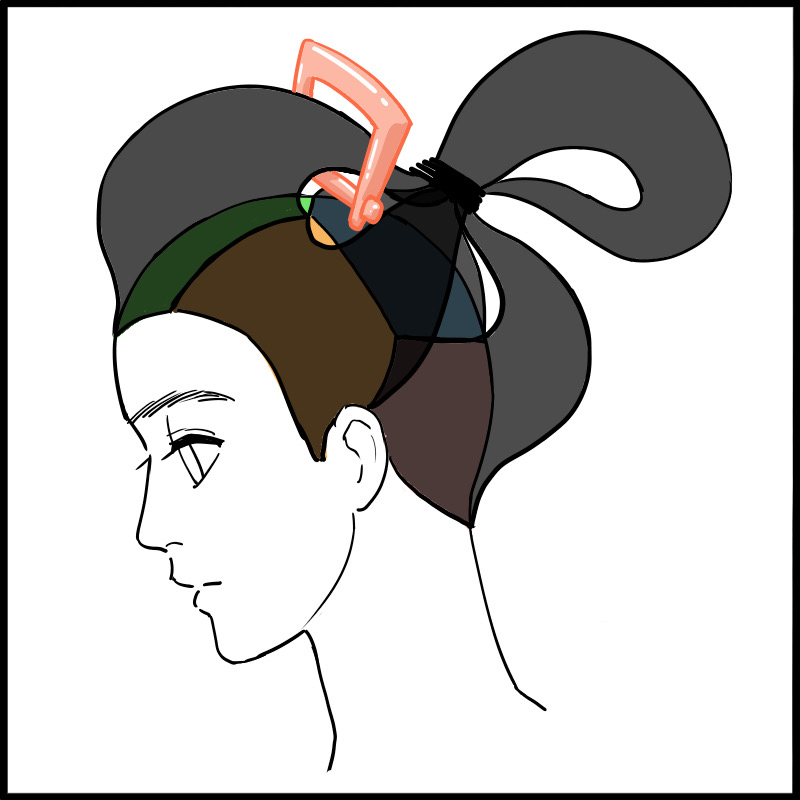
You can also thread hair ornaments through the gaps between the hair strands.
2. Let’s draw the back hair
Now that you have an idea of how to tie Japanese hair, let’s study on how to draw it.
Let’s start with the back hair.
First, draw a simple backward-facing head.
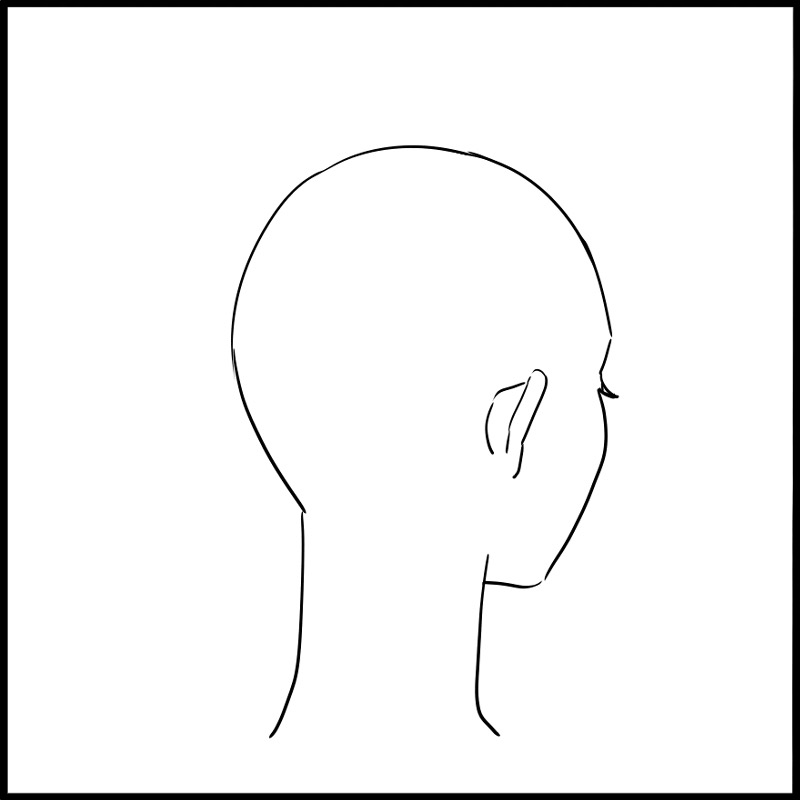
The first part to draw is the “Mage” bun.
It’s the part that ties and supports the hair’s entirety.
Draw a bunch of hair in a bun, like a dumpling.
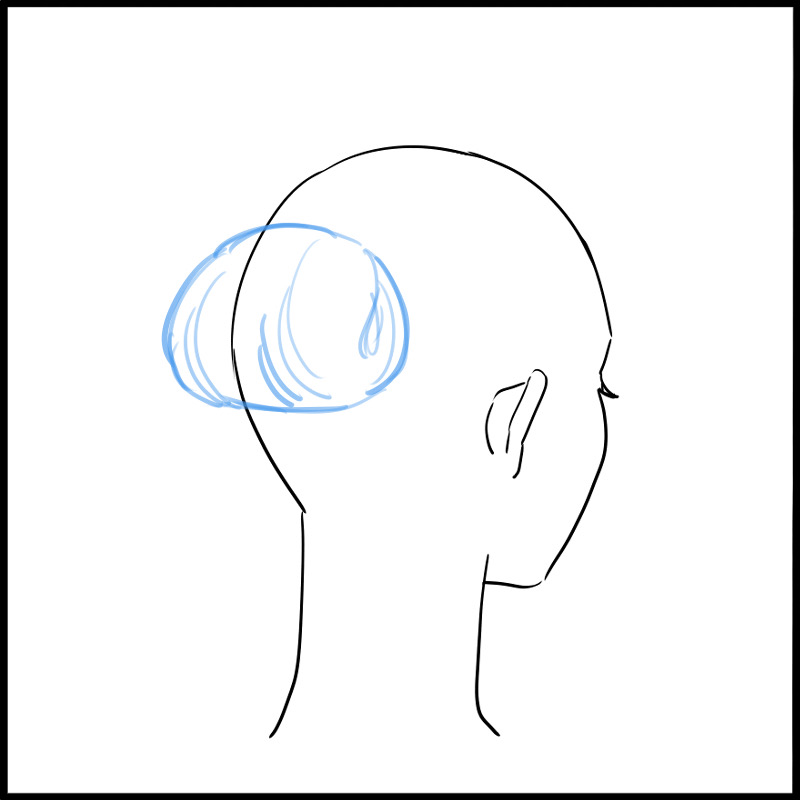
※The illustration is slightly lowered to make other parts visible, but the bun are usually tied higher.
Once done, draw the “Tabo” part, which is tied up at the nape of the neck.
Start at about the ear level and downward.
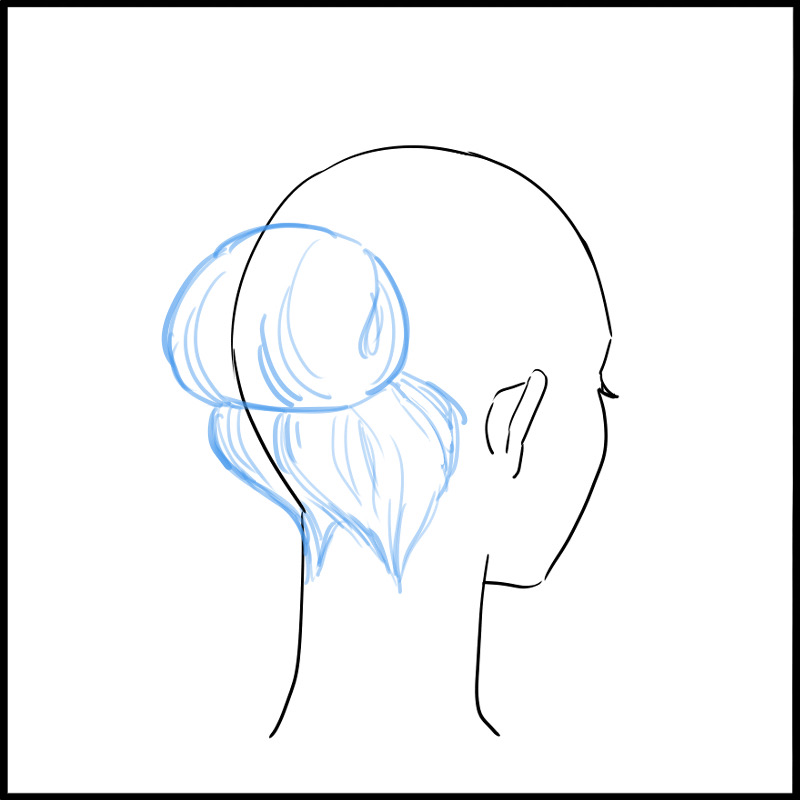
The hair should gather and flow into the bun you just drew.
Continue drawing on the side hair part.
Make sure that they also gather and flow into the bun from both sides.
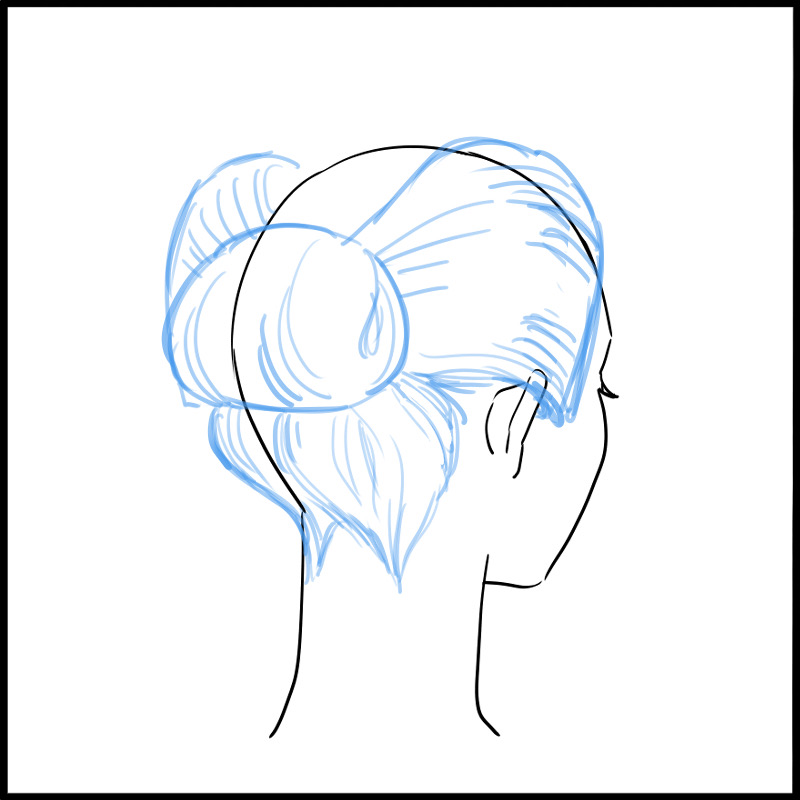
《Tip!》
This is the part that shows the most volume, so try to make it horizontally full.
Finally, draw in a bunch of frontal hair.
Depending on how you draw this part, for example you can tie the frontal hair tightly giving voluminous impression, so draft the hair in the way you prefer.
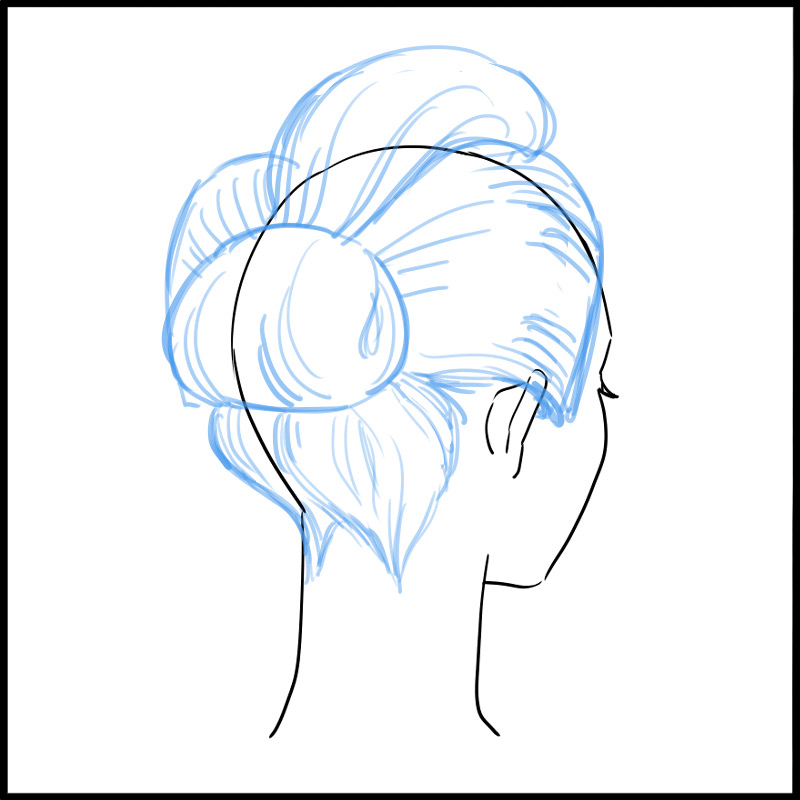
Now that the draft is complete, let’s start drawing with a pen!
Don’t worry, it’s easy.
Just like in our rough sketch, draw the hair flowing into the big bun.
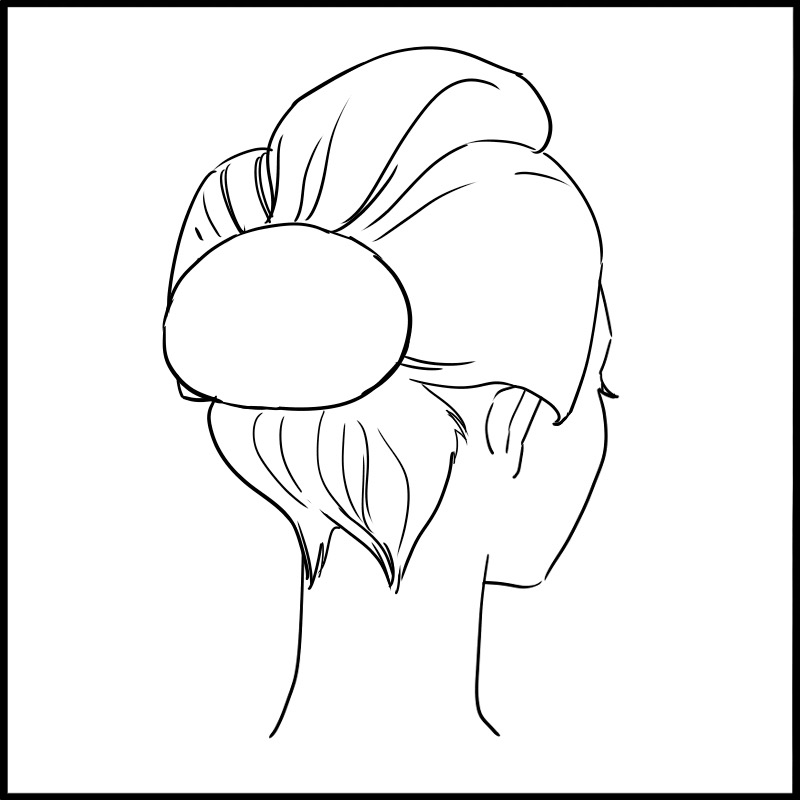
Yup, this is pretty much all you need to know to draw a Japanese hair.
However if all of the hair flows into the back, it will look more like a ponytail, so make sure the hair flow is a little more distinct and clear so that each part can be recognized.
It’s okay to separate each part in a clear outline!
Now, let’s add color, which is a little tricky.
Japanese hair is often black, so you may have trouble applying a solid color.
When applying the paint, be careful and finish each part one by one.
Apply hair shine to make the border between the parts clearly visible.
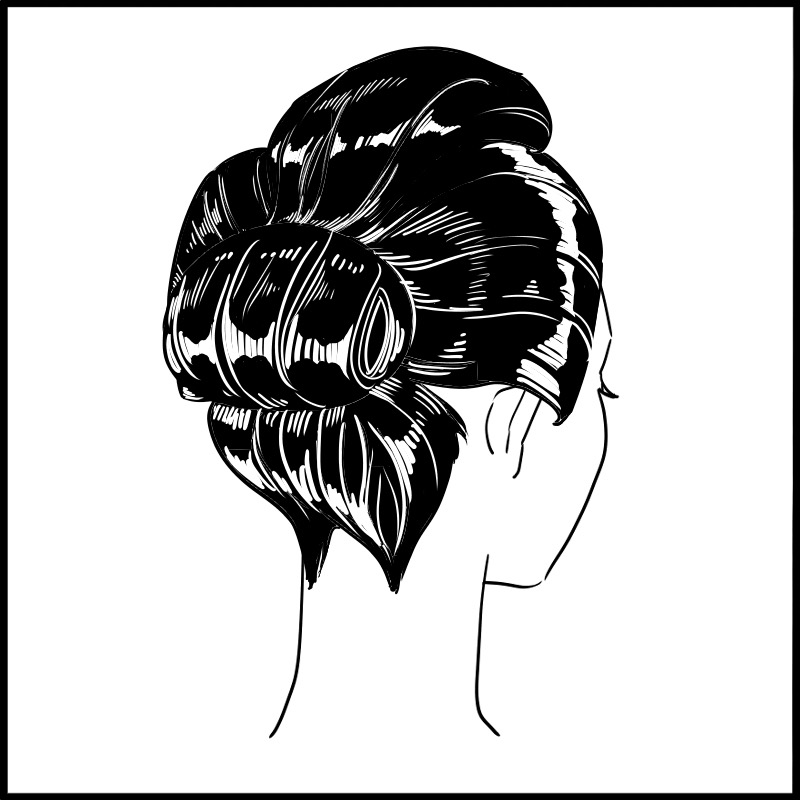
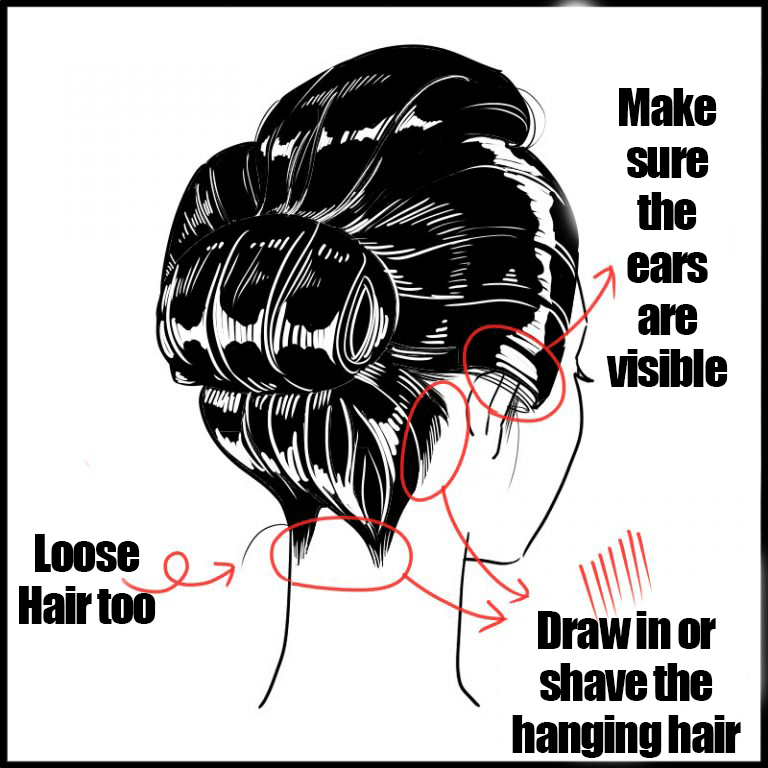
Once you finish the entirety, let’s focus on the details.
First, the hairline.
Either erase it with a small eraser or draw it in with a thin pen.
Try to move your hand in the same direction in a swooshing motion.
Add a few more strands of hairs to the bottom of the side hair.
Make sure that your ears can show though.
Finally, add some loose hair flowing from the back.
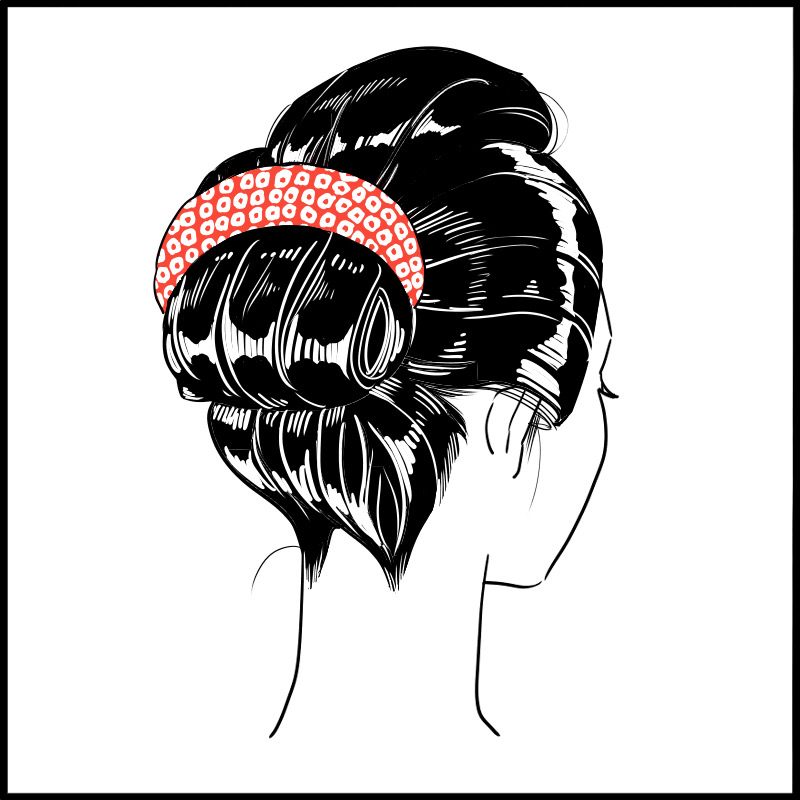
Let’s try adding various hair ornaments as an arrangement.
The figure shows an example of a hair ornament on top of the bun.
3.Draw the frontal hair
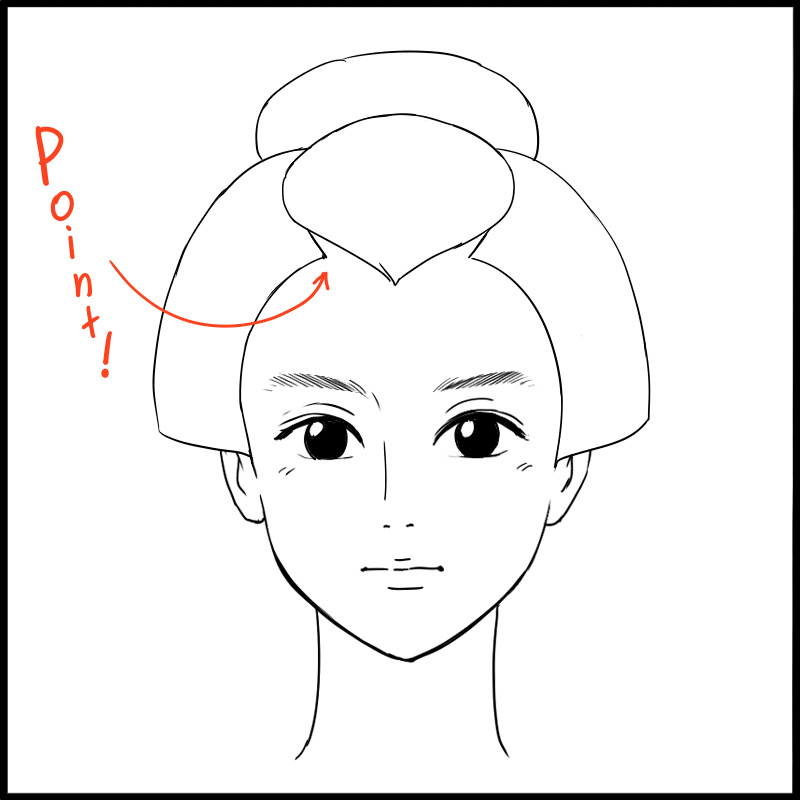
Draw another foundational head outline.
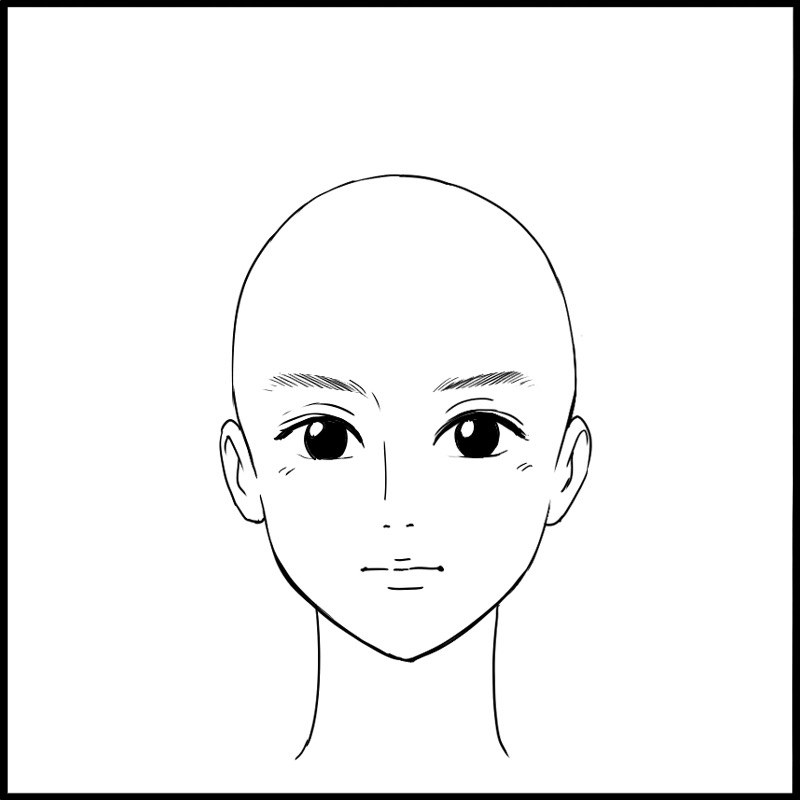
Draft a V on the top hair area so that it create a symmetrical center on the forehead.
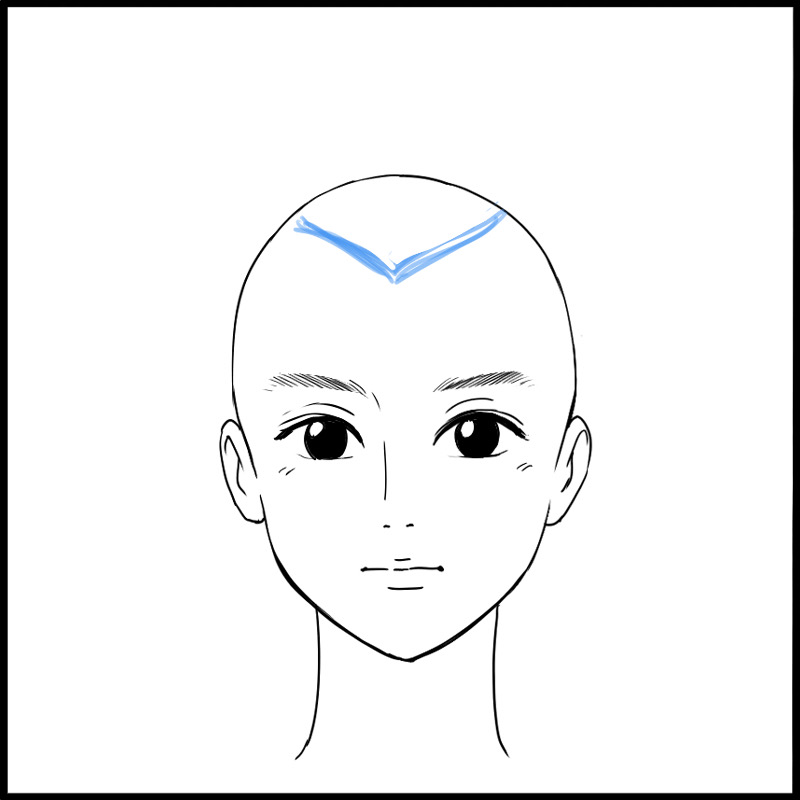
Puff up the top of the V so that the edges are connected.
It’s like drawing an upside-down chestnut on the head’s top.
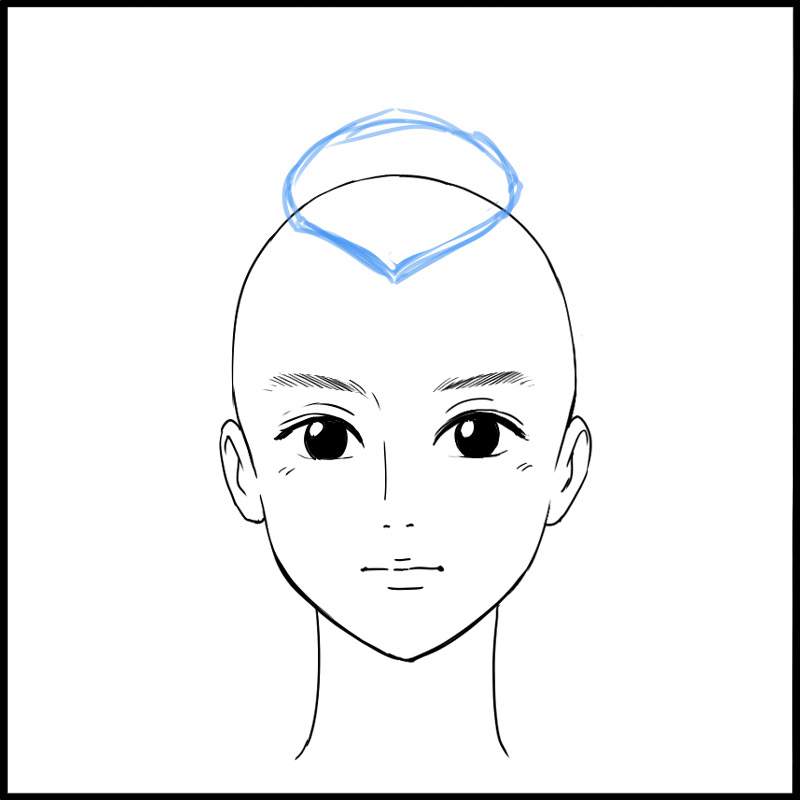
Then, draw an arc from slightly above the sharp point of the V to the base of the ear.
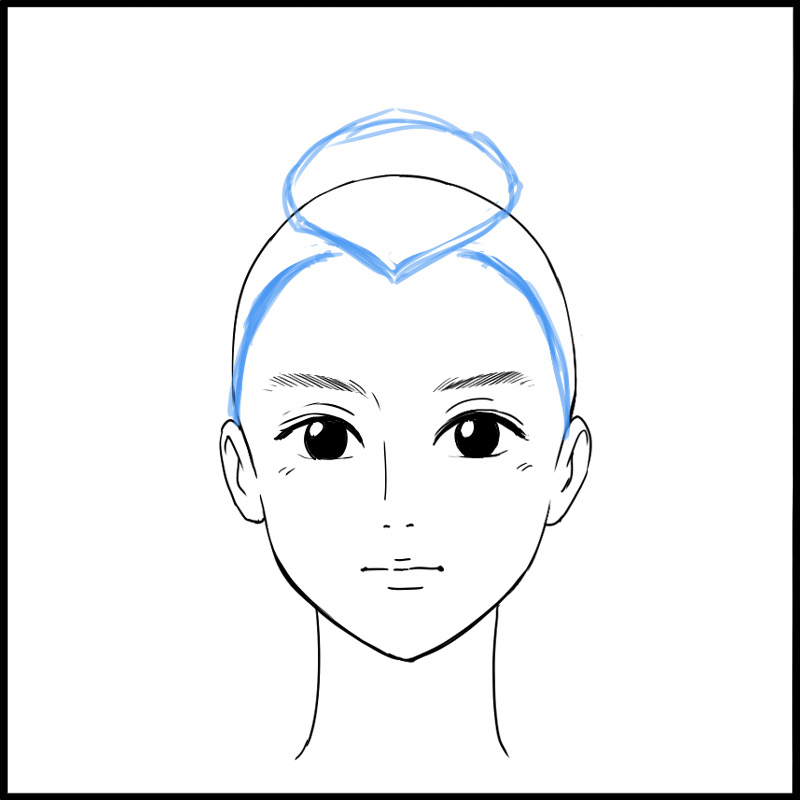
Draw a larger arc by expanding the previous arc outward.
The bottom of the arc should be slightly over the ears, and the top should be slightly below the chestnut shape.
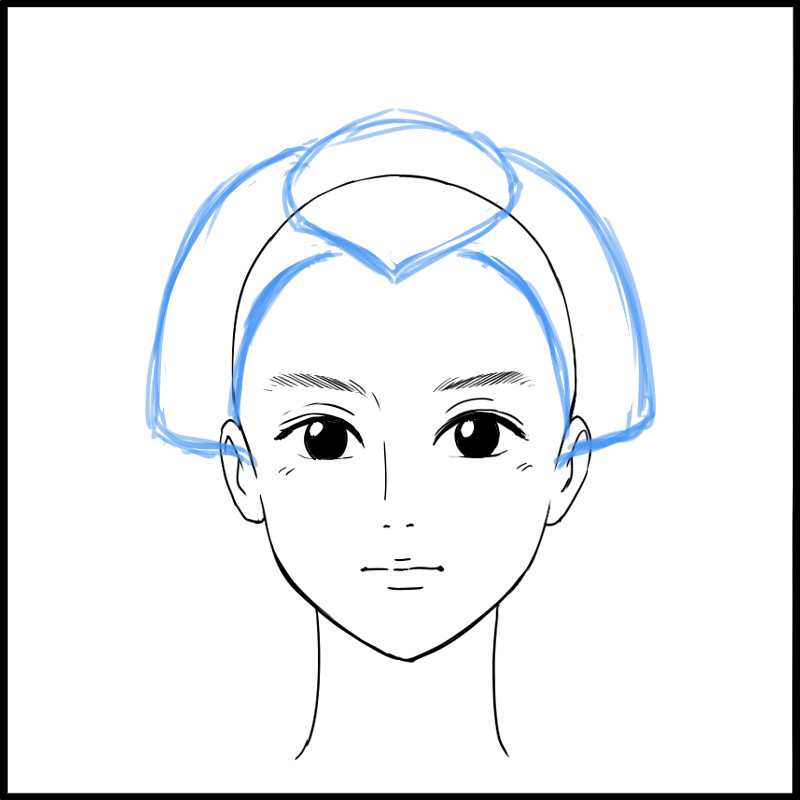
Finally, place a large oval on the top to make it symmetrical.
This completes the draft!
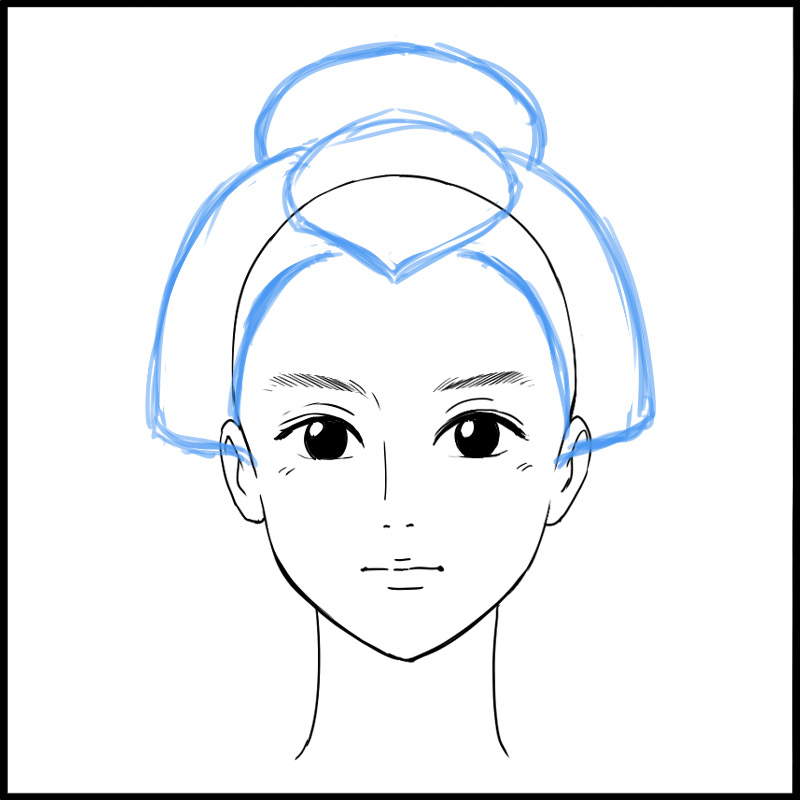
If you want to draw with a pen, you can trace from the previous draft.
If you make a small cut in the arrow part of the figure, it will look like a beautiful Fuji frame.
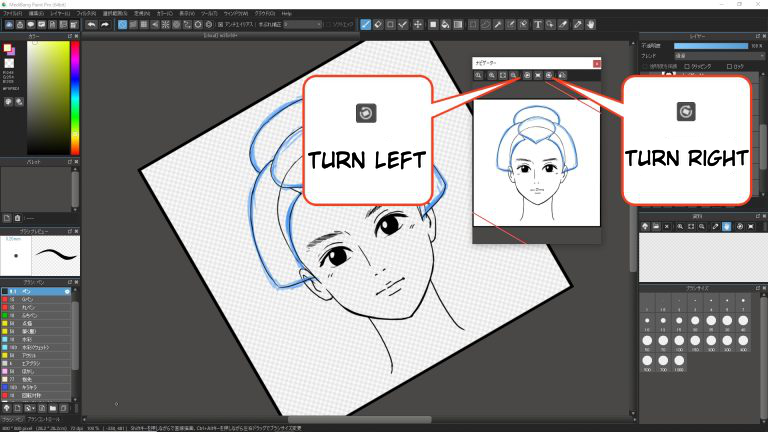
If you have trouble drawing as it is, rotate the screen!
Each time you press the rotation icon in the navigator window, you can rotate it to any angle you want.
If you can’t find the navigator window, please select “Navigator” from “Window” to display it.
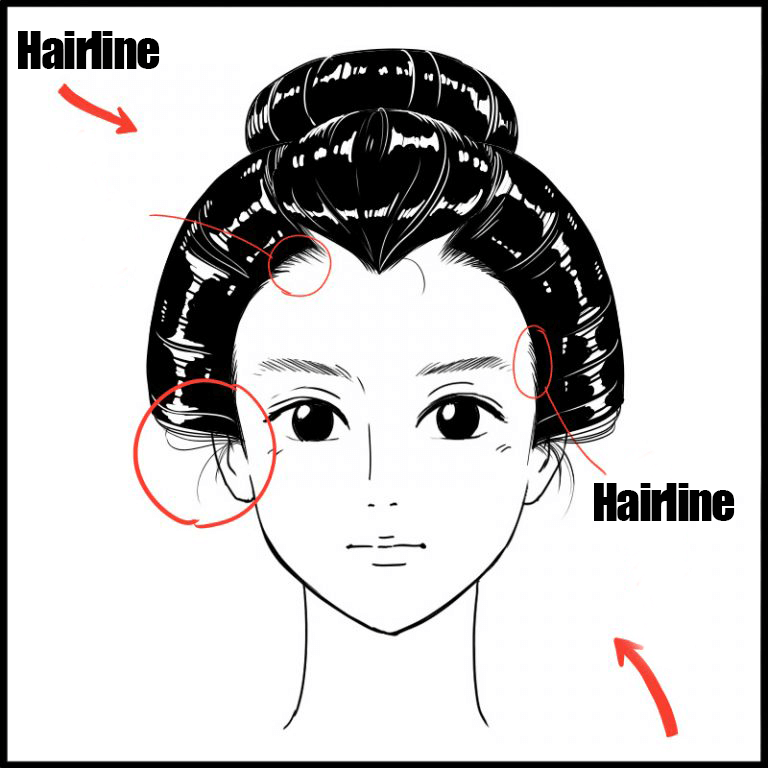
The picture below is after you painted like you did with the back hair view.
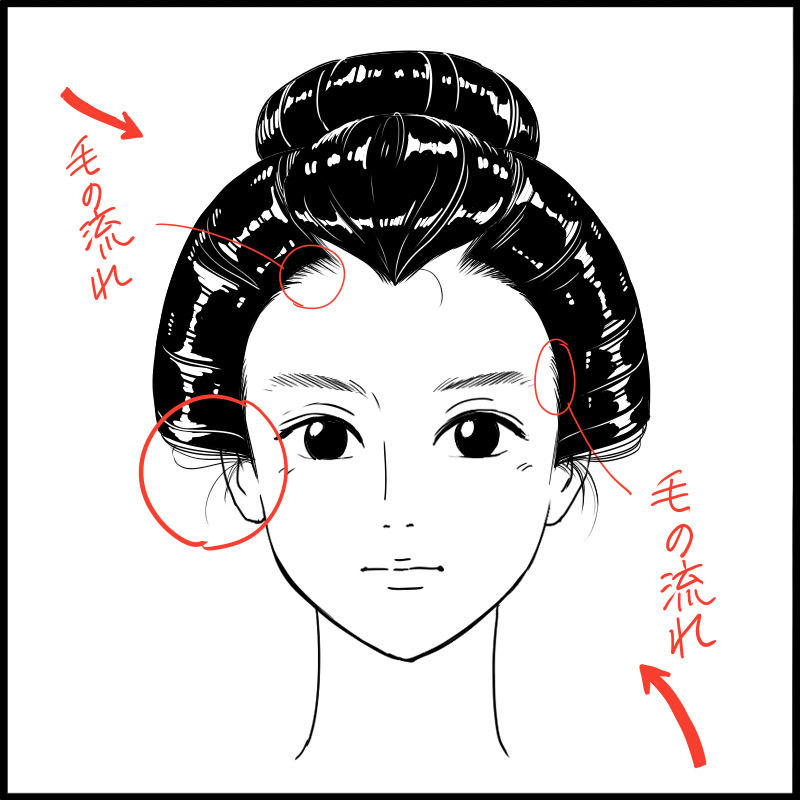
You don’t have to draw in the entire hairline of the forehead.
Just add in the sharp corners, paying attention to the direction of the hairline and flow.
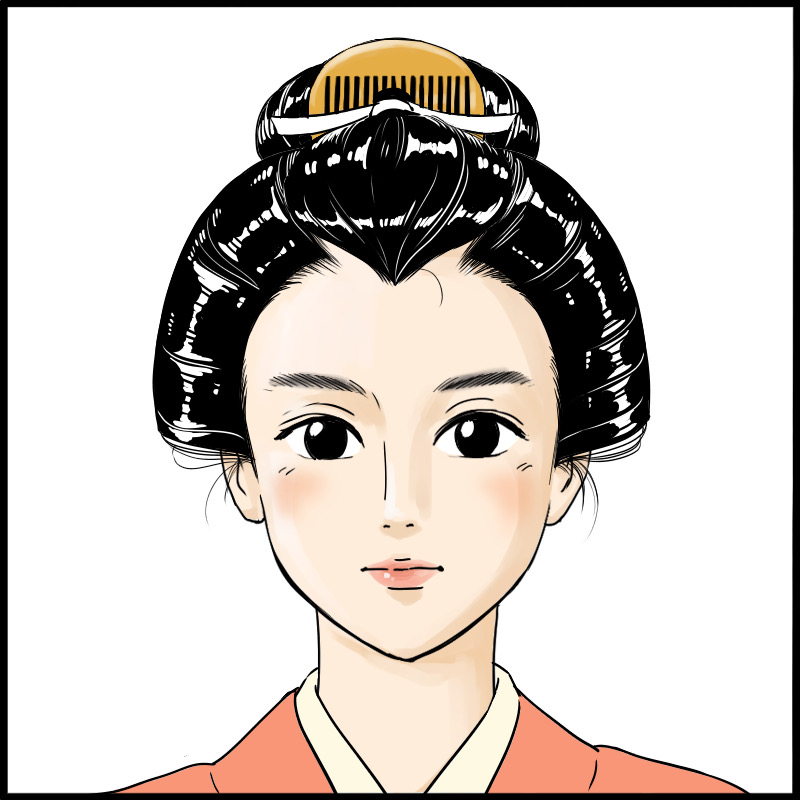
I also colored this one in and inserted a comb into the bun.
4. Research and Customize on the Period and Occupation
So far, we have introduced the basic way to draw Japanese hair.
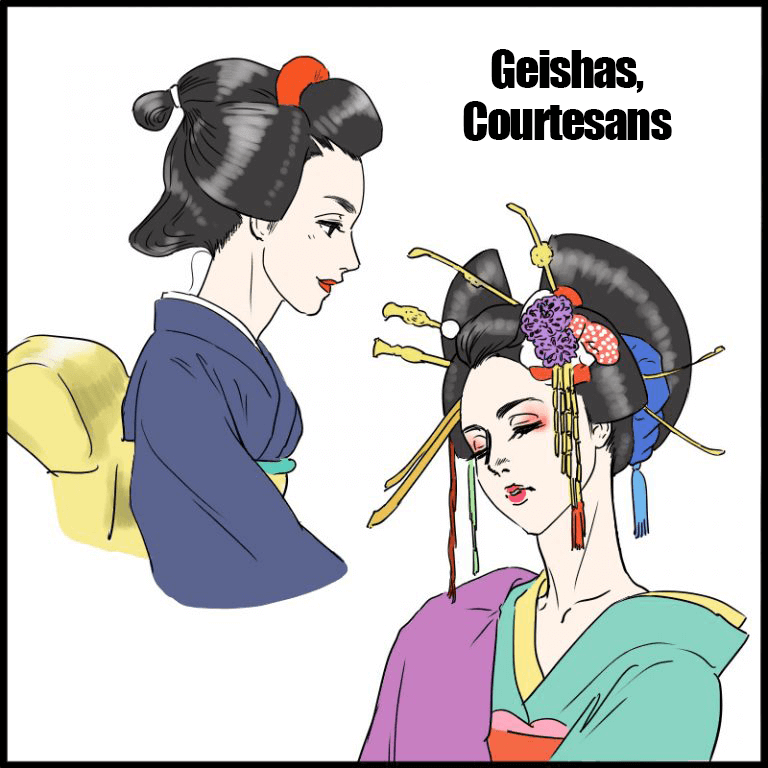
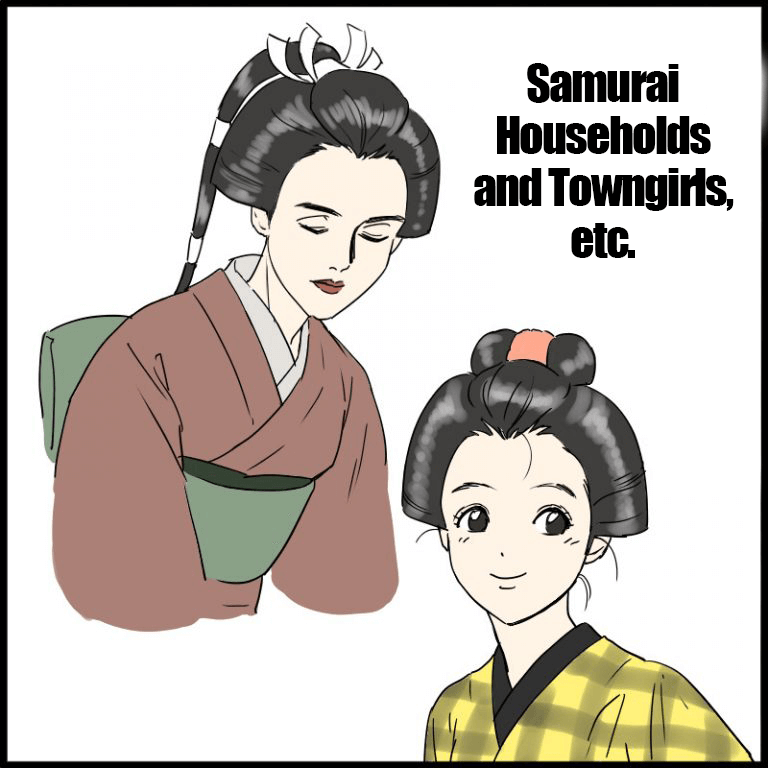
There are many ways to arrange it, such as altering the way the bun is tied, changing the hair bundle’s volume, and so on, depending on the era and occupation.
It would be interesting to study them at art exhibitions and in books!
Depending on your style, you may want to create your own original arrangement.
What do you think?
Maybe I can draw Japanese hair too! I hope you you can challenge yourself.
Please try to incorporate Japanese hair into your own work!
(Text and picture by Hiroshi Takeuchi)
\ We are accepting requests for articles on how to use /

