2021.12.18
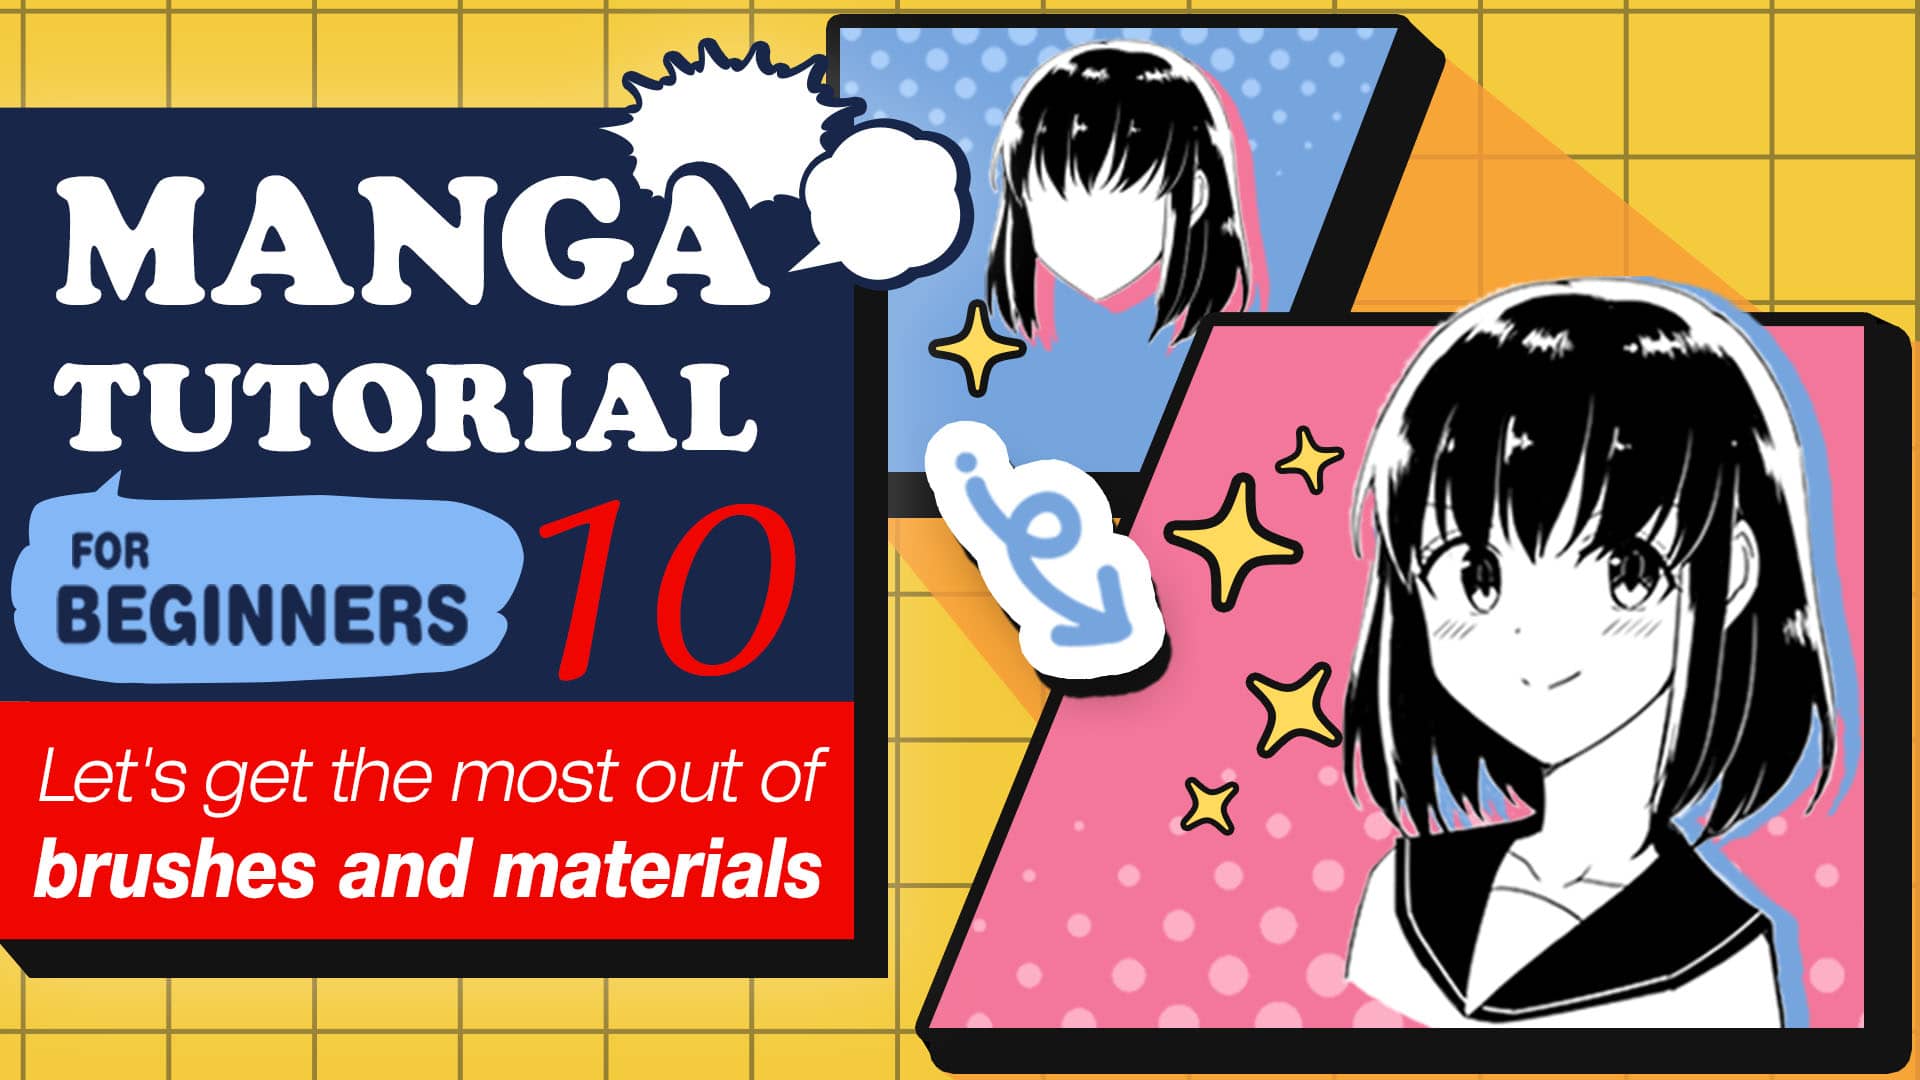
Manga Tutorial for Beginners Vol.10 Let’s get the most out of brushes and materials
Hello! This is ГФ.
When you are drawing manga, it is very common to illustrate scenes that are not particularly important or climactic. You draw them so much that you sometimes think how easy would it be to recycle these pictures over and over again. This is where MediBang Paint’s brush and material registration feature comes in.
By registering your brushes and materials, you can use them over and over again to speed up the process of drawing. This is one of the strengths of digital painting, so take advantage of it!
Click Here for Previous Tutorials.
Manga Tutorial for Beginners 01 Process of Manga Making
Manga Tutorial for Beginners 02 Let’s Make Outline (Part 1)
Manga Tutorial for Beginners 03 Let’s Make Outline (Part 2)
Manga Tutorial for Beginners 04 Get Ready to Draw Manga with MediBang Paint!
Manga Tutorial for Beginners 05 Let’s Make Name(outline)
Manga Tutorial for Beginners 06 Let’s think about frame layout and screen.
Manga Tutorial for Beginners 07 Considerations when setting up the canvas.
Manga Tutorial for Beginners 08 Let’s draw frames and speech bubbles.
Manga Tutorial for Beginners 09 Let’s draw people and natural objects
Manga Tutorial for Beginners Vol.10 Let’s get the most out of brushes and materials
1. Registering Brushes
If you do not have a particular preferences towards grass, trees, or rocks you paint frequently, you can register them as brushes and use them in your future paintings.
The first step is to draw the grass, tree, or rock you want to register as a brush.
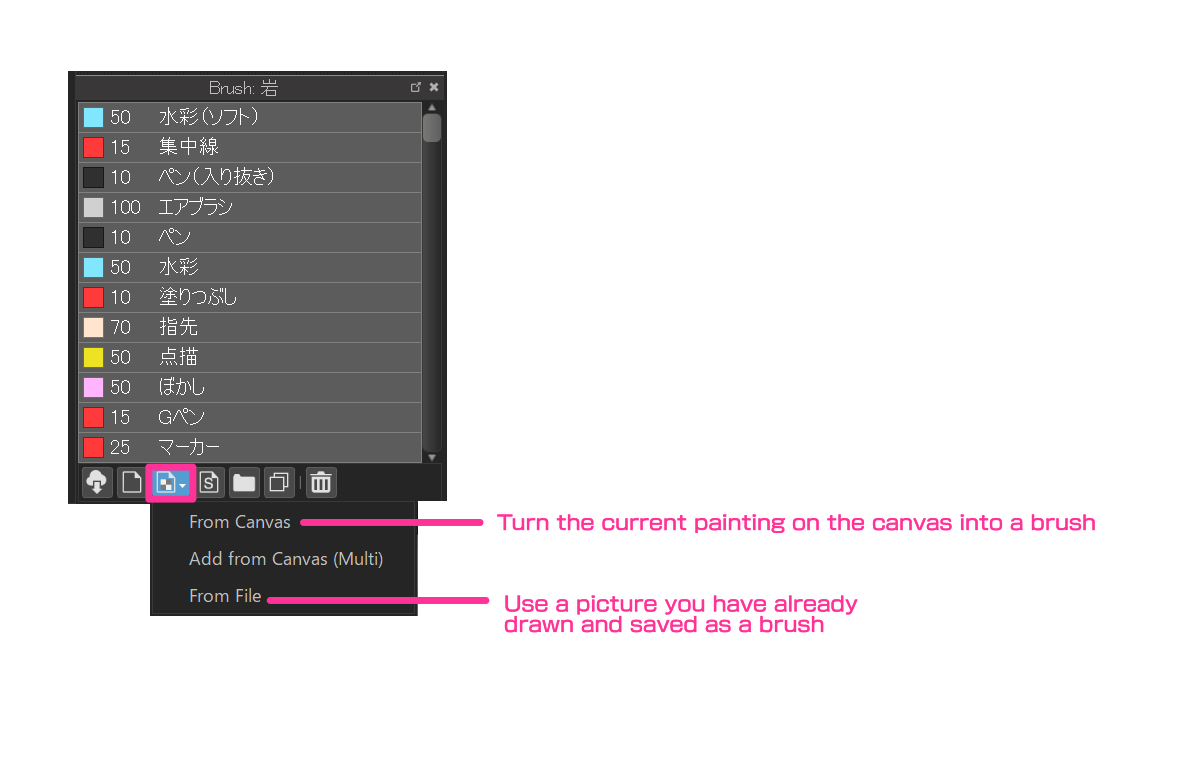
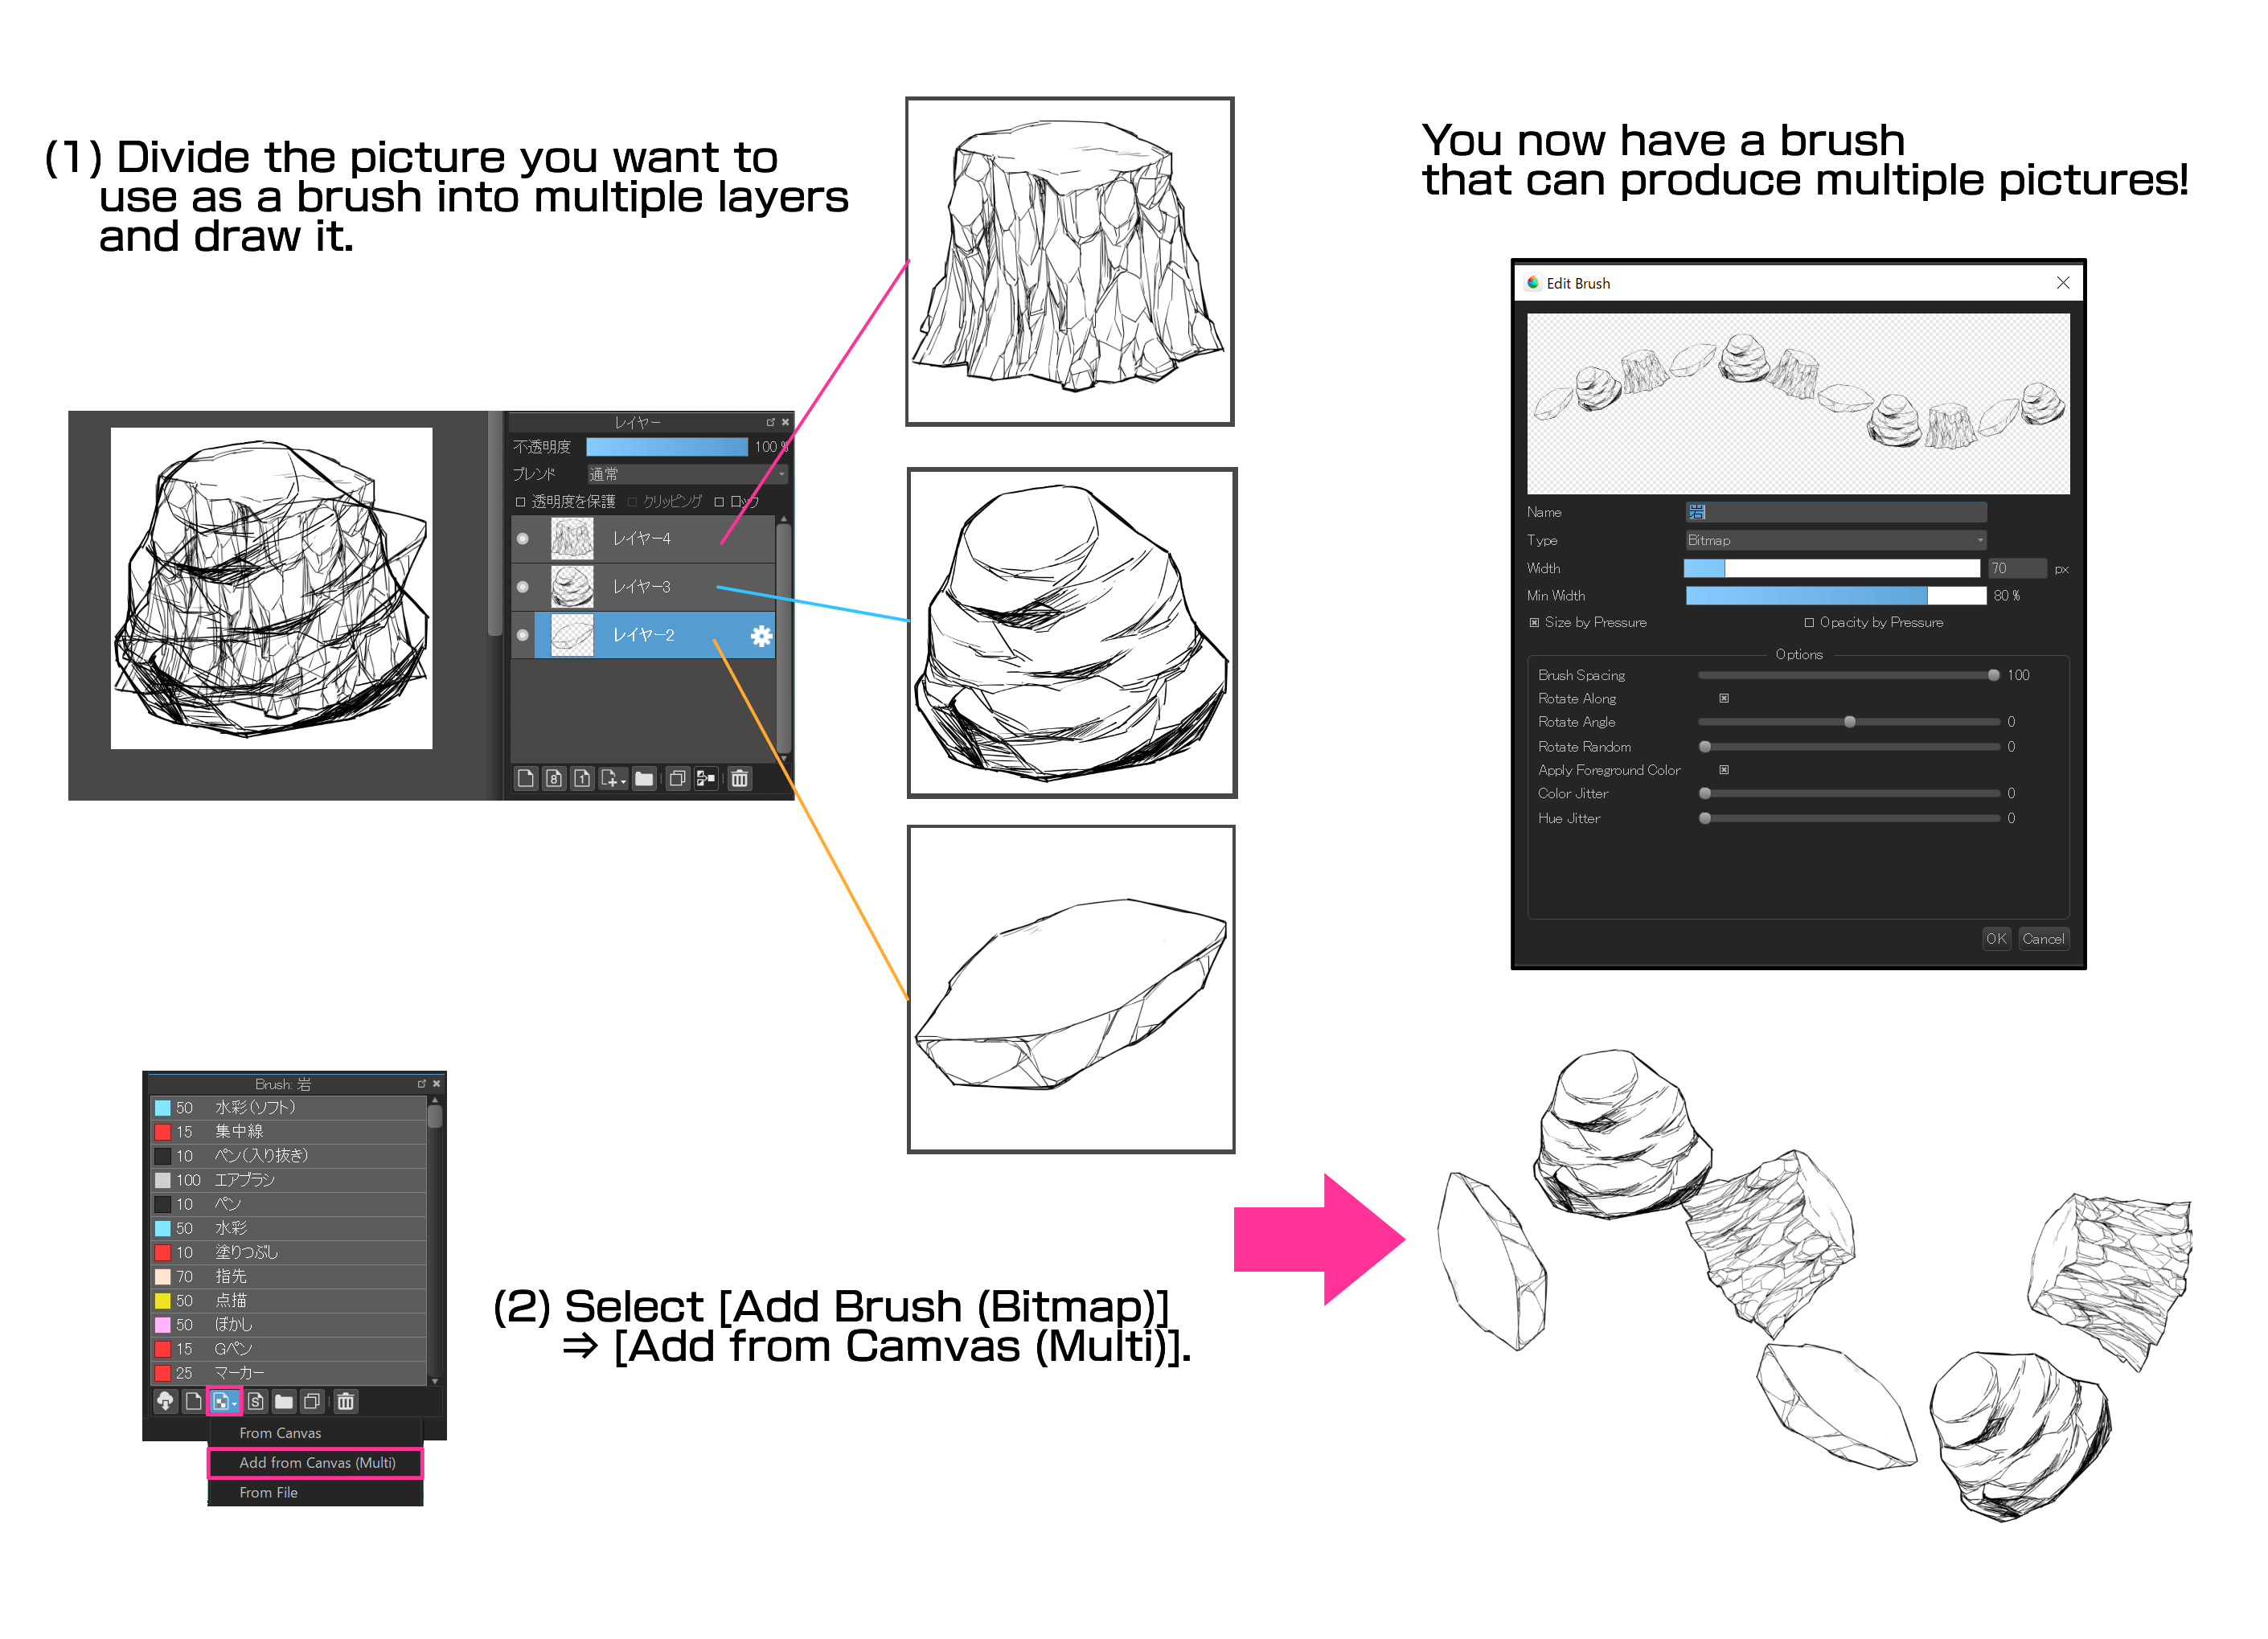
Click “Add Brush (Bitmap)”, the third icon from the left at the bottom of the brush window, to turn your drawing into a brush. [If you select “Add from Canvas (Bitmap)”, you can convert the current painting on the canvas into a brush, and if you select “From File”, you can convert a painting you have already drawn and saved into a brush.
When you select an image, the “Edit Brush” window will appear, where you can set the brush settings (you can change them later).
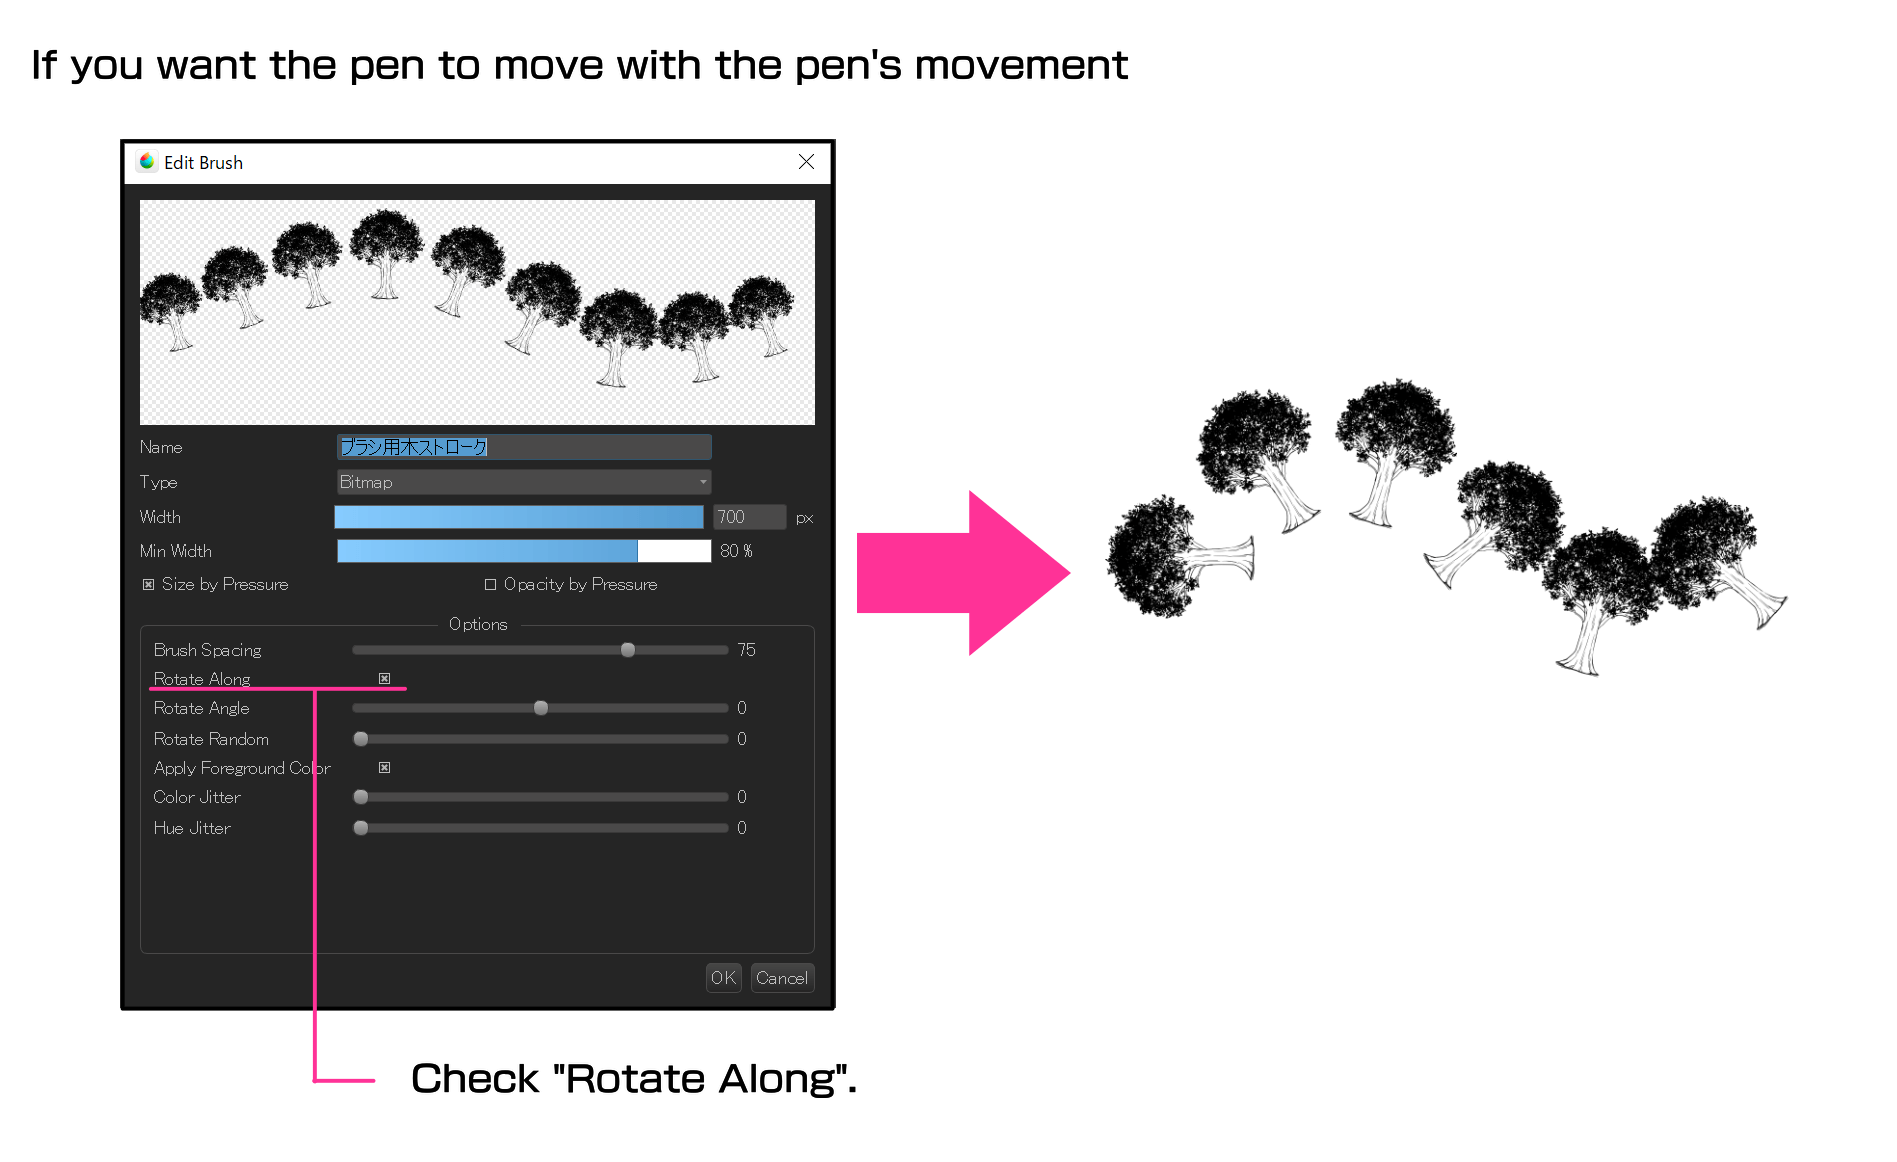
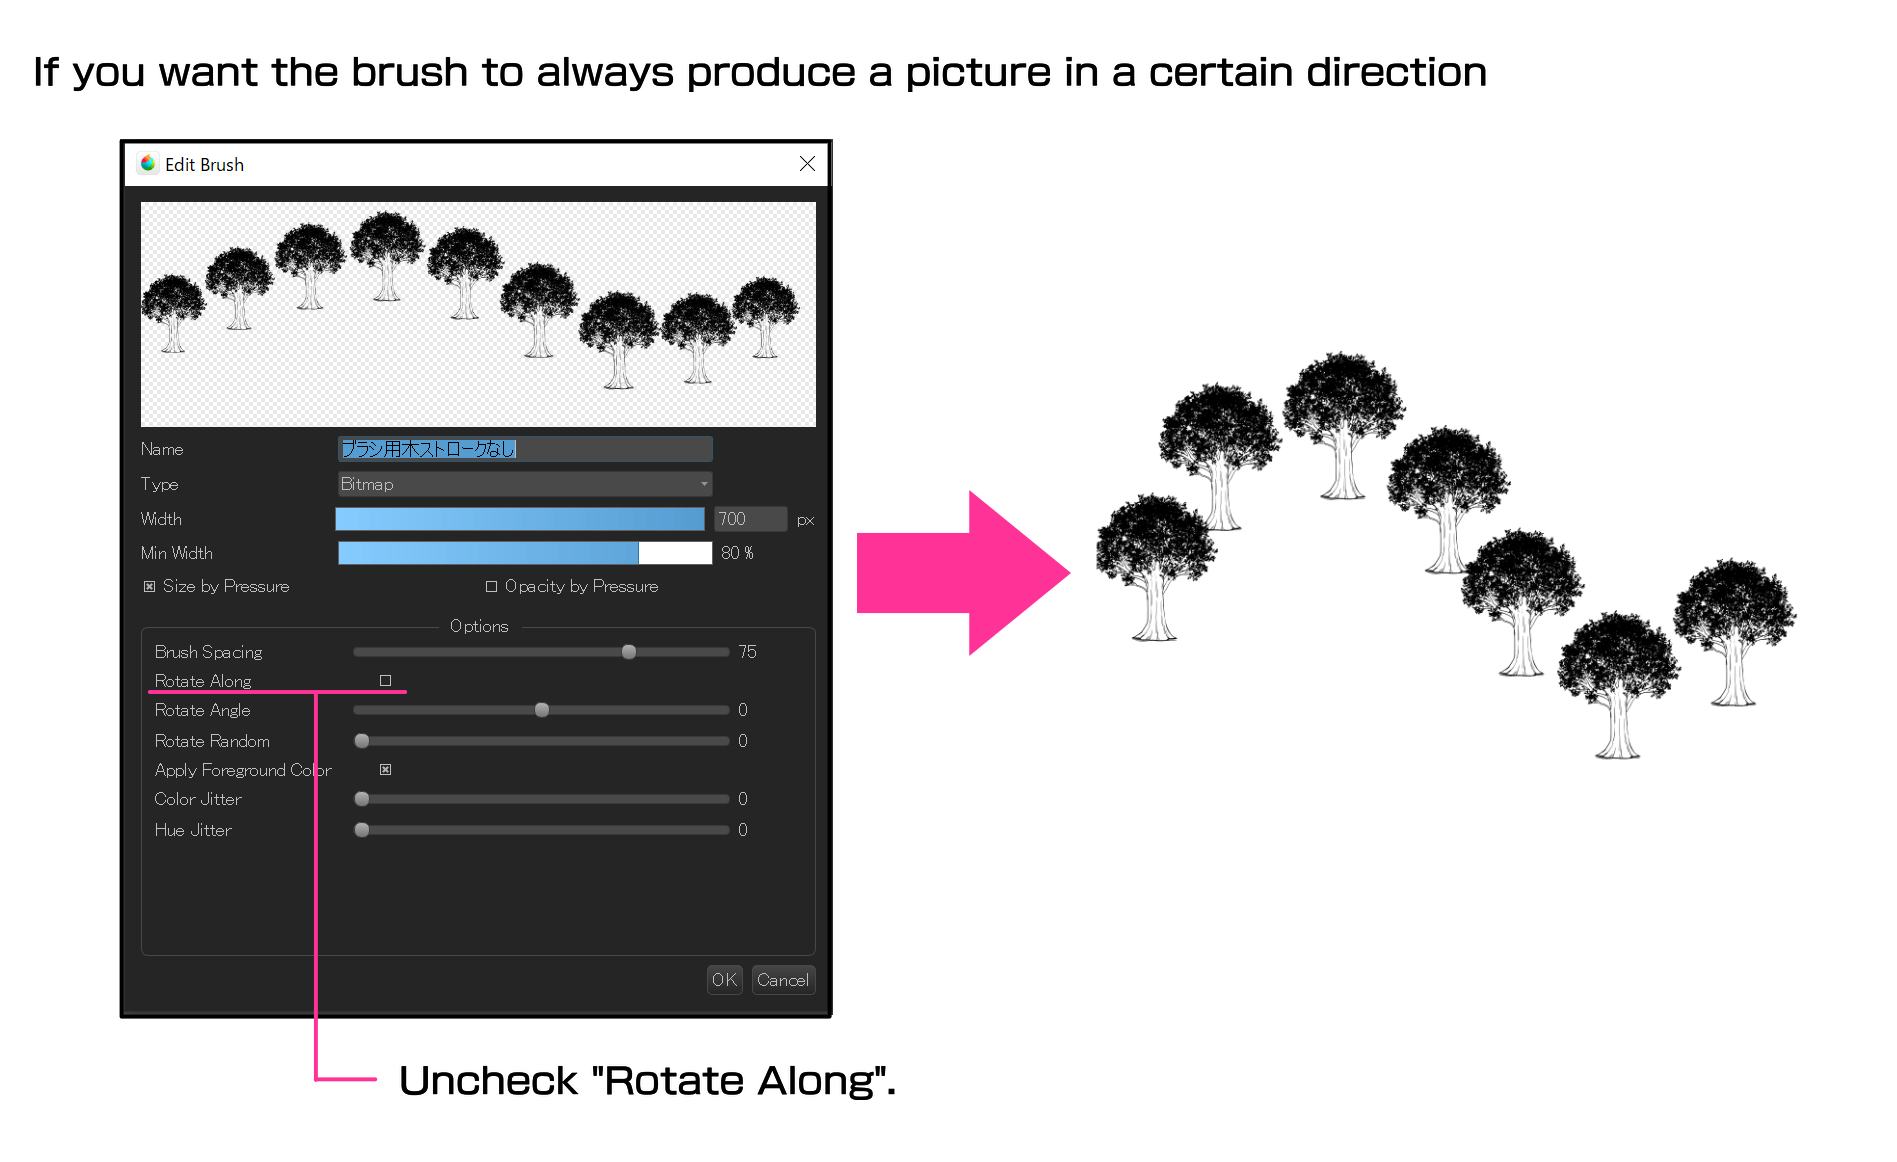
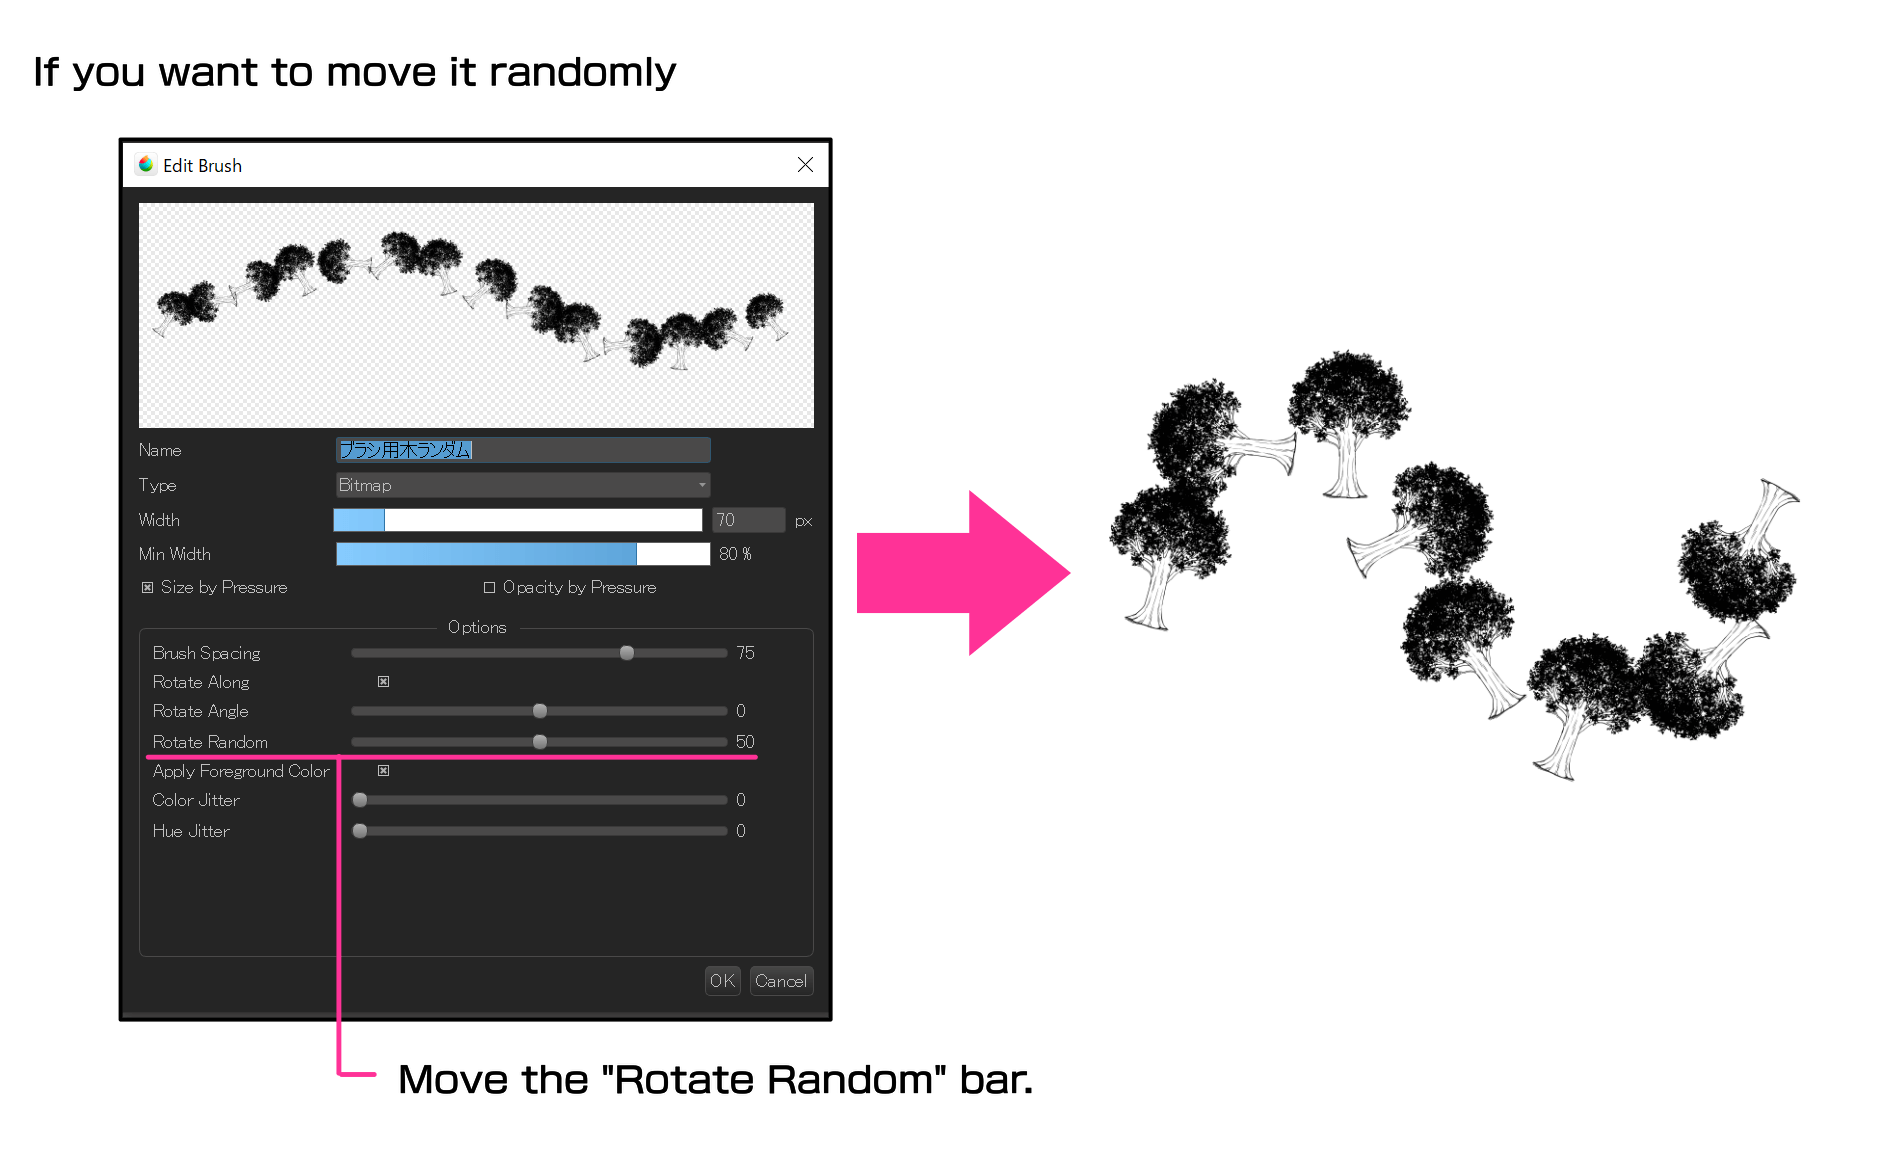
If you want the brush to move according to the movement of the pen, check the “Rotate Along” checkbox to make the brush move according to the movement of the pen. If you want the brush to move only in a certain direction without rotating, uncheck this box. If you want the brush to move randomly, move the “Rotate Random” bar to adjust it.
A multi-brush is a brush that produces multiple pictures. You can create a multi-brush by dividing the picture you want to make into multiple layers, and then clicking “Add Brush (Bitmap)” > “Add from Canvas (Multi)”.
You can also refer to this article for more information on how to make brushes in MediBang Paint.
How to make your own brushes
https://medibangpaint.com/en/use/2021/05/how-to-make-your-own-brushes/
2. Register your materials
If you want to use a larger picture, such as a background, I recommend registering it as a material rather than a brush [since brushes can only be used up to 1000px (pc version)].
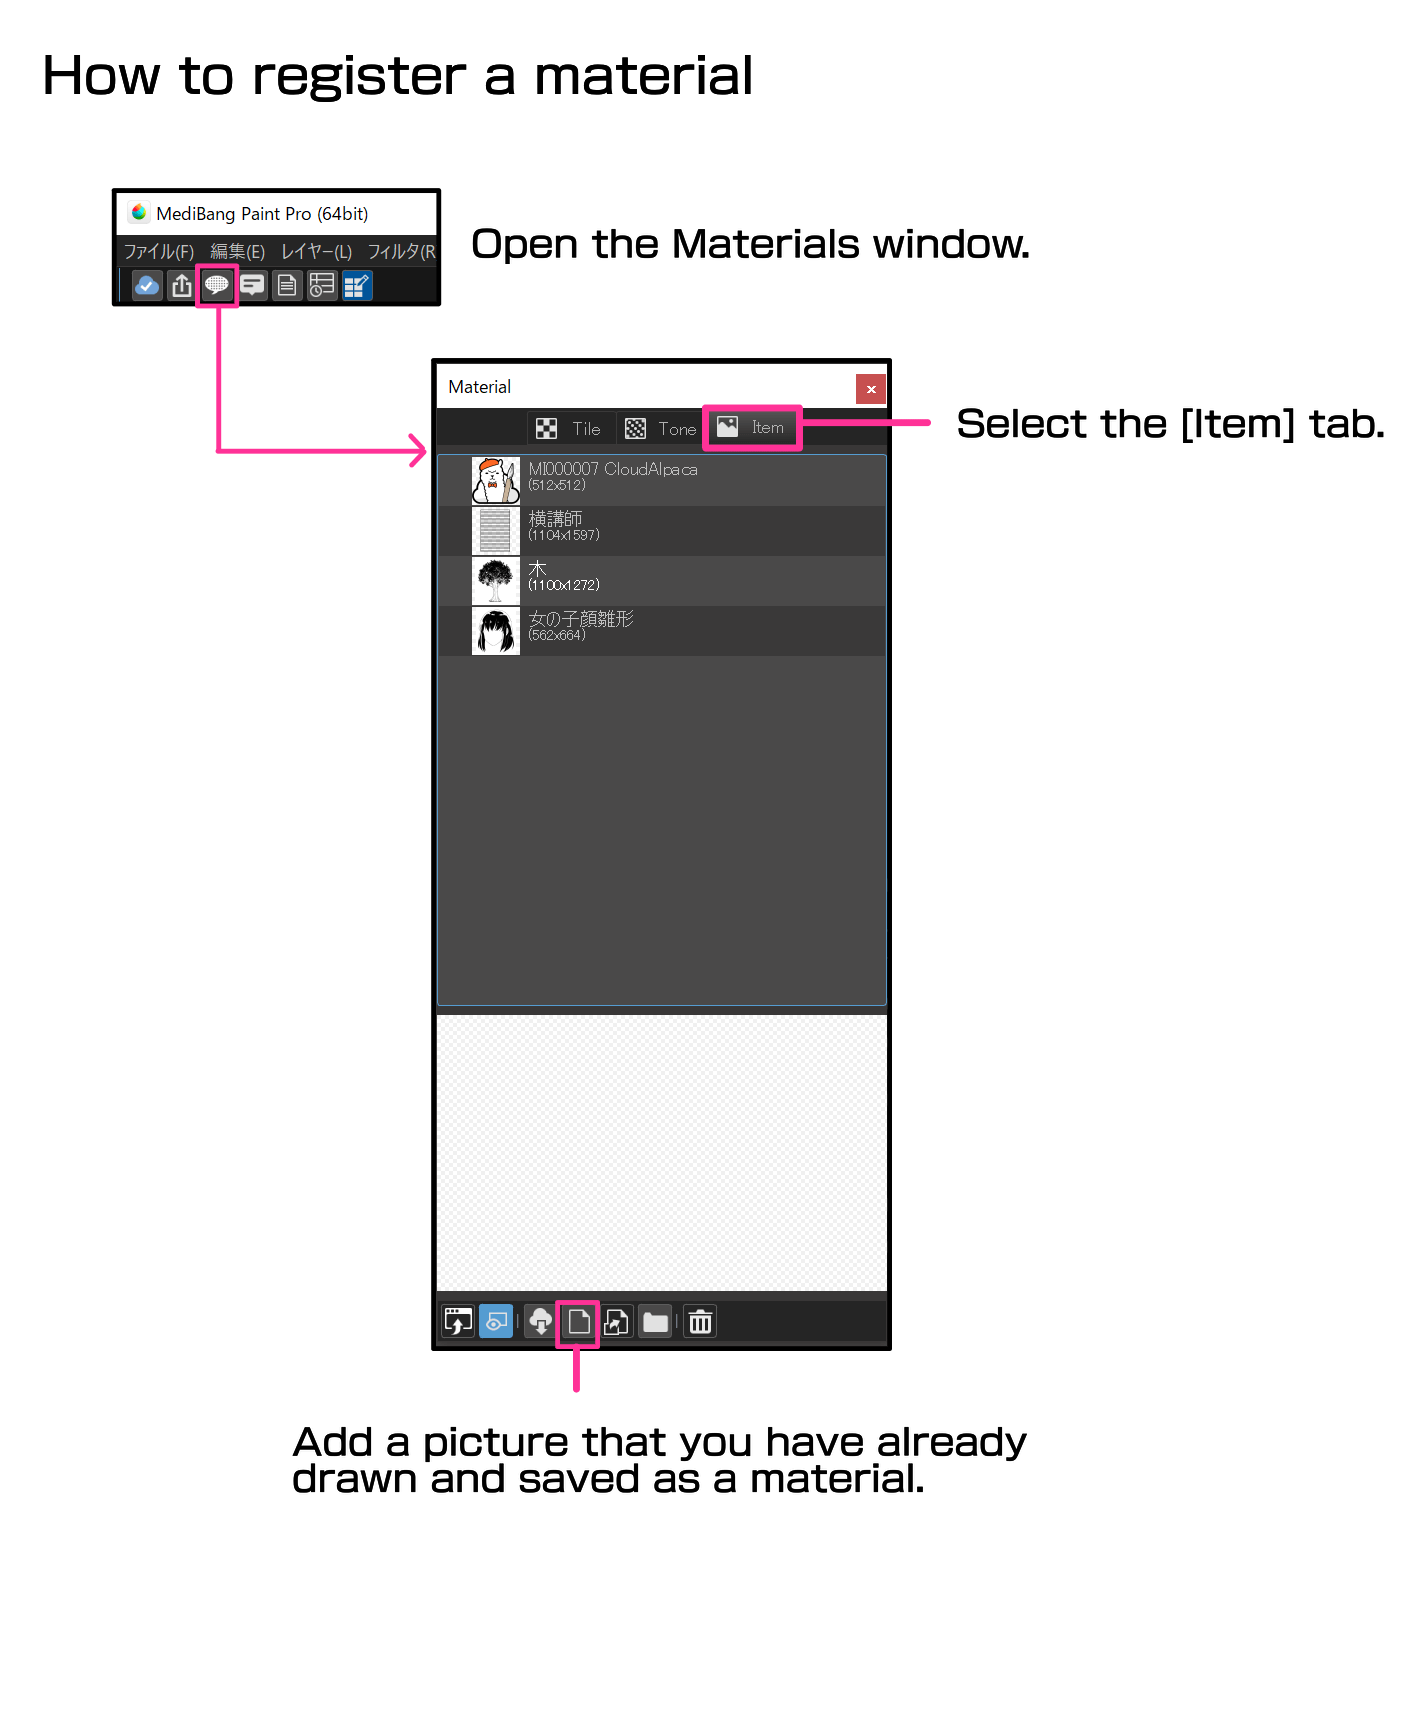
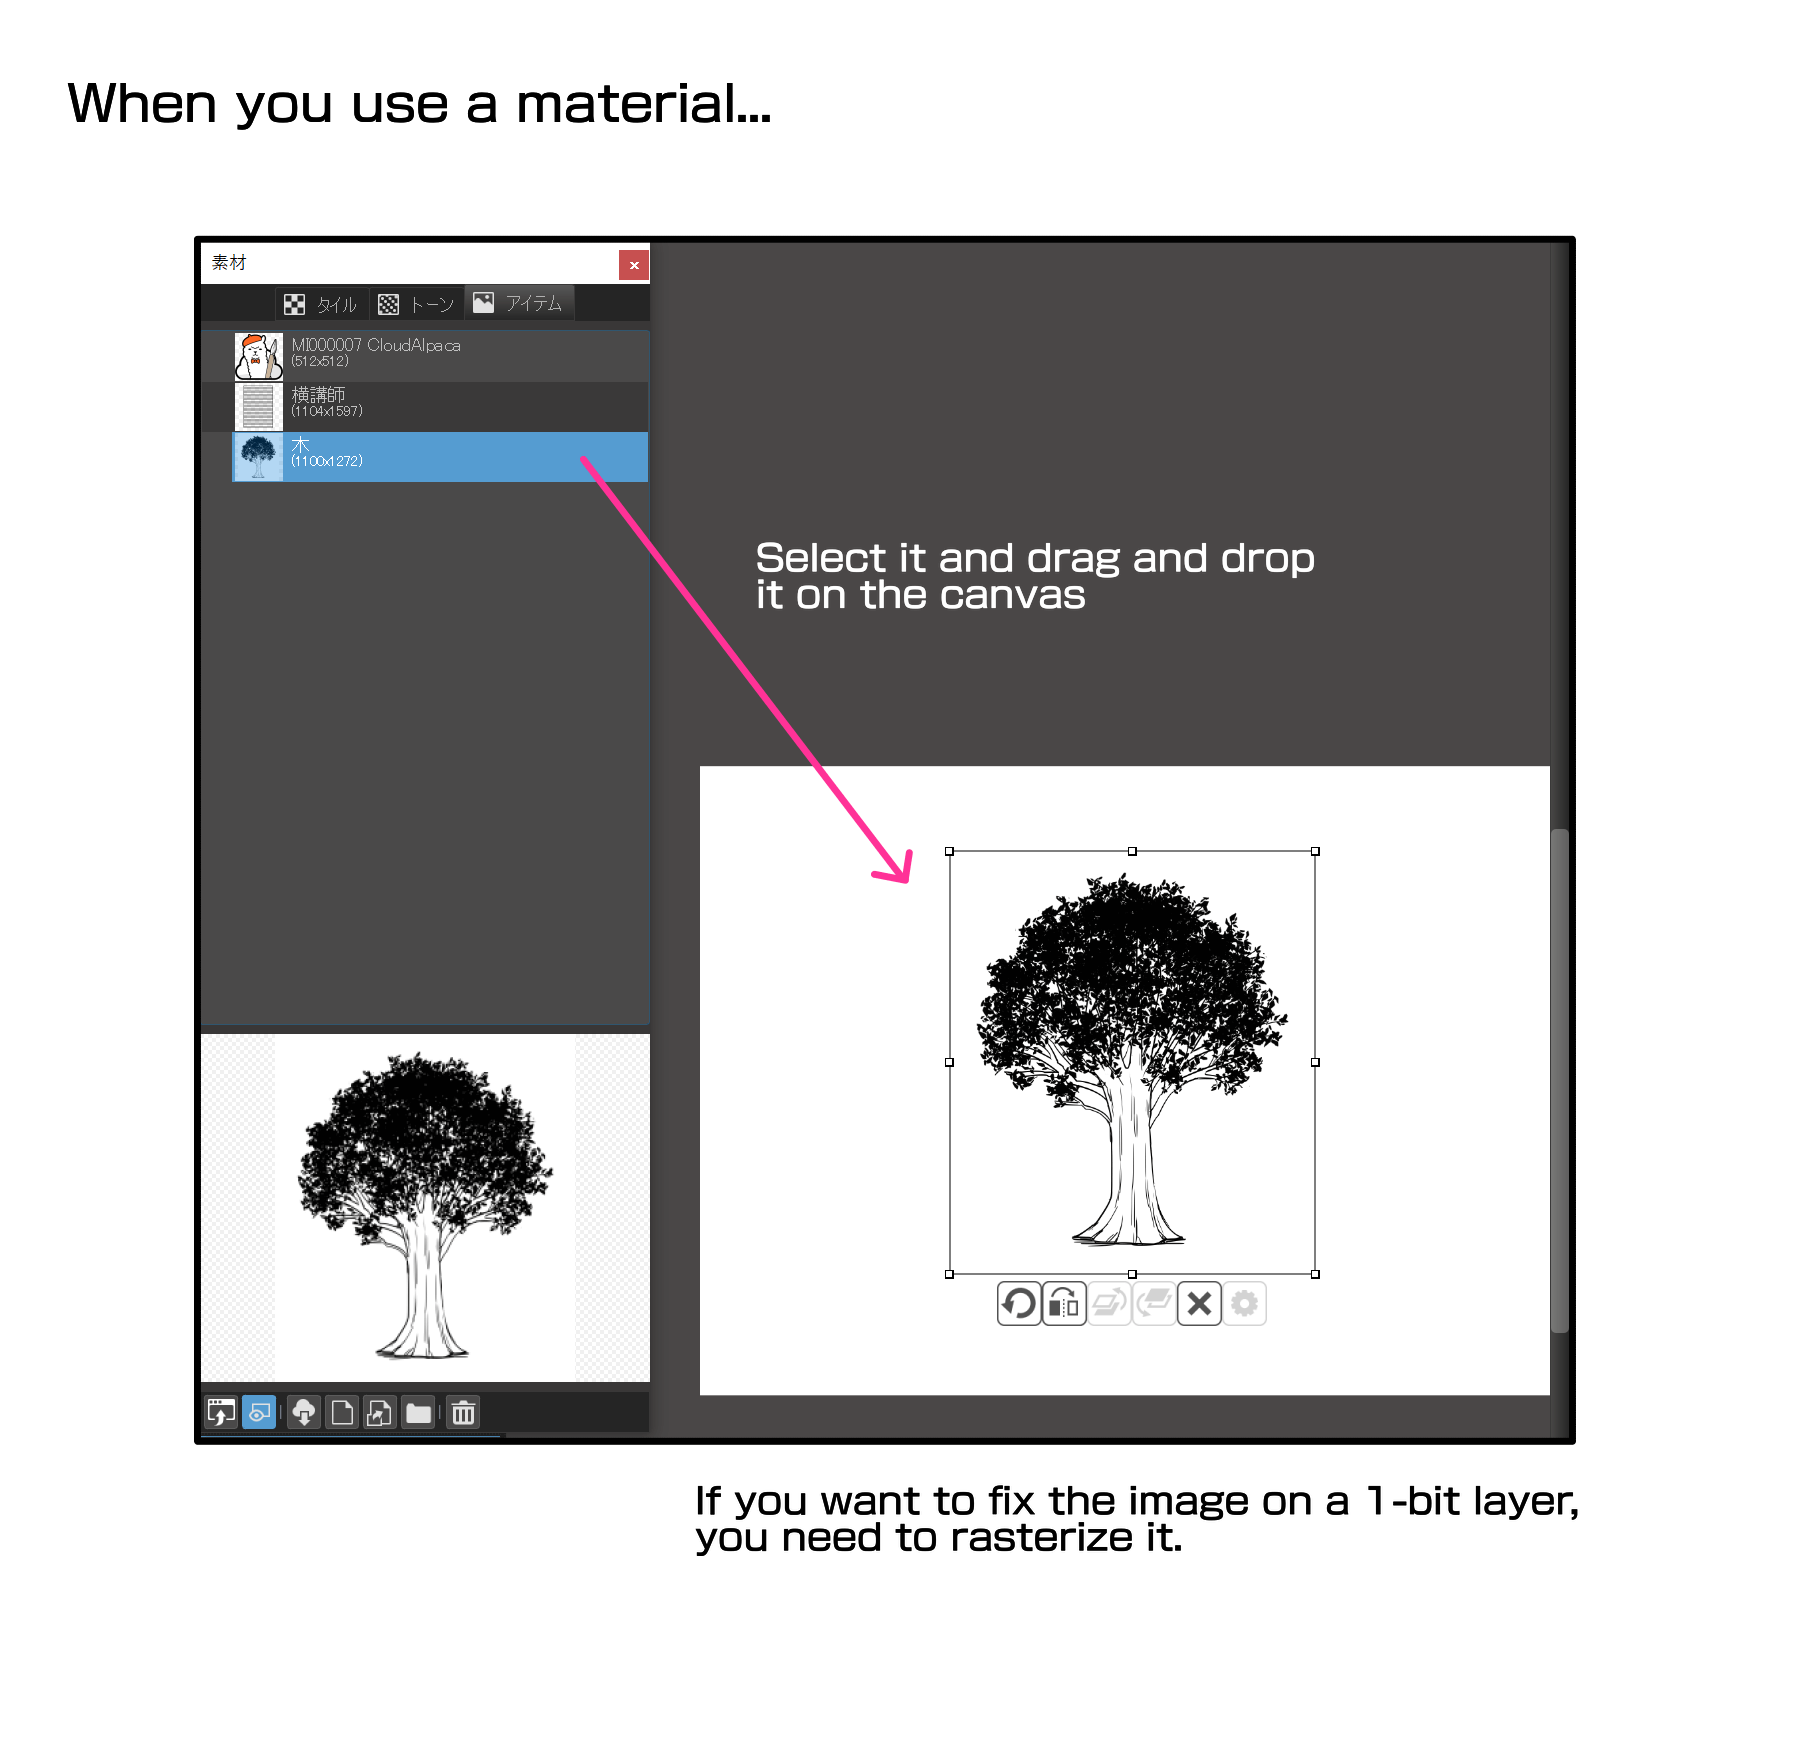
Open the Material window from the Material icon at the top, select the [Item] tab, and register the image as a material from the icon at the bottom, in the same way as for brushes.
If you want to fix the material image on a 1-bit layer, you need to rasterize it by clicking “Layer” -> “Rasterize Material”.
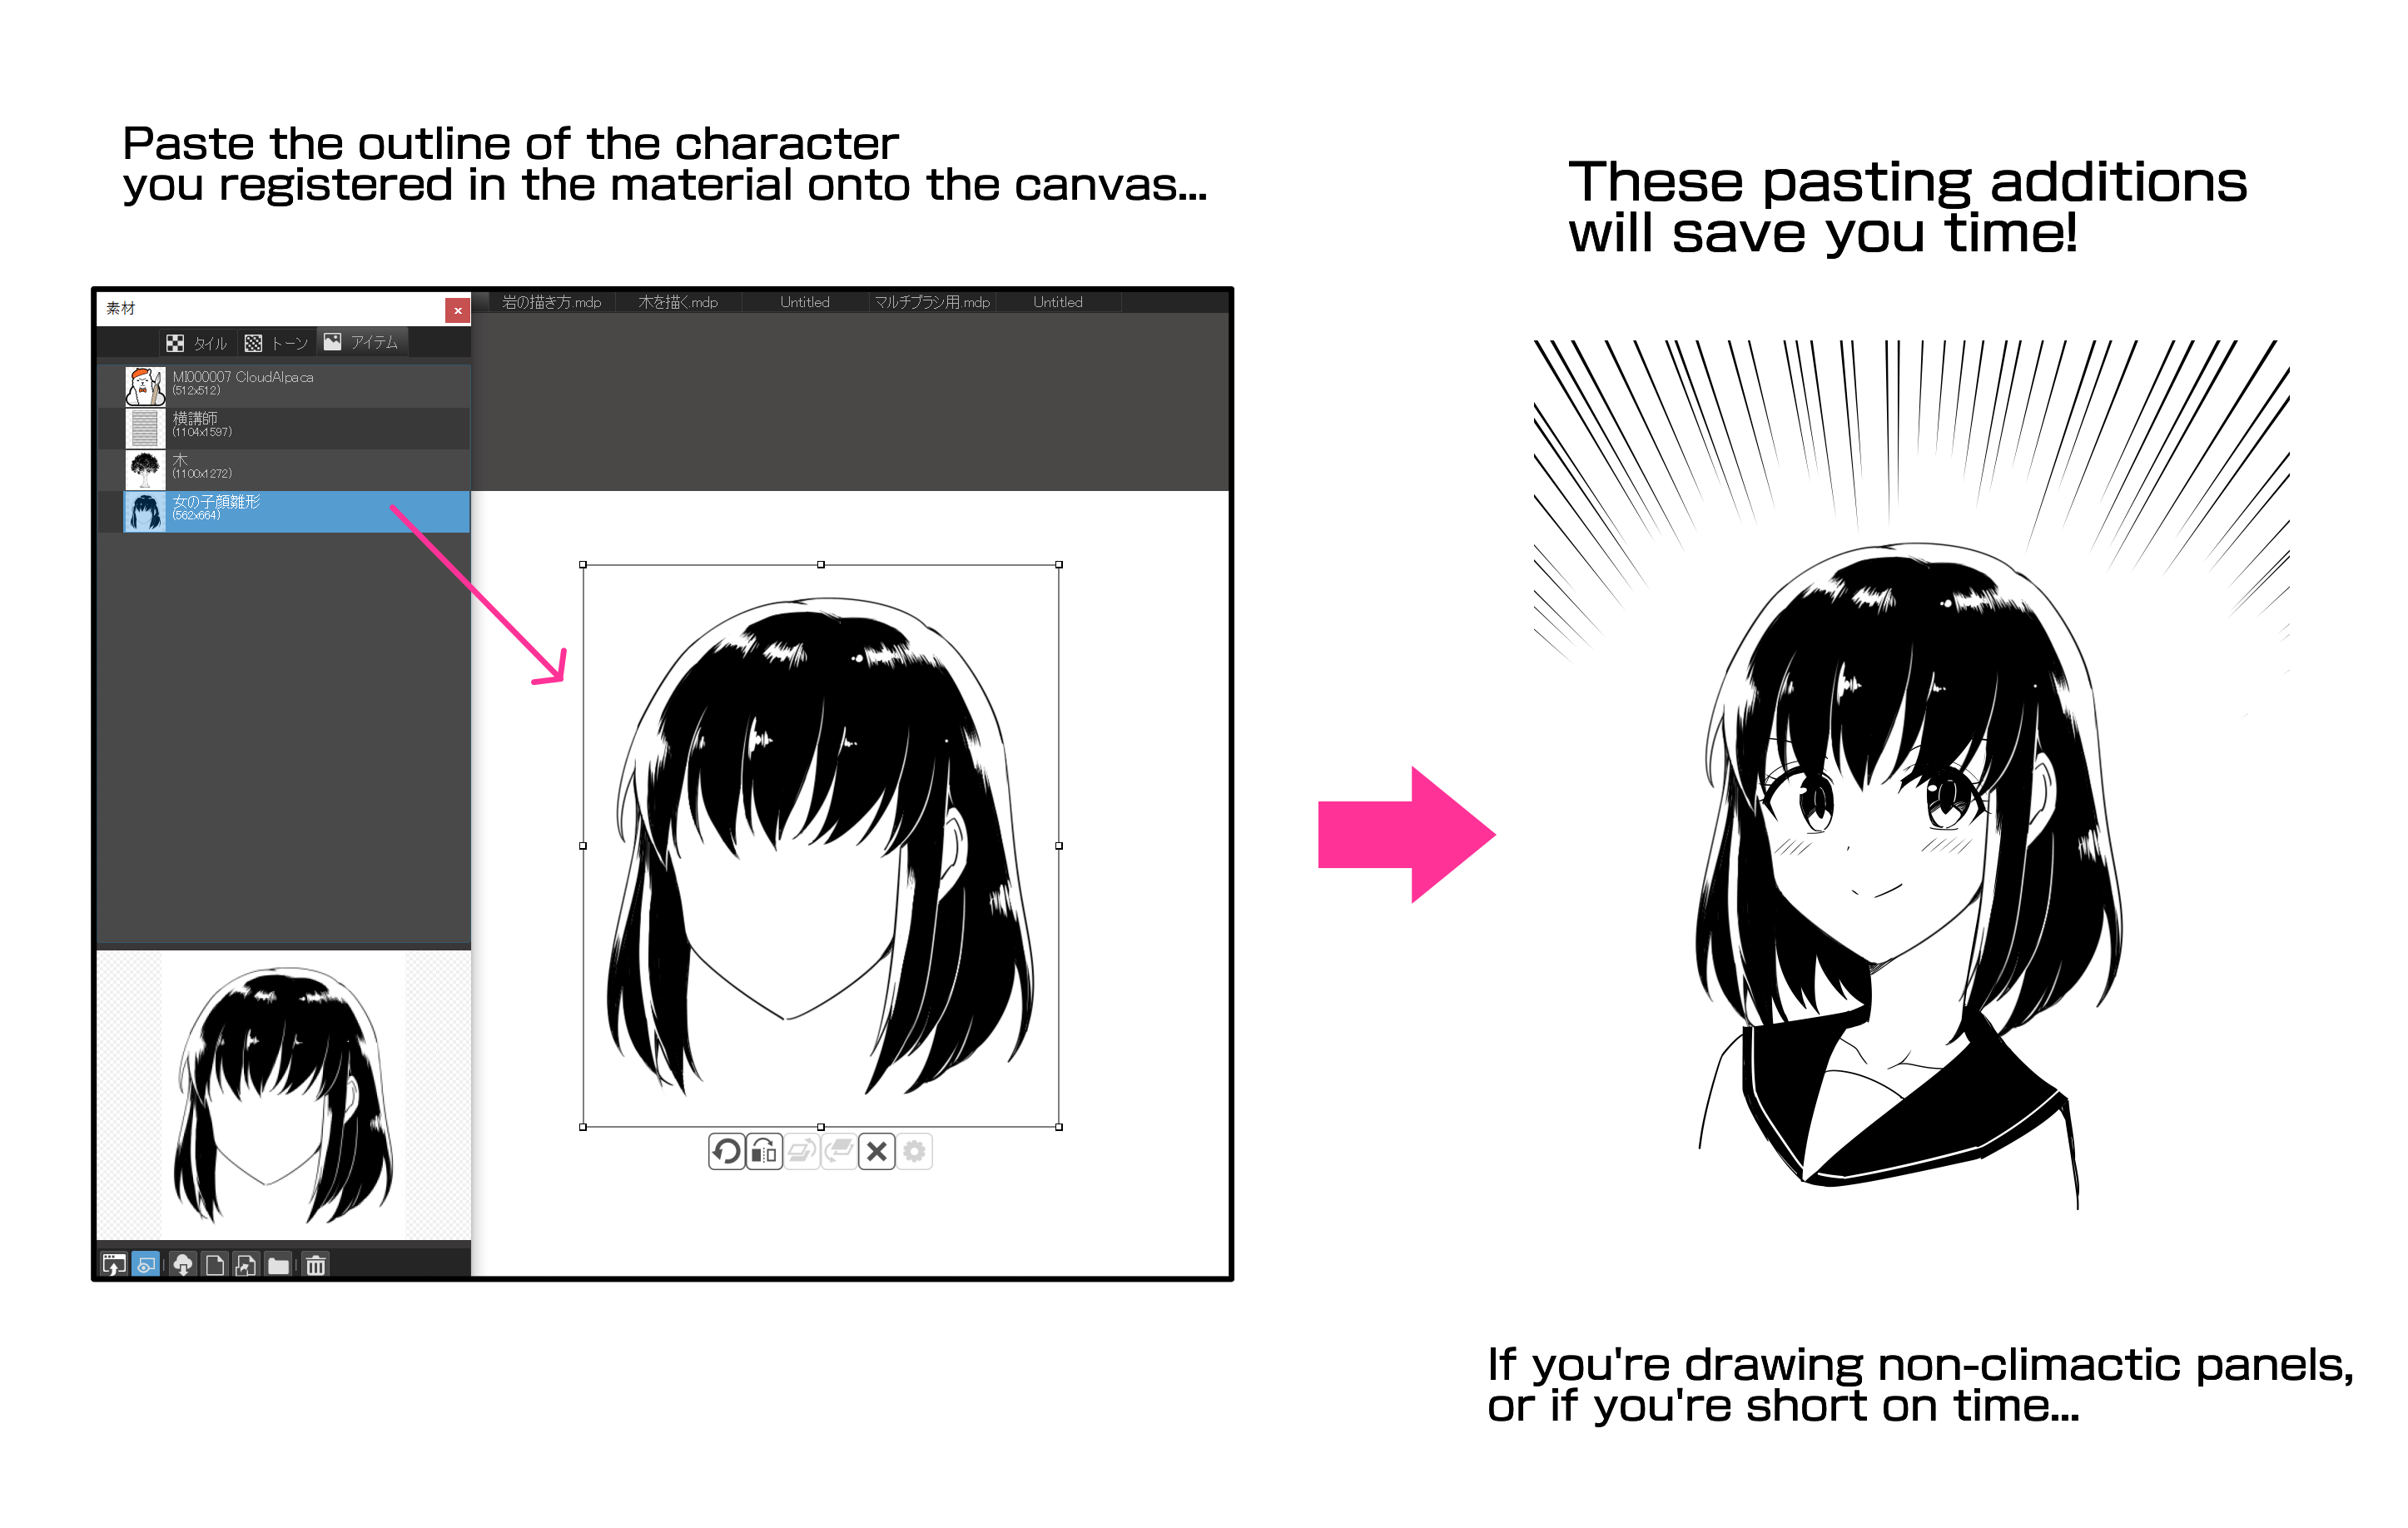
As an example, you can materialize the outline of a character’s face to speed up the drawing process. For similar angles in less important frames, you can make a model of the outline without the face parts and use it as a material to shorten the drawing time, which is recommended when you are short on time.
This method should only be used for non-climactic panels, so it goes without saying that you should draw important scenes without copying and pasting.
For other elaborate designs that you don’t want to draw over and over again, such as butterfly wings or coat arms, it’s a good idea to register them as easy to work materials .
For more information on how to use materials, this article is also useful.
[PC] How to Use Materials (Tiles, Tones and Items)
https://medibangpaint.com/en/use/2016/12/pc-use-materials-tiles-tones-items/
[For Beginner] How to Use Materials on MediBang Paint
https://medibangpaint.com/en/use/2021/06/how-to-use-medibang-paint-materials/
Was this guide helpful to you?
It takes a lot of time and energy to draw a single manga, so I think it’s healthier to create shortcuts where you can.
Next episode, I’ll explain how to draw simple human-made objects!
Click Here for Previous Tutorials.
Manga Tutorial for Beginners 01 Process of Manga Making
Manga Tutorial for Beginners 02 Let’s Make Outline (Part 1)
Manga Tutorial for Beginners 03 Let’s Make Outline (Part 2)
Manga Tutorial for Beginners 04 Get Ready to Draw Manga with MediBang Paint!
Manga Tutorial for Beginners 05 Let’s Make Name(outline)
Manga Tutorial for Beginners 06 Let’s think about frame layout and screen.
Manga Tutorial for Beginners 07 Considerations when setting up the canvas.
Manga Tutorial for Beginners 08 Let’s draw frames and speech bubbles.
Manga Tutorial for Beginners 09 Let’s draw people and natural objects
Manga Tutorial for Beginners Vol.10 Let’s get the most out of brushes and materials
「ГФ」
ART street
Click here for the collection: https://medibang.com/u/seledkapodshboi/
You can read my manga here → https://medibang.com/book/0c2101280307258390018866367/
This is also a manga that I draw under a different name. → https://medibang.com/comics/official/dobs340000005872400000000000a/
twitter: https://twitter.com/seledkapodshboi
\ We are accepting requests for articles on how to use /


