2022.07.22
Let’s try using the functions!(Applied Edition)【For Android】
In this tutorial, I will be explaining about functions available in the menu of the MediBang Paint application for Android.
Index
Settings
Tap on the Menu icon with 3 horizontal lines, select “Settings”.
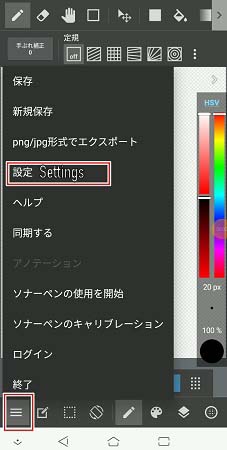
Once you open the Settings, you will see that it’s divided into the following categories;
- Settings
- Display Settings
- Display Shortcuts
First, let’s look at the Settings (for functions).
Settings
The first category is “Settings”, displayed at the top of the Settings screen.
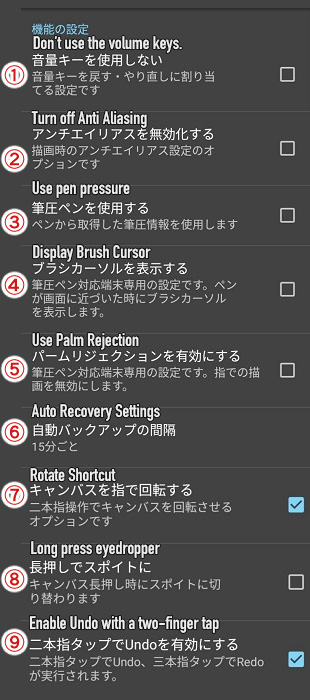
①Don’t use the volume keys.
You can choose to set your volume buttons (on your Android) to use for “Undo” and “Redo”.
In the default settings, ① is not selected so if you don’t want to use the volume buttons for such purposes, put a check to the box.
②Turn off Anti Aliasing.
You can turn off the Anti-Alias function.
Once it’s turned off, the edges and the borderlines will be jagged / pixelated.
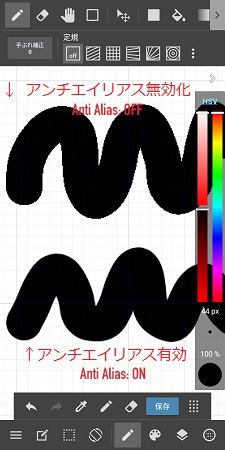
For more information on the Anti Alias function, please read the article below.
▼Article for the use of Anti Alias function▼
・【For beginners】Who should turn off the anti-aliasing function?
③Use pen pressure
With this function, the thickness and opacity of your brush lines change depending on the pressure level collected from your pen.
④Display Brush Cursor
This function is available for pressure sensitive styluses only.
The brush cursor will appear when your stylus pen touches the screen.
⑤Use Palm Rejection
This is also only for devices supporting pen pressure sensitivity.
You can turn off/on the fingertip sensor to draw with your pen or your finger.
⑥Auto Recovery Settings
You can change your settings for the auto recovery function.
You can choose from “Disable Auto Recovery”, “Every 5 minutes”, “Every 10 minutes” and “Every 15 minutes”.
⑦Rotate Shortcut
This enables you to rotate the canvas using two fingers.
⑧Long press eyedropper
This lets you switch to the eyedropper tool when you hold down on a canvas.
⑨Enable Undo with a two-finger tap
You can enable Undo with a two-finger tap and Redo with a three-finger tap.
Display Settings
Here, you can change the settings for the canvas display.
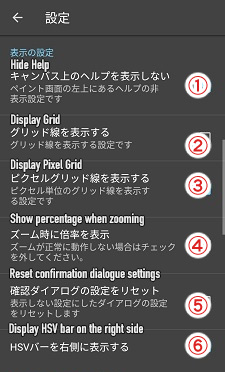
①Hide Help
The help settings on the top left of the screen will be hidden.
②Display Grid
You can display grids on your canvas.

③Display Pixel Grid
You can display the grid in pixel units.

④Show percentage when zooming
The zoom percentage will be displayed at the top.

⑤Reset confirmation dialogue settings
It resets the hidden “confirmation dialogue settings” and shows you the dialogues again.
⑥Display HSV bar on the right side
You can display the HSV bar on the right side of your screen.

※Extra information
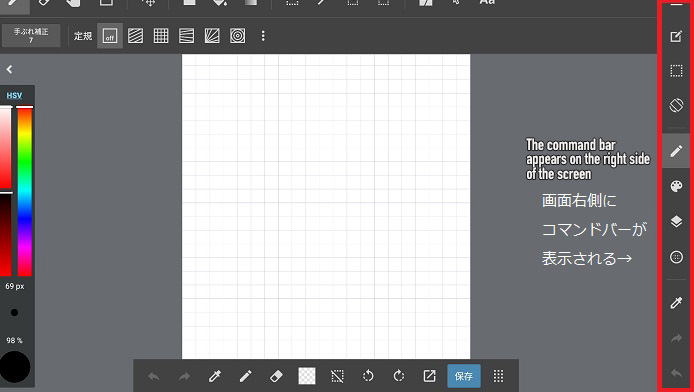
Depending on your device, there is an option to “Show the command bar on the right side of the screen.” for landscape mode.
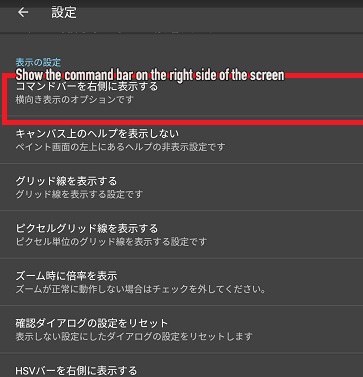
When you turn it on, the command bar appears on the right side of the screen.
Shortcut Settings
If you scroll down the settings screen, you can find the shortcut keys in the last category.
Add a check to the tools you want to add to your shortcuts.

The shortcuts will be displayed on the shortcut bar at the bottom of your screen.
Please note that the limit for the number of displayed shortcuts change depending on the screen size of your device.

Save/Save as
This is used when you want to save your illustration.
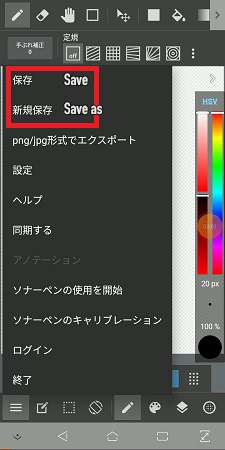
From the menu icon, choose either “Save” or “Save as”.
The regular “Save” overwrites and saves the information on the canvas you are working on.
If you want to keep your previous version too, save using “Save as”.
▼Read more about saving your illustration▼
・Saving your work
Export png/jpg files
If you want to upload your piece drawn on the MediBang Paint app, you must export your file into the png/jpg format.
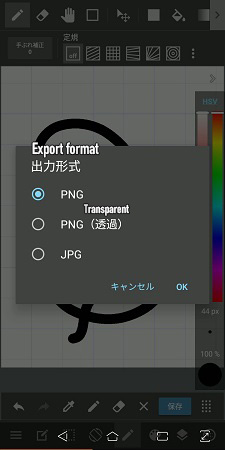
On Android, you can export your data in the following format:
- PNG
- PNG(Transparent)
- JPG
PNG
PNG is ideal for saving pictures with clear line work like illustrations, in high resolution.
As it keeps the resolution high, the file size becomes bigger.
PNG(Transparent)lets you export the picture with a transparent background.
JPG
JPG is best for saving photos or images.
The file size is lighter than PNG so it can be loaded quickly on SNS.
Both PNG and JPG export your piece as a single layered illustration.
Make use of the characteristics of PNG and JPG and choose the ideal format when exporting.
For a detailed explanation on the differences between png and jpg files, please read the article below.
・How are the PNG/JPEG/MDP/PSD extensions different? What do you recommend using for saving things?
Help
If you are confused with the settings or how to use the application, check out Help.
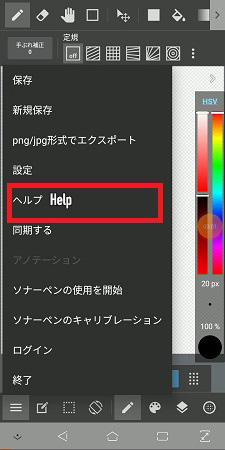
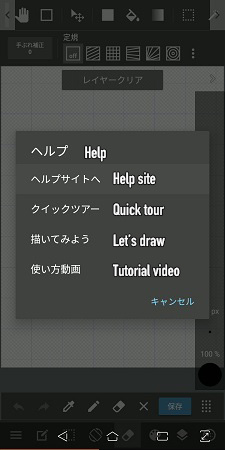
If you tap on Help from the menu section, the following will be displayed;
Help
You will be redirected to the website for MediBang Paint Tutorials if you choose “Help”.
▼Tutorial articles for Android users▼
「Tutorials」
Quick Tour
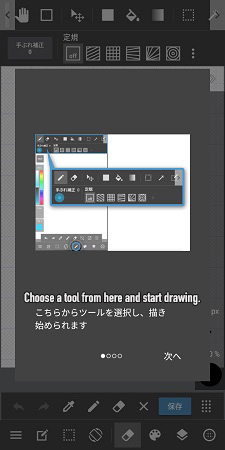
If you tap on “Quick Tour”, you can see an explanation for how to view the in-app screen.
Let’s draw!
You will be able to read an explanation for the drawing tools if you select “Let’s draw!”.

Tutorial Videos
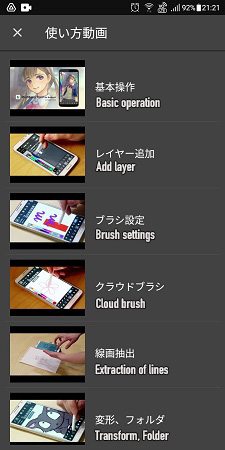
You will be able to watch the video explanations if you select “Tutorial Videos”.
Sync
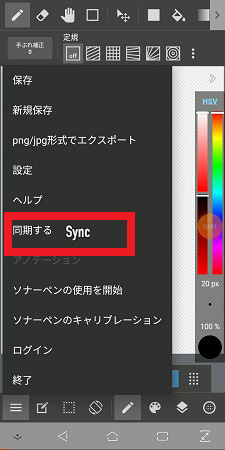
You can sync the resources and brushes from MediBang Paint Pro on PC with the MediBang Paint app on your Android device.
Sonar pen
Start using the sonar pen.
Sonar pen refers to stylus pens you can plug to your device via the earphone jack.
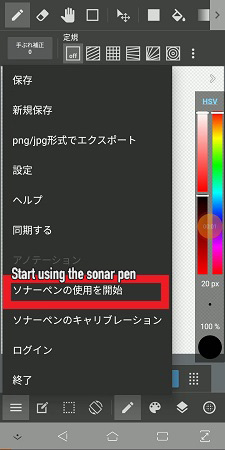
Plug in the audio cable to your Android and choose “Start using the sonar pen.”
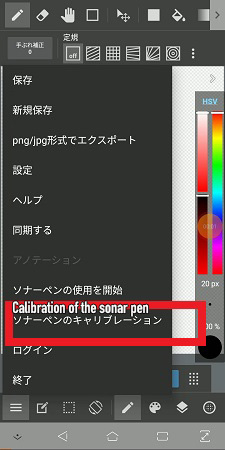
If there is a lag between your cursor and the pen tip, adjust by choosing “Calibration of the sonar pen.”
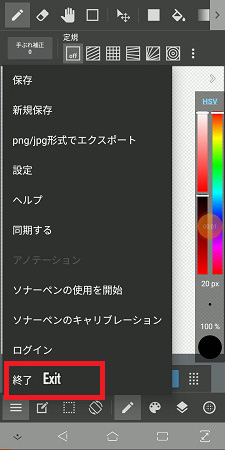
Exit
If you want to finish drawing, tap on “Exit”.
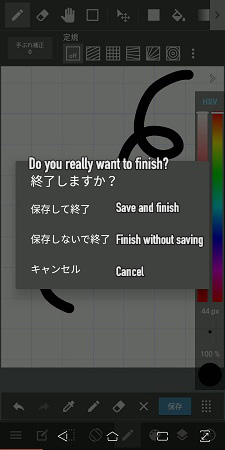
If you haven’t saved already, a message will pop-up and you can choose from “Save”, “Close without saving” and “Cancel”.
This was the tutorial on the menu function of MediBang Paint application for Android.
As of the settings, if you make use of the features available on your device, it will be much easier for you to draw on the app.
I hope you check the settings on your Android device and adjust the functions to your liking !
(Text・Illustrations/吉田 セツ)
\ We are accepting requests for articles on how to use /

