2022.09.30
Let’s draw a school desk !
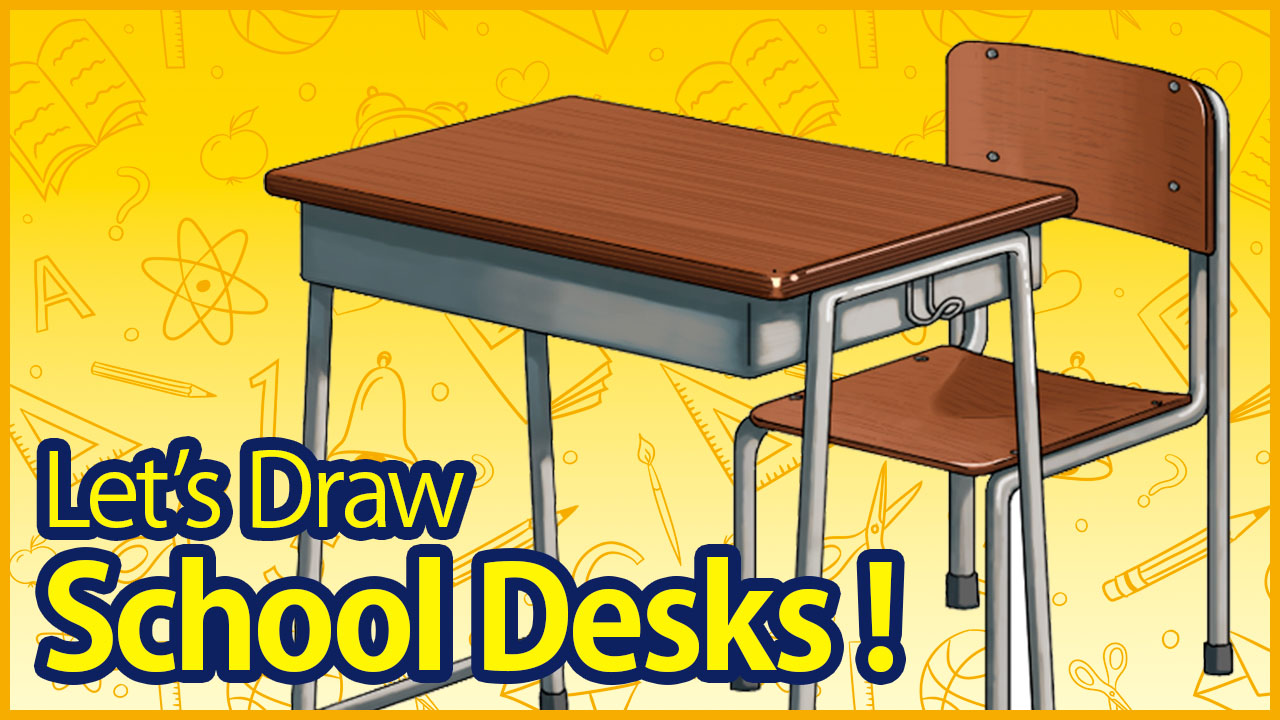
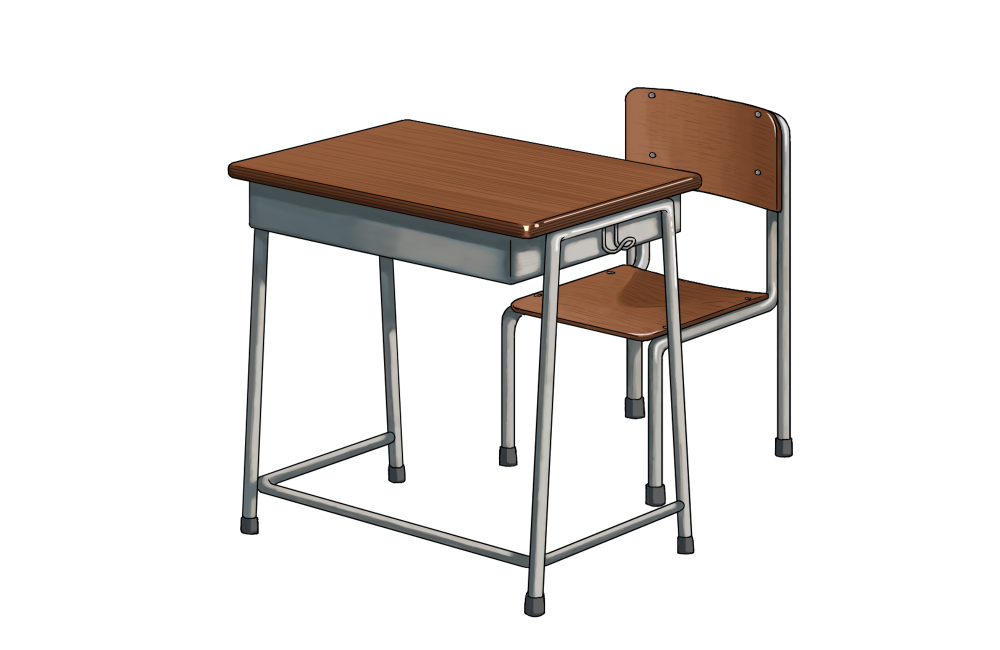
In this tutorial, I will be making an illustration of a school desk.
I recommend this article for those of you thinking “I want to draw classrooms in my illustrations or manga but I don’t know how to draw the shape of desks…”
I will also be explaining tips to draw a character sitting down so I hope you stay with me until the very end.
1Creating a rough sketch and setting the Snap tool
To start off, I will be creating a rough sketch for the desk illustration.
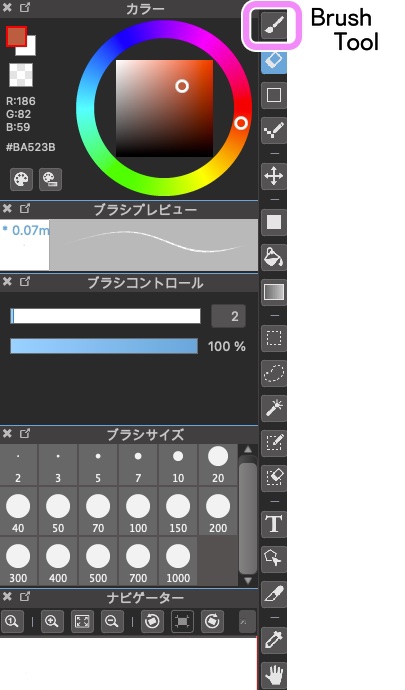
From the toolbar, select the Brush Tool.
Now I will think about the composition; the size of the desk and the position of the chair.
When you are drawing a desk, imagine a three-dimensional rectangle.
Then place the chair parallel to the desk.
At this point, the shape does not have to be accurate.
When you are done creating the rough sketch, lower the opacity of the layer so it will be easier for you to create the line drawing.
From top of the layer window, lower the “Opacity” to about 30%.
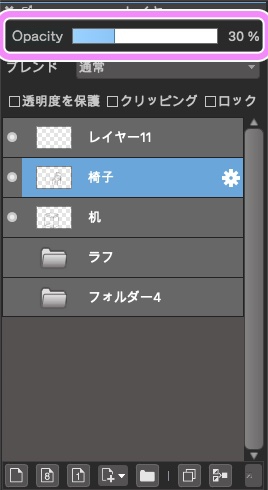
You can see how the layer looks.

Next, I will use the Snap Tool to move on with the rough sketch.
Keep the Brush tool selected and click on the “Vanishing Point Snap”.
You can use this Snap tool to set a vanishing point.

As done below, draw two snap lines parallel to the angle of the desk to create a vanishing point.
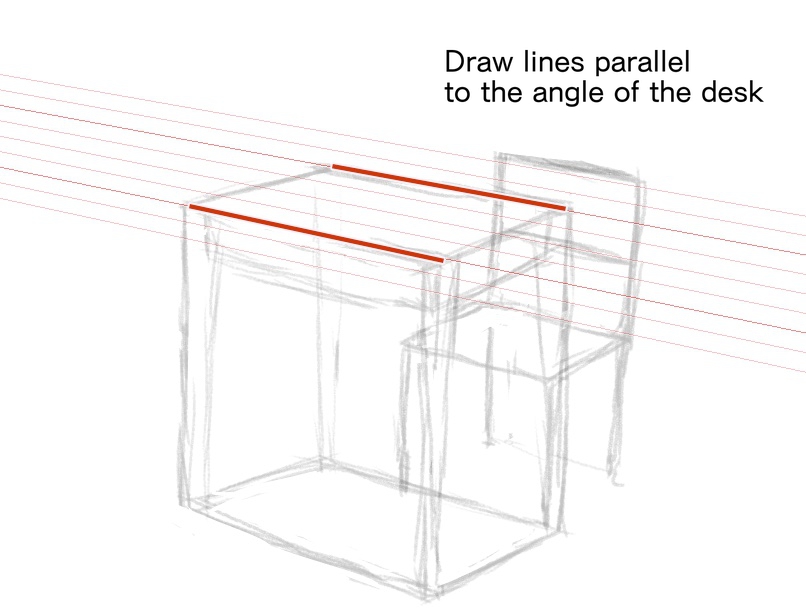
The first vanishing point has been created.
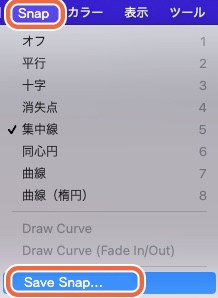
Then save the current snap by selecting “Save Snap…” inside the Snap tab of the top menu bar.
Let’s create the second vanishing point.
Choose the Vanishing Point Snap once again and click the Snap Setting, with the gear icon at the right and reset the snap.

To create Vanishing Point ❷, draw the two blue lines in the illustration below.
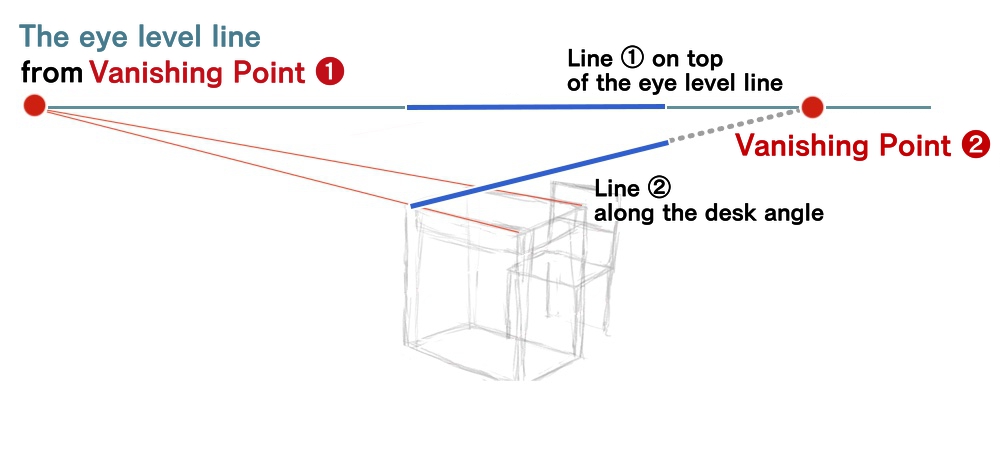
The two vanishing points must be placed on top of the flat line parallel to the ground.
From Vanishing Point ❶, drag the eye level line to the right and now draw the first line “Line ① on top of the eye-level line”.
Then draw the second line “Line ② along the desk angle”.
This creates the second vanishing point as shown above.
When you are done with these steps, save the current snap too.
Now that you have the shape of the desk table top, use the “Crisscross Snap” to add the vertical length.

Draw in the height of the desk using the Crisscross snap and with the two vanishing points you have saved, create the shape of the desk base.

Continue with the desk by drawing in the thickness of the desk table top and the book box below the table top.

Now I want to add the desk legs using the “Radial Snap”.

Set the snap high above the center of the right side of the desk.

Instead of the center of the table top, aim for the center of the book box to create a clean angle for the desk legs.
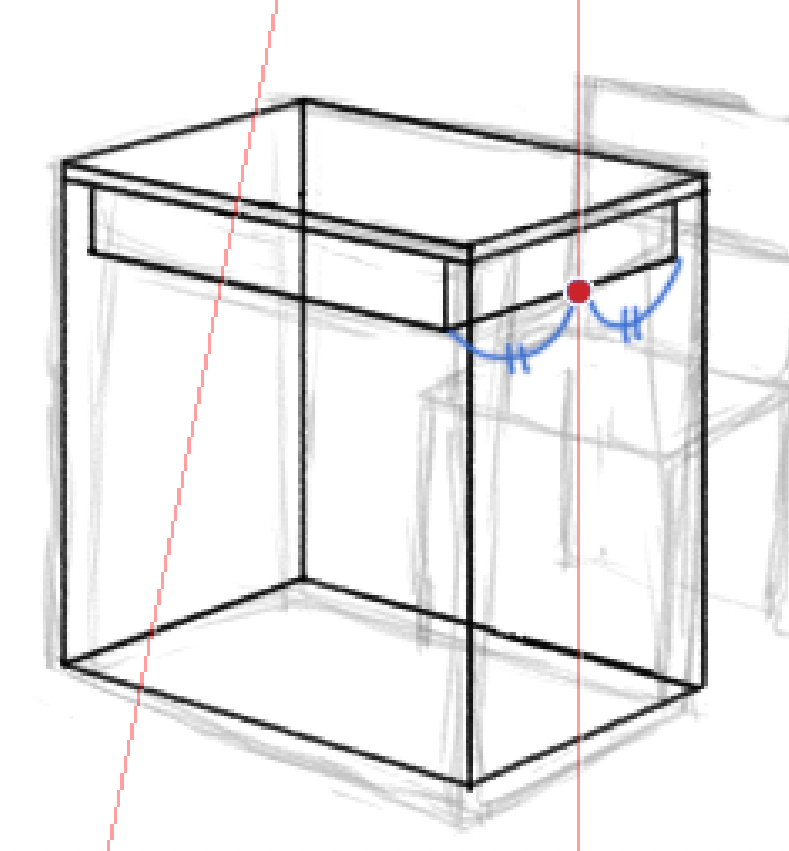
This is how it looks with the legs created along the snap I just set.
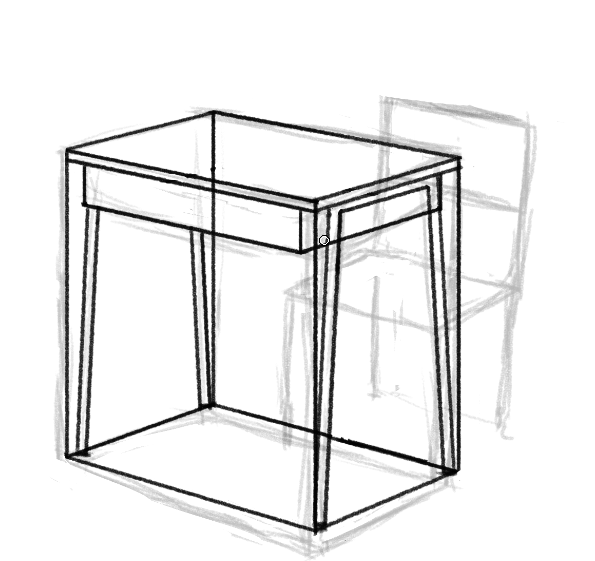
I have a tip for this step.
You must draw 2 lines for each leg; during this process, do not use the Radial Snap for both of them.
Instead, use the Parallel Snap tool for one of them.

I will explain in more detail.
Refer to the illustration below;
① Draw a line along the Radial Snap you just created.
② Set the angle of the Parallel Snap to the line you just drew.
③ Now trace the Parallel Snap with an angle parallel to the line created using the Radial Snap.
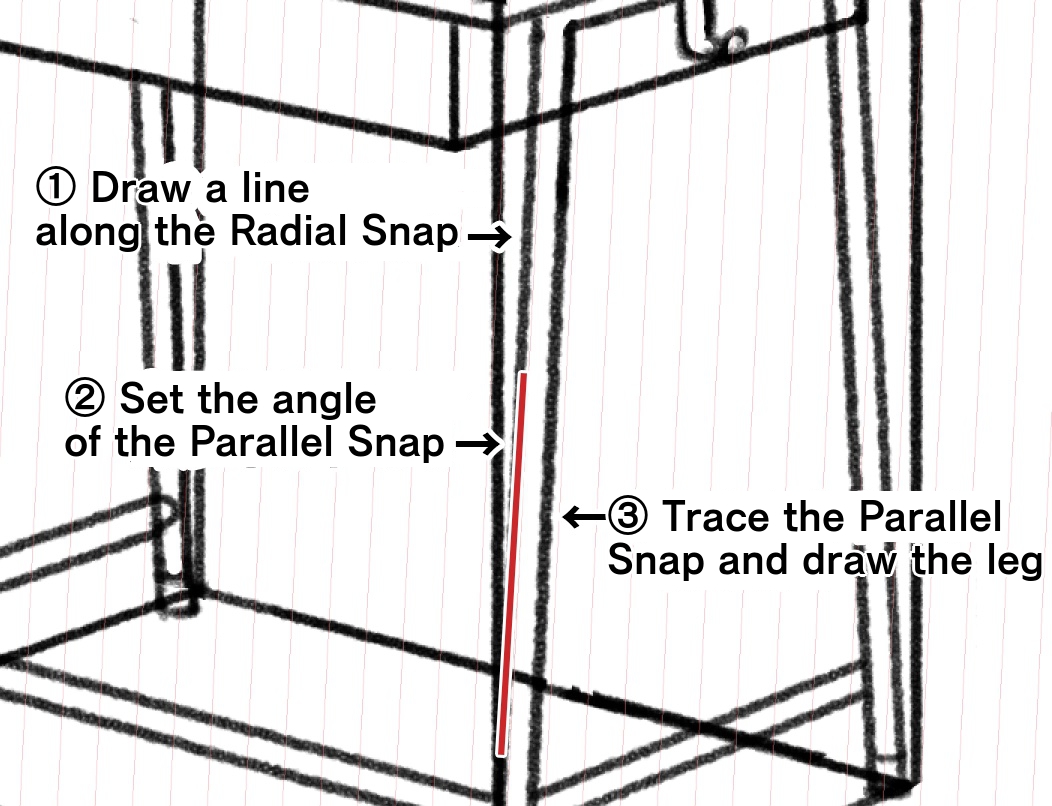
By using two snaps to draw the leg, you can create the right shape for the desk legs.
Let’s also draw in the bottom frame supporting the desk legs and also the hook for bags.
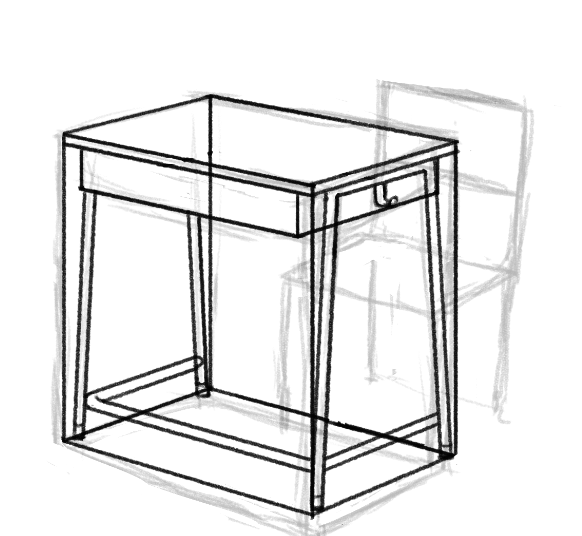
I am now done with the sketch for the desk.
Next, I will draw the sketch for the chair.
As done for the desk, draw the chair using the vanishing point snaps you created together with the crisscross snap.
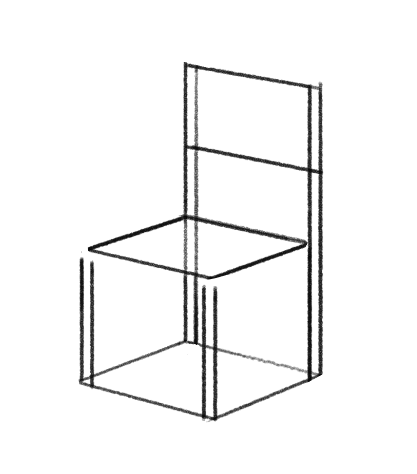
Draw the seat and the back support with a surface, and the legs in stick shape.
By also drawing the surface touching the ground, you can draw the legs with a good balance (similarly to how the desk was drawn).
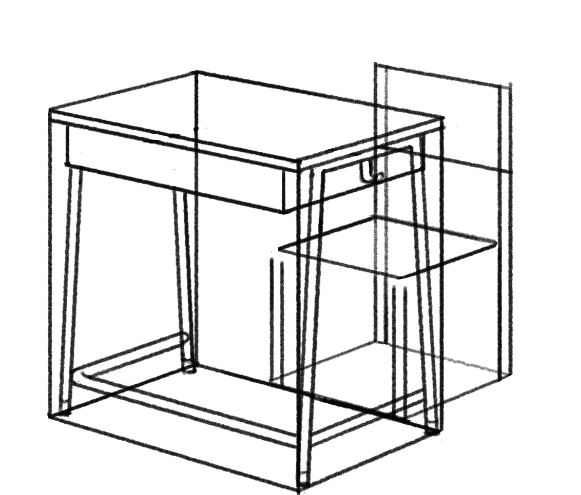
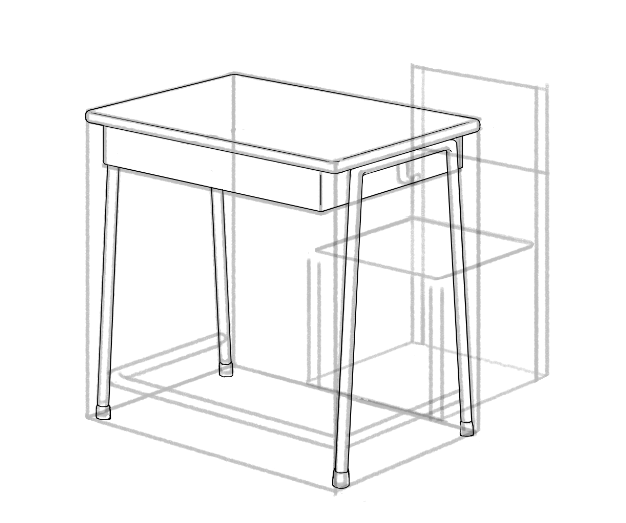
This is how it looks with the desk and the chair combined.
2 Creating a line drawing
The next step is creating a line drawing.
Although I’m just tracing my sketch, there is a tip here.
As shown in the drawing below, pay attention to drawing the corners of the desk with a circular form.
With this detail, you can recreate the touch of the school desks.

For the shape of the leg caps, trace the leg until it reaches the ground and draw a round leg cap around the pipe.
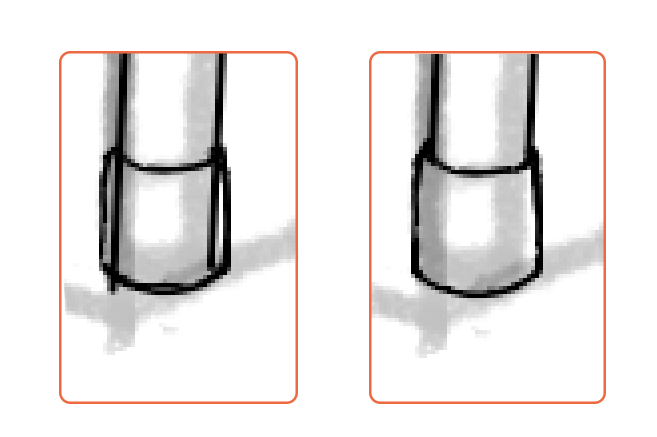
My line drawing has progressed like this.
Next is the bag hook.
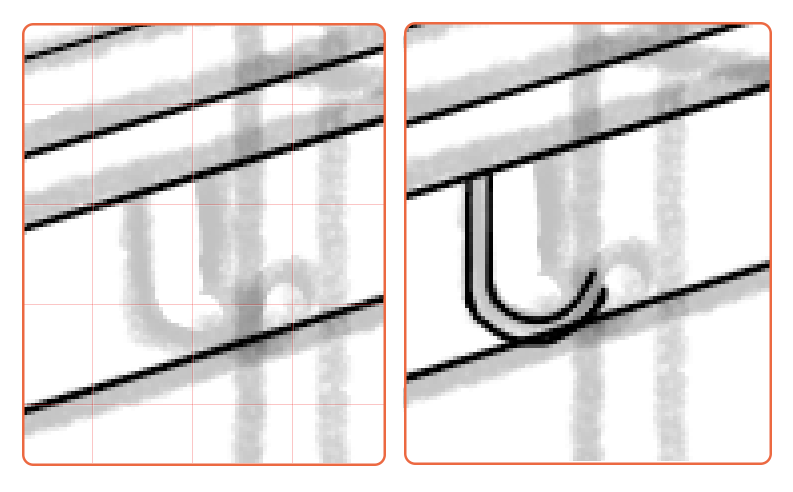
First, trace your sketch and draw half of the U shape. The linear part can be drawn free-hand with your brush but I recommend using the Crisscross Snap to draw it beautifully.
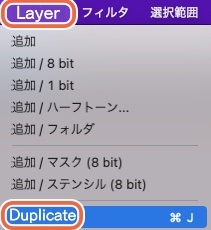
Duplicate this layer.
From the menu bar, go to the Layer tab and click “Duplicate”.
Once you are done duplicating, choose the Move Tool.
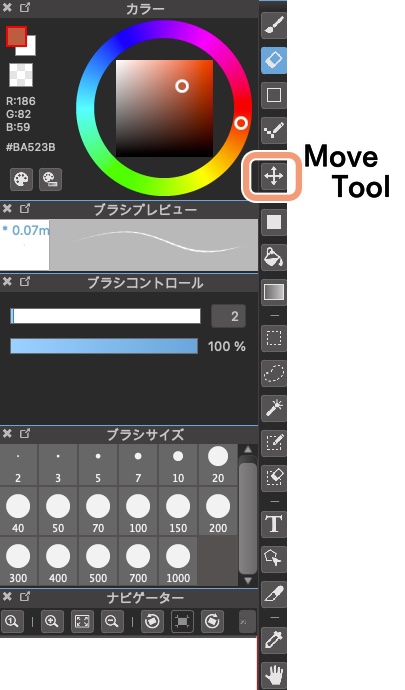
Move the duplicated layer a little to the right and connect the two half U shapes with curves.
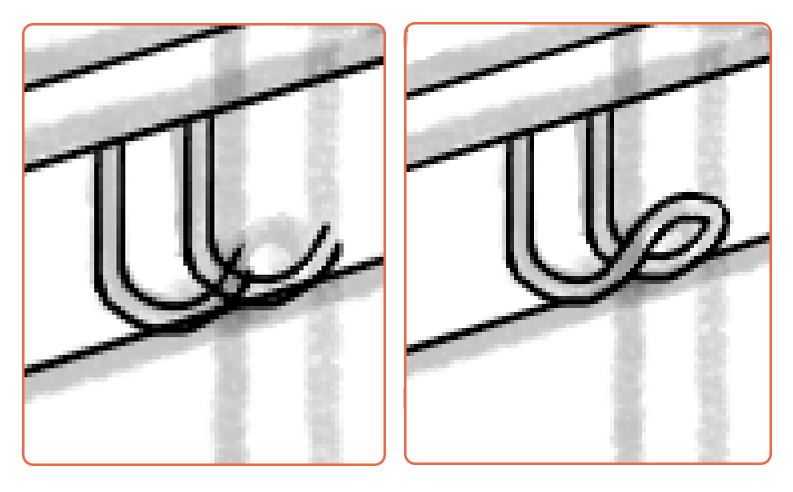
Now that I cleaned up the lines, the hook is also done.
Trace the framework at the bottom of the desk and now the line drawing is complete.
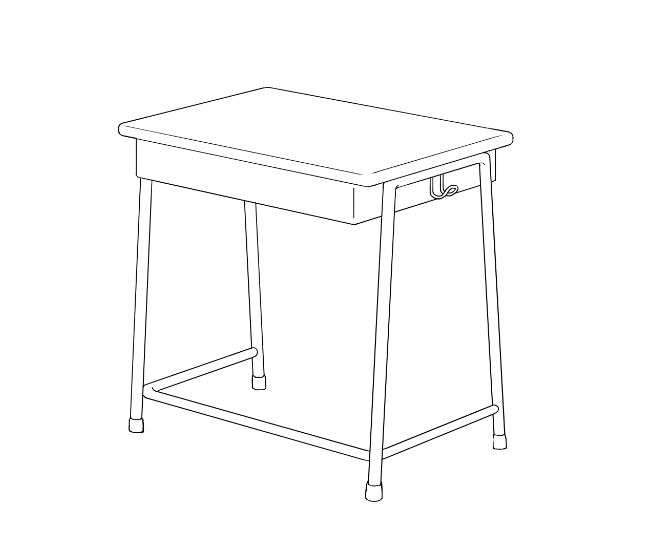
I will then start creating the line drawing for the chair.
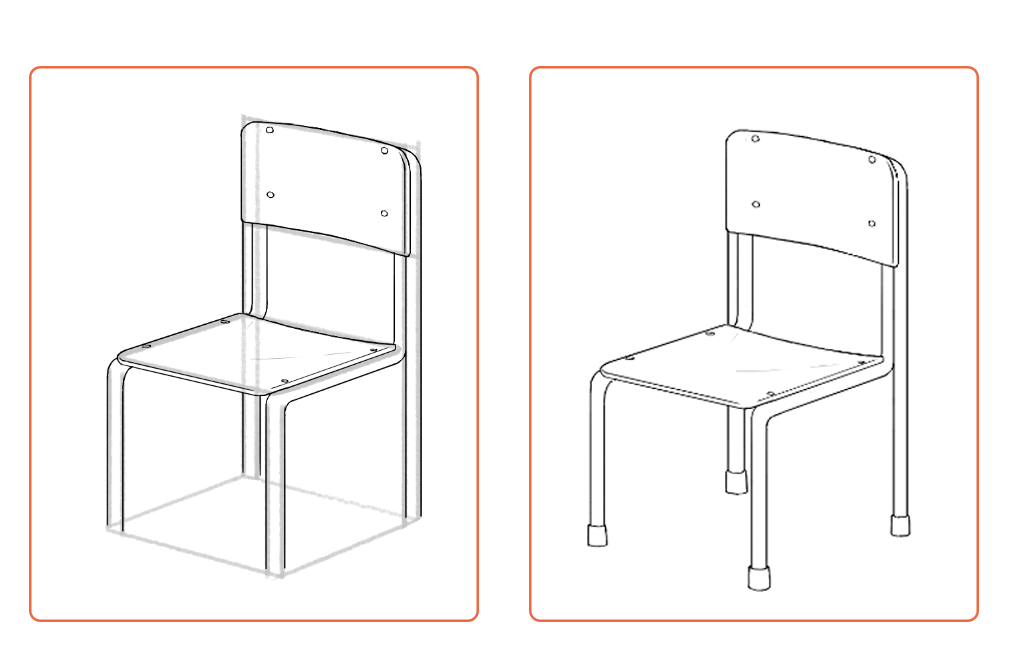
Draw the frame of the legs first.
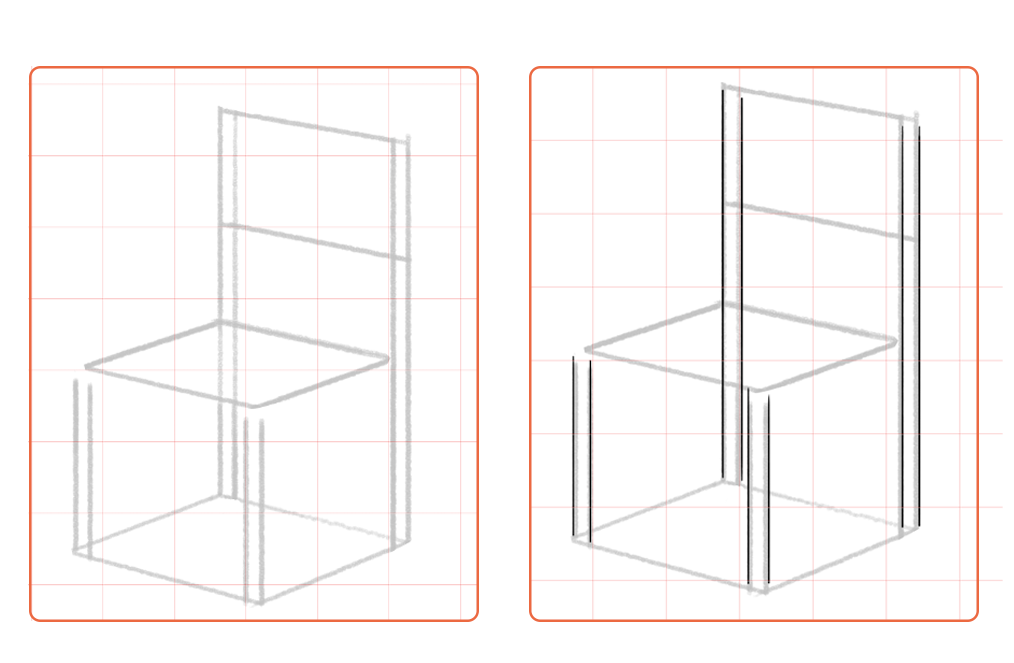
Then add the pipes along the frame.
At this point, it would be better for you to have a photo you can use as a reference to make sure how school chairs look.
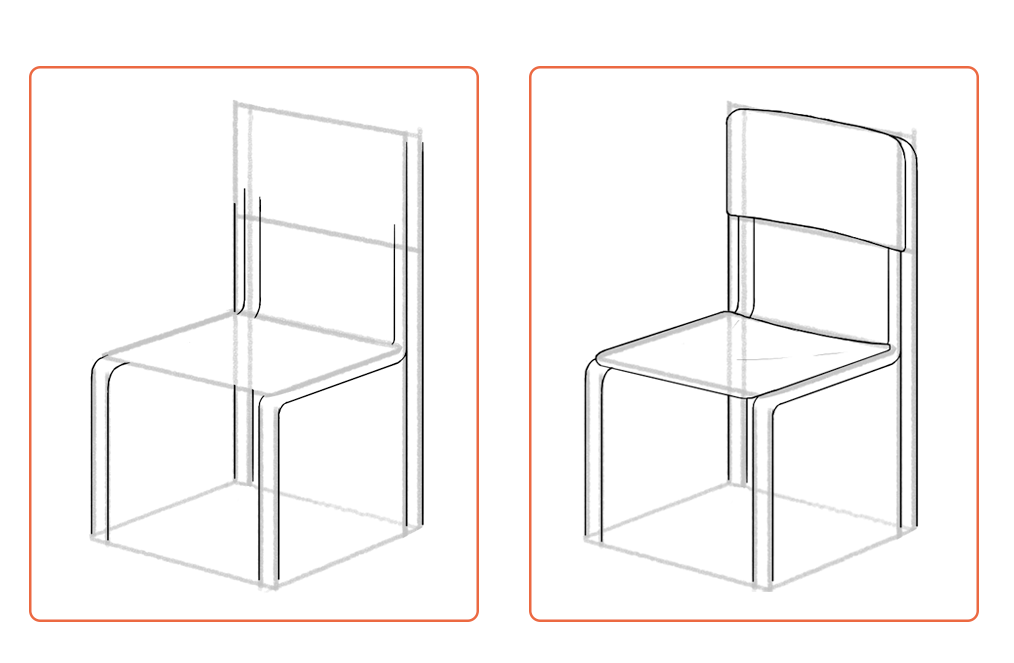
Be careful with the shape of the back support.
Although the vertical sides are linear, the horizontal sides should be curved to portray the right shape of the back support.
This is the same for part of the seat that touches the buttocks.
Add thickness to the seat and the back support and also draw the bolts.
Once you draw in the leg caps, it’s complete.
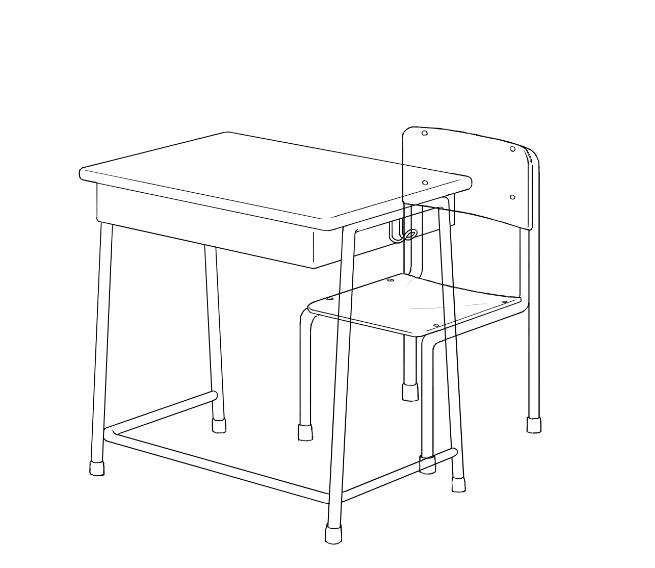
This is how the line drawings look combined.
3 Coloring
I will now start coloring the line drawing.
Select the Bucket Tool.
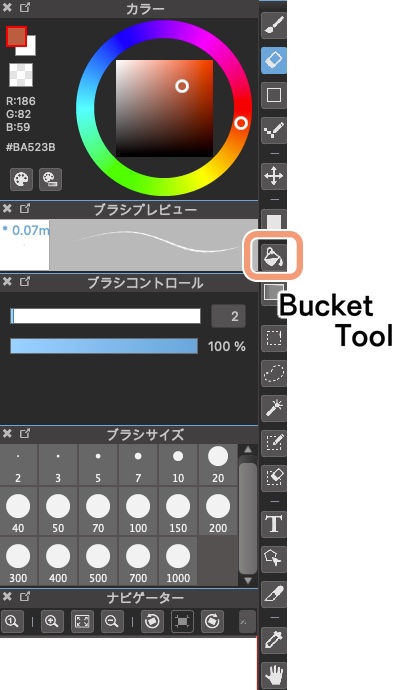
Then fill each part with the Bucket Tool, using the color you want to place.
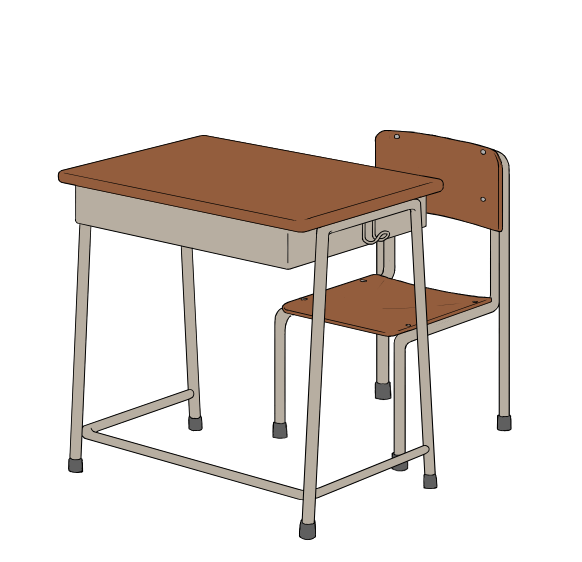
Create a new layer above the layer for coloring of the table top and click Clipping having selected that new layer.
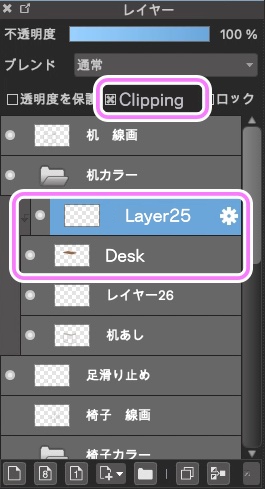
With this Clipping, you can proceed to paint on top without spilling out of the table top.
Next, paint a dark brown on the edges of the table top.
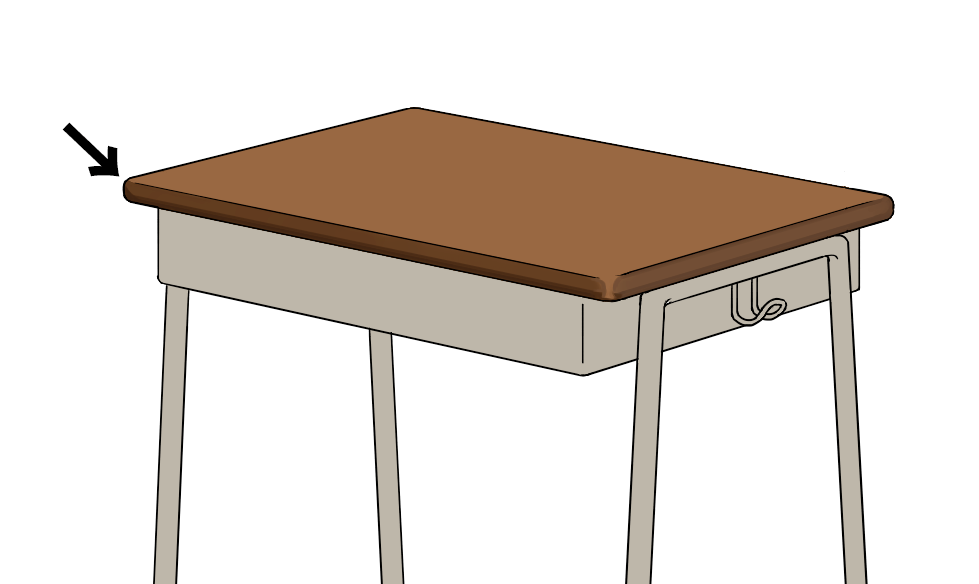
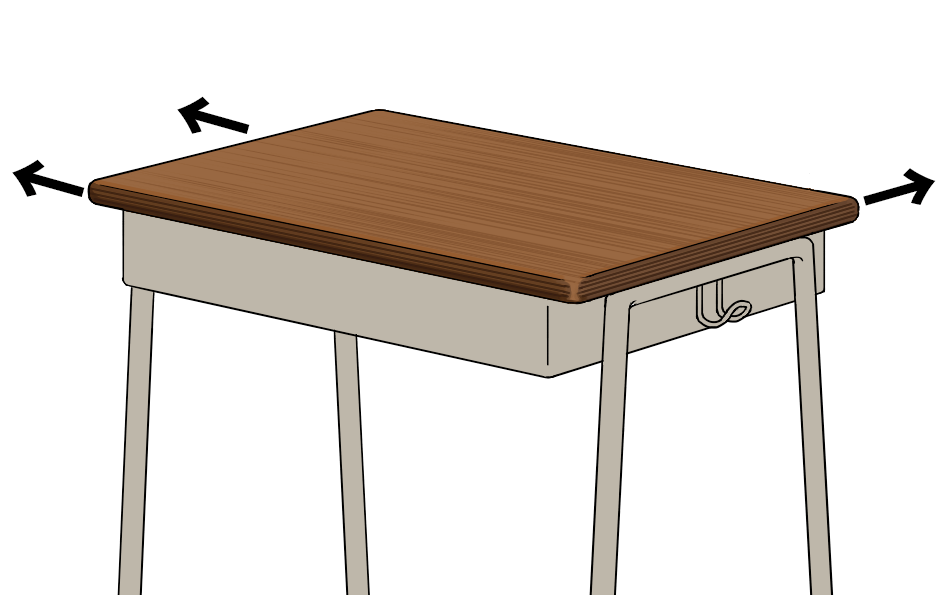
Next, add a wooden pattern to the table top.
Using the vanishing points directed toward the three arrows in the illustration below, draw in thin lines and make it look like a wooden pattern.
Add a highlight to the right side of the table top and now it’s complete.
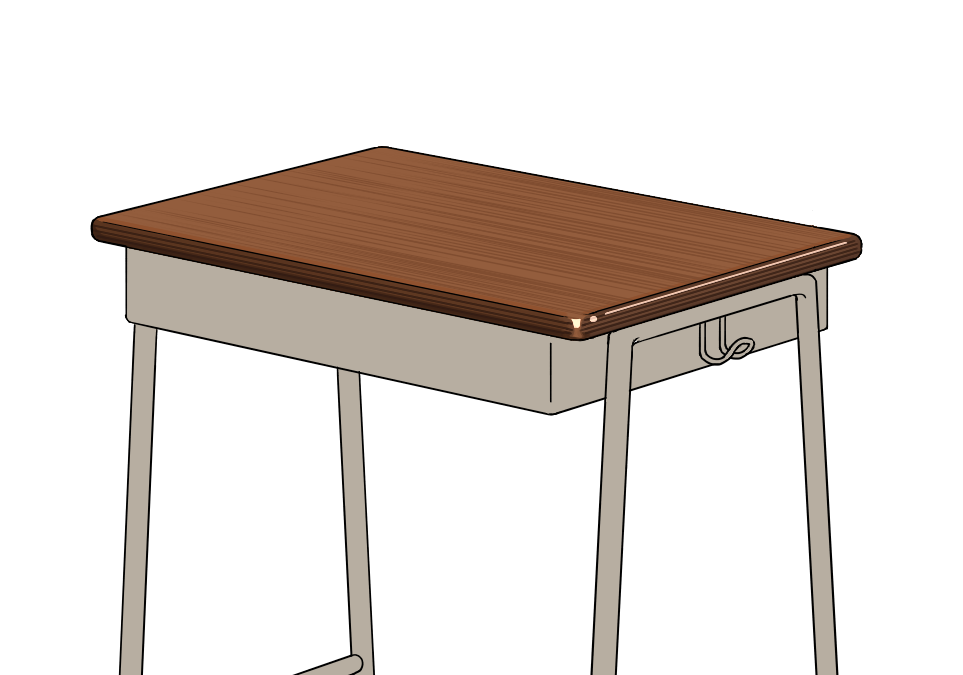
I will now move on to the legs.
Start off by drawing a shadow.
Pay attention to keeping the right side of the desk bright.
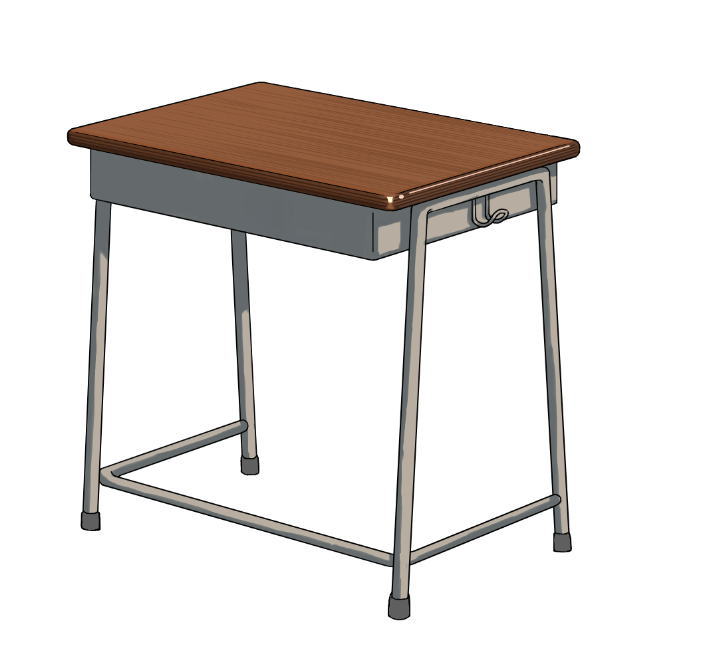
Darken the color even more and mix a brighter color to blend the shadows well.
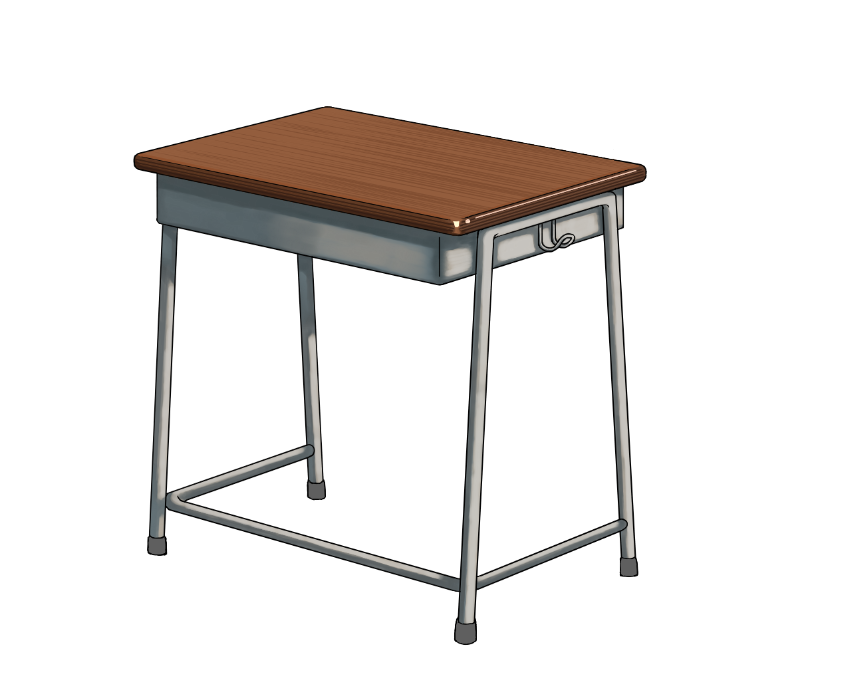
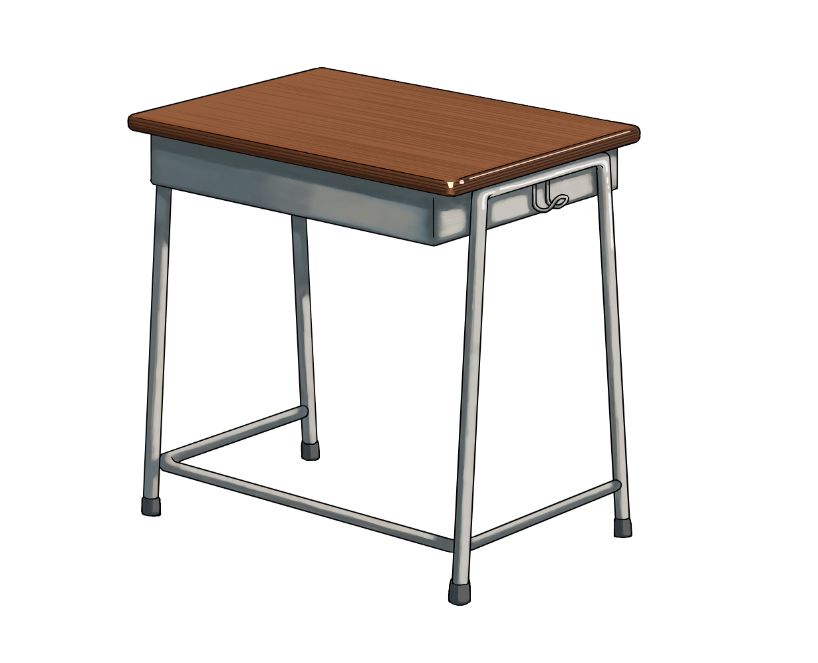
Add highlights to the legs as well.
Don’t forget to draw the shadows for leg caps too.
Next is the coloring of the chair.
Paint the legs in the same way as done for the desk; drop the shadows and blend the colors well.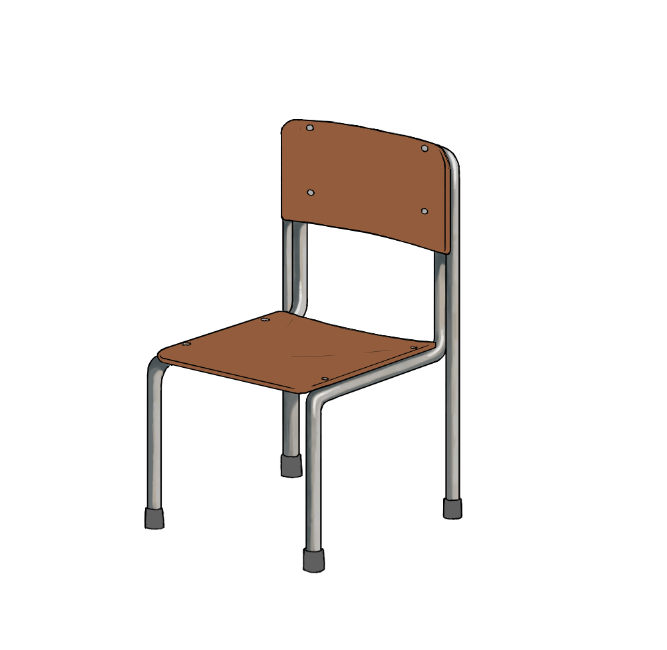
The next step is the back support and the seating.
First, shade in the edges as I did earlier for the table top.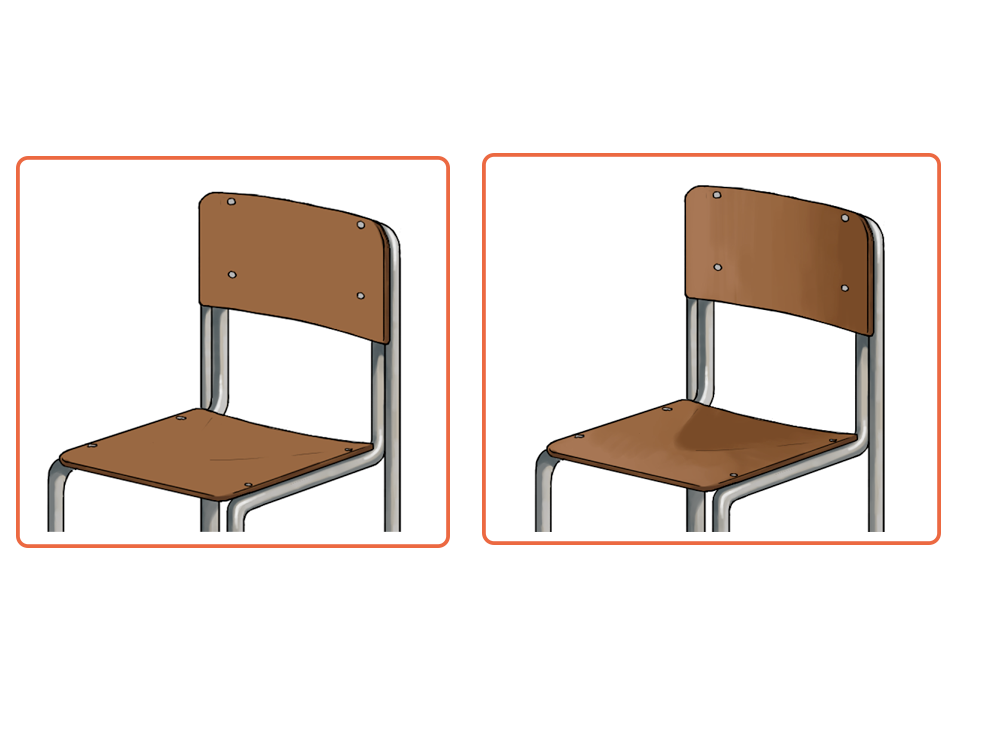
Then add a dark brown shade so it fits the curve of the chair.
Now you can see that there is a curve along the back and the seat.
I also drew in lines along the curved shape to recreate the wooden grain.
Don’t try to be neat here and just keep drawing in the lines roughly.
For the bolts, add a gray shade to create three-dimensionality.
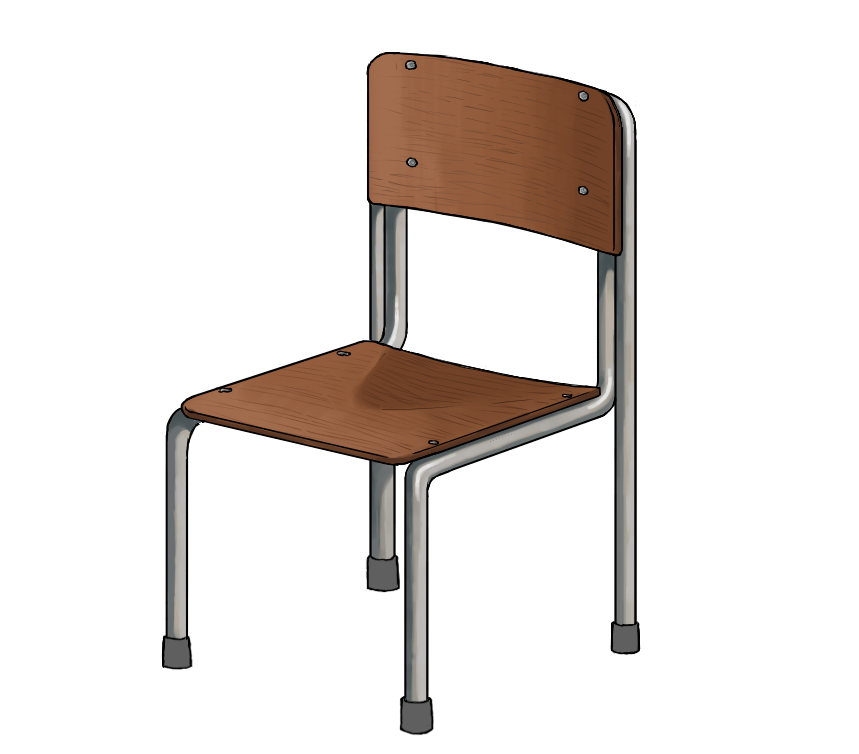
Draw in highlights at the top right of the back support as well as the bottom right of the seat, and now the coloring of the chair is complete.
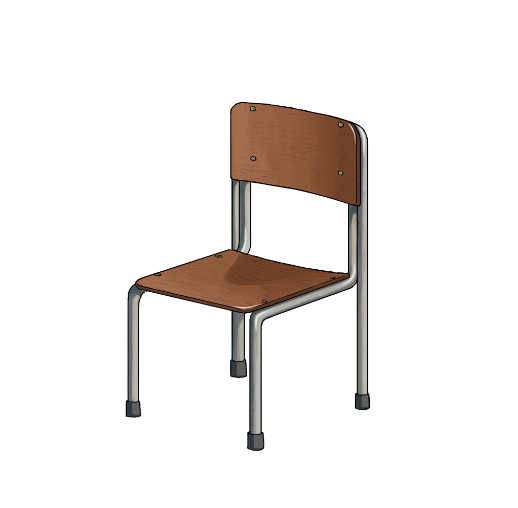
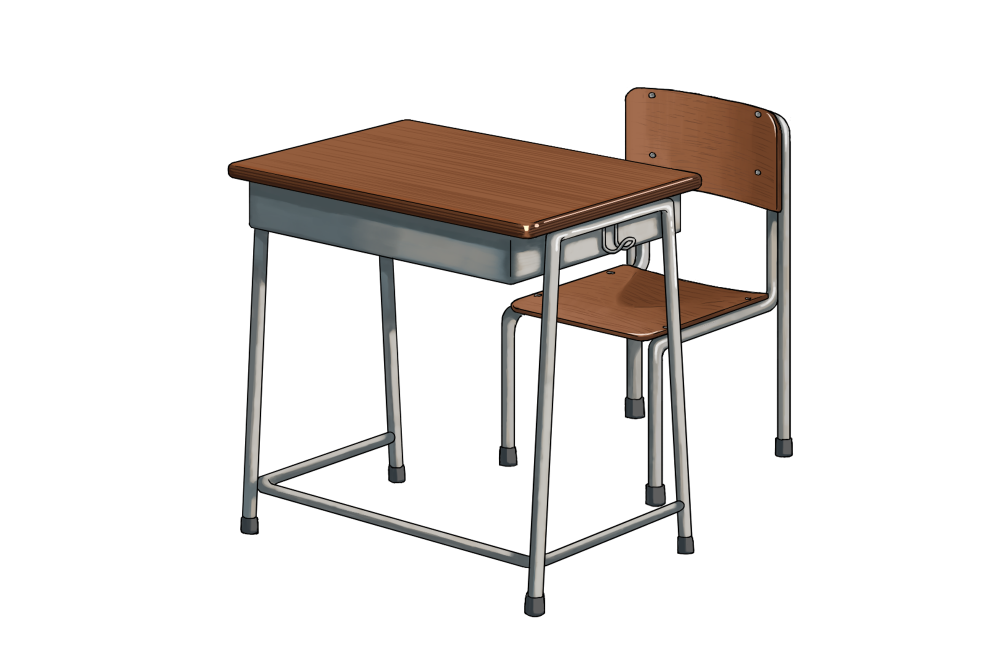
Combine the desk and the chair together; the making is finished !
These two are very common and familiar motifs but it feels difficult to draw.
I hope you gained some confidence to draw a school desk/chair by following this tutorial.
4 Tips for drawing in the character
Lastly, I will explain the tips for positioning a character.
I first chose a female character.
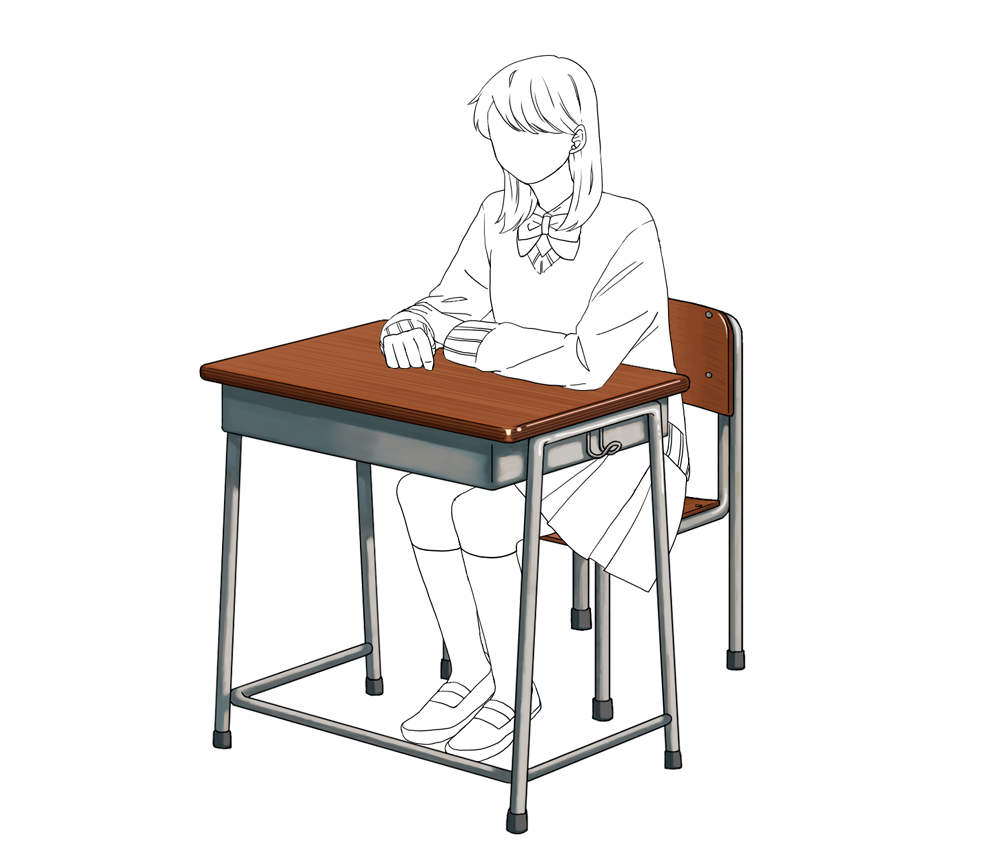
Here are the tips for a female figure.
Try drawing them bent forward a little and have their elbows rested on the desk.
You can illustrate the girl to be paying attention to whatever is in front of her.
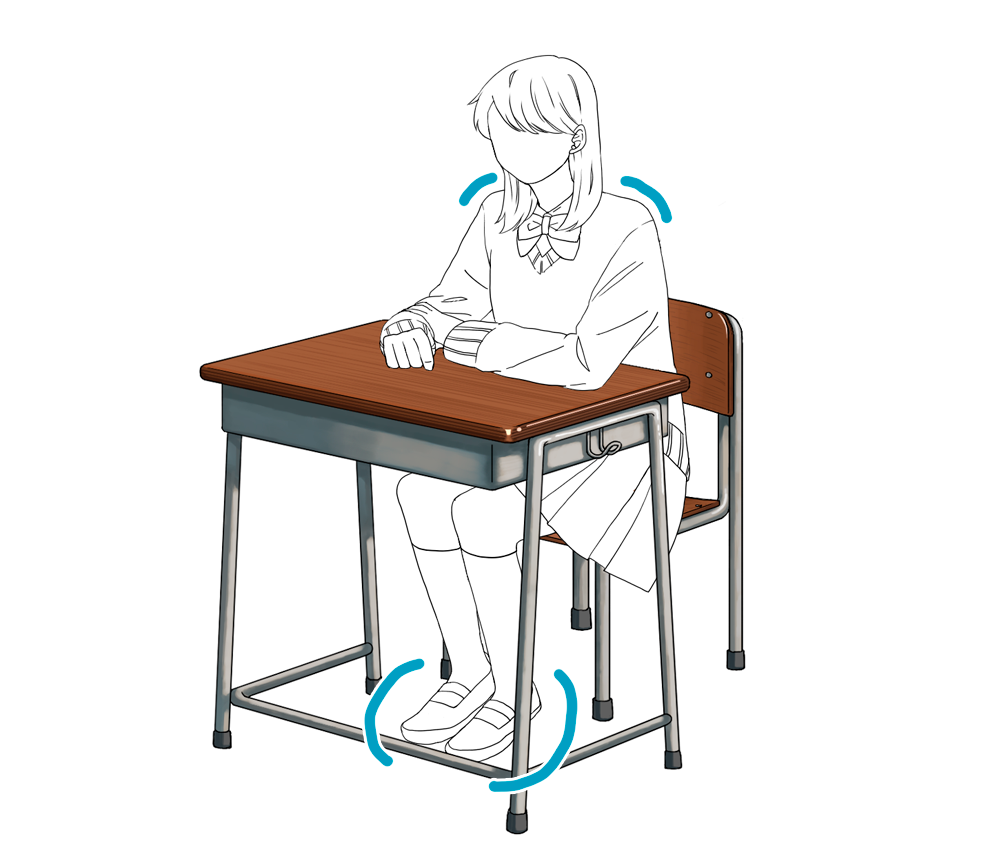
Make sure to draw the shoulders shrugged a little and place the feet together.
You can portray a cute impression by drawing them smaller than male characters.
Next is a boy.
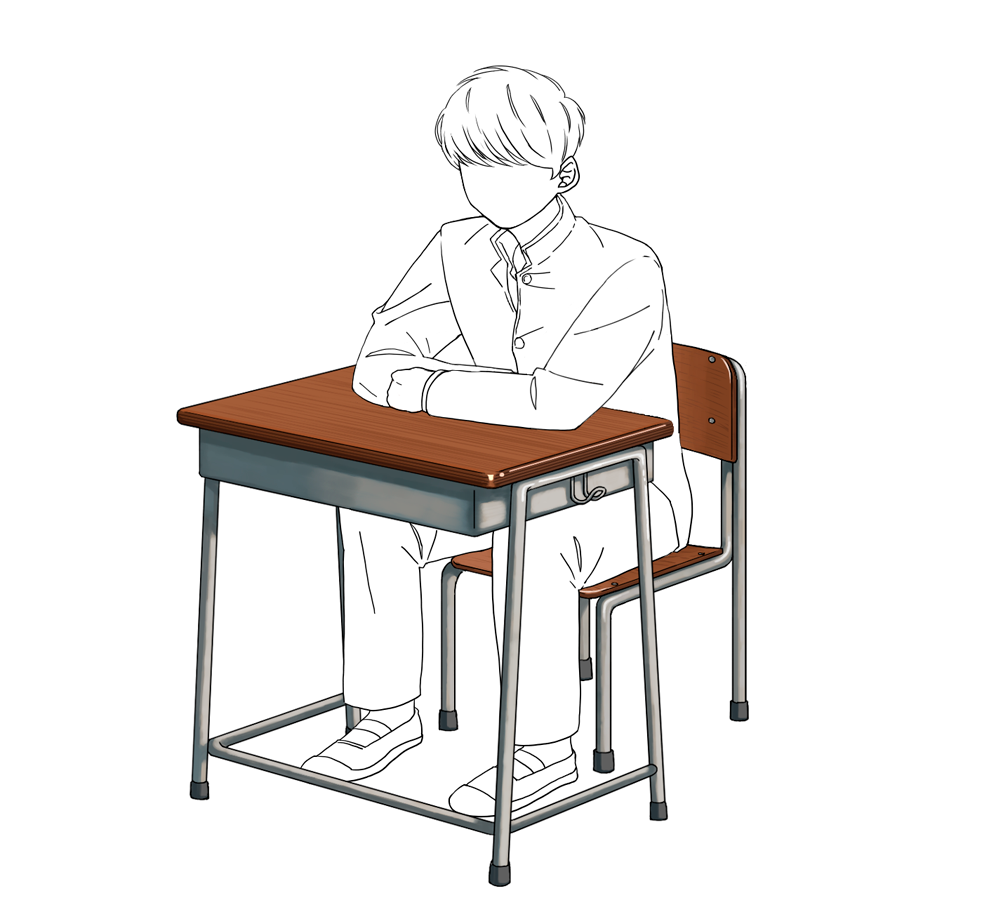
I’ve also drawn him bent forward with his arms resting on the desk.
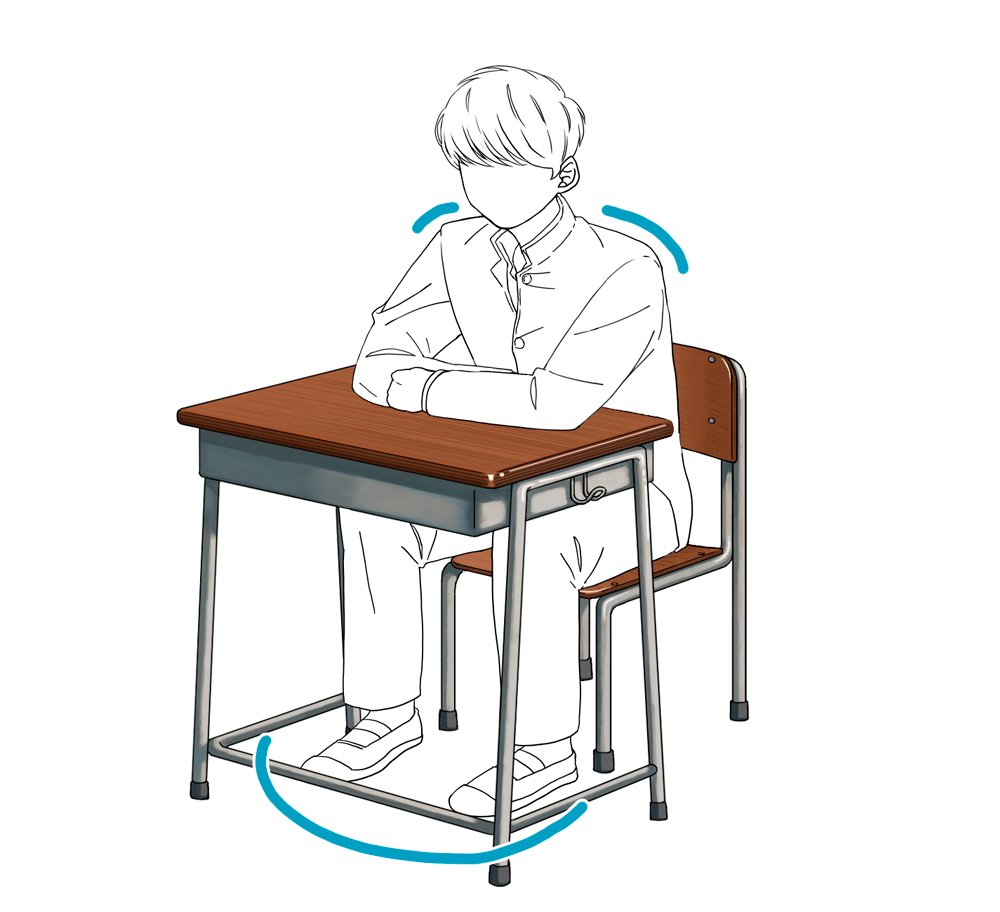
Don’t make the shoulders shrugged and keep it rather natural.
Draw the feet hip-distance apart as well.
As for the sitting position, draw male characters to be sitting more deeply at the back.
By portraying him to be sitting down heavily, the character will become more masculine.
I recommend making use of such tiny details to illustrate the difference between female and male characters.
How was this tutorial ?
I described the steps for drawing a school desk as well as how to draw characters sitting down.
I hope you can use this article as a reference for when you want to draw students or when you want to add a school themed background to your illustrations !
Thank you for following this tutorial until the very end !
(Text・Illustration/荒金ひろみ)
\ We are accepting requests for articles on how to use /


