2023.05.19
[For super beginners] Draw with your smartphone! Techniques for line drawing with your fingers
 With video
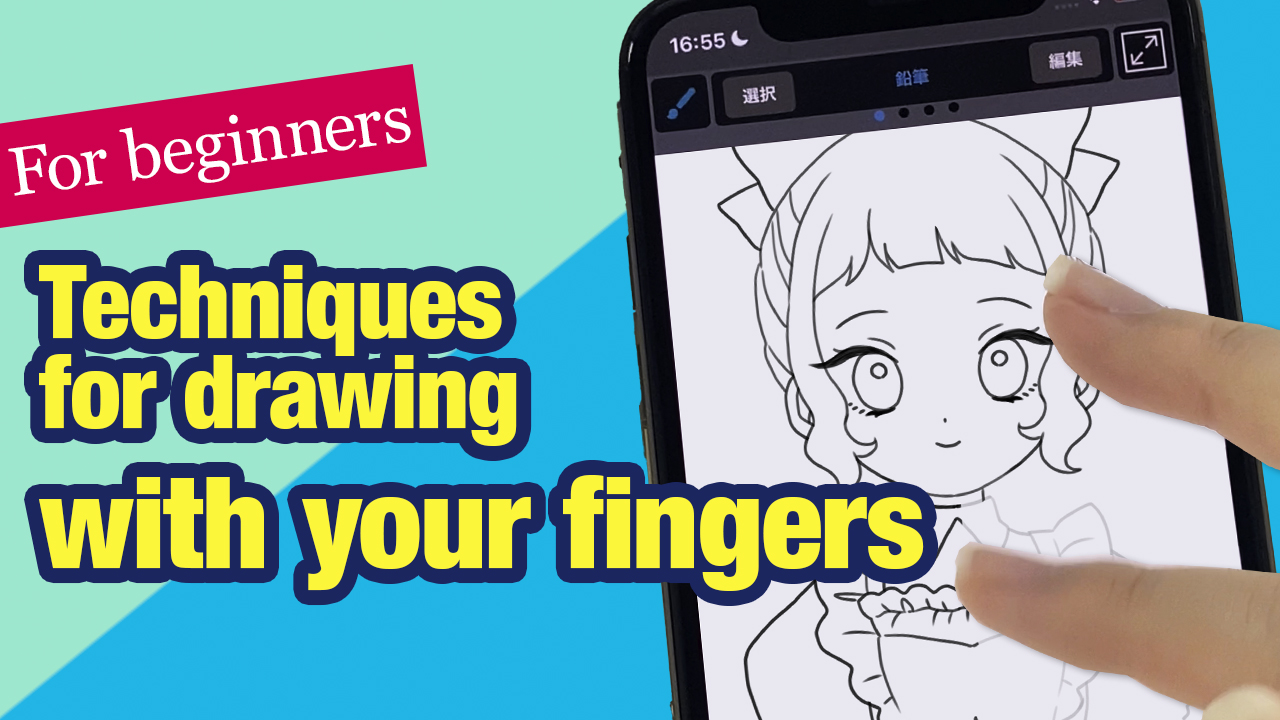
“Drawing on a smartphone is so difficult…”
“I would like to start drawing on my smartphone, but I don’t know how…”
Do you have these problems?
Smartphones have smaller screens than PCs or tablets, and you may find it difficult to draw on them.
However, you can easily have fun drawing with your smartphone by learning a few quick tips or ways to use some tools!
Today we are going to learn the 7 tips for drawing better line drawings with smartphones.
You don’t need a pen, use your fingers for the whole drawing process.

We will use the practice material above.
This material is available from MediBang Library.
Set the image stabilization
Image stabilization is a useful feature that automatically corrects blur caused by hand movement.

The higher the value, the more sensitive the function will be to detecting and correcting blur.
Too much sensitivity can make drawing uncomfortable.
Find the value that you find favorable.
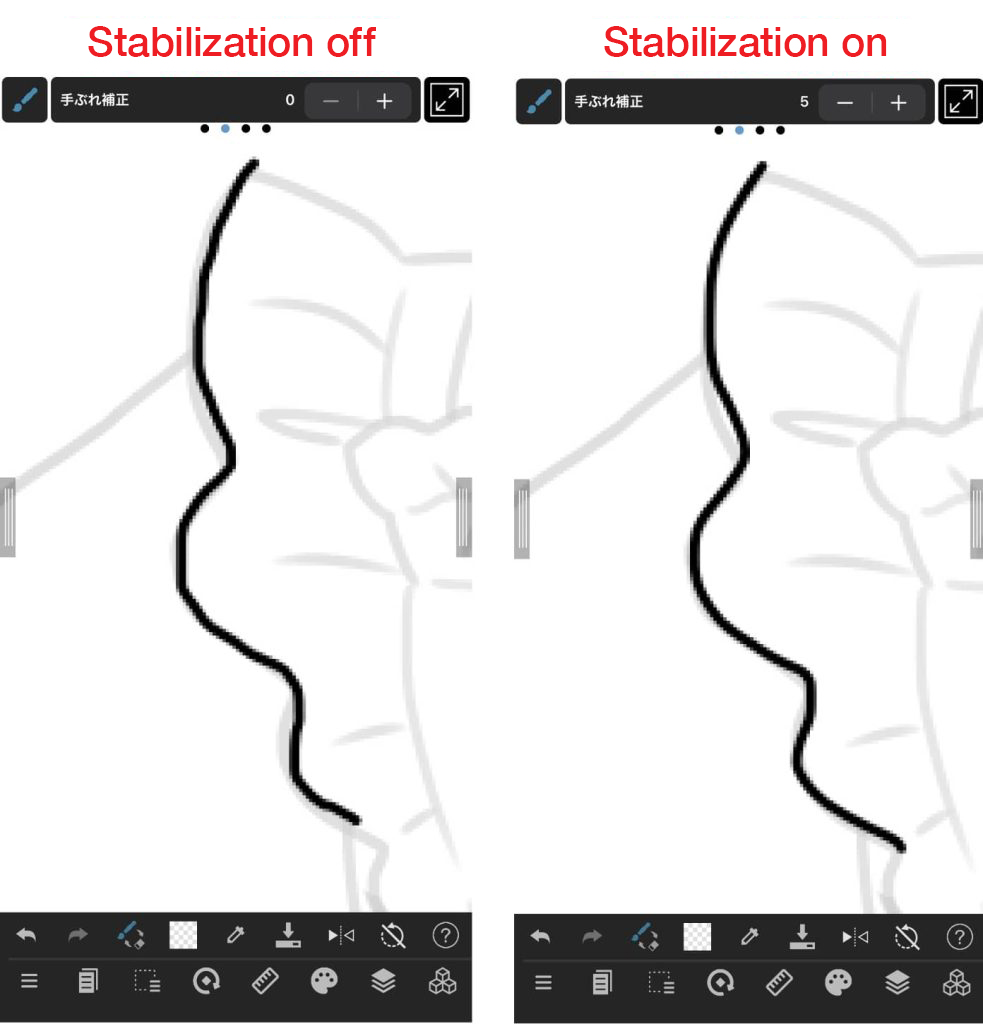
I usually set the value to 3 to 5.
Read this article to learn more about image stabilization↓
https://medibangpaint.com/en/use/2019/08/use-correction-to-draw-beautiful-lines/
Draw lines with long strokes
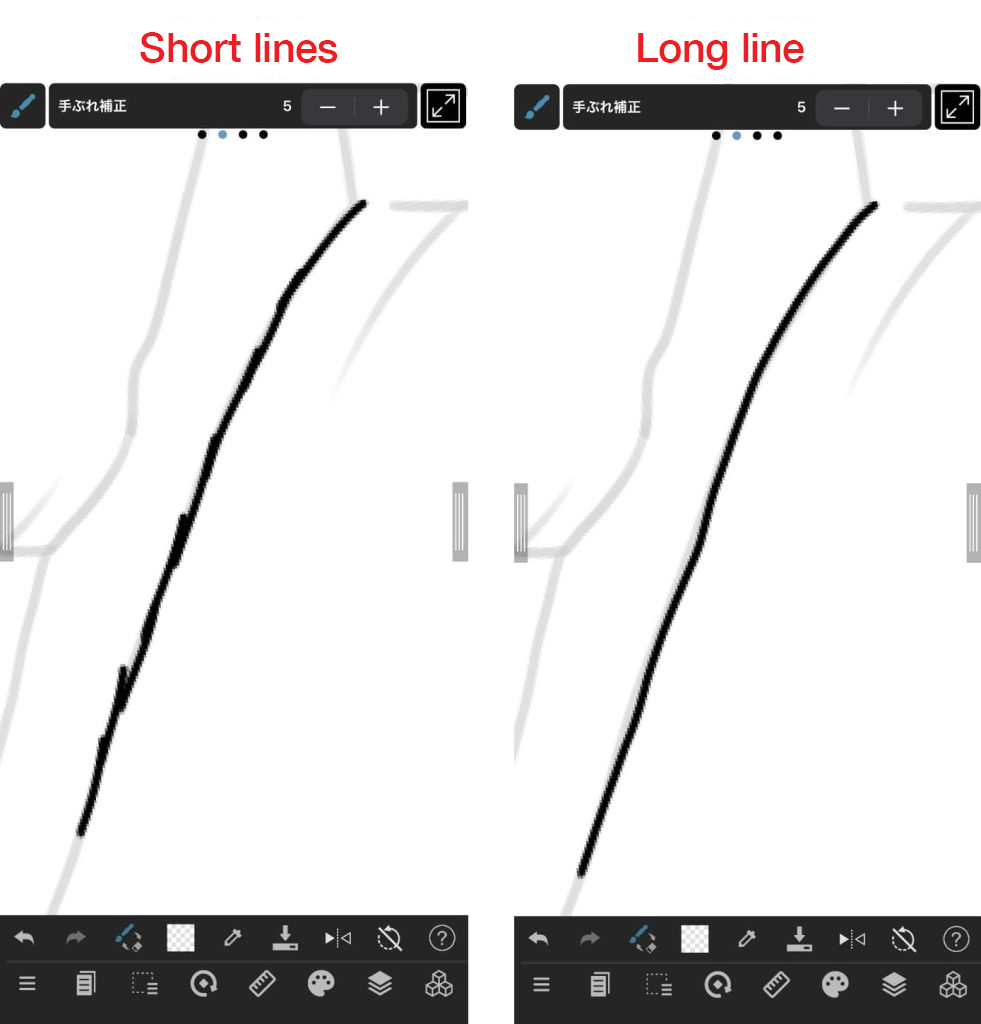
If you draw pictures by drawing lots of short lines and connecting them, the line will look ugly because the stitching lines will be visible.
Practice until you can draw long lines with a single stroke.
Make full use of the transparent color
As for odd-shaped seams, make them even by erasing them, not by redrawing them.
Don’t use the eraser tool. Use brushes with the transparent color so that you can erase them with the same width as the brush you are using. It’s useful, I recommend it.

By adding it to the shortcut, you can make it easier to switch instantly.
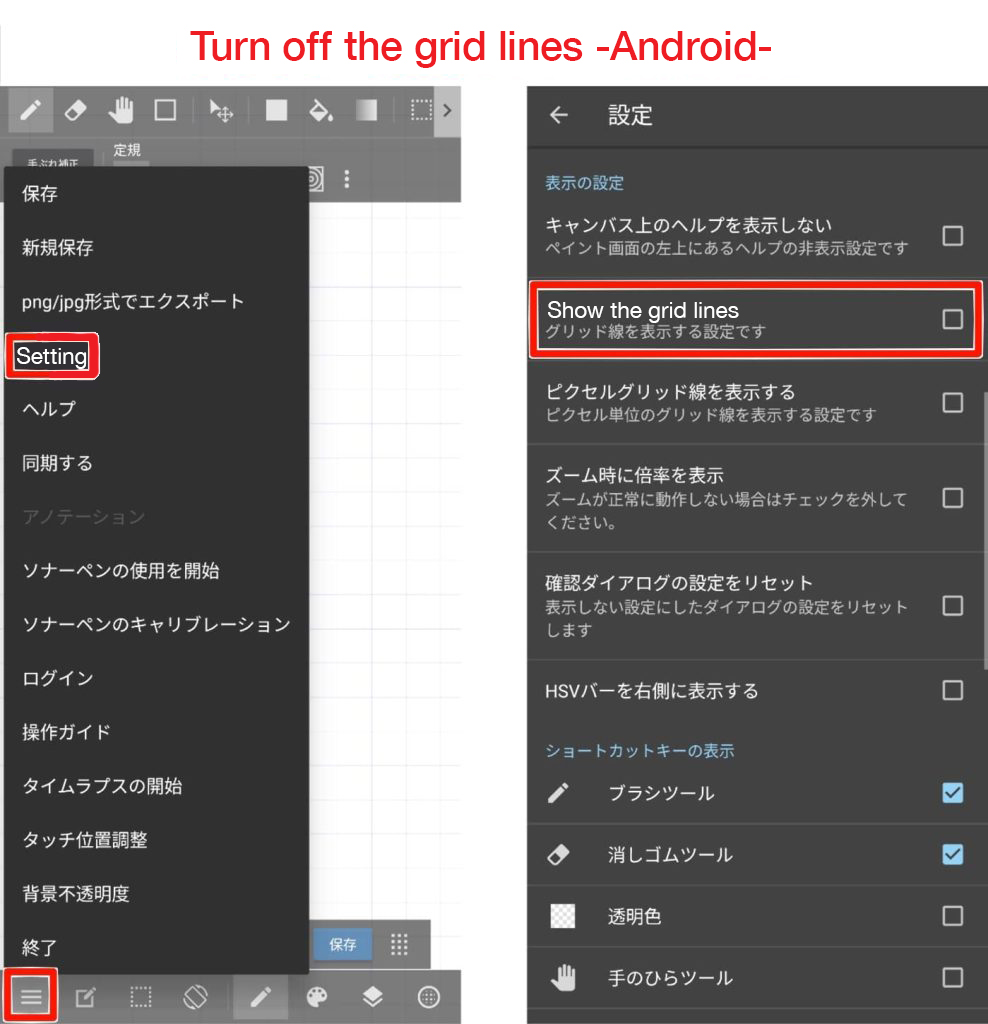
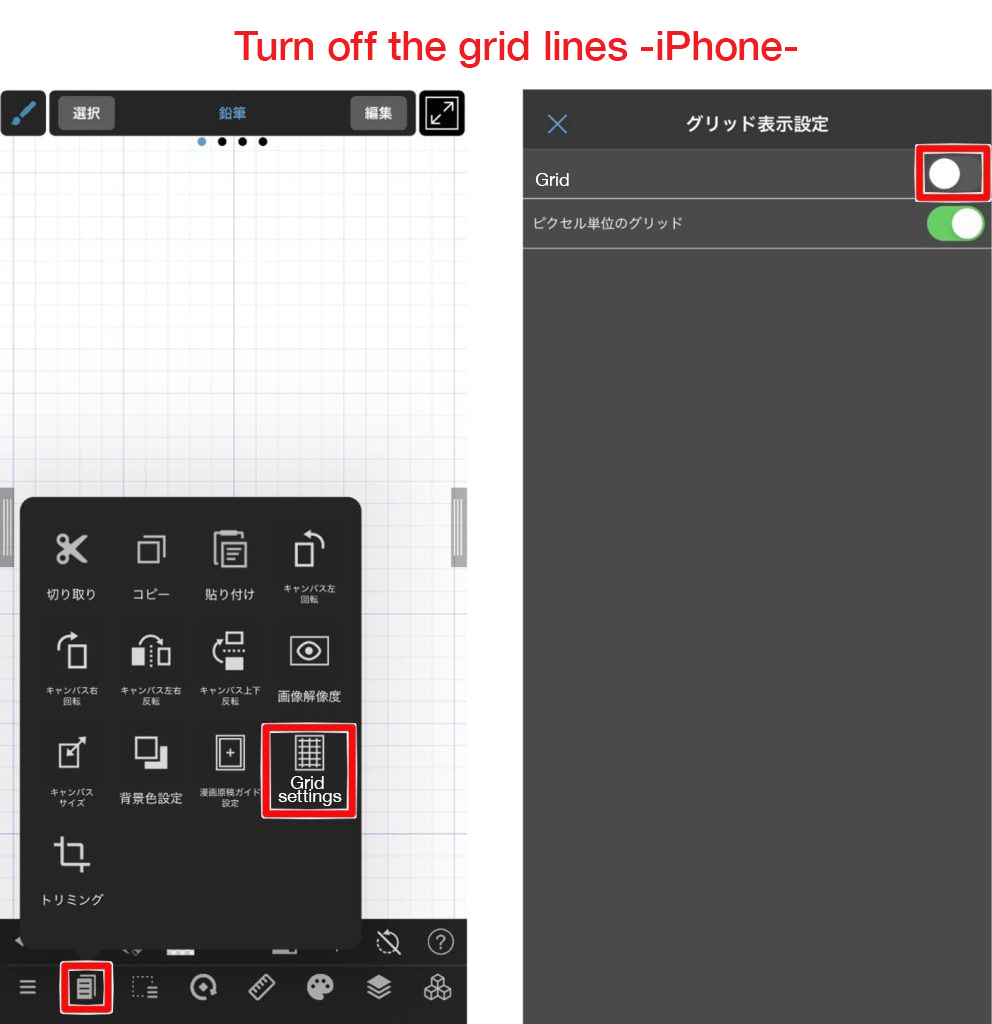
Turn grid display on/off
If you zoom in on the canvas at a high level, you will see grid lines on the canvas.
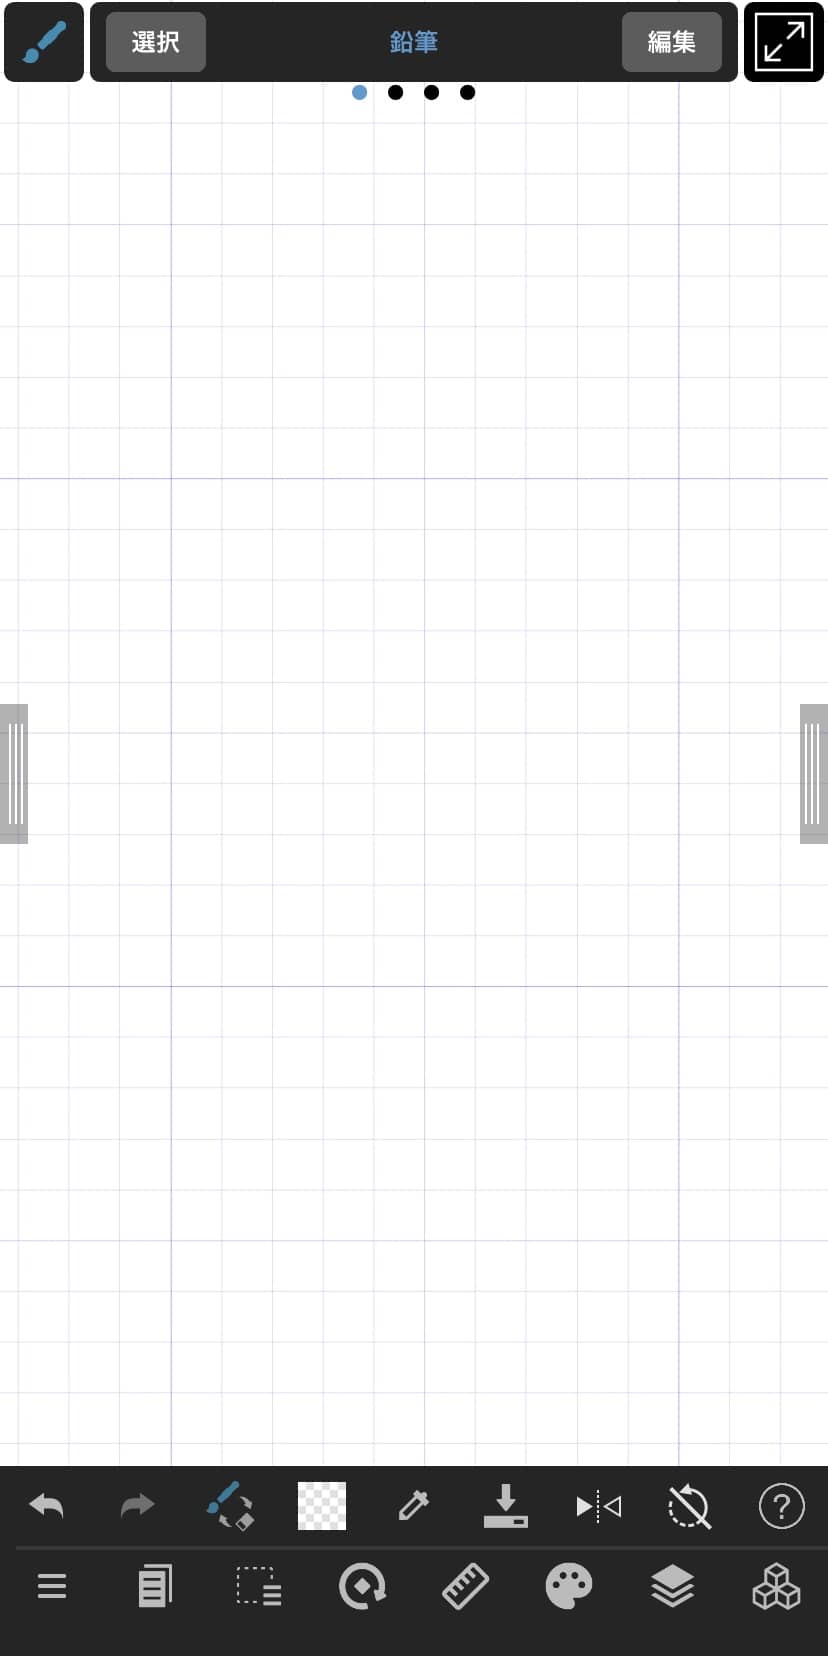
Turn off the grid lines if you find them distracting.
Rotate the canvas
You can also rotate the canvas while drawing to make it easier to draw.
You can rotate the canvas by pressing and holding the screen with two fingers.

It’s easier to draw lines from the top of the canvas down.
That’s why it’s a good idea to rotate the canvas as you draw.
Curved lines of the Shape tool
I’ve told you before that you should draw as long lines as possible.
But I know that drawing long lines is not so easy.
This is where the Curved Line tool in the Shape tool comes in handy.
With Curved Lines, you can draw beautiful curved lines just by touching the screen.

Click on areas along the rough line drawing to define some starting points.
Adjust the order of some circular markers to…

Draw a smooth curved line in the blink of an eye!
You could use this tool until you get used to drawing lines on your own.
*But remember, you won’t improve your lines without practice.
Use this tool wisely, for example, use the Shape tool in the rough sketch stage and draw the lines yourself in the inking stage.
Flip Vertically
Now, the left half of the line drawing is completed.
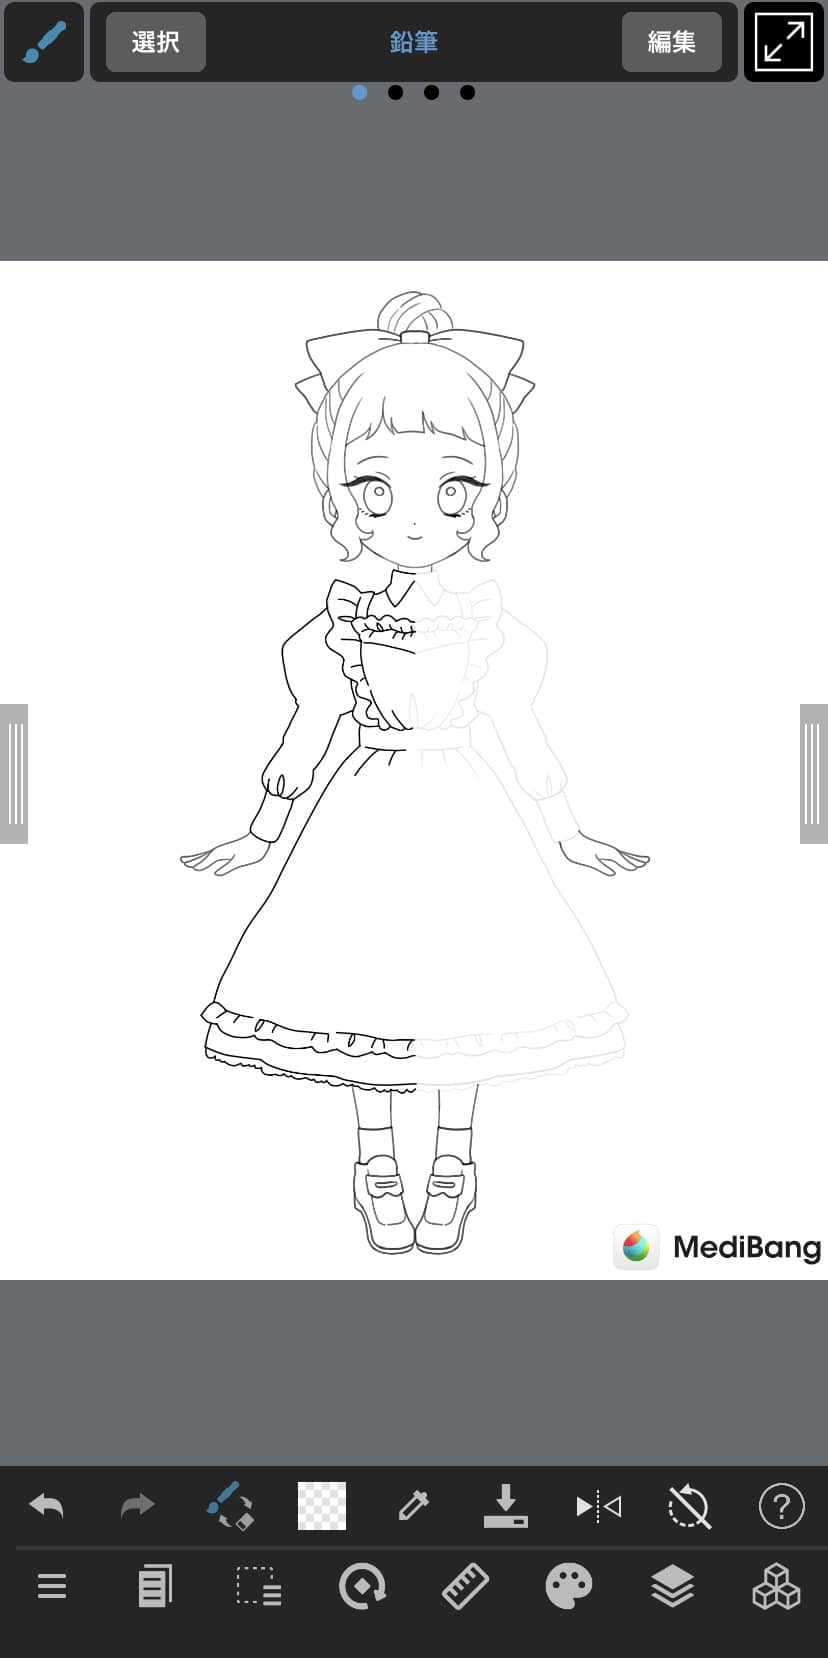
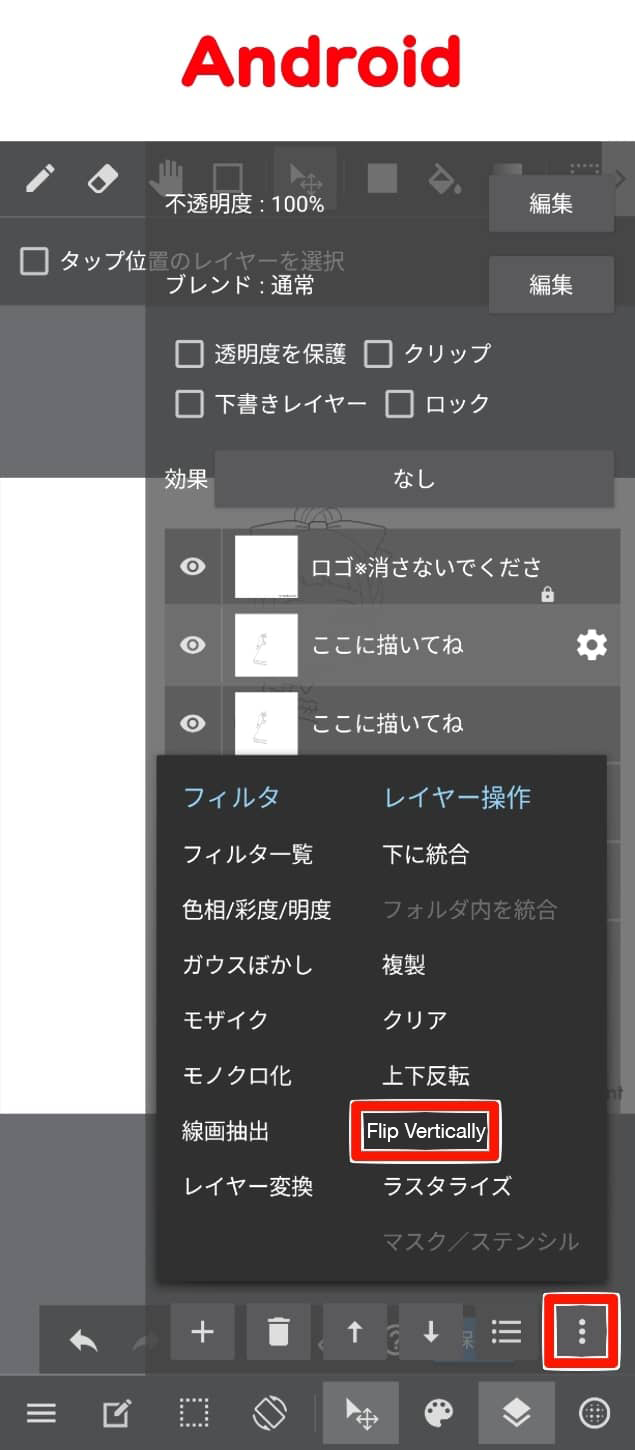
Let’s use the Flip Vertically feature.
Duplicate the line drawing layer and select the Flip Vertically from the Transform tool.
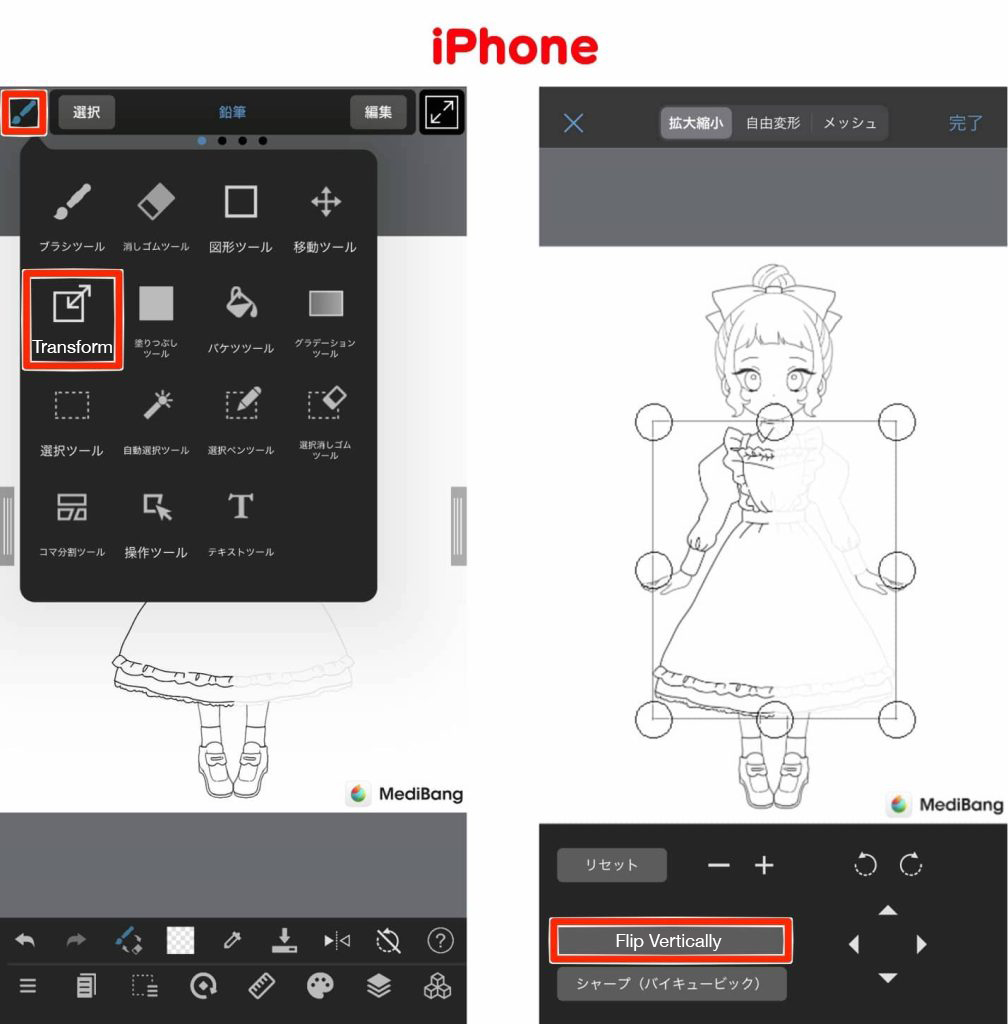
Use the Move tool to adjust the position, and now we’re done!

Flip Vertically can only be used for illustrations where the characters are facing forward, but it is a useful feature, so make full use of it.
Conclusion
How do you like this article?
Drawing a lot is essential for improving your art.
There are many more articles on drawing with your smartphone.
We hope you will find them useful♪
[For beginners] Two tips for drawing line art without pressure sensitivity [For smartphones].
[For Beginner] Let’s Try a Line Drawing (1) Basic Drawing Method and 5 points [Smartphone]
Watch the video to see the whole process
▼YouTube
(Text, Illustrations / あかね)
ART street:https://medibang.com/u/AkaneMB/
\ We are accepting requests for articles on how to use /


