MediBang Paint’s Transformation Tool allows you to alter your art in a variety of ways.
Access the Transformation Tool by clicking “Select” → “Transform” from the menu, or click CTRL+T for Windows/Command+T for Macs.
Expand, shrink, and rotate are some of the most basic transformation functions.
When you activate the Transformation Tool, its toolbar will display at the bottom of the main window.

You can choose the interpolation setting from the drop-down list on the right of the transformation tool bar.
There are three interpolation settings.
Choose according to your taste.
Click the button below to download and open a sample MDP file to follow along with.
Now, select the “line(face)” layer and click “Select” → “Transform” from the menu.
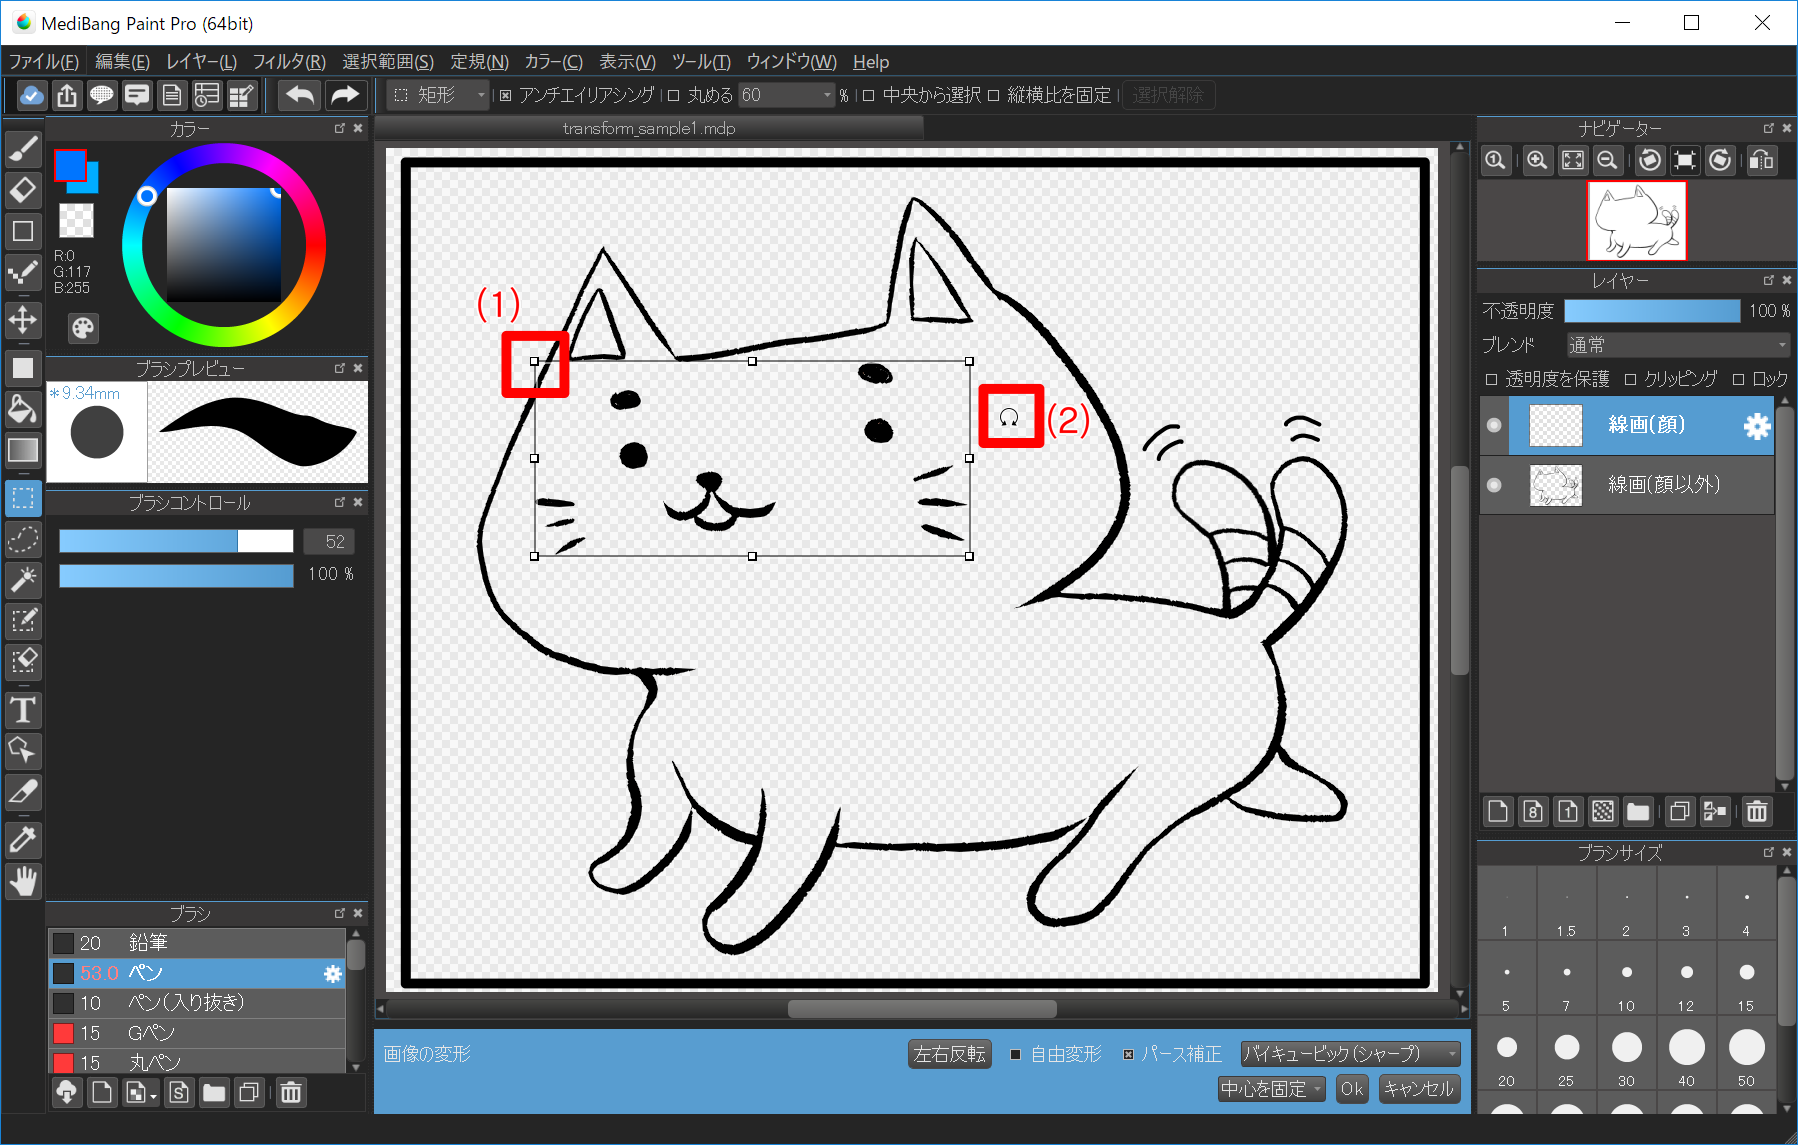
Start “Transforming” the image by dragging the “Transform” is done by dragging the circular reticles (1) displayed around the image.
To rotate the selected part, simply move the cursor to the outside until it changes to a steering wheel (2).
Use the reticles to enlarge the selected area, rotate it, and more. When you are satisfied with the result, click the “OK” button on the Transformation toolbar.
If you do not like the results and want to revert to the previous state, press the “Cancel” button.
Use MediBang Paint’s Free Transformation tool to scale, rotate, and adjust your work without having to redraw a single line.
Click “Select” → “Transform” from the menu and click the “Free Transform” box on the Transformation toolbar to activate the feature.
Click the button below to download and open a sample MDP file to follow along with.
Next, select the “cat” layer and click “Select” → “Transform” from the menu.
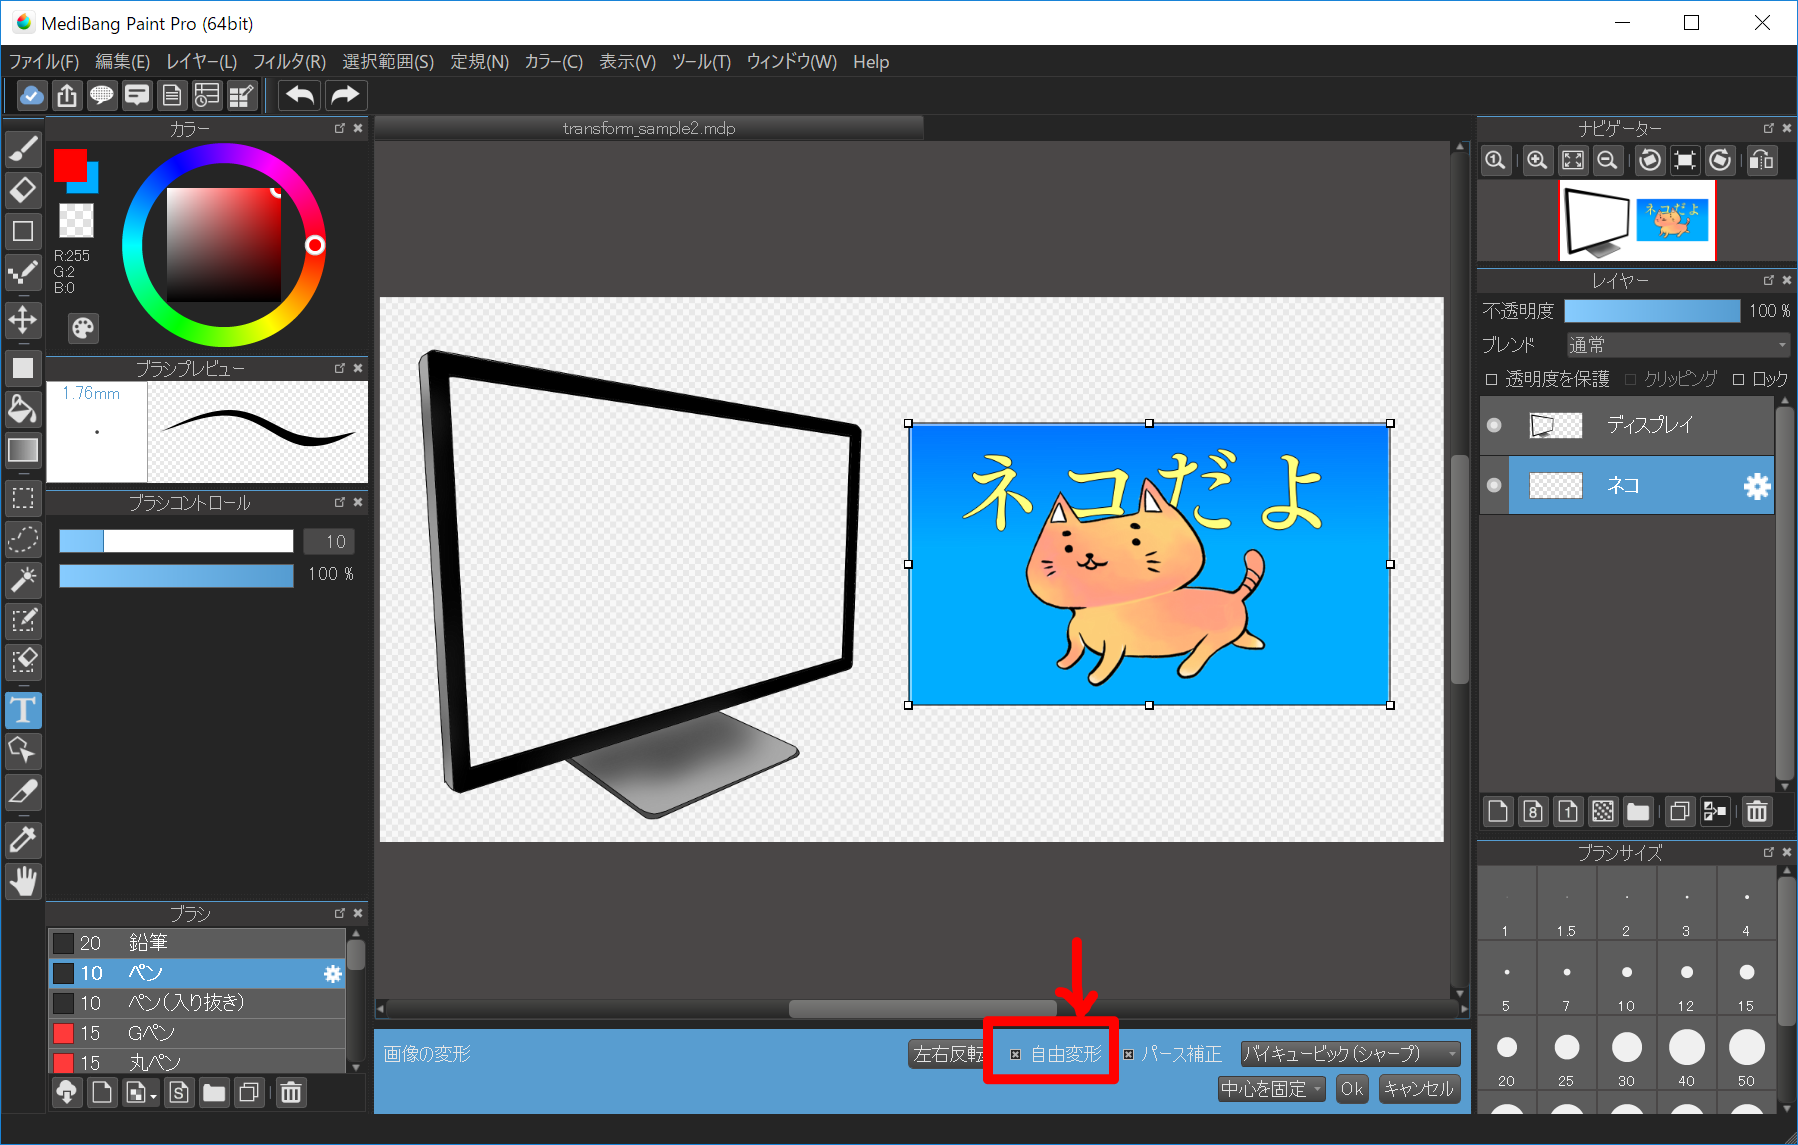
Then check the “Free Transform” box. Now you will be able to transform the cat image to fit in the display.
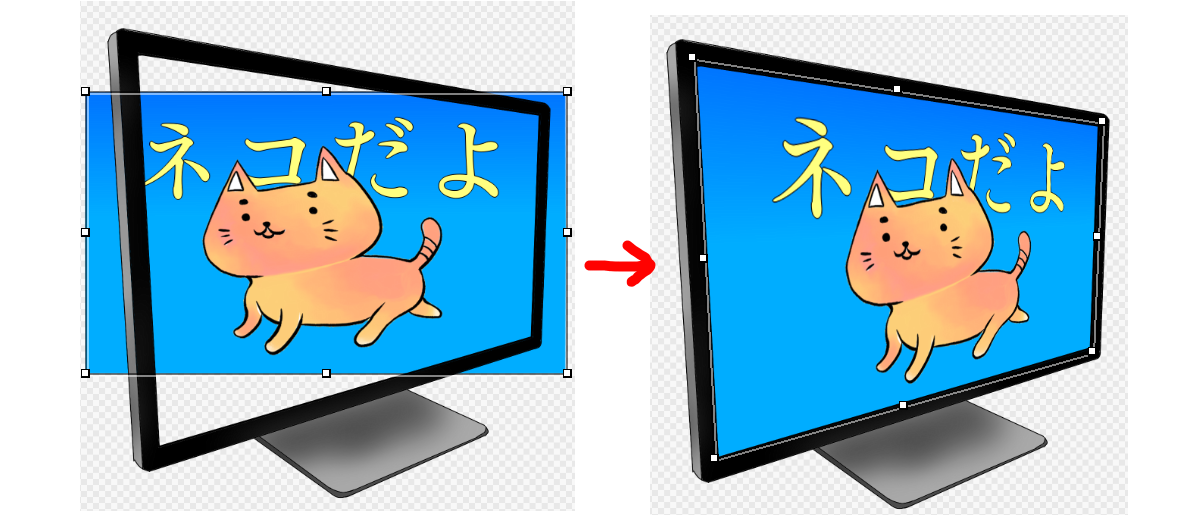
Move the reticles to match the corners of the computer display on the canvas.
Now, change the “Perspective” setting and see the difference.
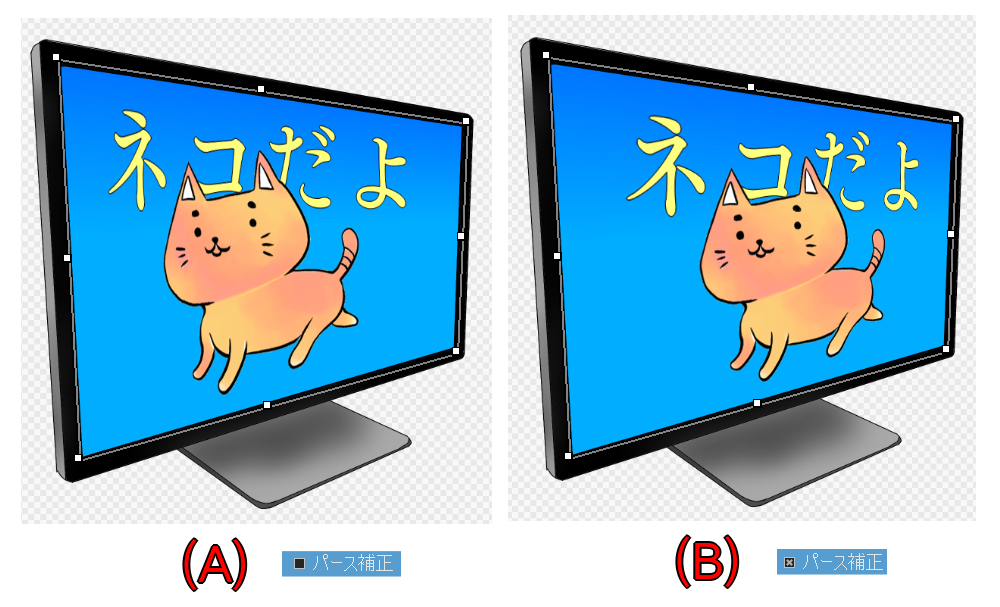
Due to the perspective depth of the computer display, the result of Free Transform with the Perspective setting checked is the one that appears more natural.
When you are satisfied with the results of Free Transform, please click the “OK” button on the Transformation toolbar.
Medibang Paint’s Mesh Transformation tool makes it easy to tweak even the smallest parts of your artwork.
For details click here.
Click the button below to download and open a sample MDP file to follow along with.
Click “Select” → “Transform” from the menu and click the “Mesh Transform” box on the Transformation toolbar to use.
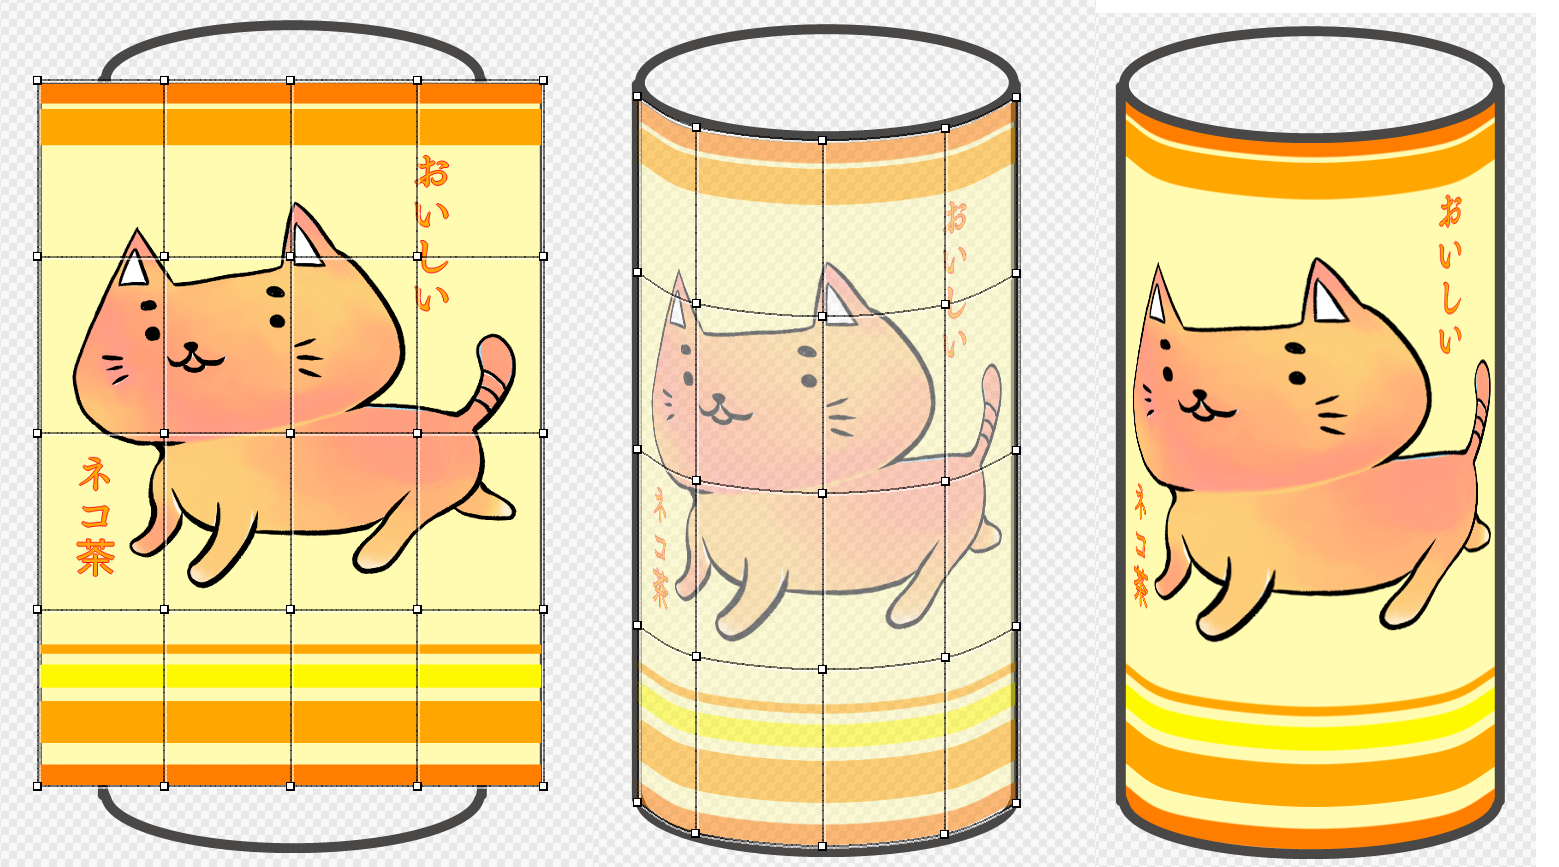
Use Mesh Transformation to apply the “cat tea” label onto the can. Let’s transform the sample “cat tea” layer mesh and put it on the picture on the “can” layer as a label.
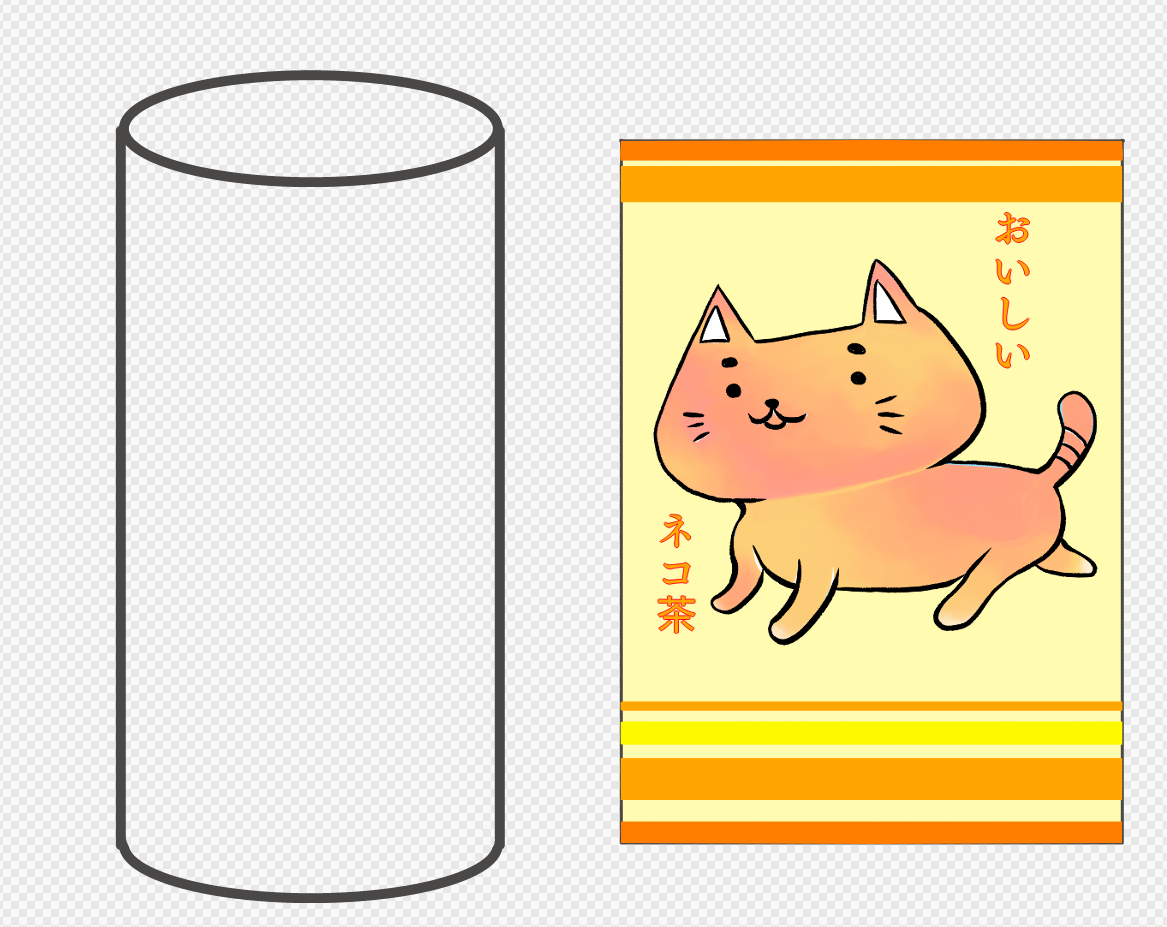
Select the “cat tea” layer and using “Mesh Transform” move it on the can.
Now, let’s warp the image according to fit the shape of the can. To make this easier, check the “Vertical Link” box.
Your creativity will be more special!
MediBang Paint's new service,
Unlimited use of exclusive brushes and
materials,
full access to MediBang Paint,
and many other benefits to help your
creativity.
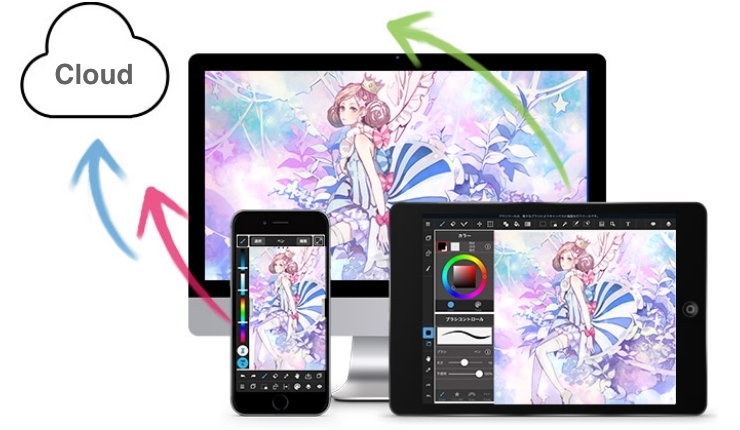
We introduce cloud features available on MediBang Paint.

We introduce specific examples of team production using MediBang Paint and mangainem.

We introiduce "JUMP PAINT", JUMP's official soft and app for manga creators.