2021.03.31
[Easy Tips] How to Draw Sword Poses [Enhance Your Character]
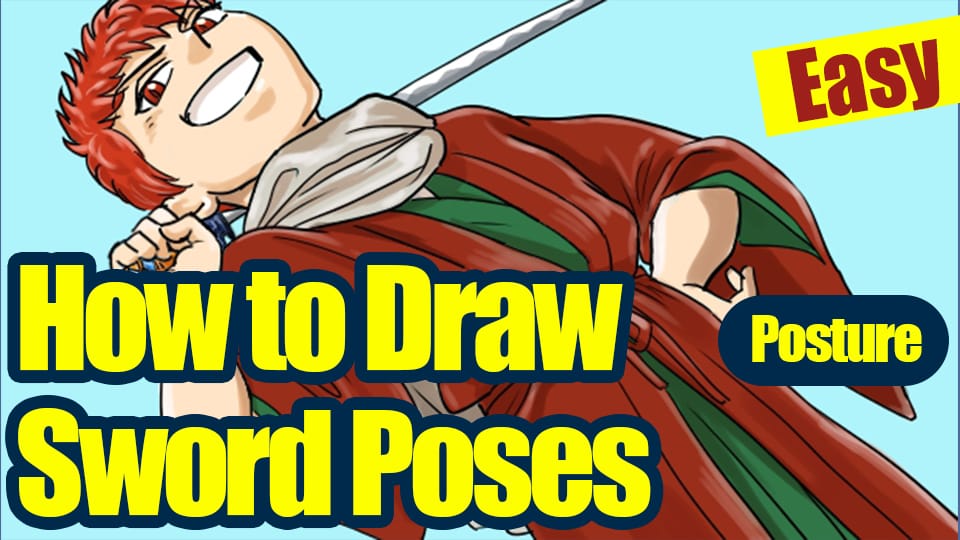
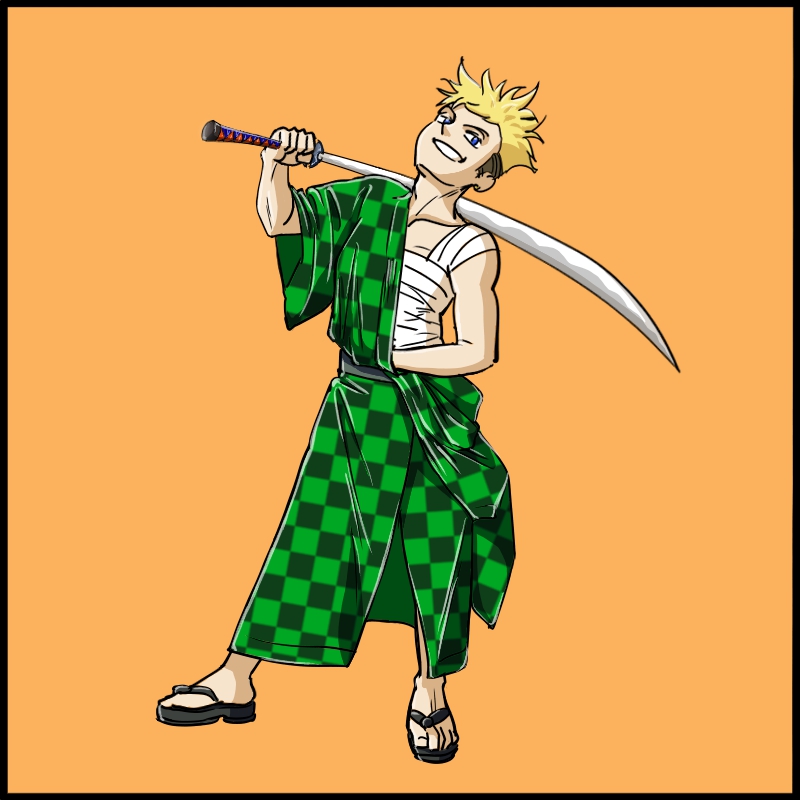
This time, I’d like to draw a figure standing with a sword in his hand.
It may seem easy enough to just hold a sword in your hand, but this time let’s try to make the pose more characterful!
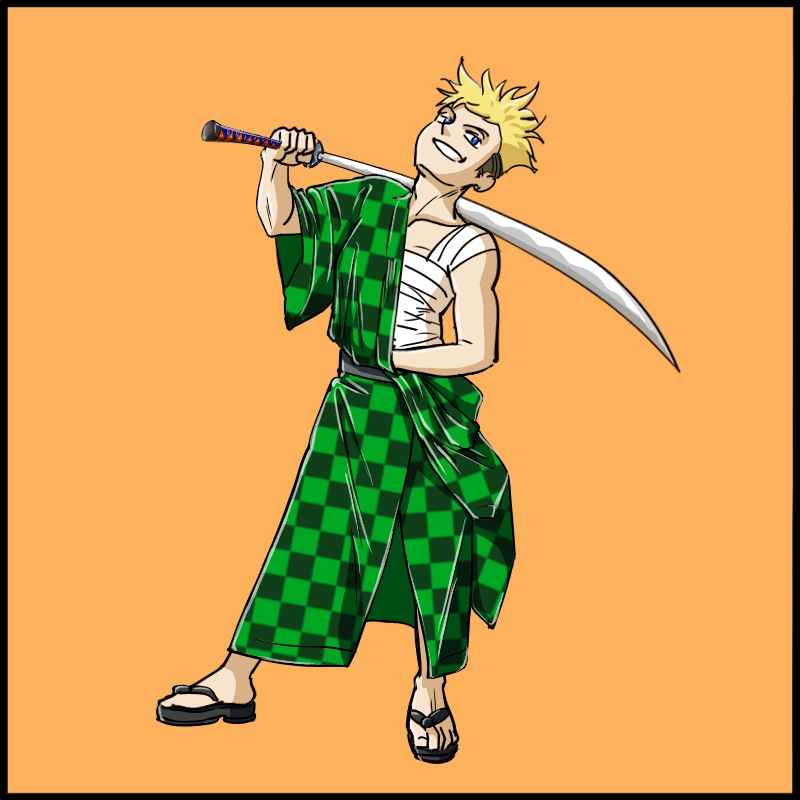
Let’s compare the finished product and see what kind of difference it makes.
1. Split the canvas
First, let’s do some prep work.
A good prep will make the rest of the work easier.
After placing a new canvas of the desired size, select the “Pen” brush tool.
(The captured image is from the PC version.)
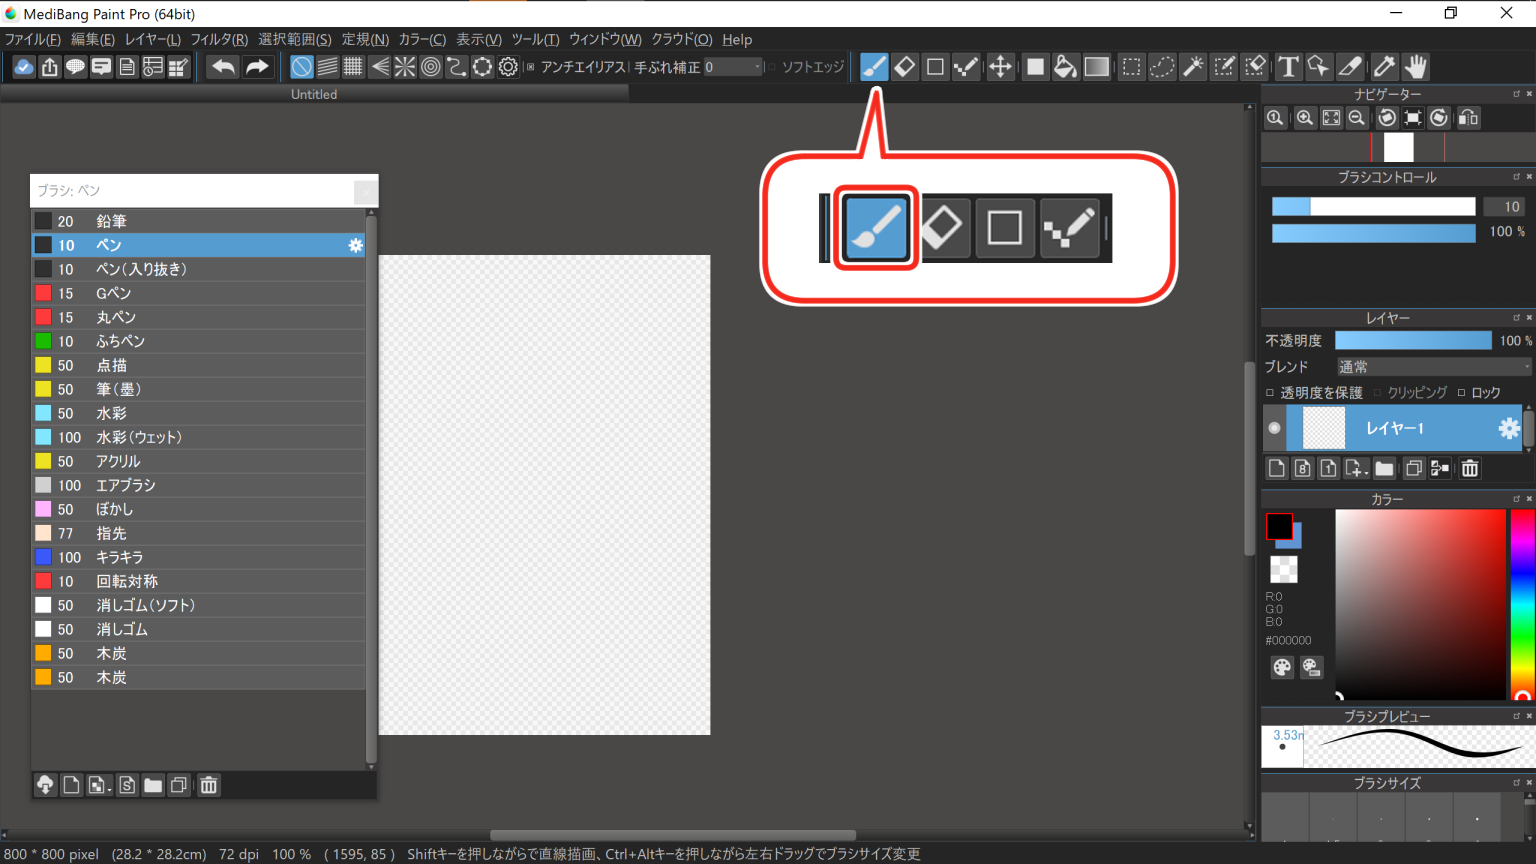
After selecting the “Split” brush, press the gear symbol to open the brush settings and set the “Vertical Split” and “Horizontal Split” values to 2 respectively.
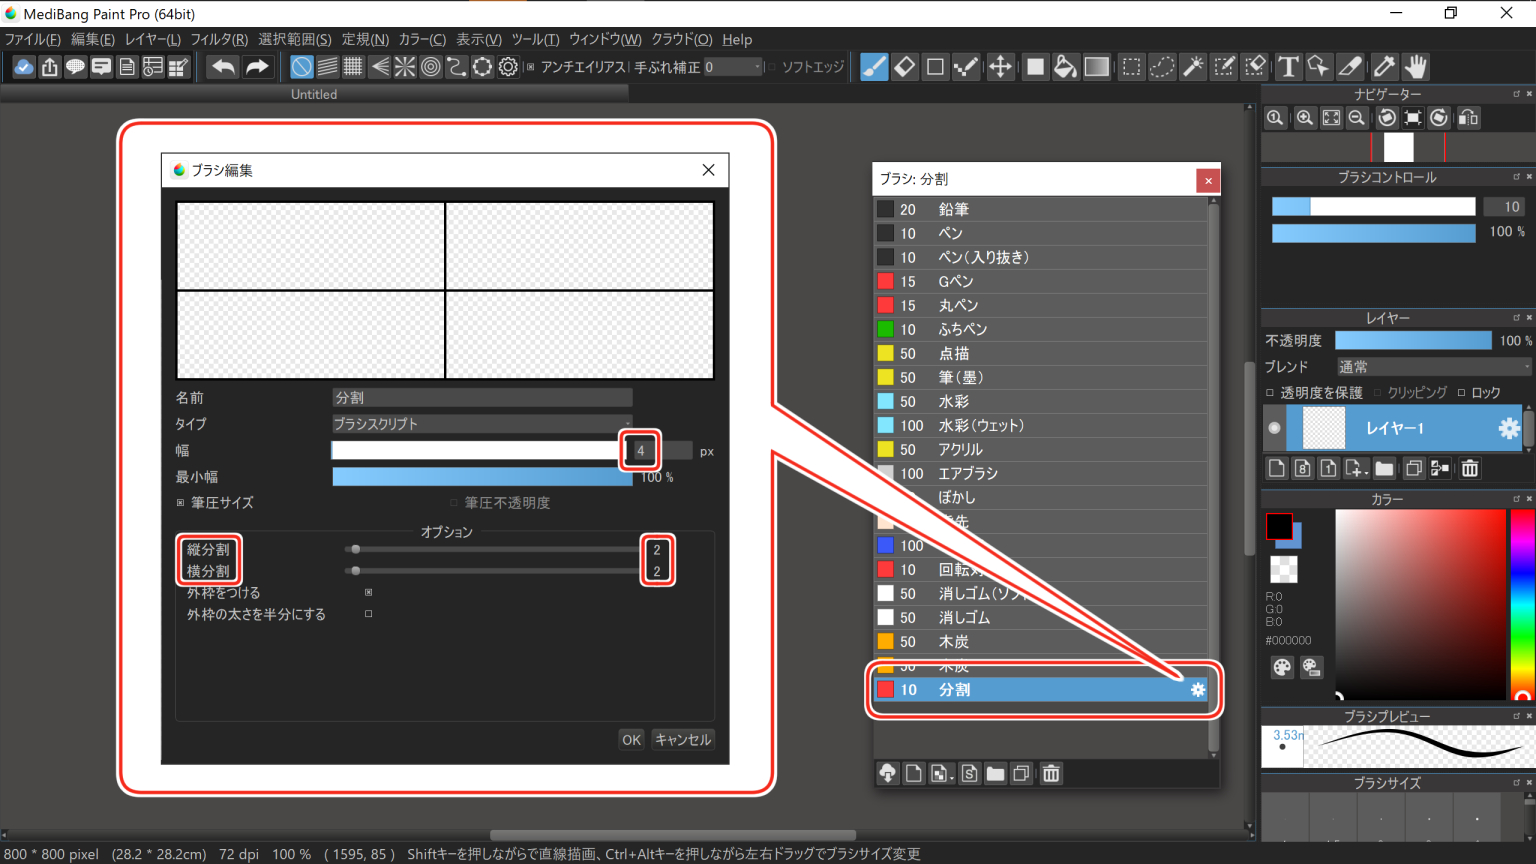
Now, press a button anywhere on the canvas.
The canvas will then be neatly divided into four sections.
Choose a color that is easy for you to understand, considering that you will be overlaying a draft on top of this.
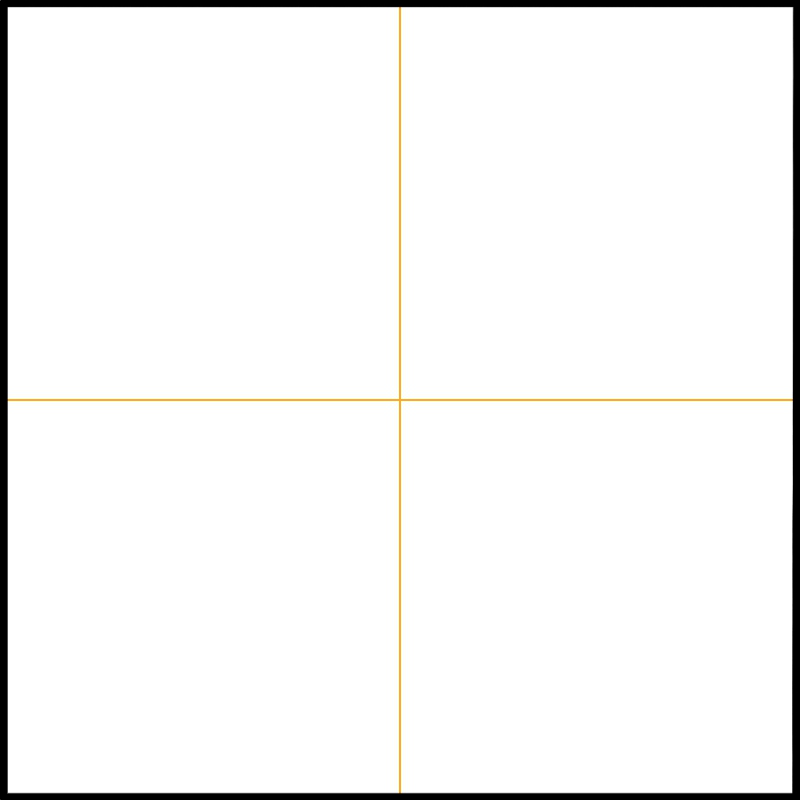
The image has a black outer frame for clarity.
The canvas can be portrait or landscape.
We will use this center point as the waist of the person.
We don’t need to make it the center of the canvas this time, but this method is convenient because you can always easily find the center point of the canvas.
If you want to know how to use the tool, check out this page.
『MediBang Paint iPad Tutorial』
You can also learn more about how to use it on your iPad or other screen.
(You can choose between PC, iPad, iPhone, and Android versions.)
This time, create a new layer, change the Split Brush setting to “Vertical Split 9”, and click on the canvas again.
You should now have a screen like the one shown in the figure.
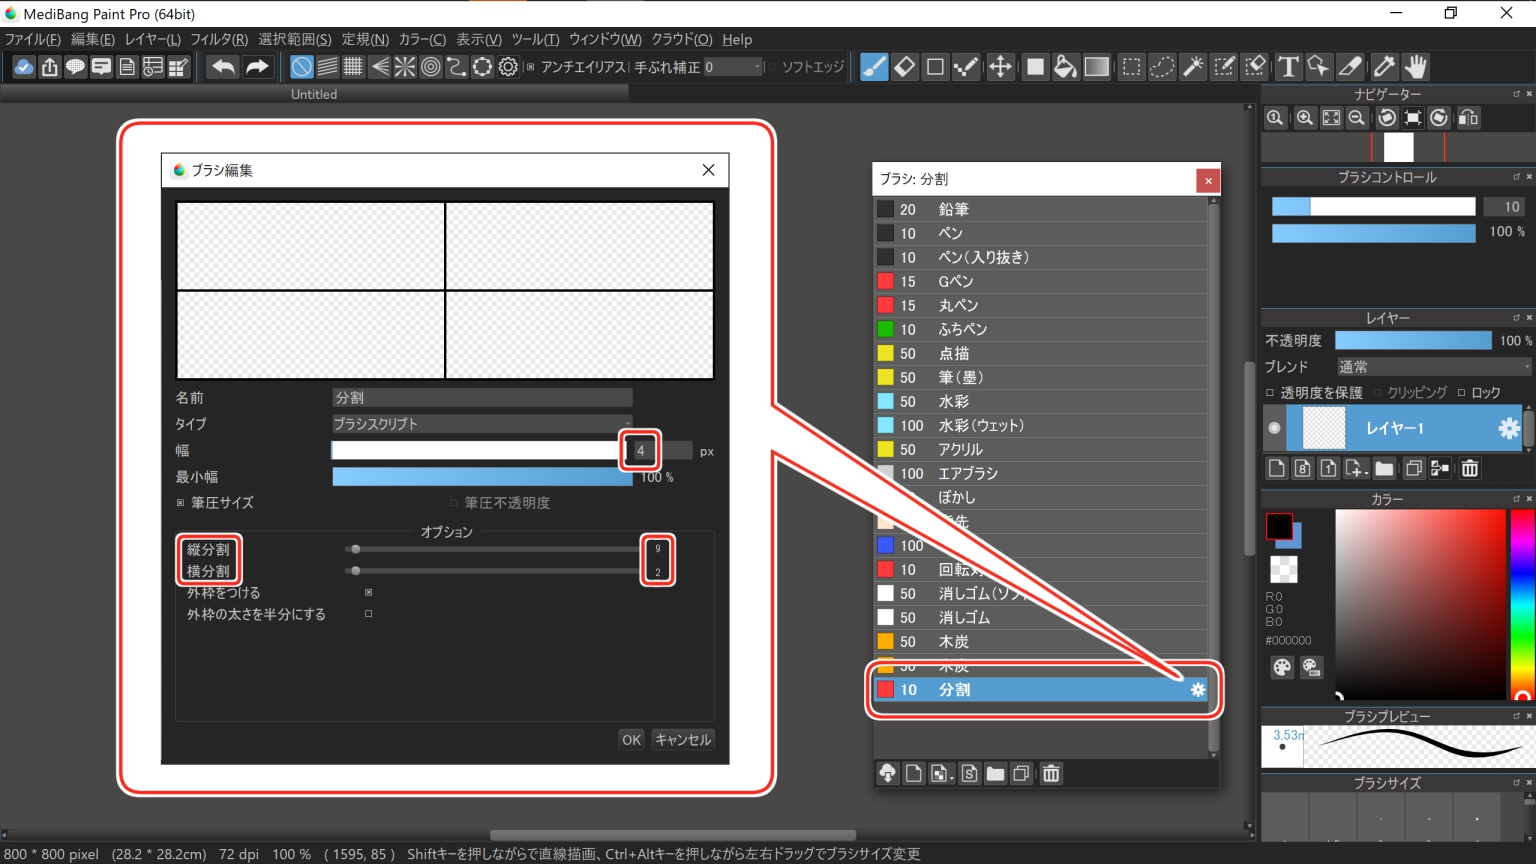
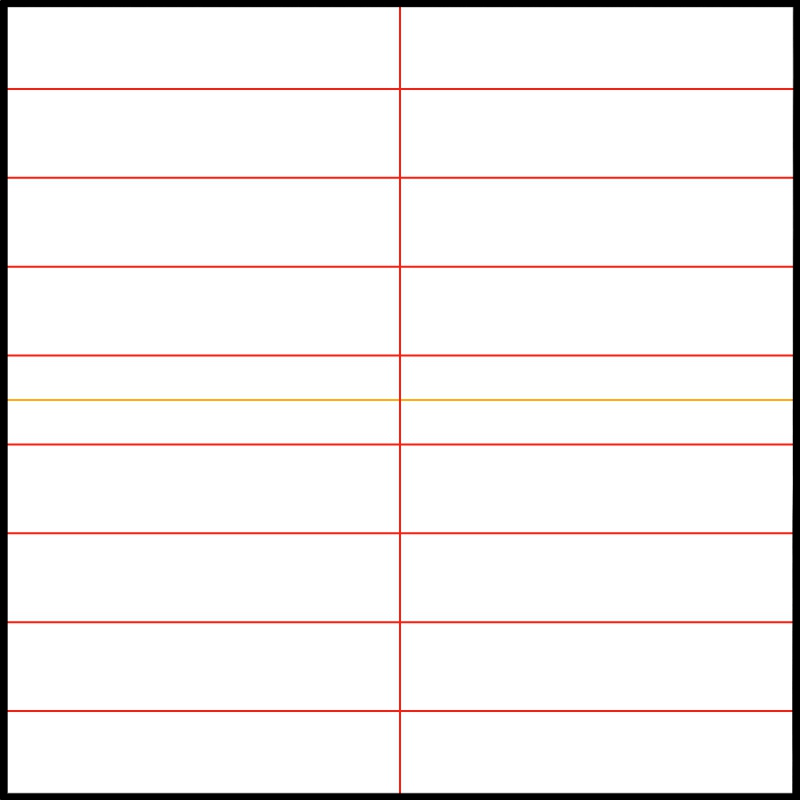
The colors have been changed for clarity.
This leaves the top and bottom margins and divides the screen into seven equal parts vertically.
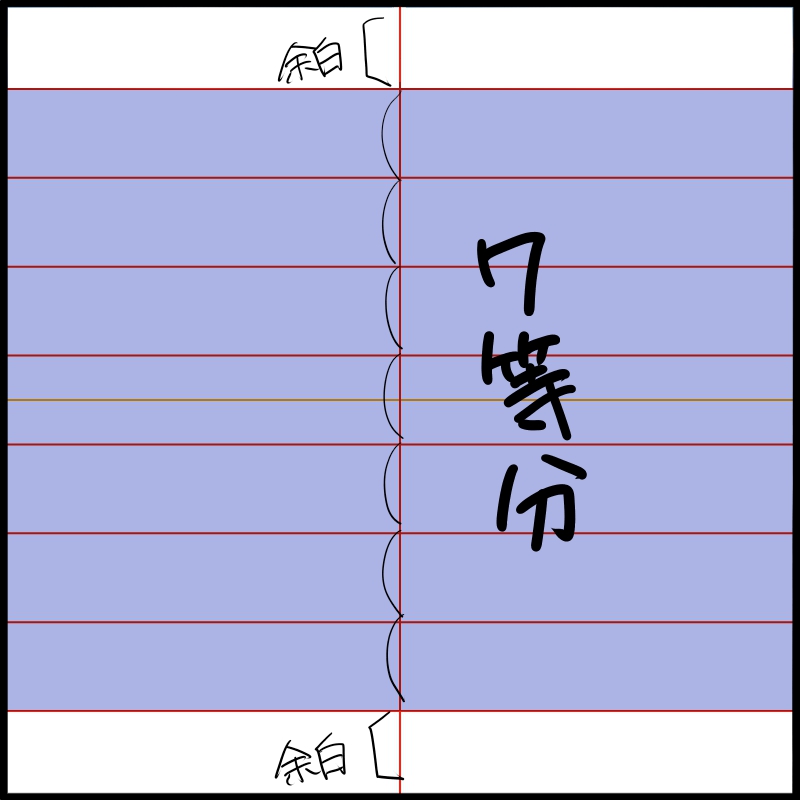
This is to make the person you are about to draw a 7-headed figure, but if you want to change the equal height to your liking, please set the vertical split value at +2.
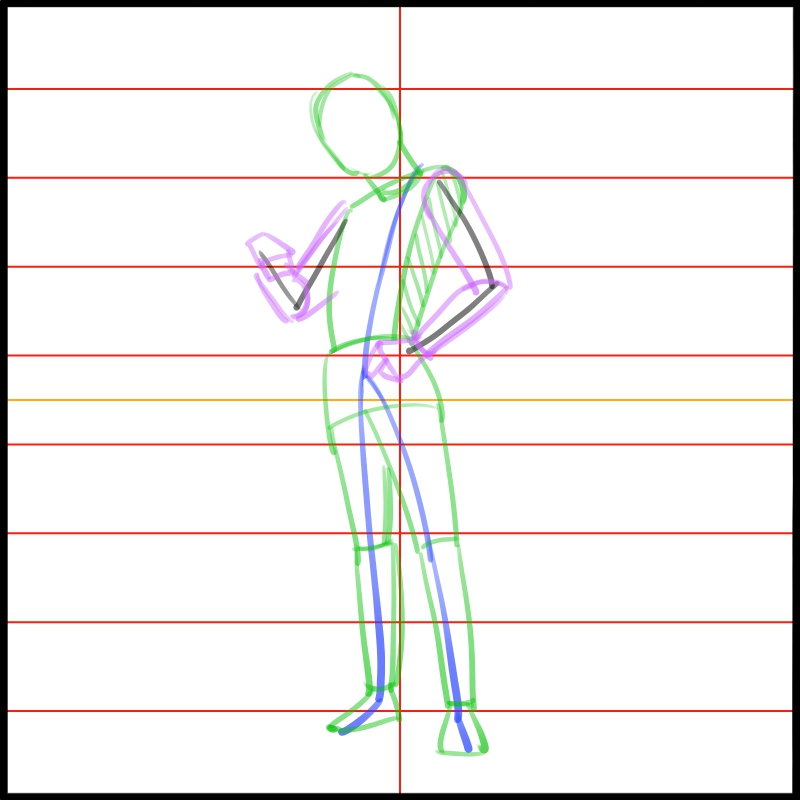
2. Draw a stick figure
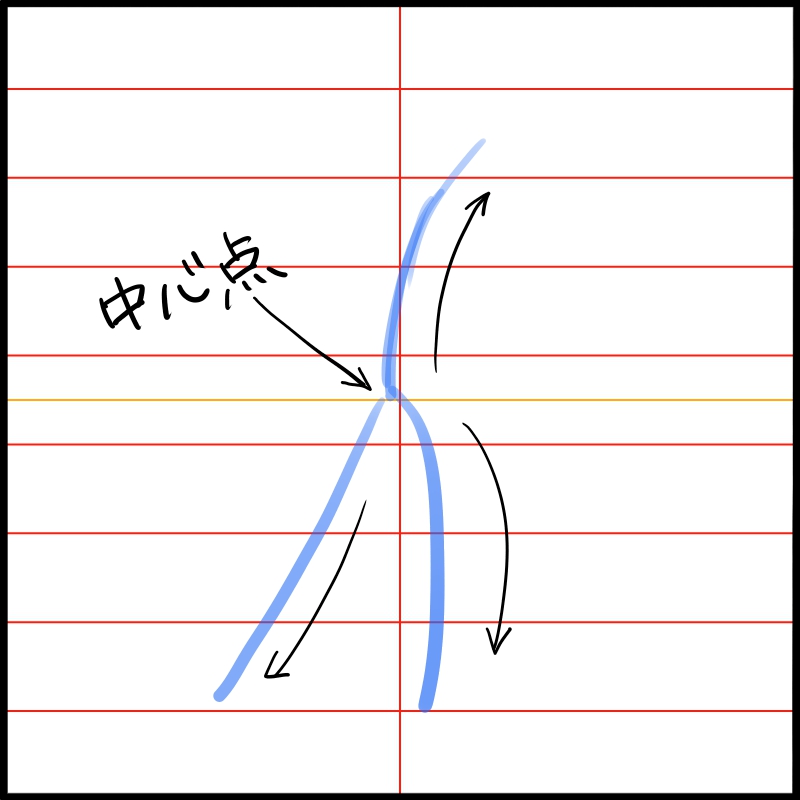
Before drafting, let’s draw a stick figure to serve as a guide line.
Place a new layer and select the brush pencil.
We will draw the guide lines for the upper and lower body.
Set the center point as the waist and draw three lines, each in an arc.
Be aware that your weight should be on the right side of the screen, and be careful not to let your upper body jump too far to the right.
The rest of the picture can be drawn roughly without worrying about the details.
3. Draw the body parts
Now it’s time to draw a rough draft using the guide lines we’ve created!
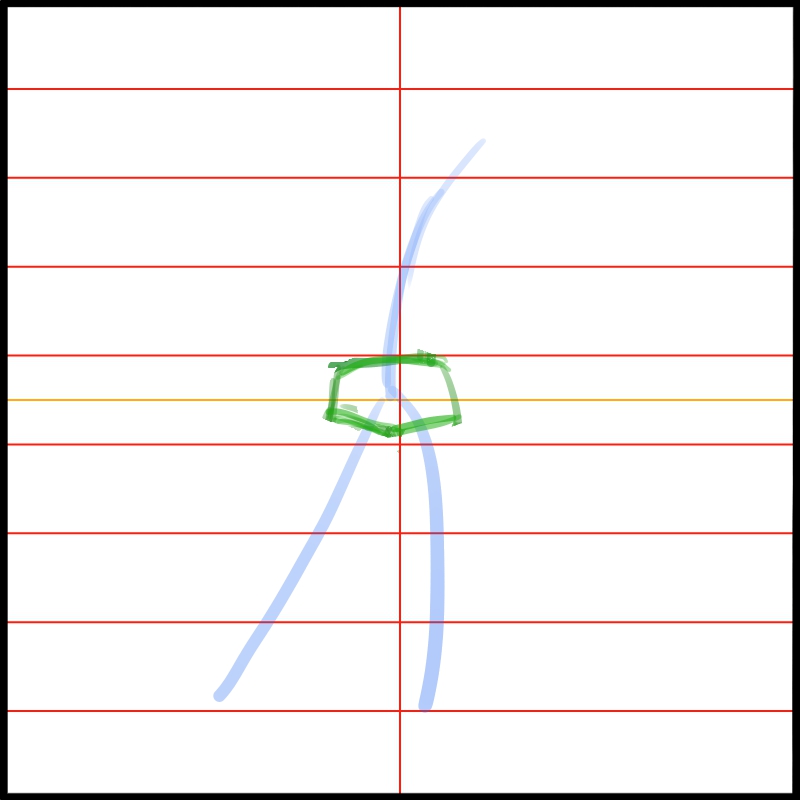
First, place a new layer and draw the waist in the center.
First, place a new layer and draw the center waist. Draw a trapezoid so that the stick figure goes right through the center.
Next is the foot part.
Draw the thighs, knees, and toes, keeping in mind that they should follow the curve of the stick figure and bend slightly at the joints.
Use the dividing line as a guide for the position of the knees to get a good balance.
Be careful not to overdo it, as too much bending will make it look like a broken bone.
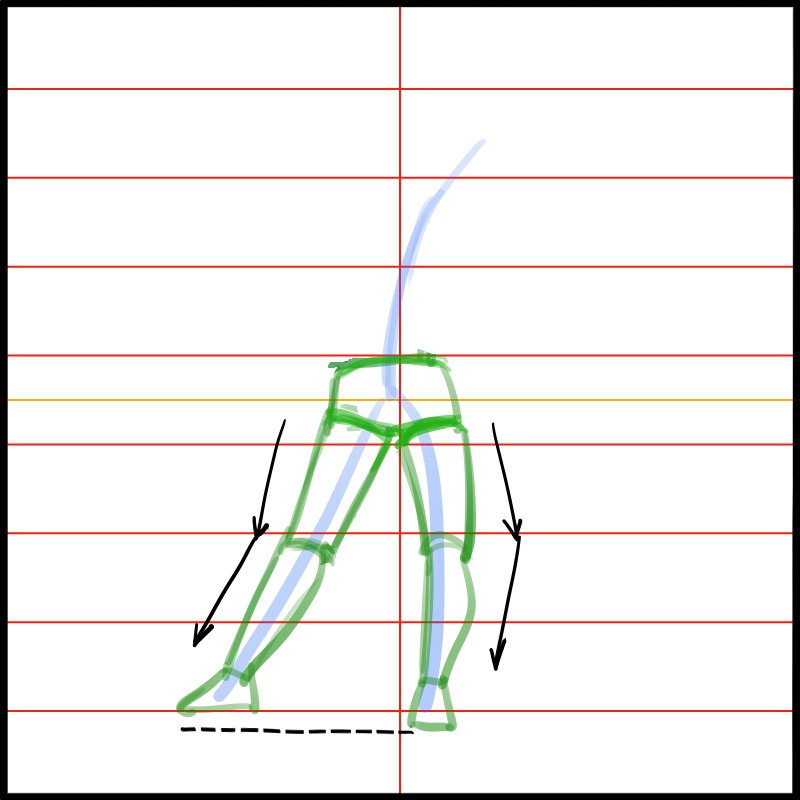
In addition, it looks more natural if the right leg is slightly longer than the left leg.
Now let’s move on to the upper body.
Imagine a rectangular box.
If you squish the top and bottom of the left side, you get a shape just like this one.
To make it easier to see when you paint, draw a diagonal line on the sides to create a shadow.
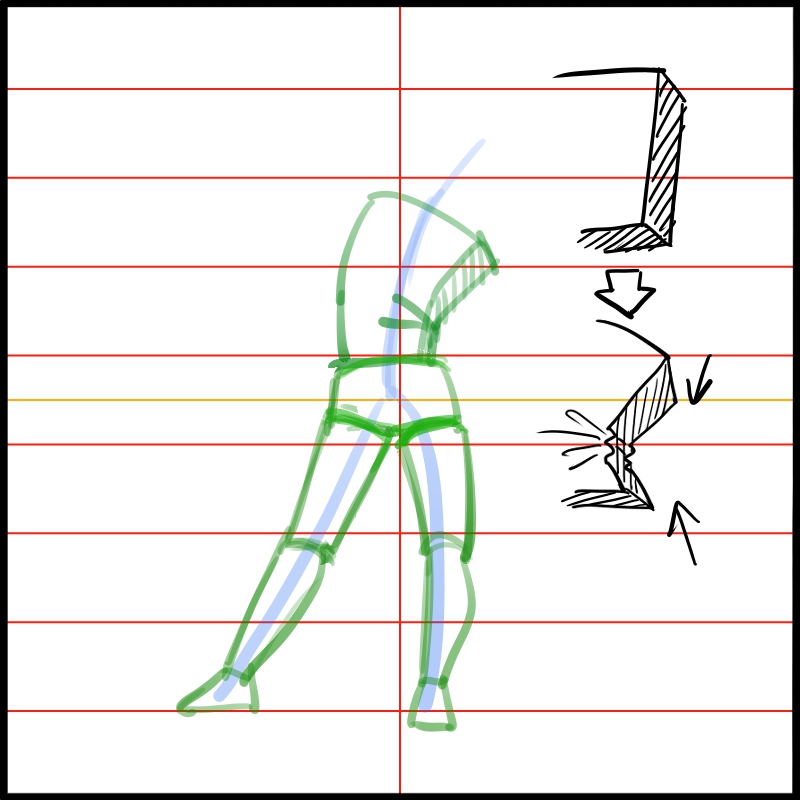
Finally, draw the neck and head.
Again, the stick figure will serve as a reference, so draw it as if it were an extension of the upper body.
The head should be about the size of one square of the nine segments.
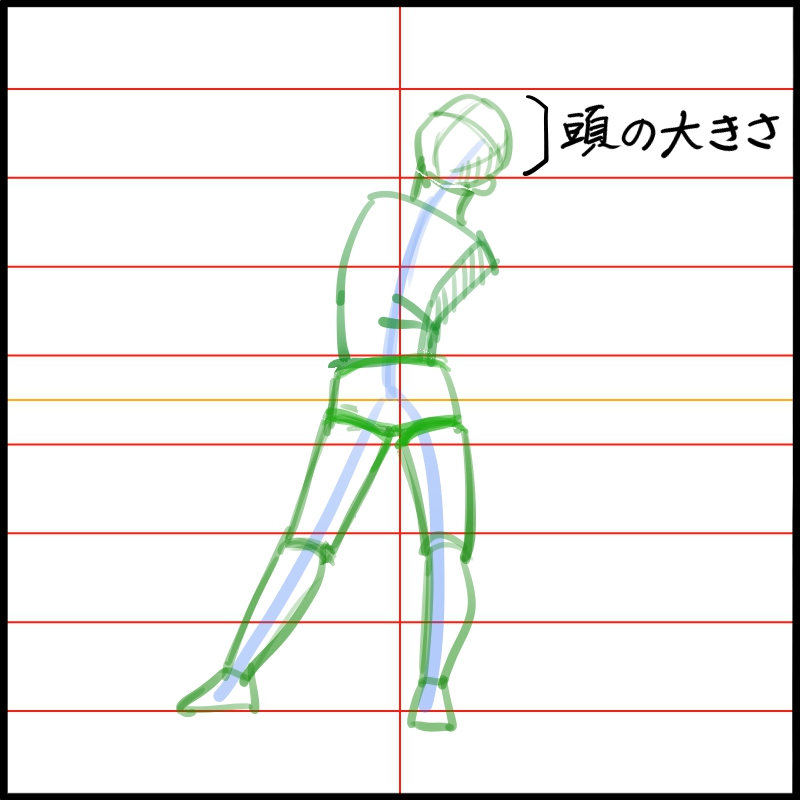
Cut a cross to make it easier to see that the face is facing up.
Now we’ll add the arms to this.
Place a new layer and draw a bent guide line from the shoulder entrance as shown.
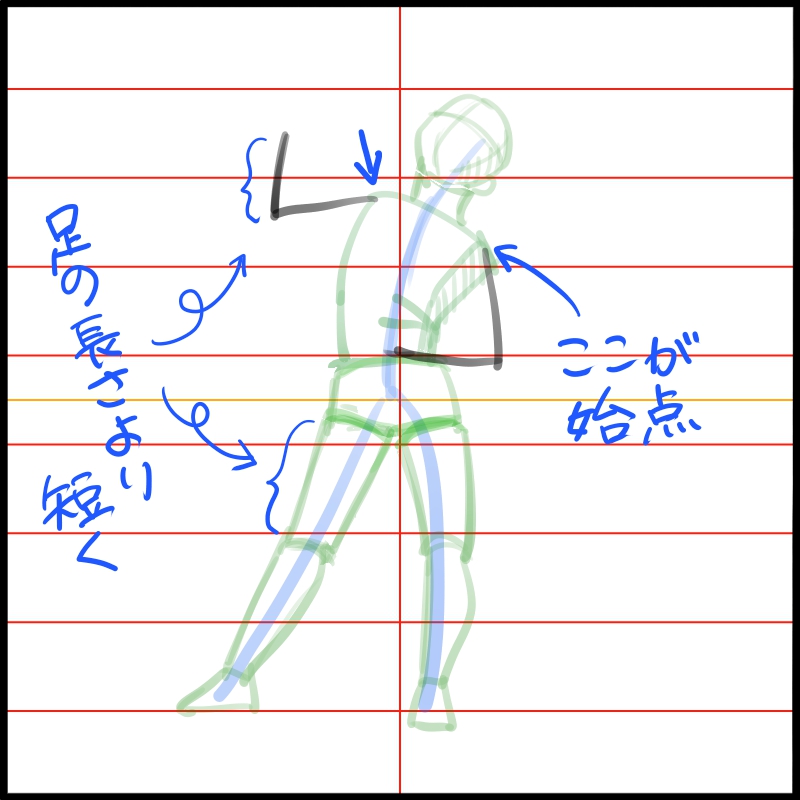
Place a new layer as well and flesh out the arms.
Now we have the basics of a pose with a sword!
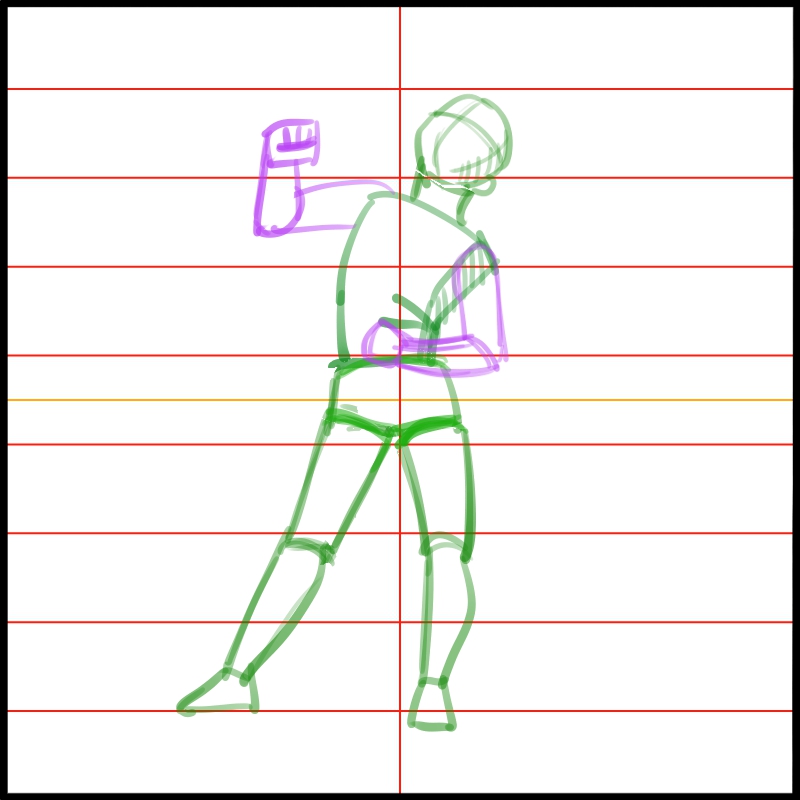
4. Finishing
If you want to add pen, please put a new layer.
Put a sword in his hand and he’s done!
Then you can color it as you like.
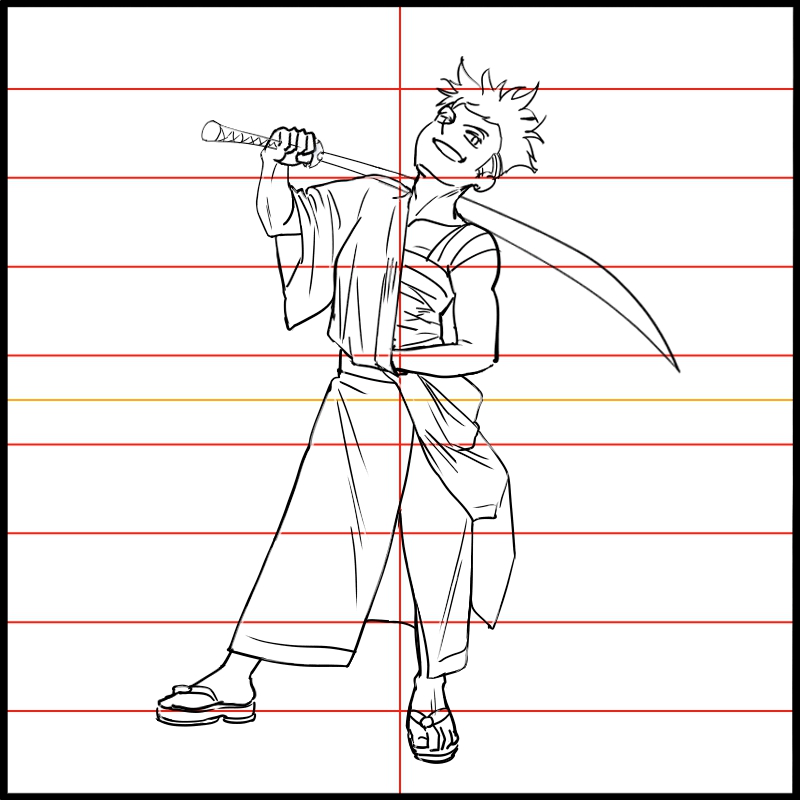
If it’s too difficult to draw right off the bat, draw over more drafts and add pen.
If you can’t draw it right off the bat, draw over the draft and add pen.
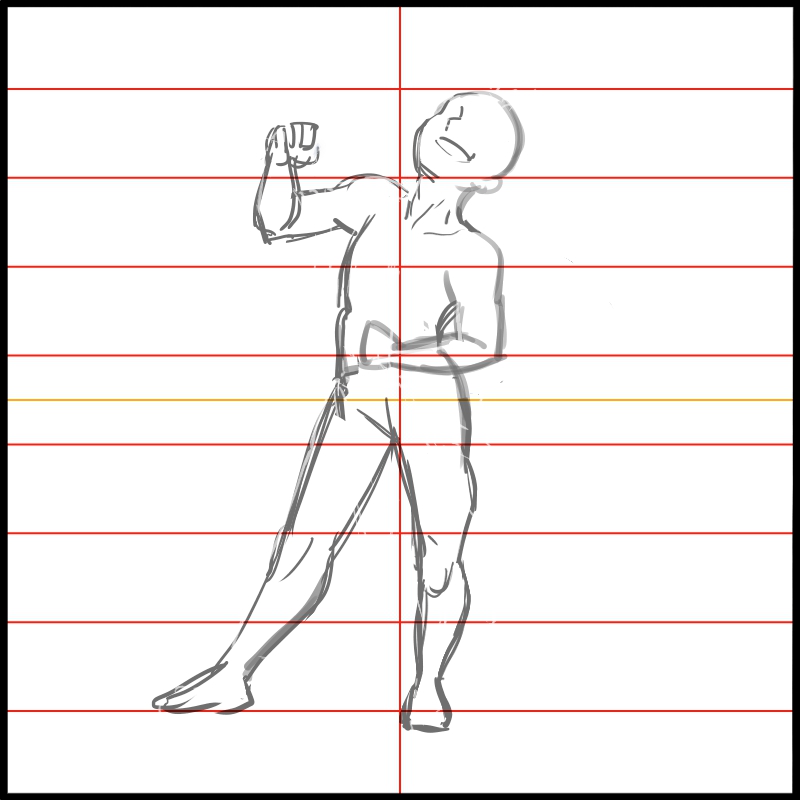
If you pose the character with his chest out and his upper body turned up, he will look confident and strong.
If the character is holding a sword, the atmosphere will be even better!
A pose with the body weight tilted to either side will give a rough, slanted impression, while a pose with the head tilted upward from below will give a cool, intelligent impression.
(It also depends on how the character is drawn!)
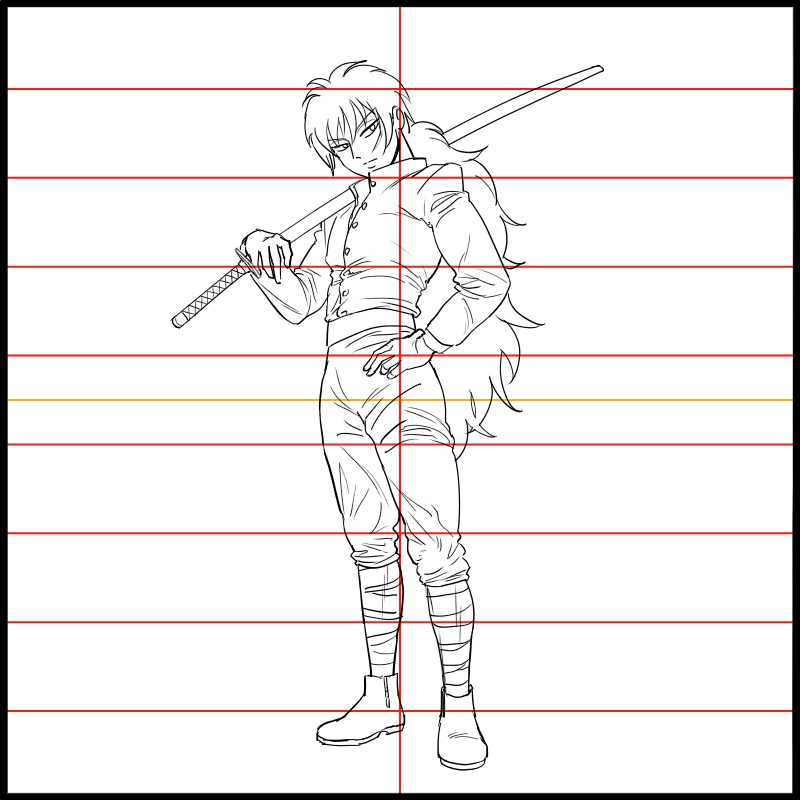
Try different poses to find the perfect one for your character.
Finally, here is an image to check the difference between a normal drawing without guide lines and a drawing without guide lines.
Do you think the pose is more imposing with the sword as a weapon?
Please compare yourself!
(Text and pictures by Hiroshi Takeuchi)
\ We are accepting requests for articles on how to use /

