2021.07.23
[For Beginners] Let’s make a Fanzine using only MediBang Paint!
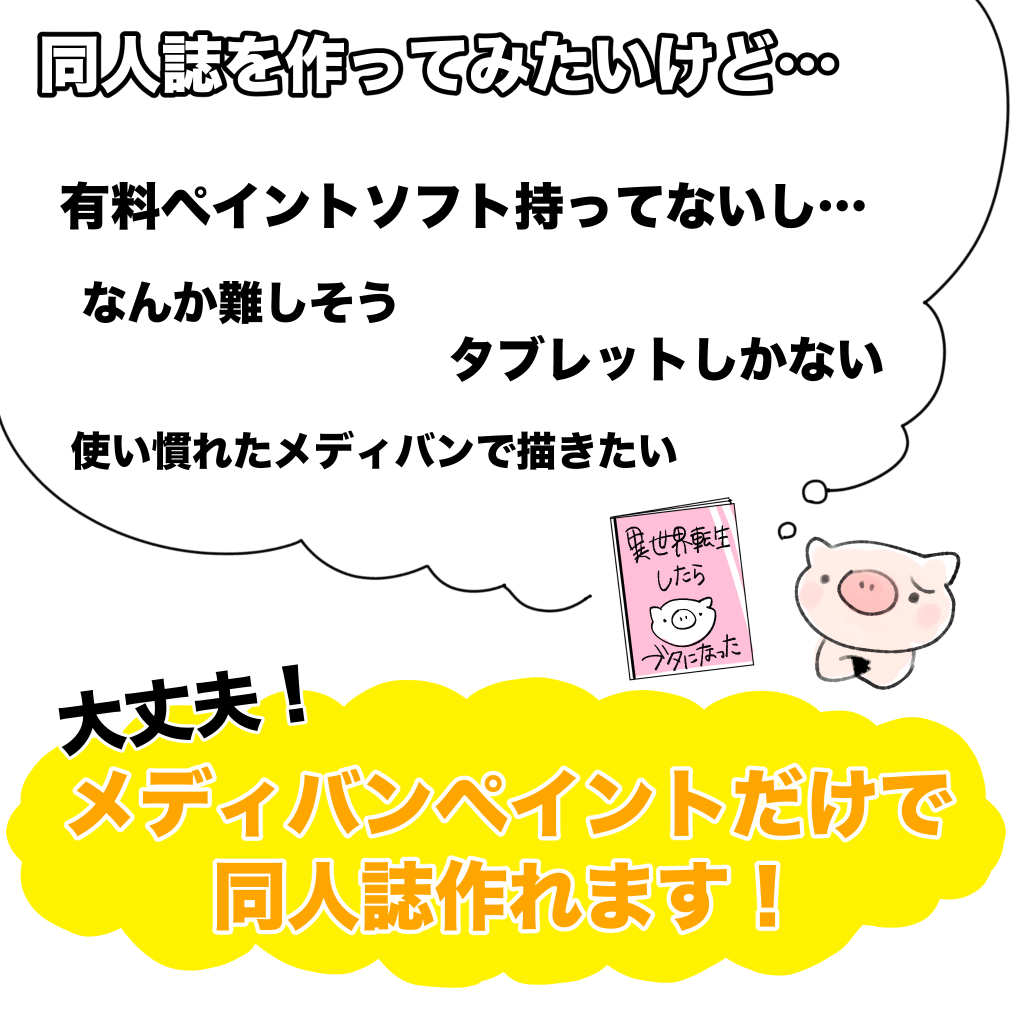
I want to make a fanzine, but…
I don’t have a PC, I only have a tablet…” “I don’t have any paid painting software…” “Manuscripts seem difficult…” “I want to use MediBang Paint, which I’m used to…
We can do it!!!
You can do everything from creating a manuscript for a doujinshi to submitting it to a printing house with just MediBang Paint!
In this article, I’ll show you how to set up the paper, export, and other tasks necessary to create a doujinshi!
Index
1) Let’s set the paper settings
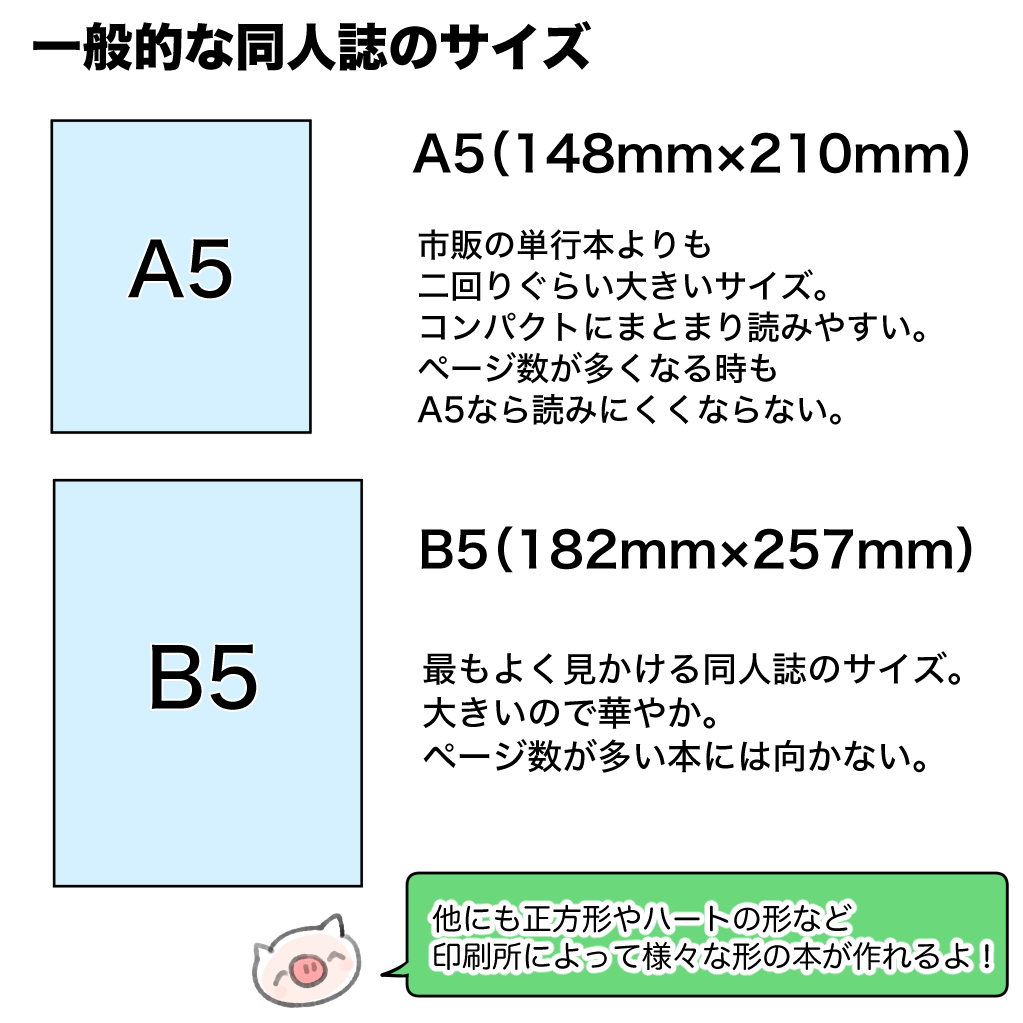
First, decide on the size of the finished book.
The most common sizes for manga doujinshi are either A5 or B5.
Choose the size that you like.
(If you want to make a special type of book, such as a square book or a soybean book, use the template on the website of the printing company you plan to use.
Once you have decided on the size of your book, go to MediBang Paint and set the paper settings.
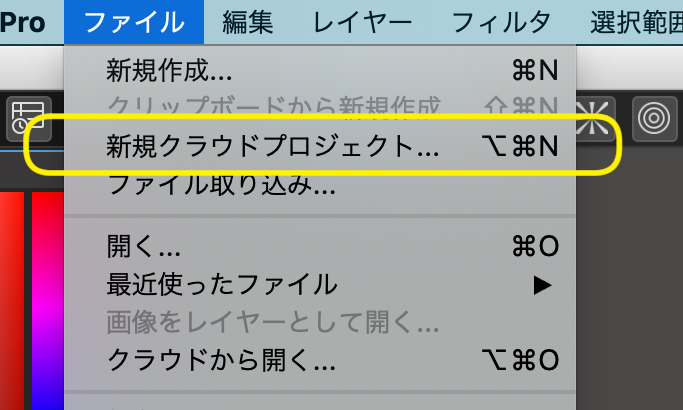
Select [File] → [New Cloud Project].
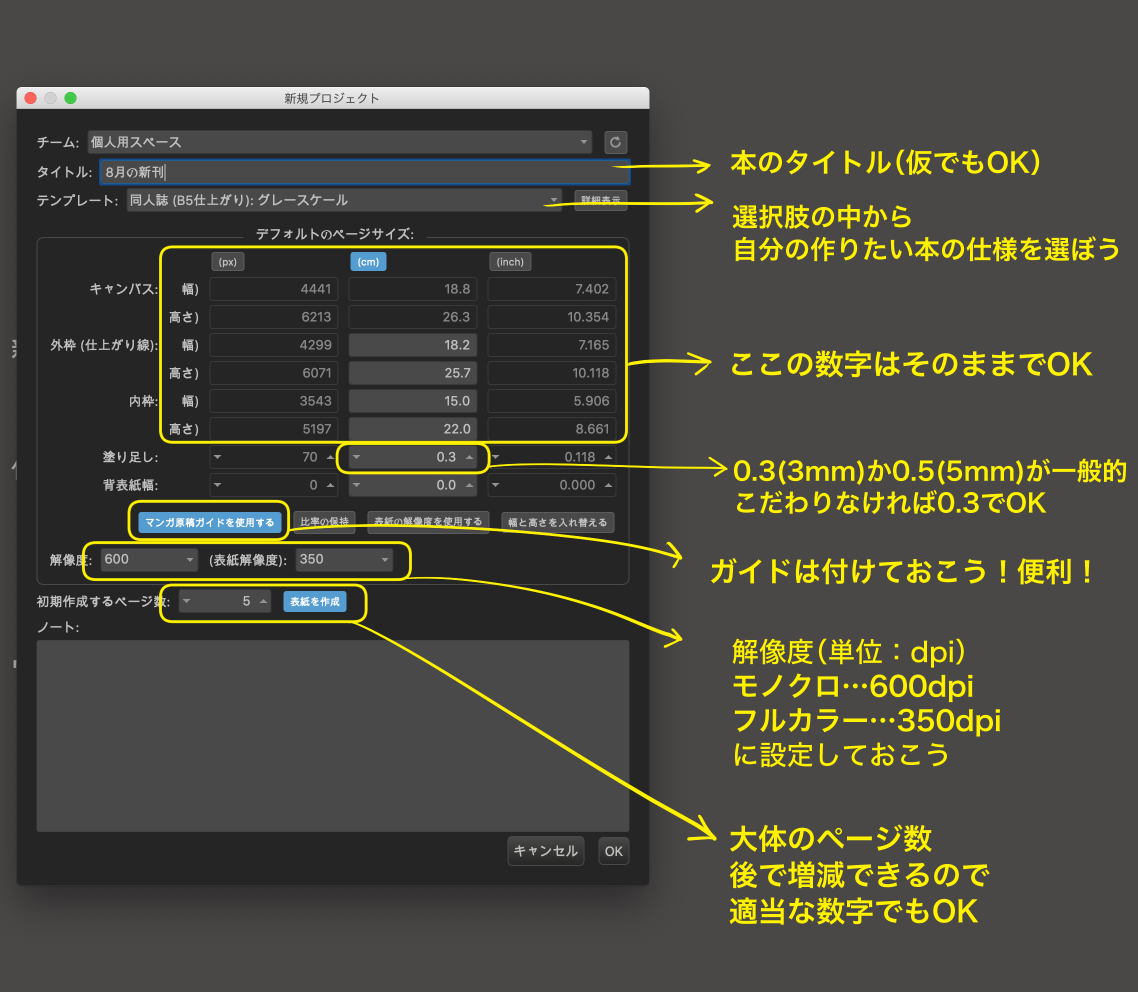
Then this screen came up.
“Team”… You can keep your personal space.
“Title”… Enter the title of your manga. If you haven’t decided on a title, enter a tentative one.
“Template”… Open this section to choose a template for your manga manuscript.
Example: If you want to make a B5 size Doujinshi (cover in full color, text in black and white (grayscale))
Doujinshi (B5 finished): Grayscale
Select the template you want.
After selecting a template, you don’t need to change the numbers of the Canvas, Finished, and Safe Area size that appear below it.
☆Bleed… This is the line where the image will be cut off when it is printed.
If you want to draw a picture that overflows or is overlooked, make sure to draw outside of the fill line.
In most cases, the fill margin is set at 3 or 5 mm.
The default setting is 3mm, so if you are not particular about it, don’t worry about it.
☆Spine… The thickness of the back of the book.
If you don’t want to make a very long comic, don’t worry about it.
☆Use Crop Marks… This will display the fill lines and inner frame as a guide with light blue lines.
It is recommended that you turn it on.
“DPI“…When printing as a doujinshi, 600dpi for monochrome text and 350dpi for full-color cover is generally recommended.
“Number of Pages in Default“… Enter the number of pages you would like to print.
You can increase or decrease the number later, so if you’re not sure, just enter an appropriate number.
If you are not sure, you can use an appropriate number. Once you have completed the settings, click OK at the bottom right.
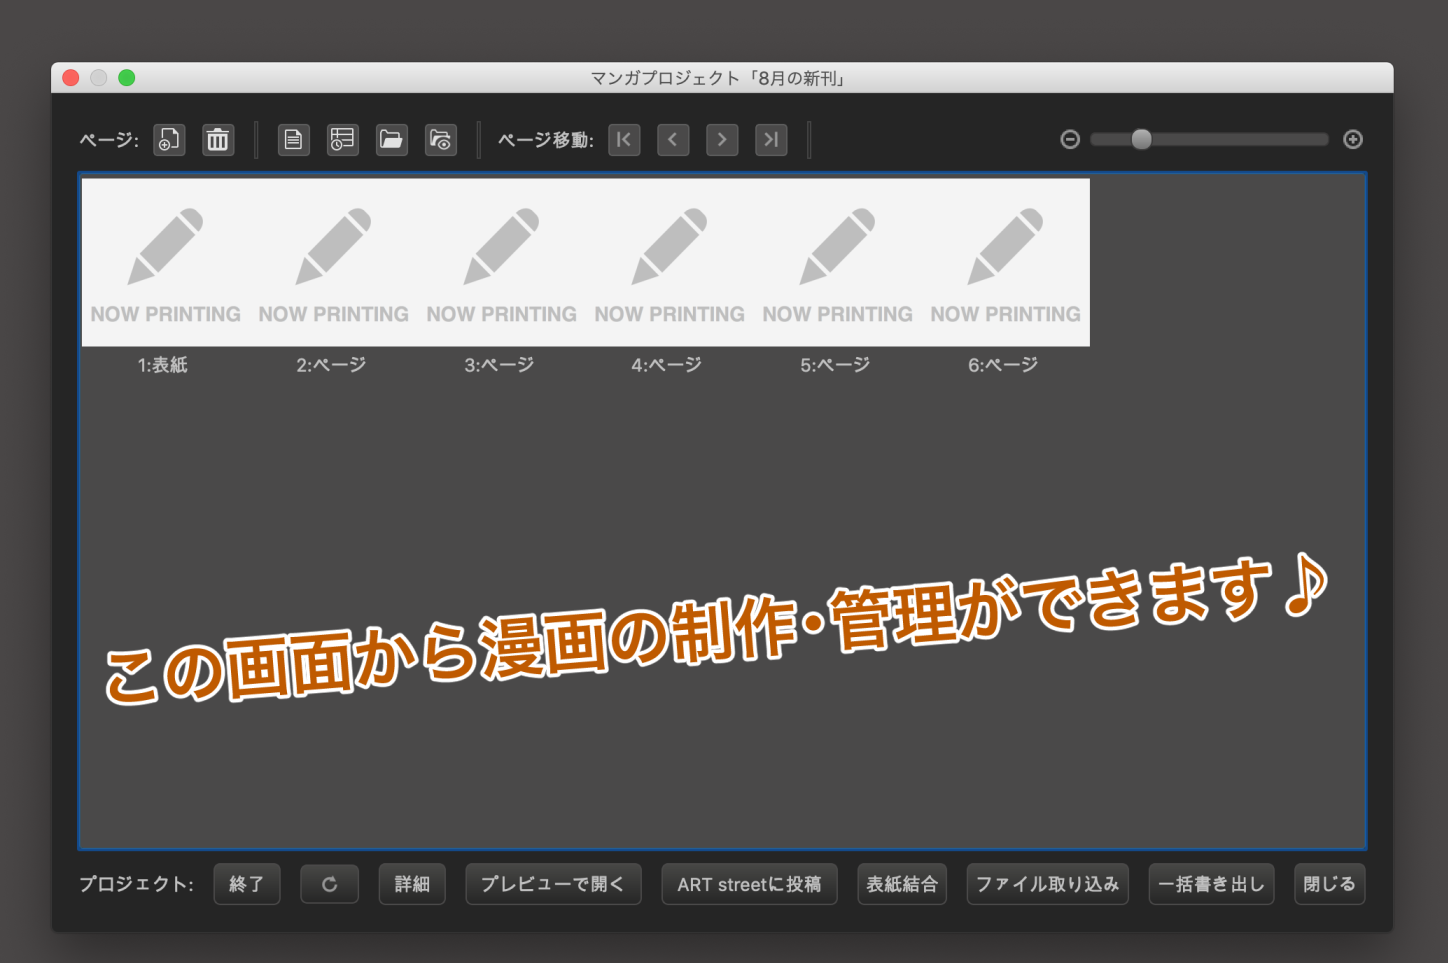
The Manga Project screen is ready!
With this screen, you can increase or decrease the number of pages and preview your drawn manuscript.
2) Let’s draw the manuscript
Now that the paper is ready, let’s actually draw the comic!
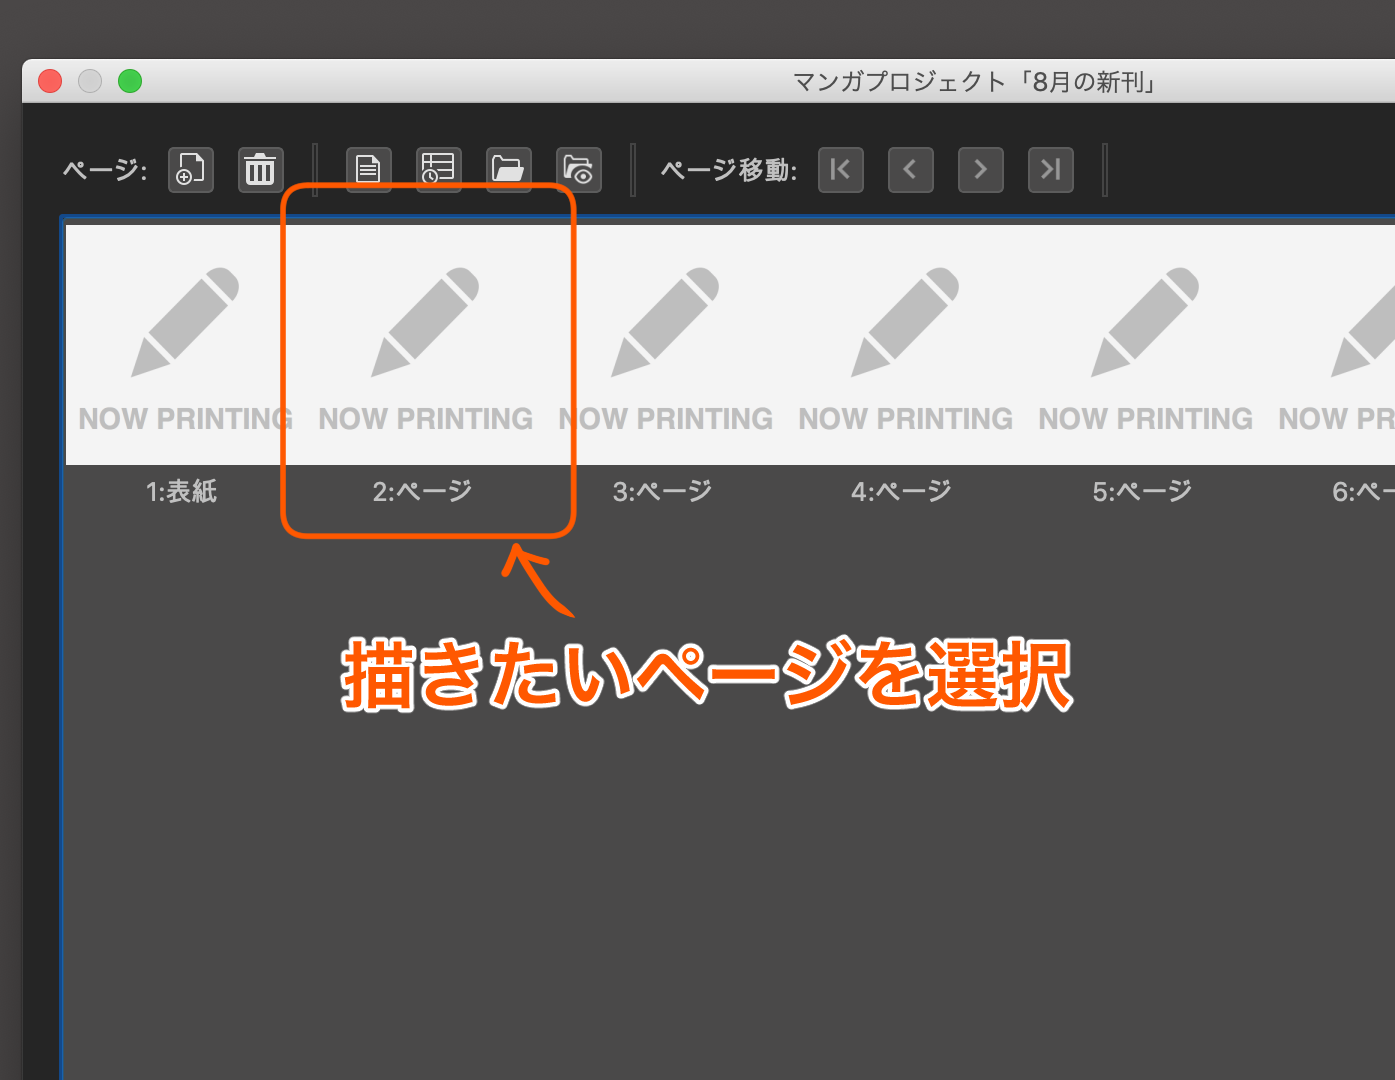
From the Manga Project screen, select the page you want to draw.
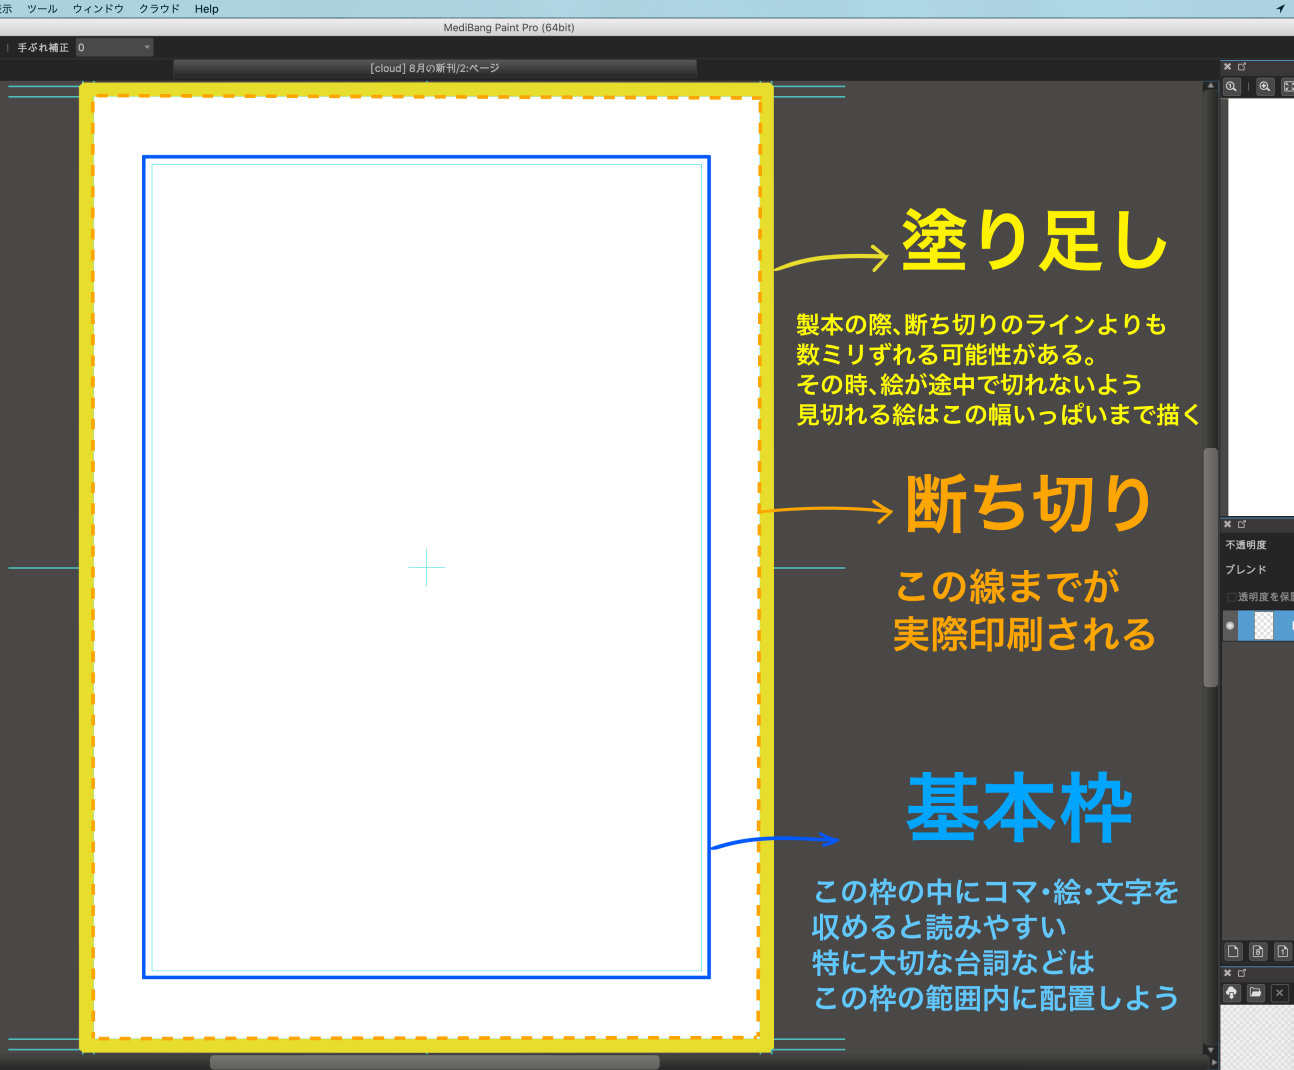
The light blue line shows the guidelines.
The outermost frame is the “fill-in”, the line inside the fill-in is the “break”, and the inner frame is the “basic frame”.
The light blue lines in the guide are only shown on the screen and do not appear in the actual printout, so don’t worry.
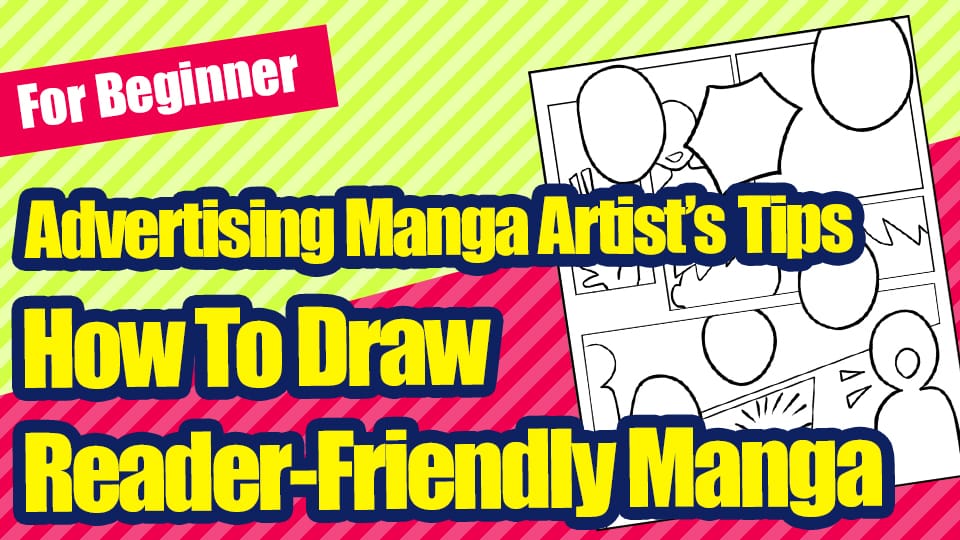
●For specific instructions on how to draw manga and how to divide the frames, please refer to this article.●
● Points for doujinshi manuscripts.●
☆Beware of the “nodo”!
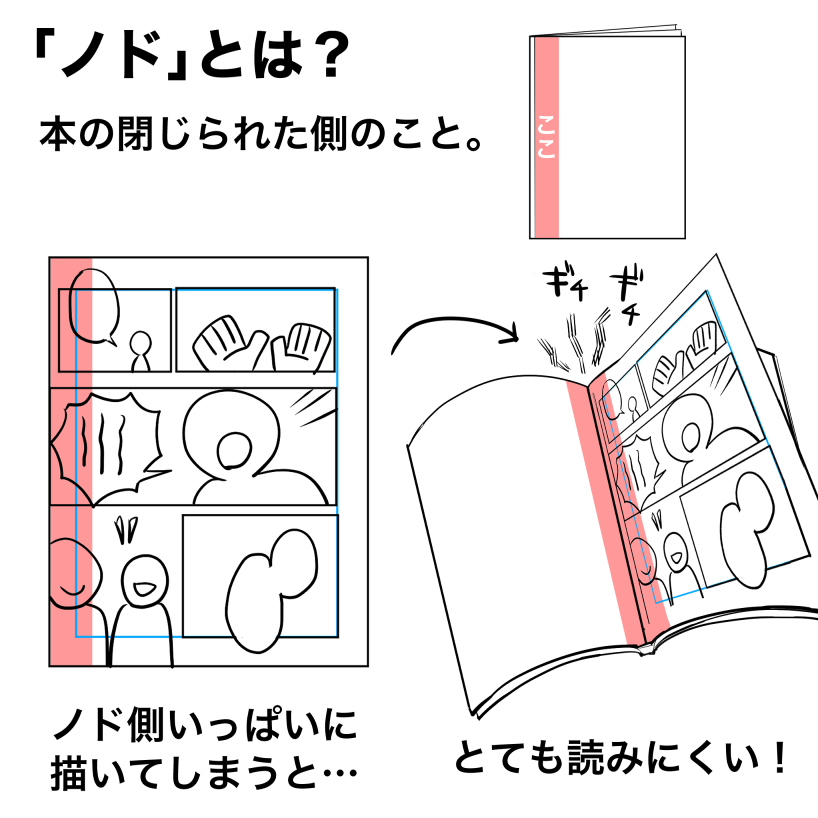
The “nodo” is the back side of the book (the side that is closed).
When a book is bound, the back of the book is glued down, making it difficult to see the pictures and text.
Let’s try to keep the pictures and text in the inner frame as much as possible. .
It is also a good idea to avoid placing important dialogues and pictures on the throat side.
When you are working on a manuscript on a PC or tablet, it is tempting to draw in a lot of lines on the bottom of the page, but when the book is ready, you can’t read the lines… This is a common mistake.
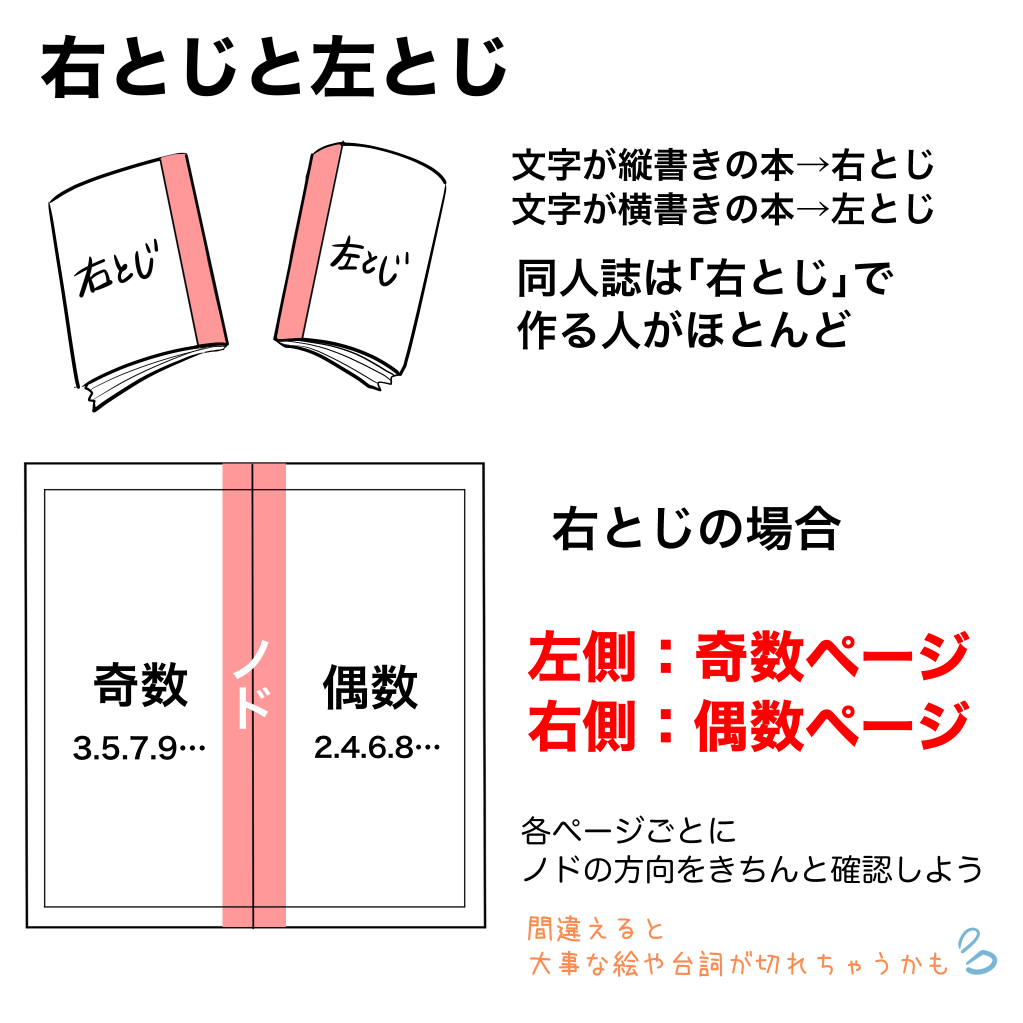
There are also two types of bookbinding: “right binding” and “left binding”.
The difference is which side of the book you start reading from.
Generally speaking, books with vertical text are right-bound, and books with horizontal text are left-bound.
Most doujinshi are made with right binding.
The direction of the binding changes depending on whether it is right or left binding, so be sure to check.
☆What is the best font size?
There is no right answer, so you are free to choose your own size.
There is no right answer to this, so you can make them as you like, but if they are too small or too large, they will be difficult to read.
The dialogue in a normal conversation should be
A5 doujinshi…about 8-9pt.
B5 doujinshi…about 9-11pt.
The line spacing is about 120%.
It depends on the amount of dialogue and your style, but as long as you keep it within this range, you should have no problems.
By the way, I use 9pt as my standard.
You can use this size for the basics, and make it larger or smaller depending on the direction.
Changing the size of the font depending on the scene is also a good idea.
3) Let’s write out the completed manuscript
Your manuscript is ready! Let’s prepare it for submission to the printing house.
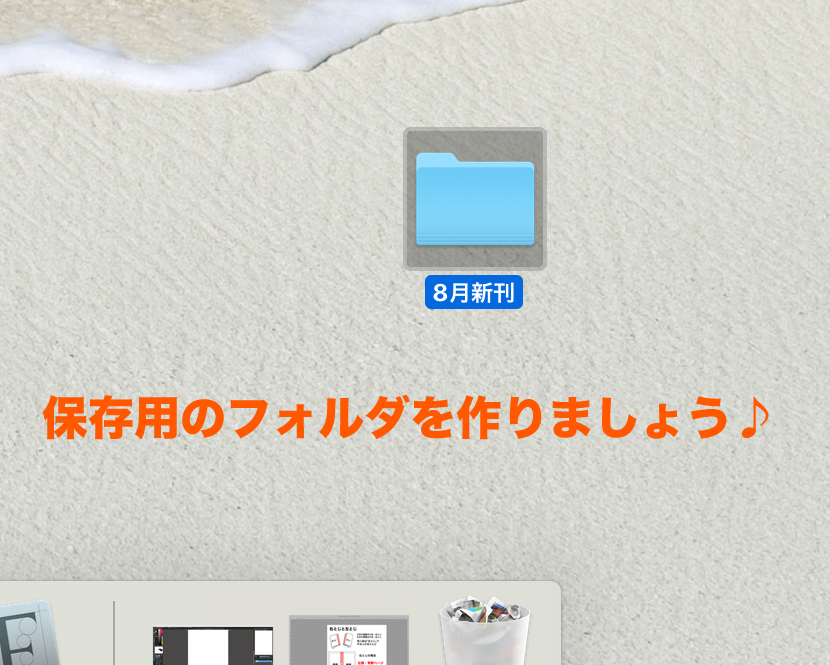
First, create a folder on your PC or tablet to organize your data.
It can be anywhere that is easy for you to find.
In this case, I created it on the desktop.
You can’t submit the data as it is now, so convert the manuscript to a format that can be sent to the printing office.
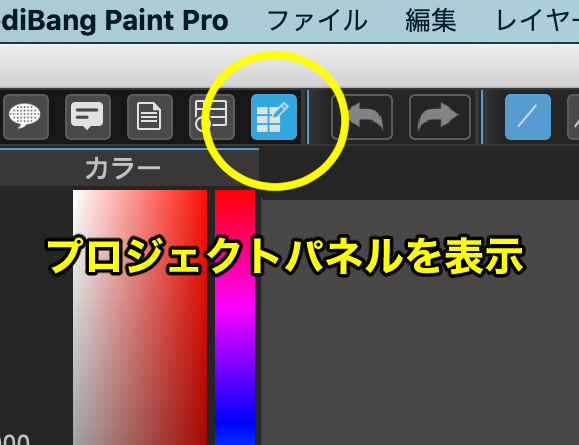
Select “Open project dialog” from the top left corner.
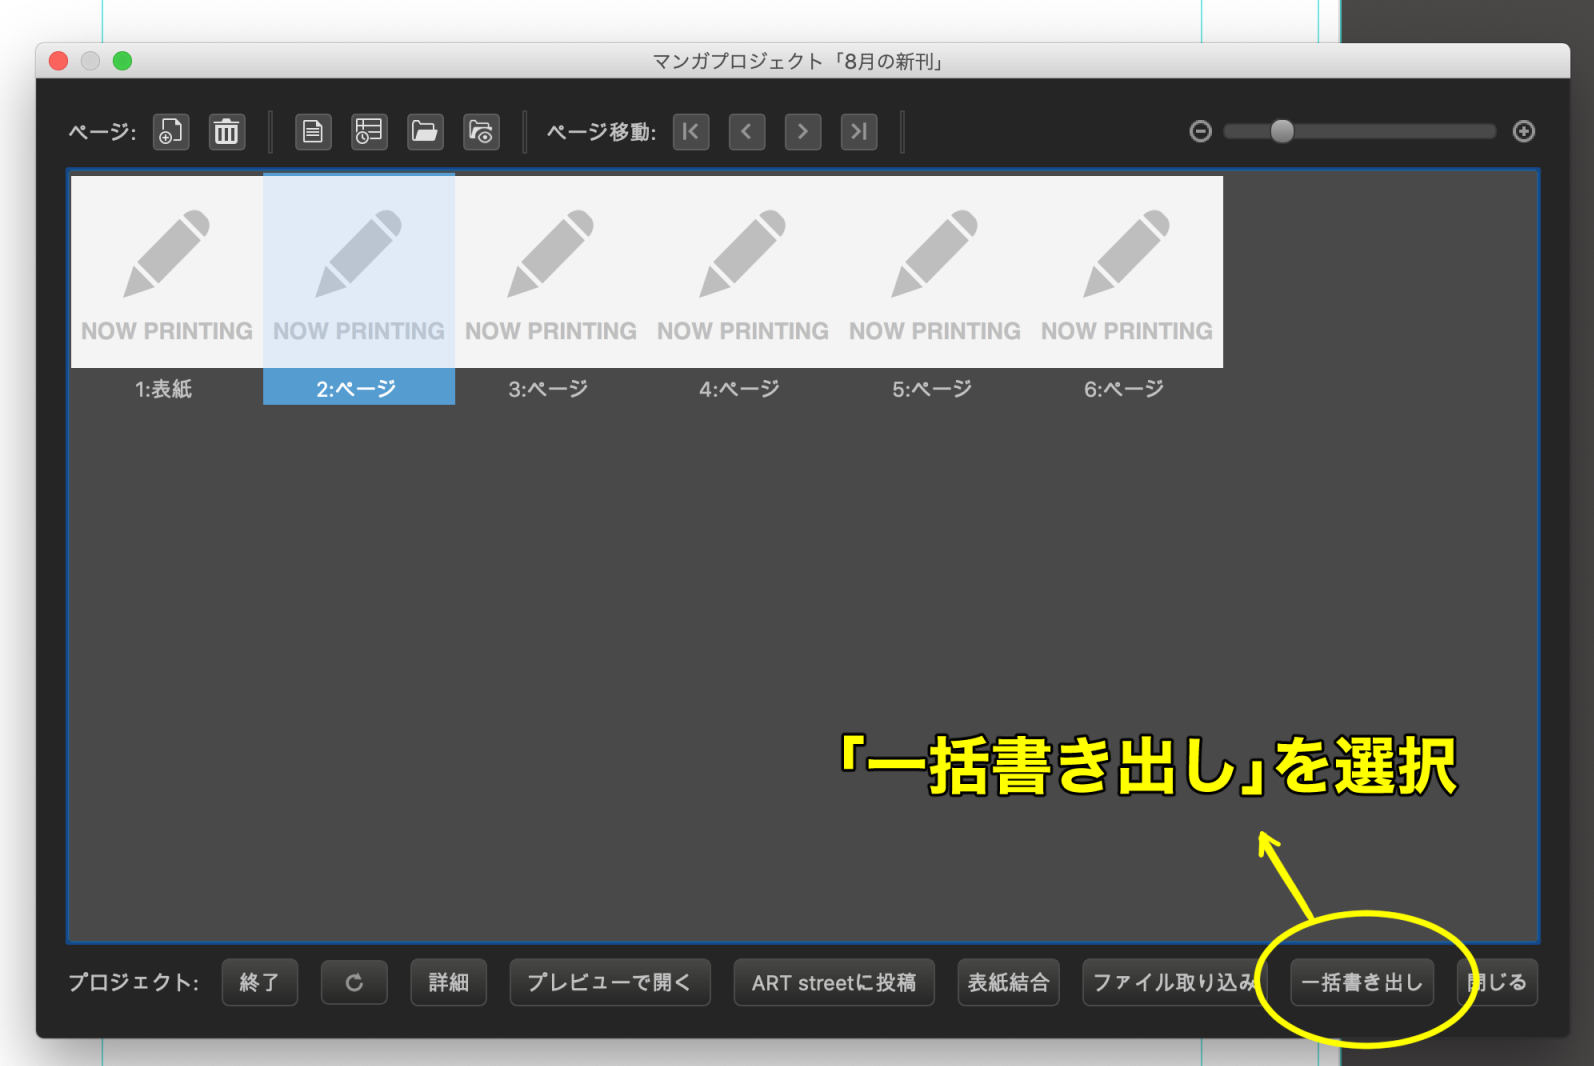
Select “Export All” in the bottom right corner of the project panel.
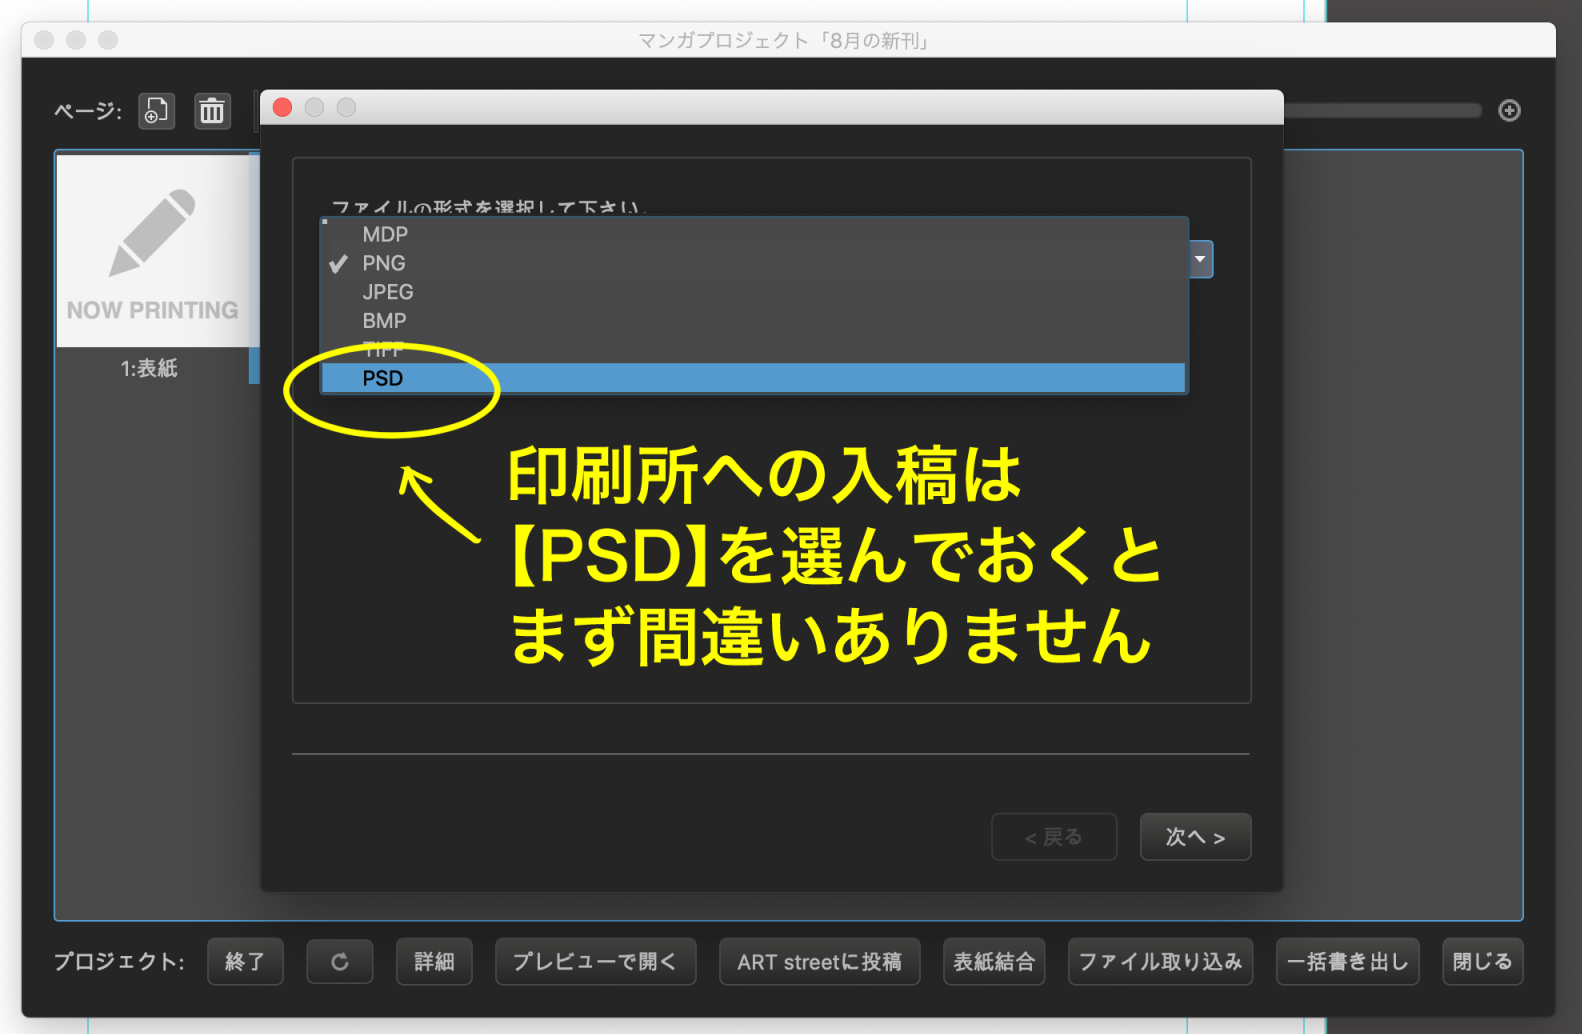
Choose “PSD” as the file format.
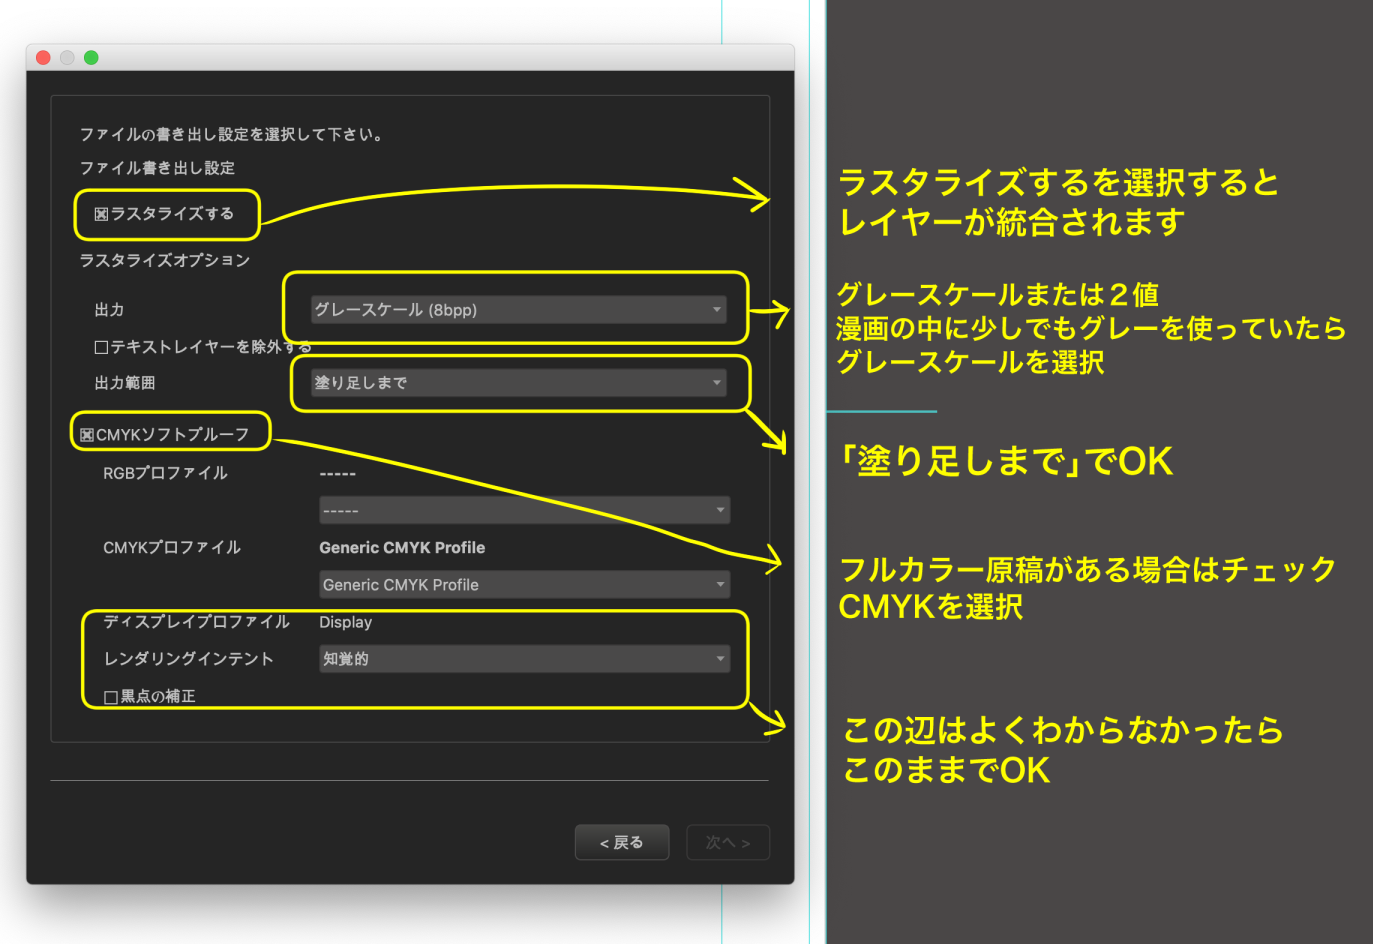
“Transparent Background”… Check the box.
Check this box to merge the layers.
“Output”… Select the output format for the monochrome text.
If there are gray tones, shadows, or processing → Grayscale
Only 100% black and white → Monochrome 2 tone
“Rasterize Area”… Select “Bleed“.
“CMYK Soft Proof“… Check this box only if you have a full-color document.
The rest of the settings can be left at the default settings.
When you have finished all the settings, select “Next”.
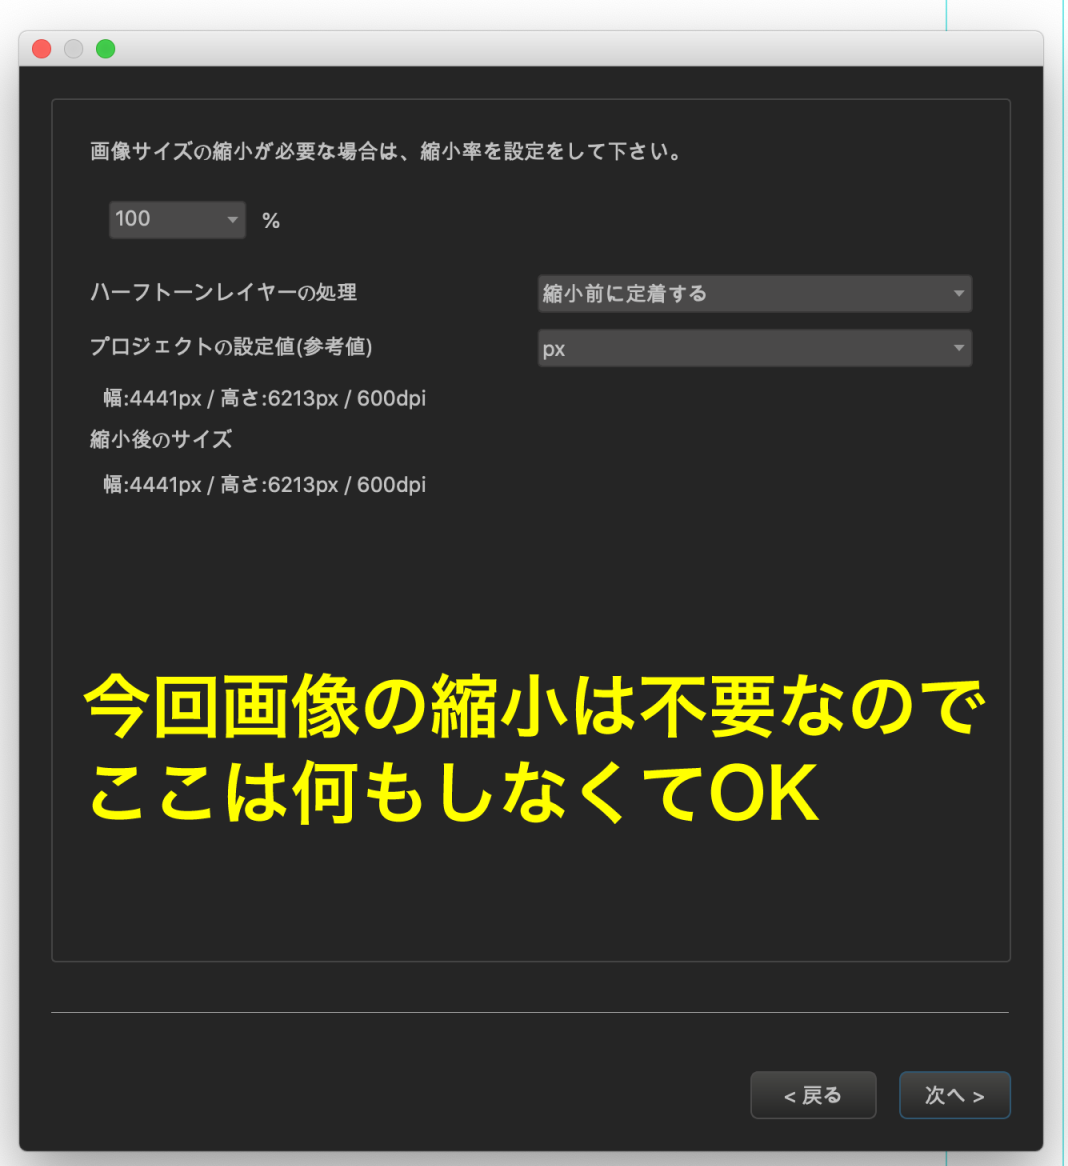
“Reduce image size”… Since there is no need to reduce the image size this time, select “Next” without entering any information.
● Add a Page number.
When you submit the document to the printer, you will need a page number.
If you forget this, the order of the pages will not be known and the book cannot be bound, so be sure to include it.
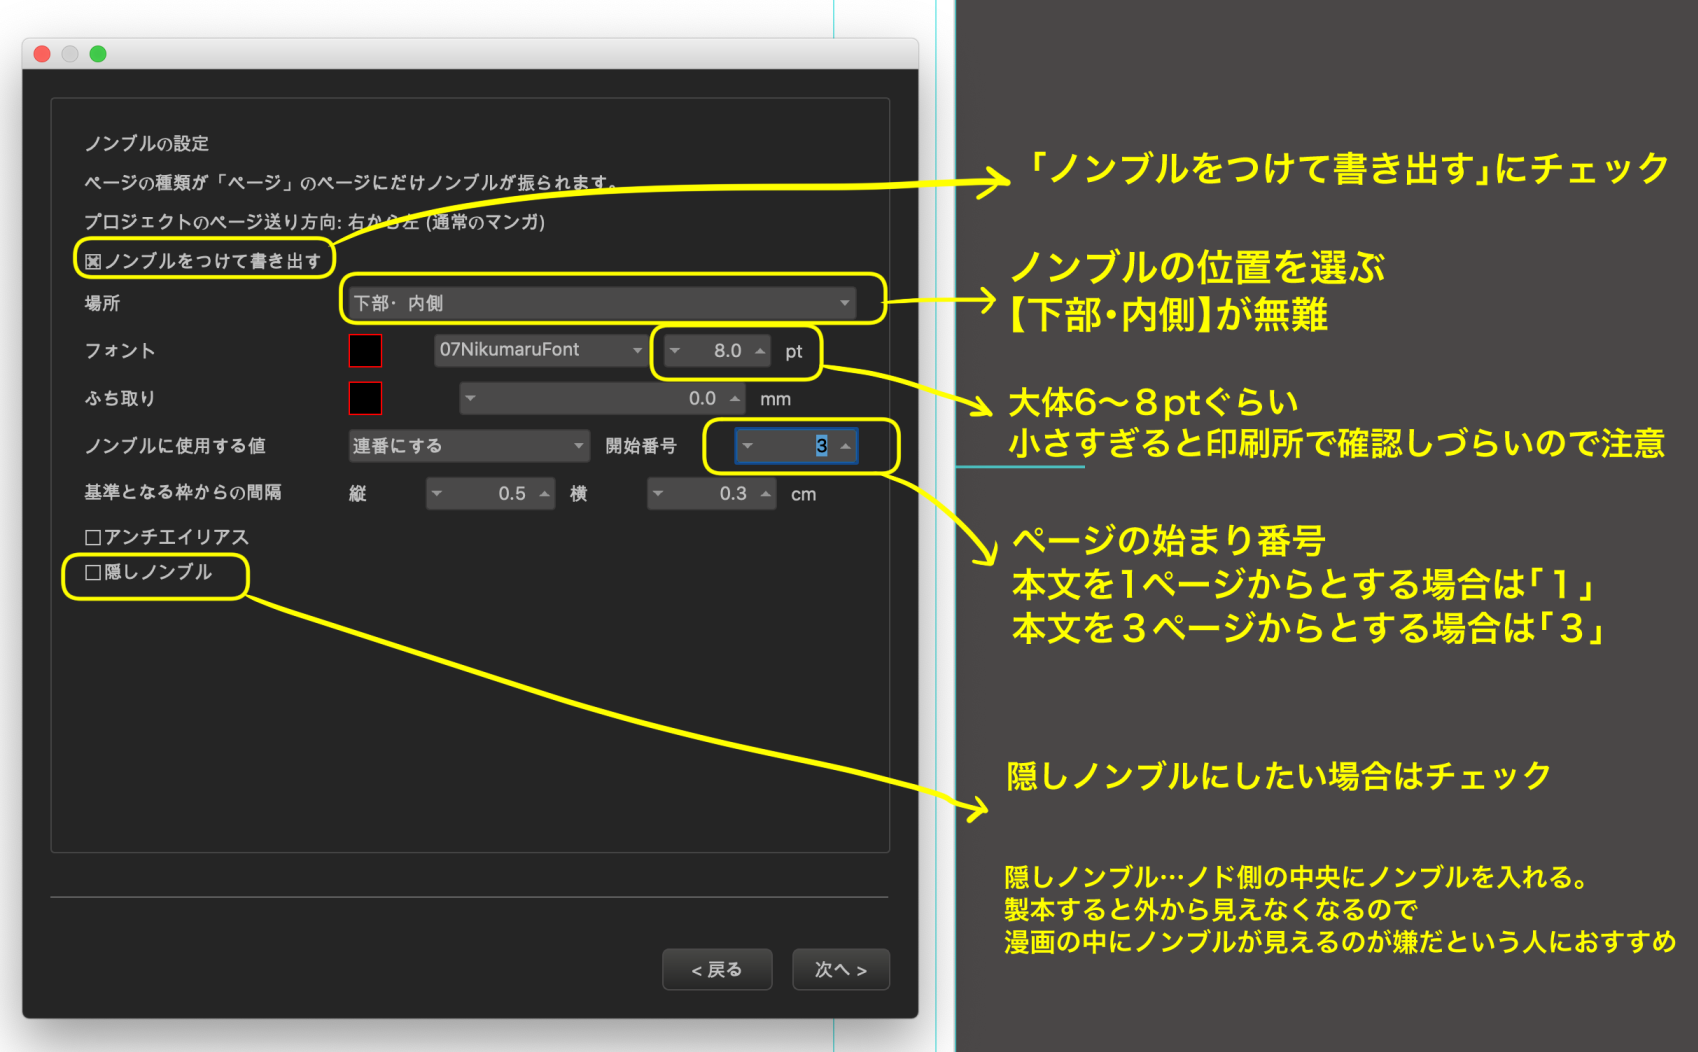
“Position“… There are several options, but it is best to put it inside (on the inside of the book) so that it is not noticeable when the book is bound.
If you are not sure, choose “Lower Inside“.
“Font”… You can use any type of font.
You can use any type of font you like, but a size of 6-8pt is good.
“Value use for Page number“… Select “Sequence number”.
“Start number“… In most cases, the front and back covers are counted as 1 and 2, and the body starts on page 3.
In this case, the Start number is “3”.
“Blind Page number”
If you want to make the page number invisible when the book is bound, you can put Blind Page number in an inconspicuous place in the middle of the page.
Select this option if you want to make it Blind Page number.
When you have finished all the settings, select “Next”.
●Choose where to save your data.
Choose where you want to save the data.
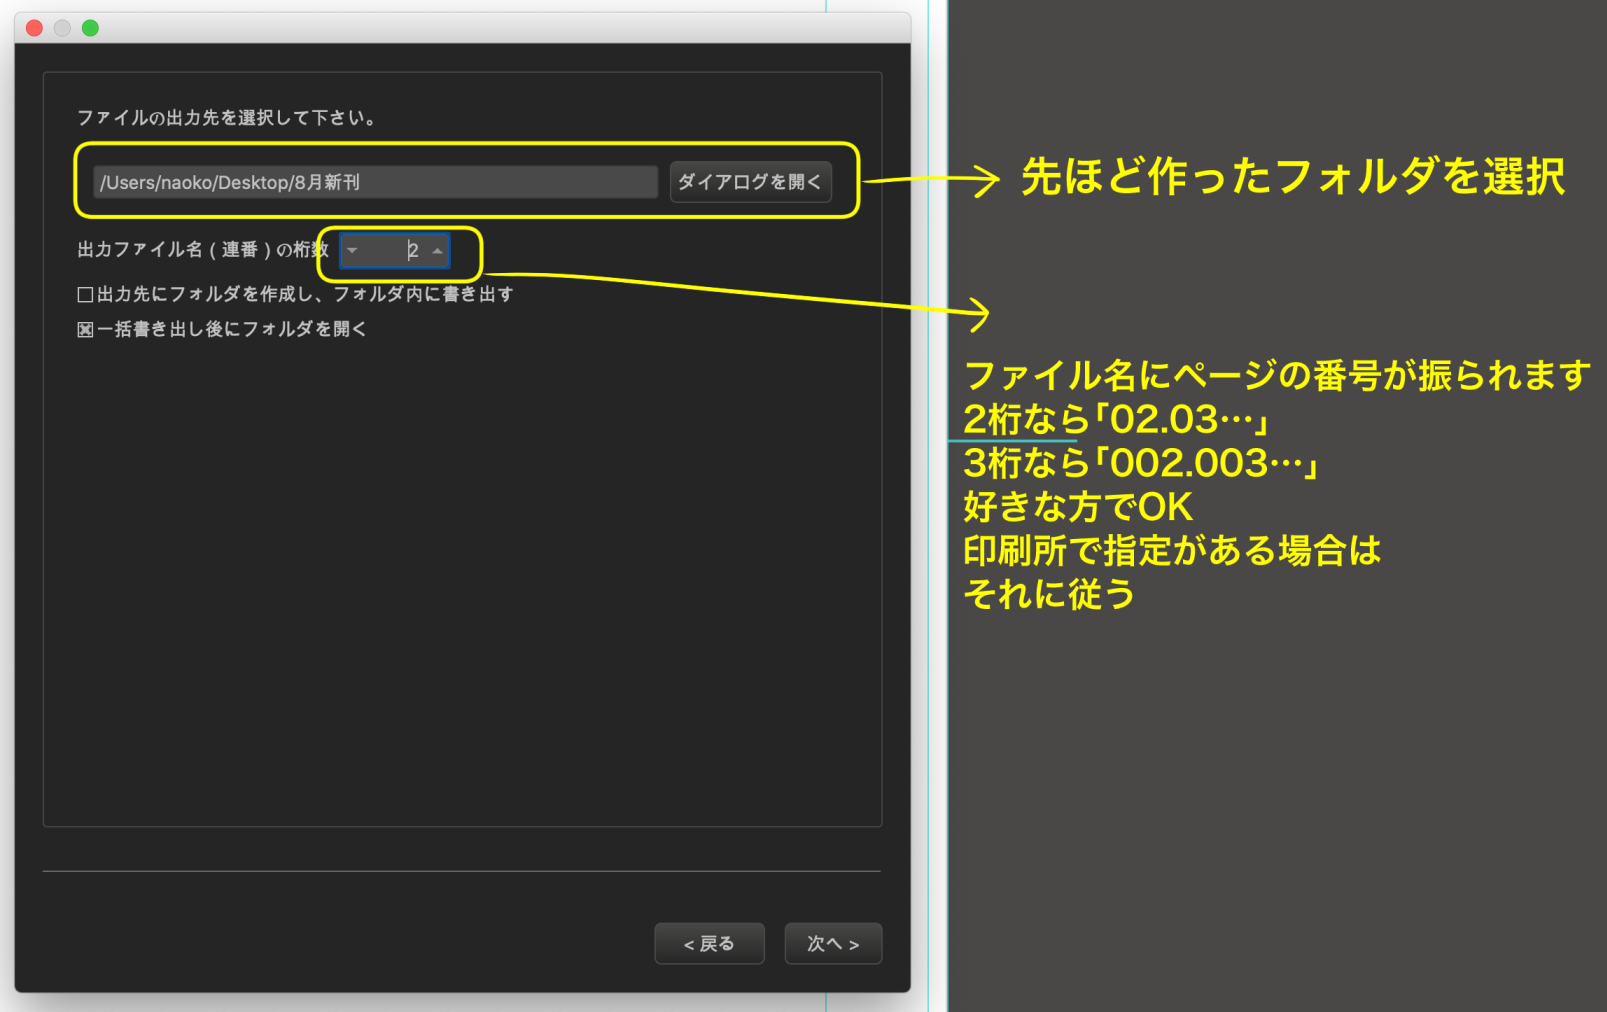
Select the folder you just created from “Browse“.
“Serial number of the export file name“… When data is written out, it is automatically numbered “01”, “001”, etc.
You can choose either 2 or 3 digits, whichever you prefer.
Some printers may specify the number of digits, so check the website carefully.
“Create a folder in the destination and export the file to it.“… You don’t need to select this option.
“Open the folder after exporting all the files to it.“… If you check this box, the folder will be opened after the export is completed.
If you check this box, the folder will be opened after the export is completed, and you can check if the export is done properly.
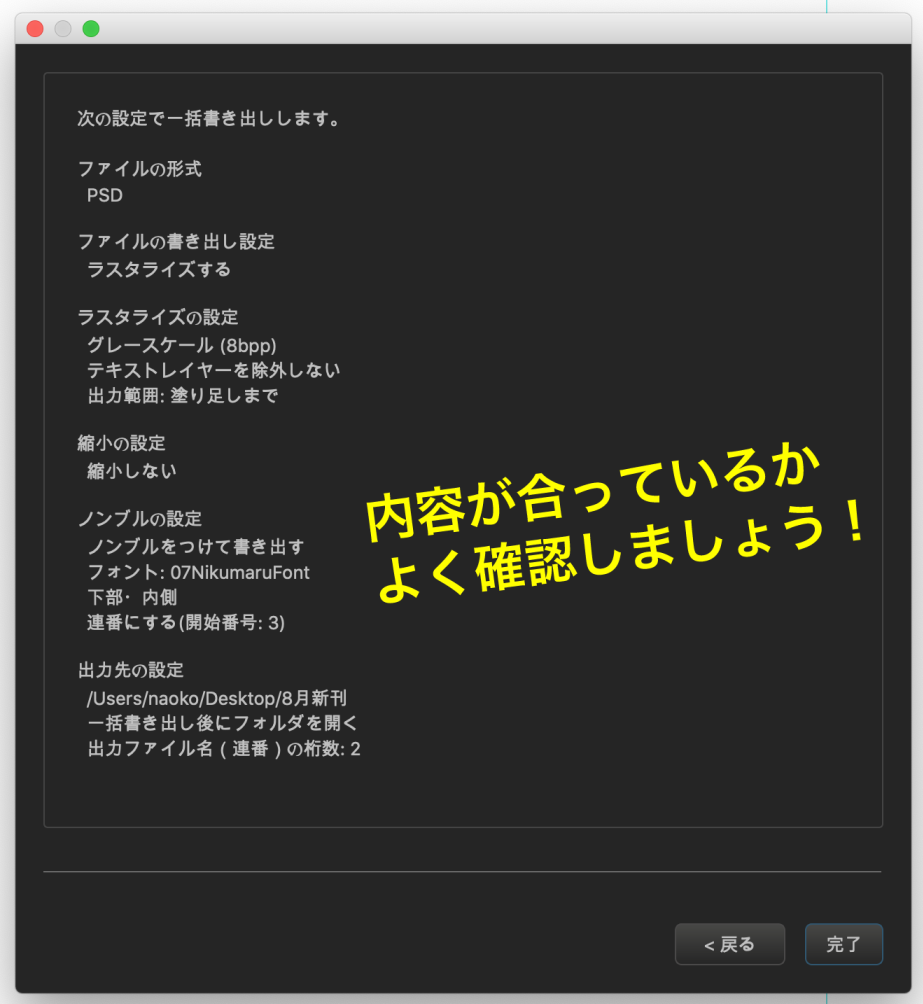
When you have finished the settings, select “Next” and you will be prompted to confirm the settings you have made.
Check the settings carefully, and if they are OK, select “Finish”.
The export is now complete!
Now, go to the website of the print shop you want to use, check the submission instructions, and follow the instructions to send your data!
(Be sure to check the submission method and data creation precautions carefully, as they differ depending on the printing office).
You can create a doujinshi manuscript from start to finish with MediBang Paint alone!
If you haven’t tried it yet but are interested, why don’t you try making a book?
I hope you’ll experience the joy of having your work turned into a book!
(Text and pictures by Naoko Hara)
twitter:@nao_comic
twitter:https://twitter.com/nao_comic
\ We are accepting requests for articles on how to use /

