2021.09.13
[For Beginners] Let’s make our own child! Part 1 [Original Character]
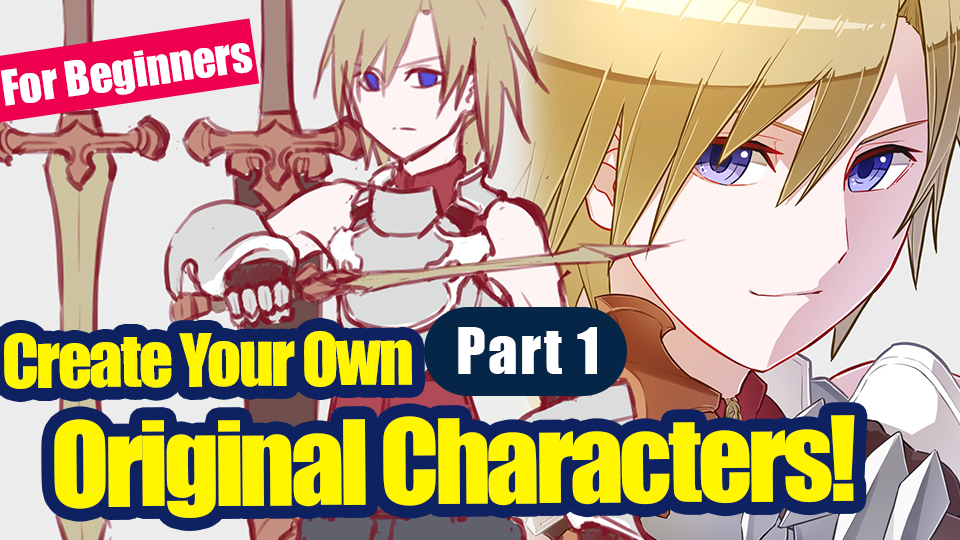
Once you start drawing, you’ll want to try drawing your own original character at least once.
That haircut, that personality, you can manifest that embodies a fantasy stuffed to your liking!
There’s no right answer, just draw as you wish, and create your own best partner!
You can do it, now!
Is what you think until you pick up your pen ……, and don’t you hate it when your hype and brain simmers down quietly as if all of that were a dream? It happens to me all the time.
This article will help you break free from that frustration of not being able to draw even though you want to, and give you the freedom to create whatever you want, however you want, whenever you want.
In the first part, I’ll explain how you can make character design process as a “hobby” and in the second part, I’ll explain simple icon creation in as simple a way as possible!
Let’s start with the first part character design, which is the key to everything.
Whether you’re new to this or have stumbled upon it, I hope this article will help you have fun drawing!
Now, it’s time to create your own original character, your own baby!
Index
1. Fantasize
You have to start somewhere… so let’s fantasize a lot!
You can be vague at first, like the face and clothing, etc.
Once you get into a rhythm, you can even come up with little settings.
Another way to do these is to write everything that comes to your mind in words.
You can brainstorm a few things while drawing as well.
There are two main types of character design: realistic and fantastical.
In the real world, you can draw while looking at the actual clothes and accessories, so the drawing is relatively stable and stylish.
The fantastical style is imaginary for better or worse, so you can draw anything you want, but it is difficult on where to start.
Both have their advantages and disadvantages, so I think it’s best to try the one that’s easier for you to draw at first.
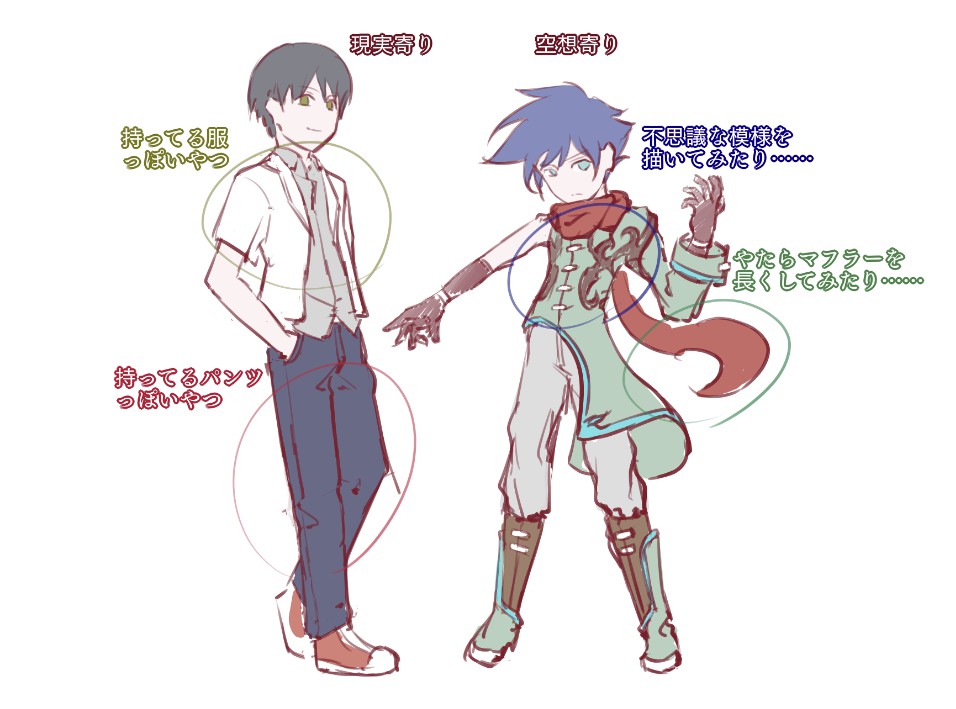
For me, well … I like cool characters, so let’s go with a guy character!
I can also try a hairy animal and human hybrid, but let’s start with a regular human.
Young man or little boy…… let’s go with a young man, handsome and stoic…… but with burning passion!
I also like fantasy, so I’m going to use fantasy.
He also has a sword …… or two, short ones!
Dressed in …… hmmm, I’ll come back to this later!
2. Prepare
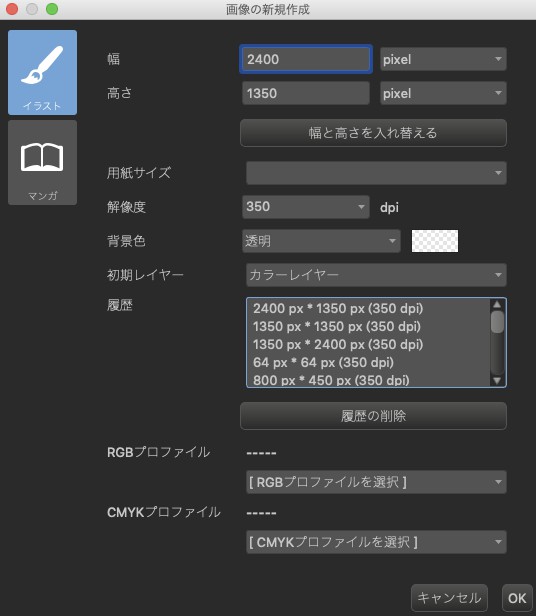
Now that you’re fired up, open MediBang Paint.
Choose [File] and then [New].
Click here for an article with more details.
▶︎Let’s make an artwork.
The image below shows my settings.
If you have your own settings, that’s fine!
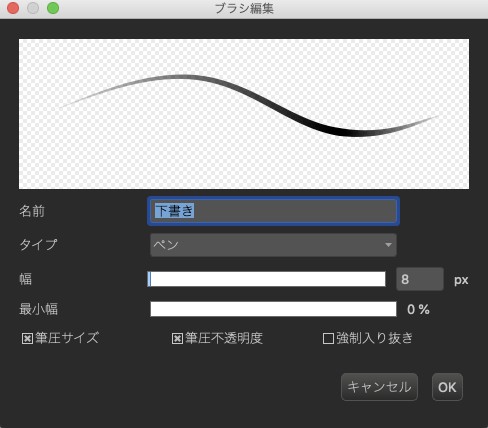
This is the pen we will be using.
This is also your choice.
It’s a bit thicker, and I recommend turning on the [Pressure Opacity] setting.
3. Let’s start drawing
Now it’s time to start. Let’s start with a fluffy drawing.
The point is to draw it softly, because it is difficult to draw it in detail from the beginning. Draw a rough outline.
If you draw too much in detail, you may end up in the state of thinking stuck at the beginning.
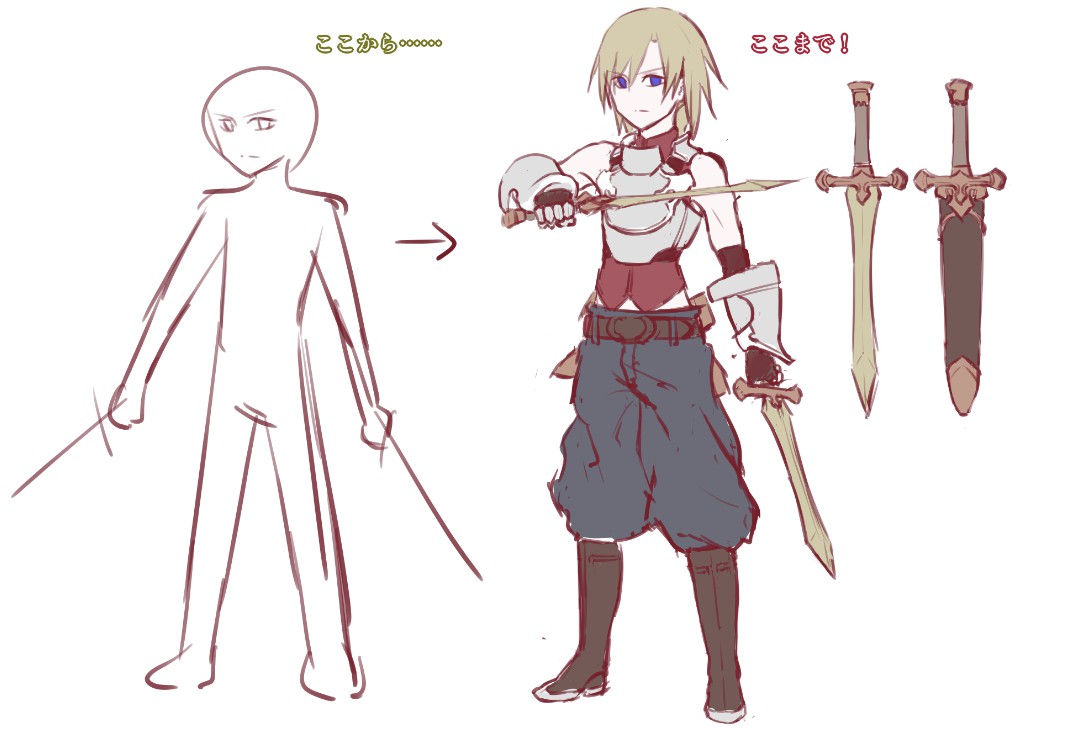
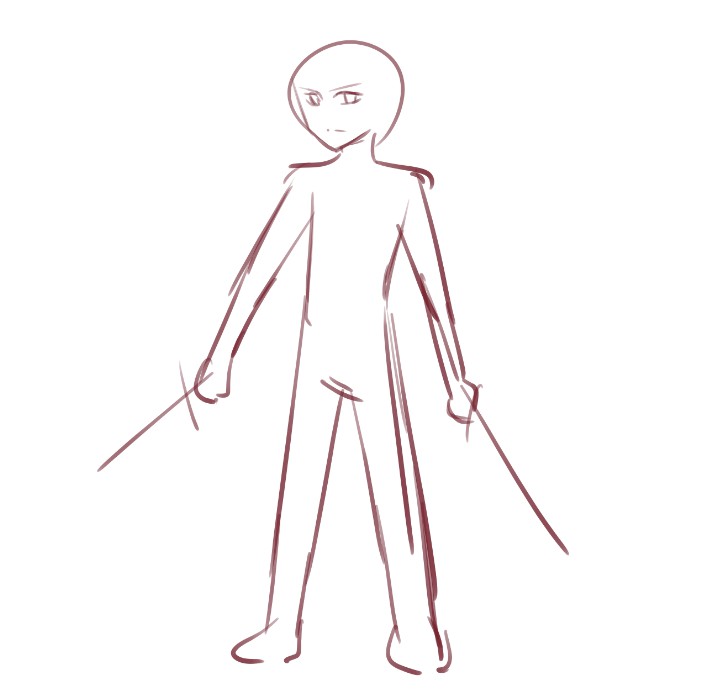
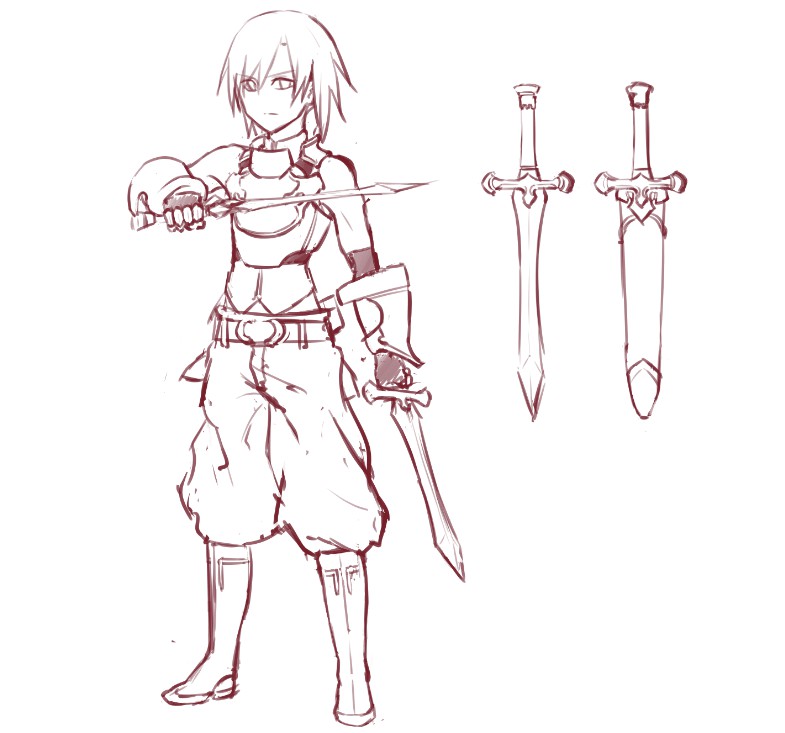
It’s easier to proceed if you draw a silhouette of the whole body.
This will be the base of the character.
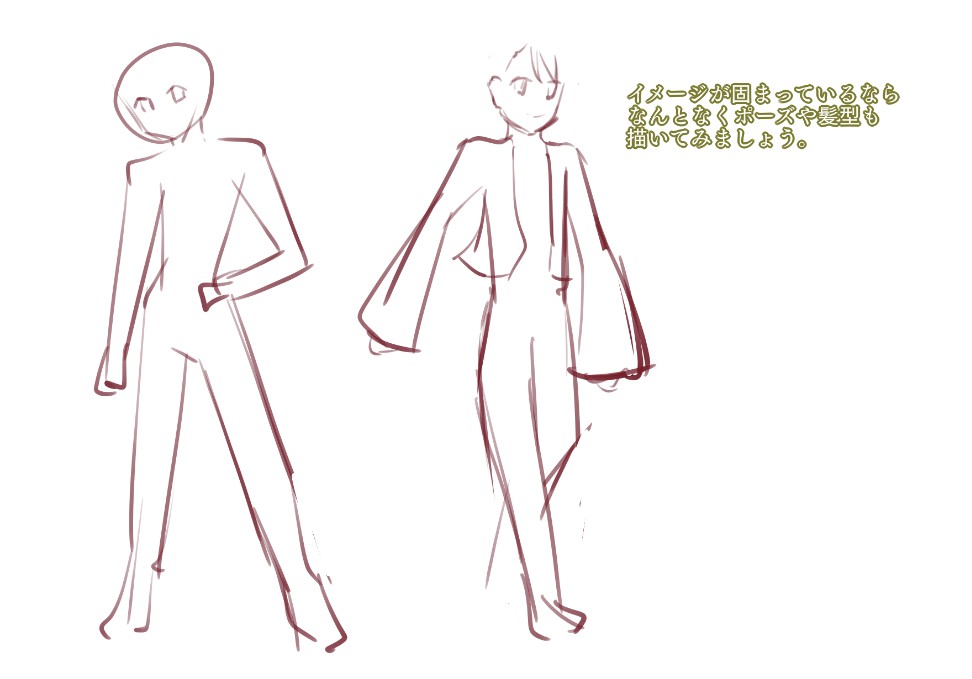
He’s stoic, so keep the eyes crisp and the mouth muffled. …… What to do about the hair… I’ll get to that later. And add two swords!
4. Draw the part you want to draw (face, hairstyle)
Once you have a rough idea of what you want to draw, it’s time to draw the parts you enjoy drawing.
The face is definitely fun to draw, especially the eyes and the hairstyle.
This is the part where you get serious!
Prepare your serious face.
Try to get closer to your ideal eyes as you repeatedly draw and erase.
Setting the pen to transparent (shift + Z) will make it easier erase while drawing.
The angle of the eyes changes the impression, so choose the eyes that match your personality and image.
It’s a subtle difference, but it’s surprisingly important.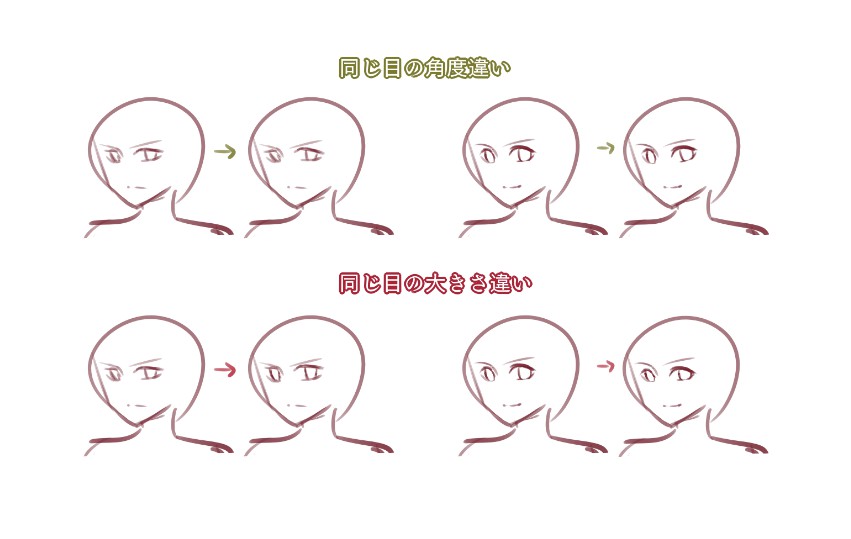
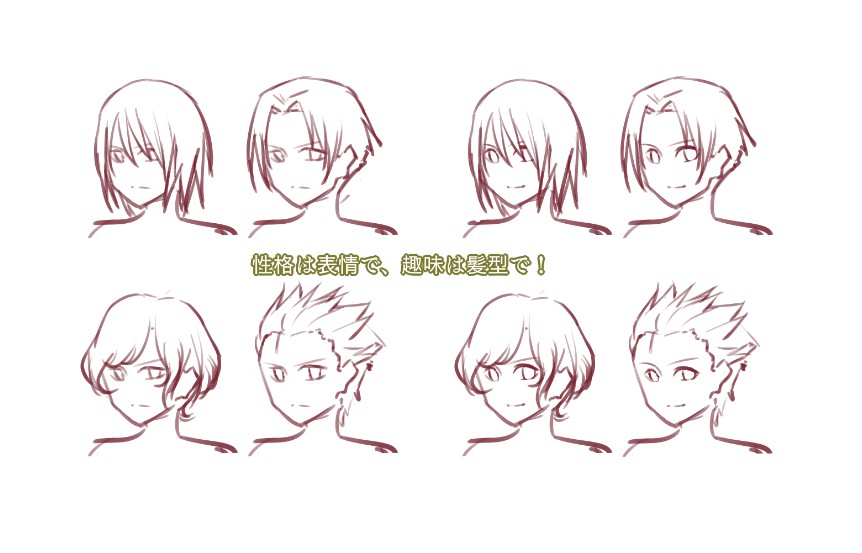
The hairstyle also gives a variety of impressions, but I don’t think there’s much of a problem with drawing freely in this area.
It’s your character after all!
Hair styles describe characters’ hobbies than their personalities.
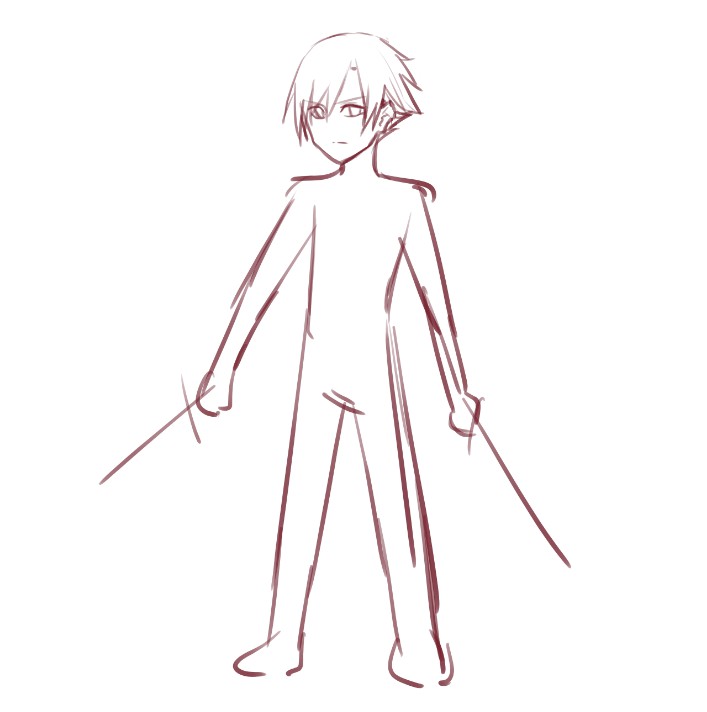
If you feel like something is missing ……, duplicate the layer and save it.
Saving your work process won’t maximize your saving storage that often, so don’t worry!
▶︎Let’s use the layer function.
…… Yeah! Something like this!
5. Draw the parts that need to be drawn (clothes)
Now, let’s move on to the clothes.
I’m not very good at this, but I can’t skip this…
Let’s face the music and do this together.
For those who say “I can’t draw clothes for the life of me!”, don’t force yourself and challenge yourself next time!
You don’t have to draw the whole body when you draw a character.
You can make your drawing look better by drawing in a way around your weakness, such as hiding his/her hands under a cloak and/or overlapping his/her body under weapons.
The key to continue enjoying drawing is to look at your work and praise yourself for your skill.
Eventually, there will come a day when you will think, “I’ll try a little harder today.
Let that be the day you take on a challenge!
This process is one of the most difficult in character design, but there are a few points to remember.
First of all, try to divide the design into different parts.
You’ll find it easier to draw the undergarment and jacket, as well as the collar, shoulders, and hands, by narrowing down your field of vision.
I recommend starting with the collar, chest, and shoulders.
It’s easier to get the tone right if you start here.
After drawing the face and neck, move on to the collar.
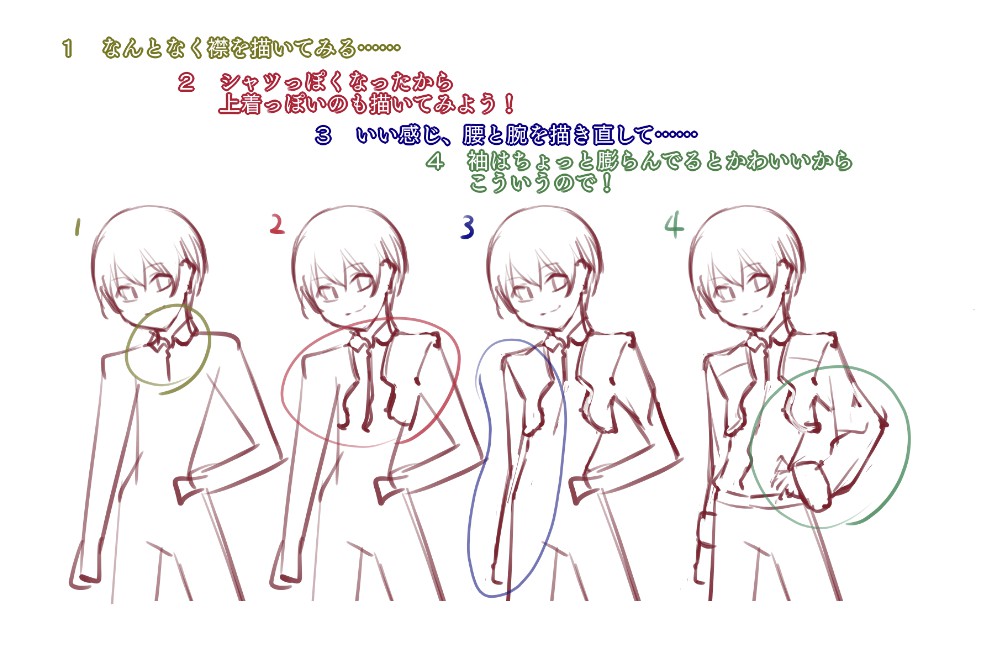
If you feel that the balance of the base is not right, you can change the size and position of the base by using the [Selection Tool] or [Lasso Selection Tool] and transforming it (command + T).
If you think you have a good drawing but the position is not quite right.., use it!
However, this does not mean that the picture will be complete as it is, so don’t worry if it is out of balance! For more details, click the two links below.
▶︎Let’s use the selection tool.
▶︎[For Beginners] Easy with the Transform Tool! Face and Body Balancing Techniques [For Smartphones].
As usual it’s a matter of taste, but clothing is one area where the worldview and setting are particularly indicative.
For example, knights wear armor, high school students wear blazers, and so on.
One of the key points is to draw something simple first and work your way up rom there.
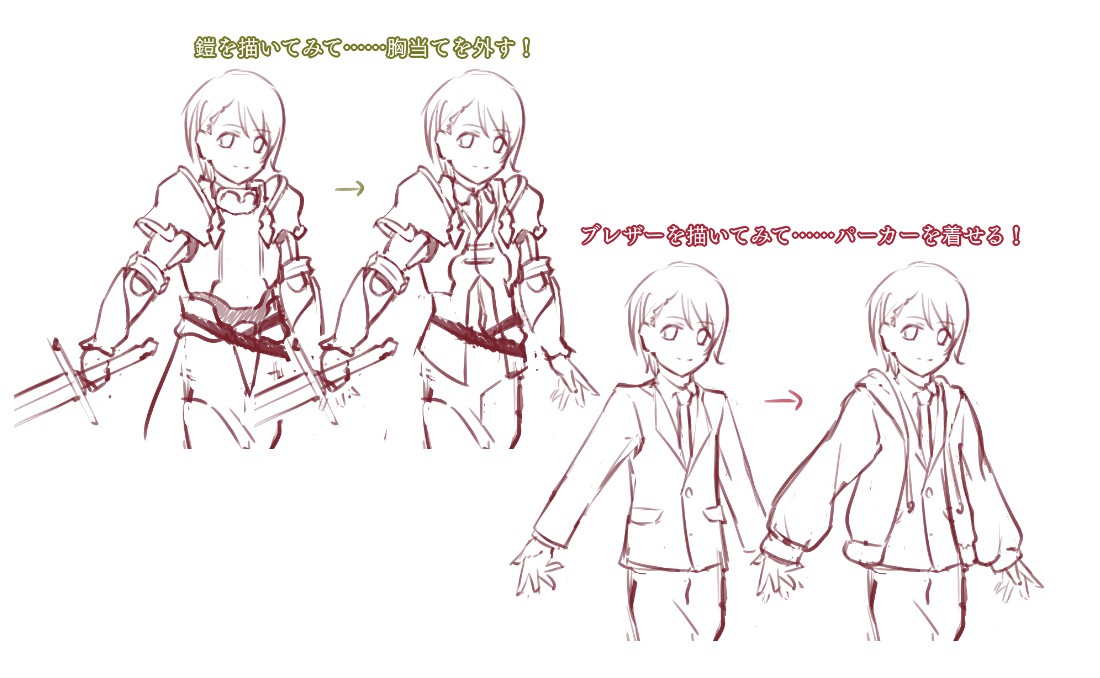
For those who say “I can’t draw simple clothes!”, try drawing while looking at photos or real clothes.
I think the main reason why people can’t draw well is because they don’t know much about it.
You don’t have to draw everything correctly, but it doesn’t hurt to have the right image.
Your curiosity to question something “What is that really like?” is the first step.
It’s also a good idea to take a closer look at the costumes worn by your favorite anime and video game characters.
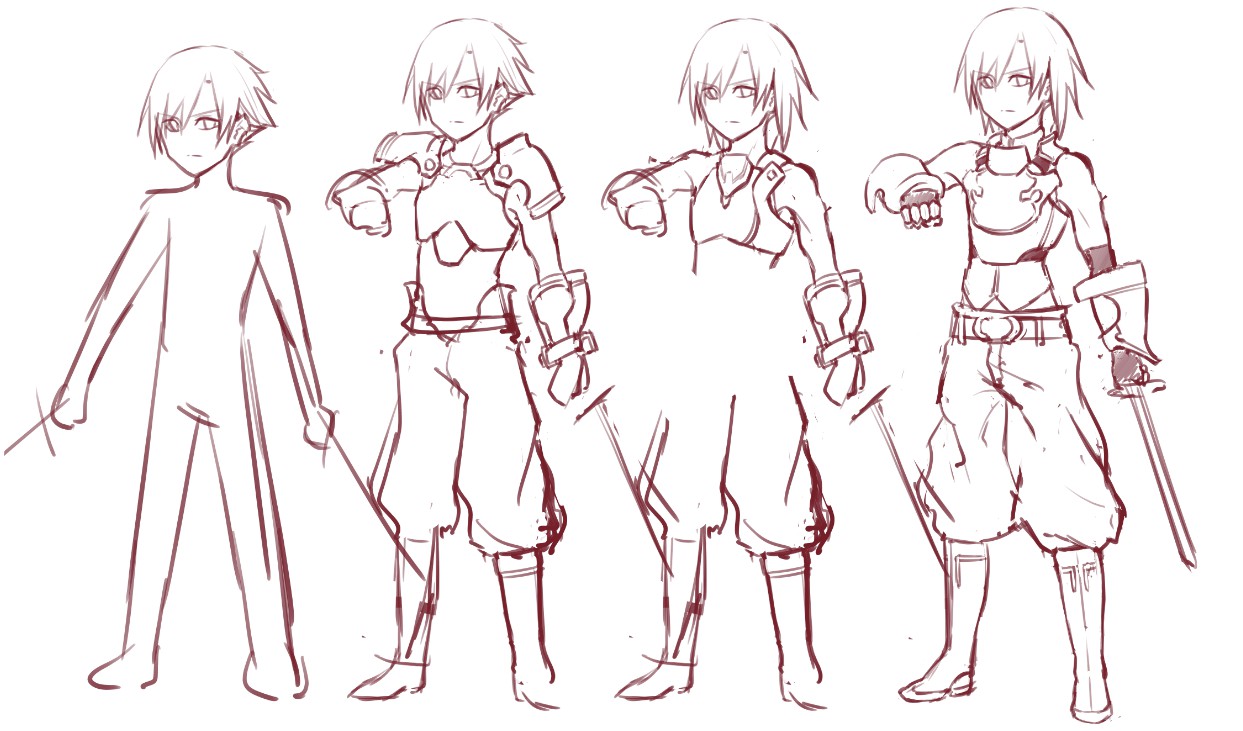
My character carries two swords, so he needs clothes that look light and mobile.
I also drew the armor on…., but it doesn’t look right.
I’m not sure if it’s the hair or the haircut, but I’ll have him grow it out a bit.
I also took off the shoulder armor…. Yeah, it’s looking good!
6. Take a break
Remember to take a break from time to time.
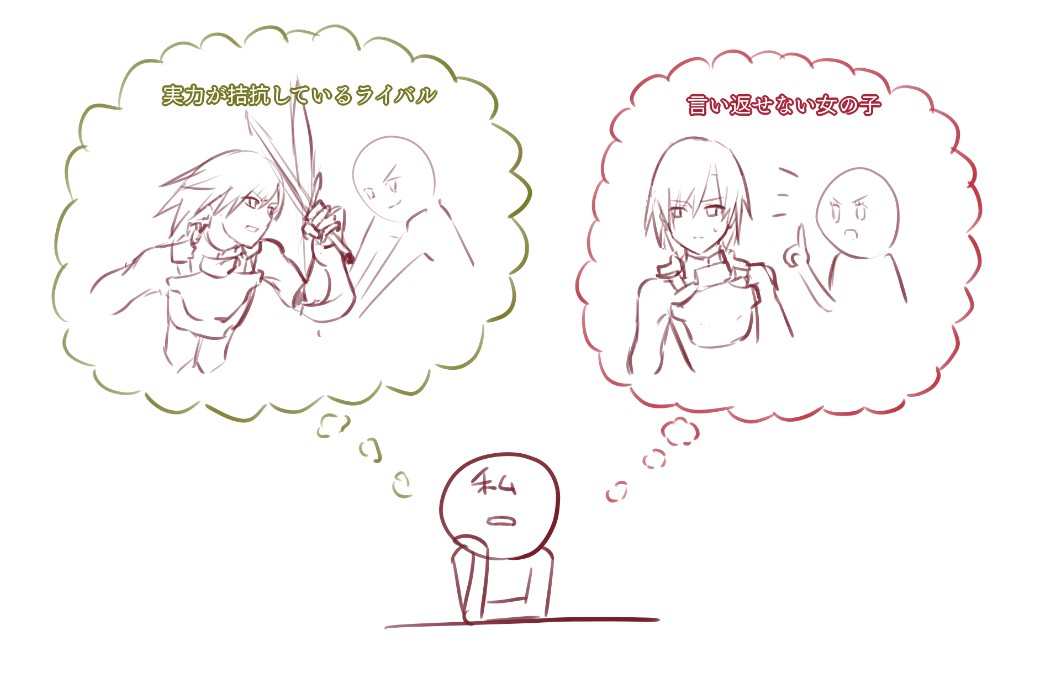
It’s fun to look at the characters you’ve drawn and fantasize about their stories.
Once the look is solidified, you can come up with more detailed settings than when it was all in your head.
As you see new characters and their relationships, it will energize you for the next round of character design.
When you’re done drawing, it’s easier to move on if you take some time to staring out and emptying your mind.
7. Draw a weapon
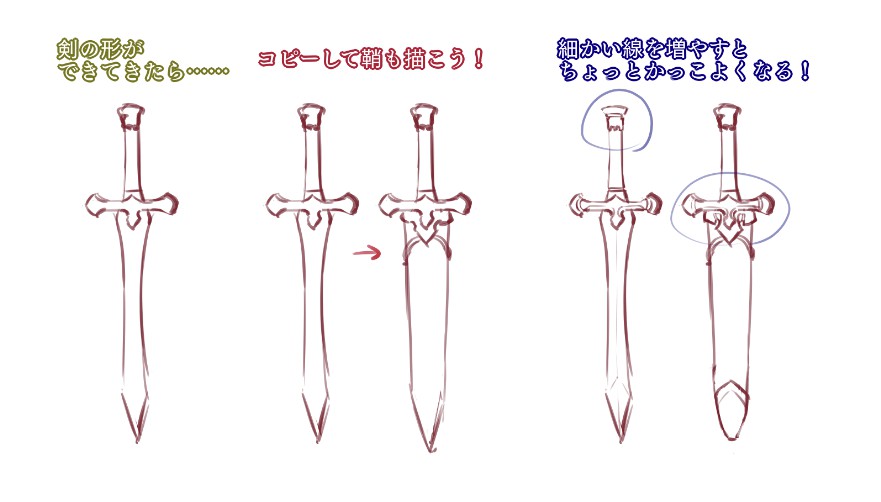
Weapon design is also difficult.
I think there are a lot of people who want to draw a cool weapon, so they make it intricate but too complicated. I would like you to consider the option that a weapon can be simple.
I like to think about the setting first, so I decide who made the weapon and who wields it first.
So you would think a weapon with lots of ornaments is either a valuable sword for a great man or a special weapon that contains inhuman power… right?
So it’s a little out of place for an infantry to have such a weapon,……, so he will have to work his way up from a low-cost, mass-produced weapon at first.
It’s easy, and I can draw their subsequent growth, killing two birds with one stone!
What do you think, simple weapons!?
If it’s a weapon with a scabbard, let’s draw it in its stored state as well.
If it looks cool in its scabbard, it will also look cool when pulled out.
This is also true for clothing, especially armor, but if it’s not enough, try doubling the lines or adding more parts.
If the shape is simple, the complexity will be just right.
But be careful not to overdraw!
The sword I drew earlier is cool and I’ll use it as is.
The scabbard should be attached to the back of the belt.
8. Make it complete
Now that we have drawn all the necessary parts of the character, let’s complete it.
It is easy to keep drawing in search of the right answer, but there probably isn’t one.
Besides, the character will not be born until you finish drawing it.
Not sharing your creation is such a shame!
If the hair is wrong, you can just grow it out.
If the clothes are wrong, re-tailor them.
Let’s complete the character first!
If you paint the character, it will save you a lot of time when you draw it as an illustration.
I painted it this time, but I tend to decide right before painting after much deliberation, so I’ll leave it to you.
Well, I’ve finished mine, here it is!
What do you think?
How do you like it? I think it turned out pretty cool!
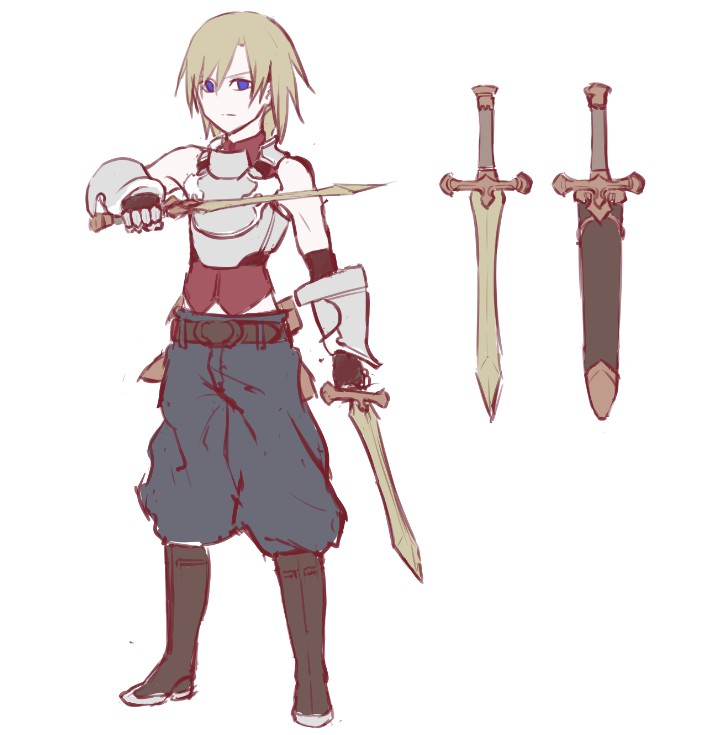
I really want to give it a name, but this is the hardest part …… and I’m really not good at it.
Can I call something complete without naming it?
So for the sake of time, let’s call him as the Nameless Swordsman.
Maybe its ok here because he’s nameless as a swordsman and he hasn’t revealed his name?
He’s hiding a big secret, I’m sure.
What do you think? I hope you were able to draw a cute and cool character of yours.
The difficult thing about this kind of article is that since it is about how to draw an original character, it is not enough to draw the same character.
“In the second part of the article, I will explain how to draw original characters, and how to draw them in a way that is easy to follow, and how to make them look good.
In the second part, we will create icons of our children that can be used on social media.
Since this is a lecture on how to draw the illustration itself, it can be applied to any character.
Thank you for reading!

(Sentence / picture / clock)
Twitter https://twitter.com/Clock1231
\ We are accepting requests for articles on how to use /

