2021.11.20
Manga Tutorial for Beginners 08 Let’s draw frames and speech bubbles.
Hello, this is ГФ.
Since I explained the rules regarding the outline and canvas, it’s time for the real work of drawing Manga. Starting off with “Frames” and “Speech Bubbles”.
Click Here for Previous Tutorials.
Manga Tutorial for Beginners 01 Process of Manga Making
Manga Tutorial for Beginners 02 Let’s Make Outline (Part 1)
Manga Tutorial for Beginners 03 Let’s Make Outline (Part 2)
Manga Tutorial for Beginners 04 Get Ready to Draw Manga with MediBang Paint!
Manga Tutorial for Beginners 05 Let’s Make Name(outline)
Manga Tutorial for Beginners 06 Let’s think about frame layout and screen.
Manga Tutorial for Beginners 07 Considerations when setting up the canvas.
Manga Tutorial for Beginners 08 Let’s draw frames and speech bubbles.
1. Frames
When you want to begin with lining the frames, the “Panel Division” tool comes in handy.
First, create a layer for dividing the panels. Choose “Add / 1 Bit” from the Layer tab and by clicking the gear icon on the right, change the layer name to “Panel” etc.
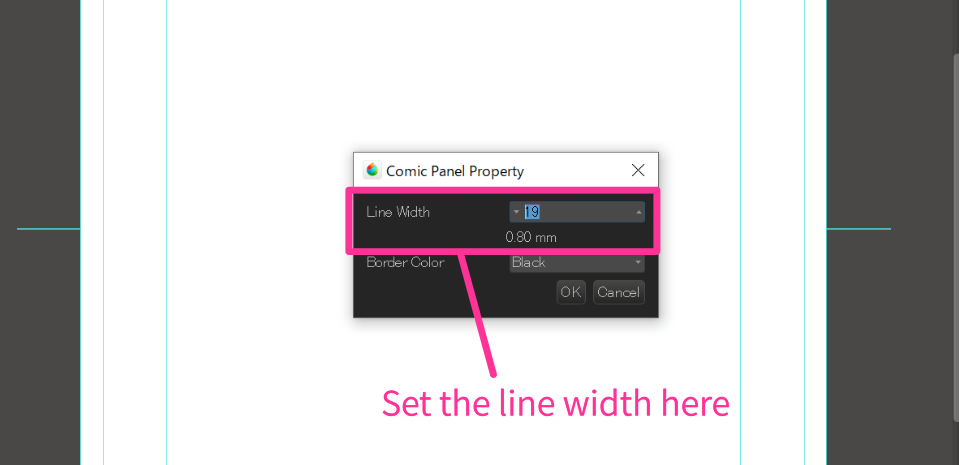
If you click “Add Panel Material” from the Layer tab while selecting the panel layer you just created, the following window appears.
Here, you can set the line width first. For reference, the numbers below (0.73mm on default) represent the thickness when you write on the analog canvas. There is no rule behind the line width but generally it is set thicker than the drawing lines. Most of the Manga uses 0.5mm to 1.0mm. I will be selecting 19 (0.8mm), as that’s what I usually draw with.
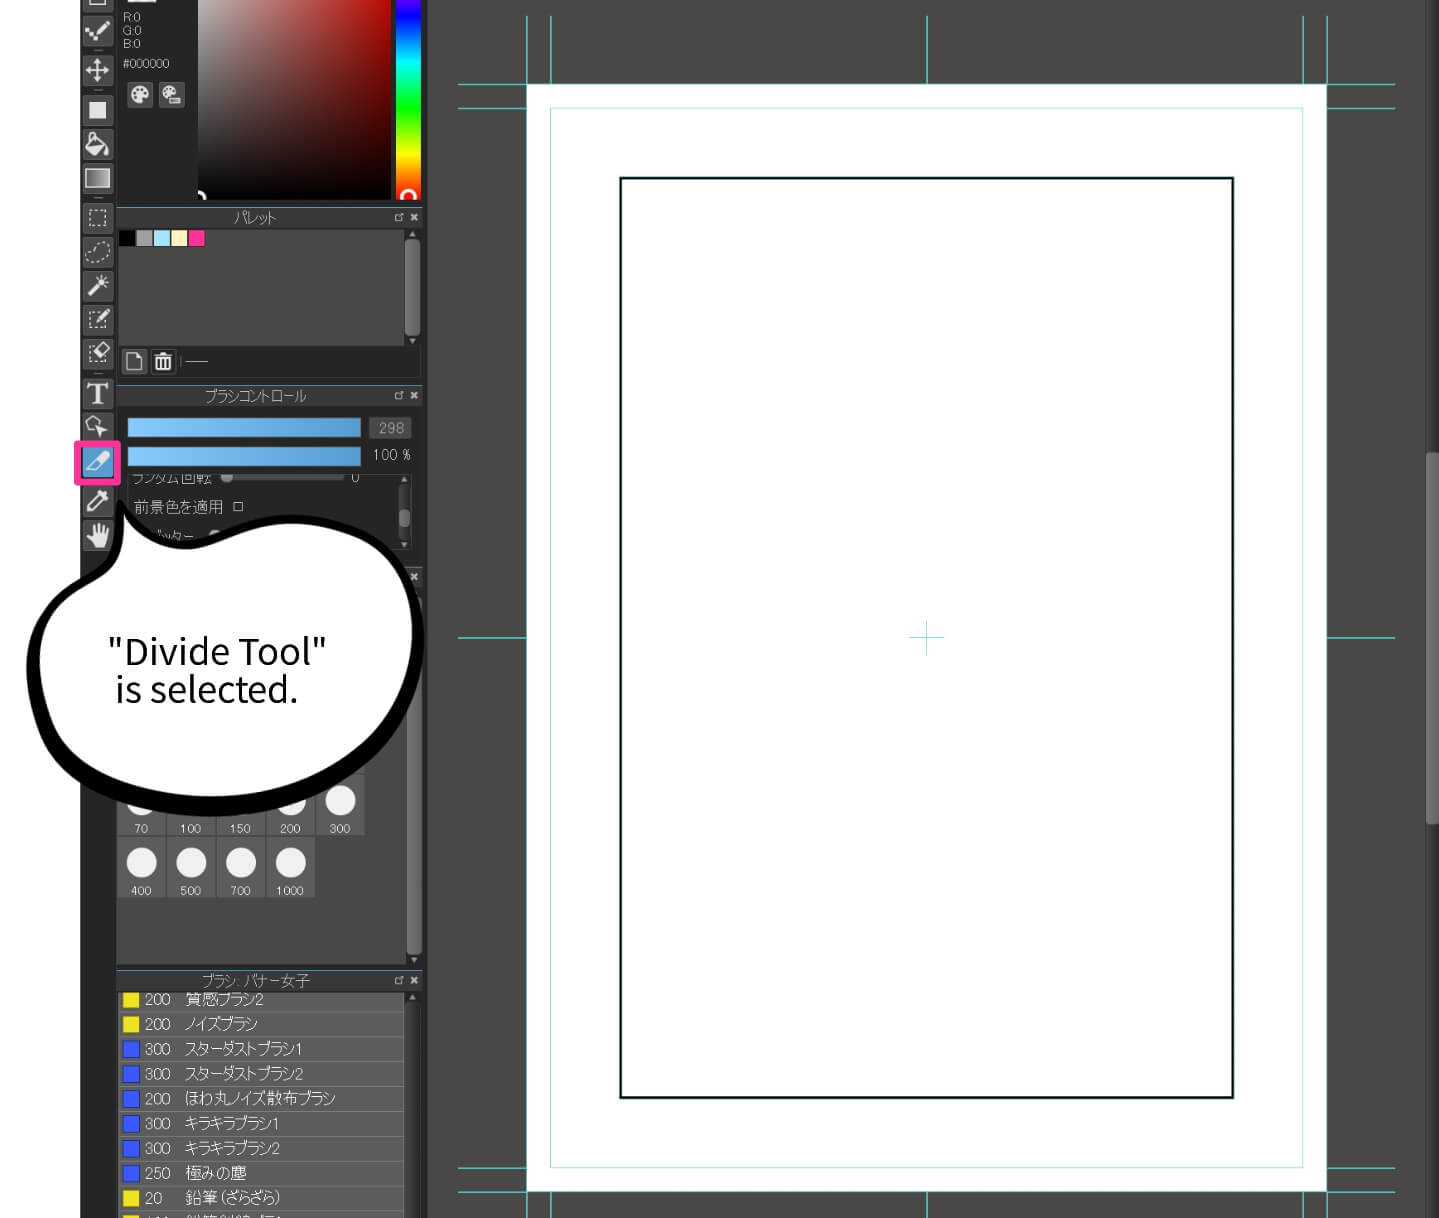
By clicking “OK”, a frame will be drawn as shown below. Additionally, the “Divide Tool” on the left tool bar is selected.
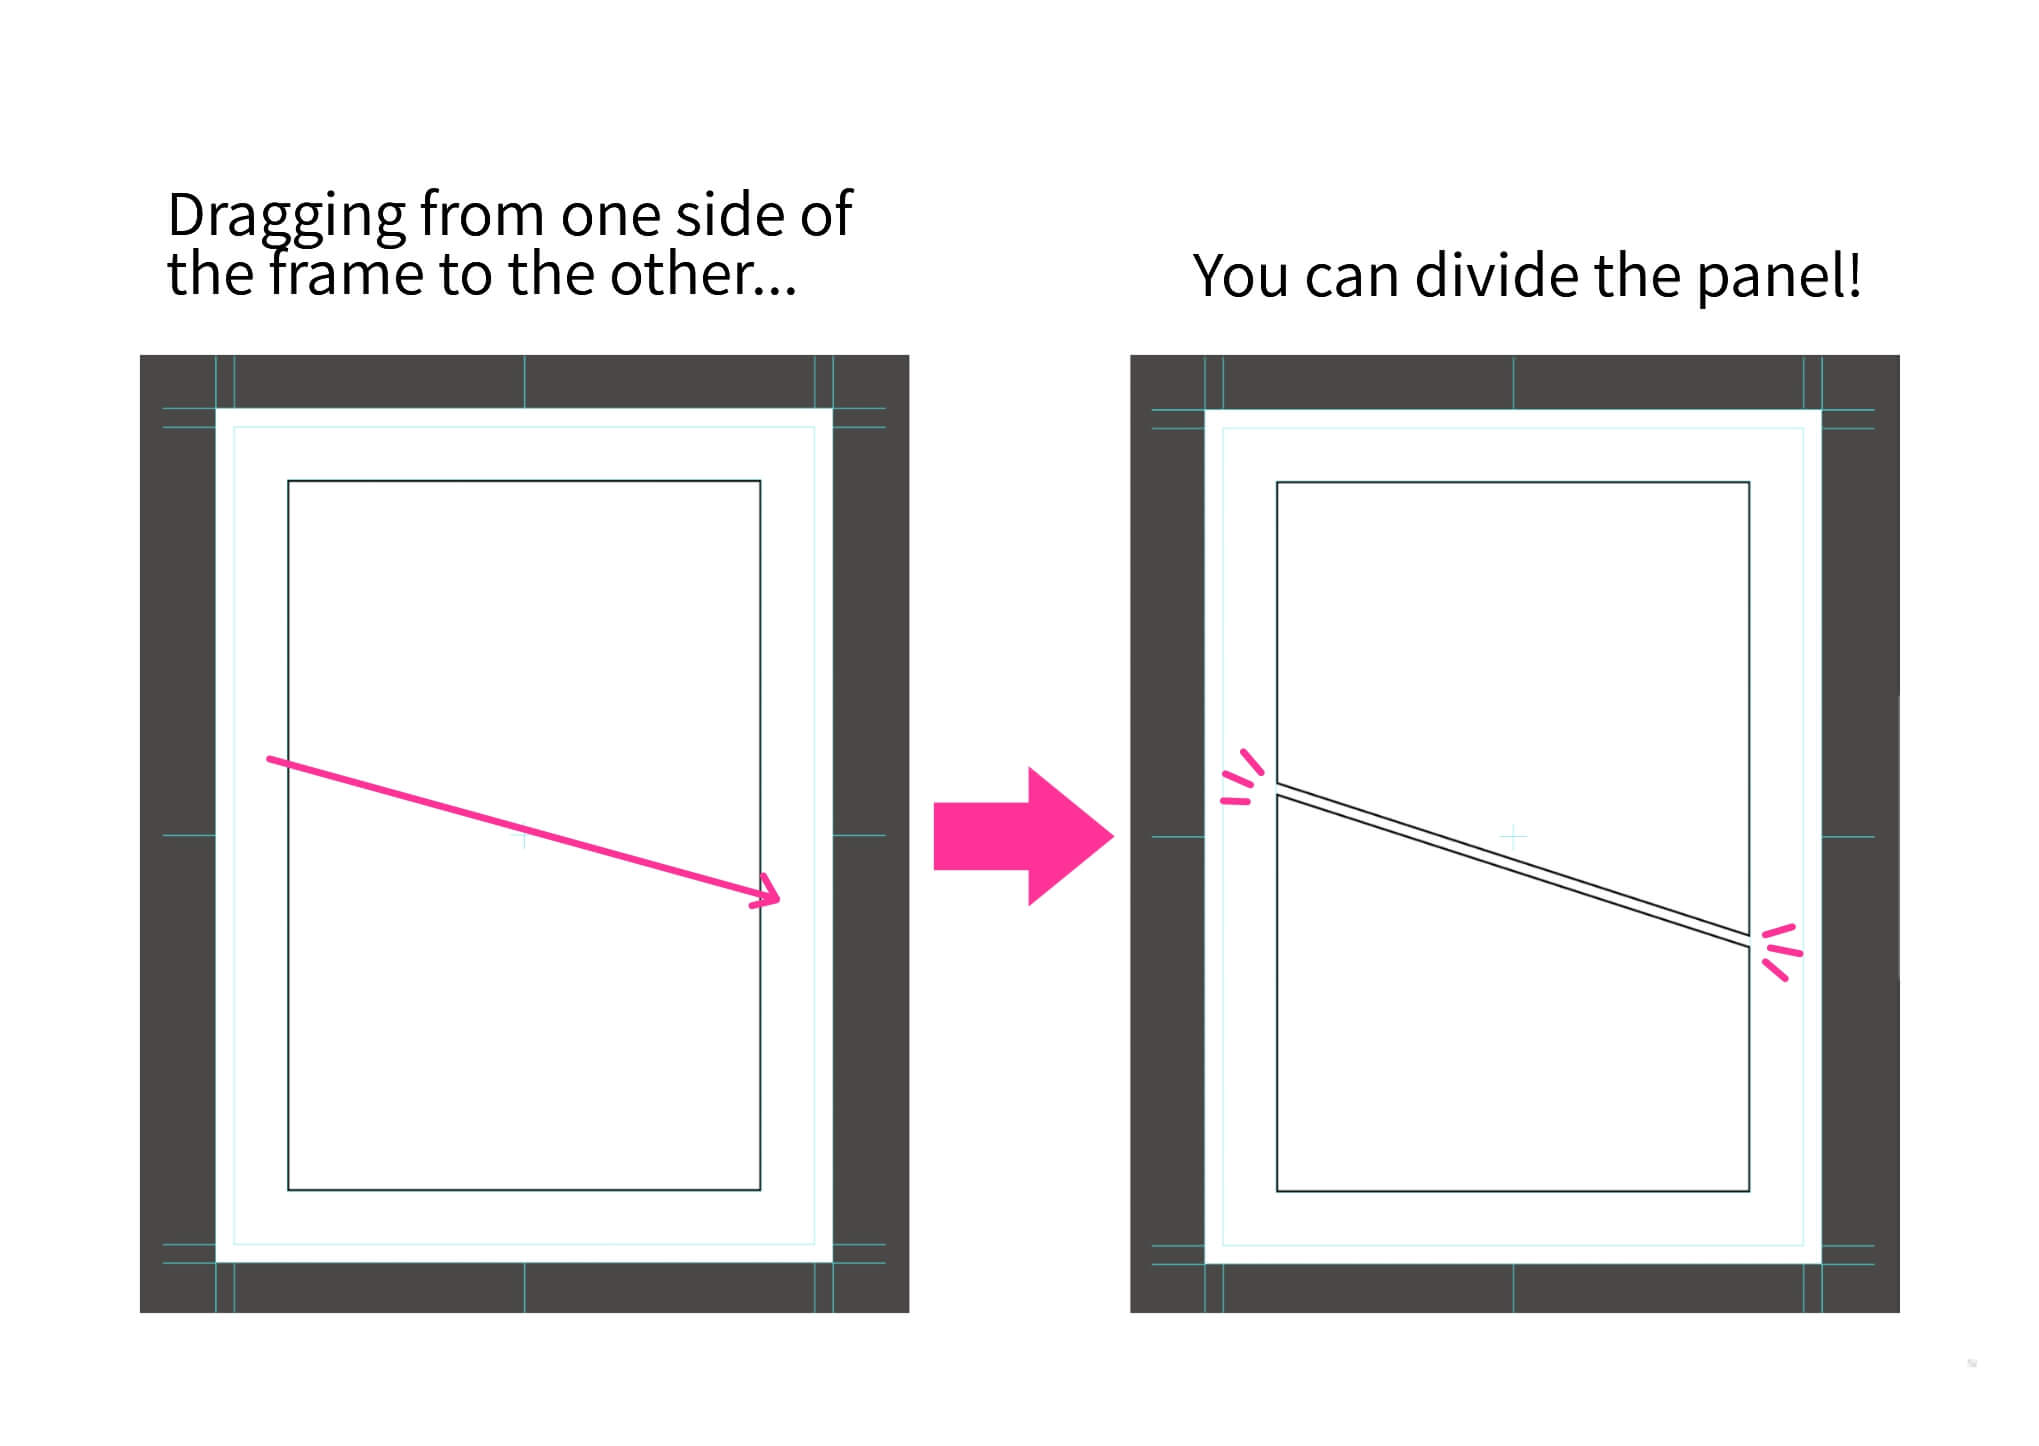
While selecting the “Divide Tool” you can divide the panel by clicking on the frame and dragging to the other side. Repeat this process to make multiple divisions of the panel. If you want to adjust the angle for when you divide diagonally, you can press the the shift key as you drag.
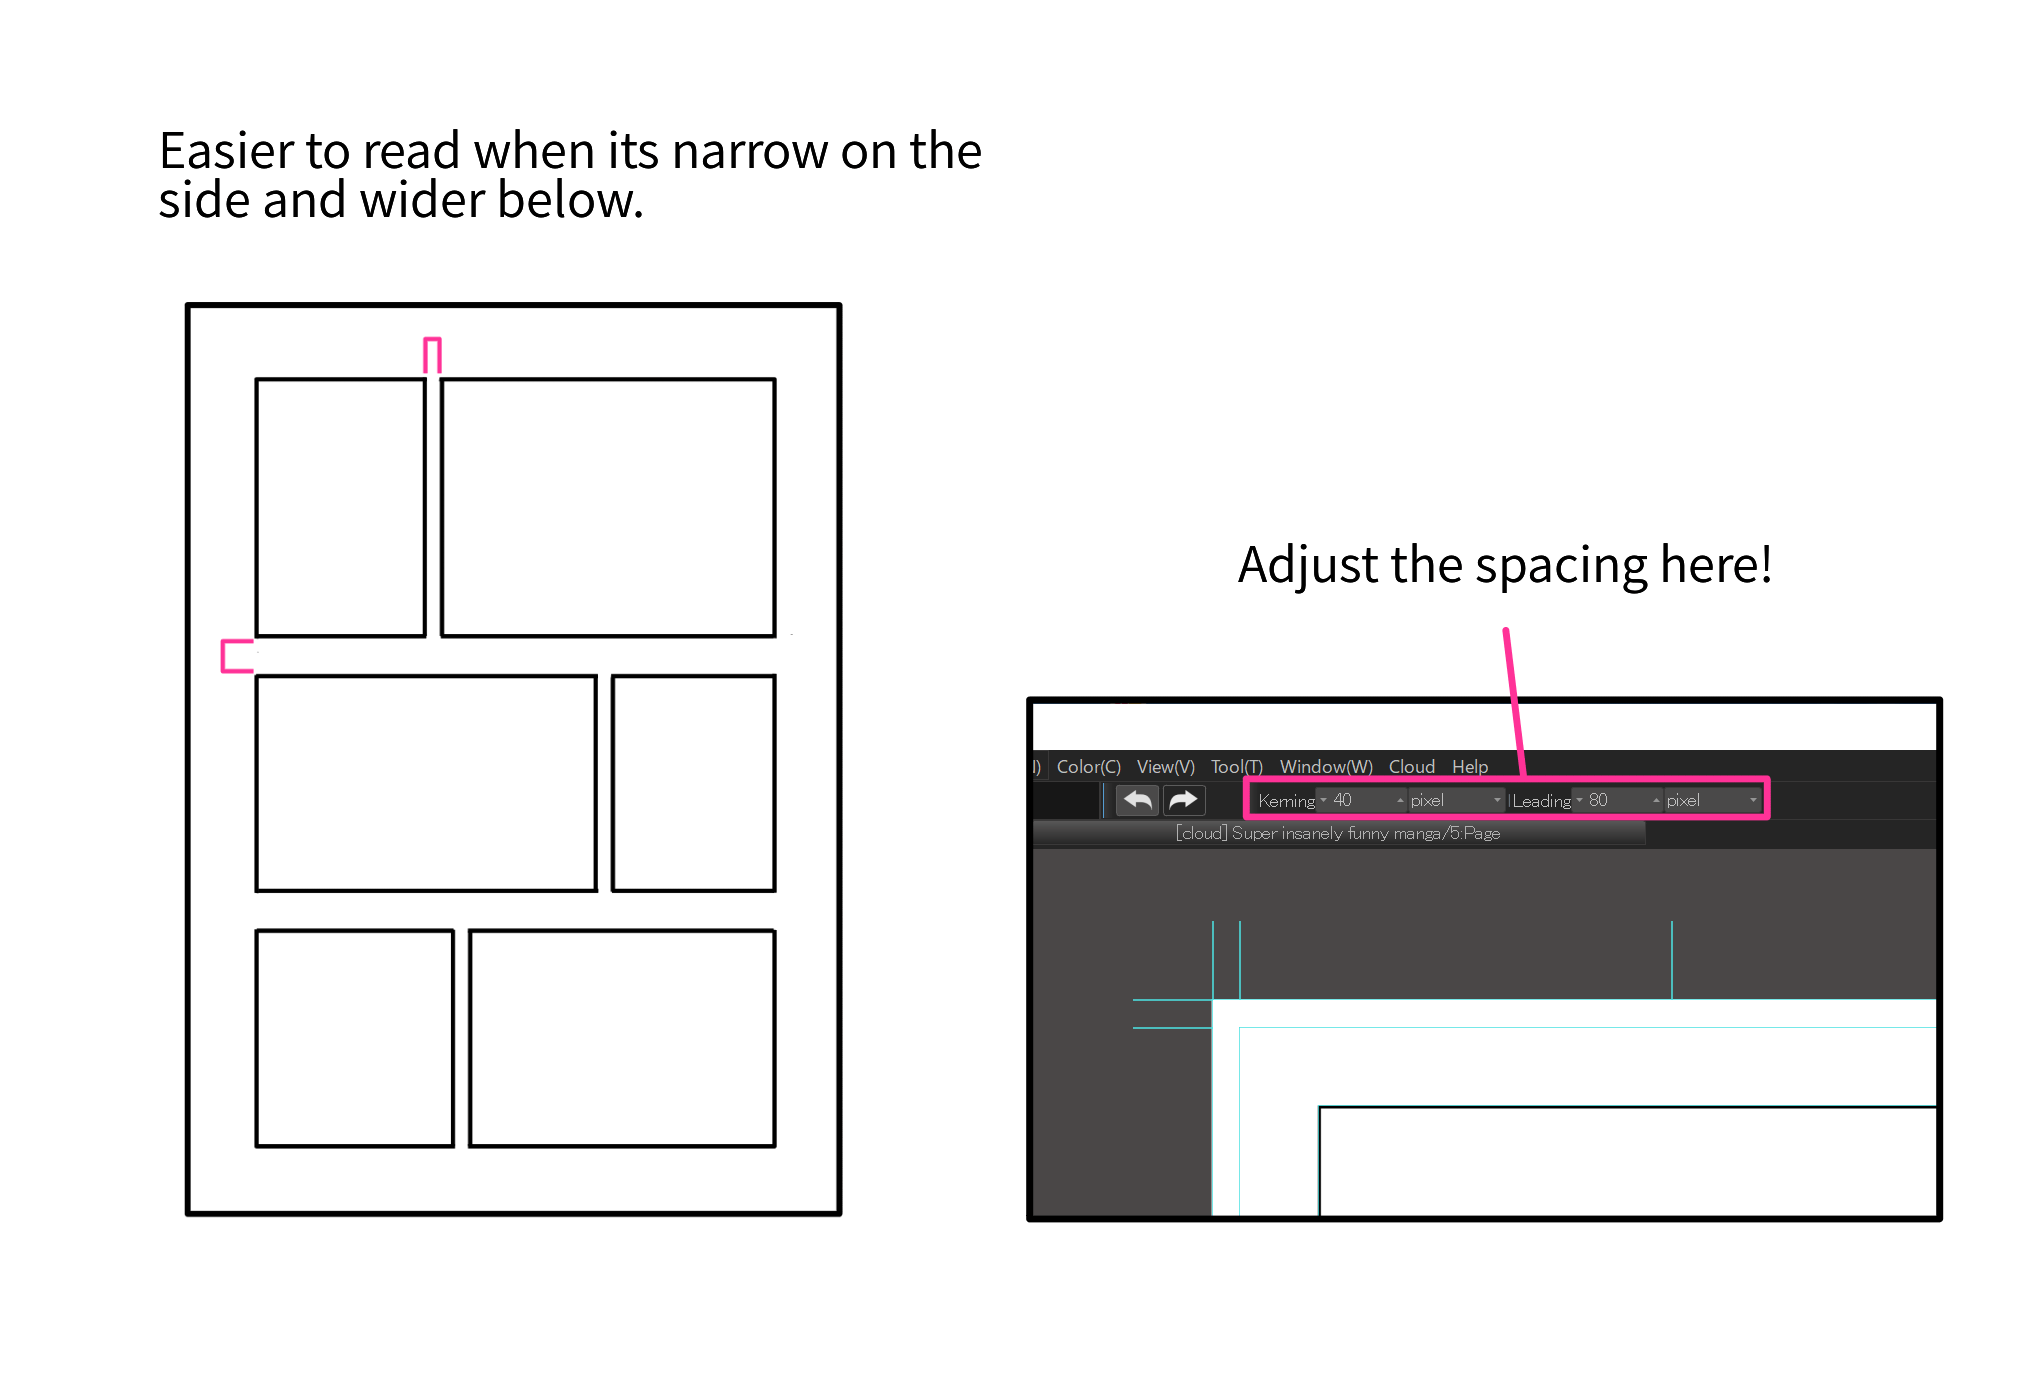
Since the panel is read right to left from the top row and move downwards as you reach the left division, it is easier to read if the spaces on the side are narrow and the spaces above / below are wider. You can change the settings for spacing at the top of the screen. The image uses pixels but you can also set in millimeters.
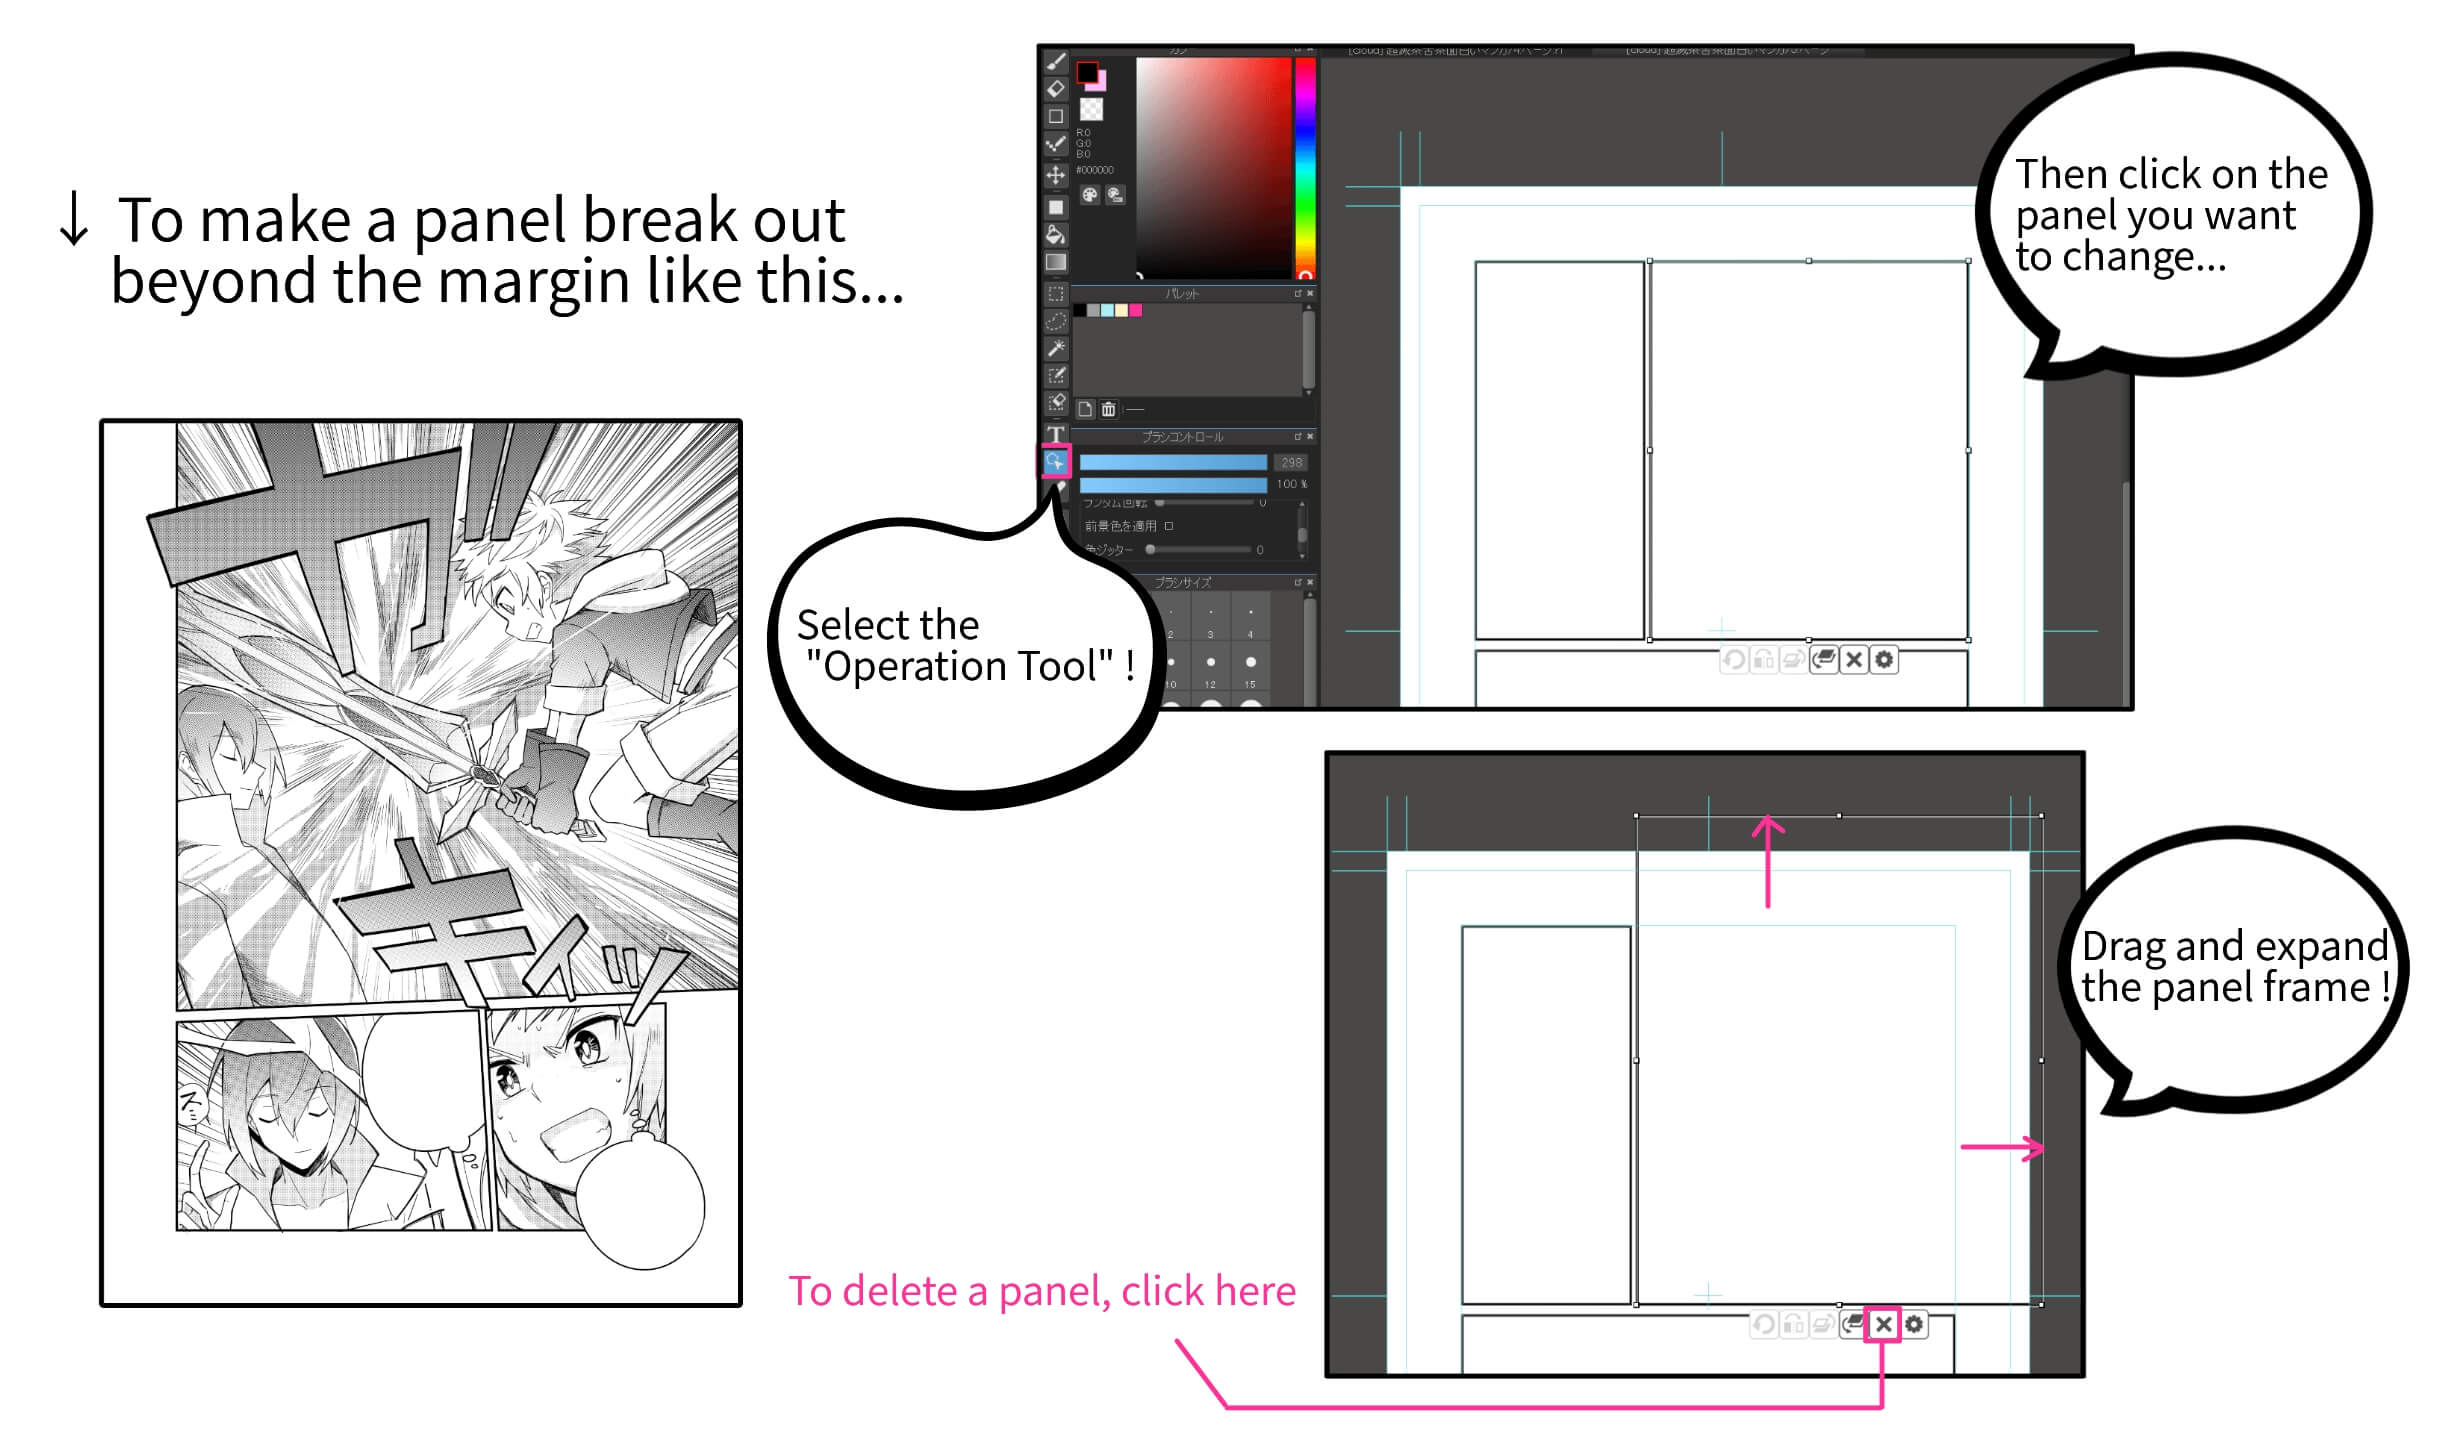
If you want to make a panel that breaks out beyond the margin (tachikiri), you can change to the “Operation Tool” from the tool bar and select the panel you want to edit. Then when you bring the cursor to the frame, while selecting the panel, it will change to a moving arrow. By dragging the frame on the arrow cursor mode, you can change the shape of frame line. You can make the break-out panel by expanding the frame beyond the page.
If you want to delete a panel, click the ” × ” icon while you select the panel using the “Operation Tool”.
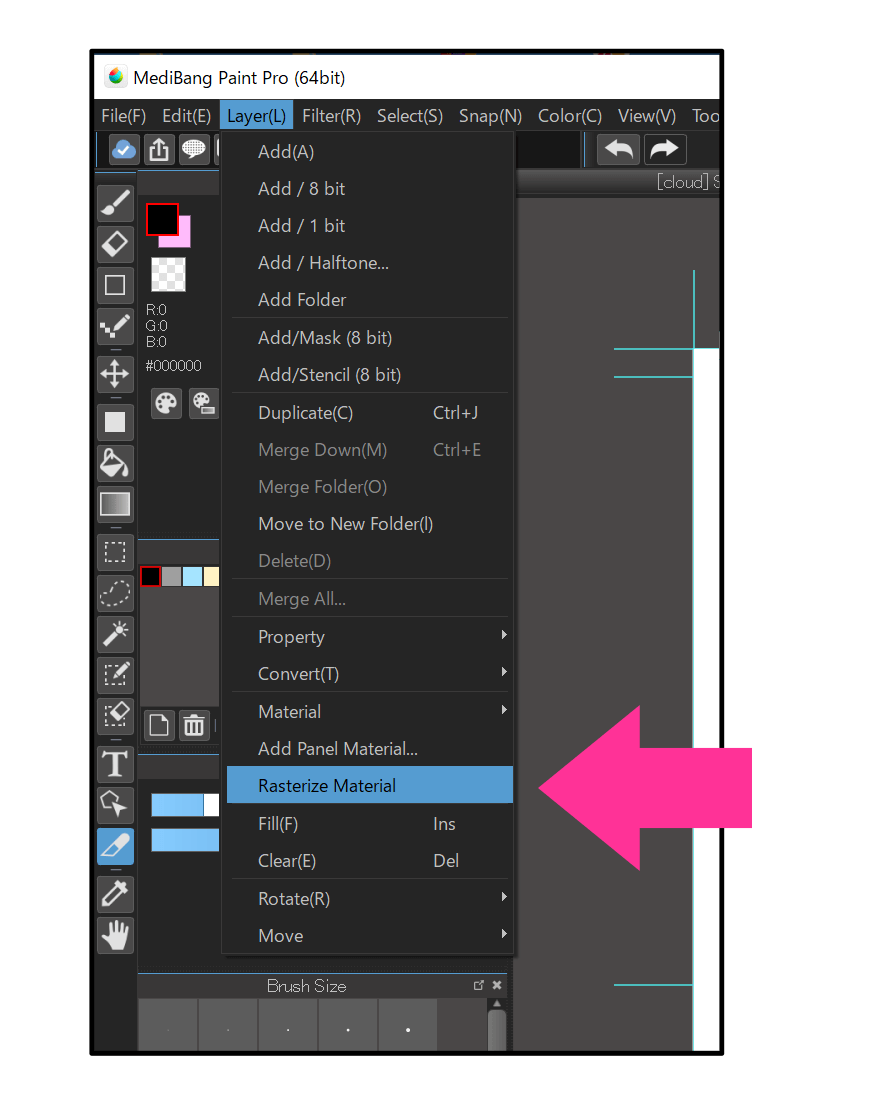
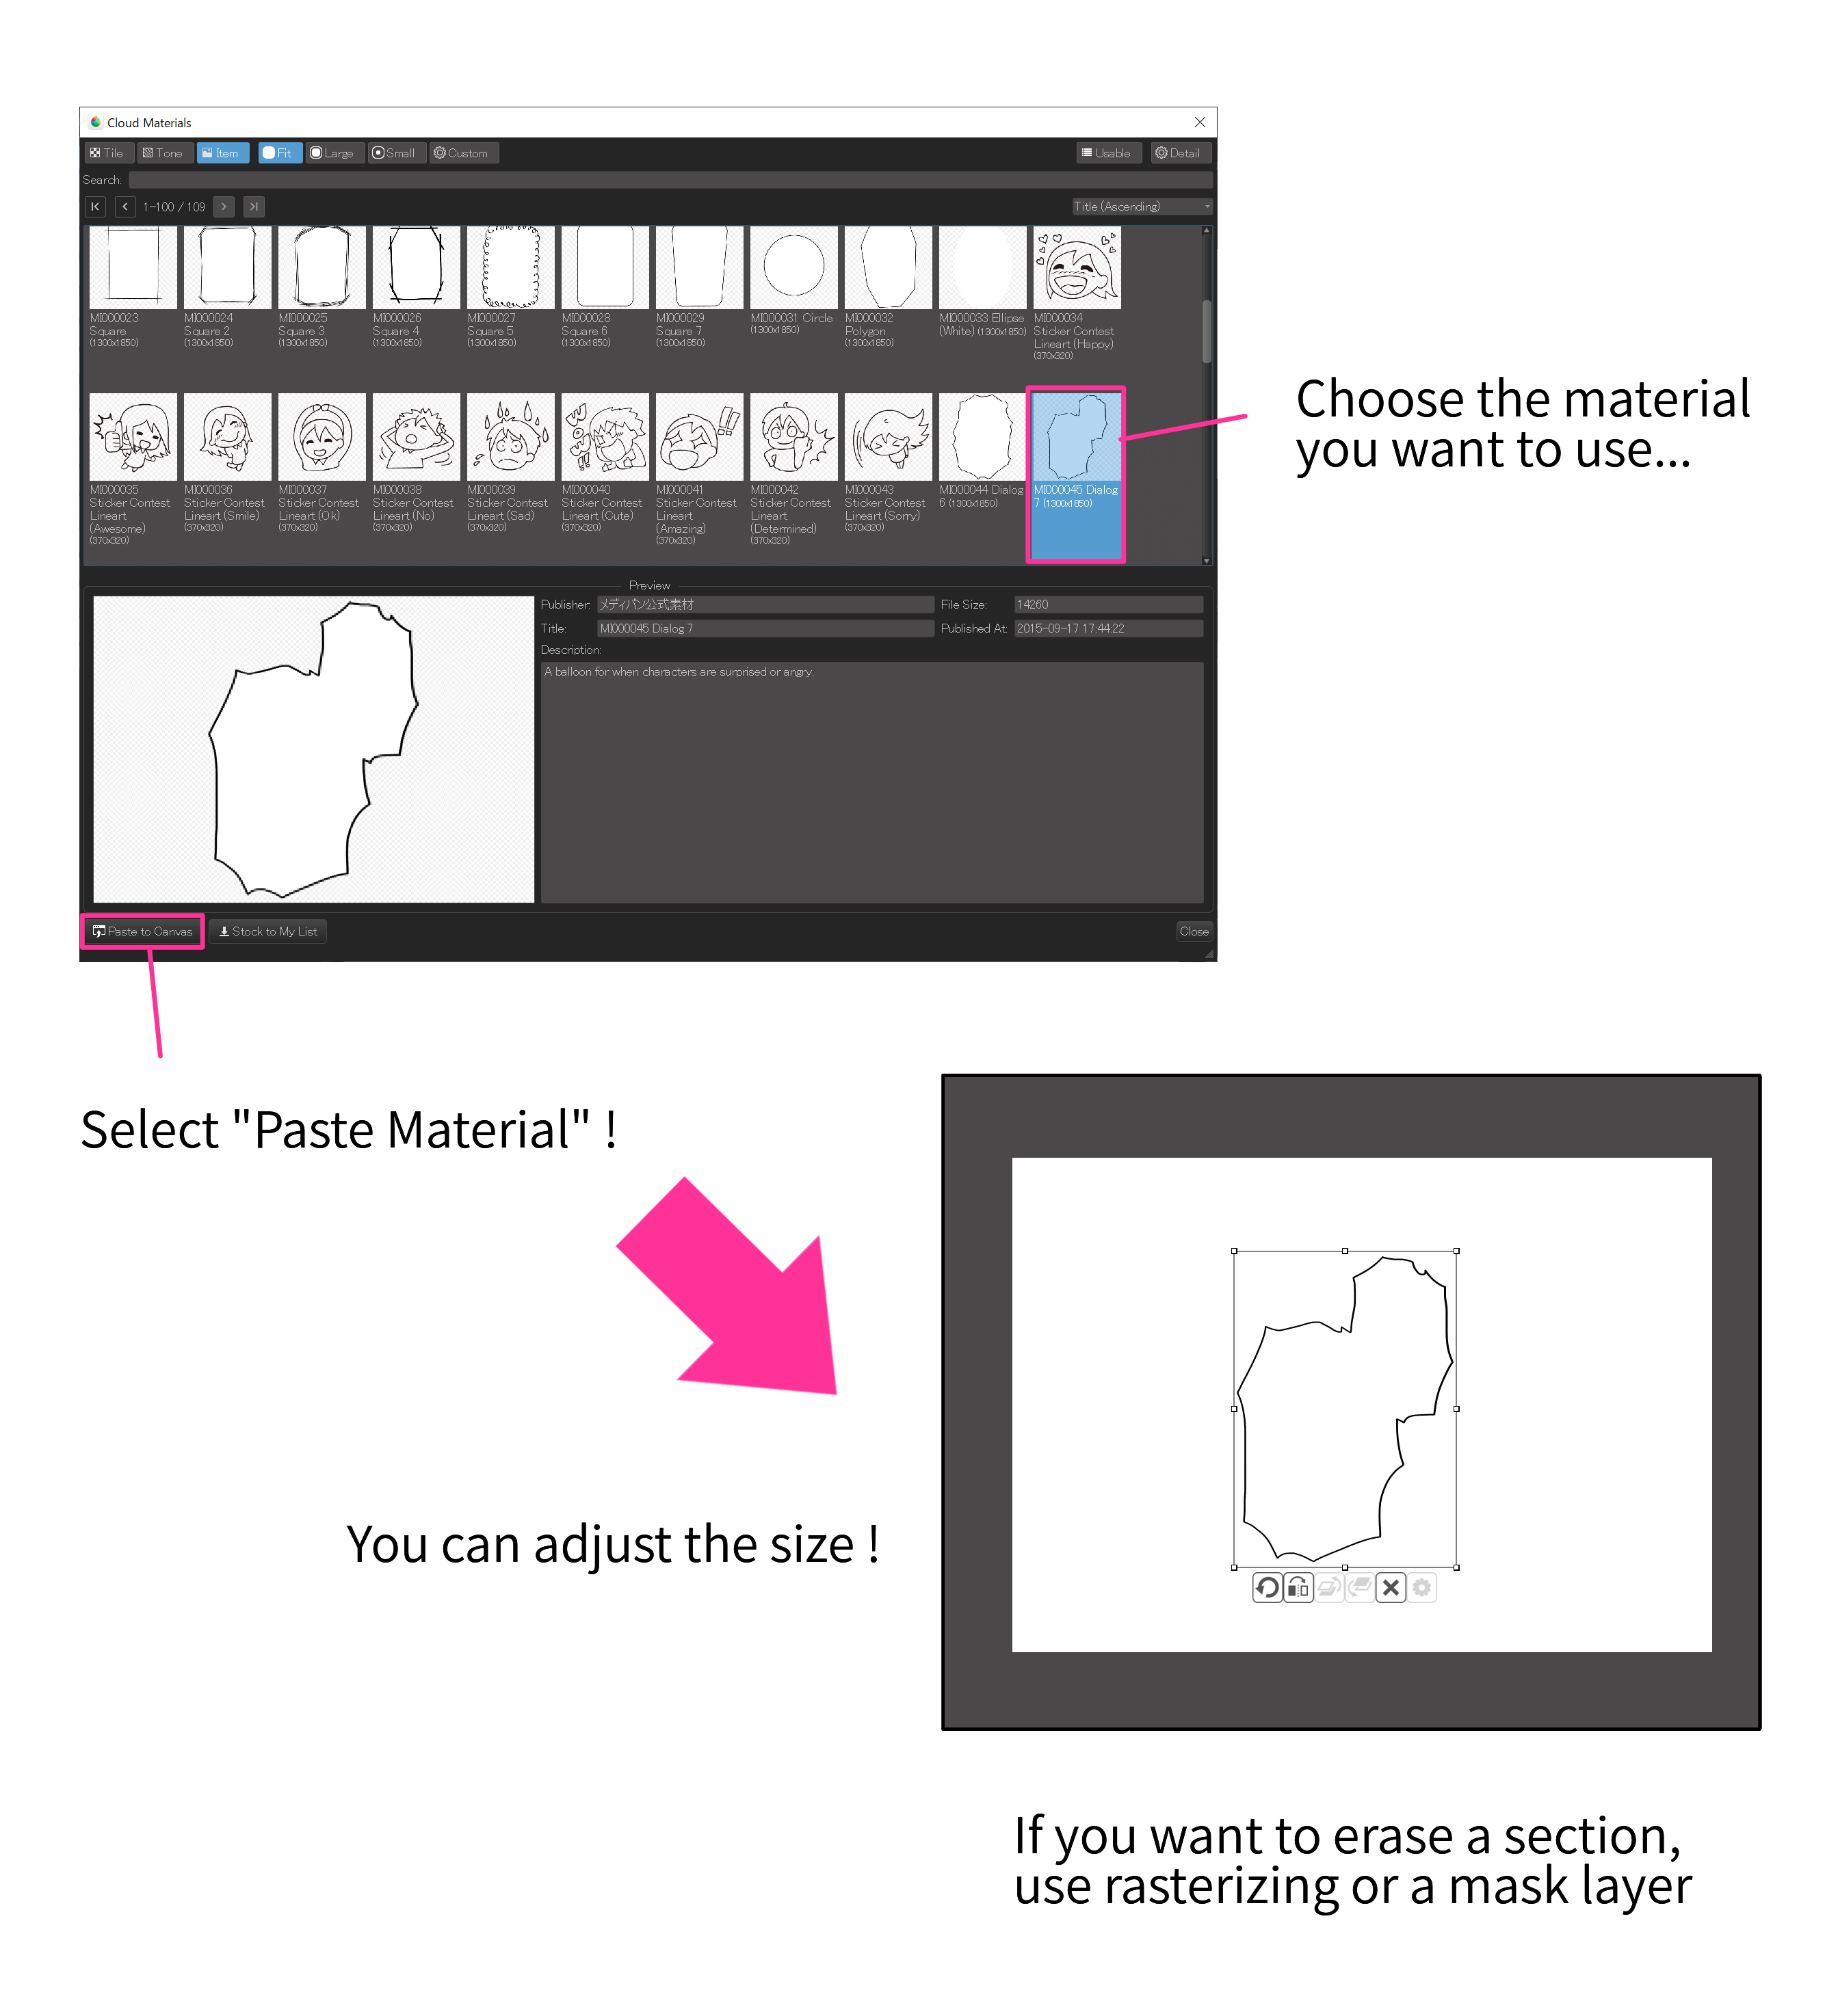
Frames (panels) drawn using the “Division Tool” cannot be erased with the “Eraser Tool”. If you want to erase a portion of the panel with the eraser, select “Rasterize Material” from the Layer tab.
However, you can also do the same without rasterizing; by using the “Mask Layer”.
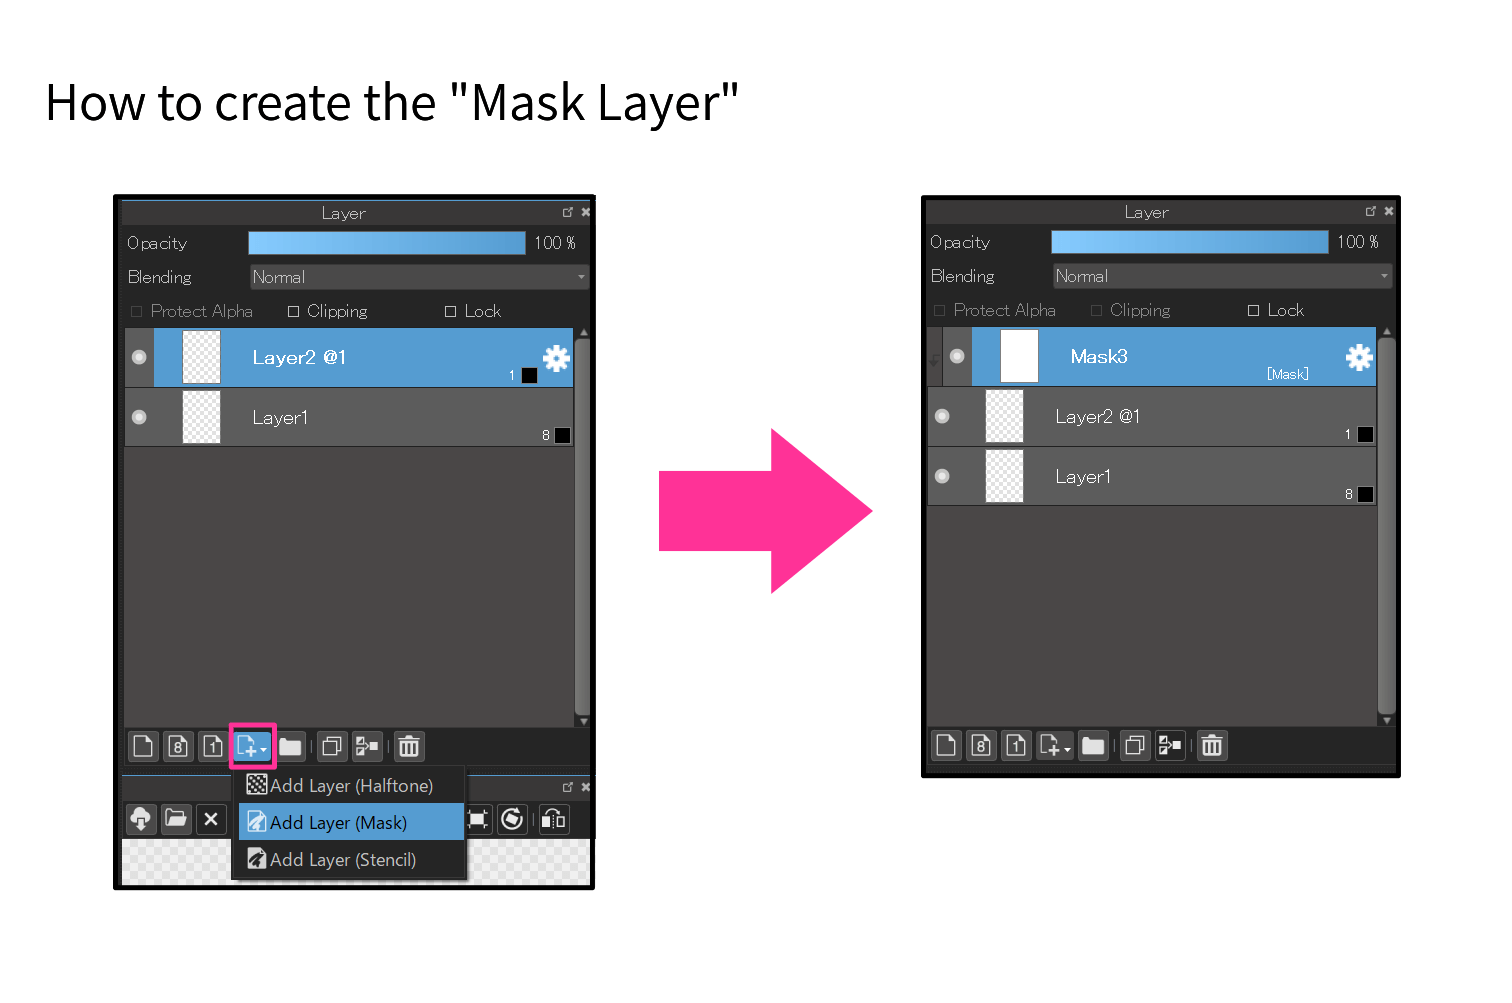
While selecting your panel layer, click on the fourth icon from the left inside the Layer window. From the three “Add Layer” options, select “Add Layer (Mask)”.
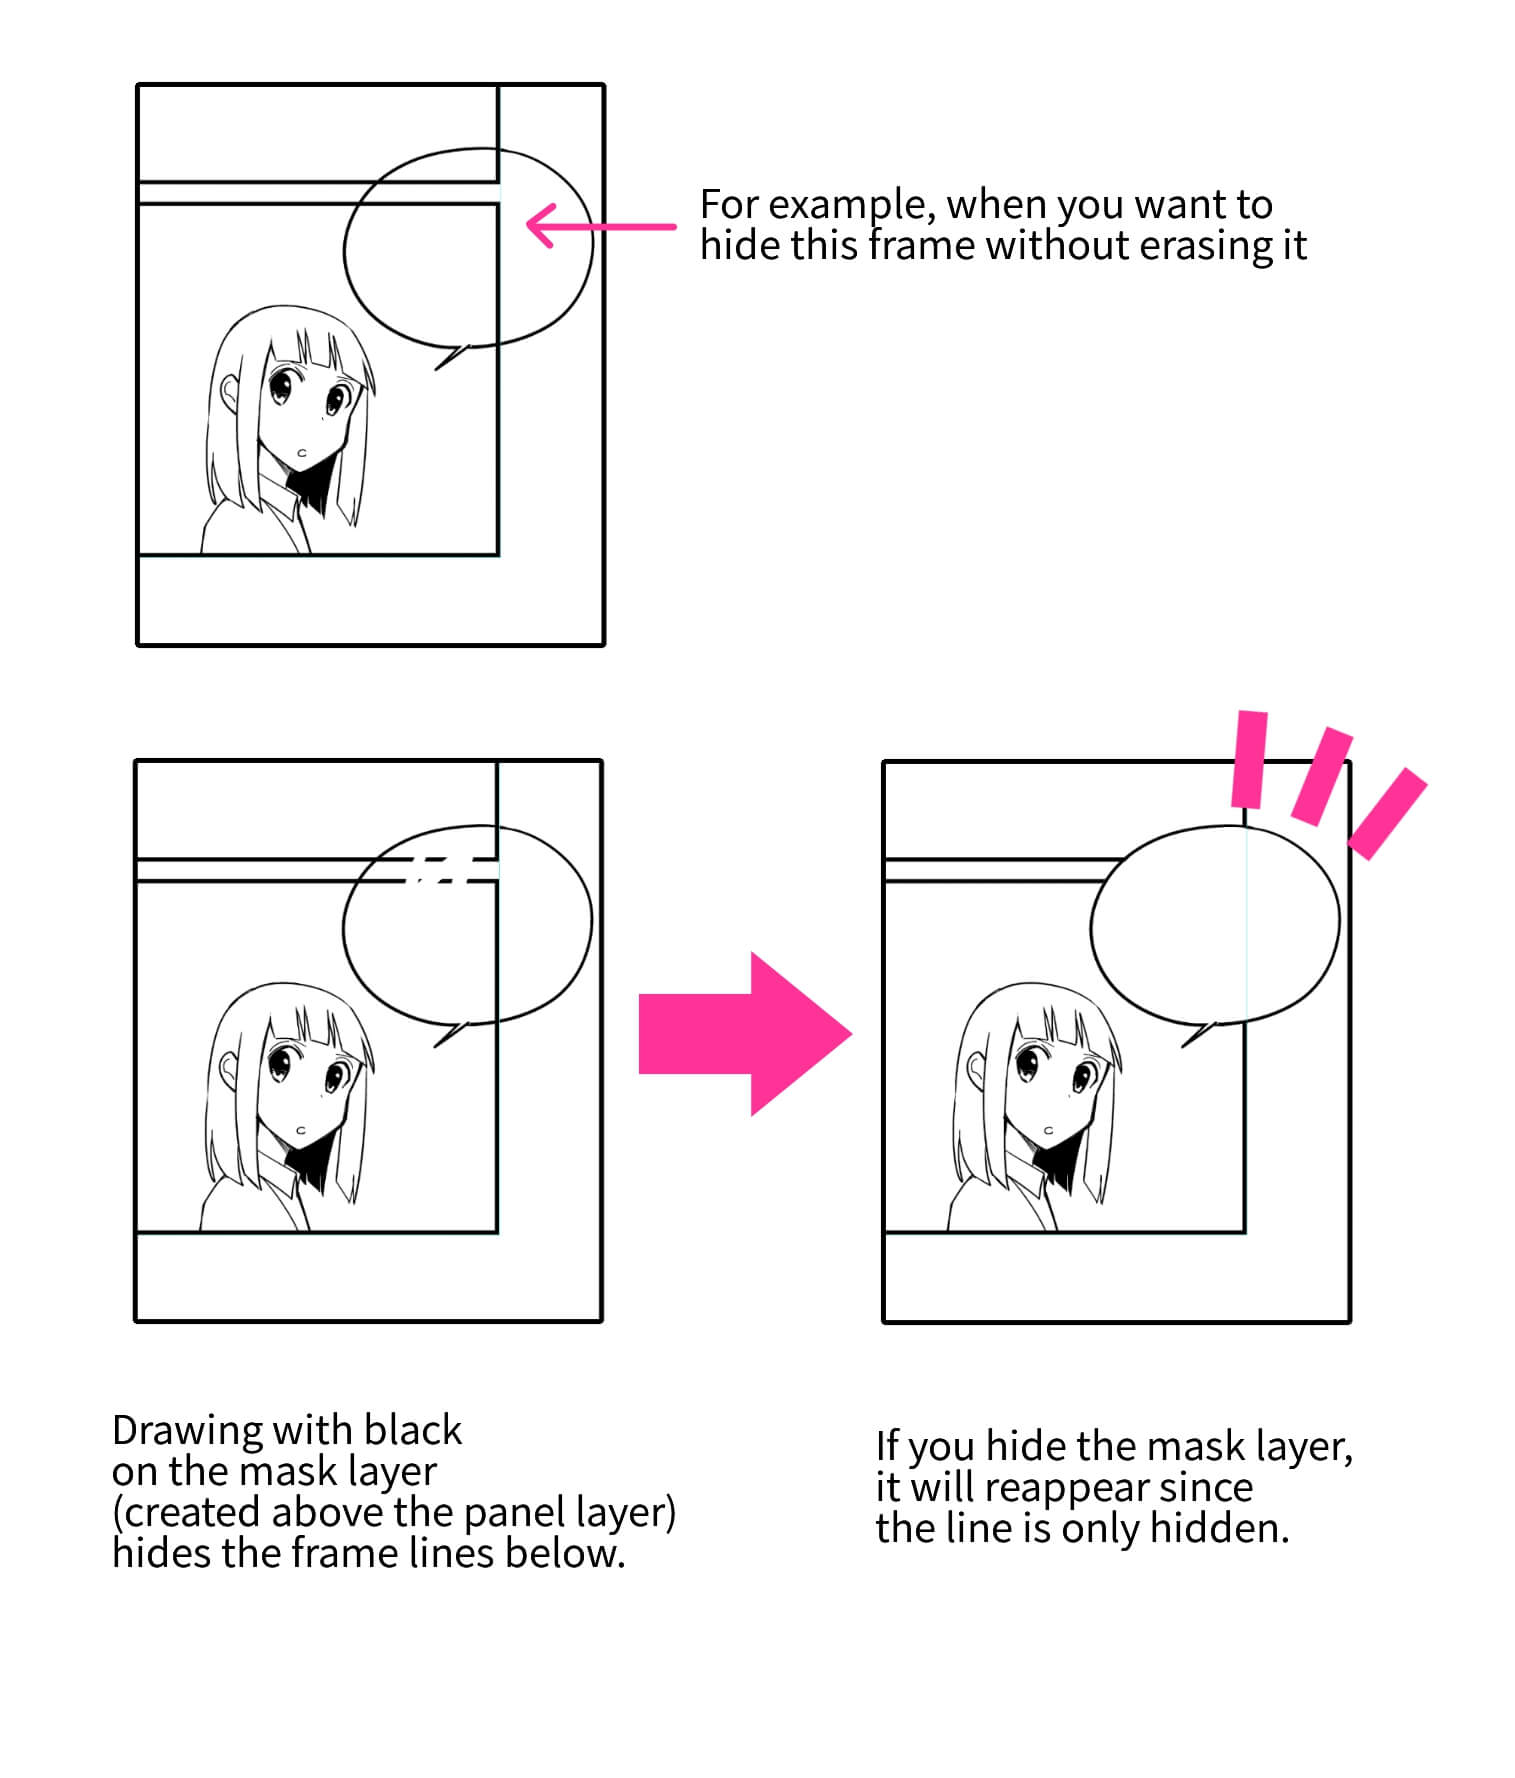
Then a layer called “Mask” gets created, if you draw on this layer using black, you will not be able to see the drawings on the layer below. You can apply this method to hide a portion of the panel frame.
The mask layer allows to hide a part of the drawing without erasing it. It will be useful when you apply this process to other cases.
When the panel division is finished, speech bubbles come next.
2. Speech Bubbles
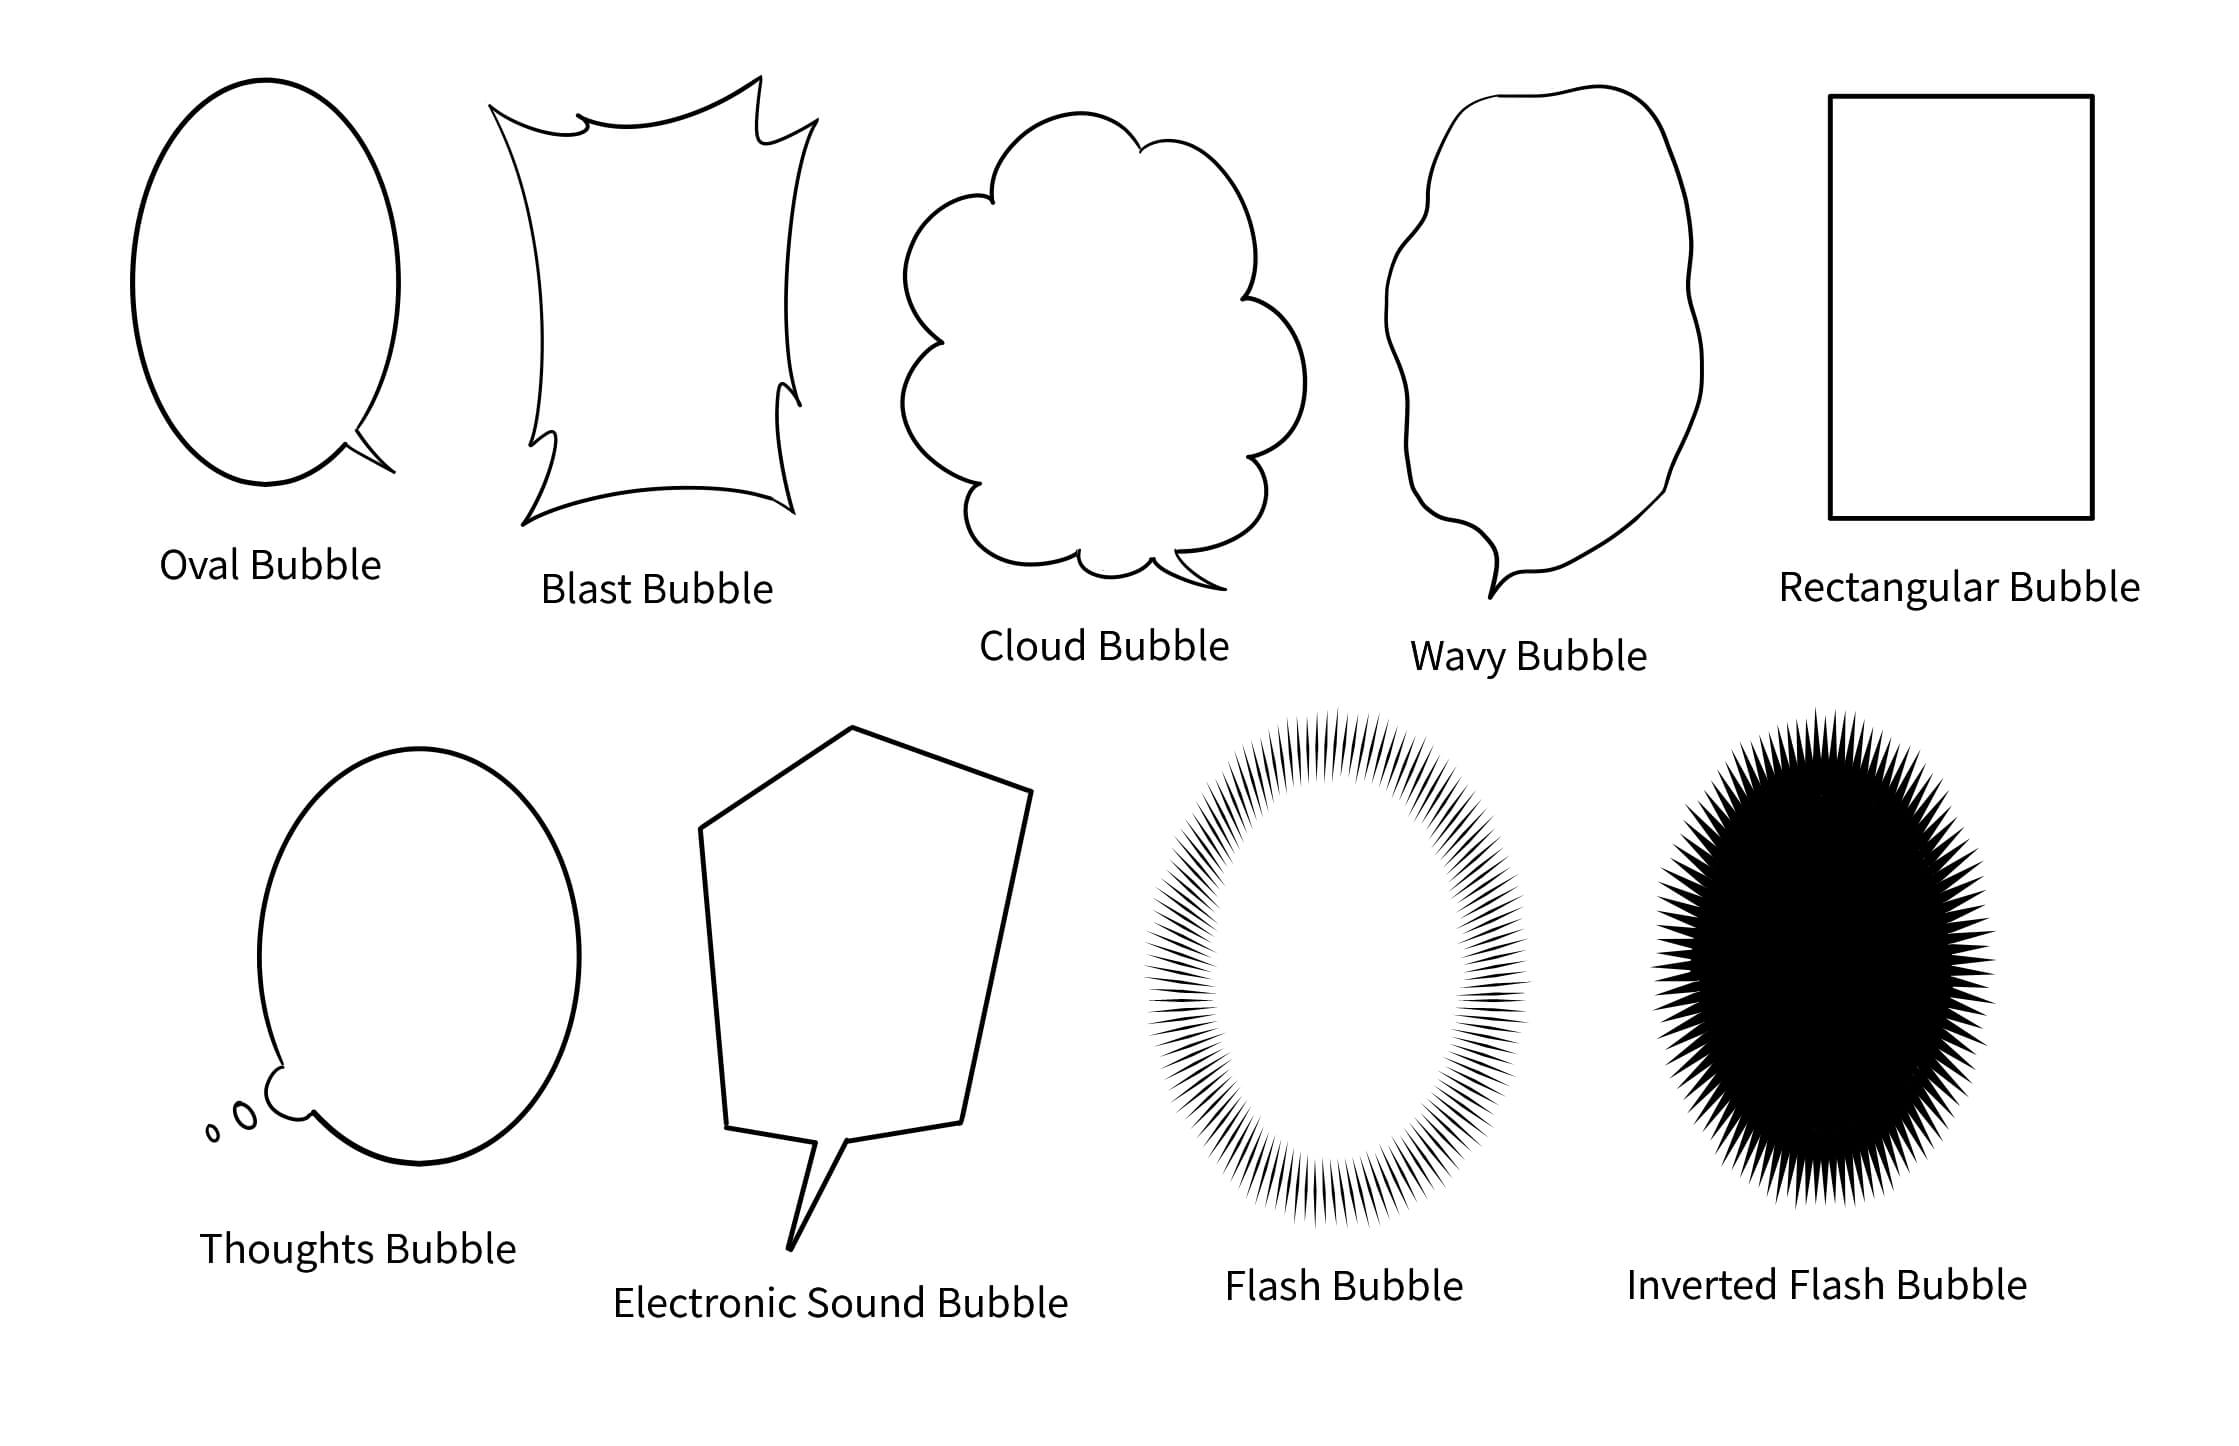
There are various styles of speech bubbles as shown below.
Before drawing the bubbles, create a layer for speech bubbles. Select “Add / 1 Bit” from the Layer tab and change the name to “Speech Bubbles” etc.
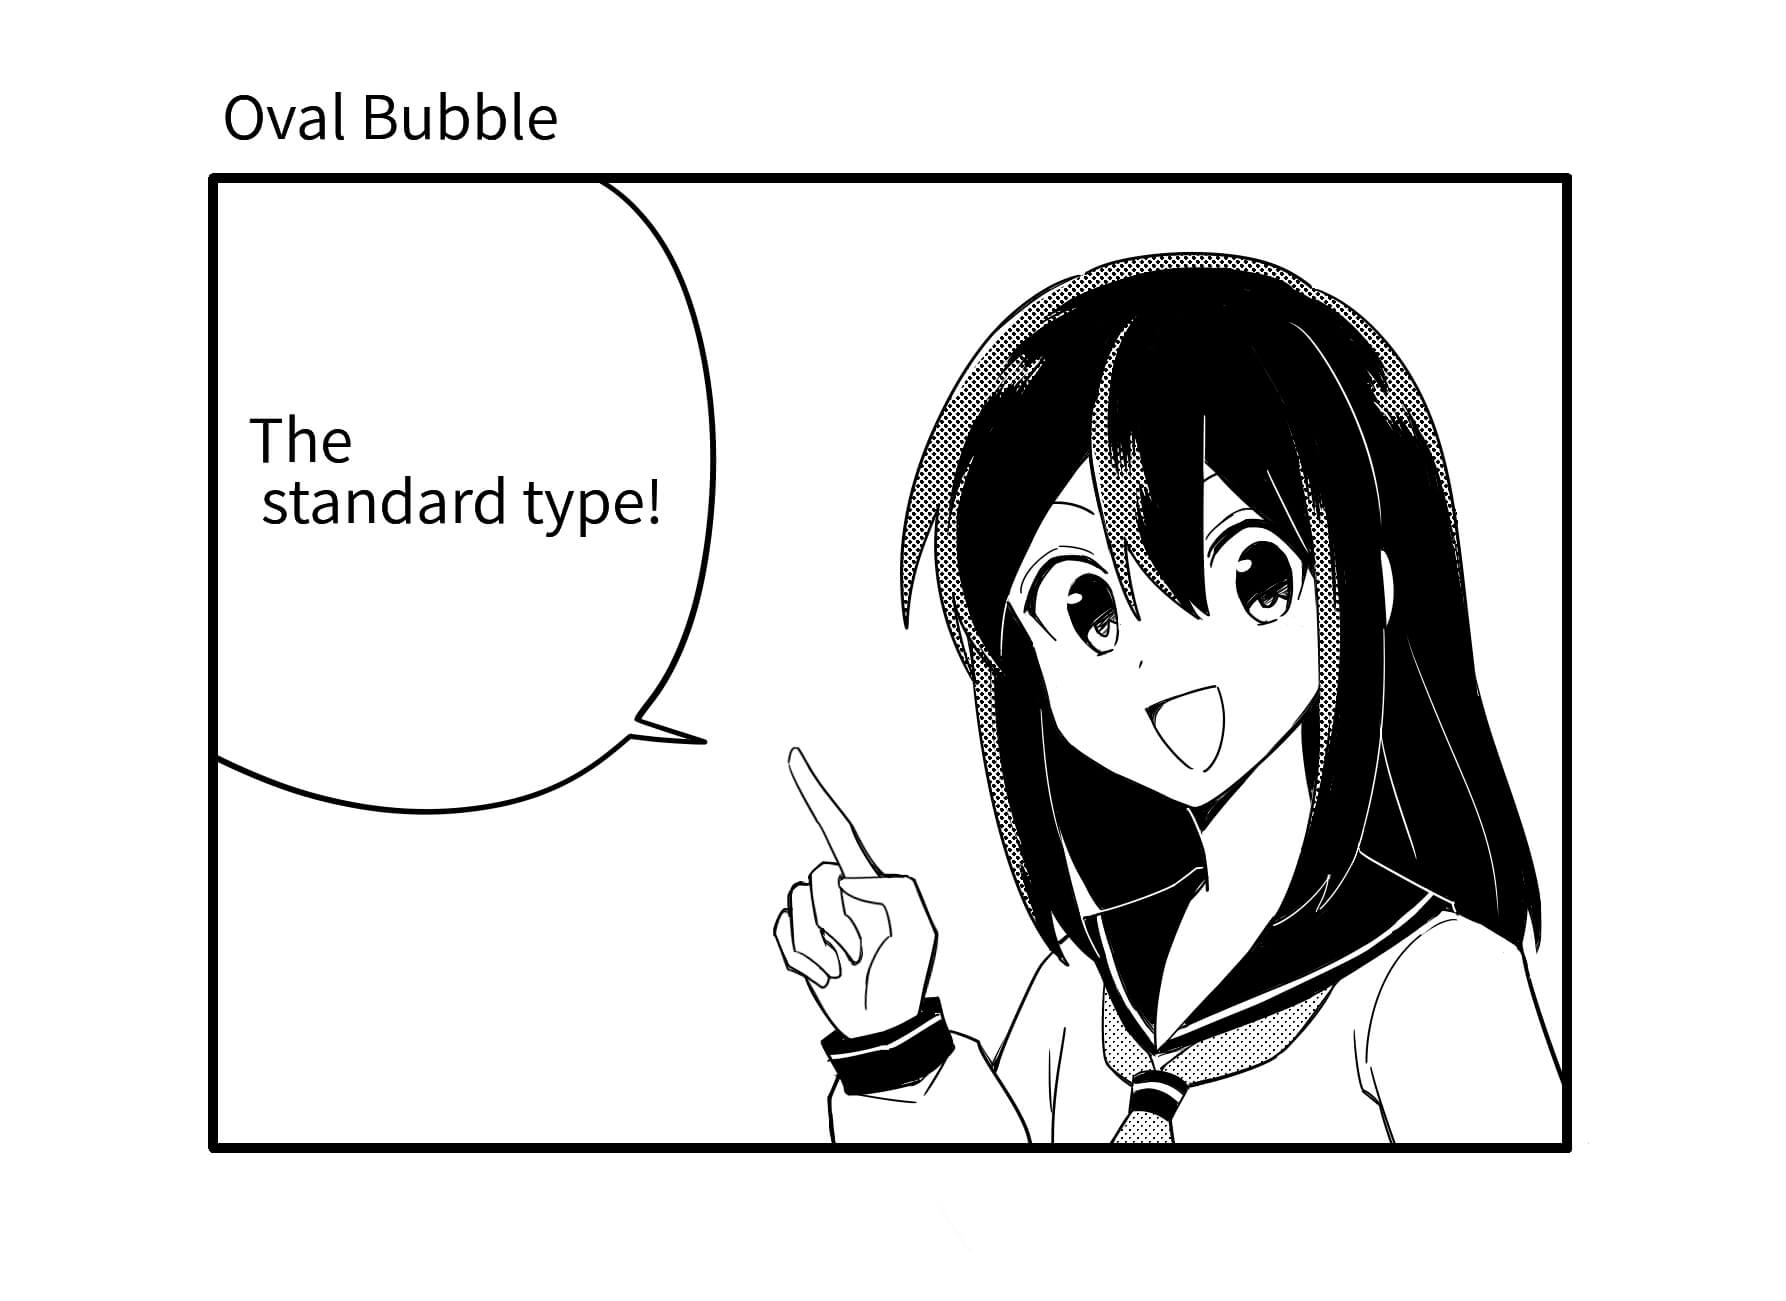
After creating the layer, begin drawing the speech bubbles. Let’s start off with the standard oval bubble.
・Oval Bubble
Draw the bubble to enclose the speech lines with some space around them. You can either draw freehand or using the oval tool.
The thickness of speech bubble lines are usually the same as the main drawing or a little thicker. I mostly use 15px for the drawing and 20px for the speech bubbles; use this as the reference if you are confused.
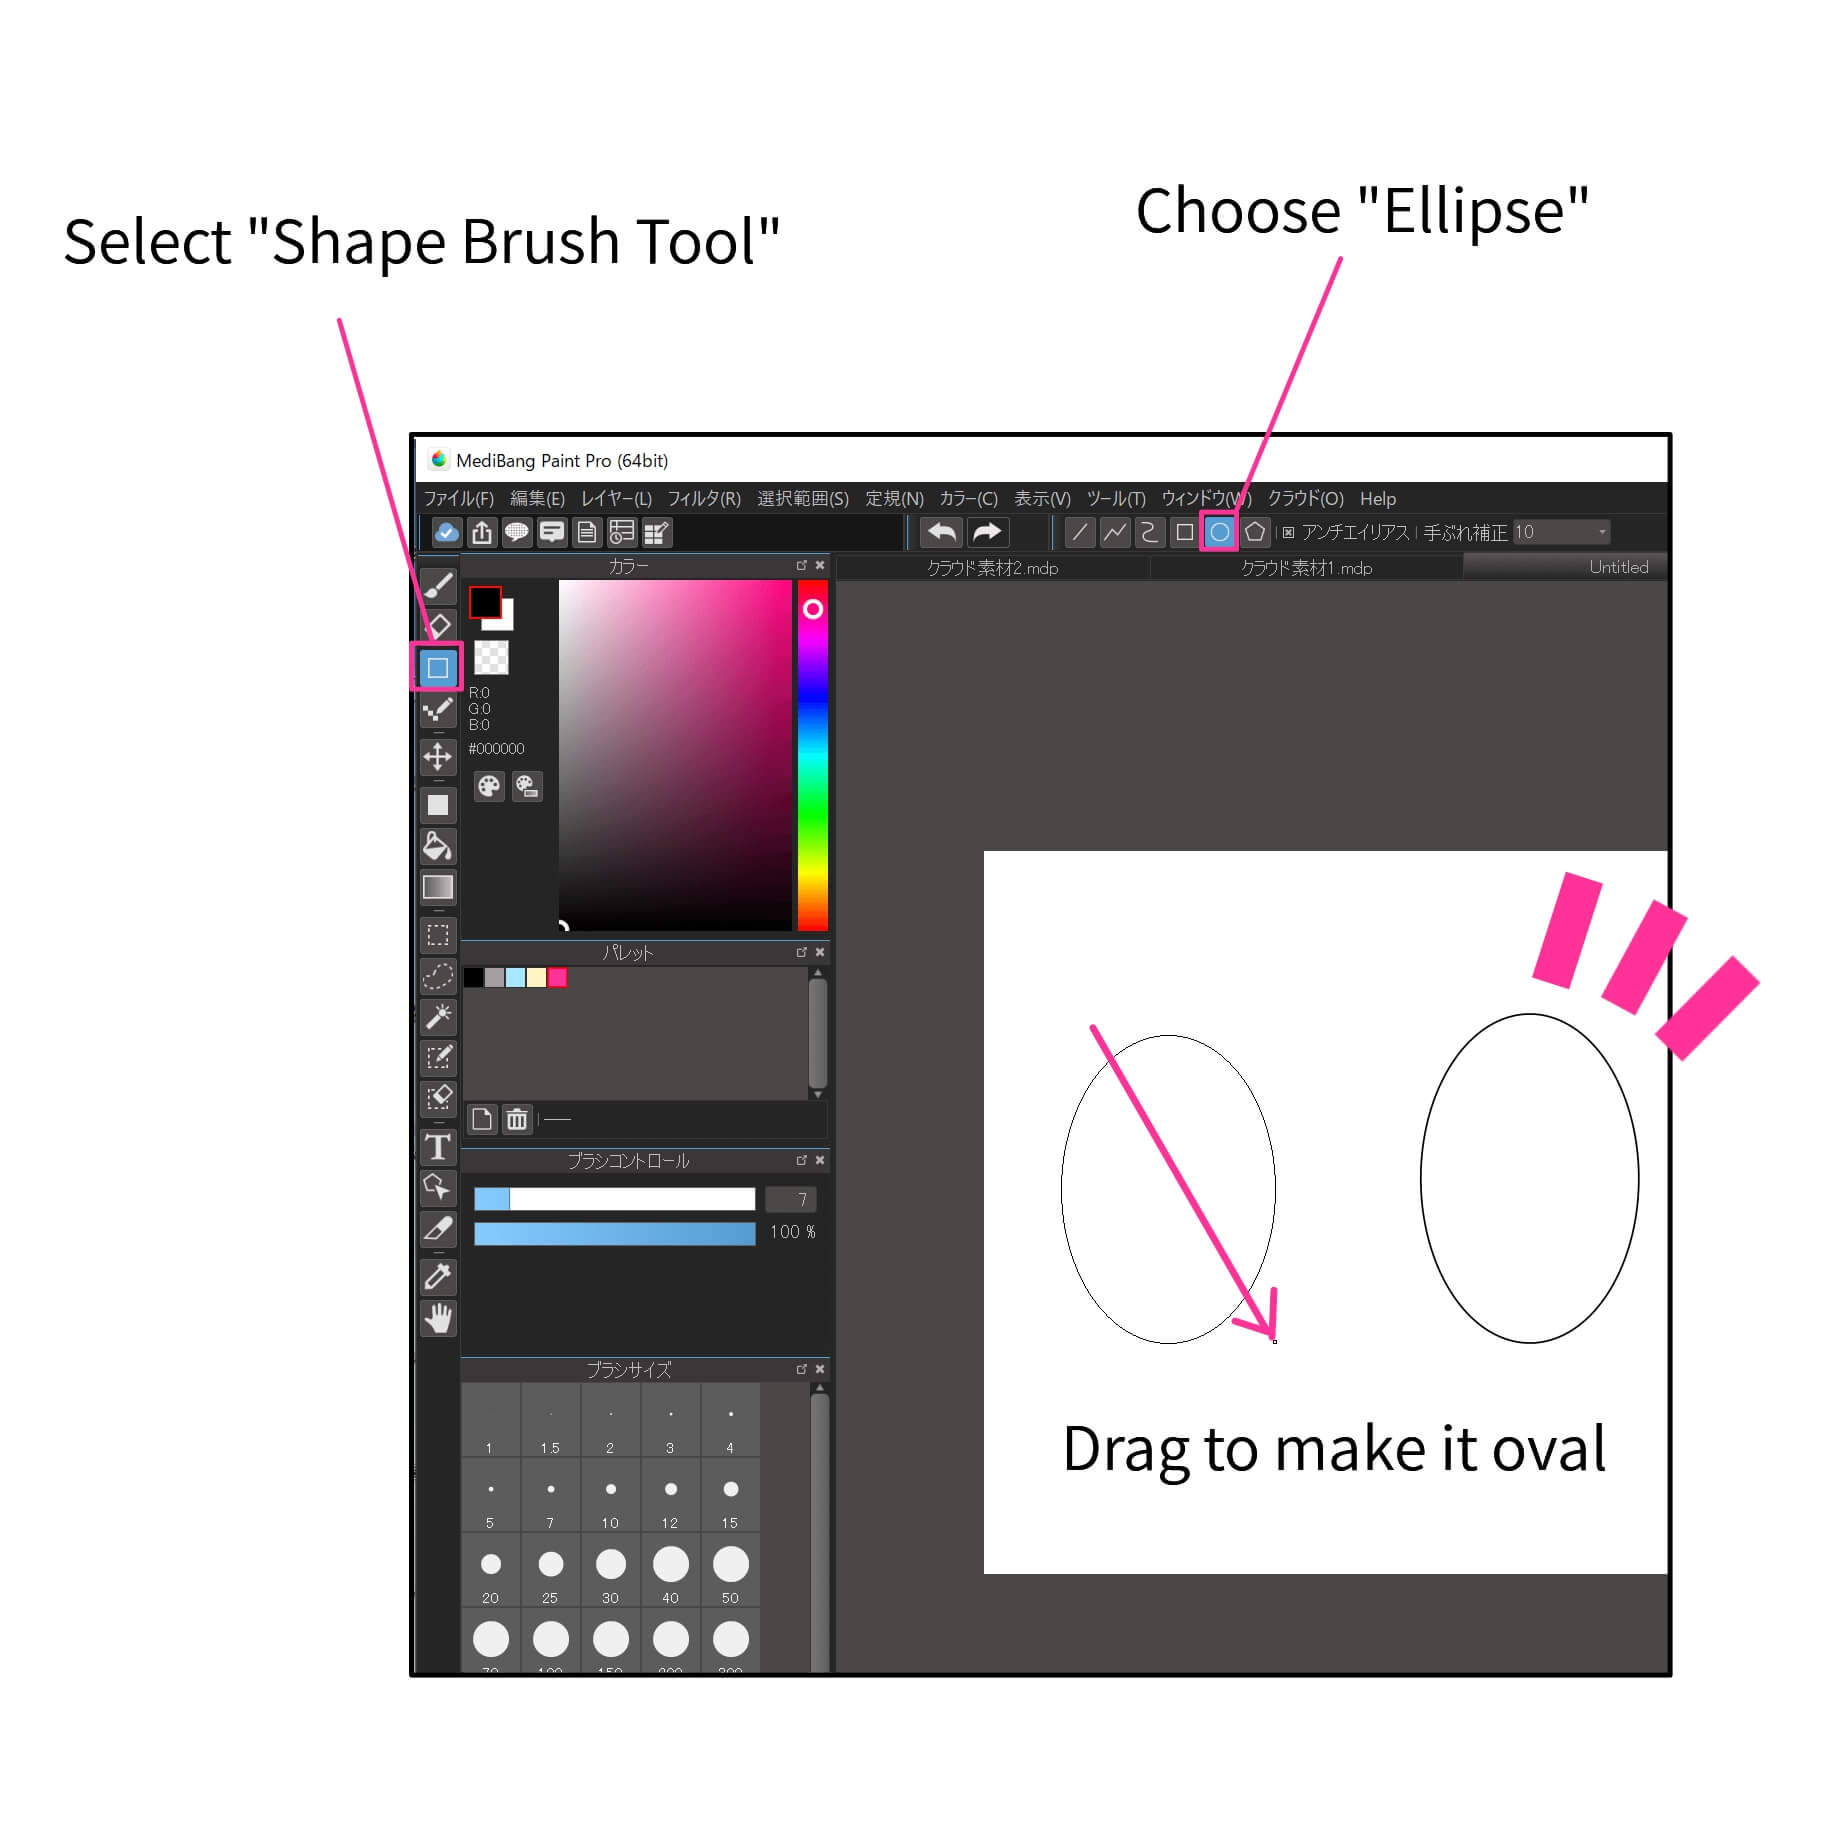
If you want to use the oval tool select “Shape Brush Tool”, the 3rd icon in the toolbar, and choose “Ellipse” from the brush shape options.
It may turn out thicker than the freehand bubble since the strength of the brush does not apply to the “Shape Brush Tool”. If that’s the case, reduce the line thickness before drawing.
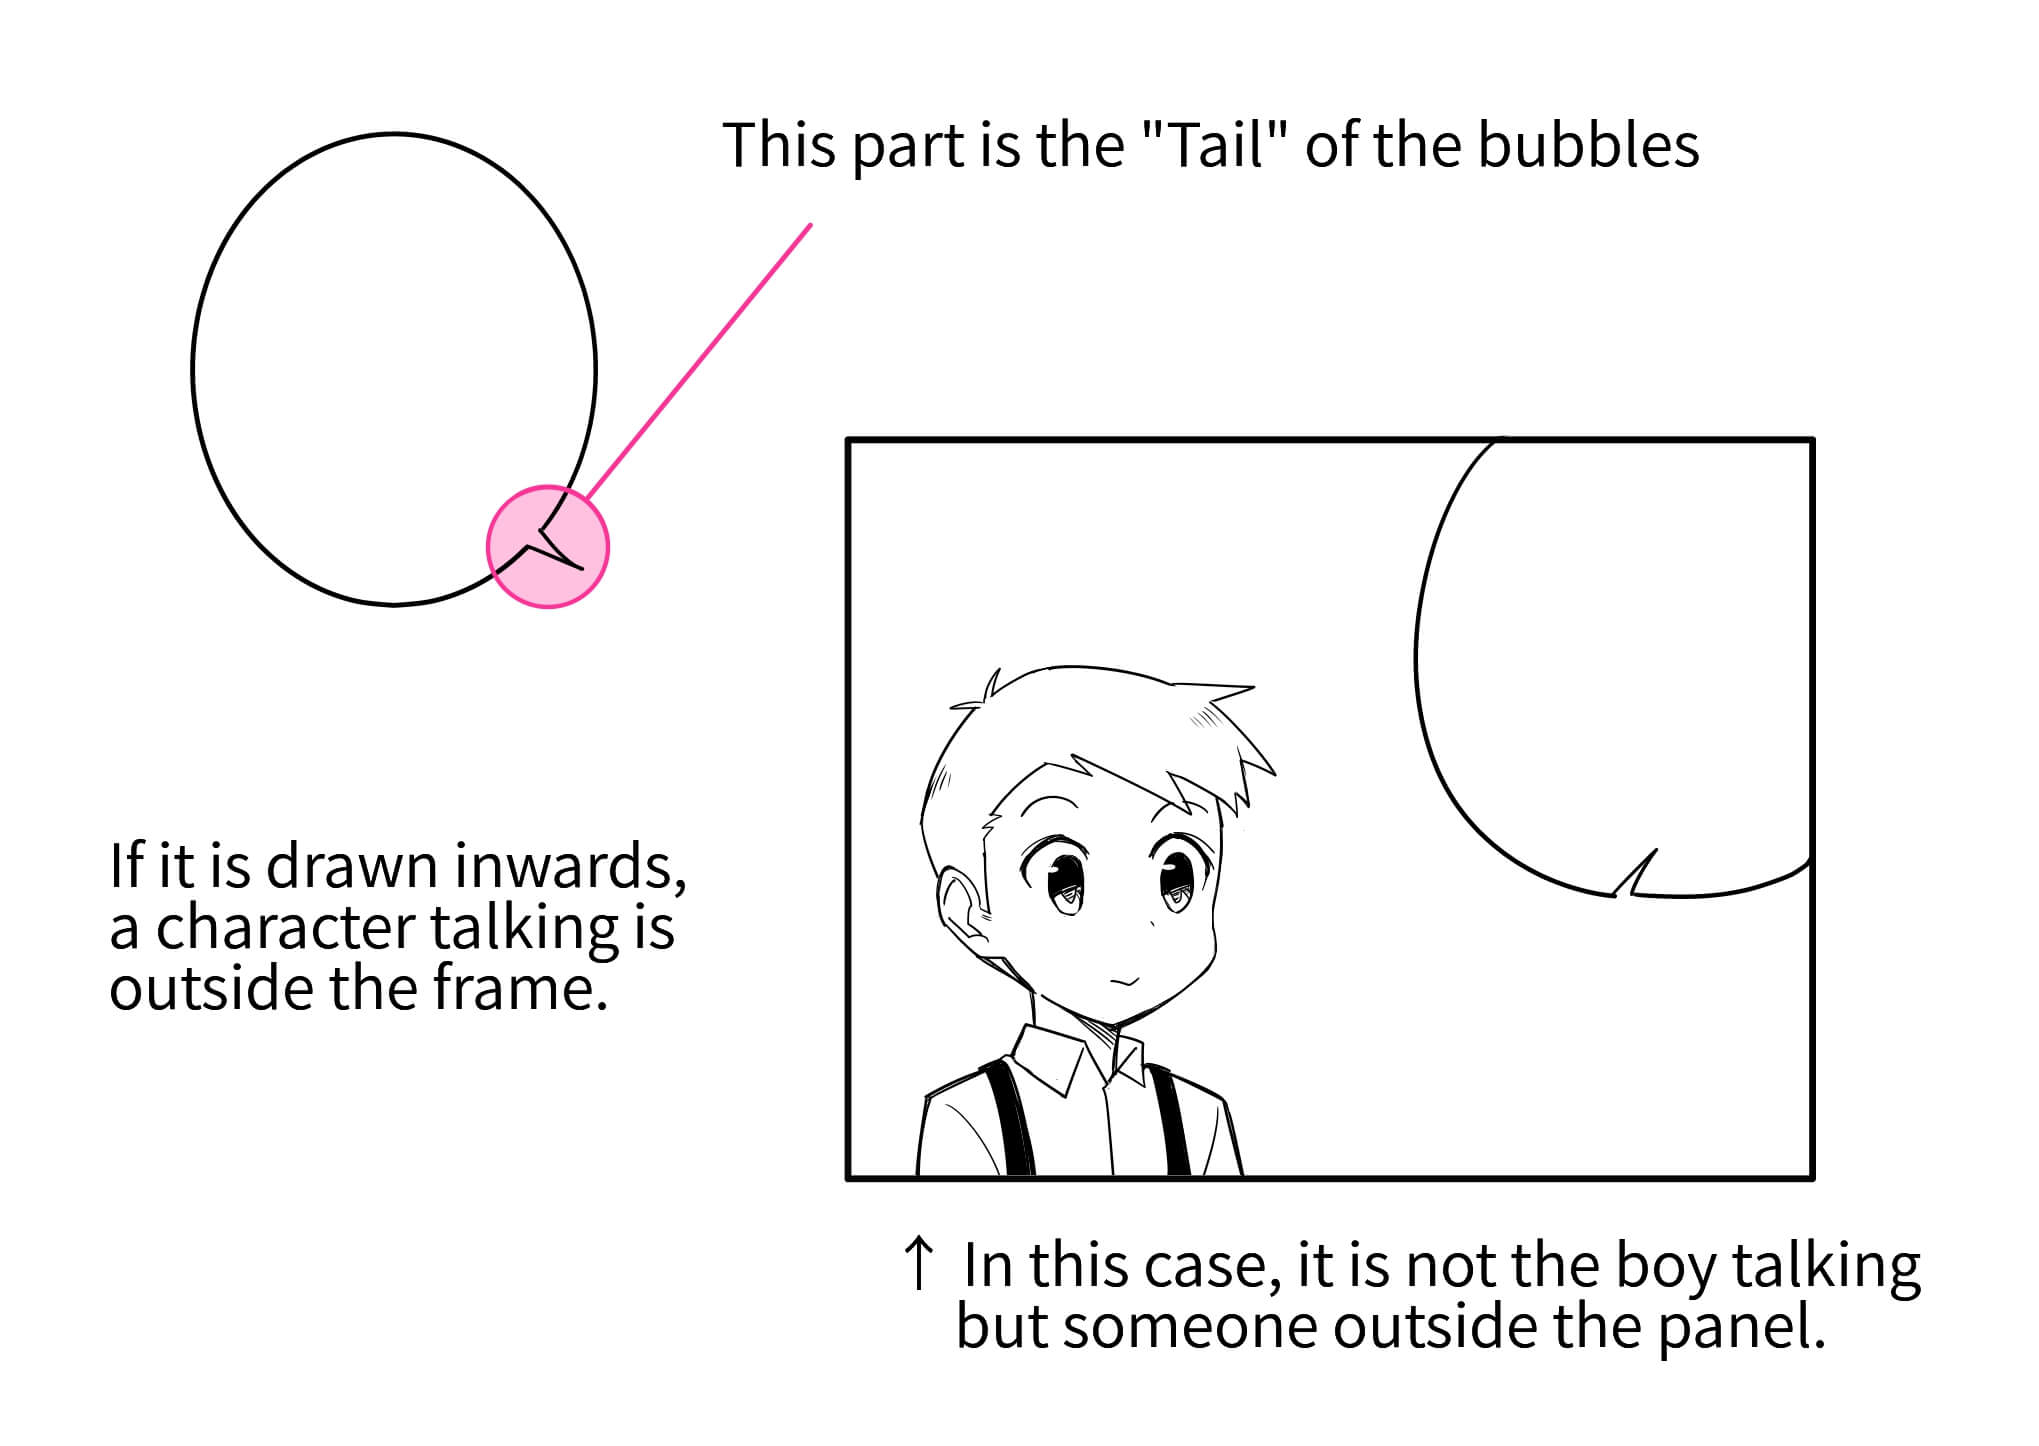
The “tail” of the speech bubble may not appear in some styles or scenes, but it clarifies which person is talking so it should be added for scenes with many characters.
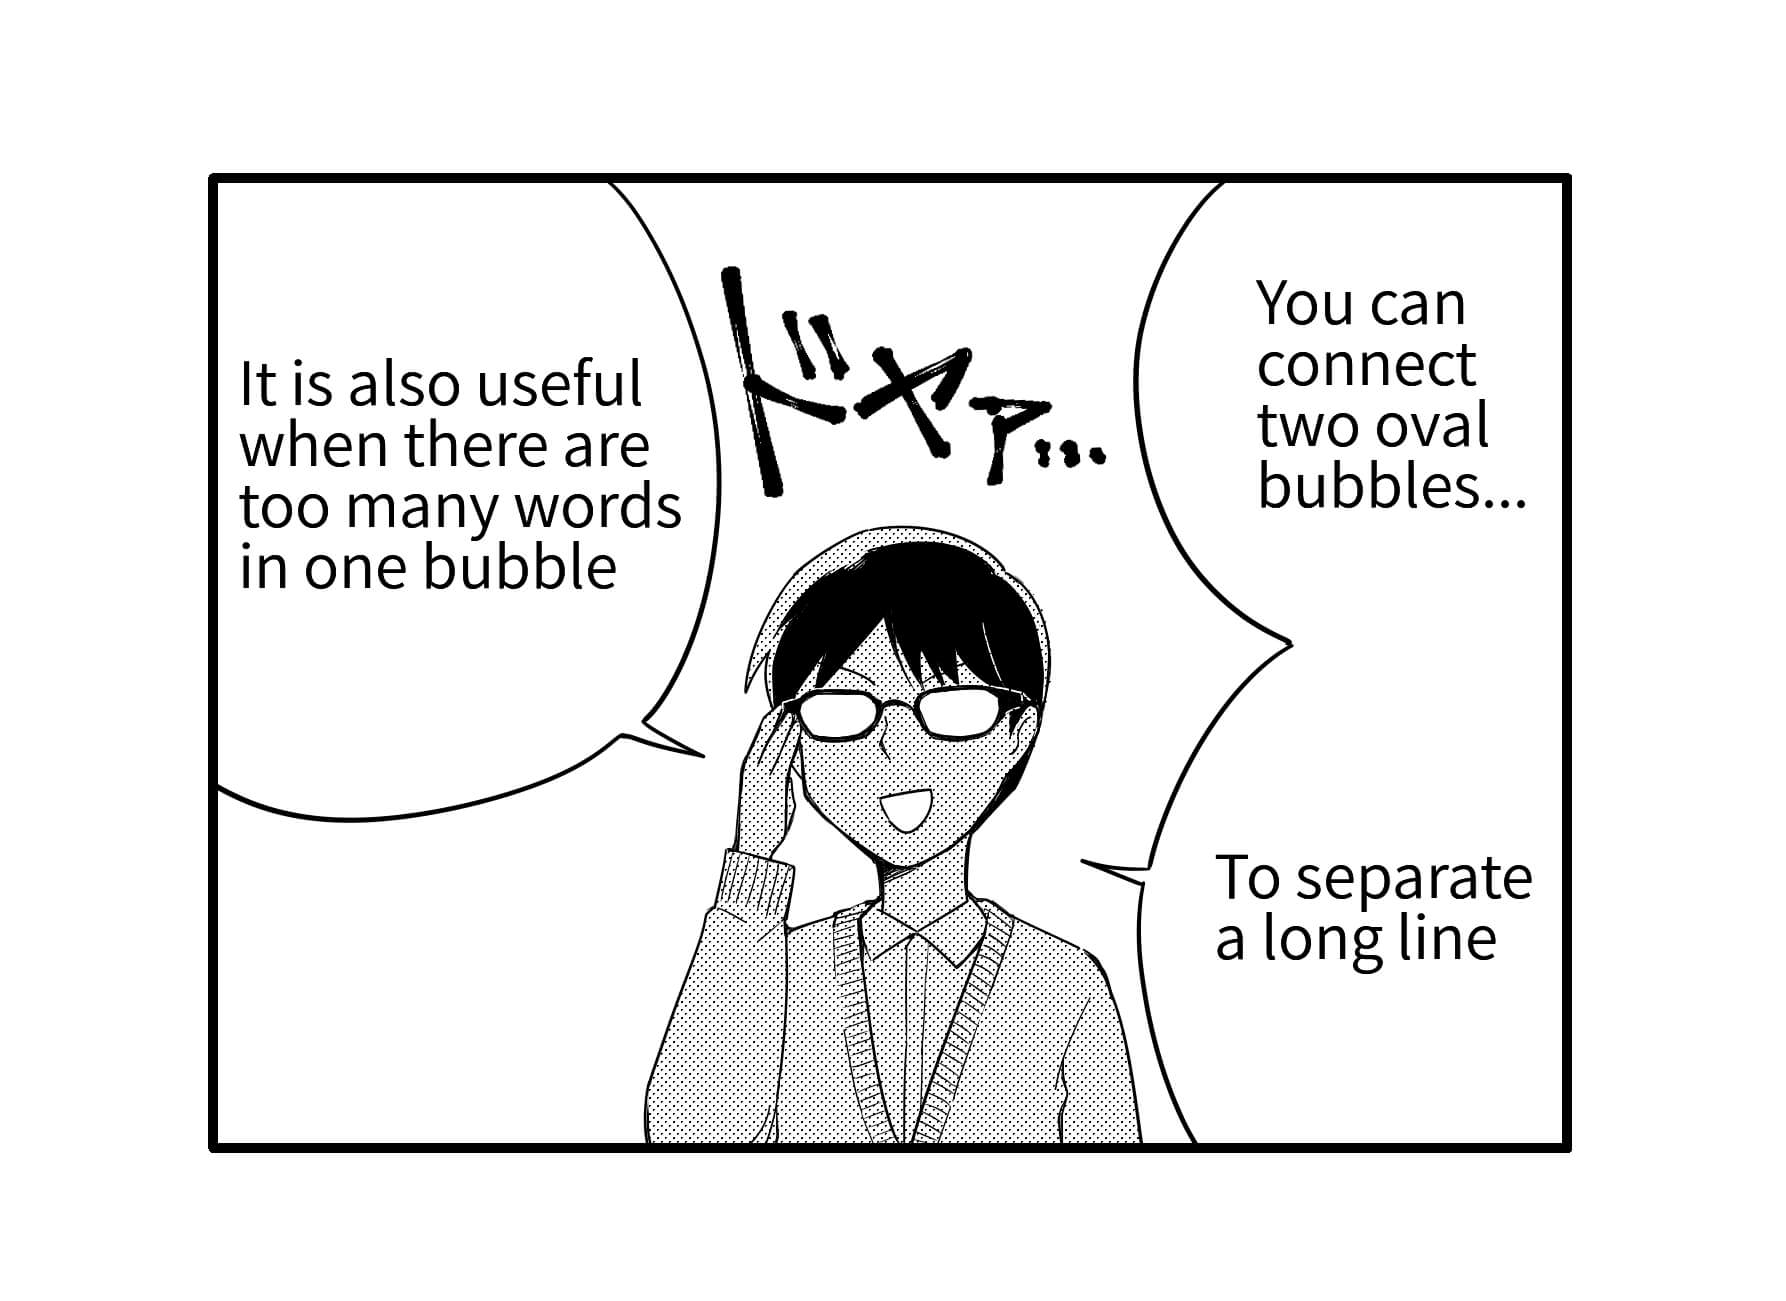
If one person is talking for a long time, you can use a double bubble. Instead of diving into two different bubbles, it shows a clear time sequence.
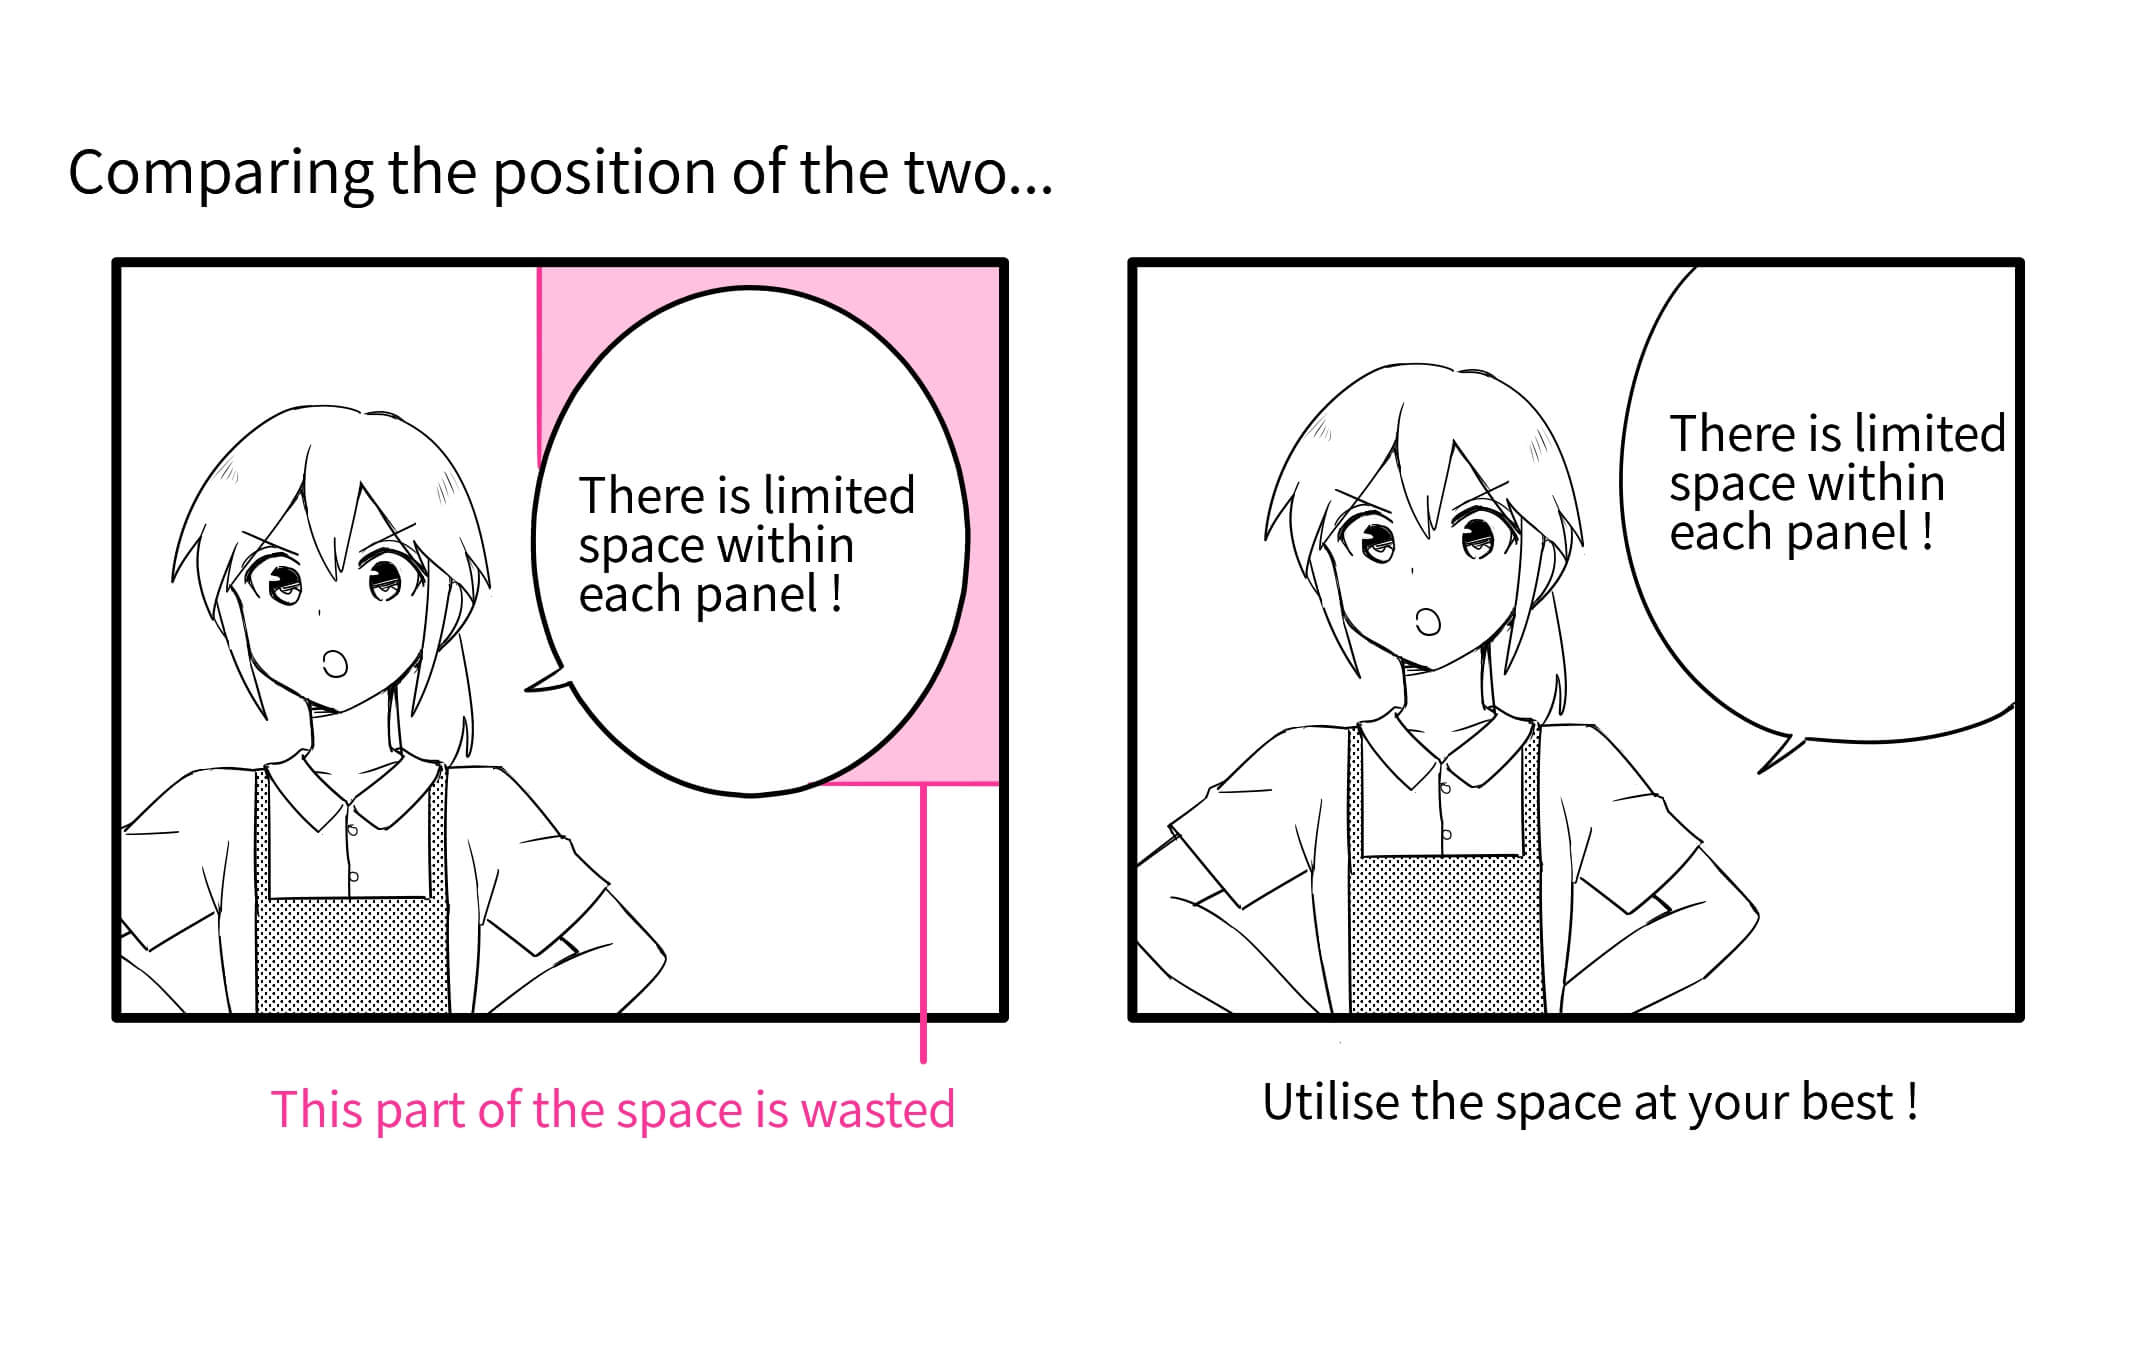
There is also no rule for the position of speech bubbles but you can create more space for the drawing if you place it next to the corner. This is because drawing a large, readable bubble takes up a lot of space. Simplifying the speeches does not only make it easy to read but also to create more space for the drawing.
Let’s try drawing different shapes of speech bubbles.
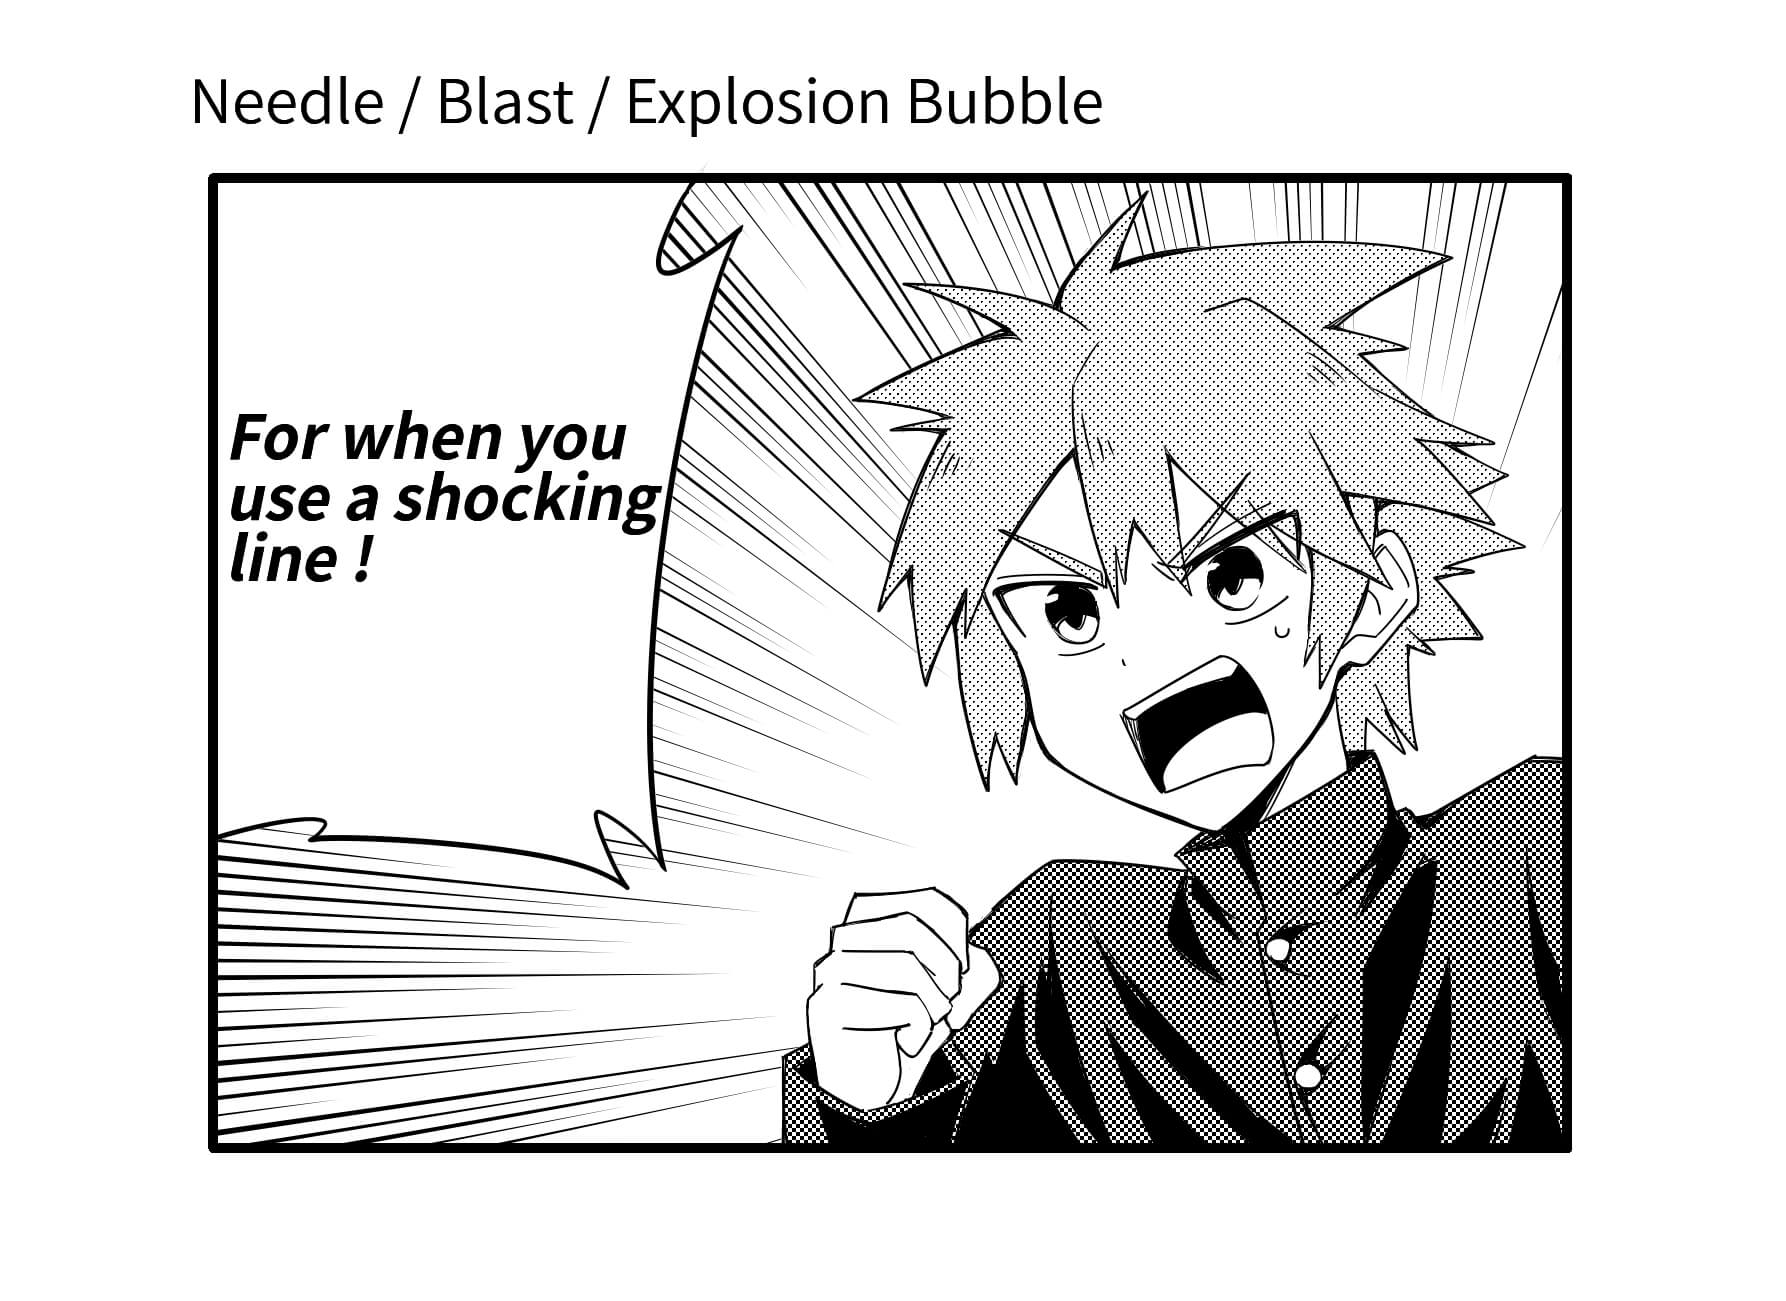
・Needle / Blast / Explosion Bubble
It is mostly used for when the character speaks loudly. It can easily be drawn freehand but if you want to straighten them out, use the “Polygon” in the Shape Brush Tool.
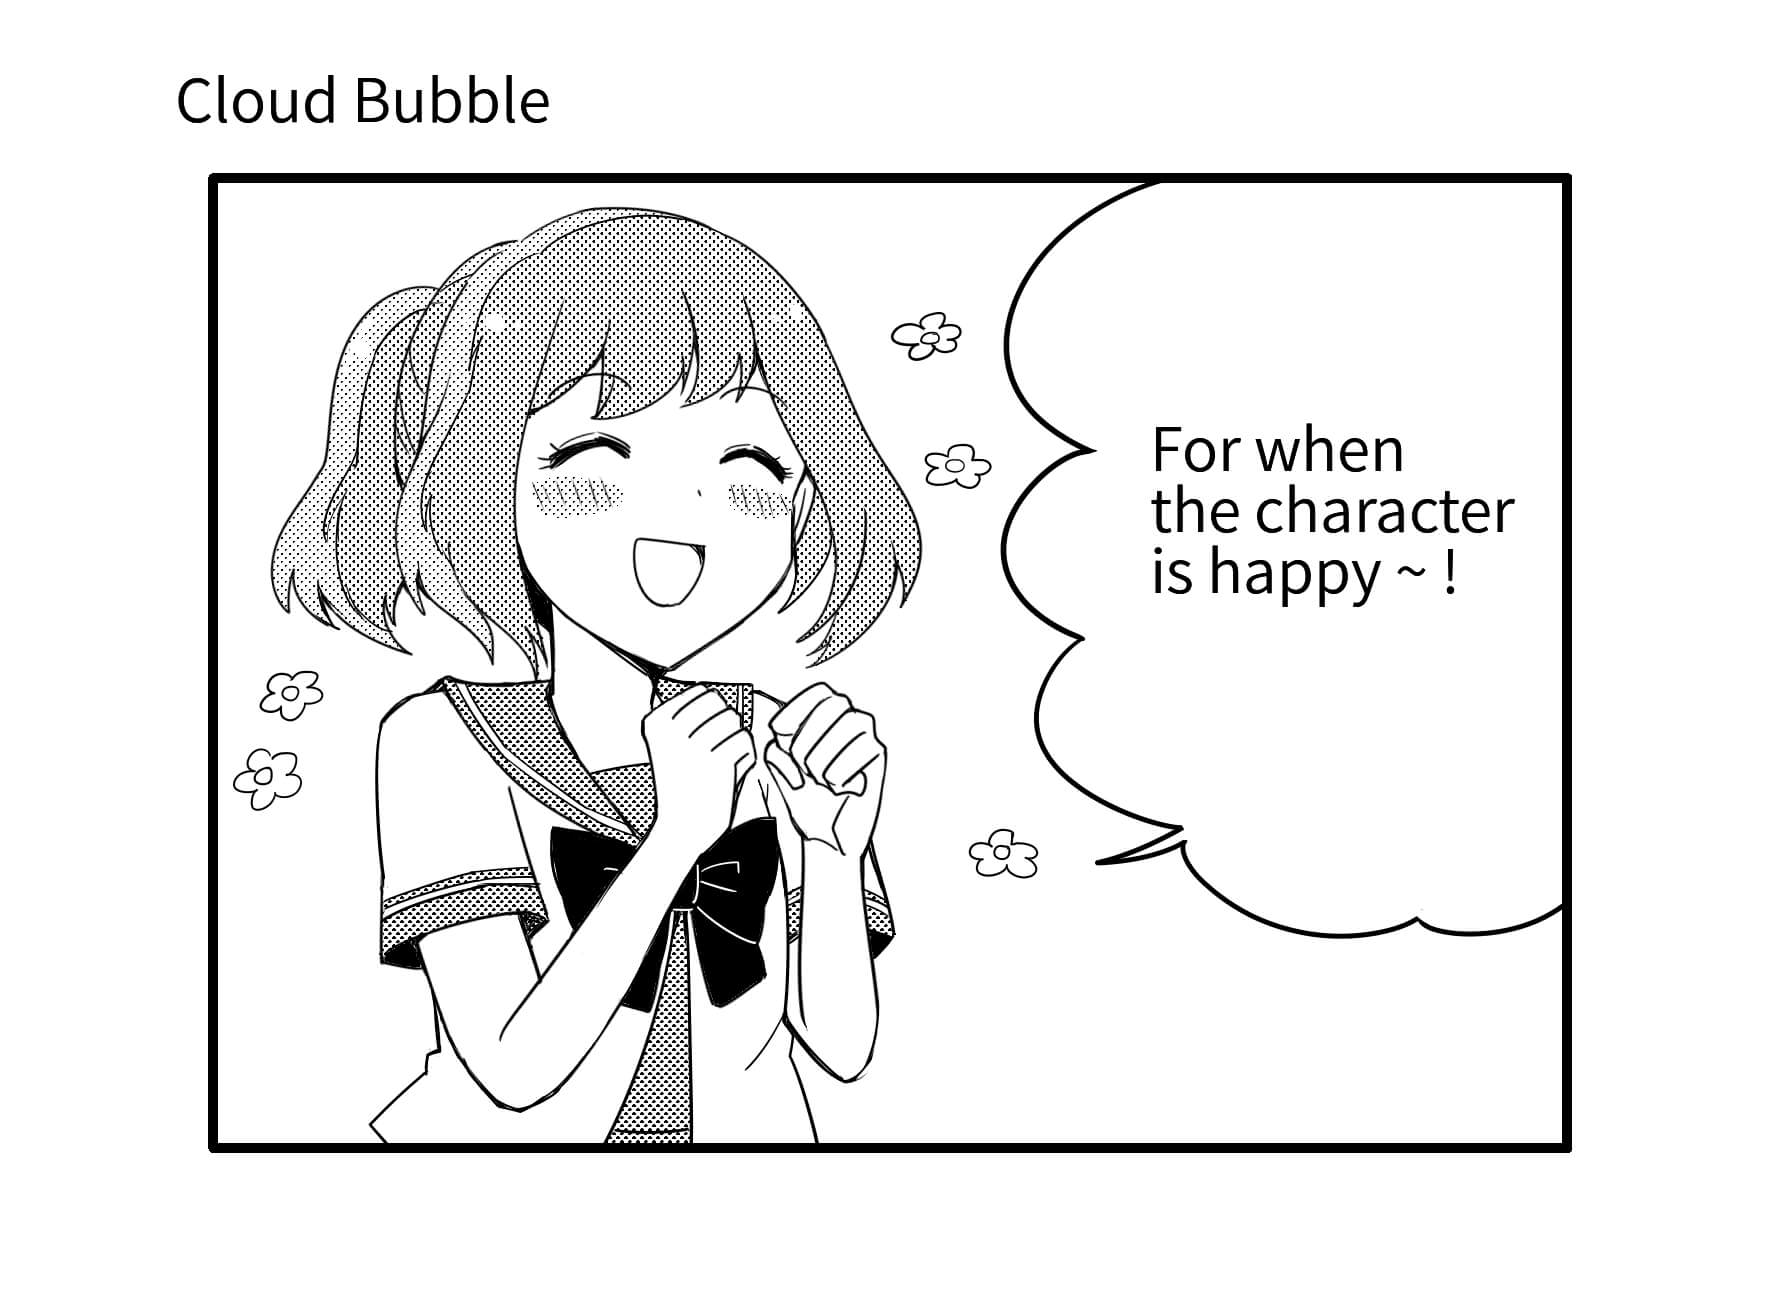
・Cloud Bubble
This is used for cheerful lines or comical speeches. It will be easy if you draw this like a flower in freehand.
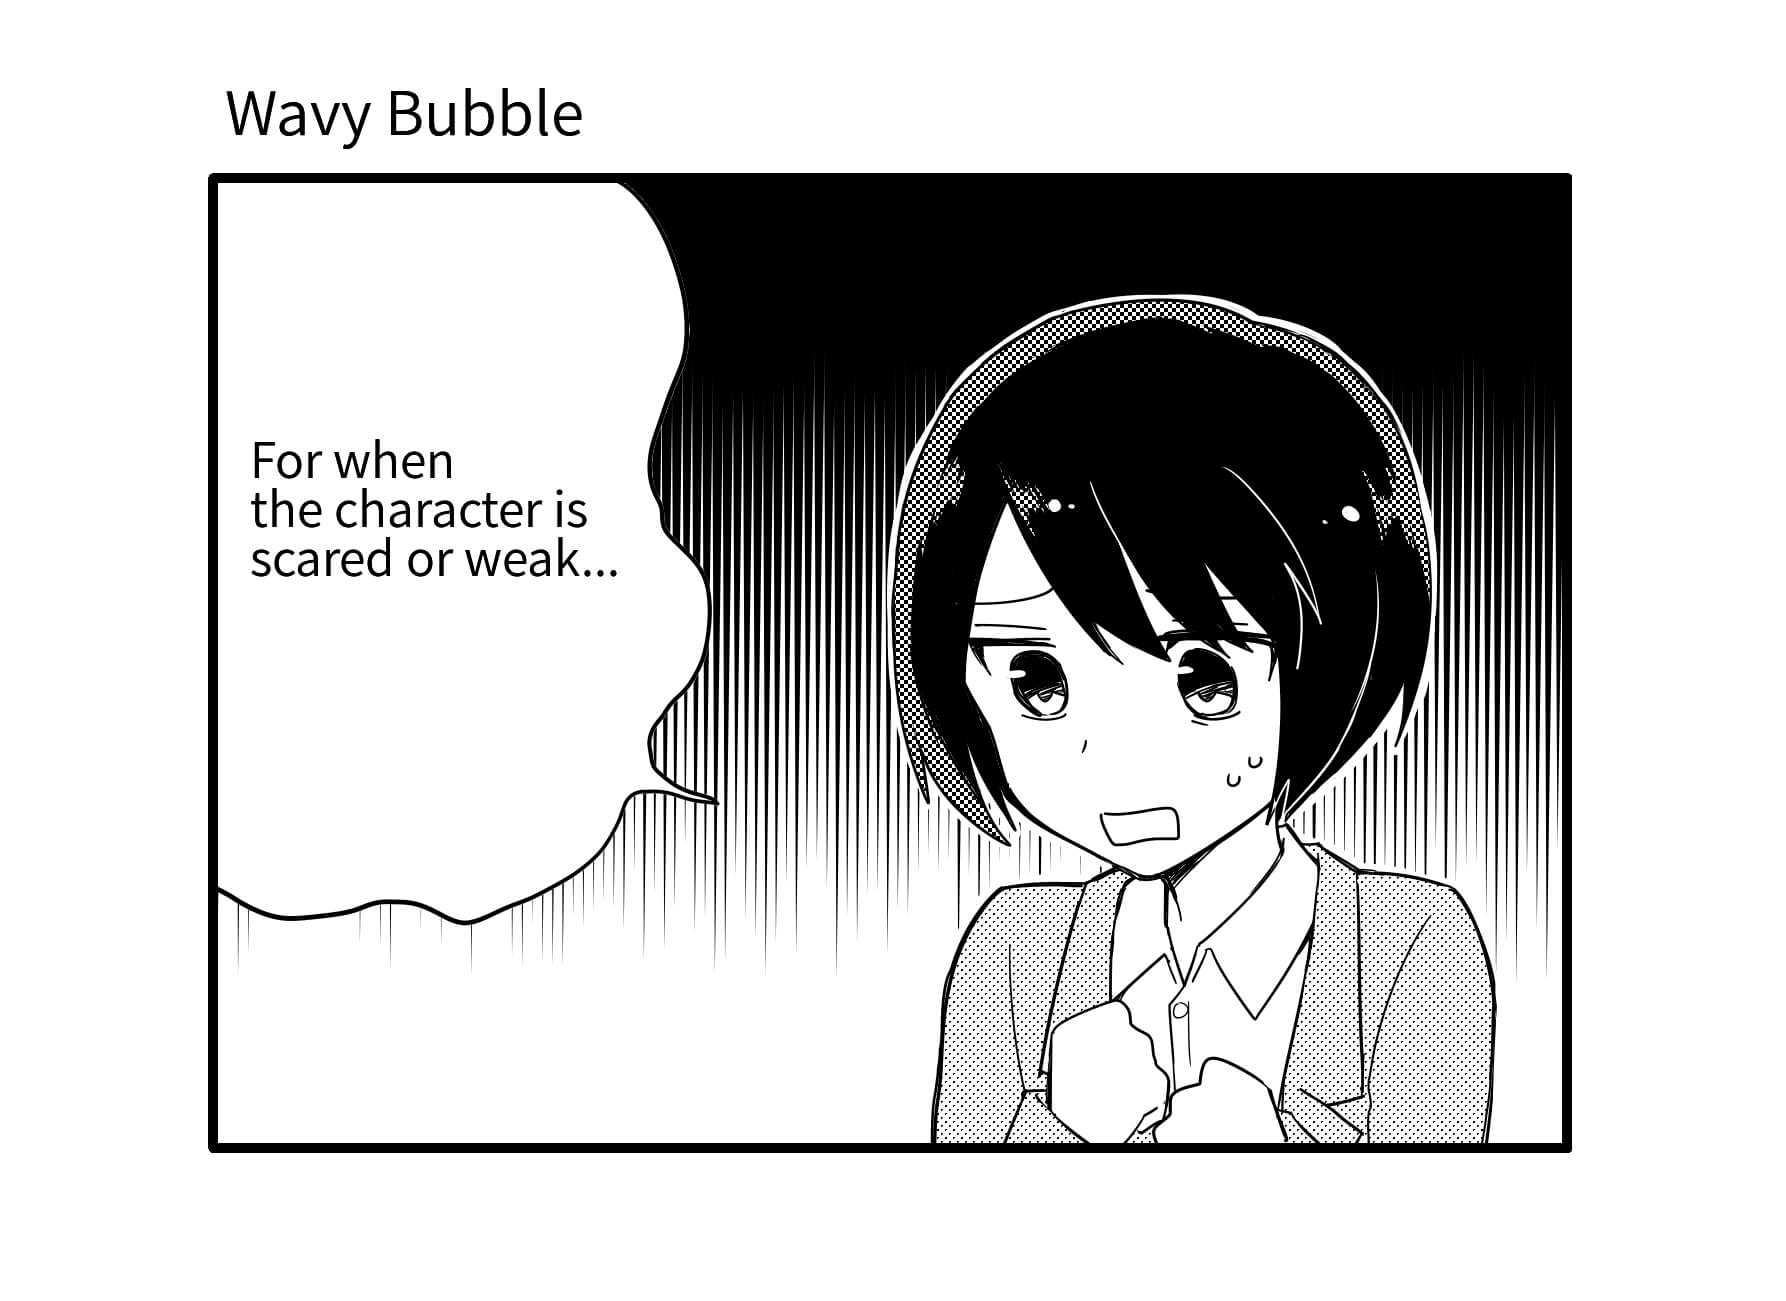
・Wavy Bubble
It can be used when the character is injured or when they are talking in fear. You can draw this easily by relaxing your grip on freehand.
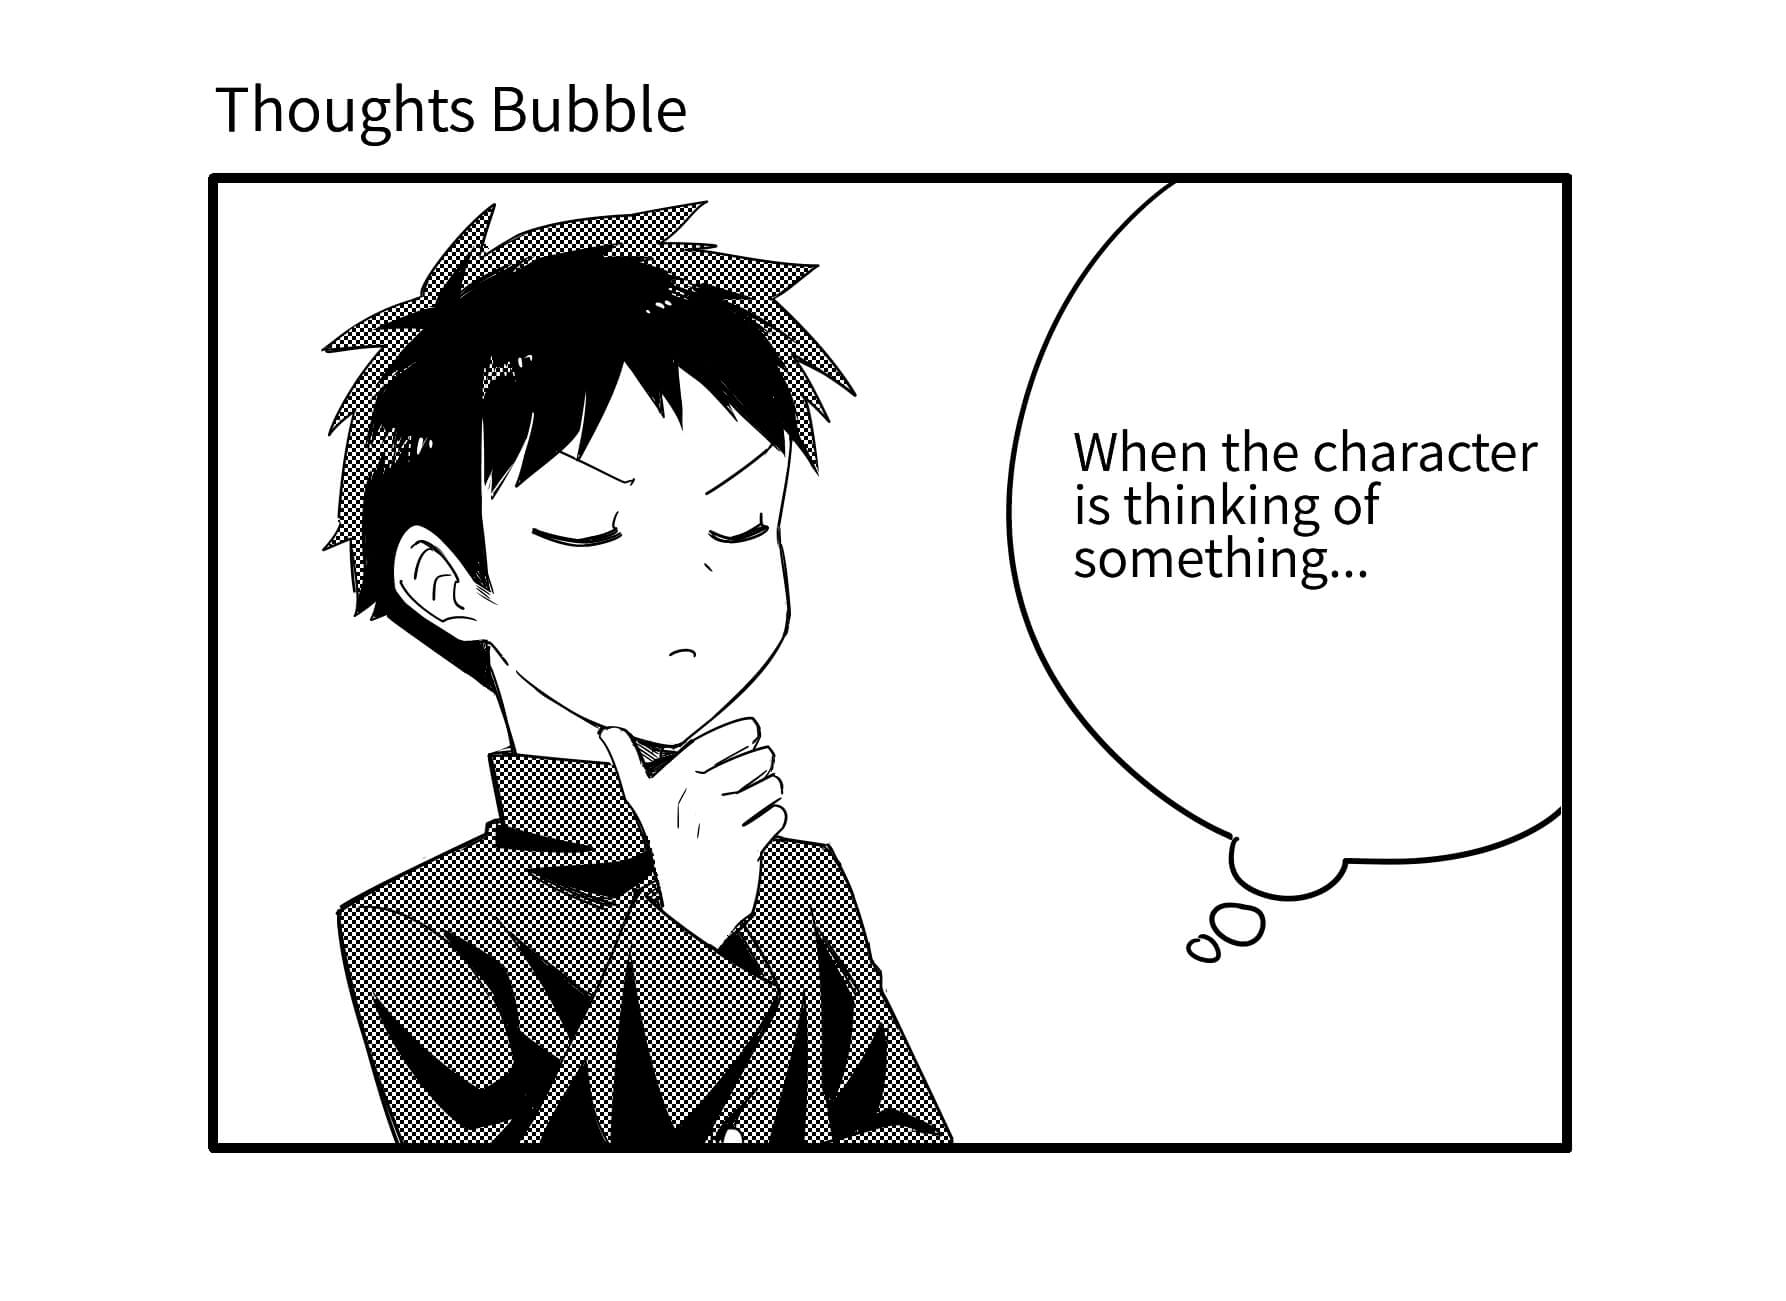
・Thoughts Bubble
It is an oval bubble with circular tails and represents what the character is thinking about. You can either use the Shape Brush Tool or draw freehand.
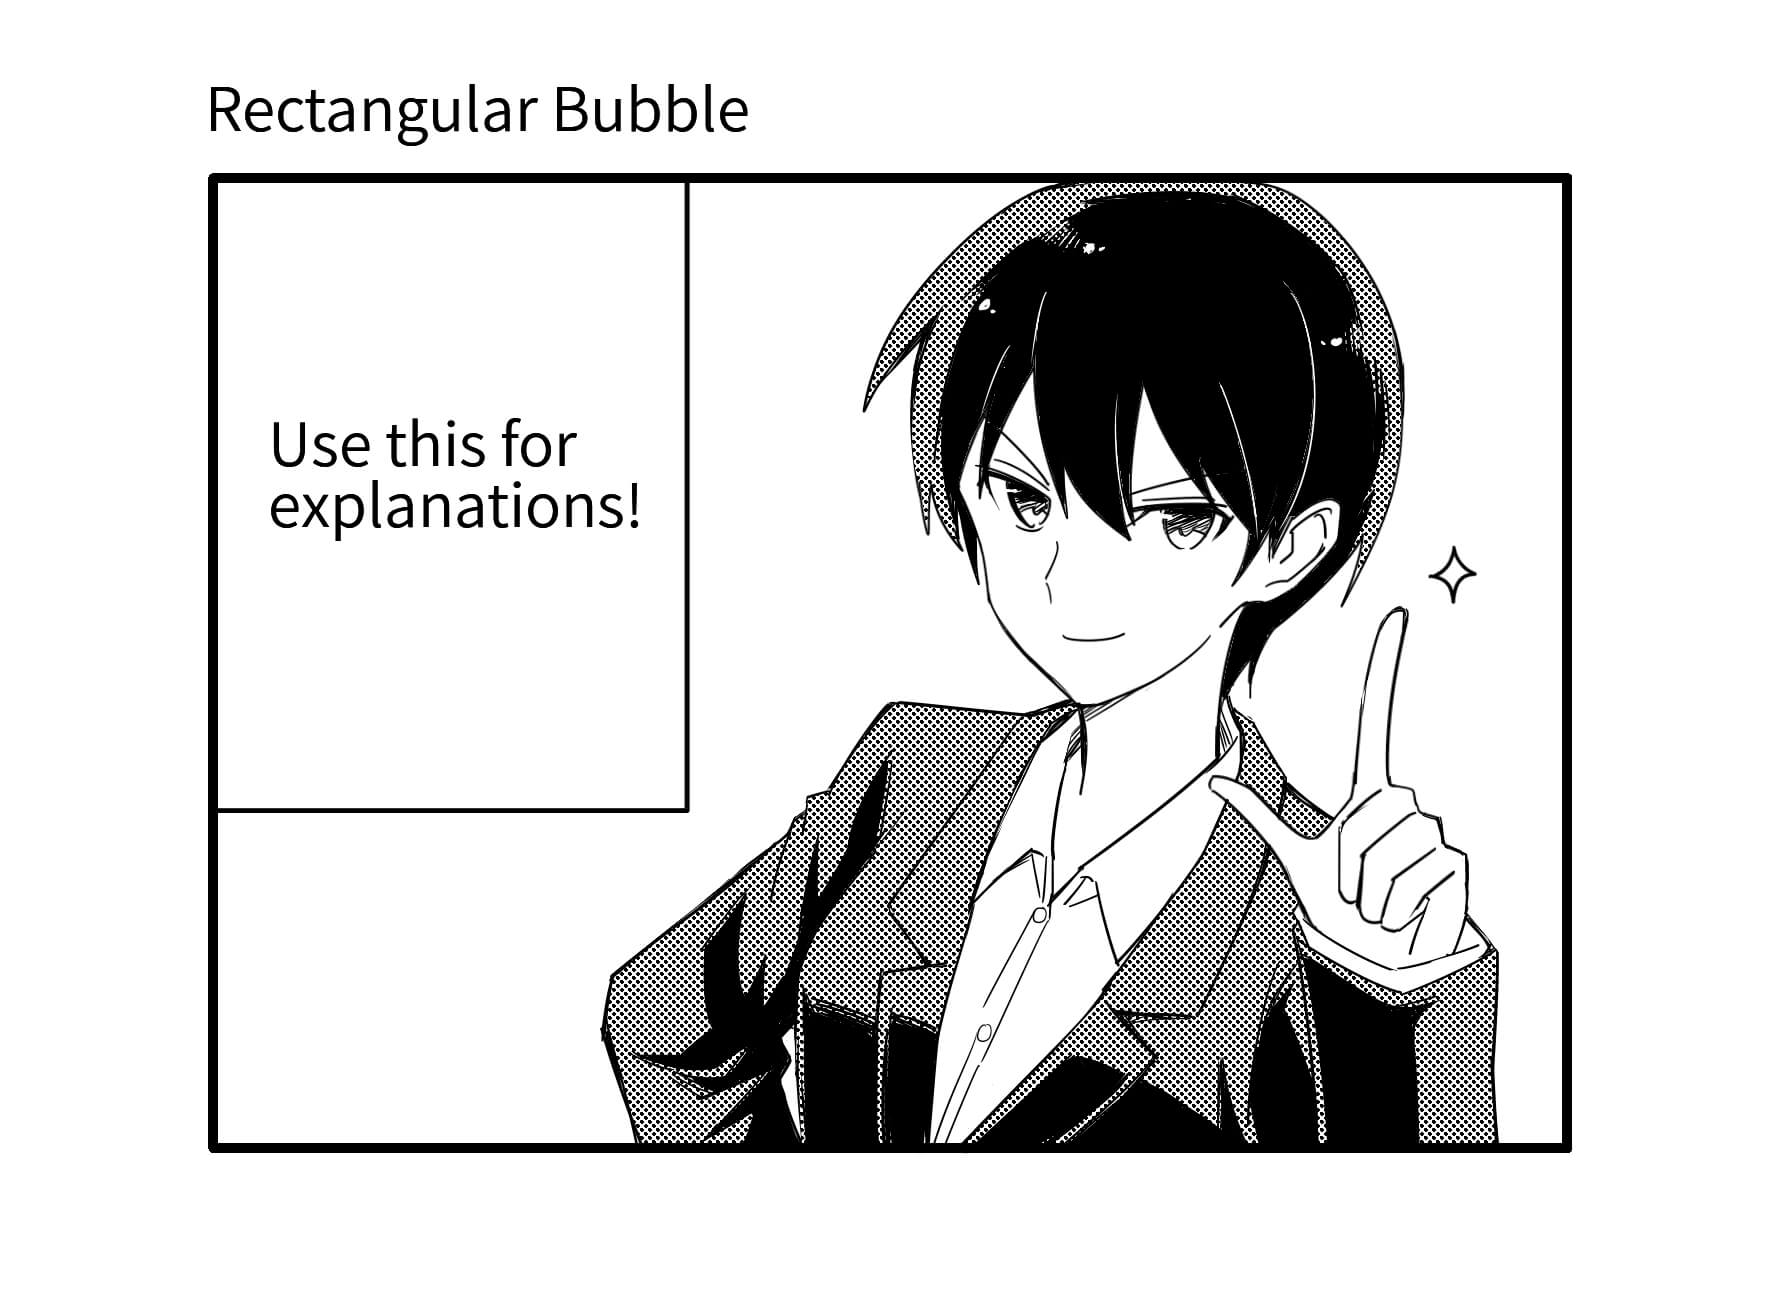
・Rectangular Bubble
It is used for narrations and inner voice spoken in light-hearted tones. Use “Rectangle” in Shape Brush Tool to draw easily.
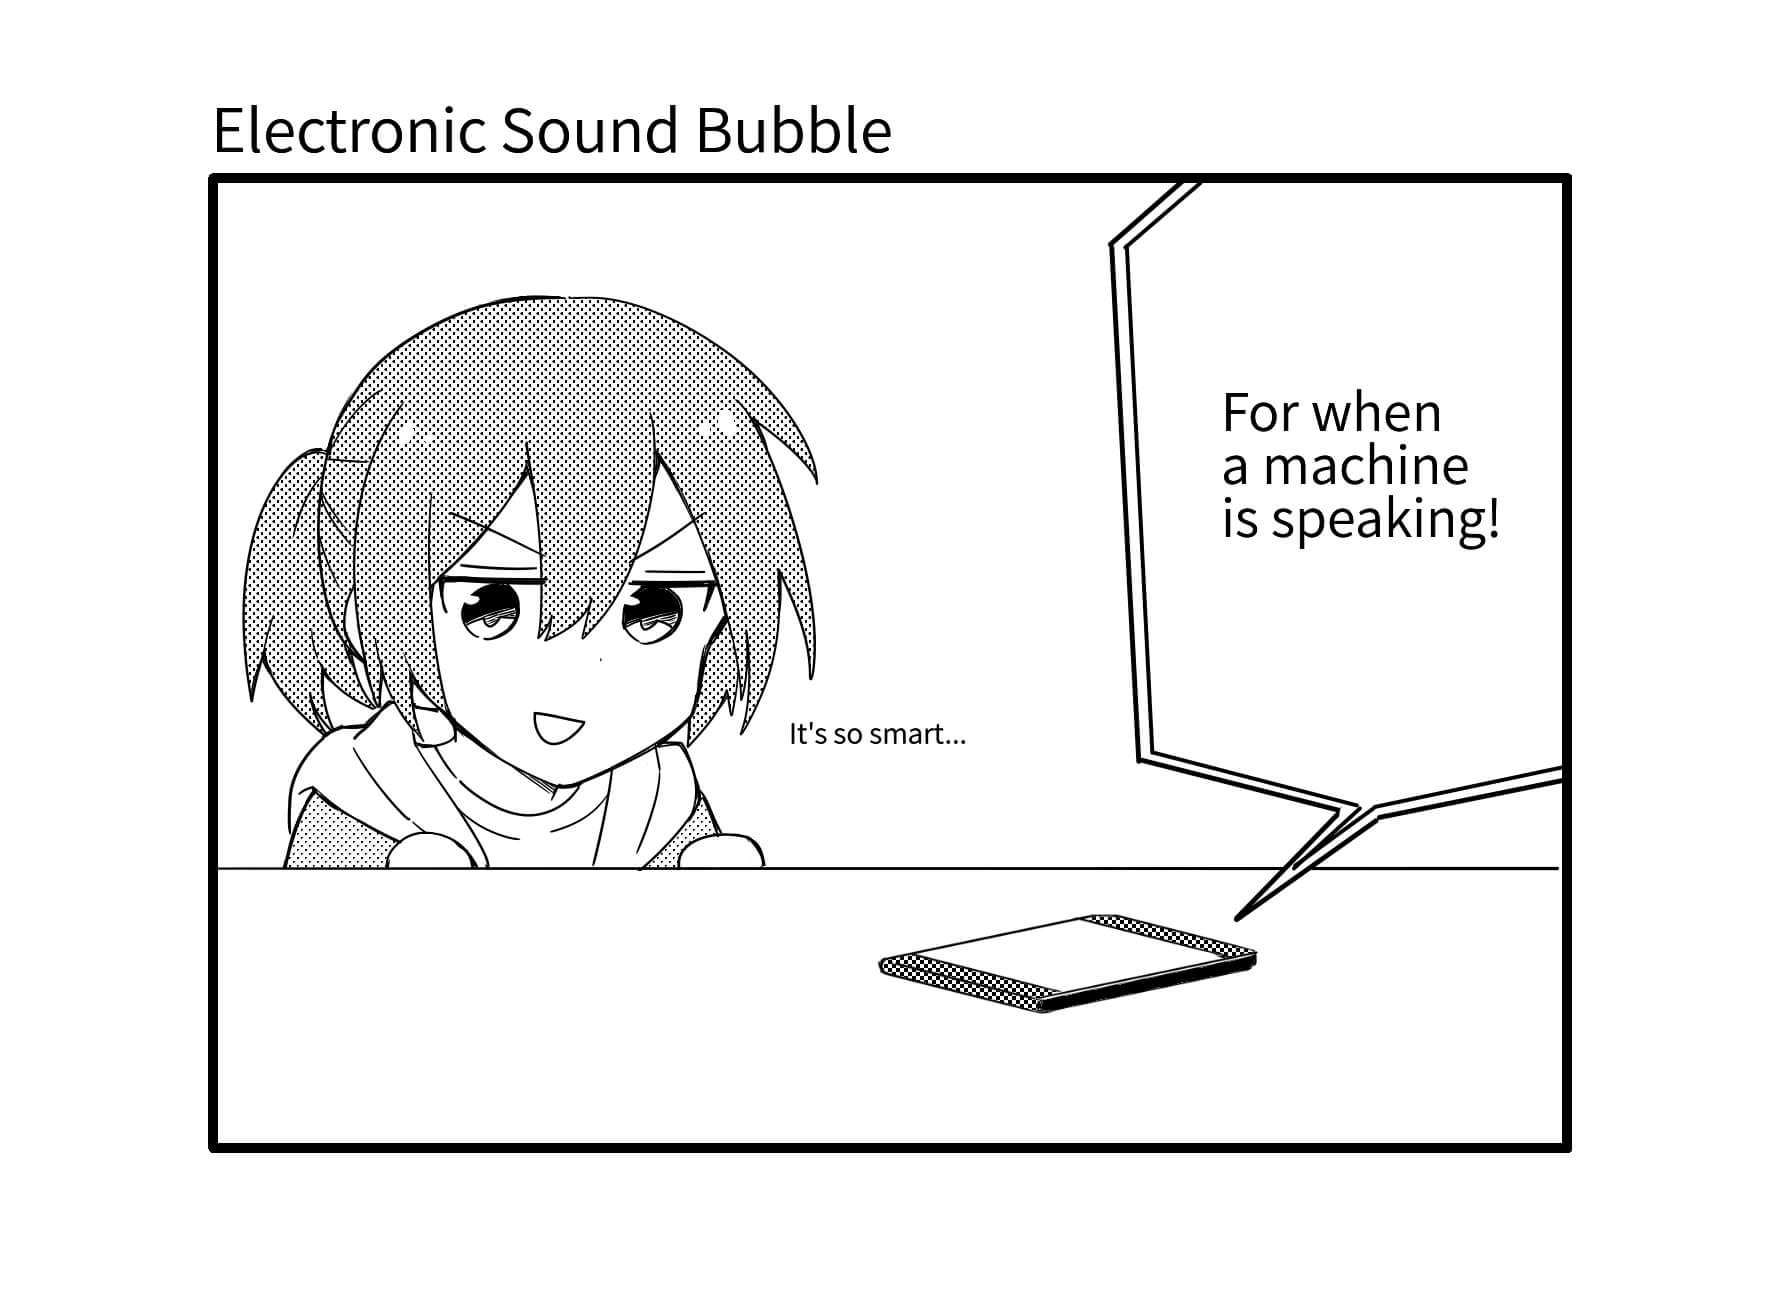
・Electronic Sound Bubble
They express lines spoken through a speaker, by a machine and sounds from electronic devices. You can use the “Polygon” of Shape Brush Tool to draw these.
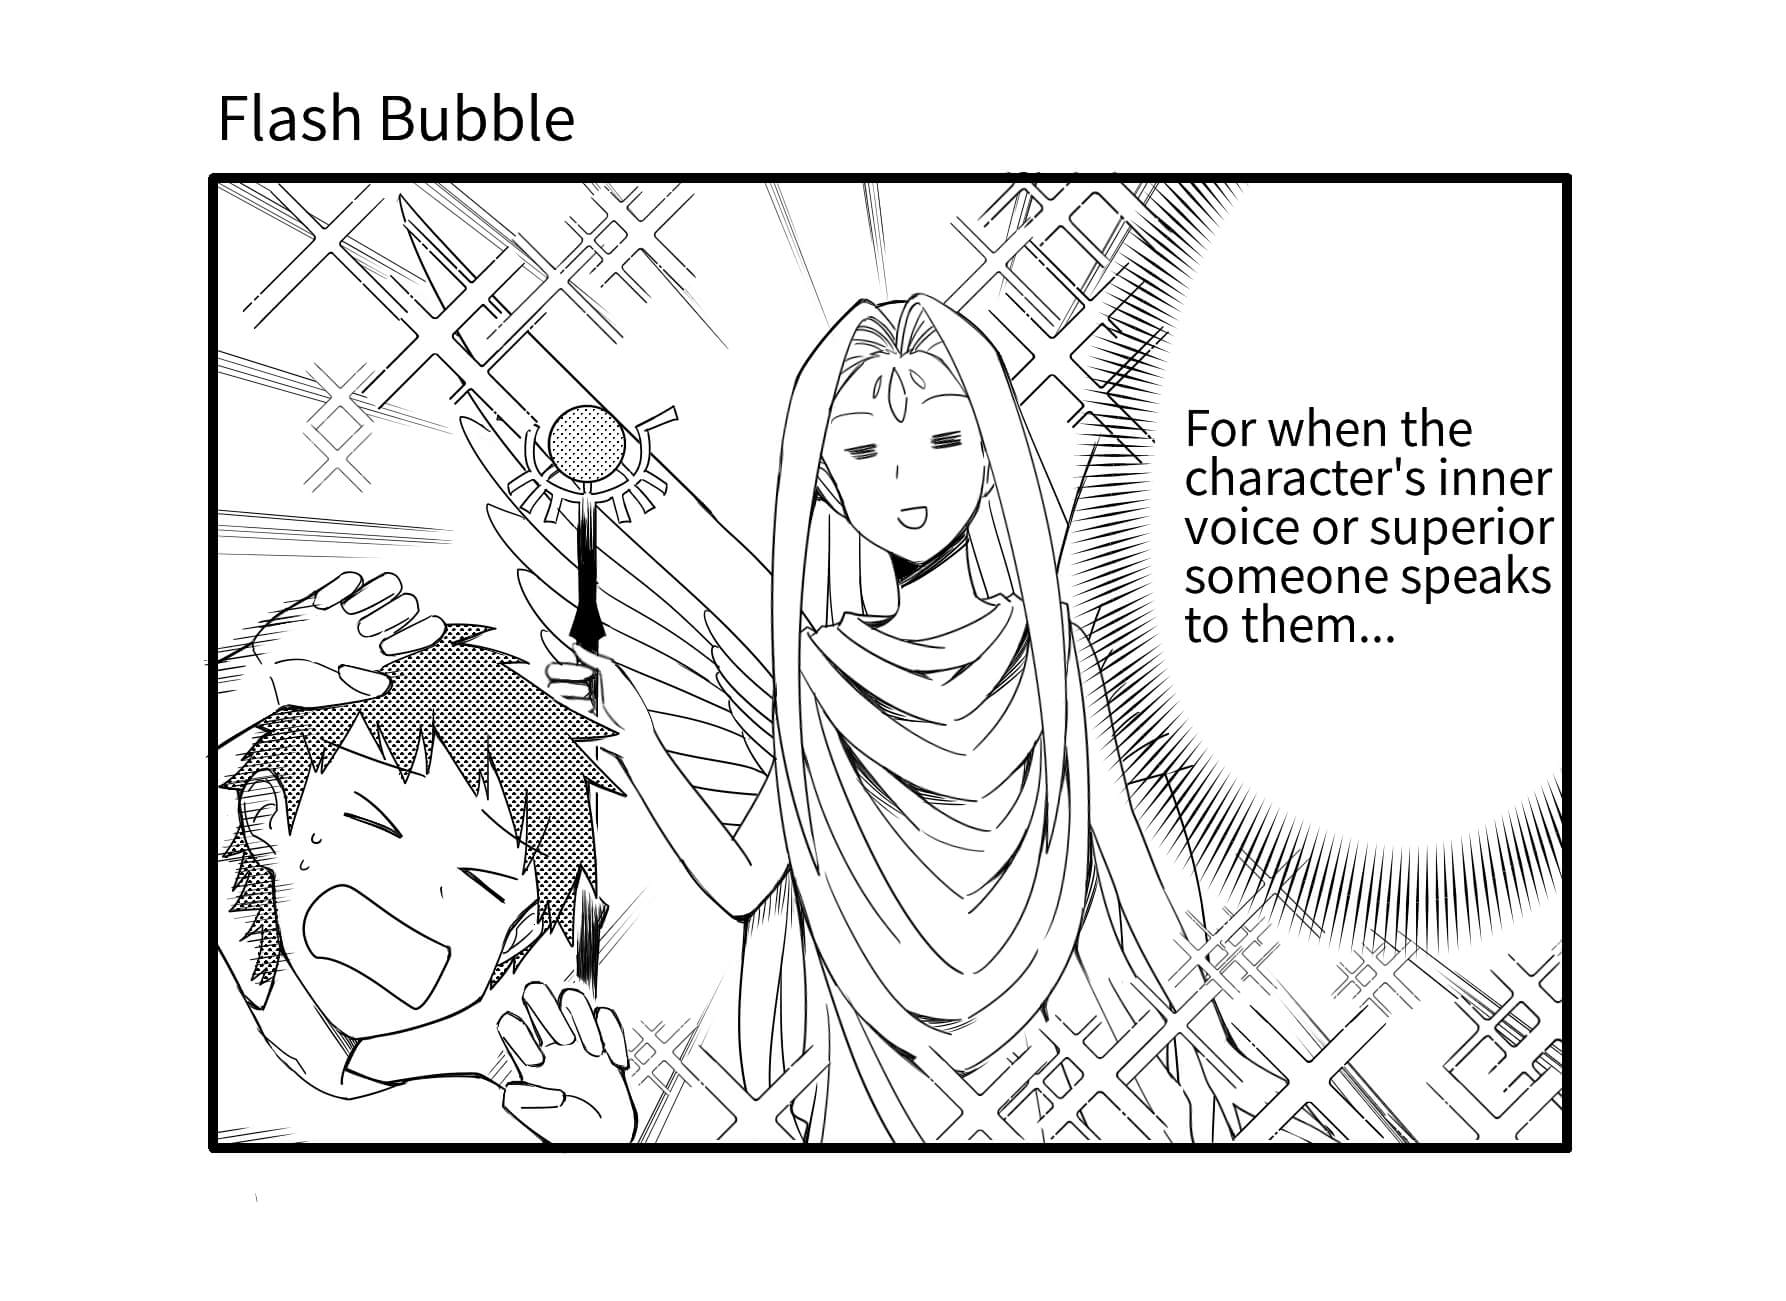
・Flash Bubble
This is used for occasions where the inner voice implies a shocking line or when a superior existence is vocalized directly to the character’s mind.
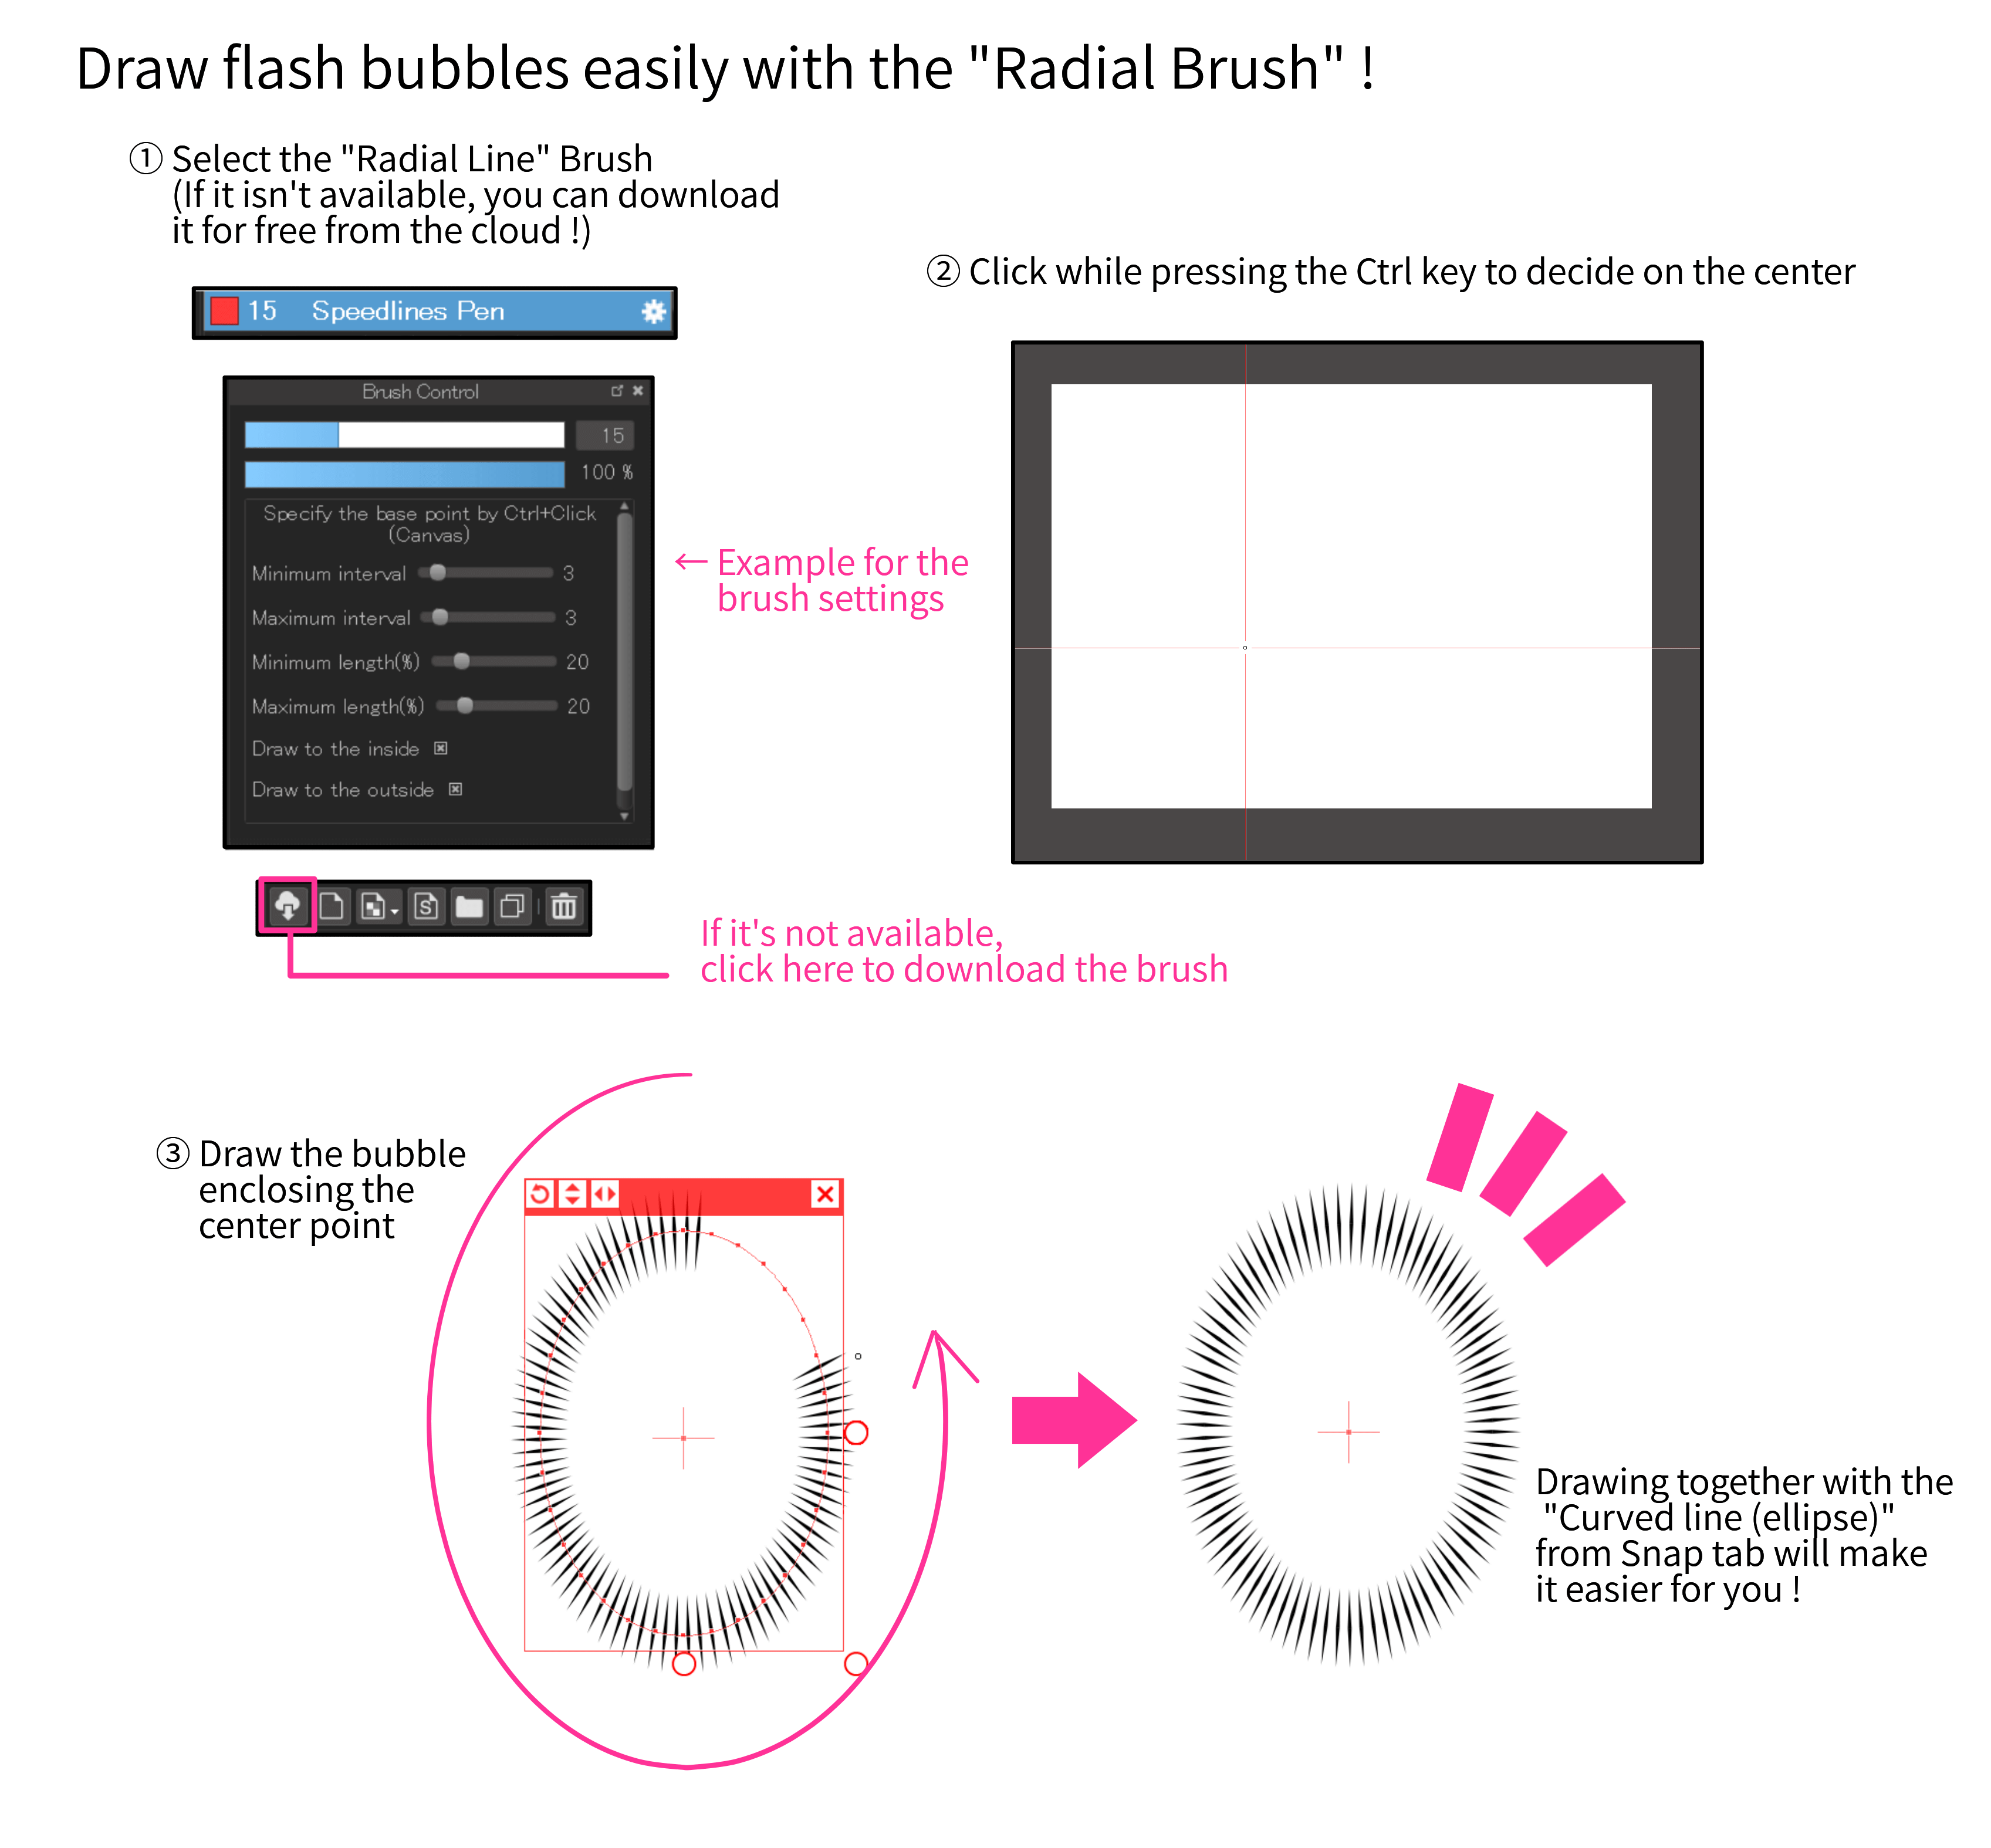
The flash bubble can be drawn easily using the “Radial Brush” from Cloud Brushes.
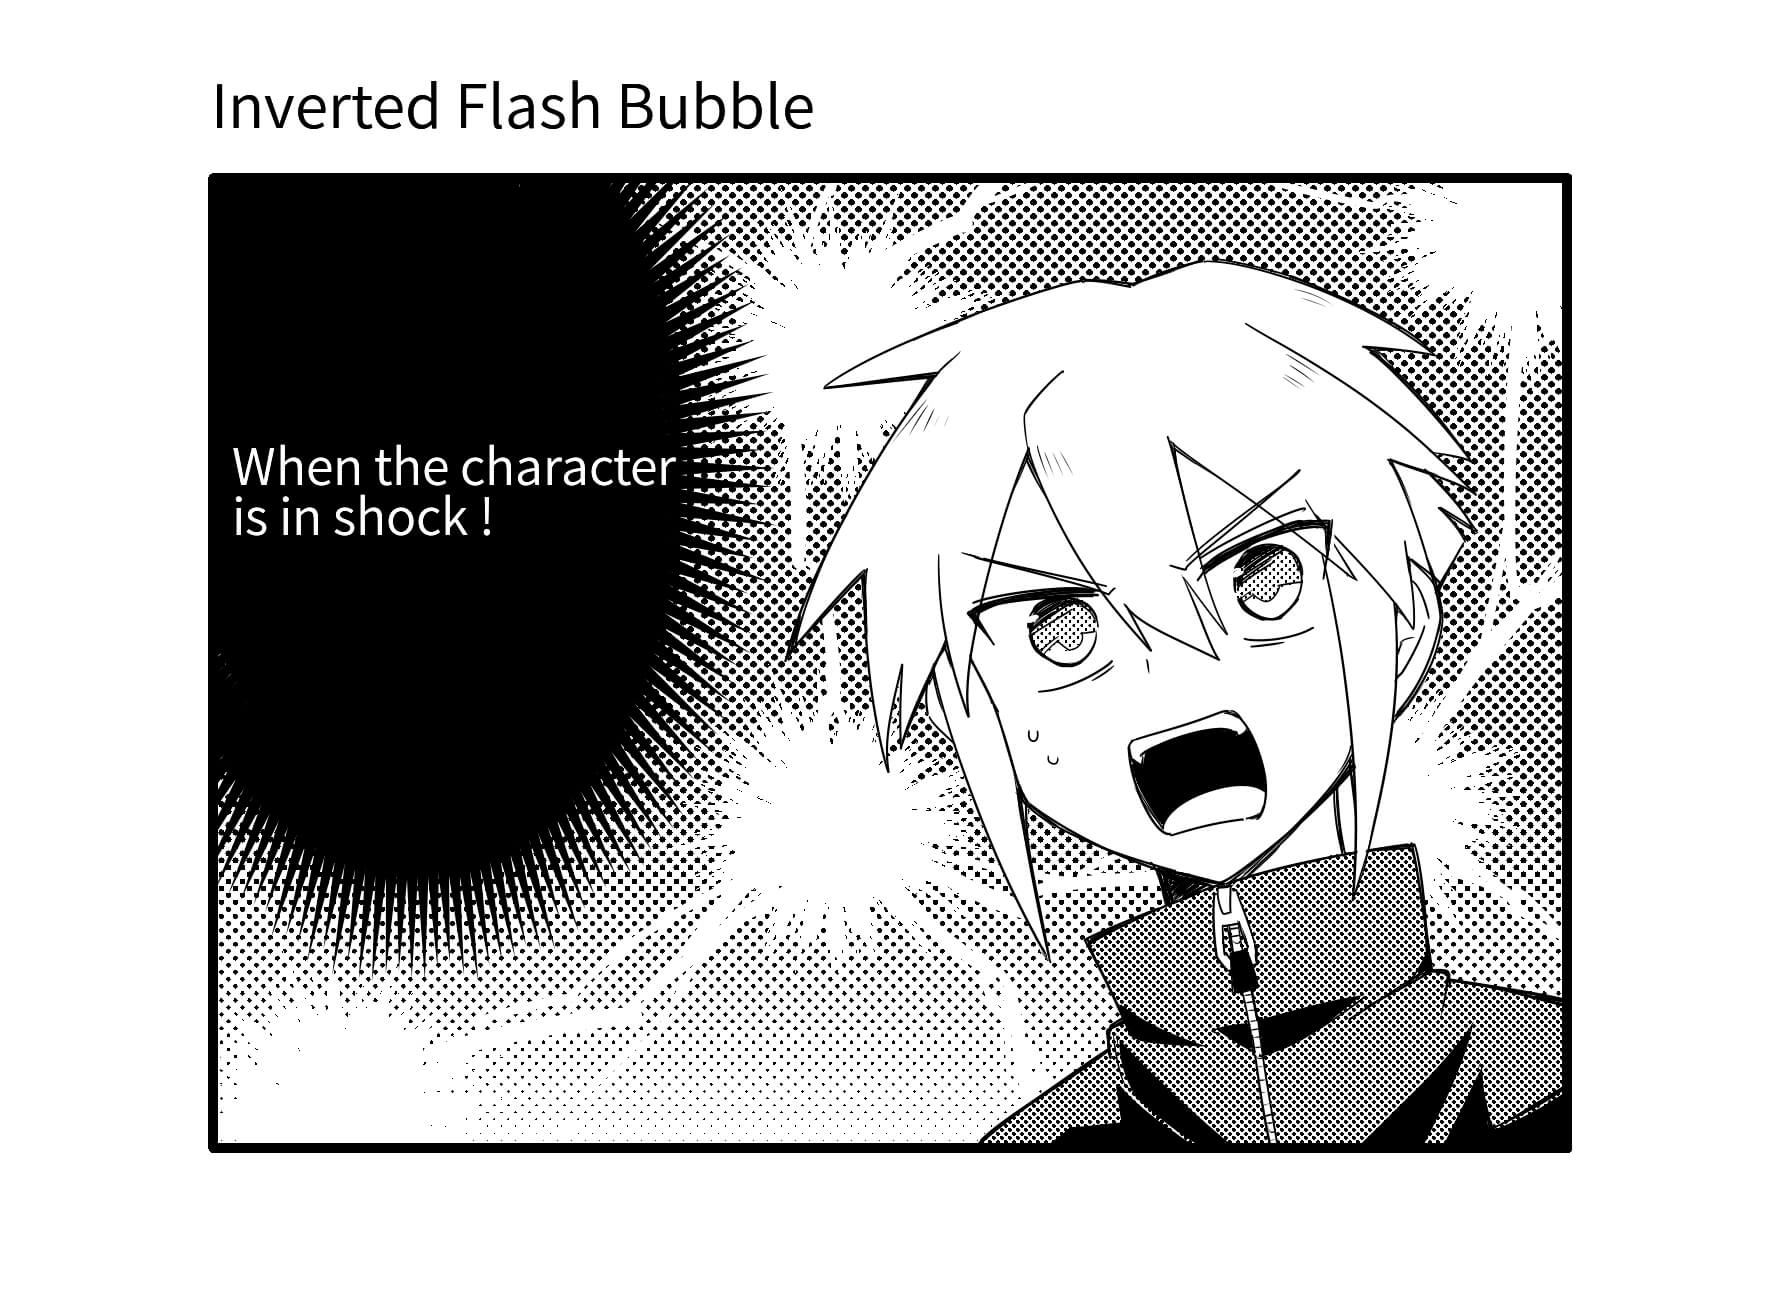
・Inverted Flash Bubble
It is mostly used for when the character’s inner voice is speaking about something even more shocking. The explanation for Inverted Flash bubble is a little complicated so I will describe it in the later tutorial when I will be talking about spot fills.
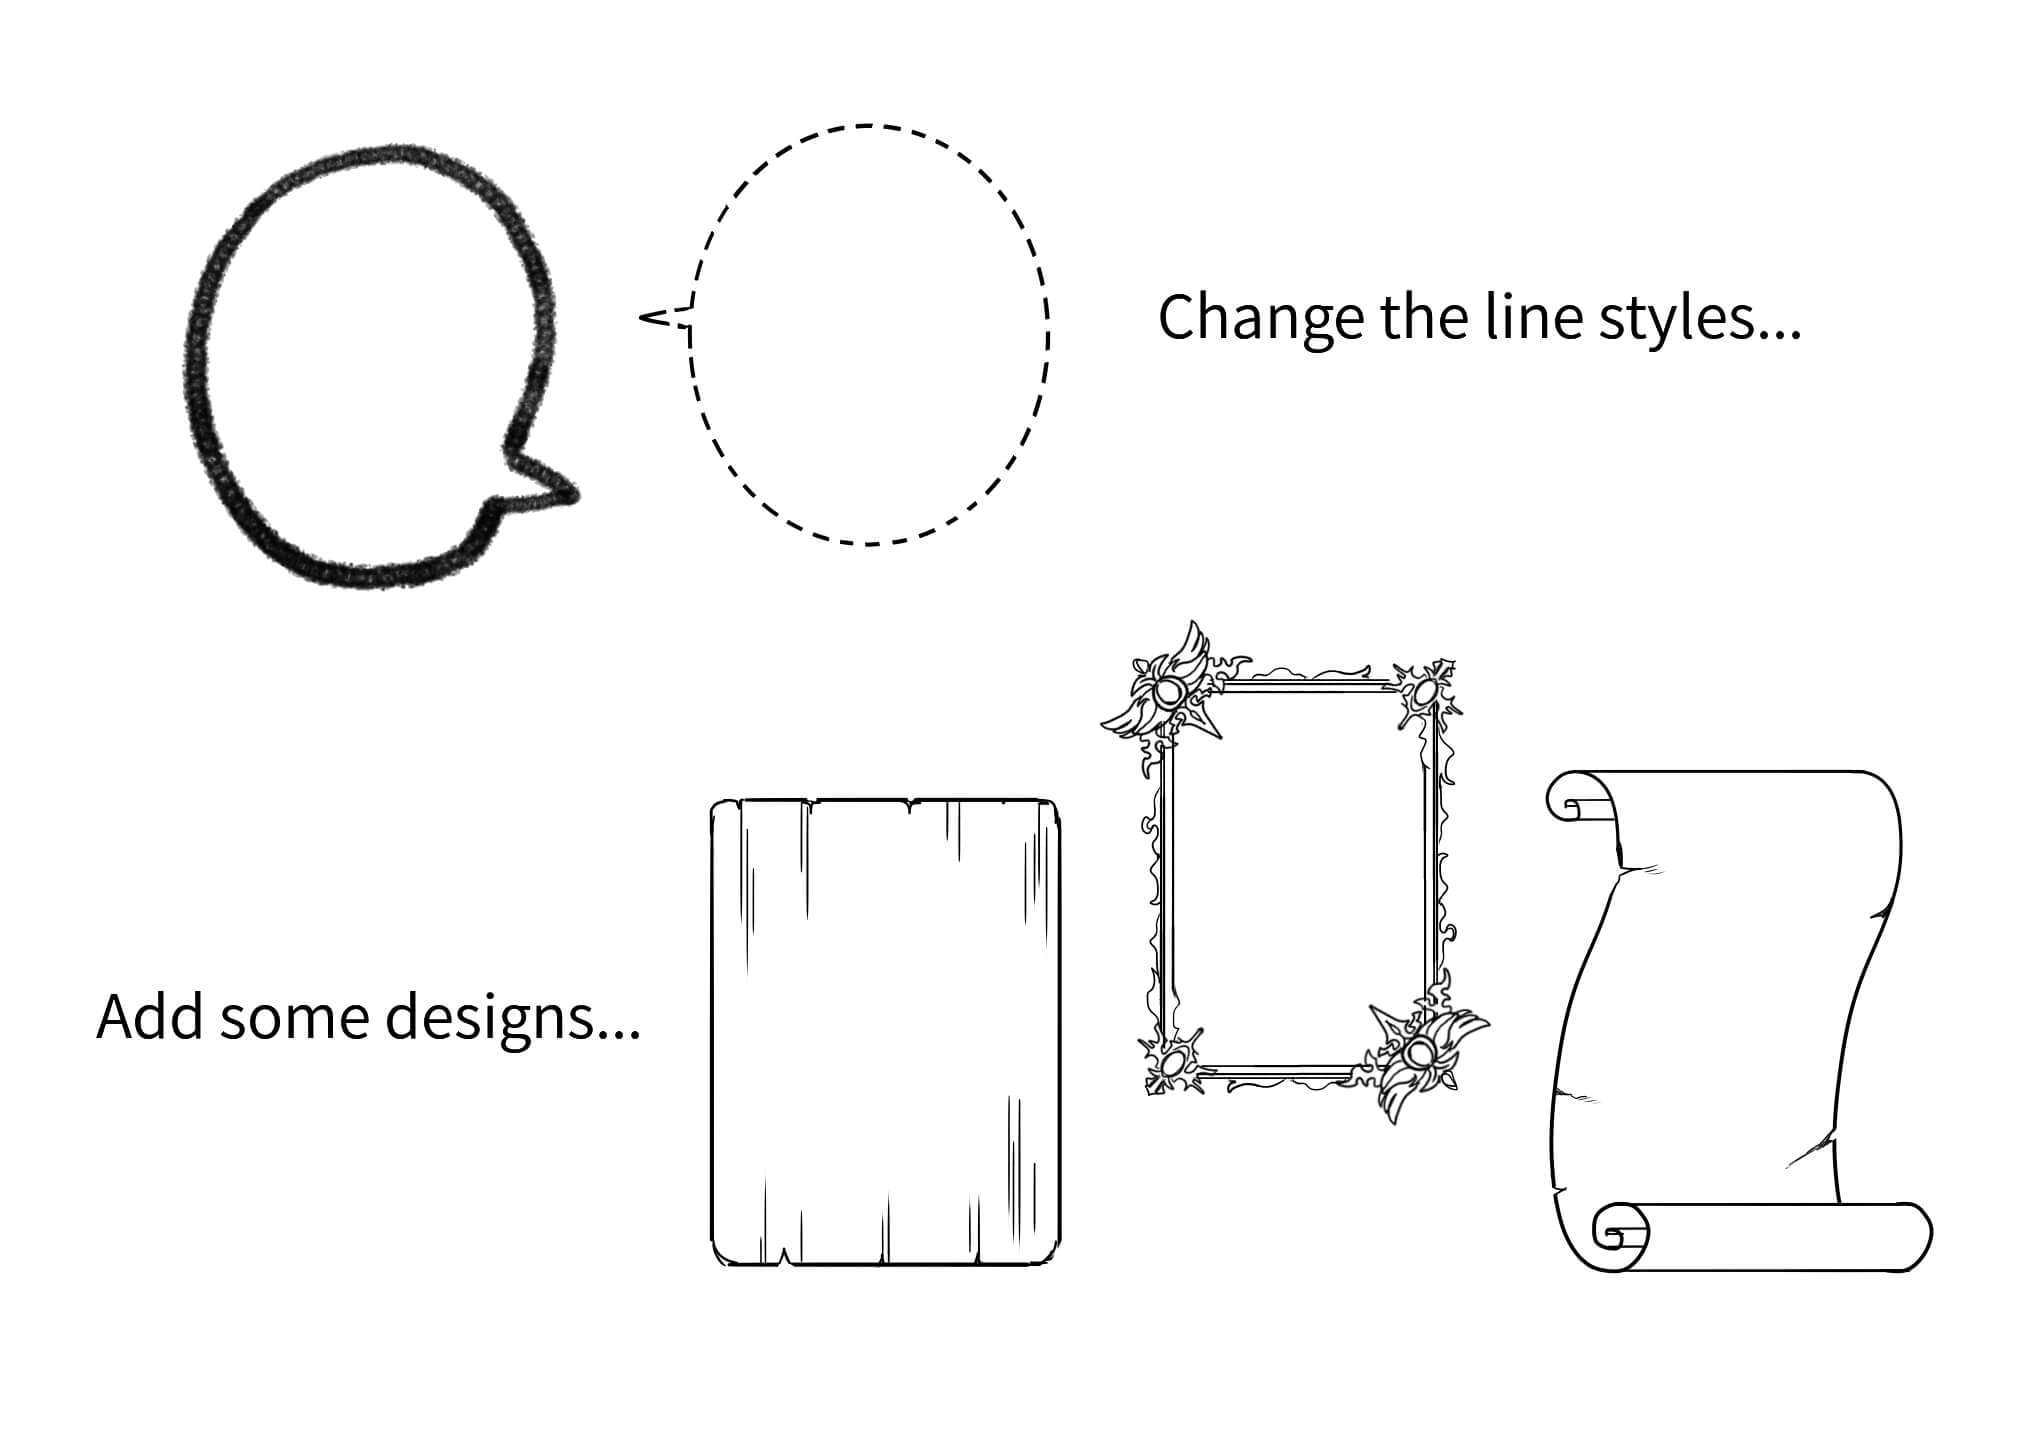
The general types of speech bubbles are as described above, but you can get more variations by changing the line styles or adding some decorations. Look into changing the bubble styles appropriate for the scene you are drawing.
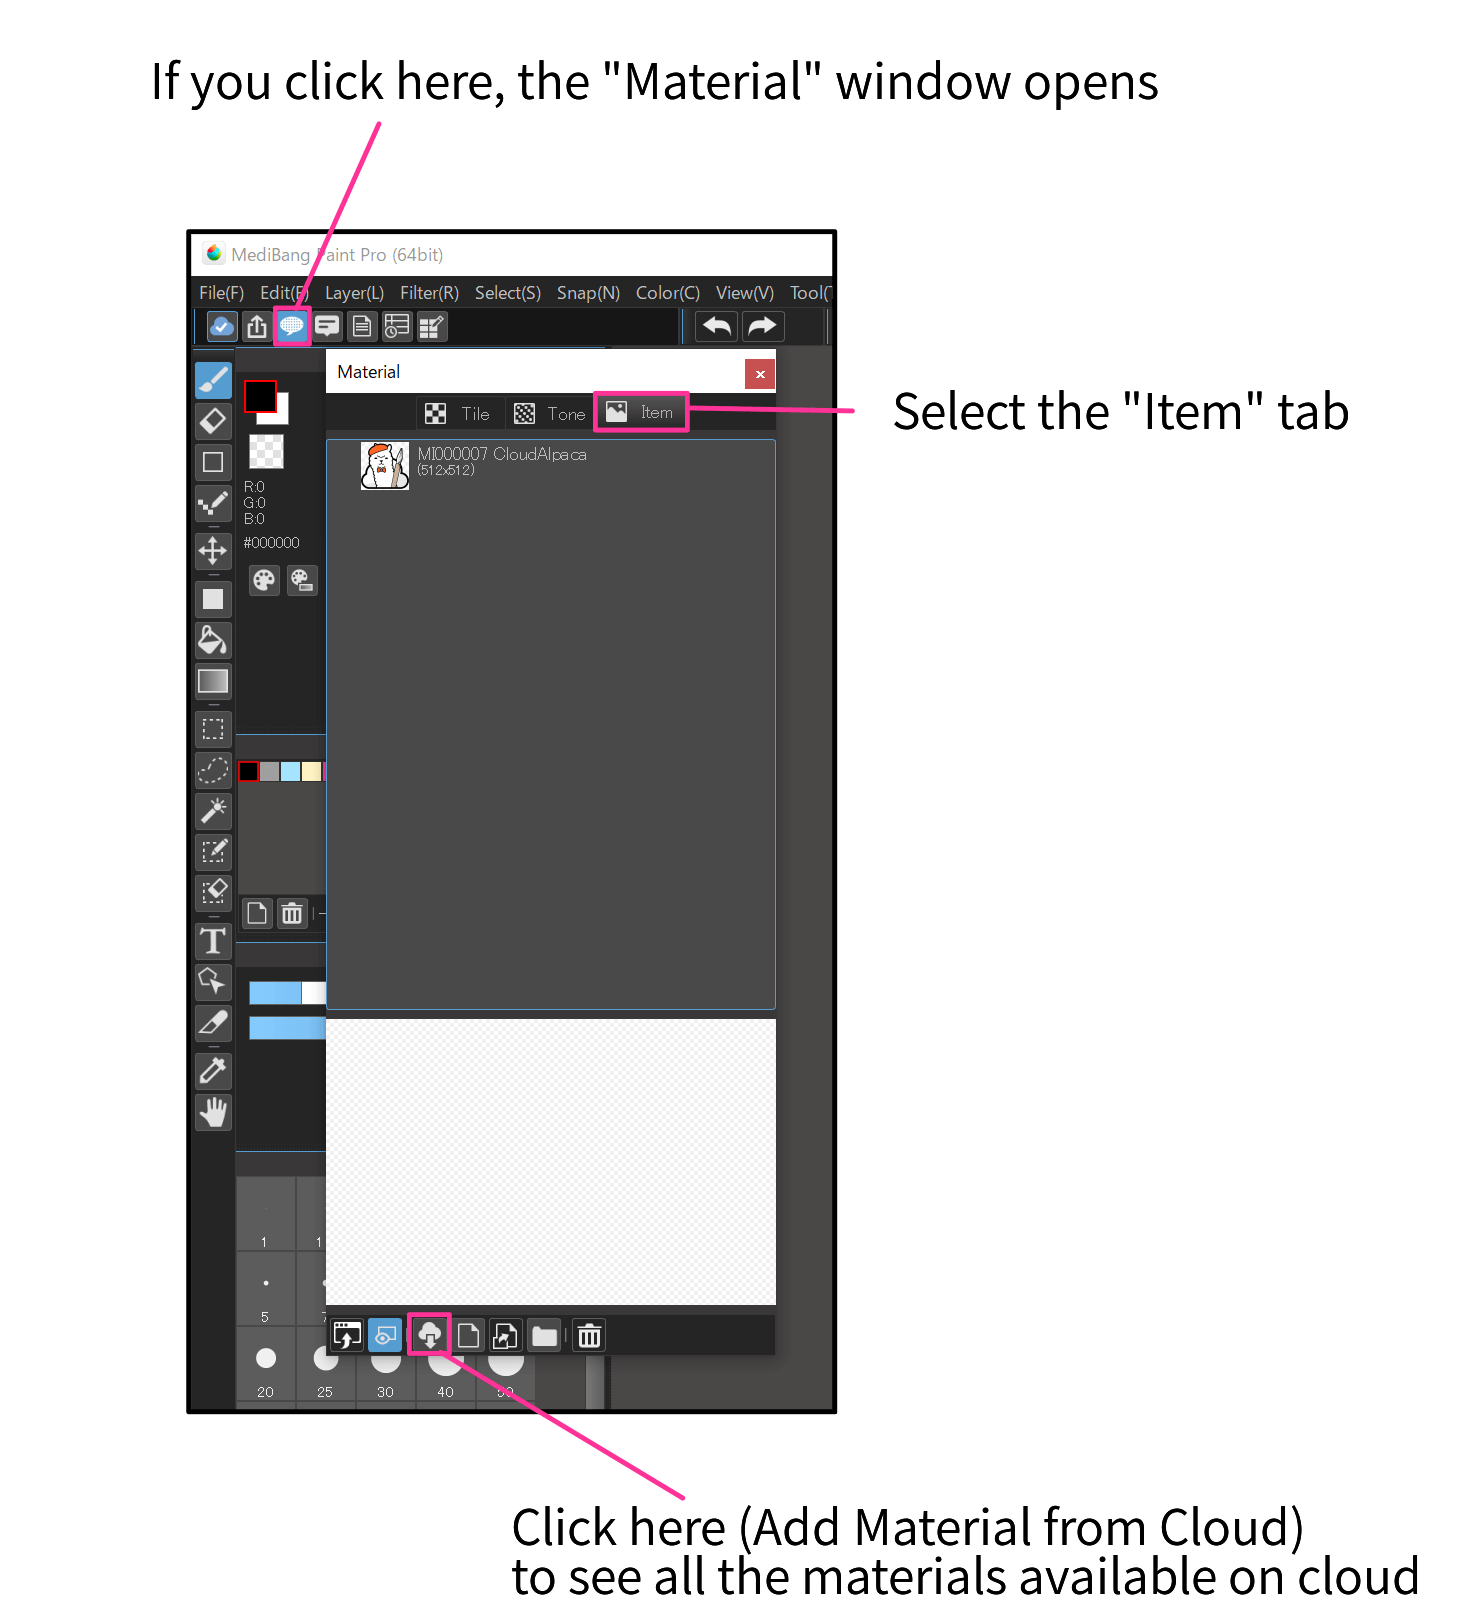
If you are not confident with drawing the bubbles yourself, you can also use the materials on cloud.
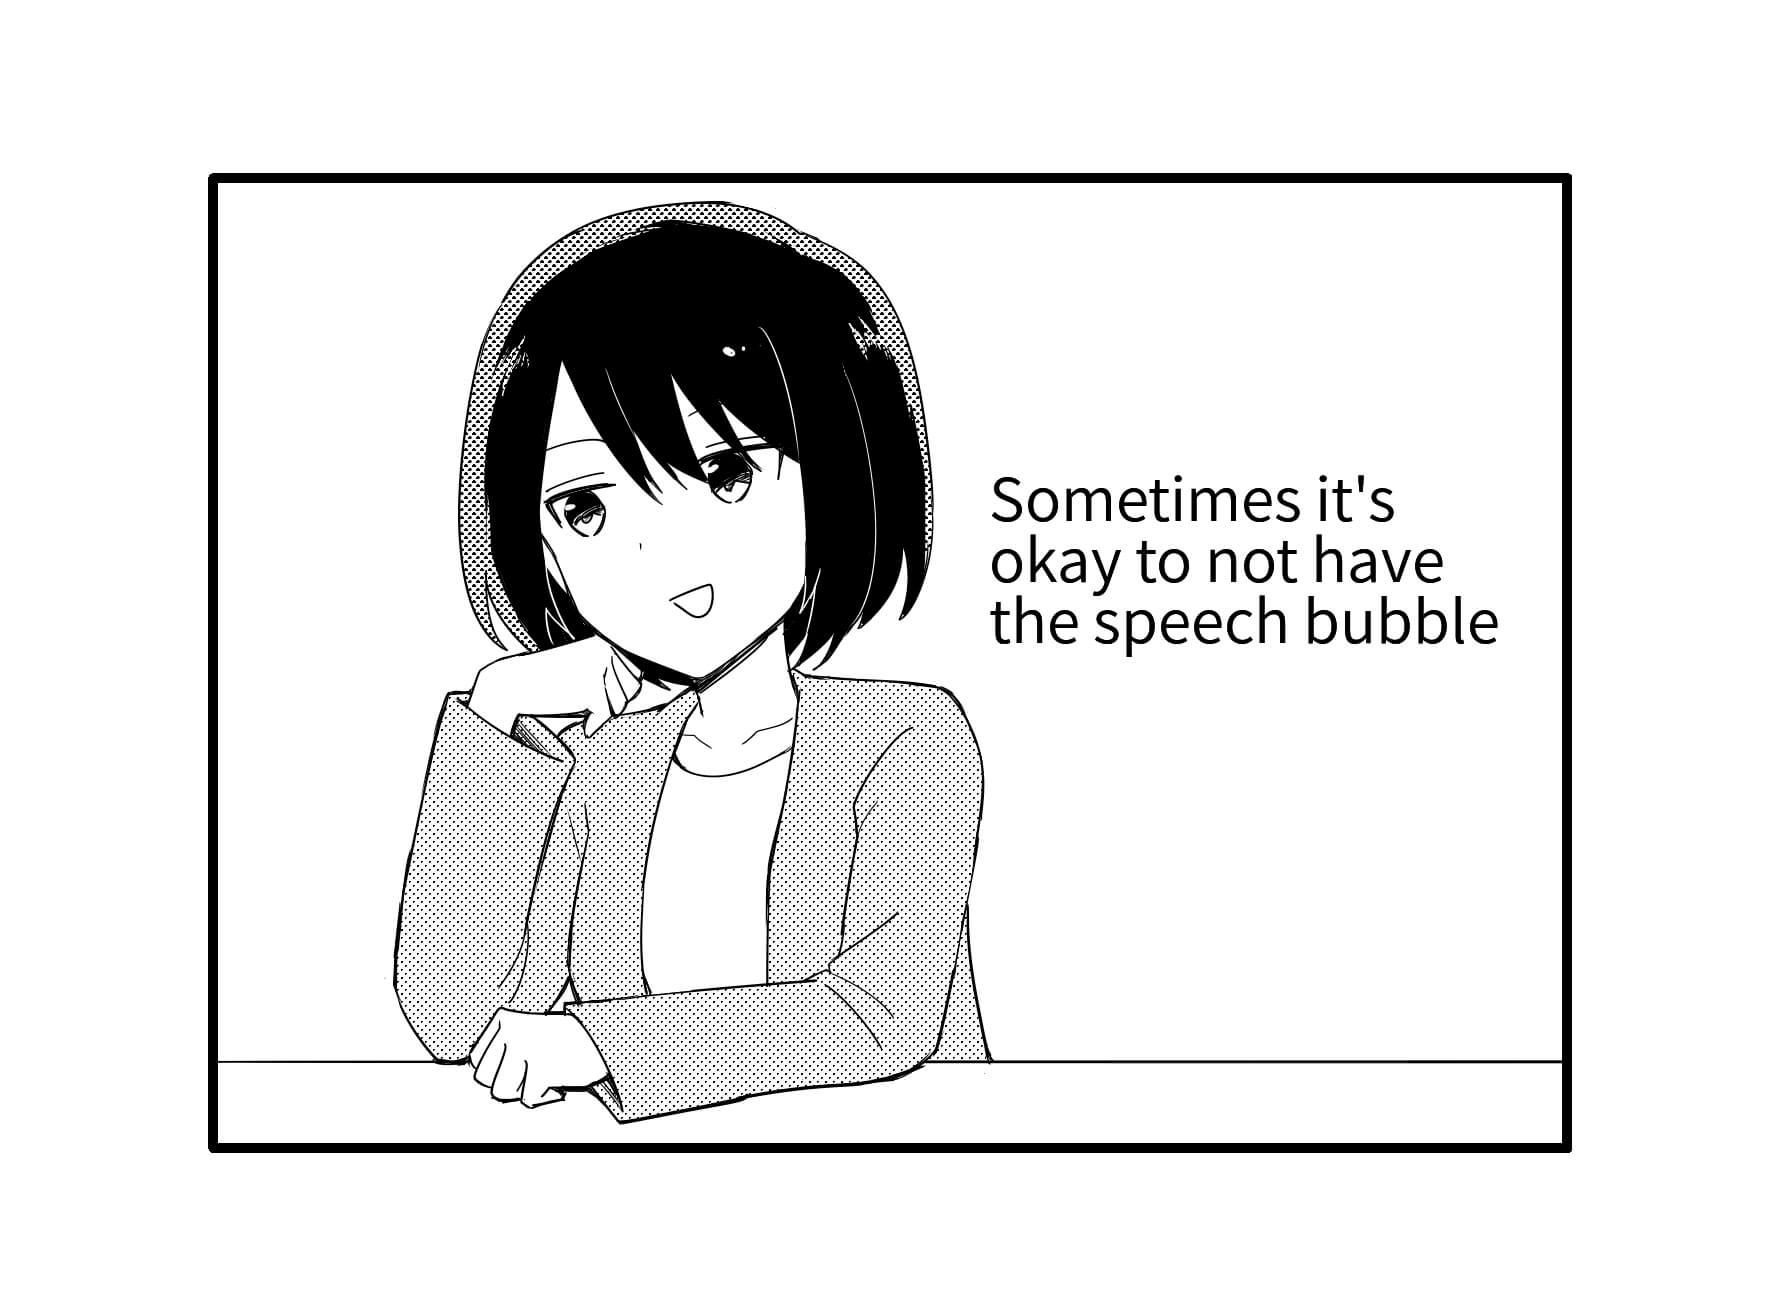
You can also leave out the speech bubble in some panels.
If you want to draw the bubble beyond the panel frame, you can erase a part of the frame, hide the frame line using the “Mask Layer” or cover it with white as I described earlier.
How was the tutorial ?
Just adding the frame lines and speech bubbles will make it look much closer to a proper Manga.
The next tutorial will be on “Drawing humans, animals and nature”.
Click Here for Previous Tutorials.
Manga Tutorial for Beginners 01 Process of Manga Making
Manga Tutorial for Beginners 02 Let’s Make Outline (Part 1)
Manga Tutorial for Beginners 03 Let’s Make Outline (Part 2)
Manga Tutorial for Beginners 04 Get Ready to Draw Manga with MediBang Paint!
Manga Tutorial for Beginners 05 Let’s Make Name(outline)
Manga Tutorial for Beginners 06 Let’s think about frame layout and screen.
Manga Tutorial for Beginners 07 Considerations when setting up the canvas.
Manga Tutorial for Beginners 08 Let’s draw frames and speech bubbles.
「ГФ」
ART street
Click here for the collection: https://medibang.com/u/seledkapodshboi/
You can read my manga here → https://medibang.com/book/0c2101280307258390018866367/
This is also a manga that I draw under a different name. → https://medibang.com/comics/official/dobs340000005872400000000000a/
twitter: https://twitter.com/seledkapodshboi
\ We are accepting requests for articles on how to use /

