2022.06.18
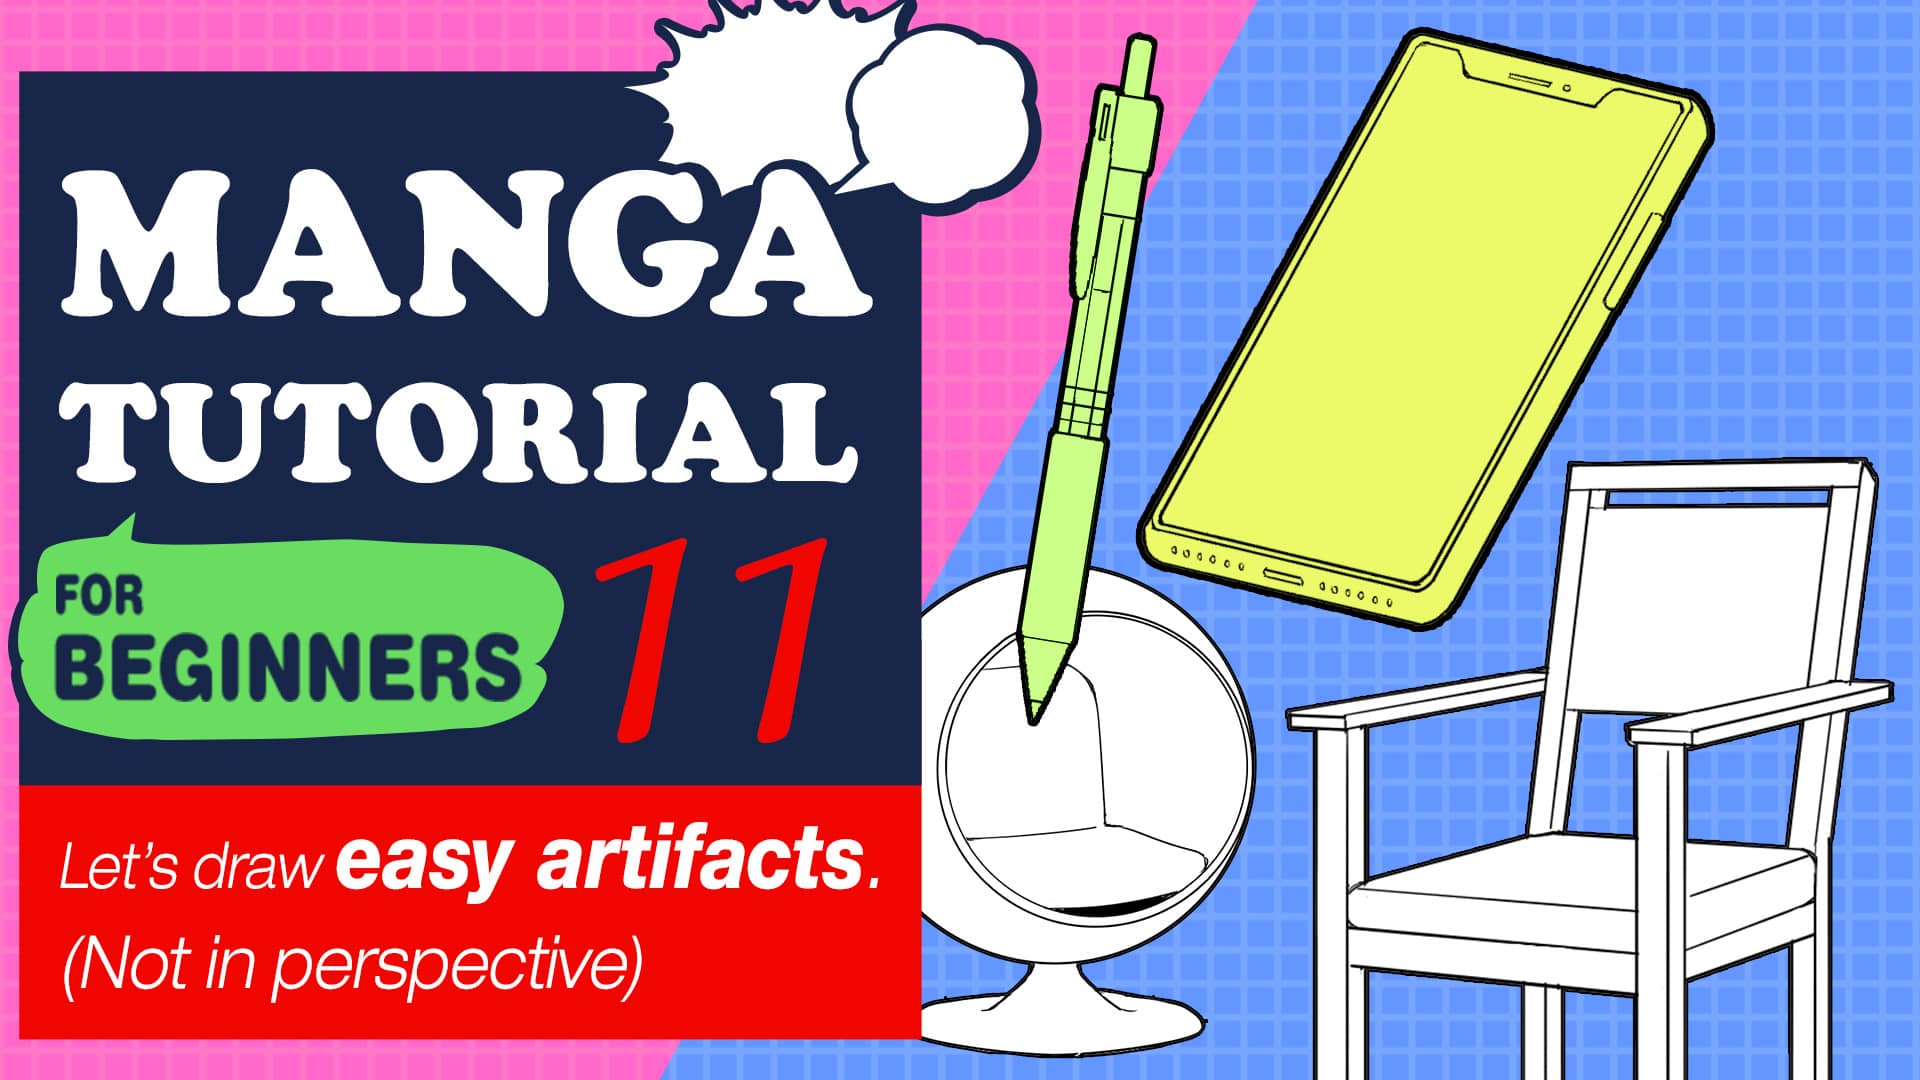
Manga Tutorial for Beginners Vol.11 Let’s draw easy artifacts. (Not in perspective)
Hi, this is ГФ.
Today, I would like to give you a lesson about drawing artifacts that include straight lines.
The following are the lineups of today’s lecture.
1.How to draw a smartphone.
2.How to draw a pen.
3.How to draw a chair.
4.How to draw stairs.
We are going to use free cloud brushes, “Symmetry line” and “Split” brushes. If you haven’t gotten them yet, please download them from Cloud.
My lesson is going to be too complex if I try to instruct the perspective drawing, so I am not going to focus on that too much this time.
Click Here for Previous Tutorials.
Manga Tutorial for Beginners 01 Process of Manga Making
Manga Tutorial for Beginners 02 Let’s Make Outline (Part 1)
Manga Tutorial for Beginners 03 Let’s Make Outline (Part 2)
Manga Tutorial for Beginners 04 Get Ready to Draw Manga with MediBang Paint!
Manga Tutorial for Beginners 05 Let’s Make Name(outline)
Manga Tutorial for Beginners 06 Let’s think about frame layout and screen.
Manga Tutorial for Beginners 07 Considerations when setting up the canvas.
Manga Tutorial for Beginners 08 Let’s draw frames and speech bubbles.
Manga Tutorial for Beginners 09 Let’s draw people and natural objects
Manga Tutorial for Beginners Vol.10 Let’s get the most out of brushes and materials
Manga Tutorial for Beginners Vol.11 Let’s draw easy artifacts. (Not in perspective)
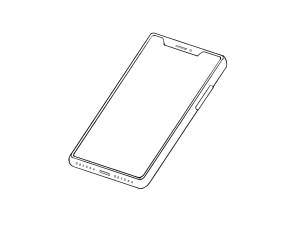
1.How to draw a smartphone.
First of all, check the ratio and take “Atari (approximation)”, by using an actual smartphone or pictures of it as reference.
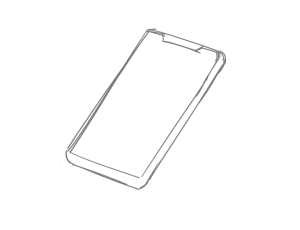
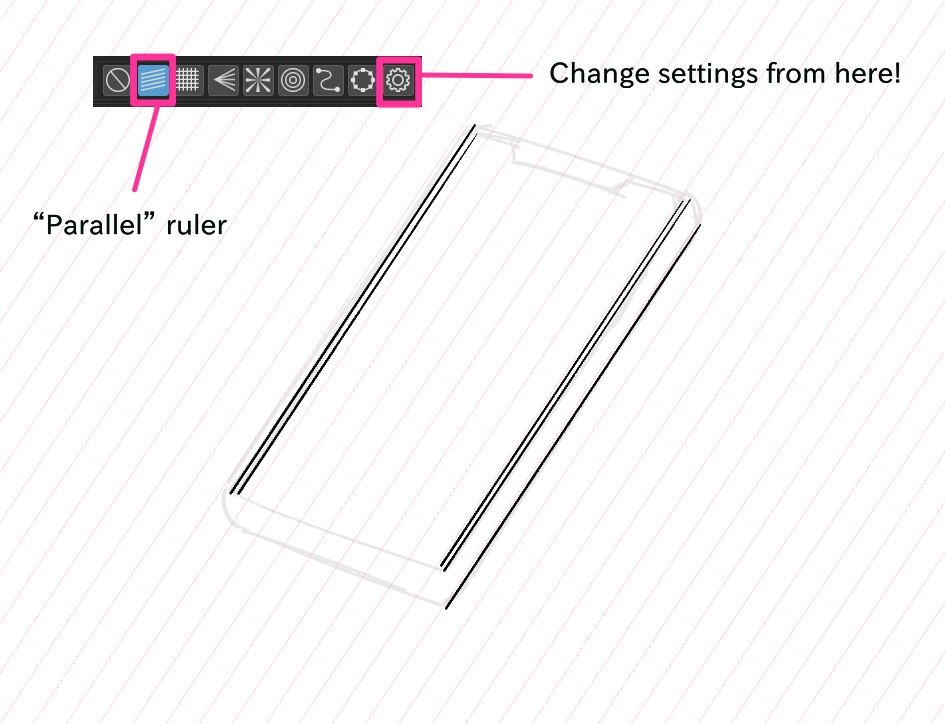
Start drawing with a ruler once you finish taking “Atari”. “Cross” ruler is useful to draw perpendicular or horizontal lines, and “Parallel” ruler is useful to draw parallel lines. If you want to change the settings of the “Parallel” ruler, press the gear mark on the right side.
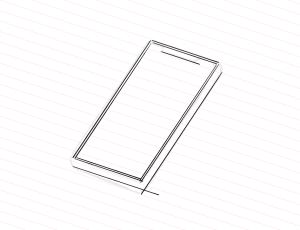
When you finished drawing the straight lines, curve the edge of it and add camera, power button, sound button and such. Erase unnecessary lines and that’s it!
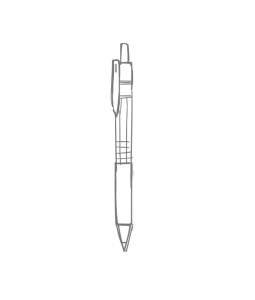
2.How to draw a pen.
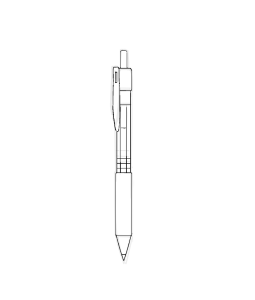
Drawing a pen is a bit harder than drawing a smartphone. I recommend a vertical length. First, observe the reference material and take “Atari”.
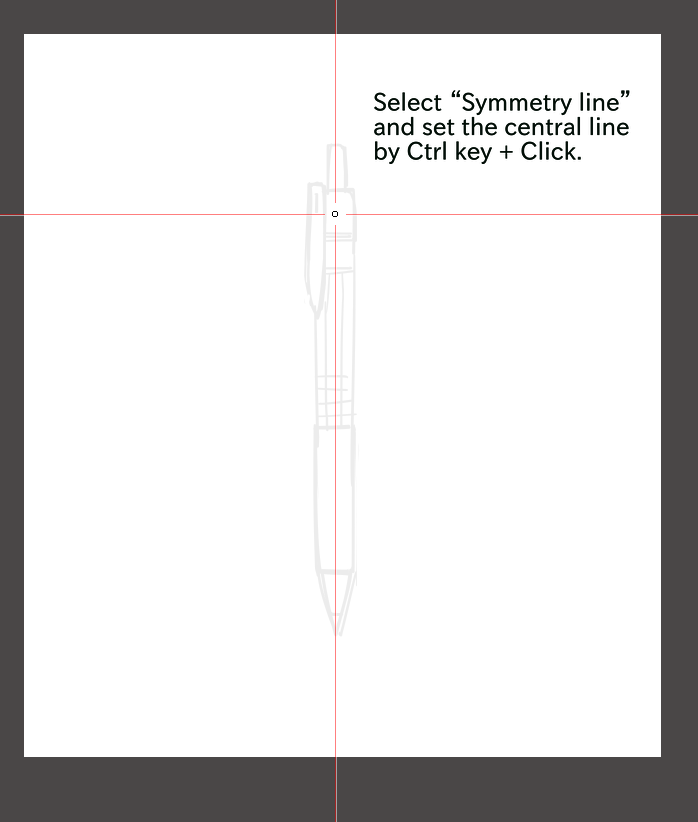
Free Cloud brush, “Symmetry line” is useful to draw something symmetrical. When you use this brush, click while pressing the Ctrl key to set the central line. This line will be the center of your symmetrical drawing.
Start drawing from the symmetrical part like the point of a pen or a knock. Draw straight lines by using the “Cross” ruler.
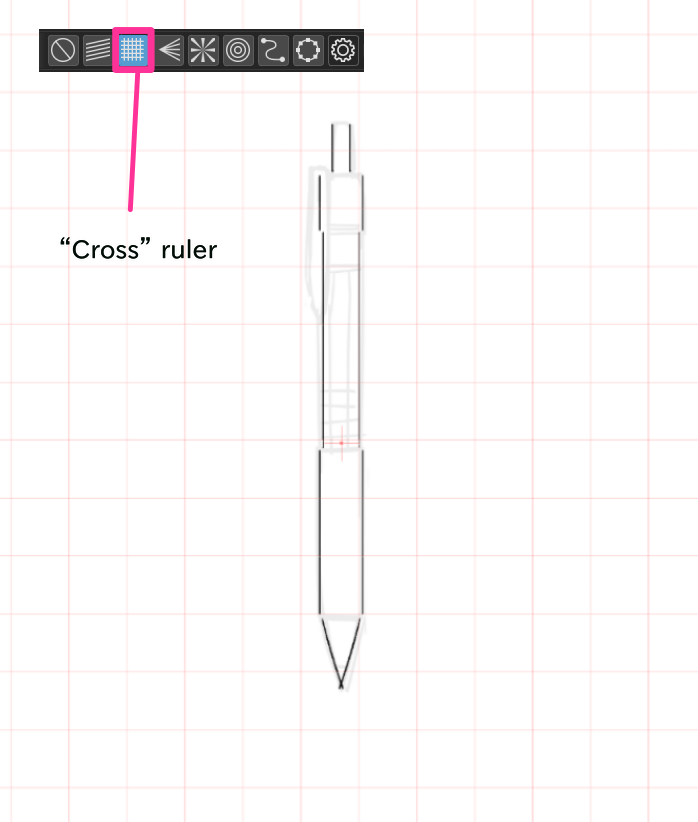
After that, draw unsymmetrical parts like a clip by using a normal pen. Then your work is completed.
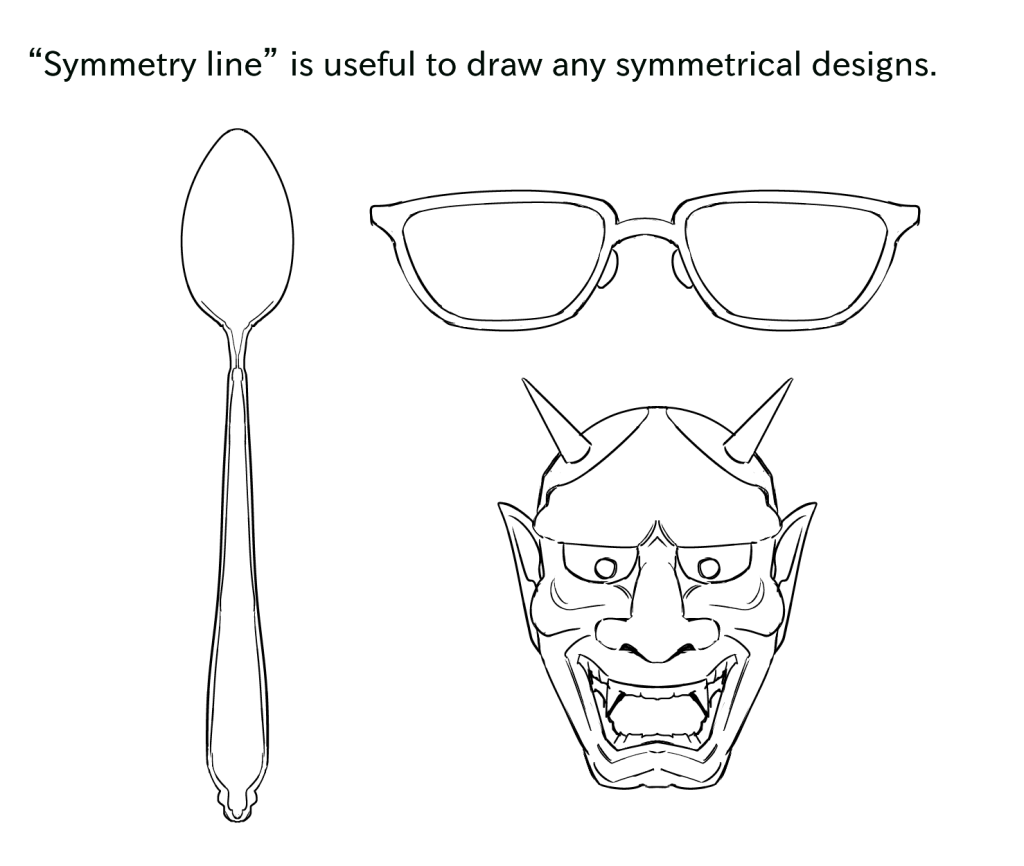
Not only for drawing a pen, “Symmetry line” is useful to draw any symmetrical designs such as glasses, spoons, and Japanese traditional masks. You can fix lines while keeping the status of symmetrical lines if you make the line colorless instead of using eraser.
3.How to draw a chair.
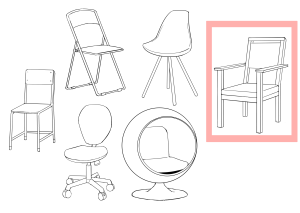
There are many types of chairs. For this lesson, we are going to draw the one on the right side.
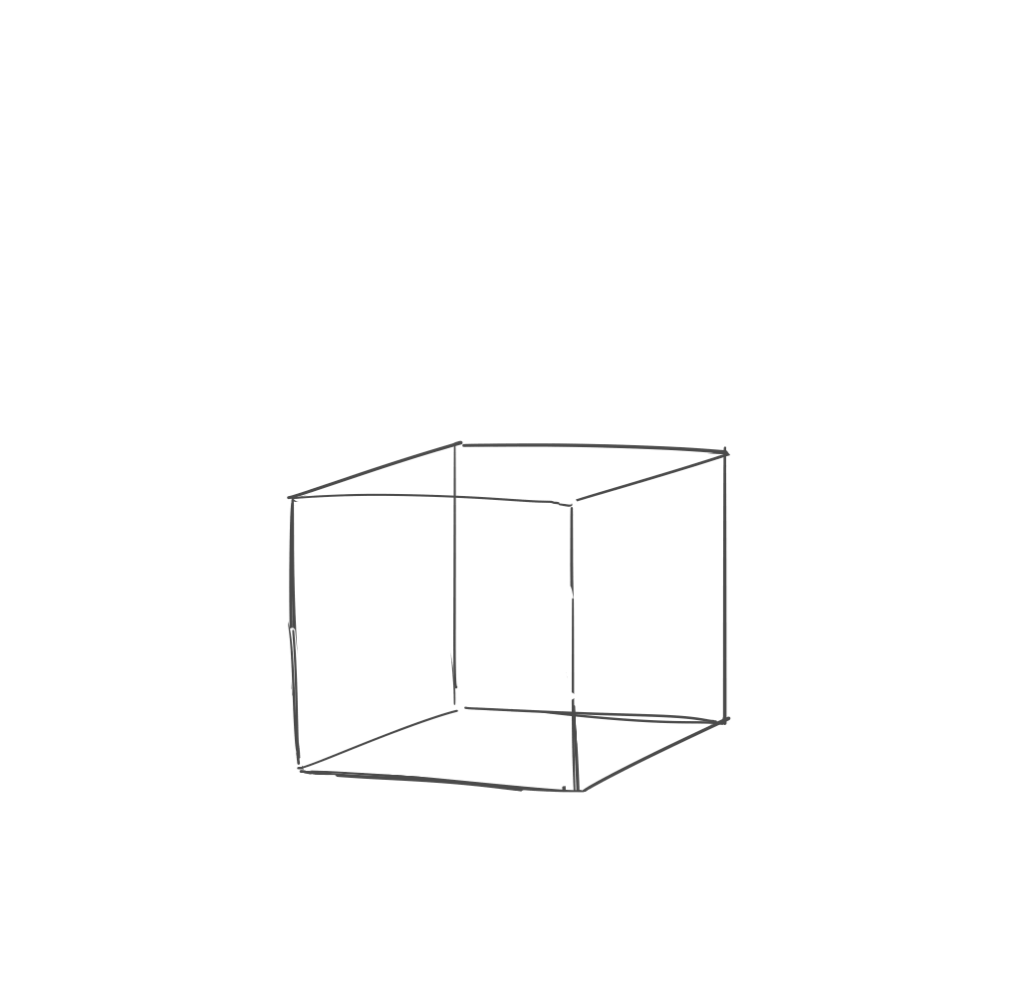
Basic form of a chair is a box, so take a box shaped “Atari”.
Then add handrails, legs, and a chair back to the box. Pay attention to the ratio, so that your artwork will look good when it is completed. Freehand is just fine for this step.
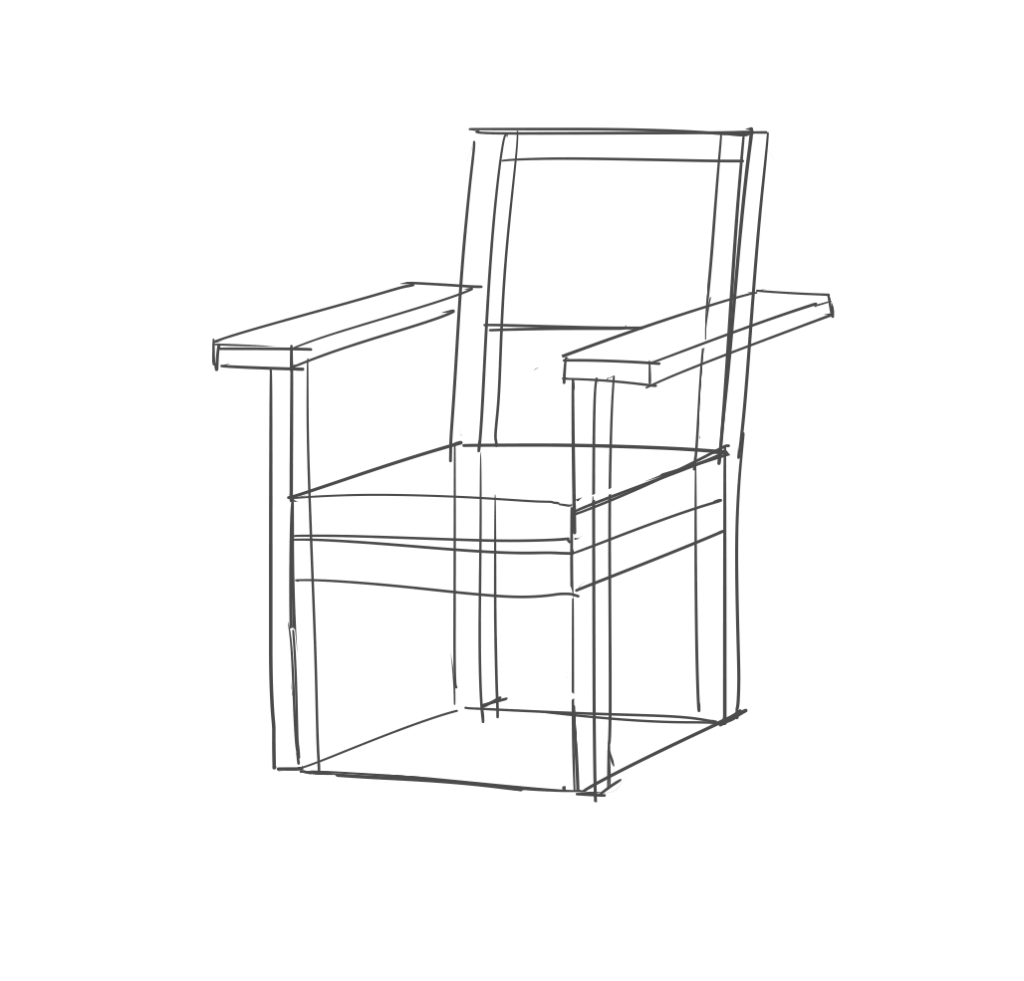
After taking “Atari” of a chair form, decrease opacity. Then draw on a new layer, using rulers.
Use “Cross” ruler to draw vertical lines, and use “Parallel” ruler to draw parallel lines.
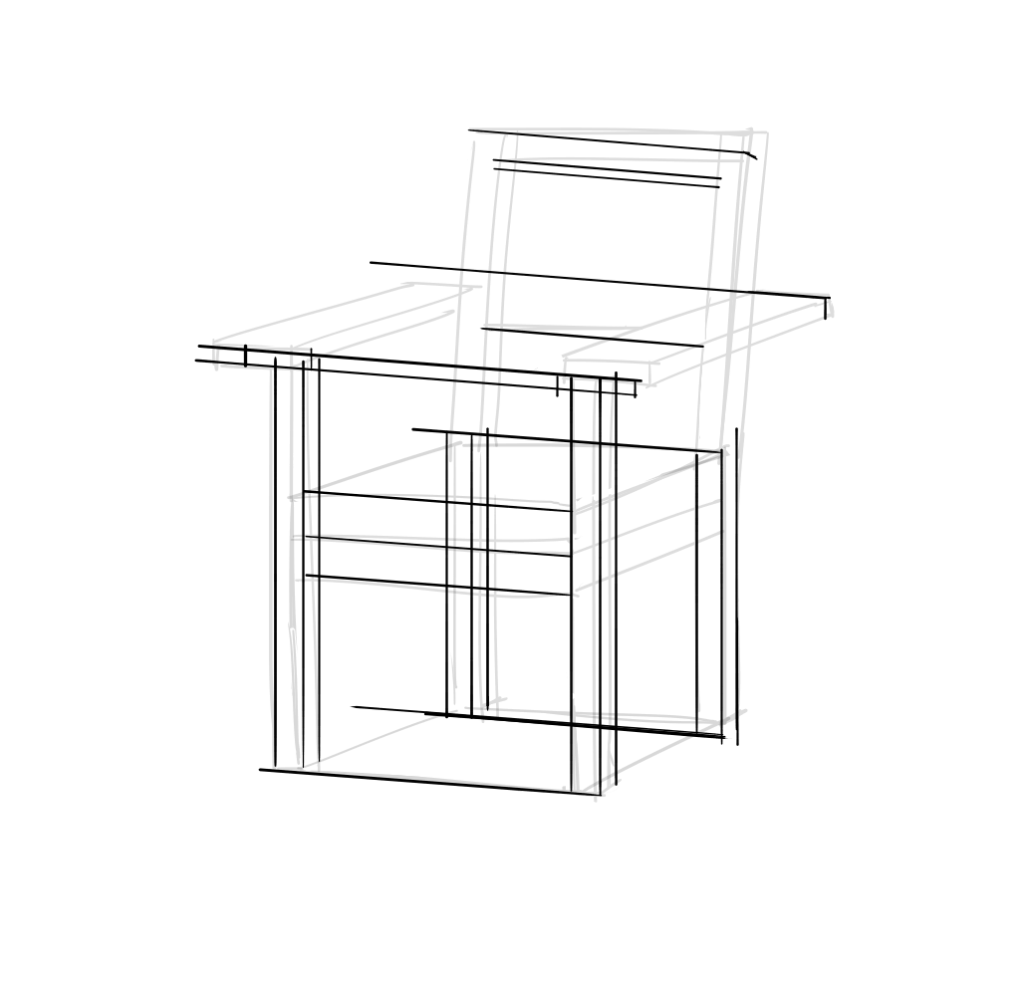
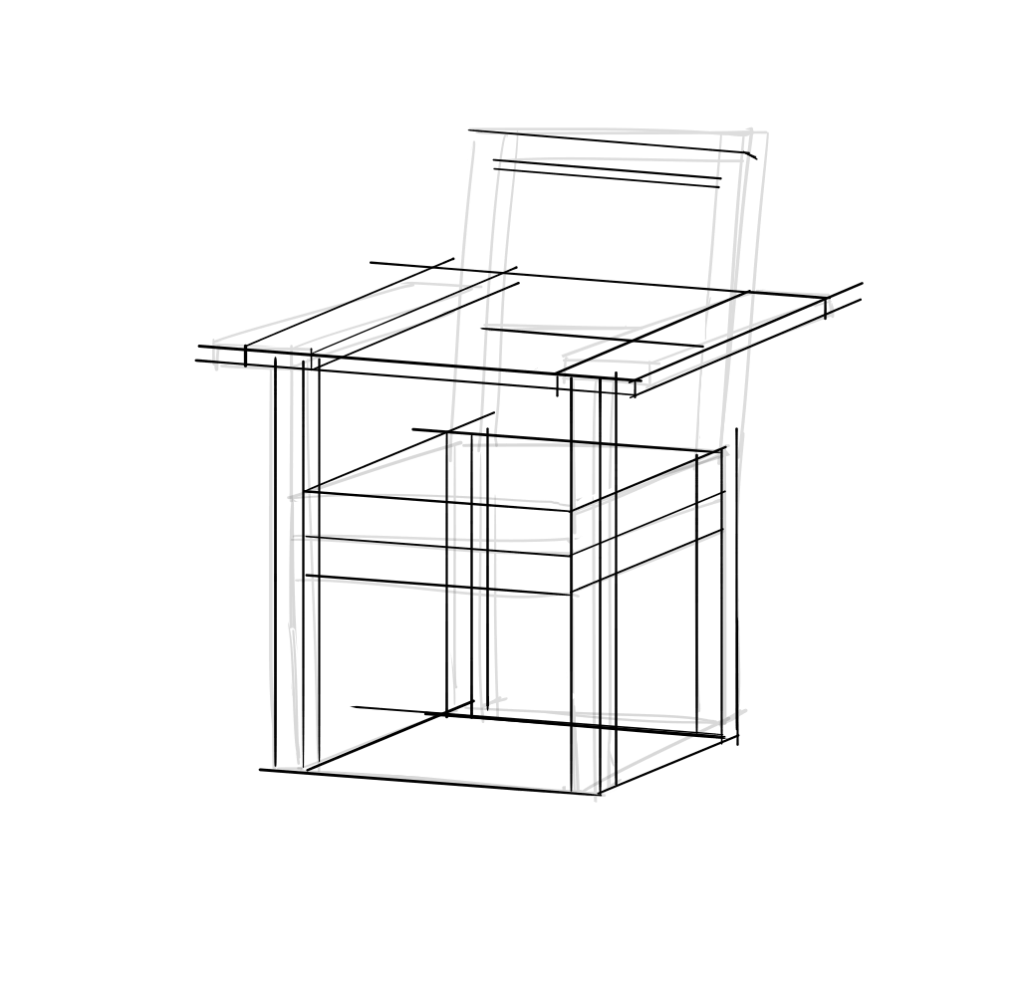
Chair back should be slightly tilted backwards because it is more relaxing that way, so leave that part until you finish drawing the other parts. Move on to chair back after changing the settings of “Parallel line” ruler.
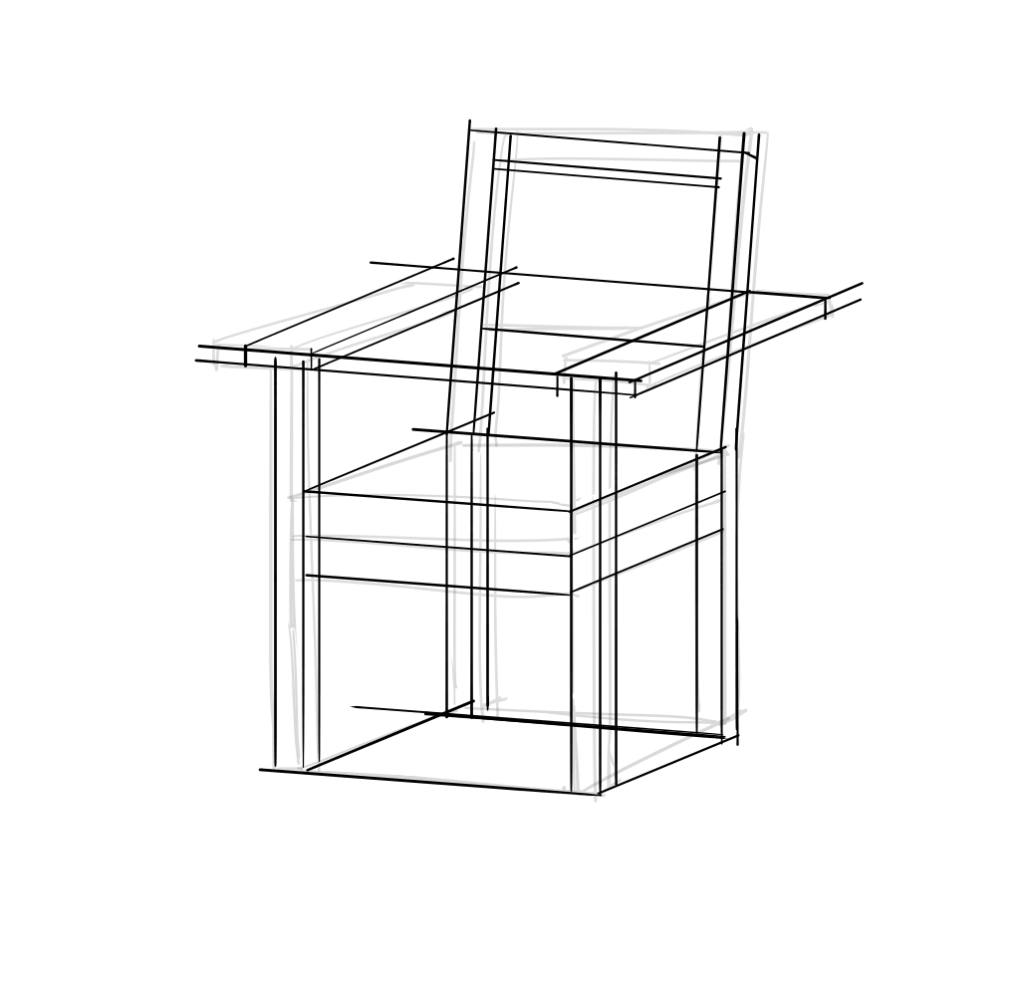
“When you finished drawing the straight lines, erase unnecessary lines and curve the edge of it. Then, your work is completed!”
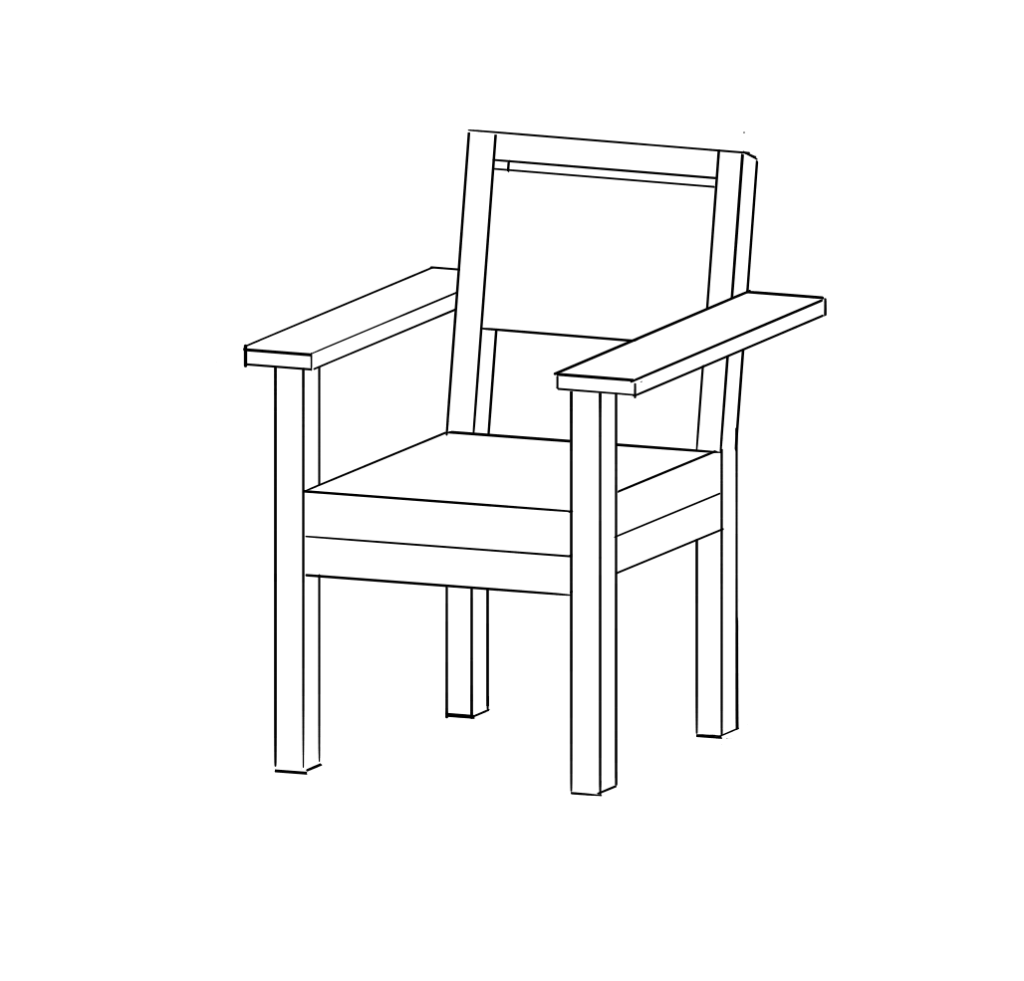
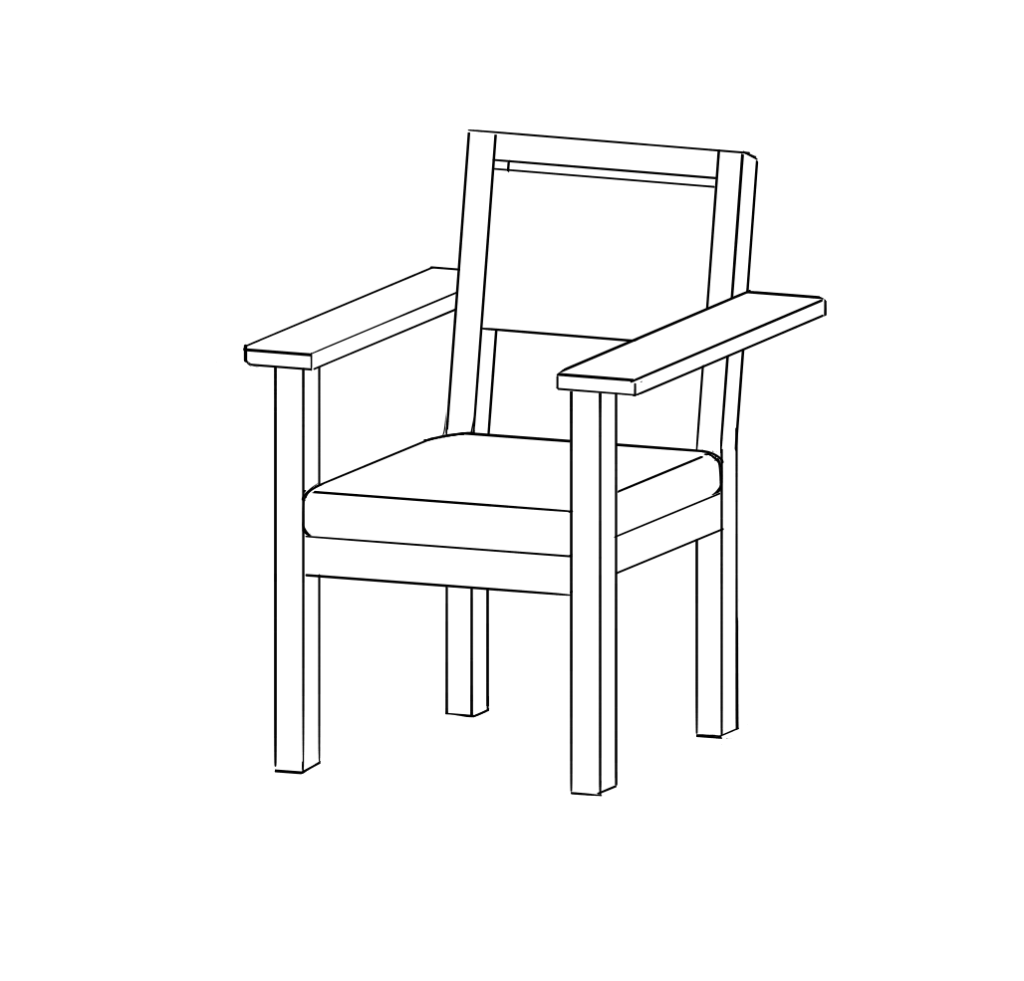
If we draw the same chair with the skills of perspective drawings, it would look like the right one. I think the right one looks more natural. You can draw like this by using “Vanishing point” ruler instead of “Parallel” ruler.
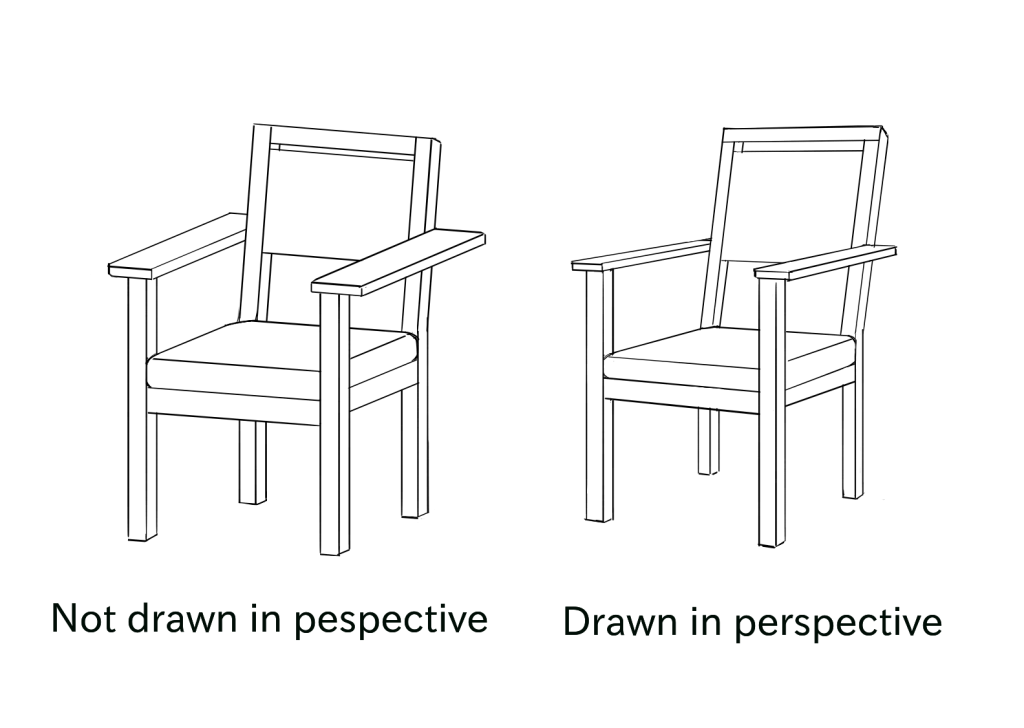
Once you master the way to draw a chair, you can draw almost any furniture like desks and shelves. Pay attention to the ratio while drawing!
4.How to draw stairs.
It looks like it gained complexity, but you can do it!
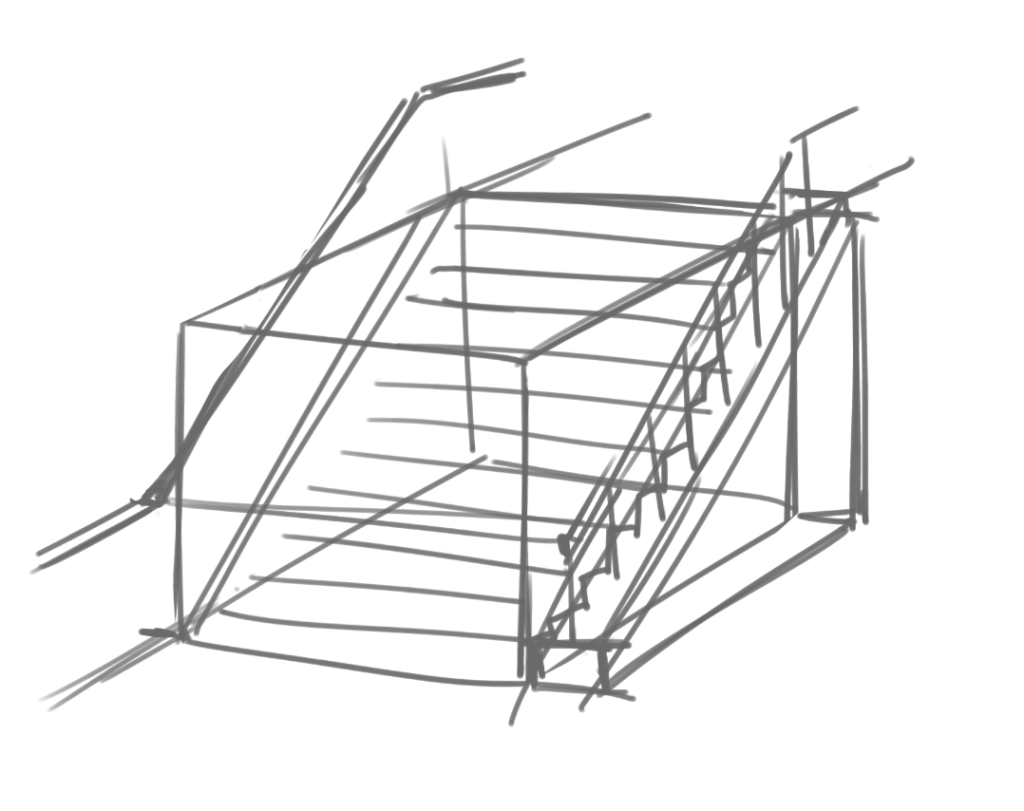
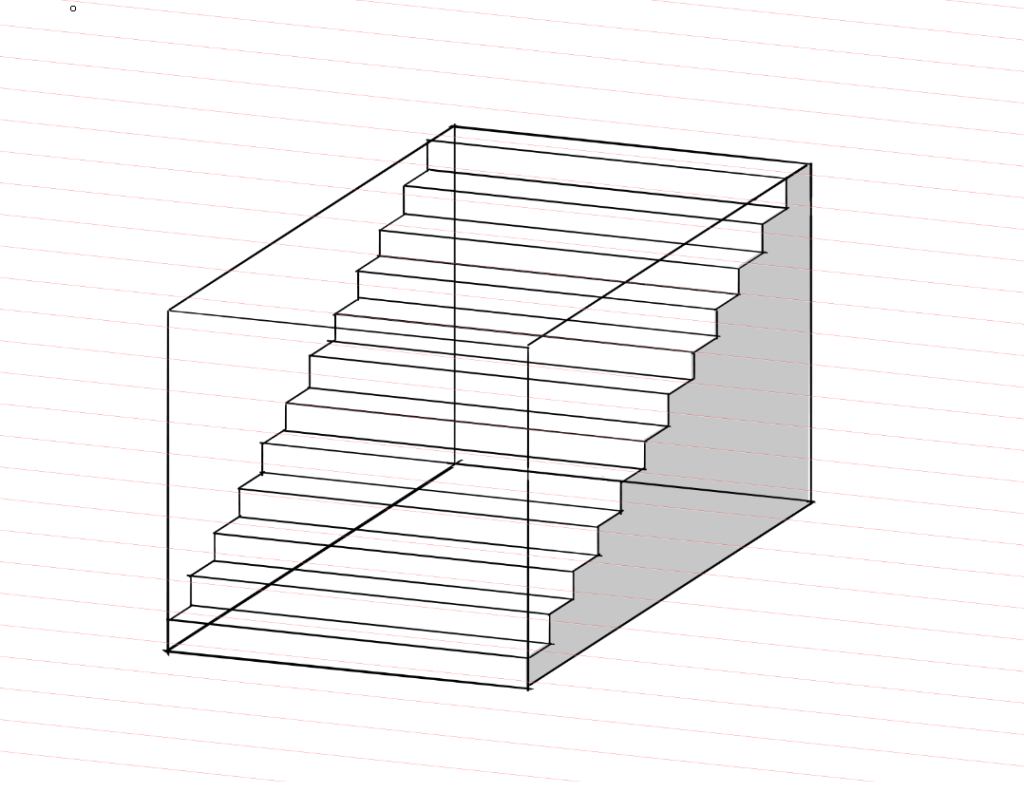
Firstly, take “Atari” of a box like we did when we drew a chair. Then draw steps and add handrails if it’s necessary.
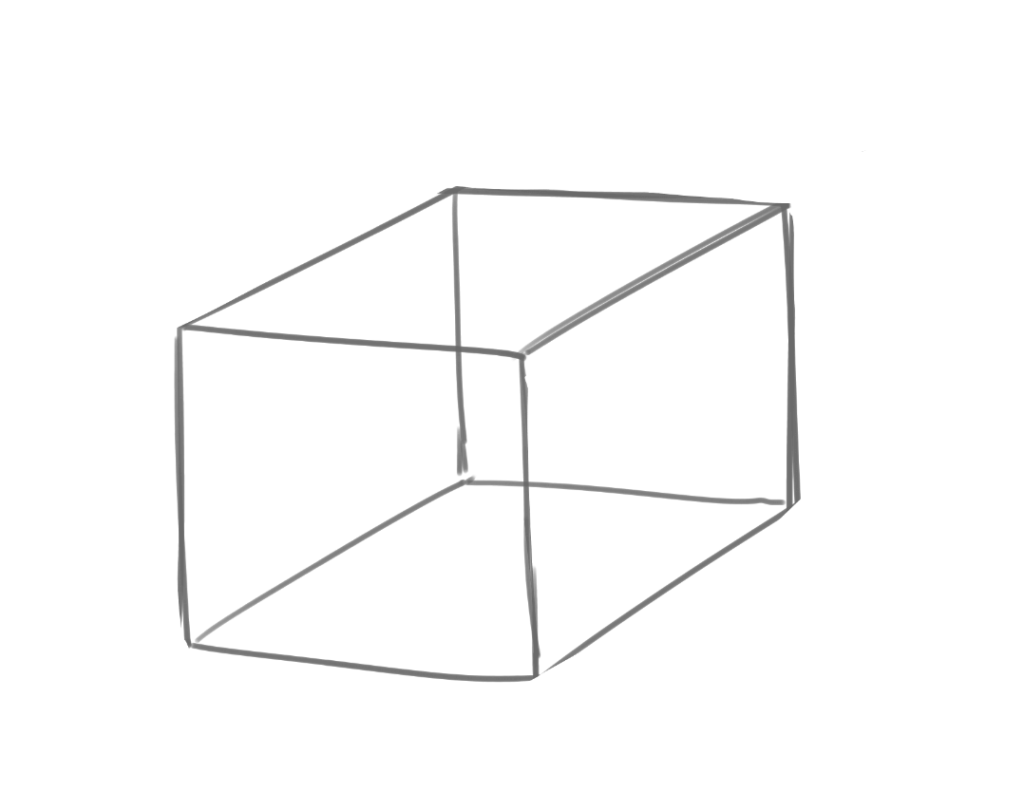
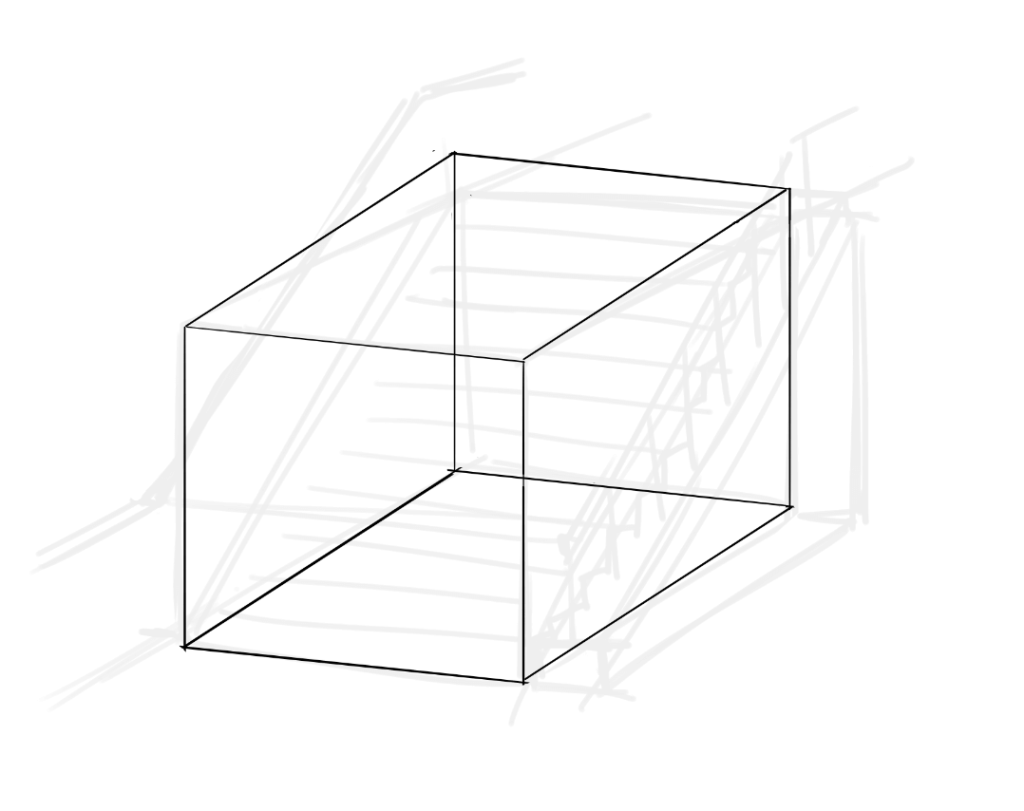
After drawing “Atari”, just make a clean copy of a box by using “Cross” and “Parallel” rulers.
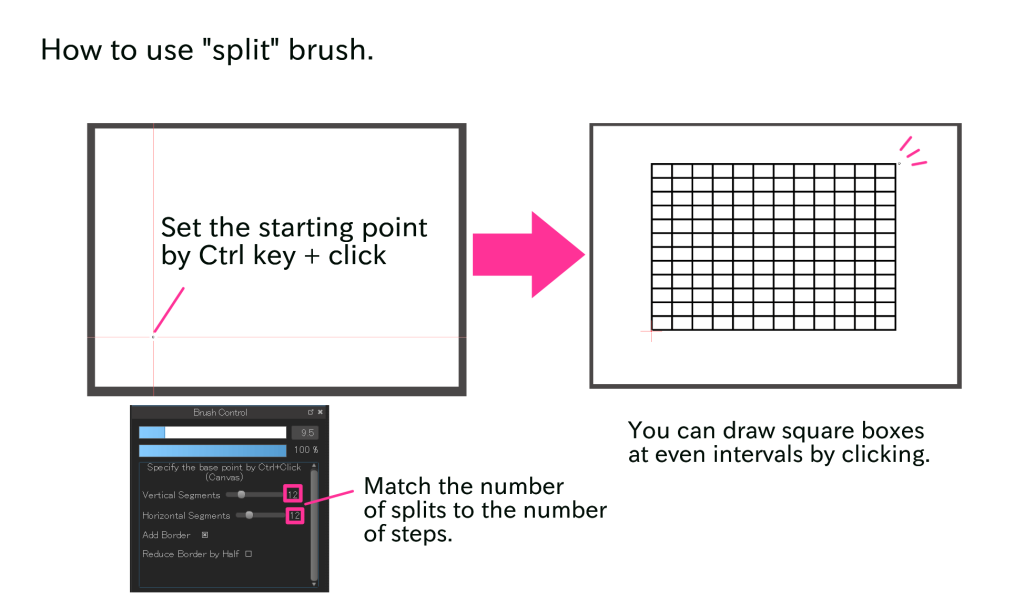
Then select a free Cloud brush, “Split” brush and match the number of vertical and horizontal splits to the number of steps. Set the starting point by Ctrl key + click, and draw square blocks on a new layer.
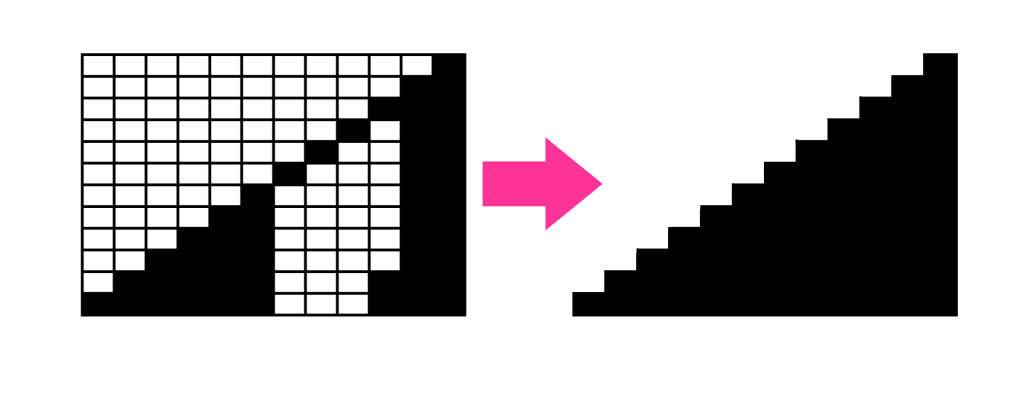
Fill in the boxes and erase the unnecessary parts so that it looks more like stairs.
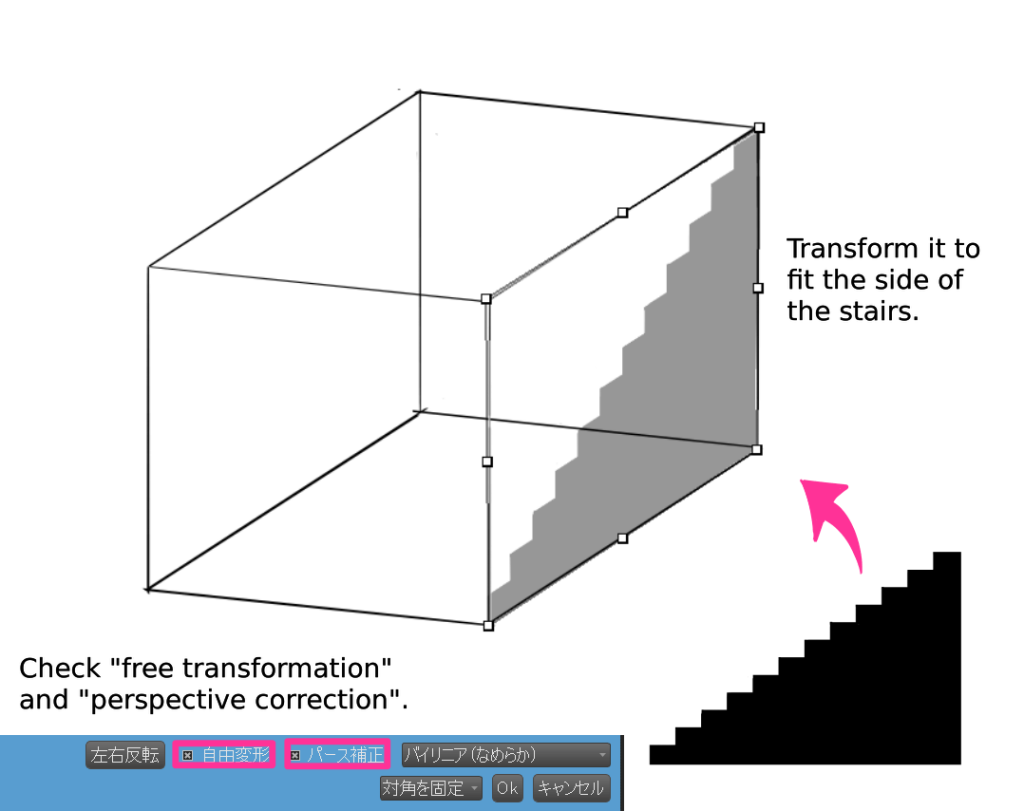
Decrease the opacity and deform it to fit the side of the stairs by using a transformation tool (Check “free transformation” and “perspective correction”). You can consider this as “Use as textures”.
Add a new layer on the transformed one, and make a clear copy of the side of the steps by using “Cross” and “Parallel” rulers.
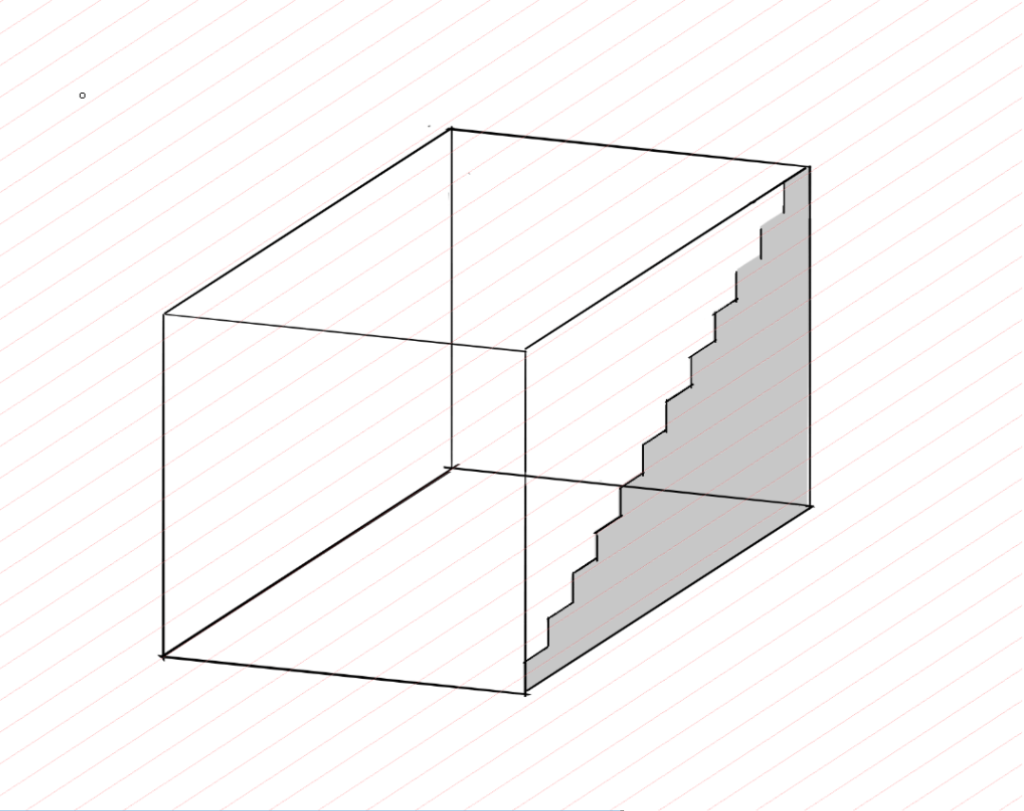
Set a new “Parallel” ruler and draw a clean line of a stair.
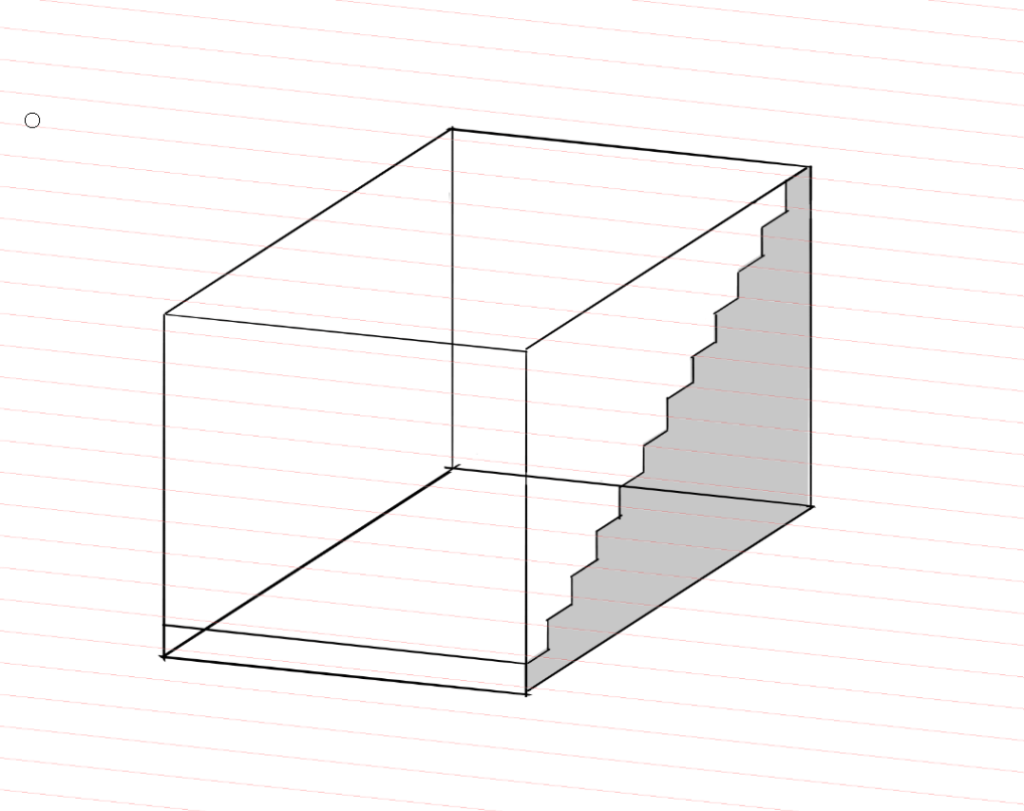
This time we are not drawing in perspective, so just copy and paste the stairs that you drew.
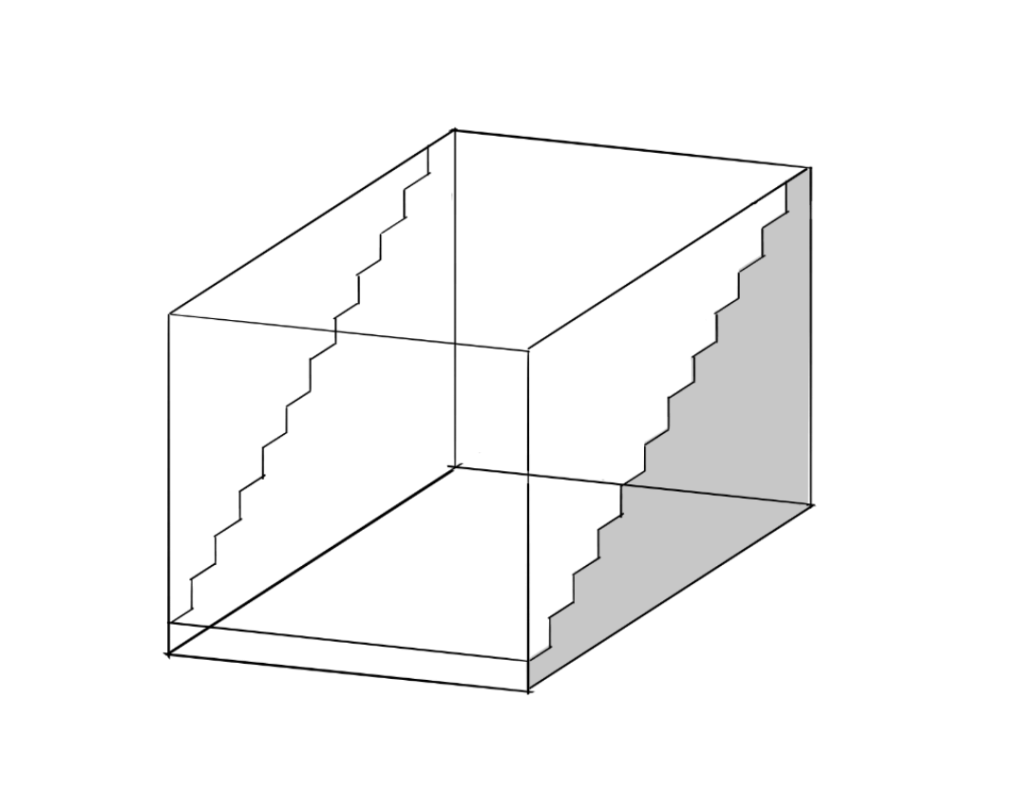
Draw the rest of the steps by using a “Parallel” ruler and erase the unnecessary parts. That’s it for the steps!
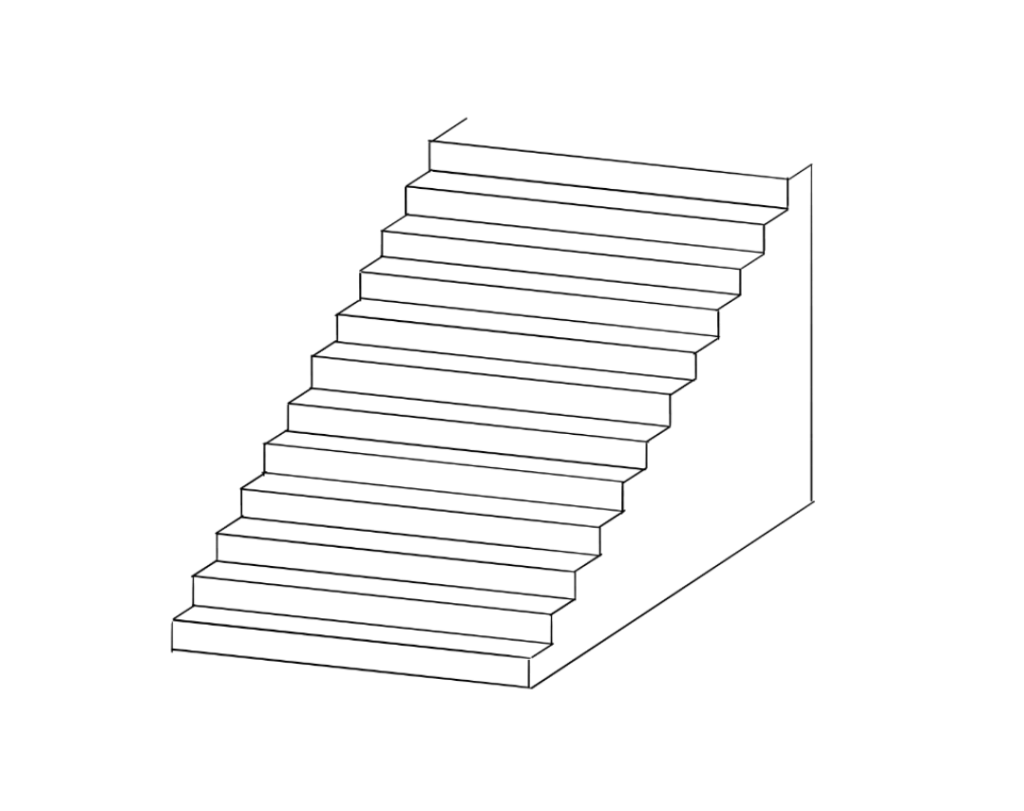
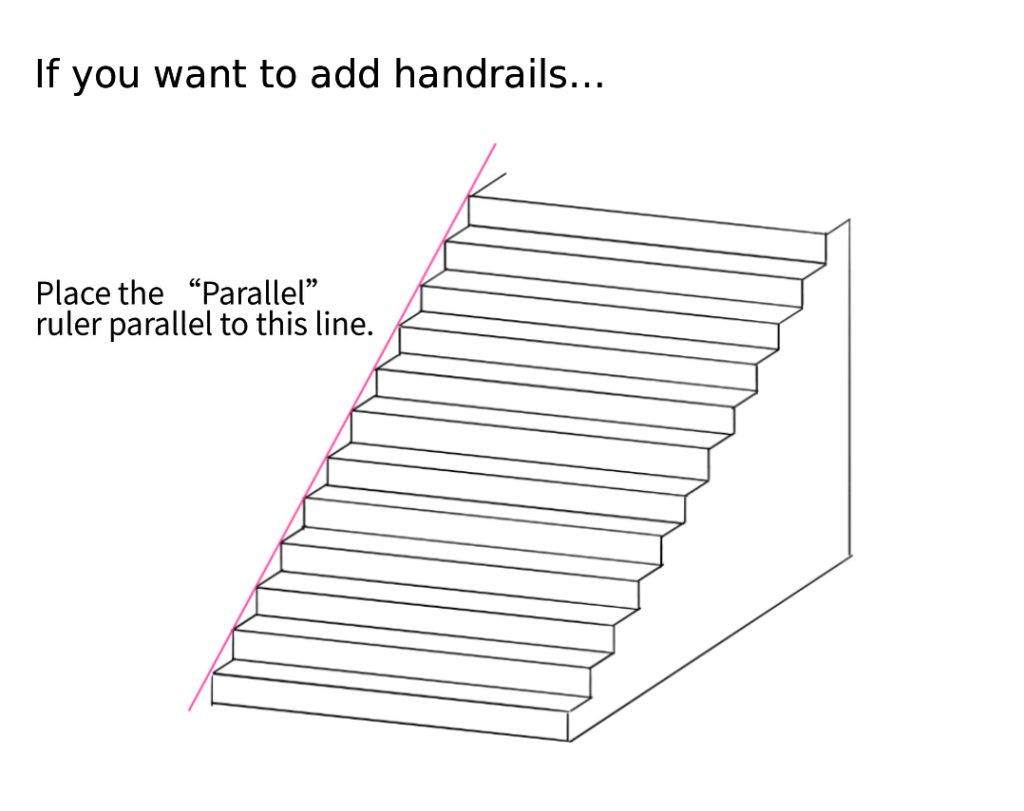
If you want to add handrails, set a new “Parallel” ruler based on the line that goes through the pointings of steps.
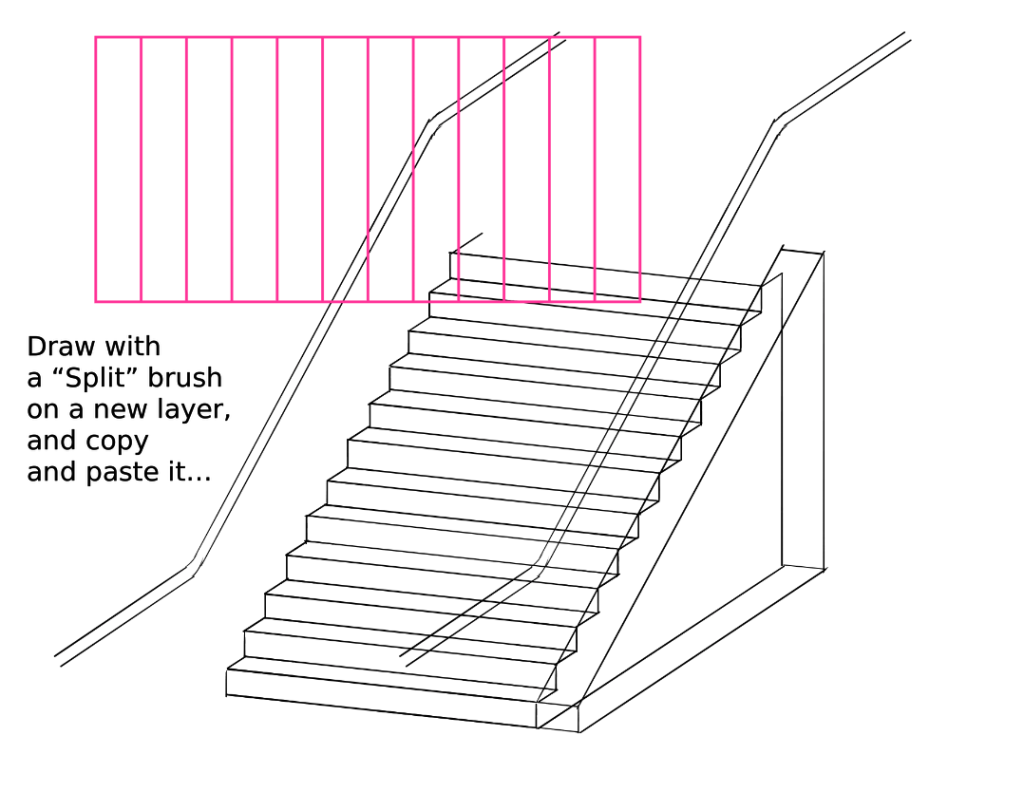
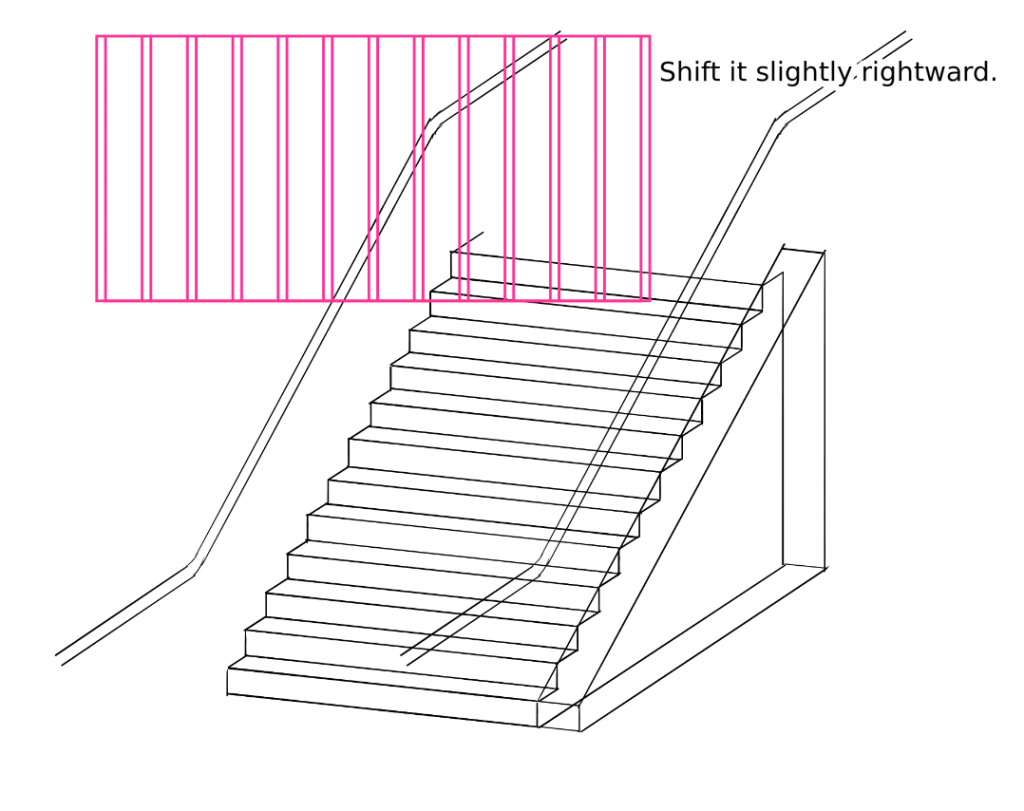
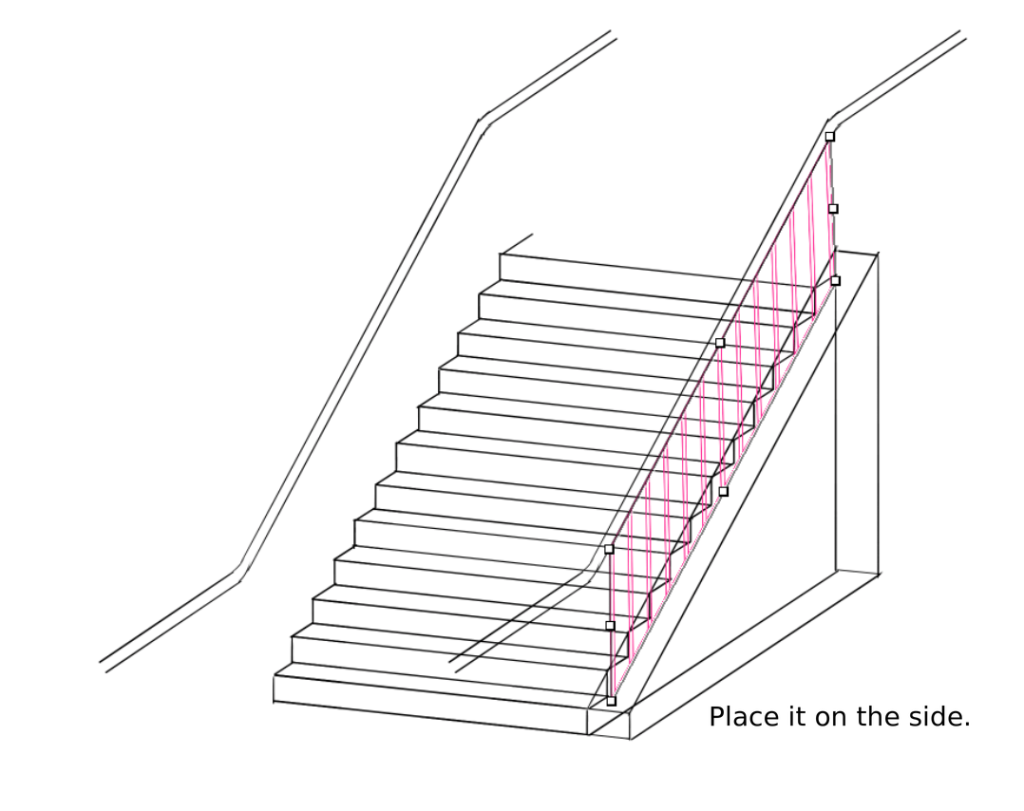
To add poles at even intervals between the floor and handrails, “Split” brush is useful. Set the number of vertical split one, and parallel split the same number as the poles. Draw them vertically long on a new layer, copy, paste and shift it slightly rightward and integrate them. Then place it on the handrail and erase the unnecessary parts!
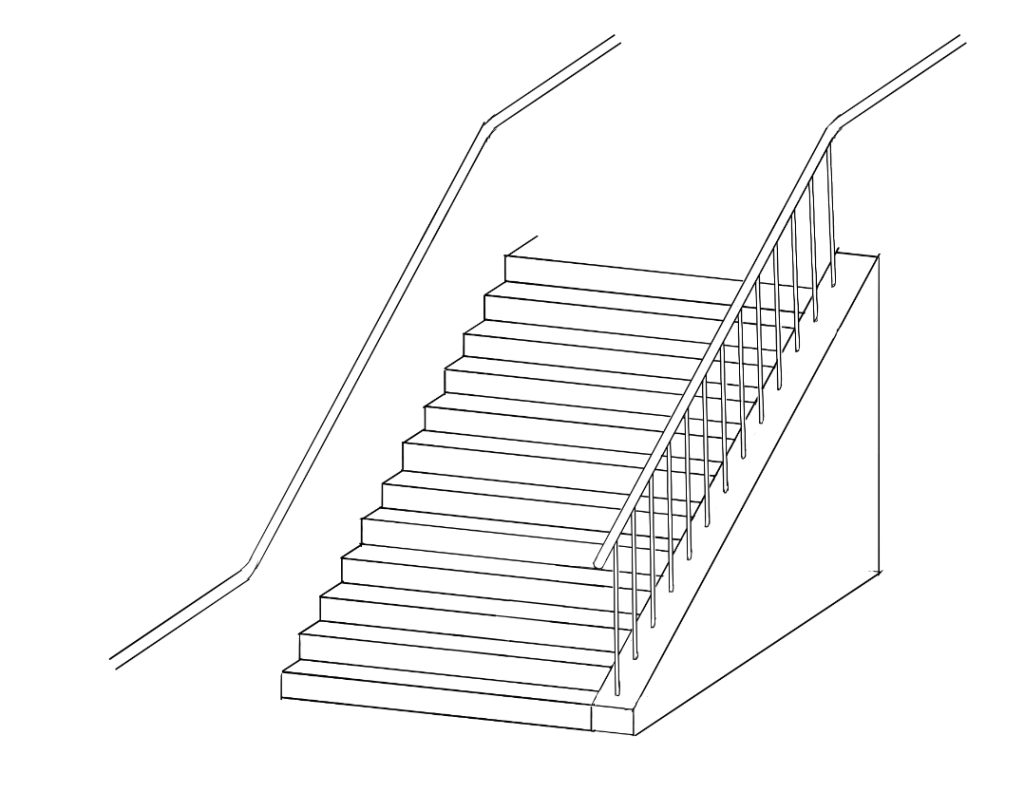
If we draw the same stairs in perspective, it would look like the right one. I think the right one looks more natural.
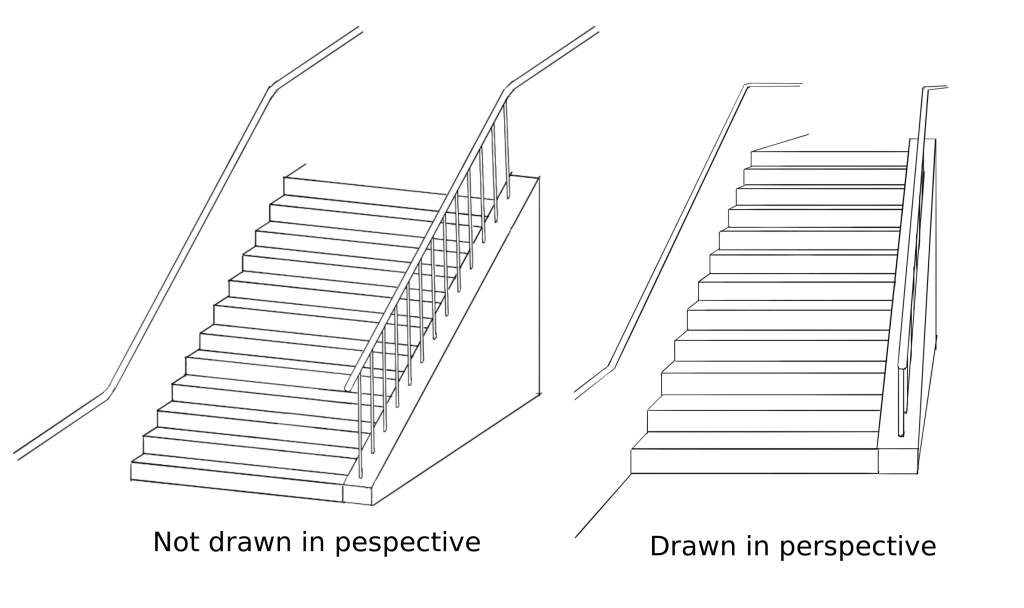
If your drawings are for Manga, it is necessary to draw in perspective. However it is a good practice to draw even if you don’t draw in perspective. You can start practicing like the way how we drew in this lesson if you feel it’s too difficult to draw in perspective.
Did you enjoy my lesson?
I will teach you “how to draw in perspective” next time!
Click Here for Previous Tutorials.
Manga Tutorial for Beginners 01 Process of Manga Making
Manga Tutorial for Beginners 02 Let’s Make Outline (Part 1)
Manga Tutorial for Beginners 03 Let’s Make Outline (Part 2)
Manga Tutorial for Beginners 04 Get Ready to Draw Manga with MediBang Paint!
Manga Tutorial for Beginners 05 Let’s Make Name(outline)
Manga Tutorial for Beginners 06 Let’s think about frame layout and screen.
Manga Tutorial for Beginners 07 Considerations when setting up the canvas.
Manga Tutorial for Beginners 08 Let’s draw frames and speech bubbles.
Manga Tutorial for Beginners 09 Let’s draw people and natural objects
Manga Tutorial for Beginners Vol.10 Let’s get the most out of brushes and materials
Manga Tutorial for Beginners Vol.11 Let’s draw easy artifacts. (Not in perspective)
「ГФ」
ART street
Click here for the collection: https://medibang.com/u/seledkapodshboi/
You can read my manga here → https://medibang.com/book/0c2101280307258390018866367/
This is also a manga that I draw under a different name. → https://medibang.com/comics/official/dobs340000005872400000000000a/
twitter: https://twitter.com/seledkapodshboi
\ We are accepting requests for articles on how to use /

