2022.08.29
Let’s Draw Manga (1) For Android

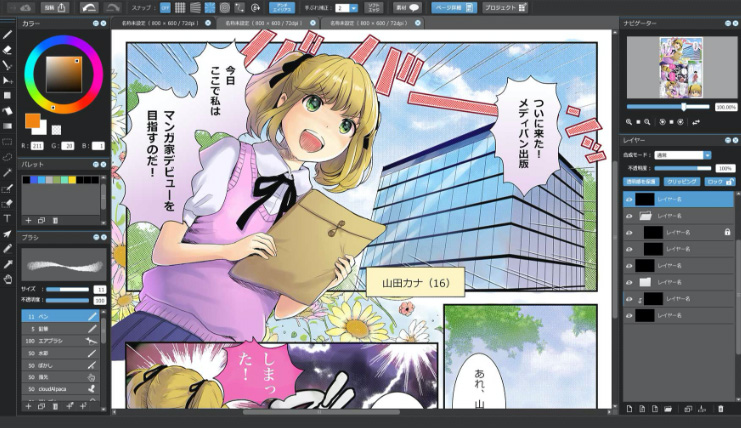
In this tutorial, I will be introducing the process of manga making using MediBang Paint for Android.
This article will follow the steps from creating a file to creating a name.
Index
Creating Data
First, start off by creating a file for your manga.
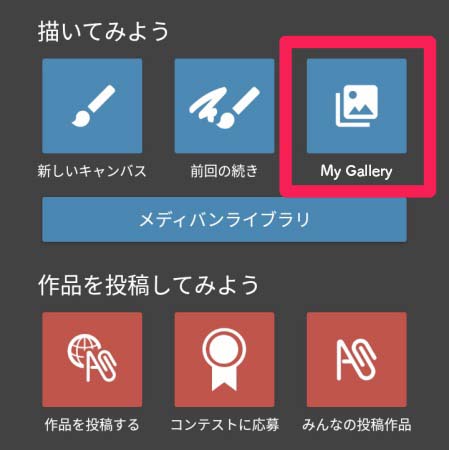
Open the MediBang Paint app and click on “My Gallery”.
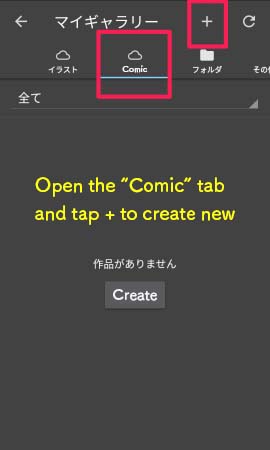
Inside My Gallery, choose the “Comic” tab and tap on + (plus) to create a new file.
If you haven’t created anything yet, it will display “File not Found” on the screen.
You can also create a new file from clicking “CREATE” below the message.
The general settings window will open so enter the title of the file.
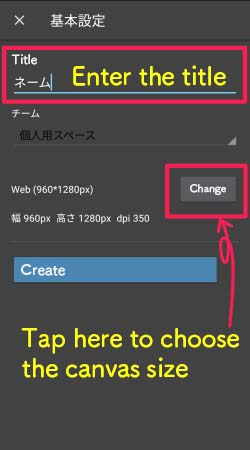
You can change the canvas size from “EDIT” next to the size section.
Since I am making a manga on my phone, I will draw one with a canvas size for web manga.
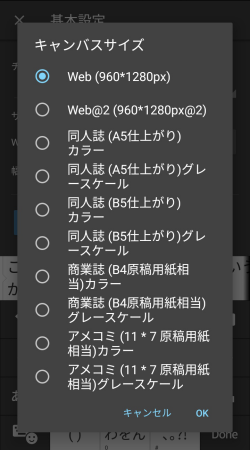
On MediBang Paint for Android, you can choose from 10 different canvas sizes.
Once you have entered the title and chosen the canvas size, tap on “CREATE”.
Now you have created a file for manga inside My Gallery.
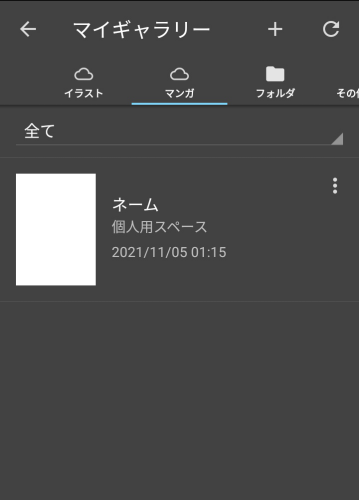
If you tap on the file, you can see further details (Page List).
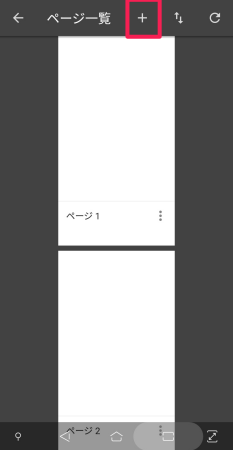
As the default setting, the file contains 4 pages of canvas.
If you want to add more pages, tap on the + (plus) sign at the top of the screen.
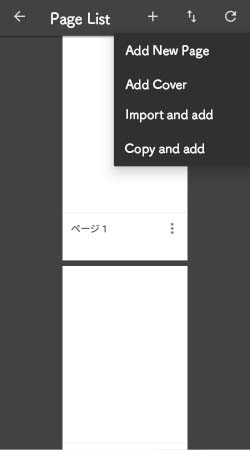
Now you can choose from four items such as “Add New Page”.
You can also create a cover page or import data from your phone.
Let’s start creating the name.
From the list of pages, tap on Page 1 to open the canvas.
Creating the name
Drawing in a name on canvas directly
Let’s draw a name on the canvas.
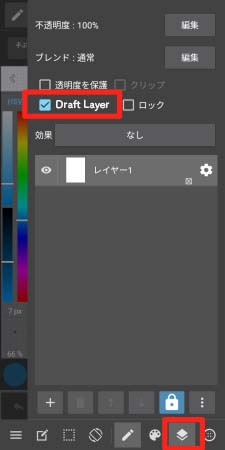
As part of the preparation, check the “Draft Layer” box inside the Layer Menu.
As for the brush, set it to Pencil with blue color.
You will be making a clean copy later so drop the opacity of the brush as well.
I usually set it to around 65% but you should change it to your liking.
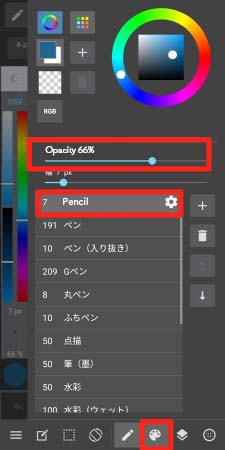
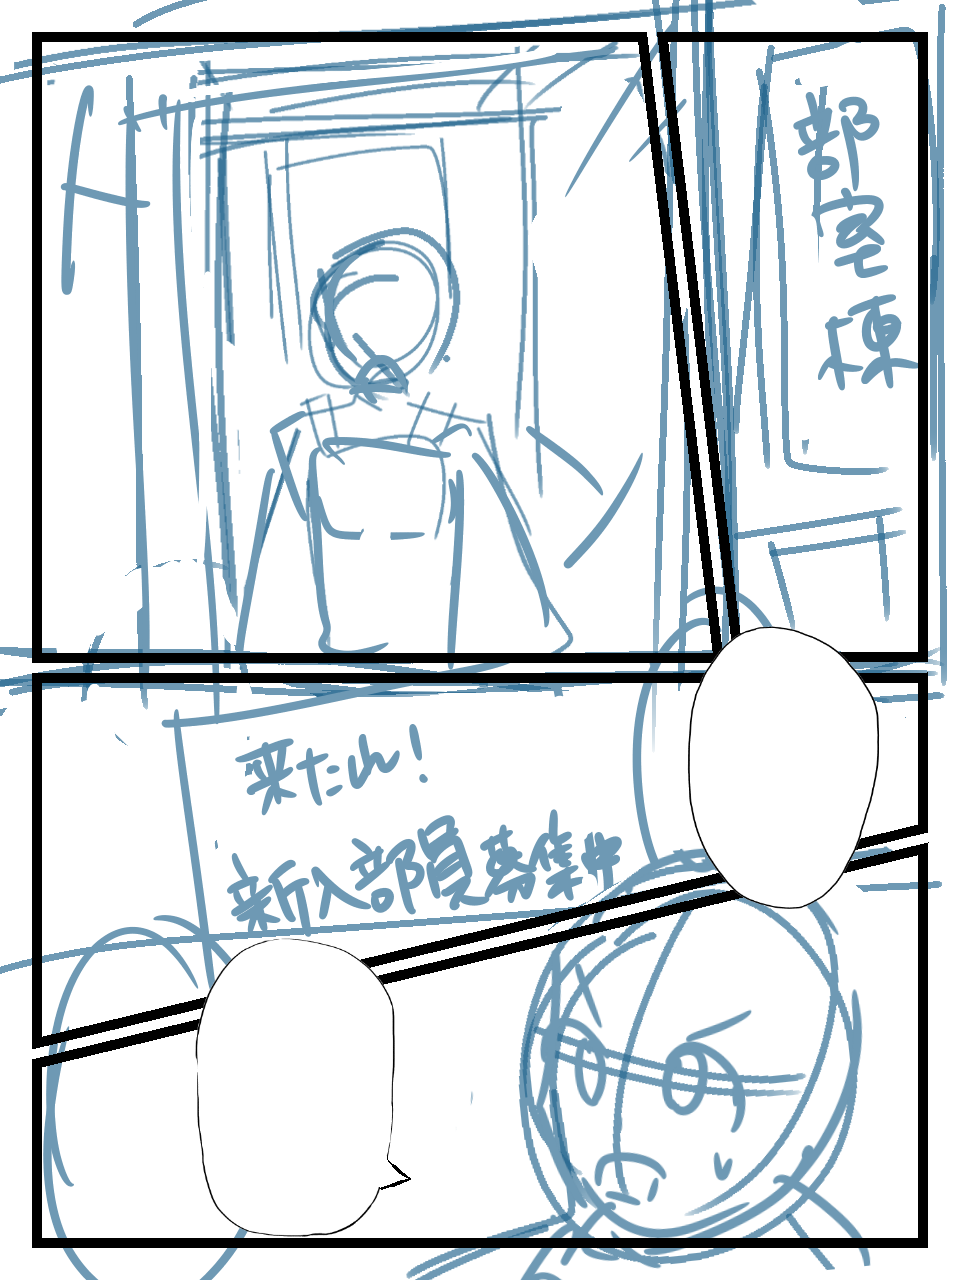
Now that I am done with preparing, I made a one-page name.
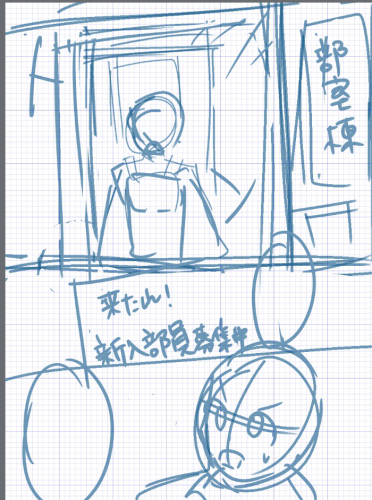
Adjust the size of the character and objects using the “Zoom In/Zoom Out” tool.
I will be using the lasso tool to select the item.
Tap on the Select Tool from the toolbar at the top of the screen and set the type to lasso.
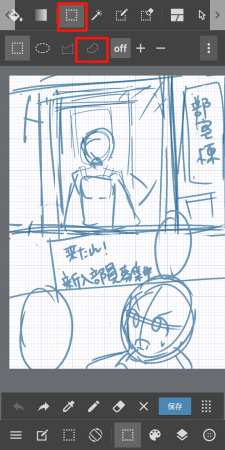
When you enclose the part you want to enlarge/contract, the selected area will become white.
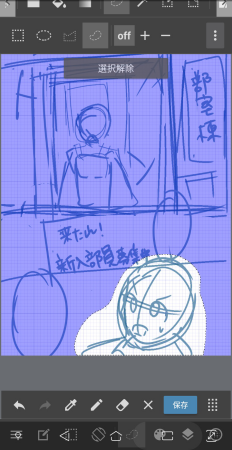
From the Selection Menu at the bottom of the screen, choose “Zoom In/Zoom Out”.
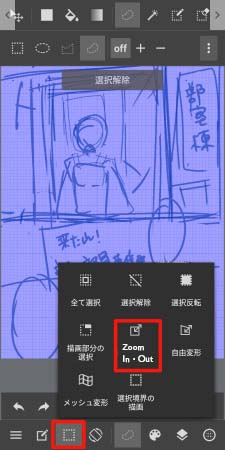
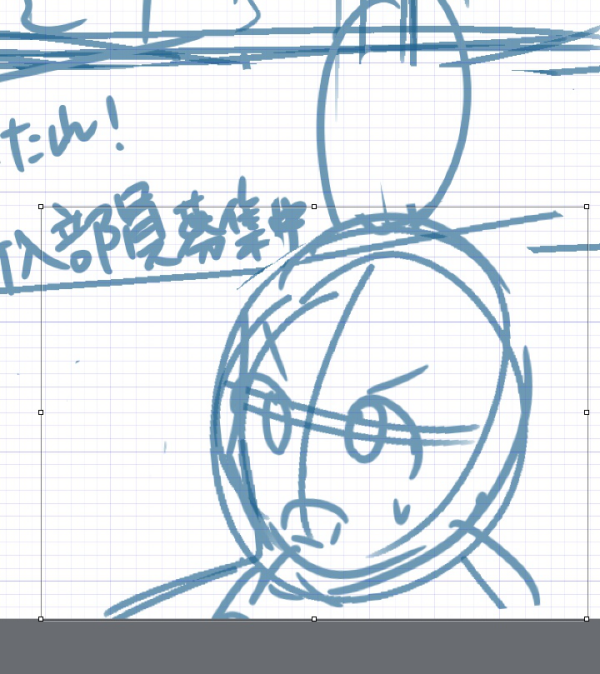
Now you can see that the area of selection will change to transformation mode.
It is in transformation mode when the area is surrounded by a frame.
By moving around the □ (squares) of the frame, you can enlarge/contract or transform/move the object.
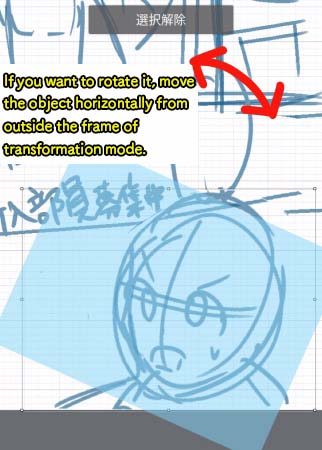
If you want to rotate it, move the object horizontally from outside the frame.
▼ Read more about Zoom In/Out ▼
Scaling and Transforming
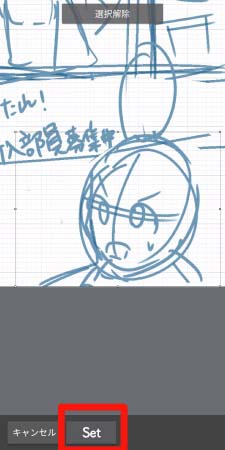
Tap on “SET” to finish adjusting the size.
Importing a name drawn on paper
Other than drawing inside the canvas, there is an option to import an image of the name drawn on paper.
From the Layer Menu, tap on + (plus sign) to create a new layer.
Choose either “Select an image to add” or “Add an image by taking a photo”.
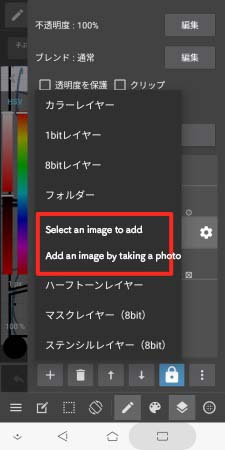
For this tutorial, I will import the photo of my name I have taken already.
Once you have imported the image, adjust the Magnification to fit the size of the canvas.
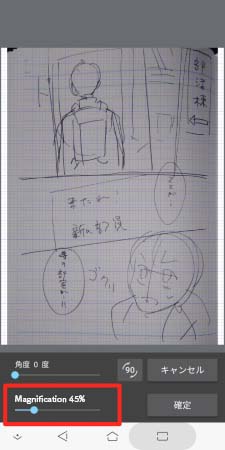
When you tap on “SET”, you will receive a message with “Extract line art?”.
I am only making the name right now so I will not extract the line drawing.
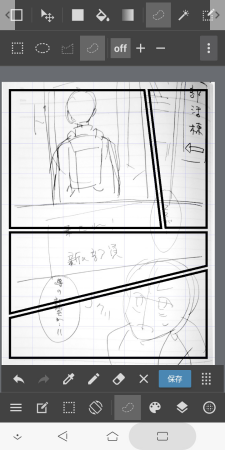
Now I have successfully imported the name I have drawn on paper.
The next step is diving into panels.
Creating Panels
Let’s create a new layer for panels.
From the bottom of the screen, open the Layer Menu and tap on + to create a new layer.
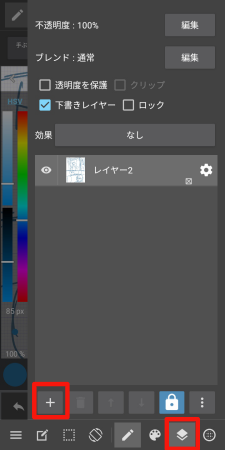
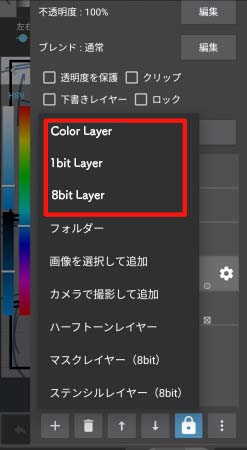
For creating panels, you can choose any of the three: Color Layer, 1bit Layer and 8bit Layer.
I chose the color layer for this tutorial.
▼ Read here about using 1bit・8bit Layers ▼
How to use 1bit and 8bit Layers
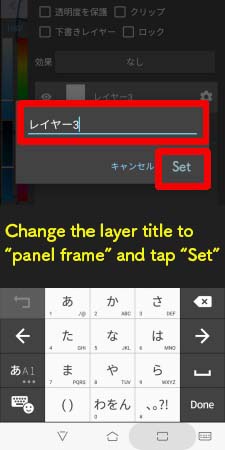
Let’s change the name of the layer.
Tap the gear icon on the right of the layer to change its title.
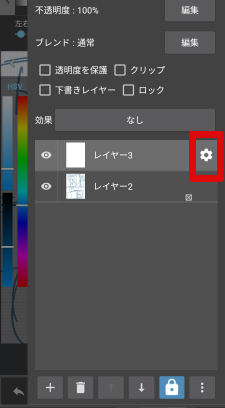
Once you have changed the title, tap on “SET”.
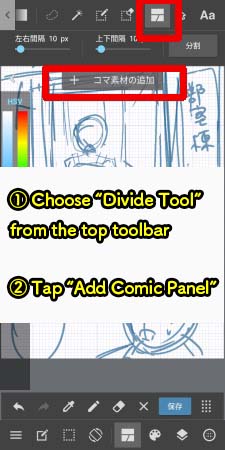
Now, choose the “Divide Tool” from the top toolbar.
Then tap on the “ADD COMIC PANEL” that appears below the toolbar.
Choose your settings for Border px and Border Color, tap on “ADD”.
I set the border to 10px and black for this tutorial.
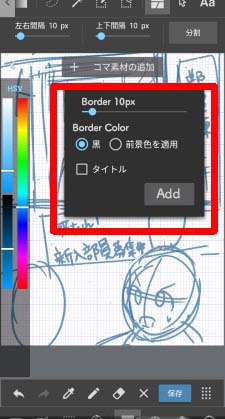
Now you can see that it created a large panel frame.
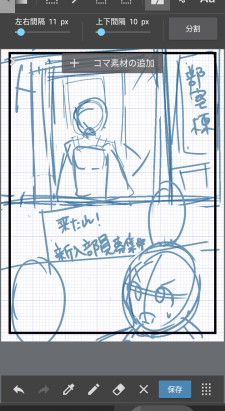
Since there is only one panel right now, you will be dividing it into multiple panels from now on.
Draw a line where you want to divide; the tip here is to draw in a line from the beginning to the end, so that it crosses the screen properly.
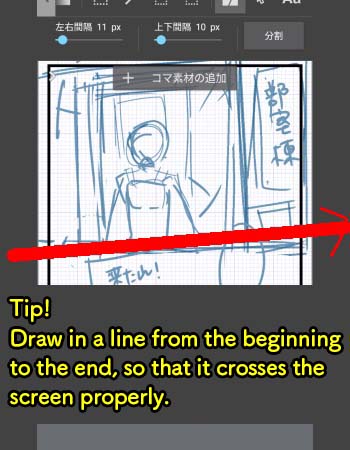
Now a new panel has been created.
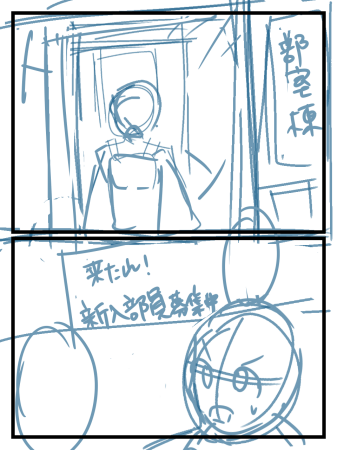
Repeat this process to create more panels.
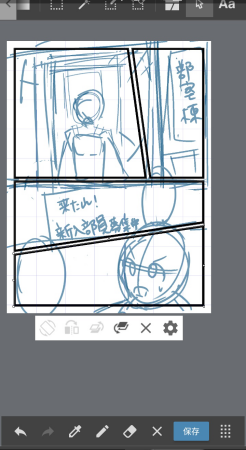
Now the panel division is complete.
▼ You can find a detailed explanation about panel division here ▼
How to create comic panels
Creating Speech Bubbles
To finish up on the name, it is time to add speech bubbles.
The main methods for creating speech bubbles are;
1. Draw the frame for speech bubbles yourself
2. Use the “Create Boundary” function
3. Use the speech bubbles available in Cloud Materials
Draw in the speech bubbles yourself
In this method, you can create the speech bubbles by drawing the frame and filling in the inside area with white.
Let’s start off by creating a new layer for speech bubbles.
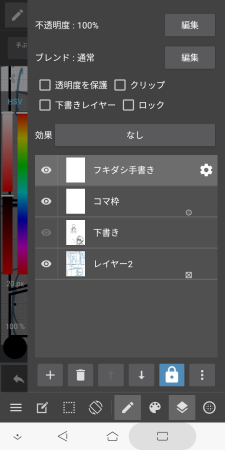
Use the Pen to draw in the frame of the speech bubbles.
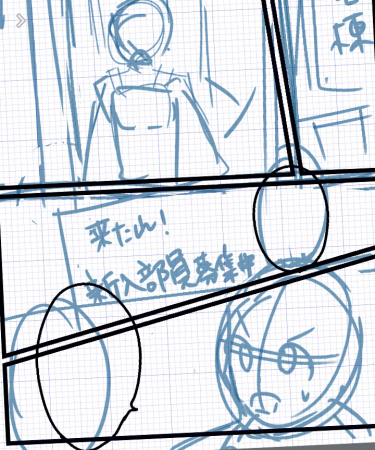
Then select the Bucket Tool with its object set to “Layer” and fill it in with white.
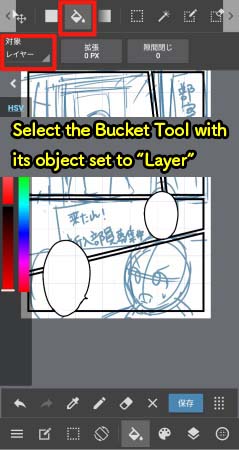
▼ Read here for using the Bucket Tool ▼
Let’s master the bucket tool! How to avoid gaps and bleeding
Now you have speech bubbles ready.
Using the “Create Boundary” function
This is the method to draw the frame using Select and Create Boundary tools, done by surrounding the parts you want to use for speech bubbles.
From the toolbar at the top of the screen, tap on Select Tool.
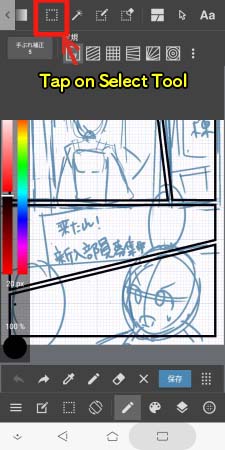
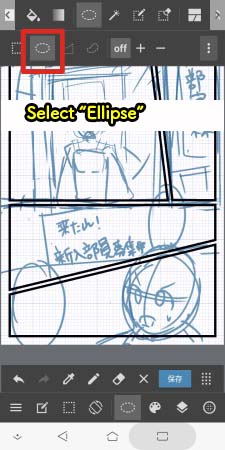
Change the style to ellipse.
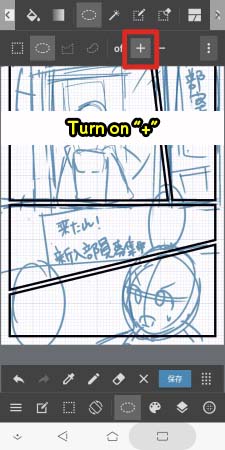
Since I want to create multiple speech bubbles, tap on the + symbol.
Select the areas you want to use for the speech bubbles.
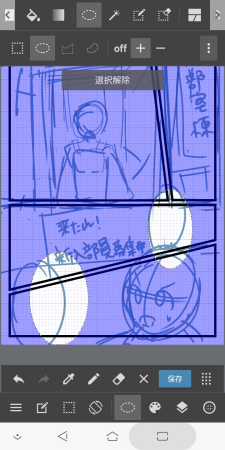
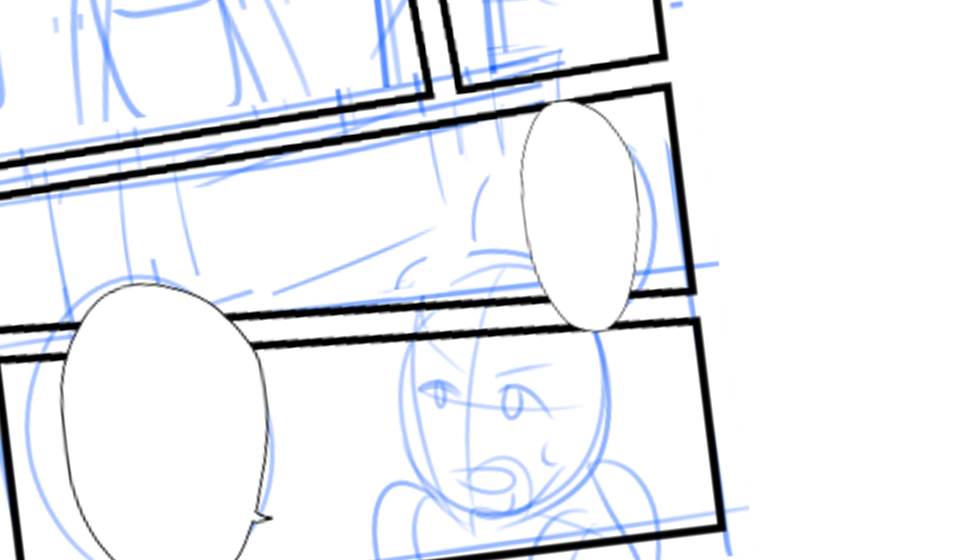
I have now created two bubbles.
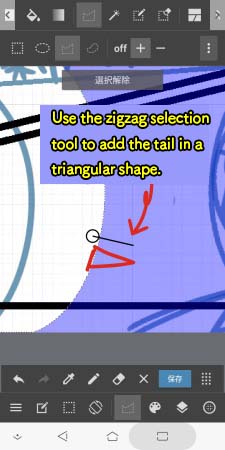
To add the tail of the speech bubble, I will change the Select Tool to “zigzag”.
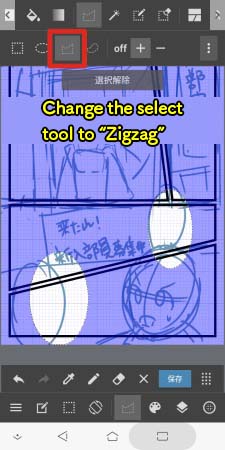
Use the zigzag selection to add the tail in a triangular shape.
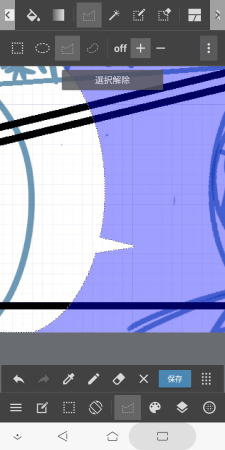
Now the speech bubble frame is chosen as the area of selection.
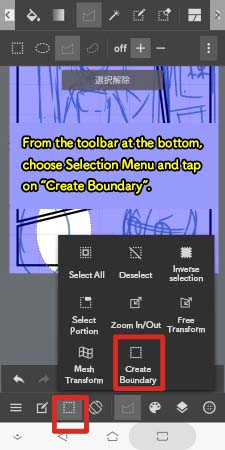
Then from the toolbar at the bottom, choose Selection Menu and tap on “Create Boundary”.
Adjust the border width to your liking and tap on OK.
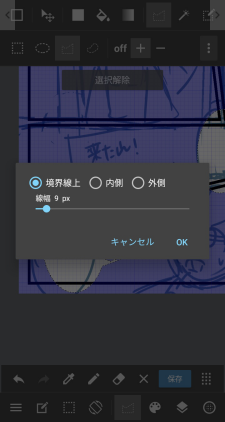
The frame of the speech bubbles are drawn in.
Tap on “DESELECT” and switch to the Bucket Tool.
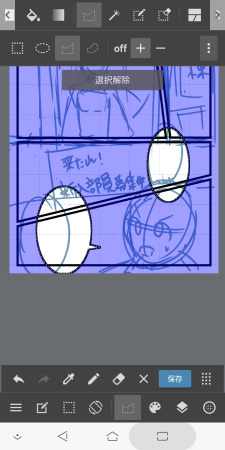
From the color palette, change it to white and fill in the inside with white paint. Now the speech bubbles are complete.
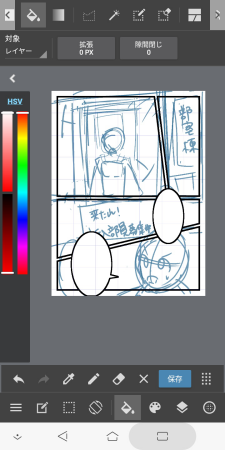
This method is super useful when you want to create speech bubbles with a clean ellipse shape.
Using speech bubbles available in Cloud Materials
Lastly, I will introduce how to use the speech bubbles inside the Cloud Materials.
Prepare a new layer to paste the Cloud Materials.
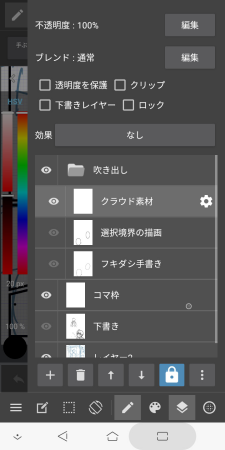
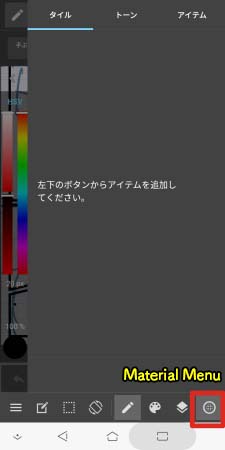
Then from the toolbar at the bottom, open the Materials Menu.
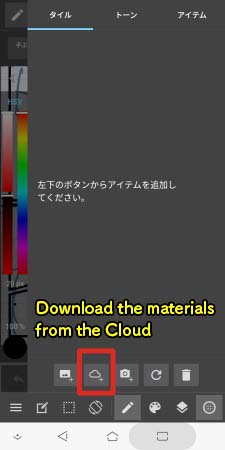
Download the materials from the Cloud.
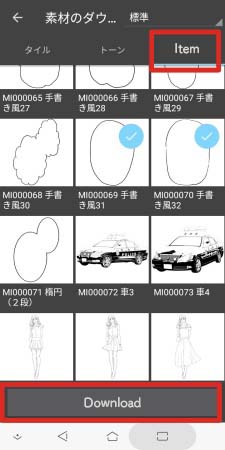
Open the “ITEM” tab and select the materials you want to use, then tap on “DOWNLOAD”.
Now the Cloud Materials have been added to your Materials Menu.
Tap the material you want to add.
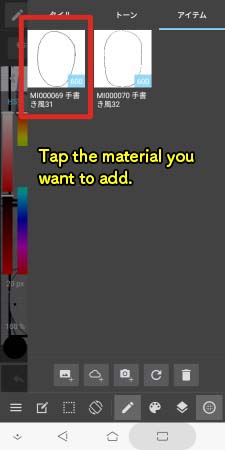
Then it will be pasted onto your layer.
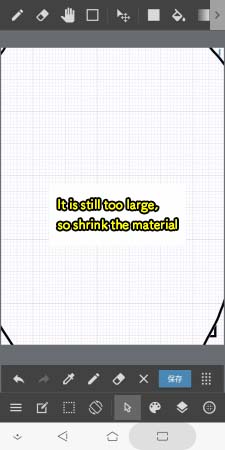
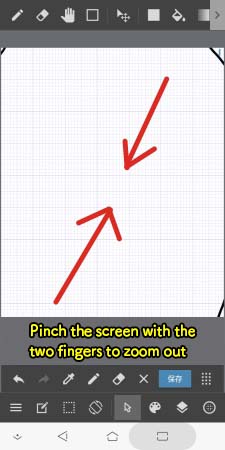
It is too large so pinch the screen with two fingers to zoom out and make sure you can see the frame of the transformation mode.
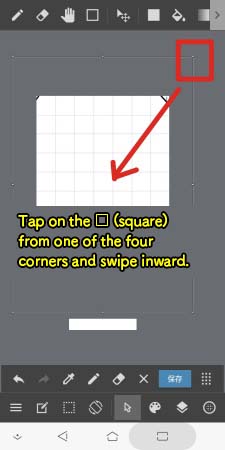
Tap on the □ (square) from one of the four corners and contract the bubble.
Once the bubble is small enough, tap a different tool to finish adjusting its size.
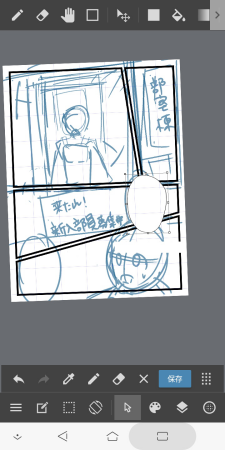
Do the same for the other speech bubble material.
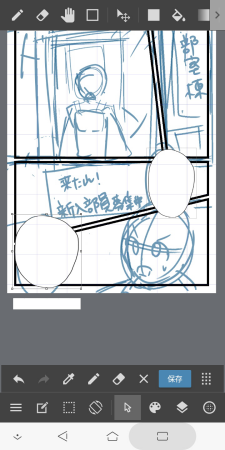
Let’s add the tail of the speech bubbles.
If you leave the Cloud Materials as they are now, you cannot draw or erase on the same layer.
So, you have to rasterize the layer.
From the Layer Menu, tap on the three dots at the bottom right corner.
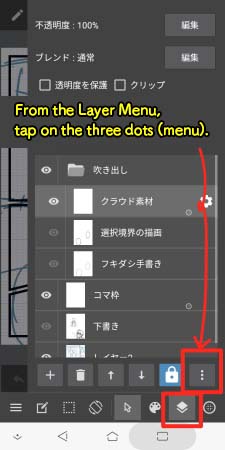
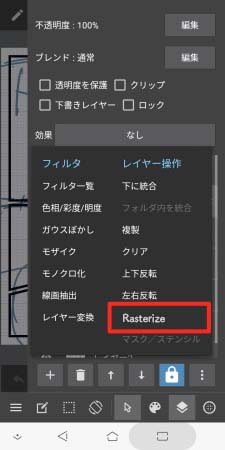
Choose the “Rasterize” option.
Now you have rasterized the Cloud Materials.
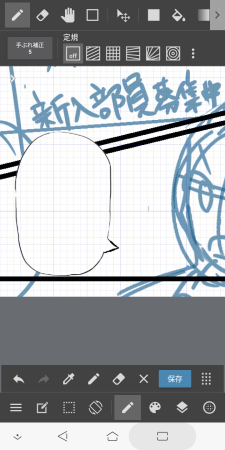
Use the eraser to erase a portion of the speech bubble and draw in the tail using the Pen.
Now the speech bubbles are complete!
This completes the process of creating the name.

In this tutorial, I introduced the steps of drawing a manga in MediBang Paint for Android, from creating the file up to finishing the name.
With the MediBang Paint app, you can easily create manga from your device at hand.
I hope you try making a name!
(Text・Illustration/吉田セツ)
\ We are accepting requests for articles on how to use /

