2022.08.31
Let’s Draw Manga (1) For iPhone
In this tutorial, I will be introducing the process of manga making using MediBang Paint for Android.
This article will follow the steps from creating a file to creating a name.
Creating Data
First, start off by creating a file for your manga.
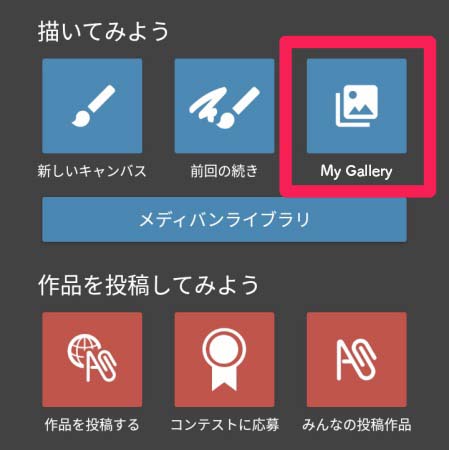
Open the MediBang Paint app and click on “My Gallery”.
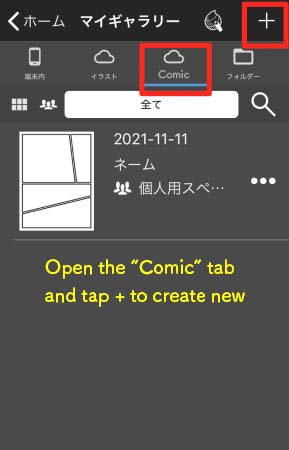
Inside My Gallery, choose the “Comic” tab and tap on + (plus) to create a new file.
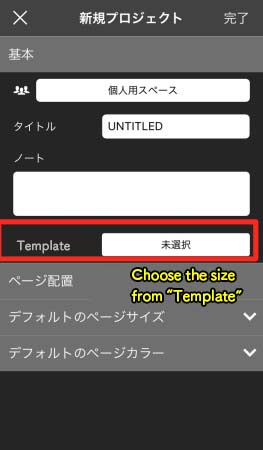
It will open a window called New Project so enter the title of your manga and from Template, choose the canvas size.
For this tutorial, I will be drawing with the canvas size for web manga.
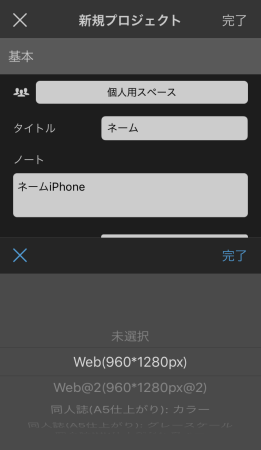
On the iPhone version, you can also decide on the Page Position, Default Page Preferences and Default Page Color besides the canvas size.
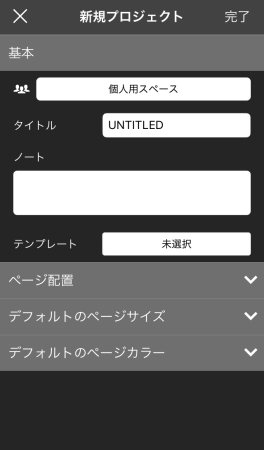
Once the setting for each item has been finalized, tap on Done.
Now the file for manga has been created inside My Gallery.
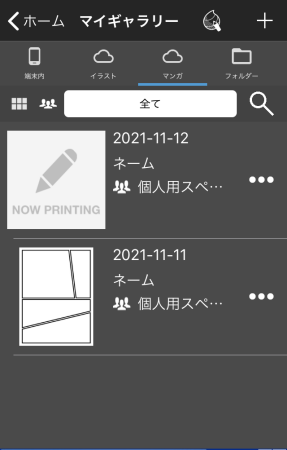
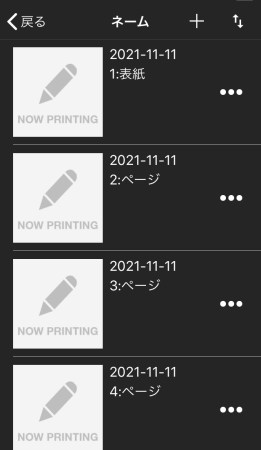
If you tap on the file, you can see further details (a list of pages).
As the default setting, the file contains 4 pages of canvas.
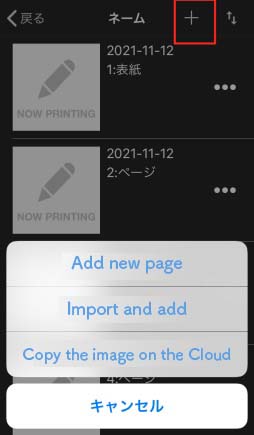
If you want to add more pages, tap on the + (plus) sign and you can choose from items such as “Add New Page”.
Let’s start creating the name.
From the list of pages, tap on the second page (2:Page) and open the canvas.
Creating the name
Drawing in the name on canvas directly
Let’s draw the name on the canvas.
As part of the preparation, turn on the “Draft Layer” inside Layer Menu.
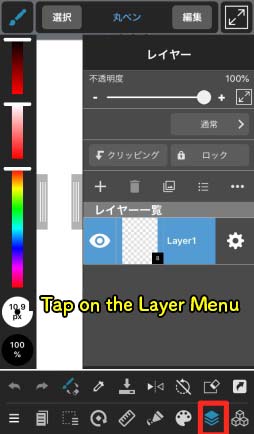
Tap on the gear icon next to Layer 1.
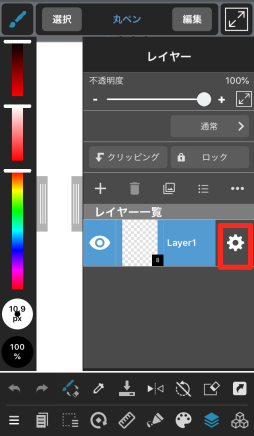
Enter the title of the layer and turn on the “Draft Layer”.
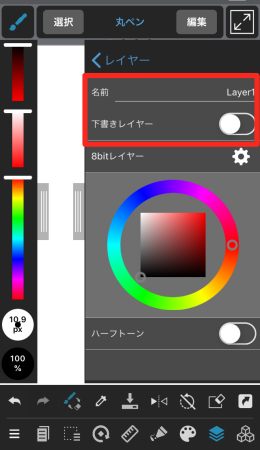
Since the layer is an 8bit layer, change the color to blue from the color picker wheel.
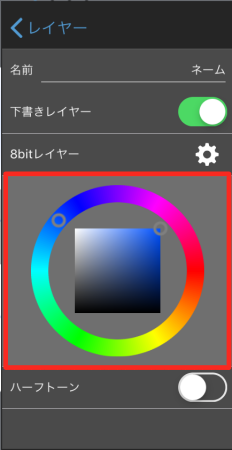
▼ Read here about using 1bit・8bit layers ▼
How to use 1bit and 8bit layers
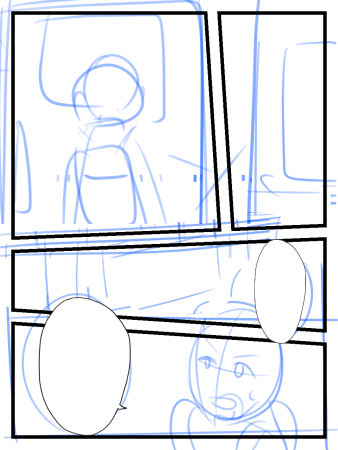
I drew a one-page name right away.
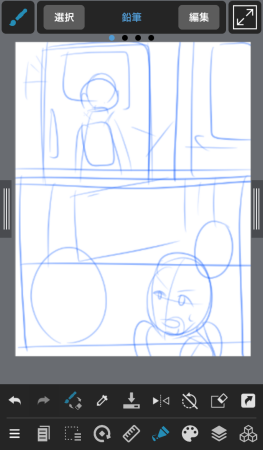
I will now adjust the size and the position of the character.
I want to make the middle panel smaller and move it further to the bottom.
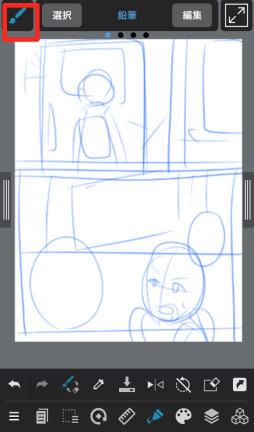
Tap on the brush icon at the top left corner of the screen.
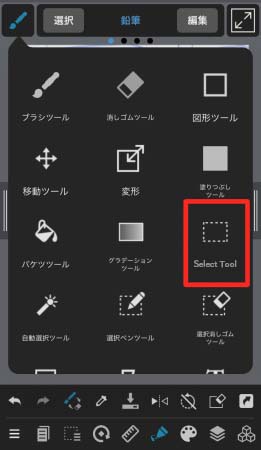
Tap on Select Tool.
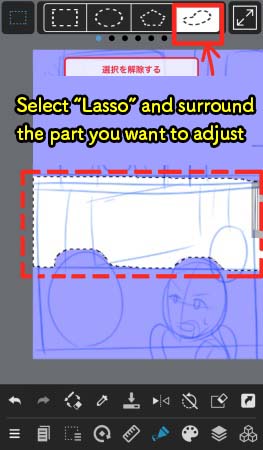
From the sub window, choose Lasso.
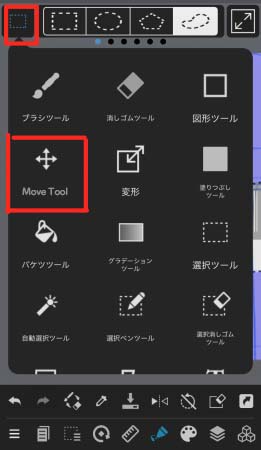
Tap on the icon at the top left corner again, and choose “Transform”.
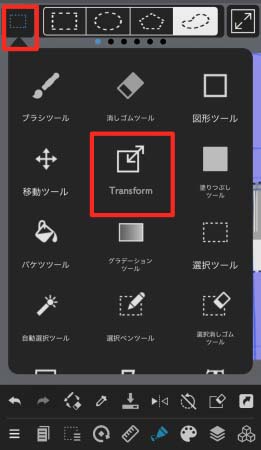
The area of selection will change to transformation mode so swipe one of the □ (one of the four corners) inwards.
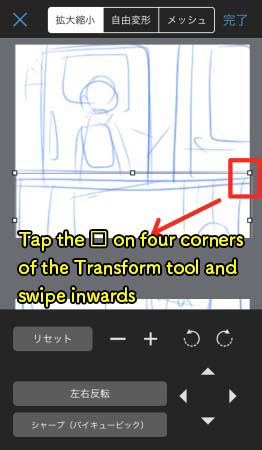
You can zoom in and out with your finger but you can also use the icons at the bottom of the screen.
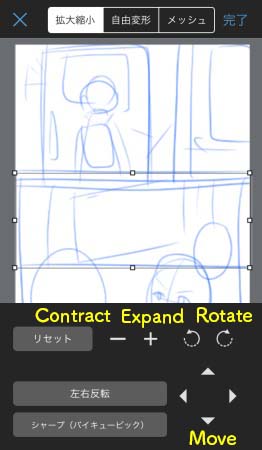
I have now contracted the middle panel.
Next, I want to move the top panel a little further down.
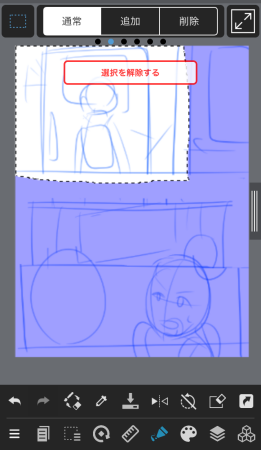
Choose the Move Tool.
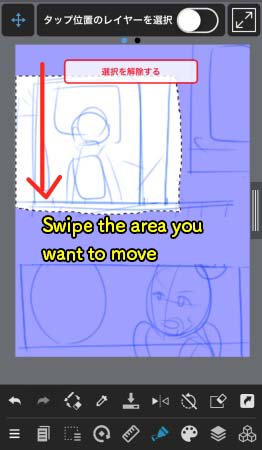
Swipe the area of selection with your finger towards where you want to move it.
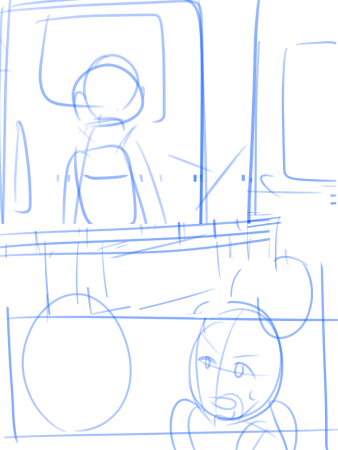
I have now finished adjusting the name.
Importing a name drawn on paper
Other than drawing inside the canvas, there is an option to import an image of the name drawn on paper.
From the Layer Menu, tap on + (plus sign) to create a new layer.
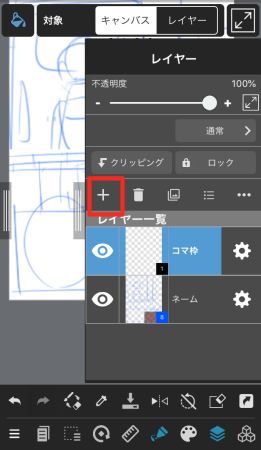
A menu window pops up so scroll down.
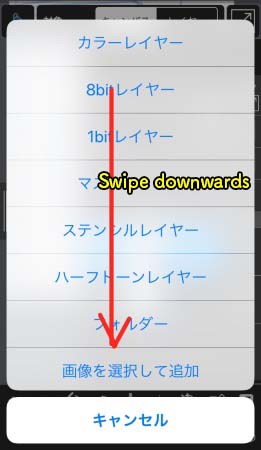
Choose from “Select an image to add”, “Add from photo” or “Scan to add” and import the name drawn on paper.
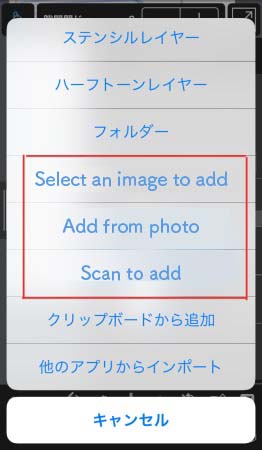
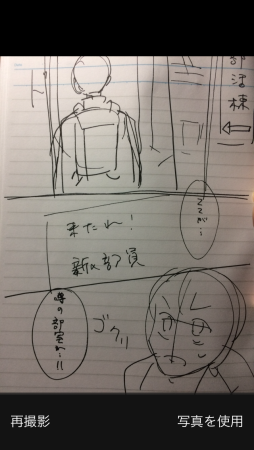
This time, I chose “Add from photo”.
Once the photo has been taken nicely, tap on “Use Photo” at bottom right.
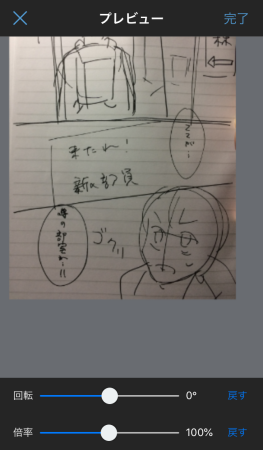
Adjust Ratio and Rotate to fit the canvas.
Once you are finished with adjusting the photo, tap on Done at the top right corner.
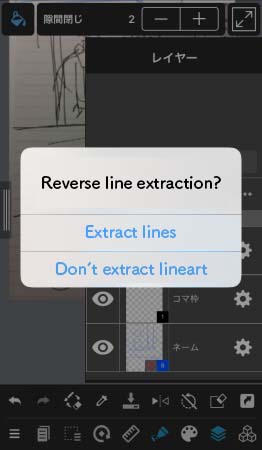
You will get a message “Reverse line extraction?” so choose either option.
Since this is a name, you don’t necessarily need to extract lines.
I have successfully imported the name drawn on paper.
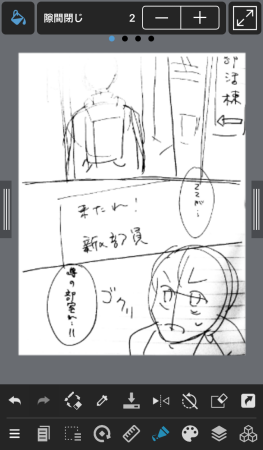
Next step is panel division.
Creating Panels
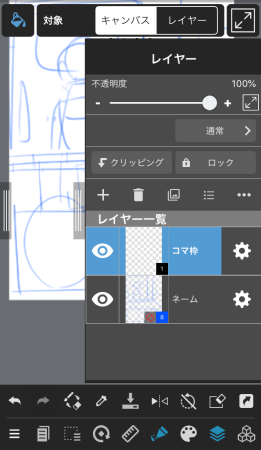
Let’s create a new layer for panels.
For creating panels, you can choose any of the three: Color Layer, 1bit Layer and 8bit Layer.
I chose the color layer for this tutorial.
▼ Read here about using 1bit・8bit layers ▼
How to use 1bit and 8bit layers
Now tap on the icon at the top left corner, choose the “Divide Tool”.

Then tap on “New Panel Material”.
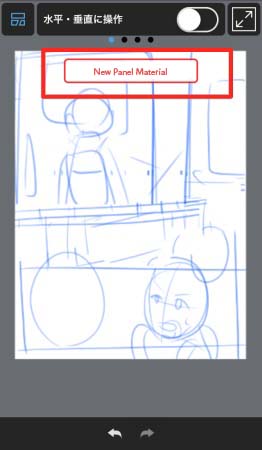
I set the Panel Stroke Width to 10px and for Automatic Panel Creation, I have chosen 2mm for both ‘Left and Right’ and ‘Up and Down’.
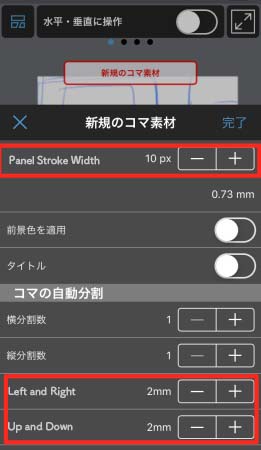
Tap on Done and now you can see that a large frame of the panel has been placed.
Now I will be dividing this main panel.
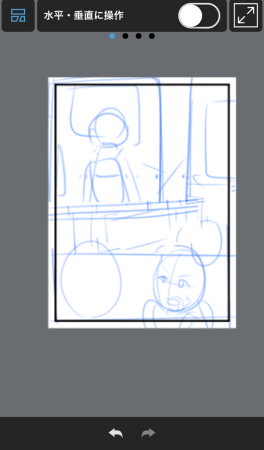
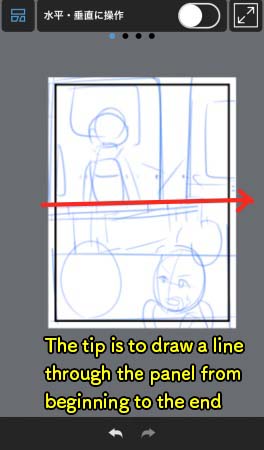
Keep using the Divide Tool and draw a line to where you want to create a panel.
The tip is to draw in a line from the beginning to the end, so that it intersects the frame properly.
Now a panel has been created.
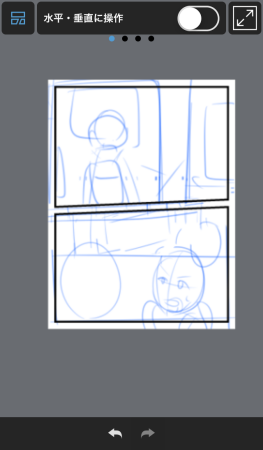
Follow the same step to create more panels from dividing the frame.
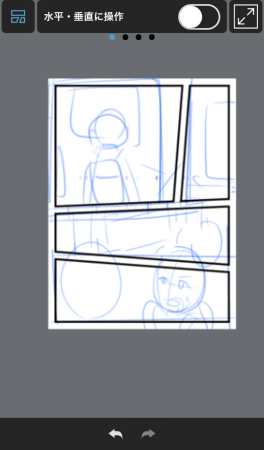
If you make a mistake, tap on the undo icon at the bottom of the screen.
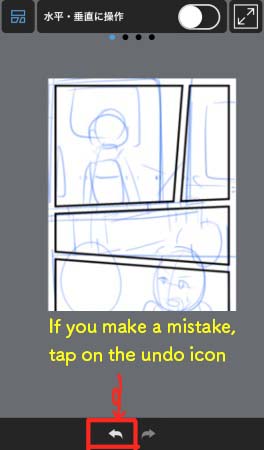
Now the panel division is complete.
Creating Speech Bubbles
Lastly, let’s add the speech bubbles.
I will introduce the two main methods of creating speech bubbles:
1. Use the “Draw Selection Border” function
2. Use the speech bubbles available in Cloud Materials
Using the “Draw Selection Border” function
Surround the area where you want to create the speech bubble using the Select Tool and choose the “Draw Selection Border” from Selection Menu.
Before I start, I have already prepared a new layer for creating the speech bubbles.
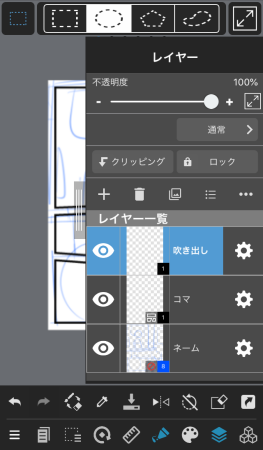
From the icon at the top right corner, tap on Select Tool.
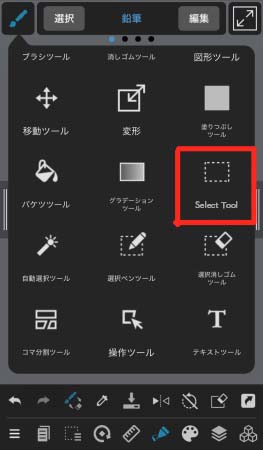
Then the type to ellipse from the top bar.
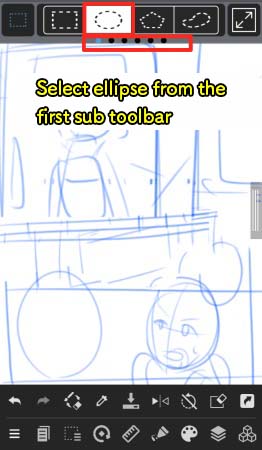
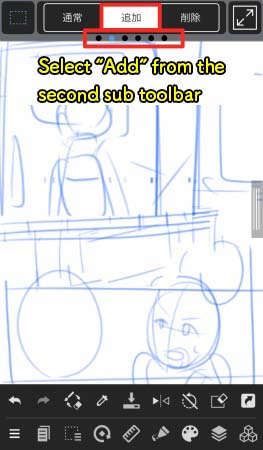
I want to add multiple speech bubbles at once so I will tap on “Add” from the second toolbar at the top (swipe left or tap on the second dot to show the second sub toolbar).
Surround the area where you want to add the speech bubbles.
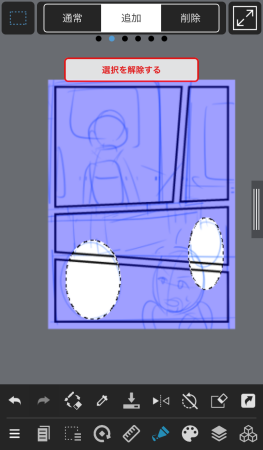
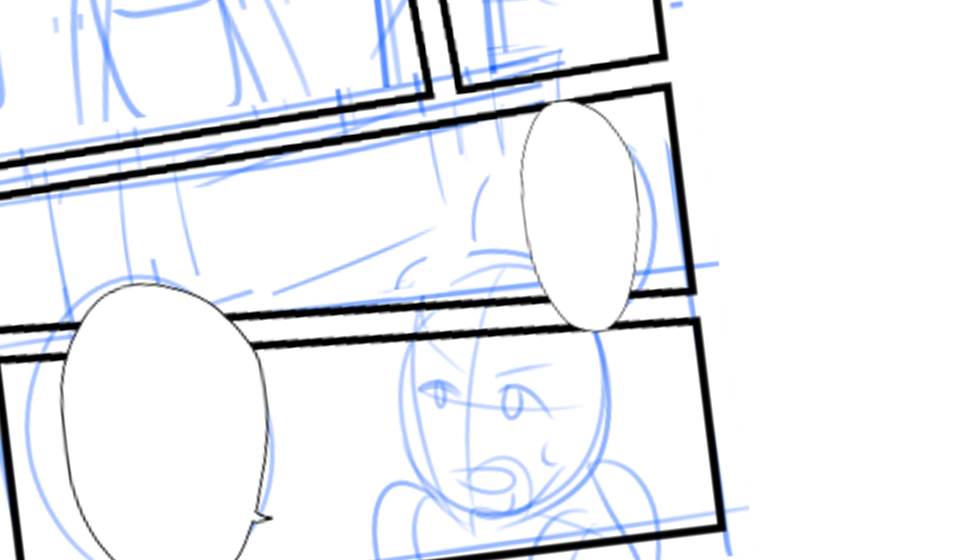
I have added two speech bubbles.
Now I will add the tail by changing the Select Tool to “Zigzag”.
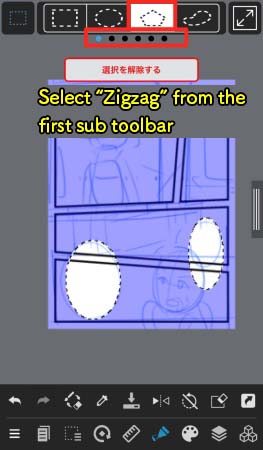
Add a triangular tail to the speech bubble.
Now I have the two speech bubbles as the area of selection.
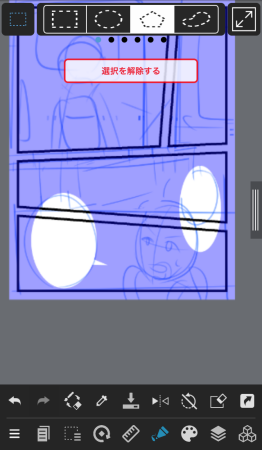
From the bottom toolbar, choose the Selection Menu and tap on “Draw Selection Border”.
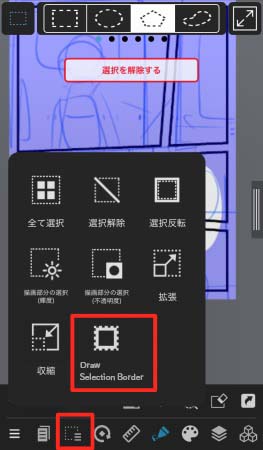
Adjust the Line Width to your liking and tap on Done.

Now I have drawn the frames of speech bubbles.
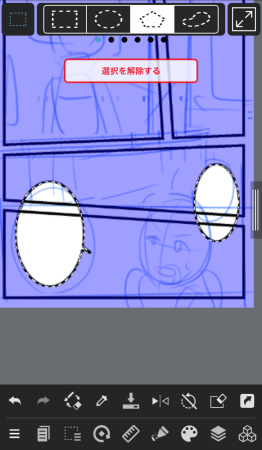
I will then be filling out the inside of the speech bubbles with white paint.
Do not deselect yet and create a new layer from the Layer Menu.

Change the tool to Bucket Tool.
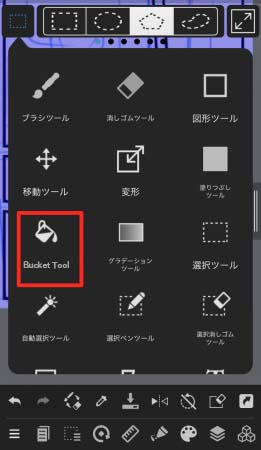
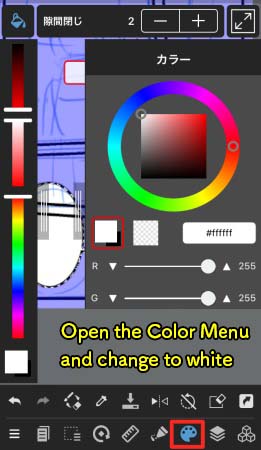
Open the Color Menu and change the chosen color to white.
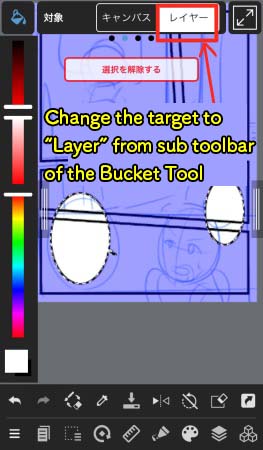
Swipe to the second sub toolbar at the top and change the Target to “Layer”.
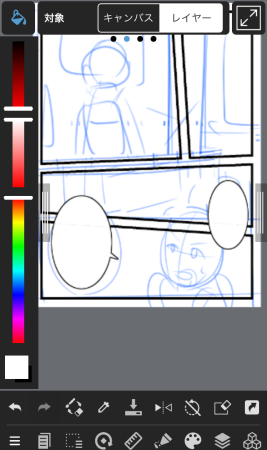
Tap the inside of the frame and now your speech bubbles are complete.
Merge the layer of speech bubble frame with the layer for white paint (speech bubble background).
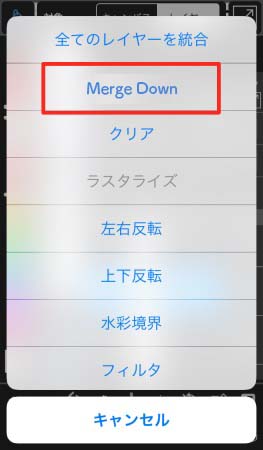
Open the Layer Menu and tap the three dots on top of the Layer List.
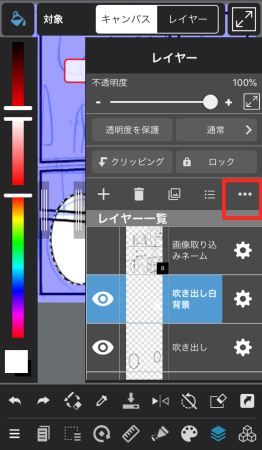
Choose “Merge Down”.
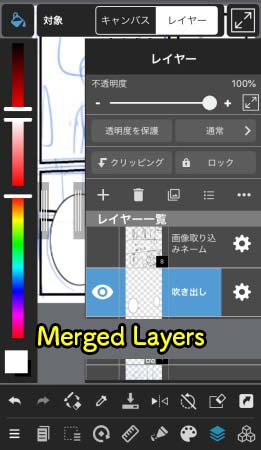
Now the two layers have been merged.
▼ Read here for using the Bucket Tool ▼
Let’s master the bucket tool! How to avoid gaps and bleeding
Using the speech bubbles available in Cloud Materials
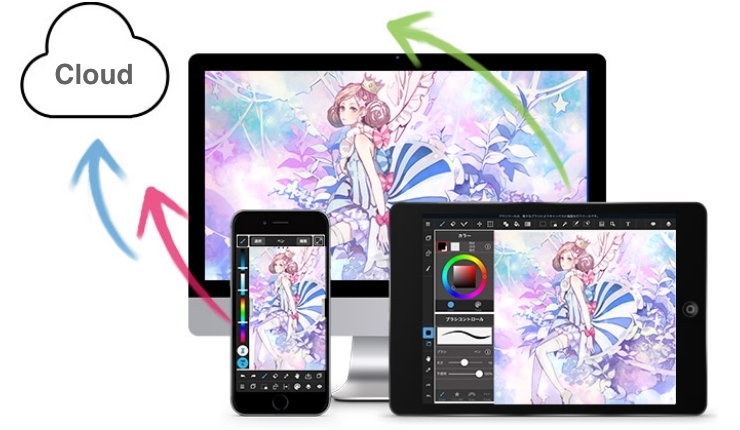
Lastly, I will introduce how to use the speech bubbles available on Cloud.
Prepare the layer for pasting the Cloud Material.
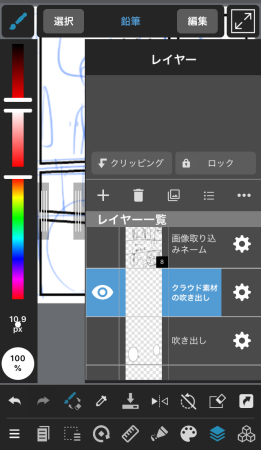
From the toolbar at the bottom of the screen, open the Materials Menu.
To add a Cloud Material, tap on + at the top left corner.
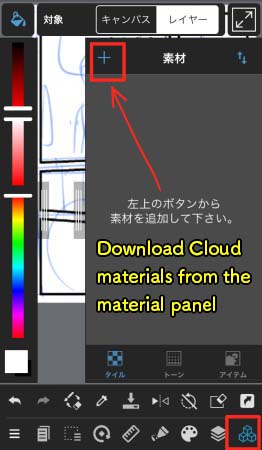
From Item, choose the materials you want to download and tap Save at the top right.
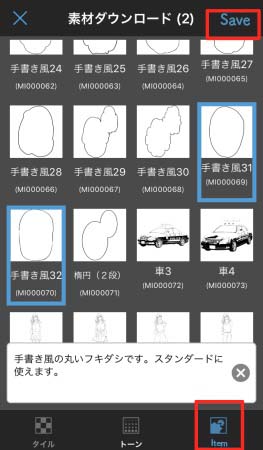
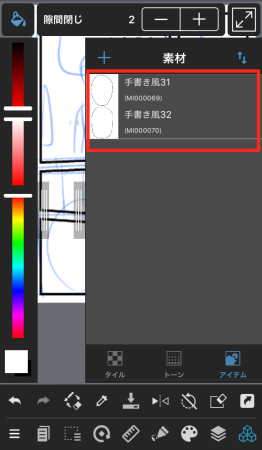
Now I have the Cloud Materials stored inside the Materials Menu.
Tap on the downloaded material.
Let’s adjust the size of the speech bubble material pasted on the canvas.
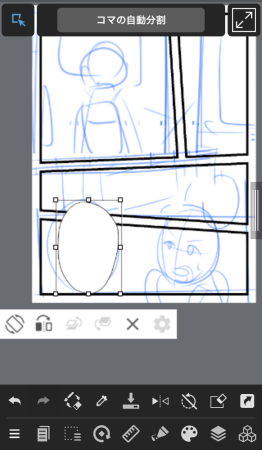
I want to add a tail to the speech bubble.
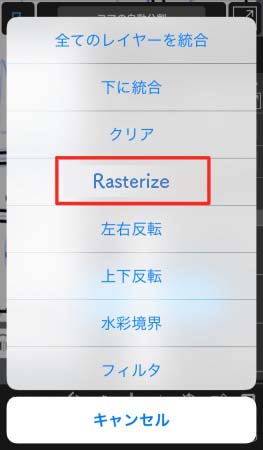
To draw on the layer with Cloud Materials, it must be rasterized (change to bitmap) first.
To rasterize, open the Layer Menu and tap on the three dots above the Layer List.
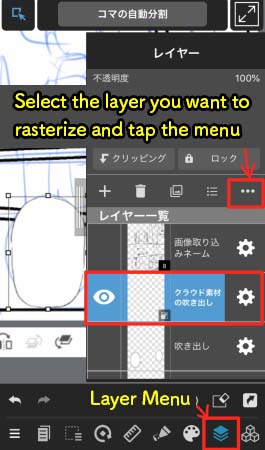
Choose Rasterize from the menu.
Now the Cloud Material has been rasterized and you can draw on the same layer.
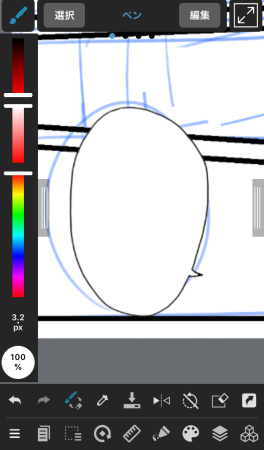
Draw in the tail for the speech bubble and it is complete!
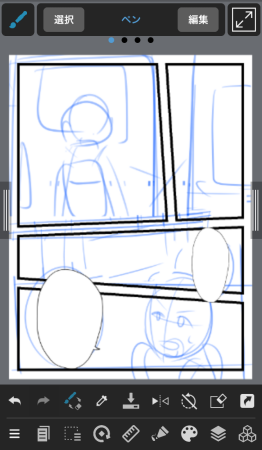
Now the name has been finalized.
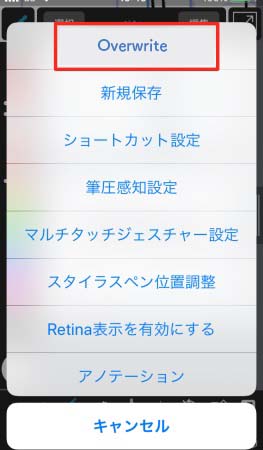
Finally, tap on the icon with three horizontal lines (left bottom corner) and choose “Overwrite File”.
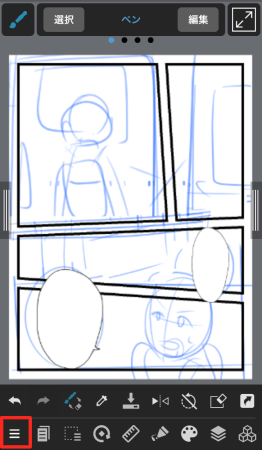
I recommend you to overwrite the file quite often.
This was the tutorial for drawing manga on MediBang Paint for iPhone, following the steps from creating a data file to creating the name.
(Text・Illustration/吉田セツ)
\ We are accepting requests for articles on how to use /


